
MagicJames
-
Posts
36 -
Joined
-
Last visited
Content Type
Profiles
Forums
Gallery
Everything posted by MagicJames
-
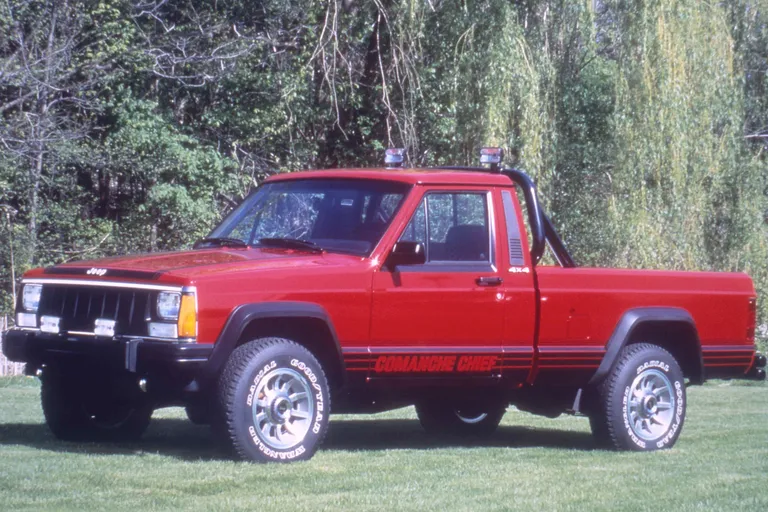
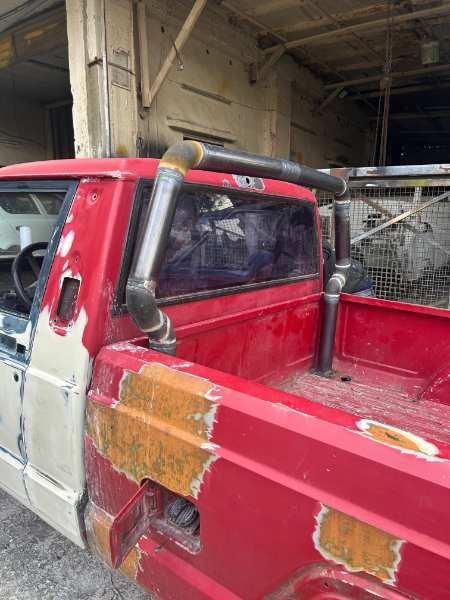
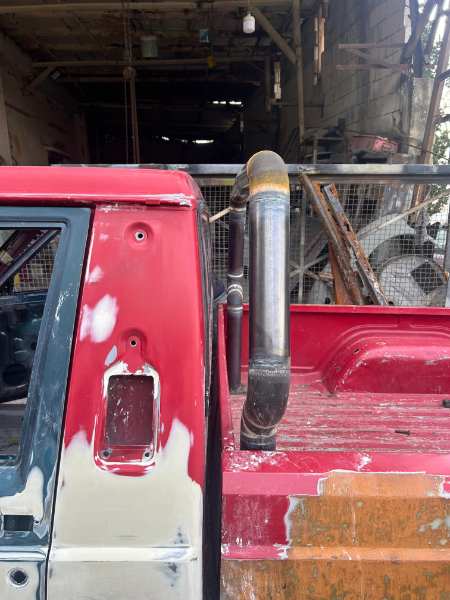
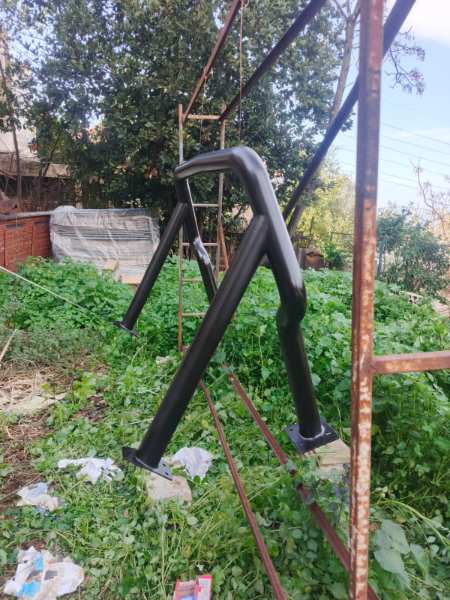
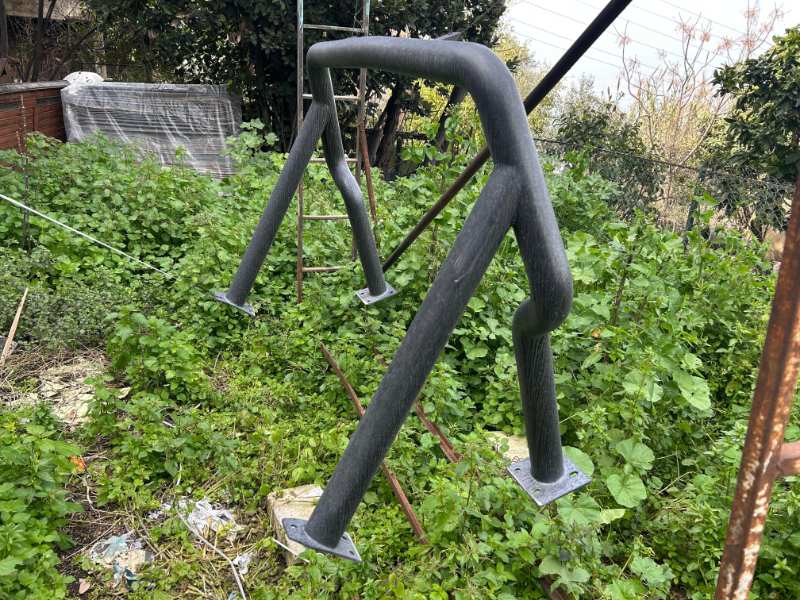
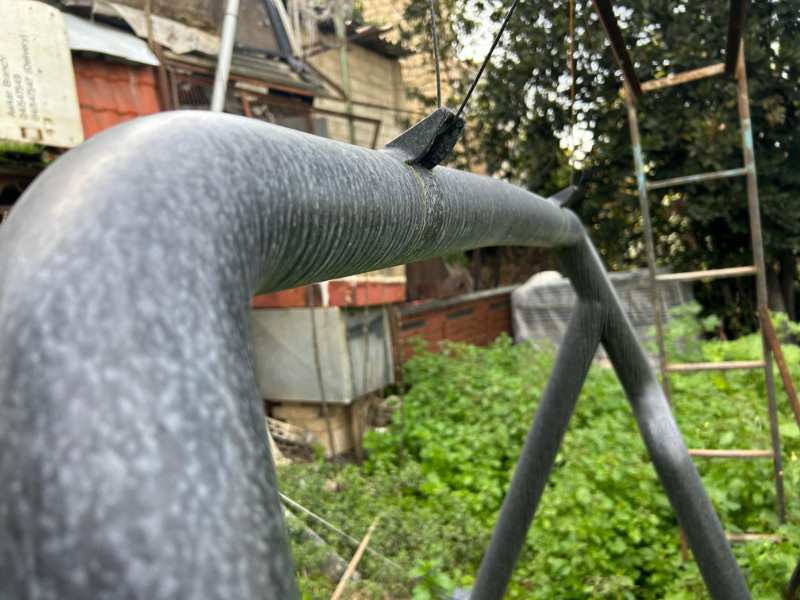
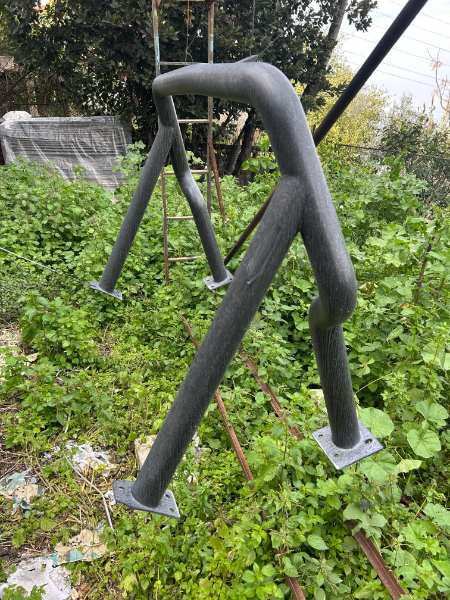
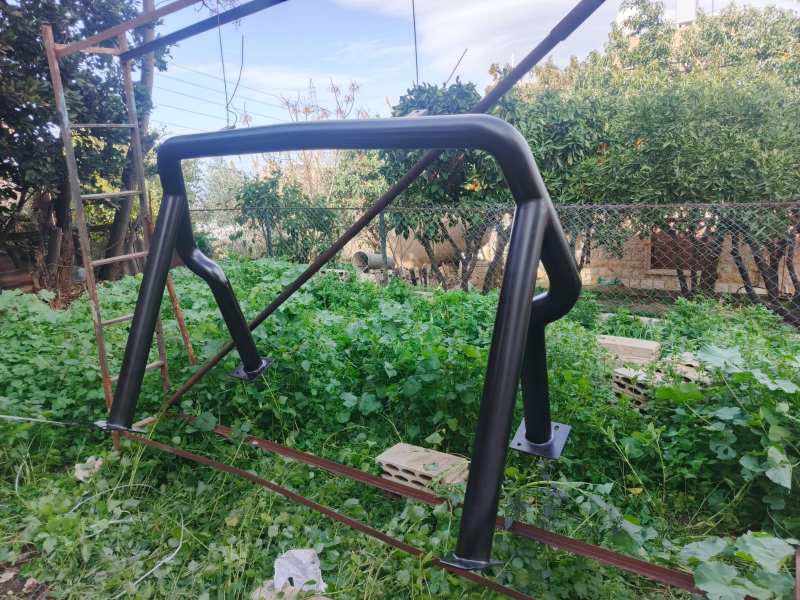
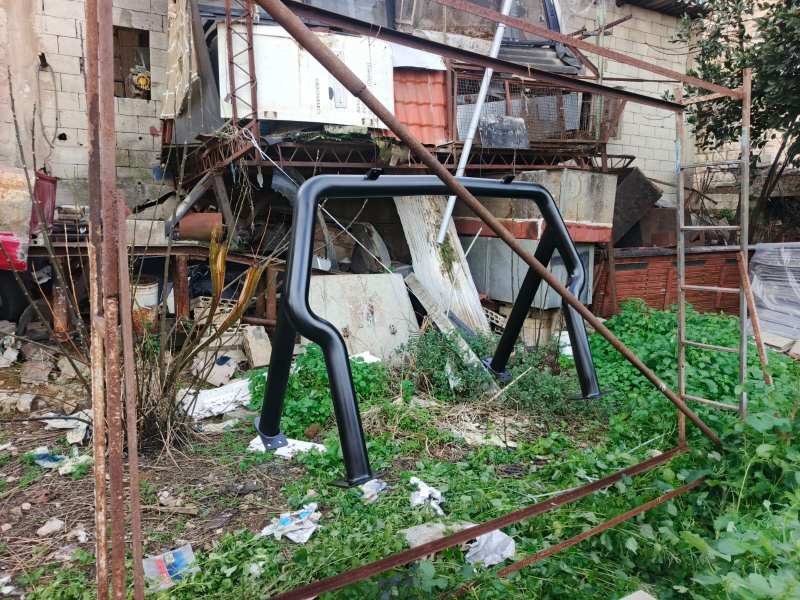
Got a 4-cylinder chief that needed one, and I'm honestly not willing to spend twice the price of the truck to buy the sport bar. Took about a couple of weeks to do this one, just messing with it after work. I'm not the best fabricator, and this would probably be my first and last time doing it. If you're thinking about doing it, I'd say give it a go, it's really easier than you think. The hardest part is the bends coming down next to the bed. You gotta do them in very small sections to get the bends right, and even then, they still look slightly off, but I'm sure a more experienced welder with a proper mould would do them right. I just eyeballed everything from photos. So yeah, I think the prices some people ask for the originals are crazy, and we shouldn't be entertaining those prices. If you're thinking about it, give it a go; you can even hide the welds like I did for a smoother finish.
-
Would you mind telling me the exact issue here with that diaphragm? I'm doing the same rebuild with the standard kit, and don't want to make the same mistake
-
A 92' 4.0 5-speed with 4x4. Looks pretty complete too, has the original bumper. I've never actually seen a bench seat that basic. https://bidmotors.bg/en/jeep-comanche-1992-1j7fj26sxnl136862
-

89 2.5 L comanche fuel pump
MagicJames replied to Overlandmark2020's topic in MJ Tech: Modification and Repairs
On my 2.5, I replaced the pump and the wiring from a YJ. Everything was plugged exactly the same. But would anyone know if you can buy the orange box I'm pointing at that indicates the fuel level separately? The tiny wires inside are snapped. If anyone knows a replacement, please let me know. Ty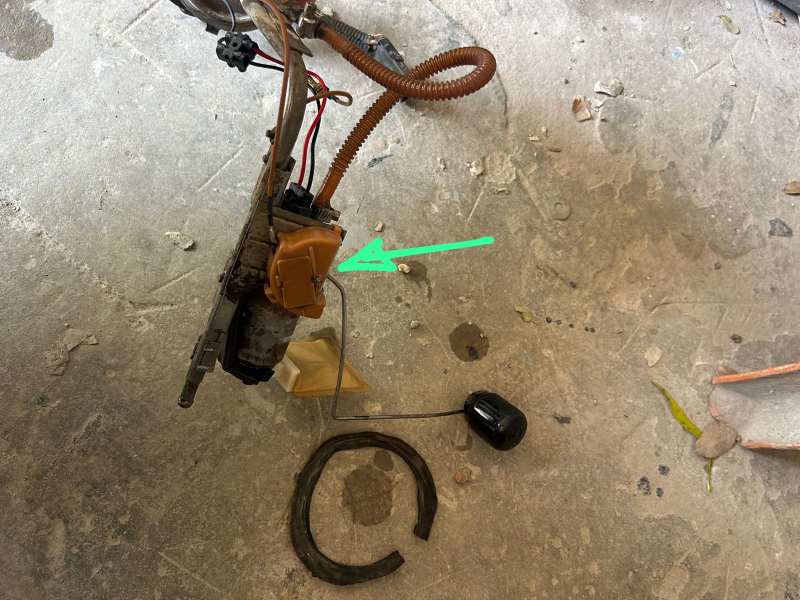
-
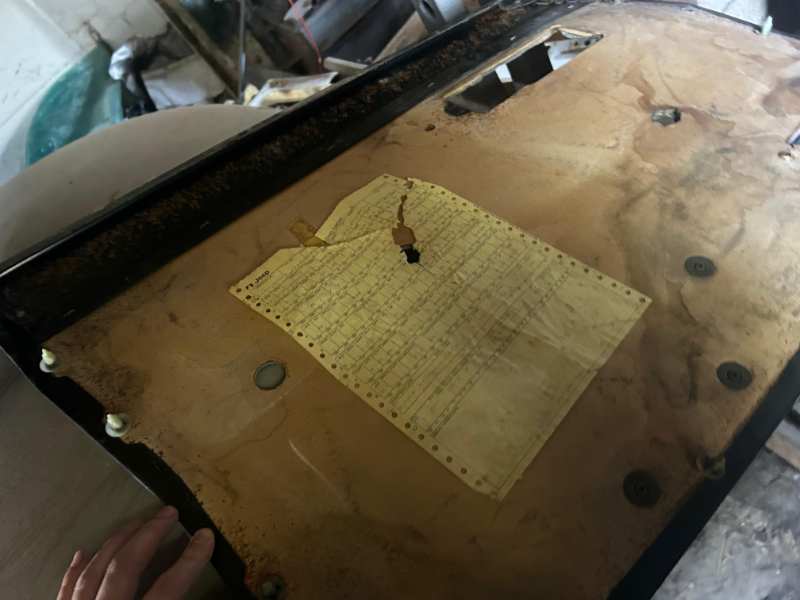
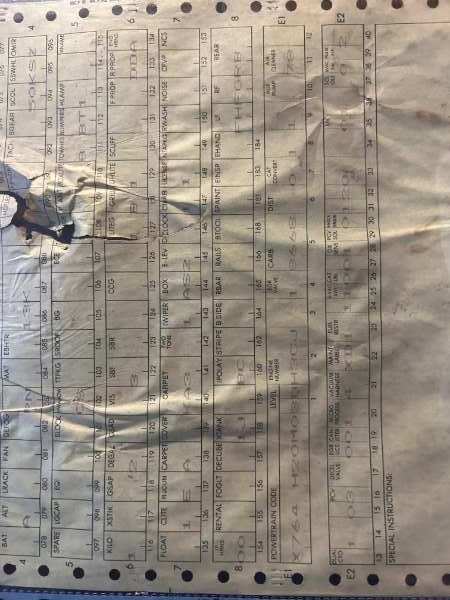
Anything you knowledgeable gentlemen can tell me about this Comanche? Anything special, or is it just a basic 4 cylinder? If anyone knows the dealer, that would be great. I tried to get the photos uploaded as HD as possible. Vin 1JTHW64SOHT114671. Zone 97. Delaer 8032.
.jpeg.66fb6a1e840e9487c78bb9294a70bb4c.jpeg)
-
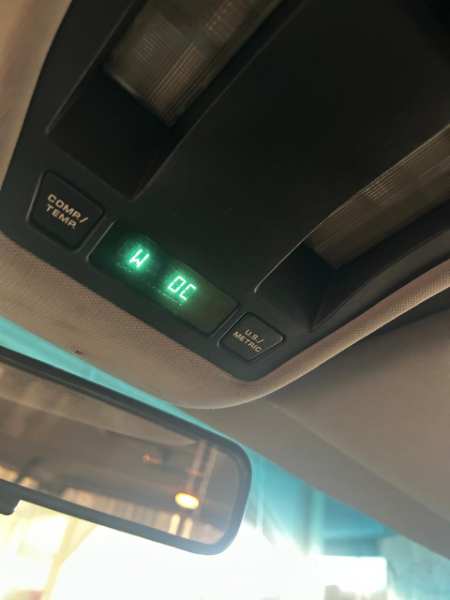
Hi, congrats on all the progress, it's looking really nice. Can I ask you about the overhead console. I have 1990, and the compass works fine, but I keep getting OC for the temp reading. I'm guessing it means open circuit. I've tried a second temp sensor from a junk yard, but no change. Did you ever get an OC reading initially before you swapped the sensor? And would you mind putting the link to the one you bought. Cheers
-
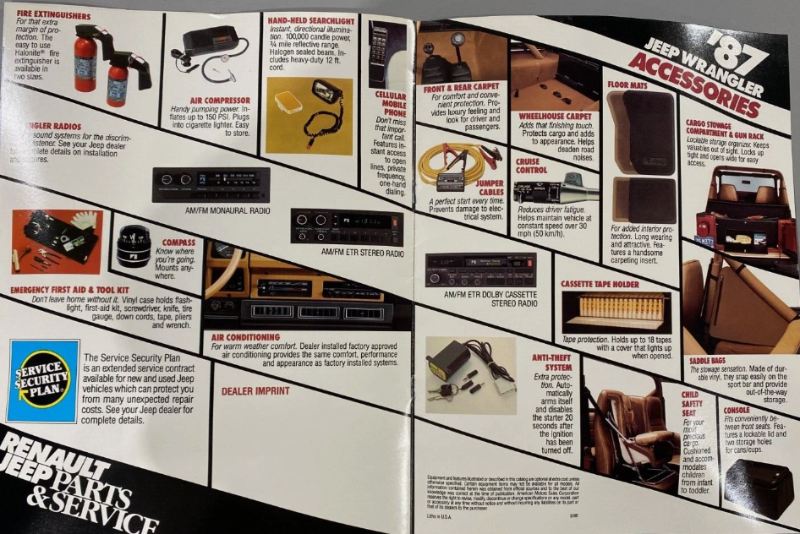
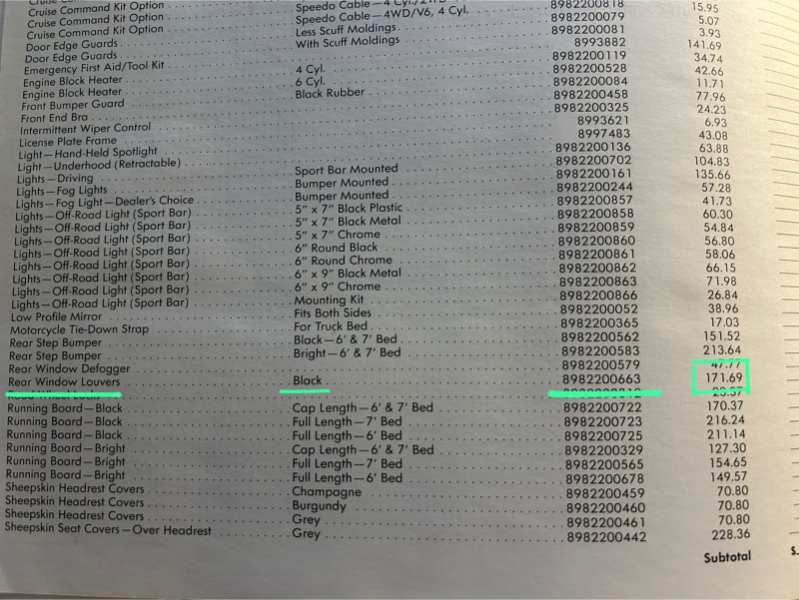
Off topic, but these were a $171 accessory option back in the day. A small price for looking cool 😎
-
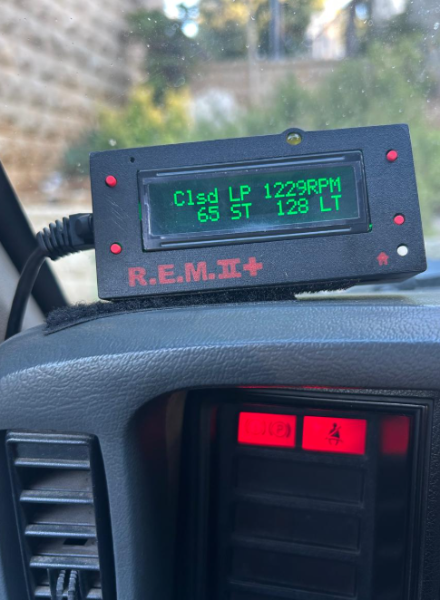
Nothing in the fuel rail vacuum line when cold IAC is at 128 and will drop sequentially as it gets up to temp. When hot at high idle (1200-1300) IAC is fully extended and will read zero. MAP when cold is starts at 12.8 then will drop to 10.5 when hot. I think my ECU is good, its a lowish mile truck and its trying to close that IAC to bring the idle down. It has to be a vacuum leak right? Do you think I should run smoke through it again? I know a guy that has one with the UV tracer thing. If so which ports do I use? last time i used the brake booster line
-
At high idle it stays in closed loop and STFT will swing between 55-70. LTFT stays a 128. So the ECU is dropping the trim a bit and it's running rich. But I have no vacuum leaks, even from the manifold. Could it be the coolent temp sensor? the connector gets about 5V when cold. Ive tried two so far but havent read the reading when hot, it should drop right? Also this is the sensor in the block, on the drivers side, in case I'm messing with the wrong one.
-
Its the third TPS and the IAC works well, gets voltage, and I can see it stepping when looking down the throttle
-
Hello and sorry in advance, I know there are a bajillion threads about this topic, and I read them all, I promise. I have a 1990, 4.0 liter, AW4. I start it up cold, and it starts perfectly every time, idling at 850-900 rpm; you could balance a coin on the engine. The throttle is responsive, sounds good, shifts perfectly, it's powerful. However, when it gets up to temp, the idle increases. between 140-190F, the idle settles at 1250-1300 -new IAC - IAC gets 12V from both sides of the stepper -new TPS adjusted just to Cruiser54's instructions -new throttle body and the idle screw hasn't been touched, factory adjustment -throttle body is spotless inside -new throttle body gasket -new EGR gasket -EGR isnt stuck -clean EGR transducer, diaphragm moves on applied vacuum, has correct vacuum routing into EGR -new vacuum reservoir -zero vacuum leaks, I ran smoke through the system, and nothing -new intake air sensor - reads 4-5V -new exhaust manifold gasket - no leaks from here -new PVC/CCV fittings -new EGR solenoid - reads 12V from both sides -new O2 sensor, the expensive one from NTK -all new grounds, no paint, metal to metal, and the extra from the -ve battery terminal -new valve cover gasket -Renix engine monitor (Nickintimes) reads no fault codes and very good readings from O2 sensor/ TPS.. ect I spent the last few months throwing parts at this thing since its a near-perfect, completely stock truck which I want as a DD. I know that one of you out there is a smarter man than I am. I'm willing to try anything at this point. I literally wake up in the middle of the night thinking about it, and can go back to sleep again. Please give me your suggestions or ask me what other readings you need for diagnosis I'll get them. Thanks in advance
-
Bringing a RX-135 Radio Back to Life
MagicJames replied to MagicJames's topic in MJ Tech: Modification and Repairs
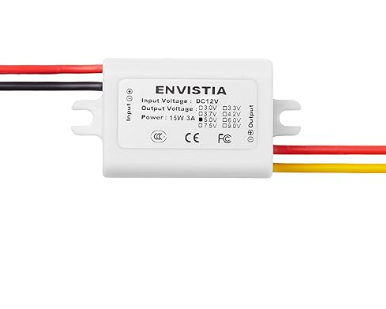
@87MJTIMIf you want the easy way you can by a bluetooth cassette , Something like what I linked. however if you don't care about playing cassette you could remove the deck from inside the radio and you would technically have plenty of room to put a bluetooth audio reciver board in there. Youd need to extra room fro the step down converter to 5V. Youd run the 12V off the back fo the radio into the converted then into the chip.e You would also have the option of running an AUX out of the cassette lid.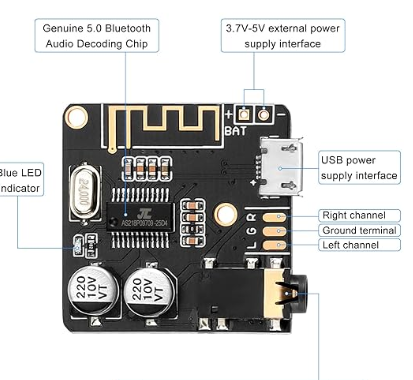
-
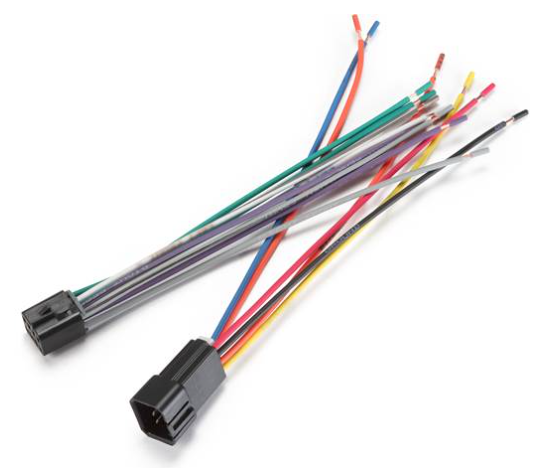
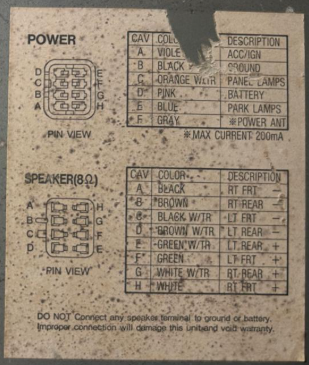
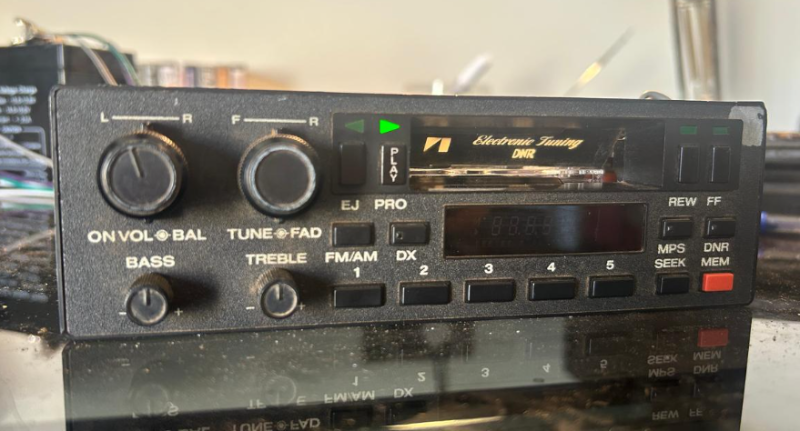
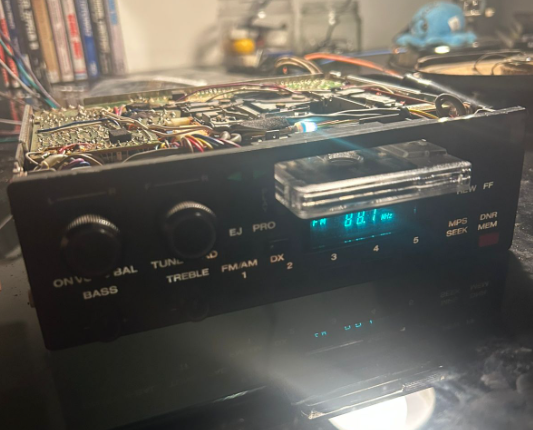
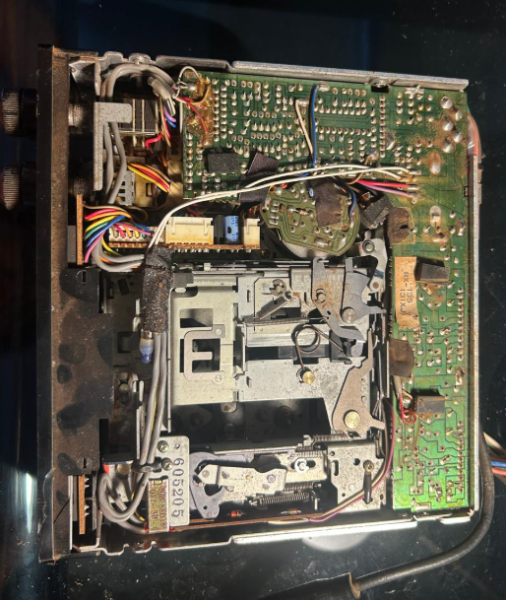
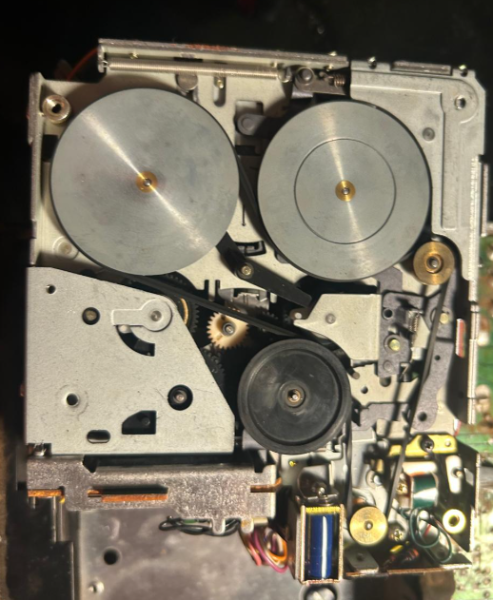
The RX-135/RX-131 radio was a nice factory option in Jeeps from roughly 1984 through to 1987. Although it was a bit of an expensive option, it's a really good quality radio made by electronic tuning in Japan. They were very durable and simple. The RX-161/RX-141 was a similar design and had the red memory button positioned in the top right instead of the bottom right. These are great-looking radios and have a cassette deck. Now, if you find one in decent condition in the yard or on ebay don't trash it, you can send it to me :) or you can try to fix it. If they're dry and haven't been messed with, they can usually be brought back to working condition with just a bit of work. First, for the connectors, these radios have 2 harnesses, one for the power and one for the speakers. Usually, you won't have the two connectors present, so from what I know, there is one company that sells the connector set new for 15 bucks. It's from Crunchfield, and here is the link. https://www.crutchfield.com/S-QvSfNxfUQAL/p_120701000/Metra-70-1000-Receiver-Wiring-Harness.html Now, after you plug into the two connectors, go ahead and set up a small 12V battery. You want the ground wire on the negative and the battery on the positive. Then, to power up the radio, connect the AC/ignition wire to the positive; this is as if you're opening the key contact. The radio should power on with a beautiful green panel. If you want to simulate turning on the lights in the truck, connect the panel lamp wires to the positive also. Your back light behind the radio and also the tiny blue bulb on the top should illuminate. If it doesnt you can try replacing the tiny bulb. To get sound, connect a matching pair from the speaker connector to the positive and negative terminals of a speaker. So left front-ve and left front +ve, for example. You can shove a paperclip in the antenna if that helps get better signal. Now we want our cassette deck working because playing cassettes is cool af in my opinion. If the deck doesn't accept the tape, pull back the black tab on the top of the deck to simulate it taking a cassette. This cassette take-up and eject function are all moved by springs. so make sure they're all lubricated with a tiny bit of WD40 and give the mechanism a small tap if it's seized. If your radio takes the cassette but doesn't play or spin at all, you should start with the belt. Open up the back of the radio and look for 5 small screws in the holes. These hold the deck in place. The two top screws might be behind the black backing foam, so you might have to peel that back to get to them. Try not to strip these screw heads. Once the screws are out, the deck itself should be able to get lifted up from the right side with some gentle persuasion. you don't need to disconnect any white connectors for it to slip out. But if you want to make it easier, you can. If the belt is snapped, worn out or loose, you can replace it. A belt of 1.5mm to 2mm thickness and a 140mm to 150 mm fold length should be fine. It is just the one belt and routed like this in the picture below. The two gold wheels are driven by the motor and control the speed of the belt. Now, if you get the cassette belt working and the tape playing, but it sounds like a chipmonk here's the fix. A really common issue with Jeep radios is that the pinch roller gets dried out and has no grip on it. Its job is to pinch the tape against the capstan and get the tape moving at a nice speed for the music to play clearly. If the roller is too dry, the tape starts to slip and gets pulled through way too fast. So to fix this, get a cotton swap and some isopropanol alcohol and really get aggressive with rubbing the roller. You can also rub down the cassette head: the shiny silver square plate. Keep doing this until the speed settles down when you play a cassette. 1382424822_WhatsAppVideo2025-09-22at09_44_59.mp4