


ARareBreed
-
Posts
98 -
Joined
-
Last visited
Content Type
Profiles
Forums
Gallery
Everything posted by ARareBreed
-
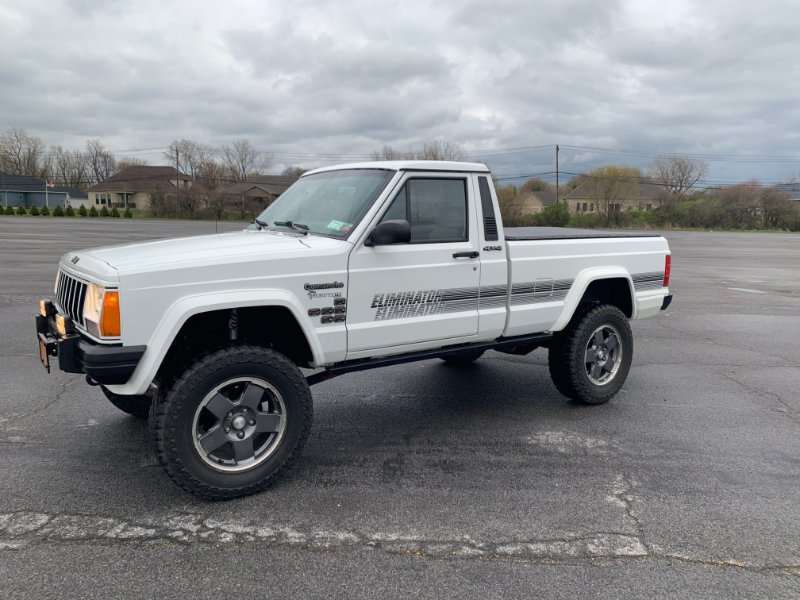
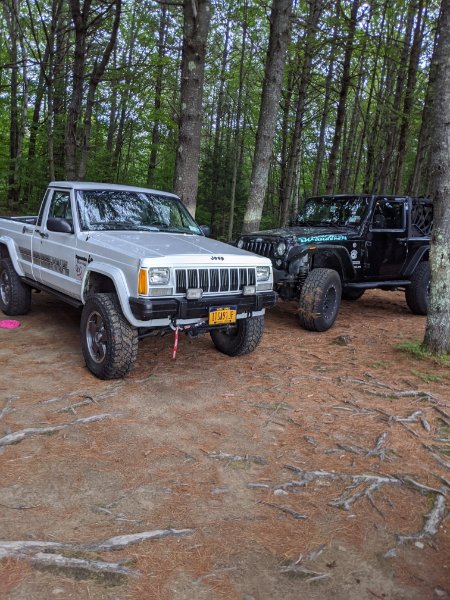
1991, Jeep, Comanche 4.0HO, AX15, 2WD, D35, 113" Swapped to 4wd with D30 front and Ford 8.8 rear 11/1990 Western New York Still on the Road Has factory front skid, eliminator model, white, grey interior, bucket seats.
-

89 4.0 Cam 180 Degrees Off?
ARareBreed replied to big66440's topic in MJ Tech: Modification and Repairs
That’s what I meant to say :/ -
89 4.0 Cam 180 Degrees Off?
ARareBreed replied to big66440's topic in MJ Tech: Modification and Repairs
Alright, I understand now. I still feel like the distributor is clocked 180* out. Since there are 2 turns of the cam for every 1 turn of the crank, if I rotate the crank 1 turn to be on the compression stroke.. the distributor would now be pointing at 1(that's what we want to achieve) but the tick marks would not be lined up between the two sprockets (the cam sprocket would now be 180* off). How has my engine been running this way! -
89 4.0 Cam 180 Degrees Off?
ARareBreed replied to big66440's topic in MJ Tech: Modification and Repairs
Sorry to bring back an old thread but I just changed out my timing chain and here’s what happened. Ran perfectly before the job, but I needed to change the crank seal so I figured to change the 200k old chain while I’m in there. Pan was off since I also did a RMS and knew for sure #1 was at TDC, crank and cam sprocket tick marks lined up perfectly but my distributor was 180* out. It wasn’t pointing at 1. What gives? Was I on exhaust stroke of TDC? Logically it doesn’t make sense to me that 2 crank rotations equate to one cam rotation. -
Thanks, yeah I did extensive research before replacing my injectors last winter and ordered a set from a reputable company. They could be the issue but I might rule them out. The injector part number I got was: 0280155703
-
I have a 1991 4.0HO and ran a compression test last night. 1: 140 2: 141 3: 140 4: 135 5: 138 6: 140 I'm getting very light weeping oil out in front of the distributor, but not enough to show a noticeable oil loss after 500-1000 miles. I tore a majority of the engine down already to replace the head gasket because of the weeping. Once I pull the head I will check for a crown where the pistons top out on the cylinder. And if the walls look scored or glazed I will pull the pistons and hone them. I might as well just change the rings too then, right? If the walls look good, I would prefer to leave the pistons as is. Is compression the only tell tail of bad rings or does burning oil tell me something too? The engine has 175,000 miles on it, so it's definitely tired. But it was very very well taken care of and I've been surprised before by the amount of love this Jeep was given. Once the head is pulled I plan to get it re-milled, cleaned, and completely rebuilt. So new valves should help the situation I think too. I got quoted for $300-$400, is that a lot? Now, I personally haven't noticed any smoke from the tail pipe. That is except for starting it the other day after sitting since October! There was a lot of blue/white smoke out of the pipe, but granted October is a very long time to sit. Wouldn't any engine do that?
-
Need new piston rings, how to determine bore?
ARareBreed replied to ARareBreed's topic in MJ Tech: Modification and Repairs
Man, you're a wealth of knowledge. I'll check that out. Thank you. Edit: Found it has 012MX14 The 1's literally look like the capital letter i, but I assume they're 1's. So it's safe to say my piston bore issss, what? -
Need new piston rings, how to determine bore?
ARareBreed replied to ARareBreed's topic in MJ Tech: Modification and Repairs
Won't I need to machine the crank if I change the rod bearings? -
I have a 1991 4.0ho eliminator and plan on tackling an engine rebuild next month. I'm going to drop the pan, again...(I replaced the rear main seal last winter) and need a new head gasket anyway. While I'm in there I'd like to replace the rings as shes burning more oil than I'd like. Is there a "tool of the trade way" to determine what size rings to get? I'd obviously like to get them in advance but I head rumors that back in the early 90's Jeep wasn't the most consistent with their assembly process. I do not want to get the wrong ring size. Also, does anyone have any leads on a good brand to buy?
-
There should be some unused orange/black wires for fog lights, heated mirror, auto trans idiot lights to the left and right of the steering wheel that you could use.
-
Flickering parking lights and dash lights
ARareBreed replied to ARareBreed's topic in MJ Tech: Modification and Repairs
Yeah, it was a mixture of a bad bulb and too much grease. I never would have thought a single bad socket would cause issues through the whole circuit. -
Flickering parking lights and dash lights
ARareBreed replied to ARareBreed's topic in MJ Tech: Modification and Repairs
After tearing down the truck into pieces to find the issue, the problem has been solved. Too much oxgard conductive grease in the rear passenger lower tail light socket. Learned a lot through this whole fiasco. Now I can begin putting the truck back together.... -
Flickering parking lights and dash lights
ARareBreed replied to ARareBreed's topic in MJ Tech: Modification and Repairs
Not the bulb, but a bad socket. If you have a socket that's causing a partial ground loop, that can cause the symptoms you are seeing. When you pull the bulb it usually opens the socket ground loop and changes the symptoms. And while you're doing that you might as well clean out all the dried out grease/crud that you'll find on the socket bases. I did that a few months ago. I cleaned out all the old yellow grease from the factory and put in a bunch of ox-gard. Maybe that could be my issue. -
Flickering parking lights and dash lights
ARareBreed replied to ARareBreed's topic in MJ Tech: Modification and Repairs
I'll try all those fixes. thanks. You can confirm one bad bulb will cause entire circuit failure? -
Flickering parking lights and dash lights
ARareBreed replied to ARareBreed's topic in MJ Tech: Modification and Repairs
Sent from my iPhone using Tapatalk Pro I'm honestly thinking a bad ground at a socket in the rear. That will be my next attempt. One concern that it might not fix the issue is this: will a single bad socket in a tail light effect the entire parking lamp/instrument light circuit? Other wise I will be out of ideas without actually pulling the harness apart one wire at a time. -
Flickering parking lights and dash lights
ARareBreed replied to ARareBreed's topic in MJ Tech: Modification and Repairs
I replaced the headlamp switch to no avail. I disconnected the plug under the radiator cap going to the front headlight harness as a process of elimination attempt. The rear harness and gauges still flickered. But once I unplugged any of the 3 plugs I mentioned above, the gauges and fronts stopped flickering. -
Flickering parking lights and dash lights
ARareBreed replied to ARareBreed's topic in MJ Tech: Modification and Repairs
It's not a renix. The front parking lamps and instrument lights stop flickering when I unplug any of the 3 connectors for the tail light harness. 1. Connector near spare tire 2. Connector behind drivers seat 3. Connector behind parking brake lever It's got to be a connection at the tail lights,right? -
Flickering parking lights and dash lights
ARareBreed replied to ARareBreed's topic in MJ Tech: Modification and Repairs
I unplugged the headlight harness below the radiator cap and the remaining bulbs still flickered. -
I'm literally at on the last straw with this issue. I'm getting flickering front and rear parking lights as well as transfer case bulb, gauge bulbs and cigarette lighter bulb. The ground behind the tail light looks to be clean and clear. Fuse #15 is good. I already got a new headlamp switch think it was that. Still flickering. The weird thing is if I leave the lights on in parking light mode that over time they flicker less. Any ideas?
-
Only use Redline MT-90
-
Trim Decals Restoration ?
ARareBreed replied to AMC86Kid's topic in MJ Tech: Modification and Repairs
I recently restored my emblems to match my graphite metallic wheels perfectly. I learned early that masking would be near impossible with all of those curves and that fake chrome in a can never looks as good as a high quality dipping job from a professional. I was in no mood to dish out $$$ for a professional chrome job, so I decided to use the metallic color scheme to match my wheels. I used a combination of silver metallic and graphite metallic Rustoleum spray paint from Walmart. I started with an even coating of the silver metallic over the entire emblem, then a VERY VERY light coat of the graphite metallic to ensure the proper coloring to match my wheels. I used a combination of the silver and graphite because one color along was either too light or too dark. After the metallic paints were dry I hand painted the black border. I know my paints well and I knew that I could paint the borders black and any overflow onto the surface of the letter can be wiped off with my fingers. this gave me a straight border of black around the entire emblem! After all the painting was done I cleared with clear gloss from Rustoleum and finished them up with 3M grey emblem tape. They came out awesome! -
I know my 4.0 distributor has a sensor. Its called the pickup coil or stator. It caused my engine to die without notice and wouldn't fire up. Similar to a crank position sensor failure. I changed it out without replacing the entire distributor and haven't skipped a beat since. Learned a lot through the whole process, especially learning how to completely disassemble a distributor and how to find top dead center. I recommend finding an exploded view of a 4 banger distributor for your year and checking if there is a stator in it. Otherwise just go look if there are electrical wires coming out of it..
-
Changing diff fluid Dana 35 (SEE PICS)
ARareBreed replied to ComancheLee's topic in MJ Tech: Modification and Repairs
Another note, use brake cleaner to clean the gears when you have the cover off. Make sure the magnet on the inside of the cover is clean as well. -
Changing diff fluid Dana 35 (SEE PICS)
ARareBreed replied to ComancheLee's topic in MJ Tech: Modification and Repairs
Yes, to properly drain you'll need to remove the entire cover. Clean the mating surface on the diff AND the cover. Use gasket maker before installing the cover obviously. Tighten all the bolts in a star like pattern. Install the new fluid via the fill hole. You'll know you are filled once fluid starts coming out of the very same hole you used to fill with fluid. MAKE SURE YOU ARE PARKED ON LEVEL GROUND! -
The round ball has one chamber. The football shaped ball has two chambers, separated from each other by a "wall" in the middle. Thus the vac ports on either end. I don't know what the thinking was when they moved to the football shaped one. I would think that one side was dedicated to cruise and the other to HVAC. My football only has one port but my MJ didn't have cruise from the factory - interesting. I wonder If I can get away with the round ball with one port now that I installed factory cruise...