
dustyinthedirt
-
Posts
357 -
Joined
-
Last visited
Content Type
Profiles
Forums
Gallery
Everything posted by dustyinthedirt
-
I’ve learned that jack stands are like clamps. You can’t have to many
-
I sent him a pm. I will get with you when I hear from him
-
Superduty MJ
dustyinthedirt replied to dustyinthedirt's topic in MJ Hardcore Tech: Epic Journeys to Greatness
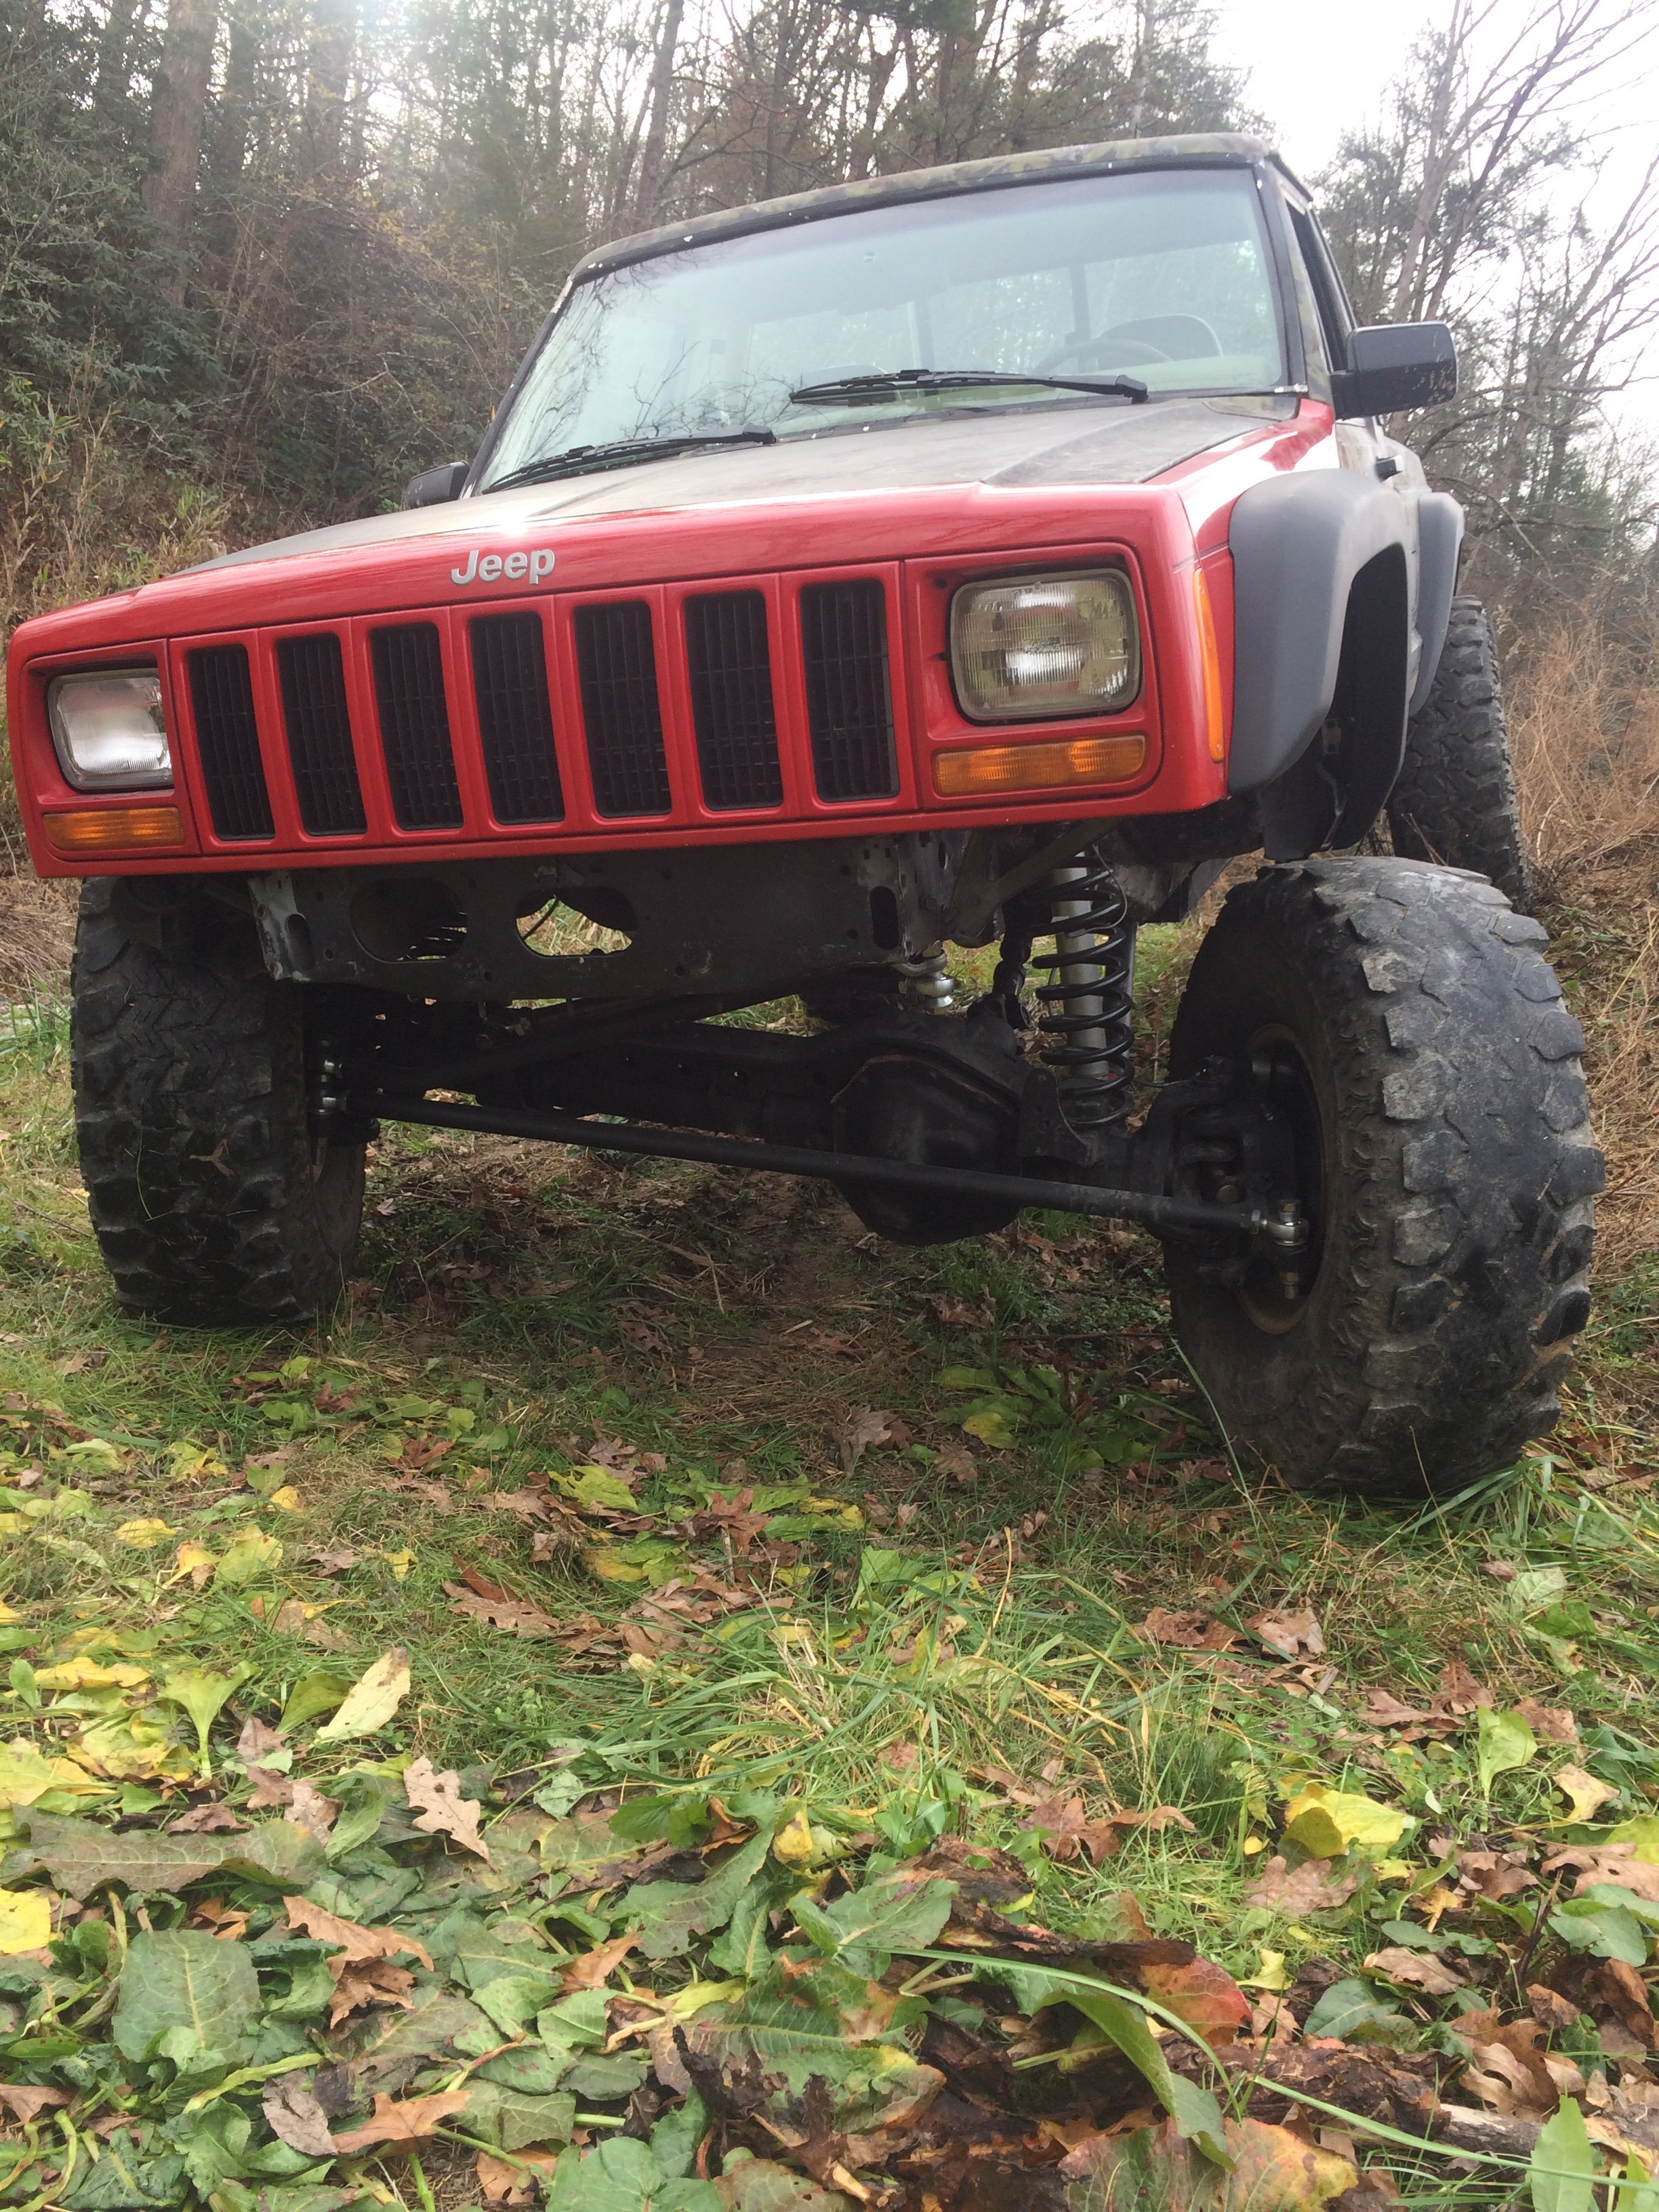
Terrible pic but the axle sorta in position. Needs to be forward a bit more. The sterling measures 12” (no brake rotors) from the outside of the leaf to the face of the hub where the wheel would seat. I believe the stock d30 is only eight and a 1/4.. but I measured from the pad where the leaf would sit to the face of the drum. Since they where already off.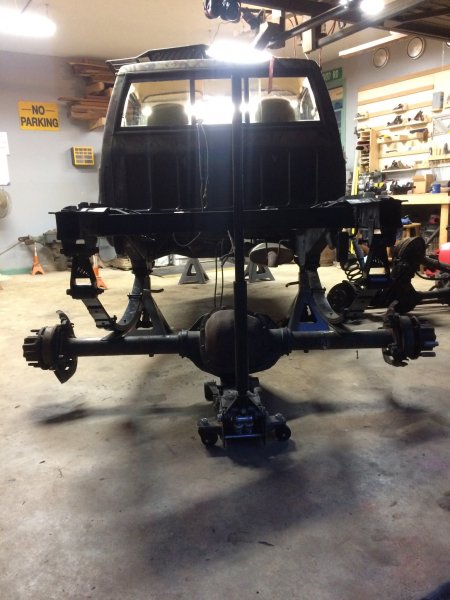
-
Superduty MJ
dustyinthedirt replied to dustyinthedirt's topic in MJ Hardcore Tech: Epic Journeys to Greatness
The 12 ton stands from harbor freight are nicetime to start the suspension
-
Superduty MJ
dustyinthedirt replied to dustyinthedirt's topic in MJ Hardcore Tech: Epic Journeys to Greatness
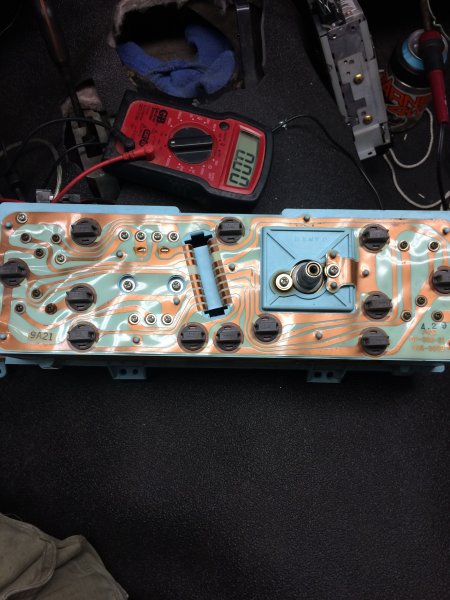
Interior is in. I haven’t mounted the console officially yet. I’m not super happy with the fitment. The seats slide really nice. They sit about 1.75-2” higher. I have way more leg room. The interior feels much more roomy. The gauge cluster lights did not work at all so I wanted to tackle that. I did the ground relocation and only had half of them after making a post and “ohms” replayed and really helped me trouble shooting it and gave me a sweet link to a electrical diagram for the truck. I really appreciate it man!! The lights where not working because of the foil on the back of the instrument gauges was slightly tarnished. A little scotch brite fixed it.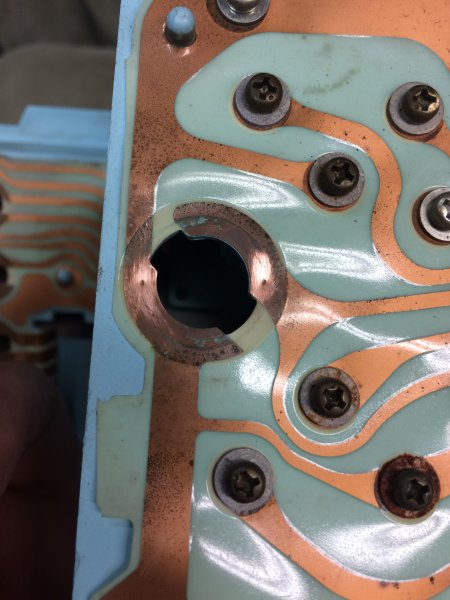
-
Thanks for the ideas I always forget about construction sites just throwing that stuff away. the Pittsburg stands are pretty nice from harbor freight. The truck feels really secure and I was kinda rough with the axle removale
-
I ended up finding a 30% off coupon from harbor freight ant got the 12 ton stands. They will let you use the coupon more then once so I made two purchases of the stands and got 60% off... sorta
-
I had thought about cribbing it up. My cousin owns a small mill and I had thought about solid 10” x 10” x 27” pieces with a notch in the top. I went and looked at harbor freight jackstands, they are not bad. $100 a piece is the only thing stopping me.
-
I am getting ready to build jack stands to set the truck on while I am doing the axle swap. Any ideas? 25” or better
-
I have one I can sell you
-
Just to finish this out!!

-
Thank you for the help!
-
THAT FIXED AT LEAST ONE!! I only did one and it works. Now to take it back out and do the rest!!!
-
They haven’t worn through yet.. but There is a little corrision on the terminals. I will clean them up with a little scotch brite. But what about the foil backing? Can I scuff it gently with some scotch brite?
-
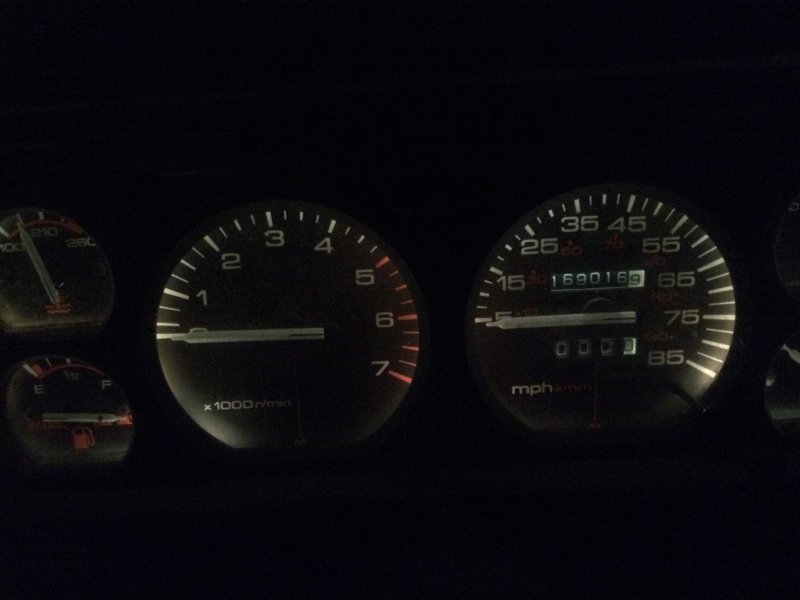
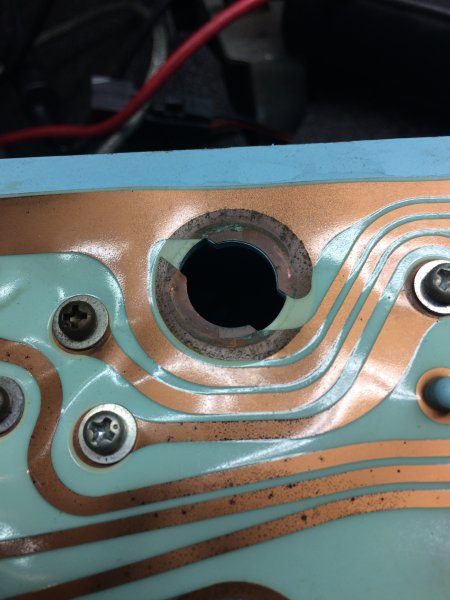
12.38 at the battery just to rule that out. Spun the headlight switch a couple times and it only gets up to 11.1 nothing higher. I have the old headlight switch switched it back in and now getting 12.24 on all of them.. nothing seems torn scratched.. in the picture attached it is laying face down not spun so the left side of the picture is the none working side. the shift light, emissions and the seat belt light all still work. One thing to notice on the left side is the little spots of black stuff which almost like mold or it could be corrision around most of the bulbs
-
And 12.38 at the battery just to rule that out. Spun the headlight switch a couple times and it only gets up to 11.1 nothing higher
-
I’m not getting but 10.68 on any of them
-
I have ground at both 5 and 10. To check the ground I put my multi meter on ohms and had 1.0 on both. This is the correct way right? I’m still new to the multimeter. while I have the instrument cluster off is there anything I should check for back here? All the bulbs seem fine and the strip doesn’t look torn
-
I will go out now and check. Thank you!!
-
Okay so I feel dumb for asking. But how do I know which pin is 5 and which is 10? I’ve done some serious googling and came up empty handed.
-
I recently did the ground upgrade for my instrument cluster lights. (Followed cruisers instructions of attaching it to the stud. I sanded it all to shiner metal) I didn’t have any lights before and now they are only working on the right side of the cluster. Would this mean I’m half way there? i moved some bulbs around from one side to the other to see if the bulbs where just bad and no different results.
-
Superduty MJ
dustyinthedirt replied to dustyinthedirt's topic in MJ Hardcore Tech: Epic Journeys to Greatness
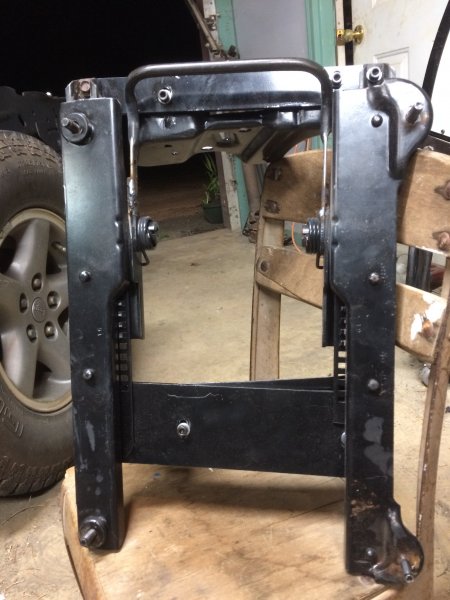
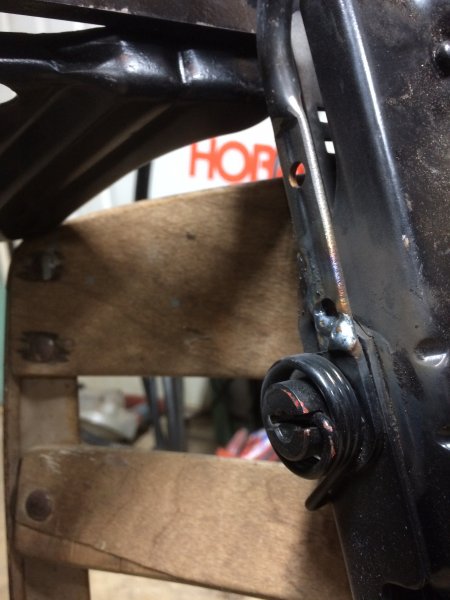
After getting the vinyl layed and the trim in. I started on the seat brackets. I should have done this before I put the trim in. Here is a little sample of what we have going on. I’m gonna do a write up on this seat bracket alteration. It was way simpler then expected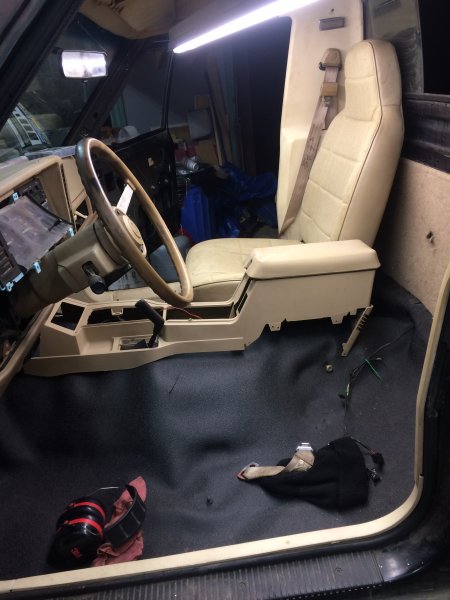
-
Superduty MJ
dustyinthedirt replied to dustyinthedirt's topic in MJ Hardcore Tech: Epic Journeys to Greatness
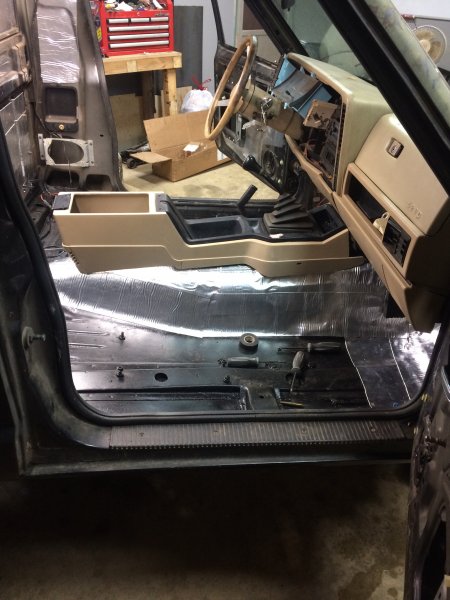
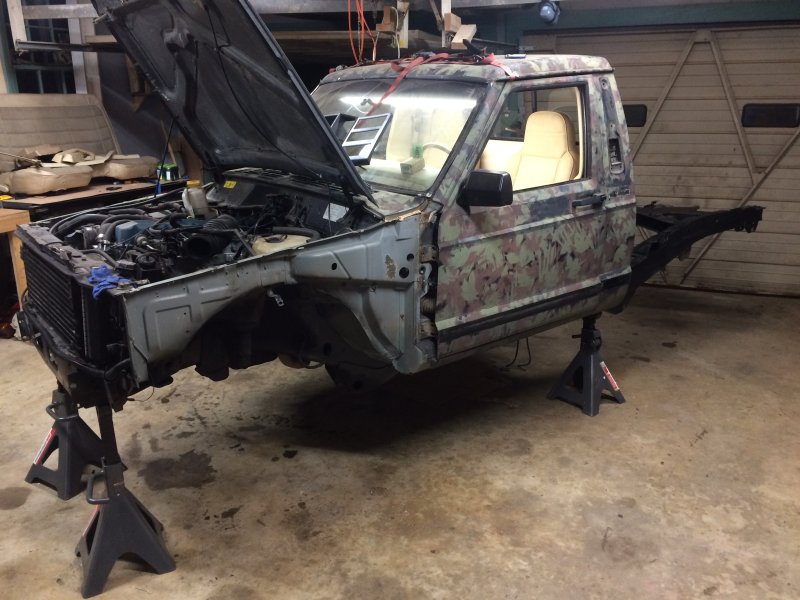
Layed the vinyl in this morning only took 7.5 hours to do it and get the interior panels back in. It fits “okay”. I purchased this vinyl flooring almost a year ago and it’s sat unfolded and flat for that long in a spare room. Using a heat gun made it easier to manover around. I wish it would have been warm enough to leave it out side in the sun for a few hours. I will try to get the rest of the wrinkles out during final install. Now to alter the seat brackets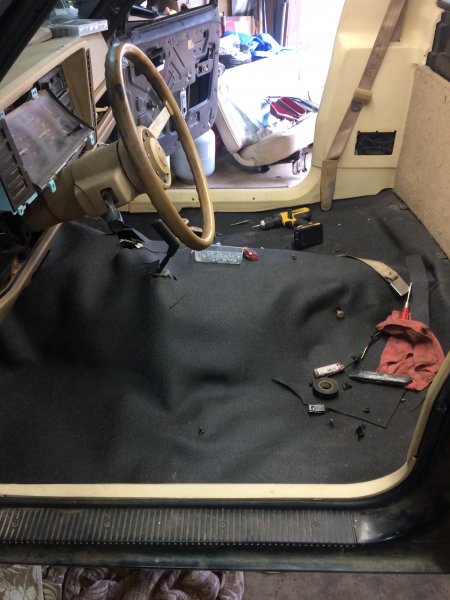

-
Superduty MJ
dustyinthedirt replied to dustyinthedirt's topic in MJ Hardcore Tech: Epic Journeys to Greatness
I wish I would have trimmed a little closer to the heater but it looks okay.
-
Superduty MJ
dustyinthedirt replied to dustyinthedirt's topic in MJ Hardcore Tech: Epic Journeys to Greatness