
dustyinthedirt
-
Posts
357 -
Joined
-
Last visited
Content Type
Profiles
Forums
Gallery
Everything posted by dustyinthedirt
-
Superduty MJ
dustyinthedirt replied to dustyinthedirt's topic in MJ Hardcore Tech: Epic Journeys to Greatness
I’ve got her fooled into thinking we need all this stuff I appreciate that man! -
Superduty MJ
dustyinthedirt replied to dustyinthedirt's topic in MJ Hardcore Tech: Epic Journeys to Greatness
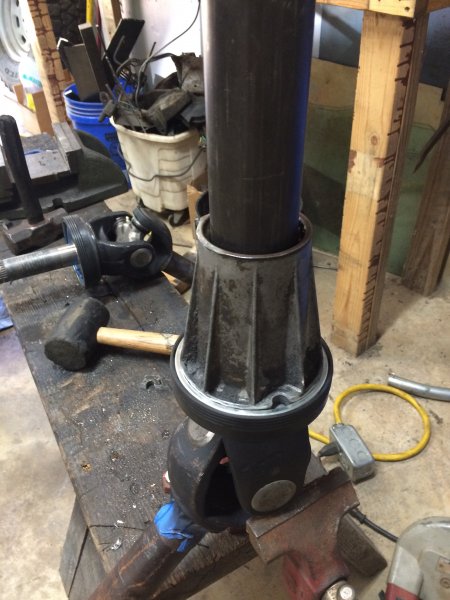
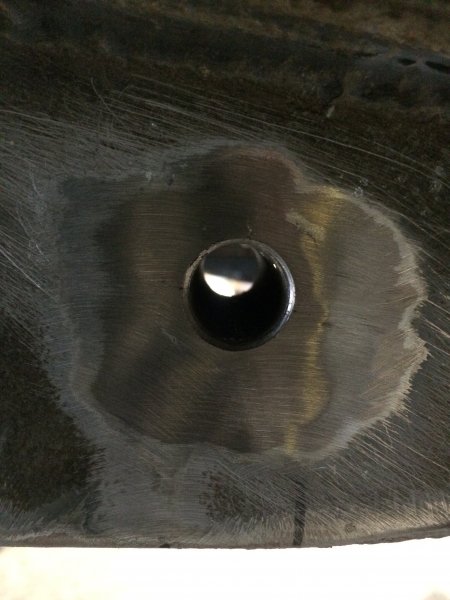
I drilled and tapped my steering box while I had it apart to replace the seals. They are a lot simpler on the inside then I thought it would be. I had to take it apart twice because I didn’t get the balls back into it correctly the first time. i didnt wanna talk about redoing the box till I made sure it works properly. I have all the pics to do a complete write up. It works like it should with little play and no leaks. i was worried the holes for the hydro would leak with the plugs in them. I haven’t got a ram yet but hopefully will order one soon.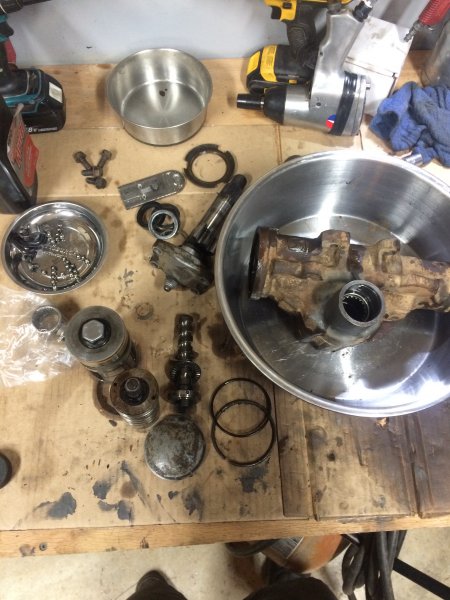

-
Superduty MJ
dustyinthedirt replied to dustyinthedirt's topic in MJ Hardcore Tech: Epic Journeys to Greatness
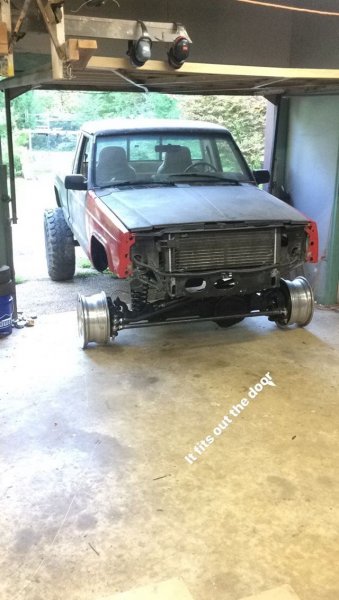
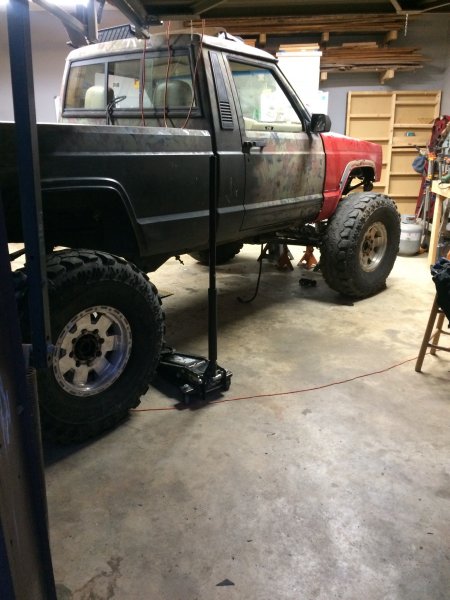
First drive was a success!! Getting it out of the garage Was tedious because it was so tall. I had to switch the front two wheels for some with no tires to be able to pull it out. after a few miles around the neighborhood, the suspension settle about an 1.5” or so and now I’m able to drive it and and out of the garage which is nice. I was wanting to try and keep my COG pretty low.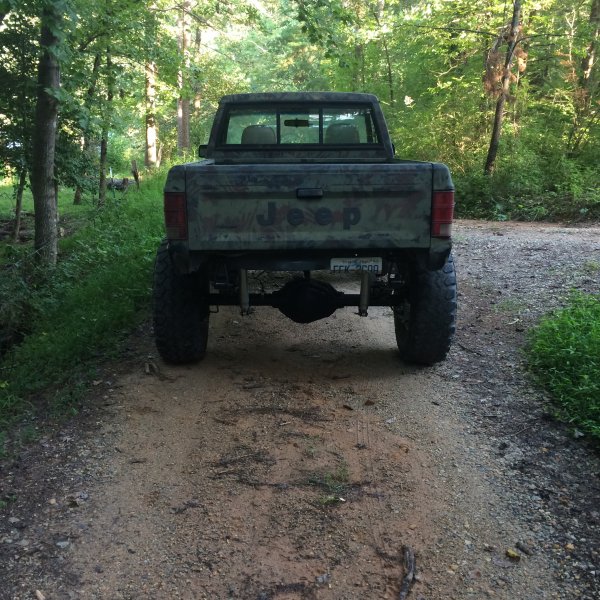
-
Superduty MJ
dustyinthedirt replied to dustyinthedirt's topic in MJ Hardcore Tech: Epic Journeys to Greatness
I deleted the load valve by following Hornbrods post. Spent the better part of 20 minutes under the truck flaring lines that I kept cutting crooked and splitting the side out of. I finally got it right after 4 try’s checked the time and it 9:40 pm. Then proceeded to pour in brake fluid to see if I had any leaks before calling it a night, pumped the brakes twice *splat* I walked to the back of the truck to see the mess I just made. Also to realize I had hooked up the wrong line...
-
Superduty MJ
dustyinthedirt replied to dustyinthedirt's topic in MJ Hardcore Tech: Epic Journeys to Greatness
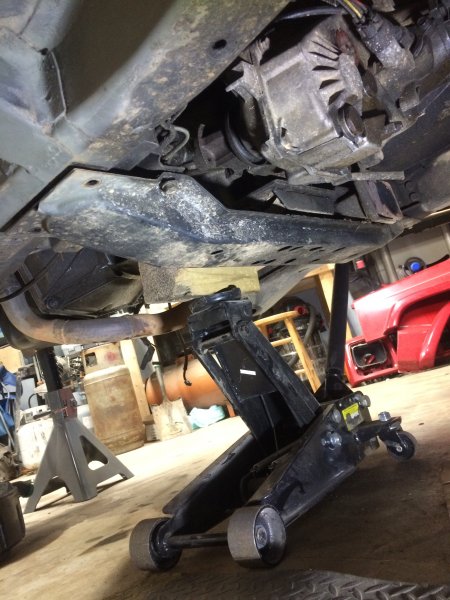
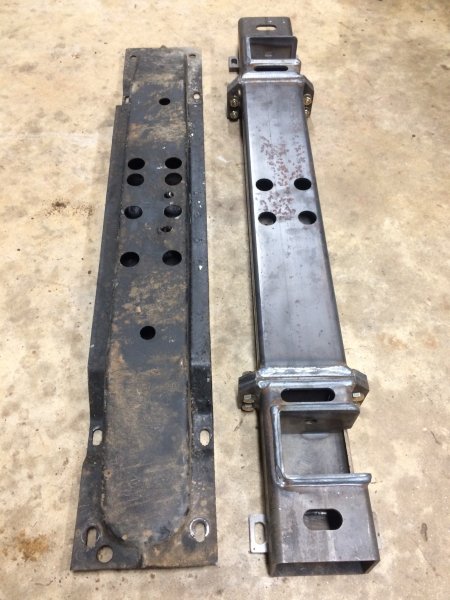
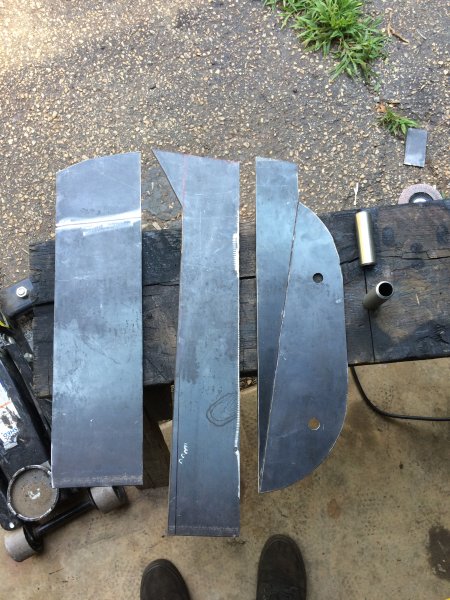
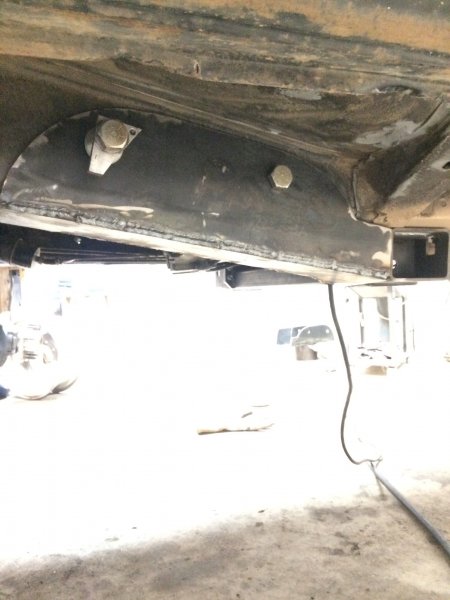
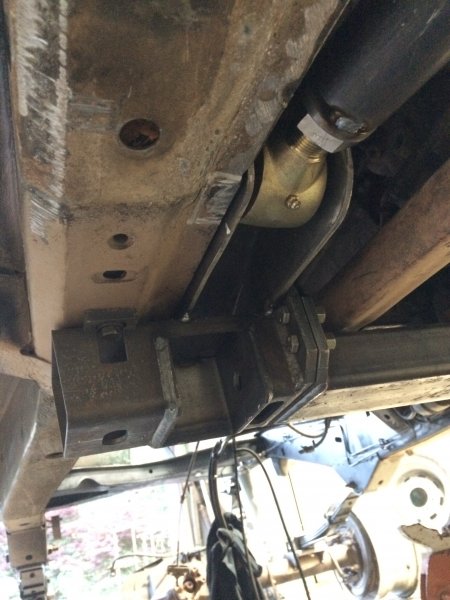
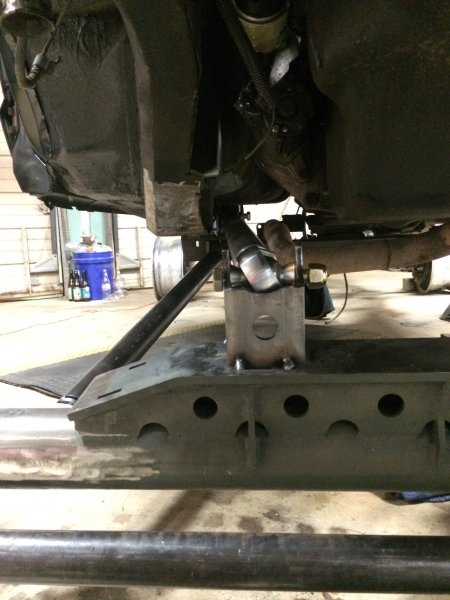
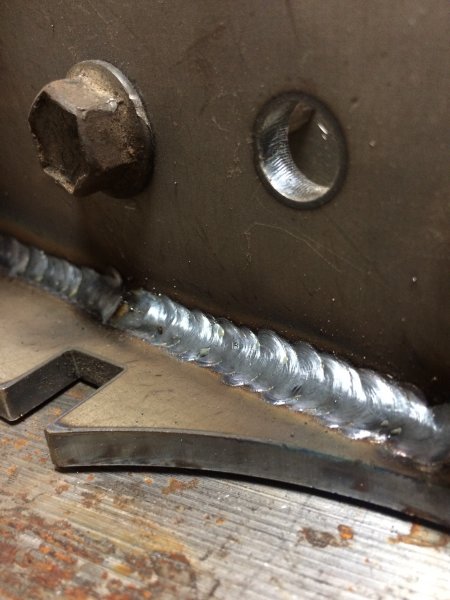
The crossmember/tcase skid is complete. All the bolt heads are recessed into the plate so it will be decently flat across the bottom with nothing to snag on. also the tcase output housing is the same size as a 3/4ton outer axle shaft seal if you cut the ears off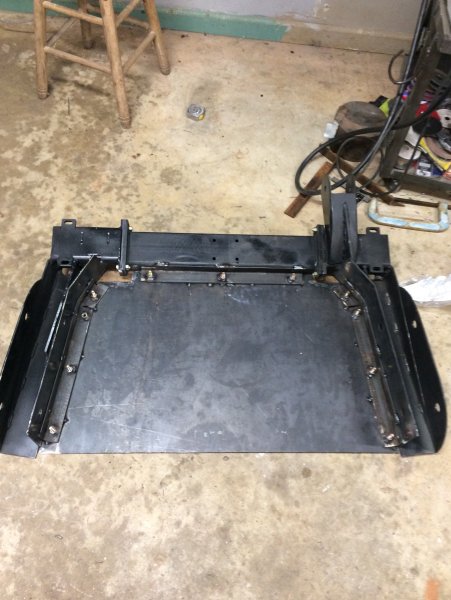

-
Superduty MJ
dustyinthedirt replied to dustyinthedirt's topic in MJ Hardcore Tech: Epic Journeys to Greatness
I have a friend who does fab work for a living. Way better then me at welding... I’m more of a grinder -
Superduty MJ
dustyinthedirt replied to dustyinthedirt's topic in MJ Hardcore Tech: Epic Journeys to Greatness
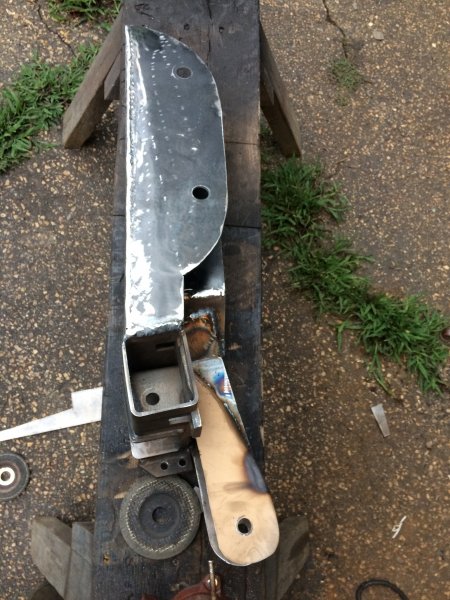
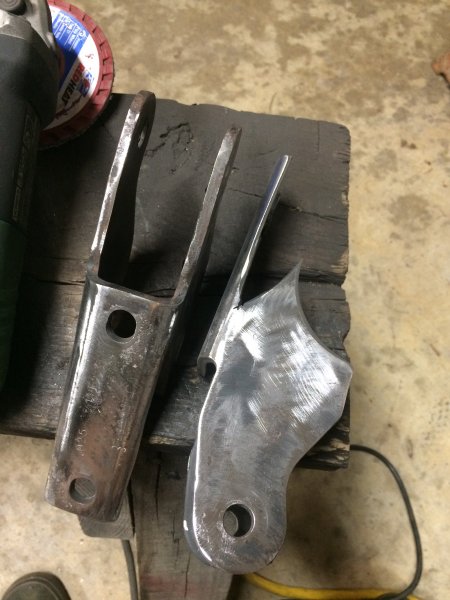
Axles are fully welded now. Starting the re assemble and tying up loose ends. I didn’t like the way the crossmember was mounted and wanted to keep it removable. so I drilled and sleeved the frame for a 3/4 bolt. I made cut some pieces of .125 wall tubing and welded it in looks really good. A coat of paint and it looks factory. Next was making the crossmember braces/skid
-
Superduty MJ
dustyinthedirt replied to dustyinthedirt's topic in MJ Hardcore Tech: Epic Journeys to Greatness
mocked up the draglink with some conduit and then cut it in half and slipped a piece of a wind-chime to make a slip joint. So I can make small adjustments and dial in the fitment before making it out of 1.5” .25 wall dom. I don’t have full lock to on the axle. I’m guessing the pitman arm is not making a big enough arc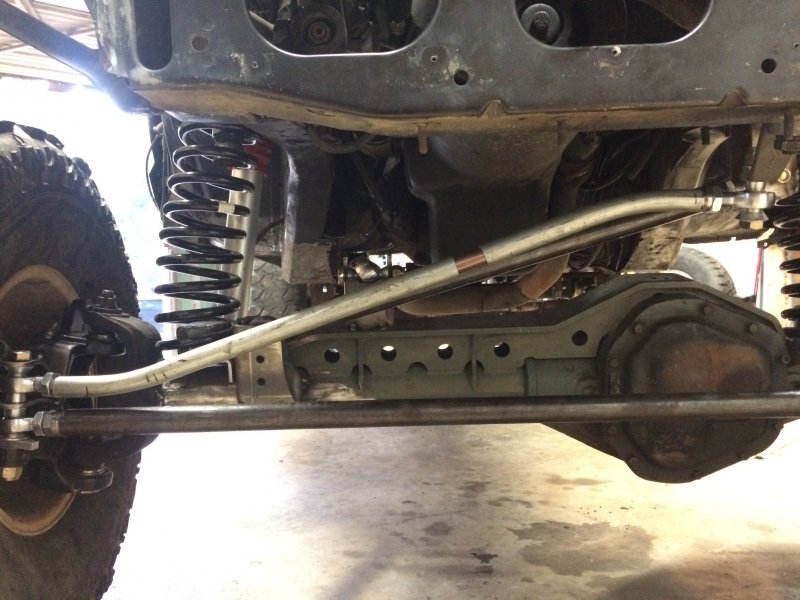
-
Superduty MJ
dustyinthedirt replied to dustyinthedirt's topic in MJ Hardcore Tech: Epic Journeys to Greatness
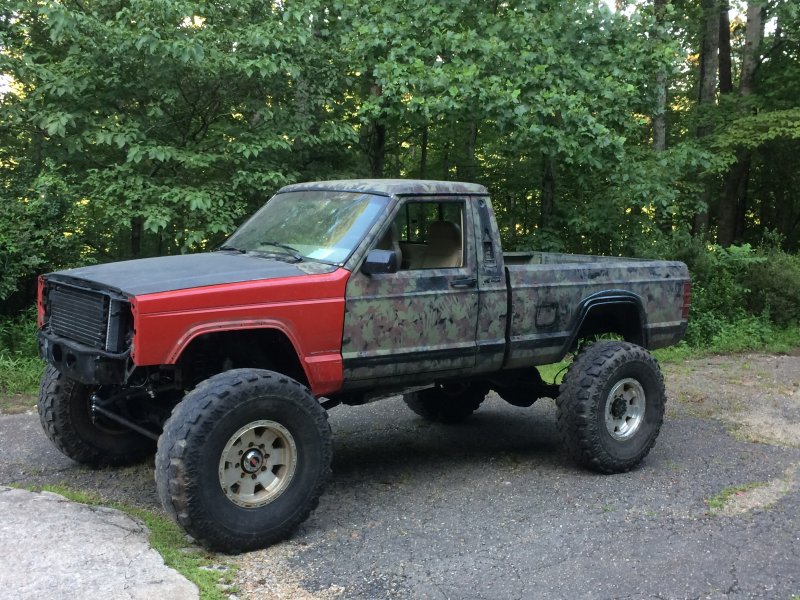
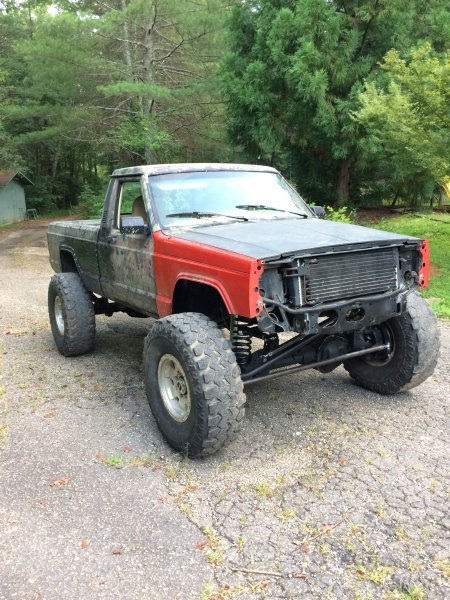
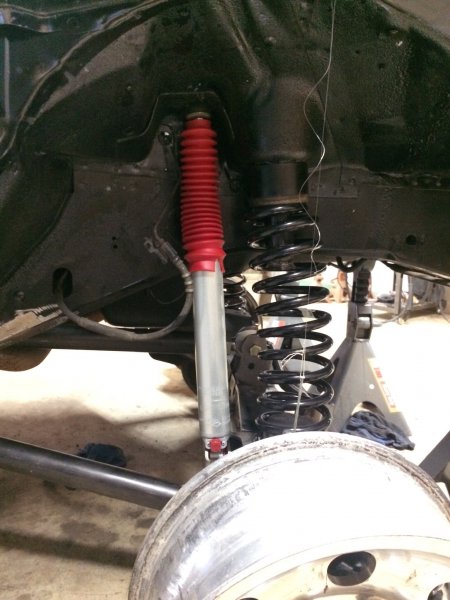
I am not sure on exact measurements. I can measure though. The truck sits nose down a little with a 6” Old Man Emu lift up front. And the Artec truss is supposed to add 2”. So 8” overall upfront. In the rear the shackles are 1.5” longer then the stock ones. I’m also using a set of u bolt eliminators which also add 3/4” to a 1”. With a stock shackle and a regular ubolt kit it would sit level with a 6” lift in the front if you did just a SOA And thanks man! Hoping to paint it before I take it out of the garage -
Superduty MJ
dustyinthedirt replied to dustyinthedirt's topic in MJ Hardcore Tech: Epic Journeys to Greatness
Thank you Pete! -
Superduty MJ
dustyinthedirt replied to dustyinthedirt's topic in MJ Hardcore Tech: Epic Journeys to Greatness
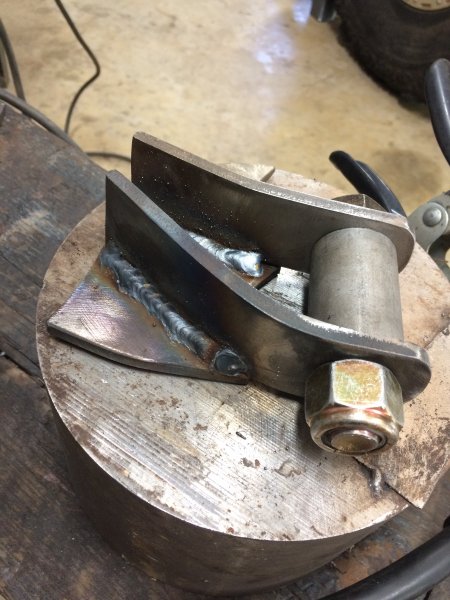
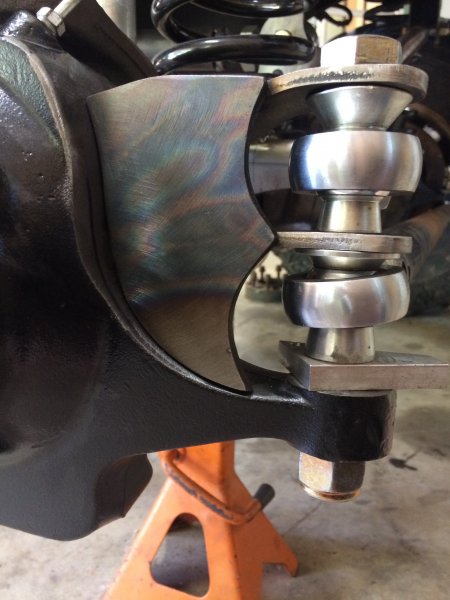
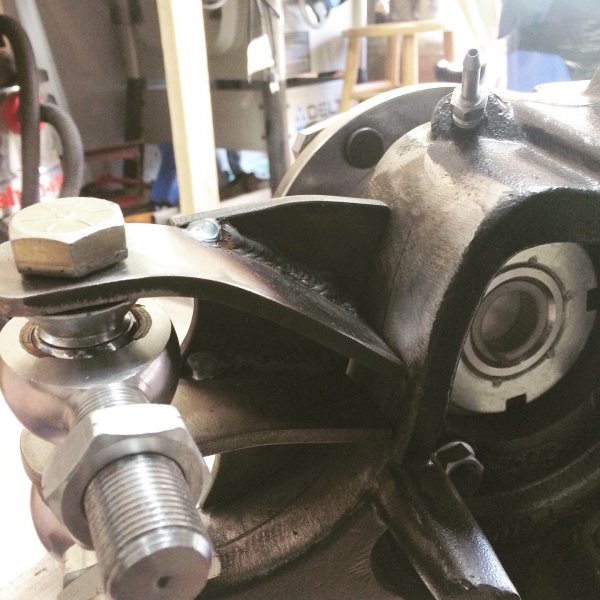
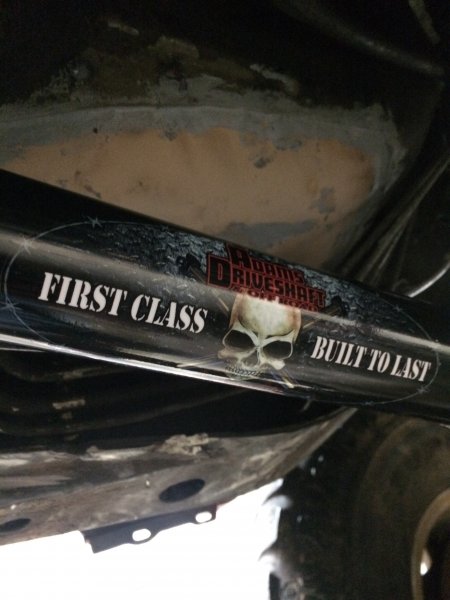
The stock box leaked fluid so as I was replacing the seals I went ahead and tapped it for hydro assist. Much easier to tap then expected. I did have to pull the box apart twice to make it work correctly made a double sheer steering setup yesterday. All out of .25 and got the tie rod up above the bottom of the axle. I’ve gotta make real spacers now to space it up My driveshafts arrived! Adams gave me great service and a good price with two new yokes. Took a week to arrive after I ordered. Now I’m just waiting on brakes and the company I ordered them from is giving me the run around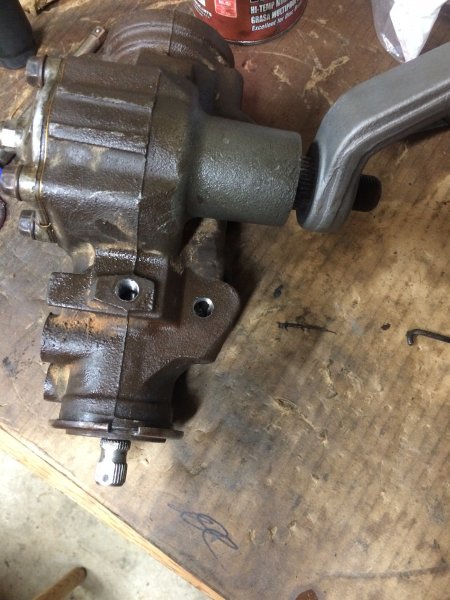
-
Superduty MJ
dustyinthedirt replied to dustyinthedirt's topic in MJ Hardcore Tech: Epic Journeys to Greatness
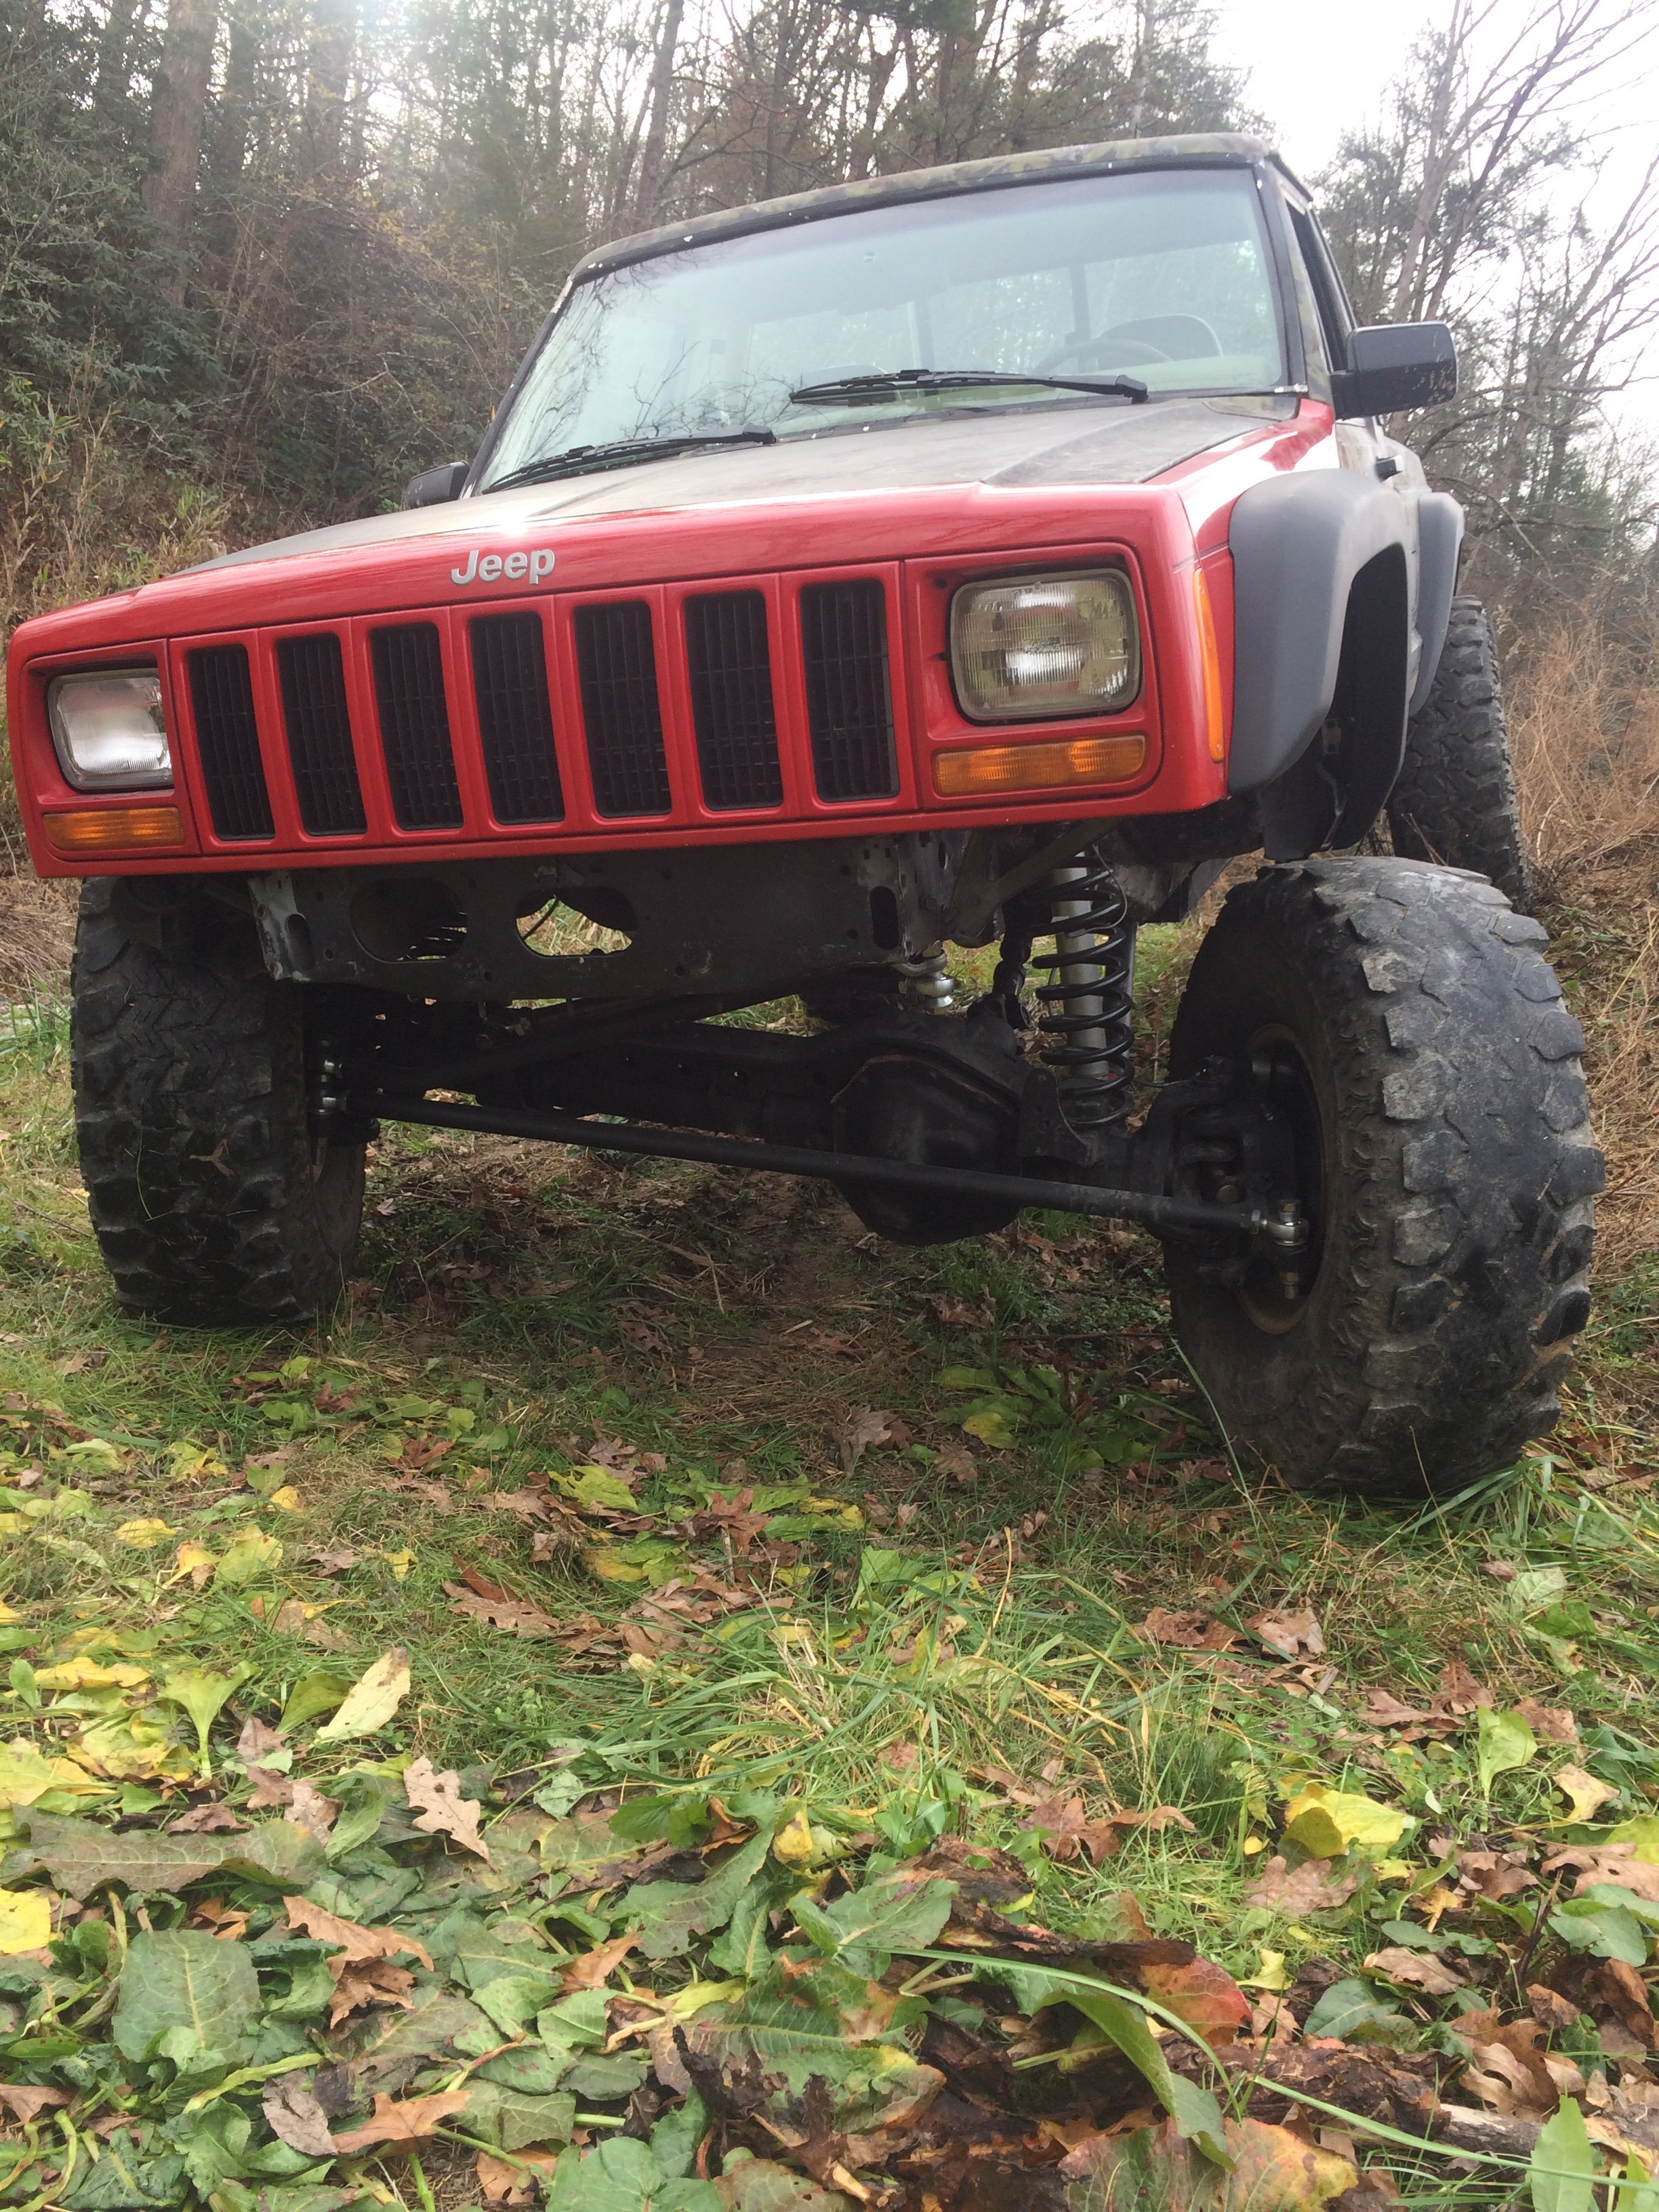
Well it’s sitting on its own weight, with 37” swampers (more like 36”) i haven’t trimmed anything yet cause I wanna flex it out once I get driveshafts in. it sits a little nose down but the body lines are also nose down and the frame is flat across the bottom 22” from ground to crossmember (lowest point on frame) 25” from ground to frame 114” wheelbase 71” rotor face to rotor face (I should have measured hub to hub but my arms are to short)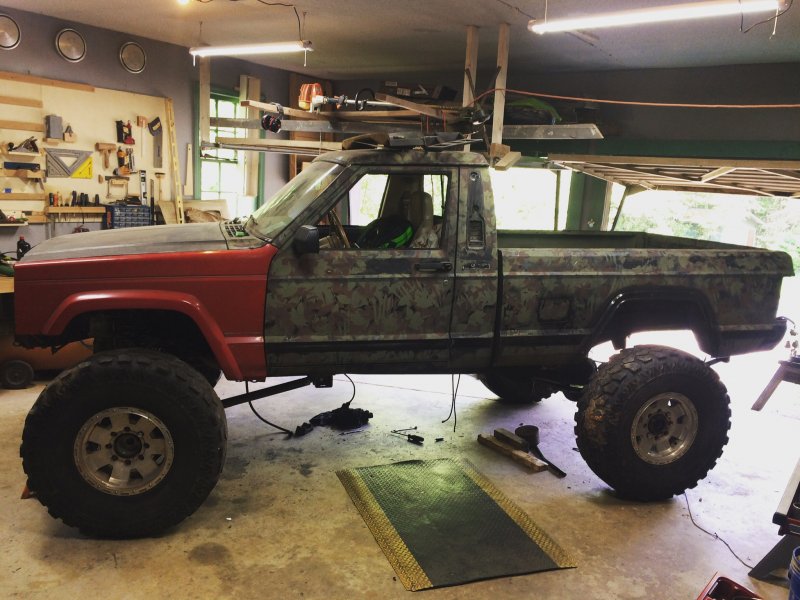
-
Superduty MJ
dustyinthedirt replied to dustyinthedirt's topic in MJ Hardcore Tech: Epic Journeys to Greatness
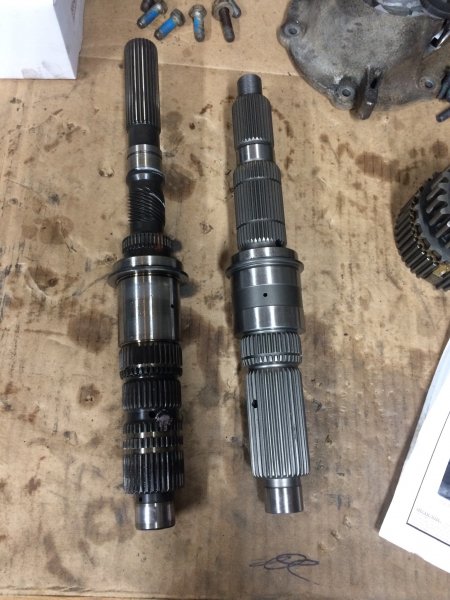
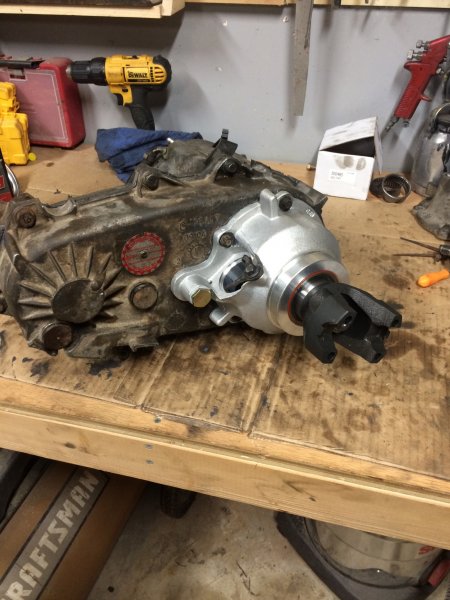
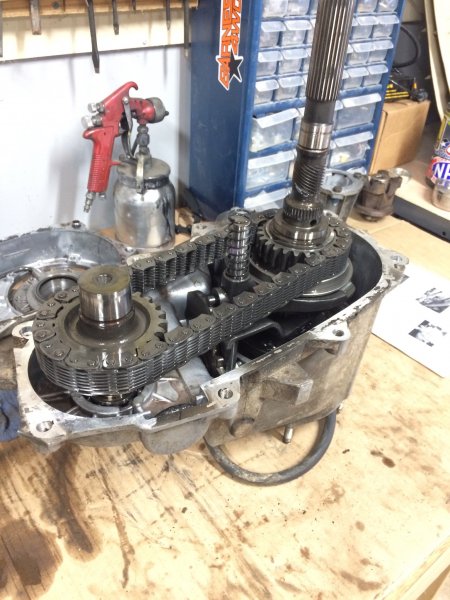
Installed the advanced adapters SYE. The instructions for it made it super easy to follow. It took longer to get the tcase in and out of the truck then to do the swap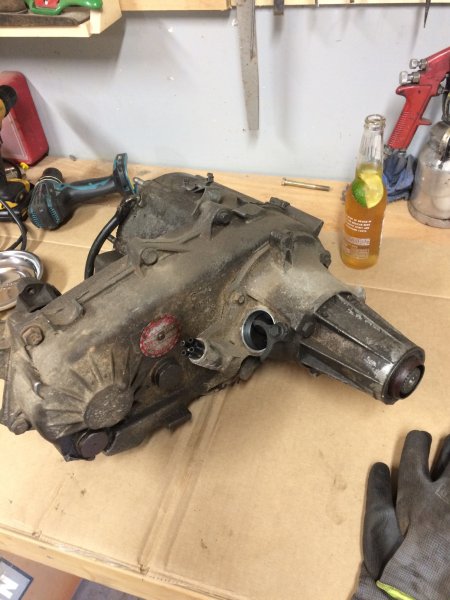
-
Superduty MJ
dustyinthedirt replied to dustyinthedirt's topic in MJ Hardcore Tech: Epic Journeys to Greatness
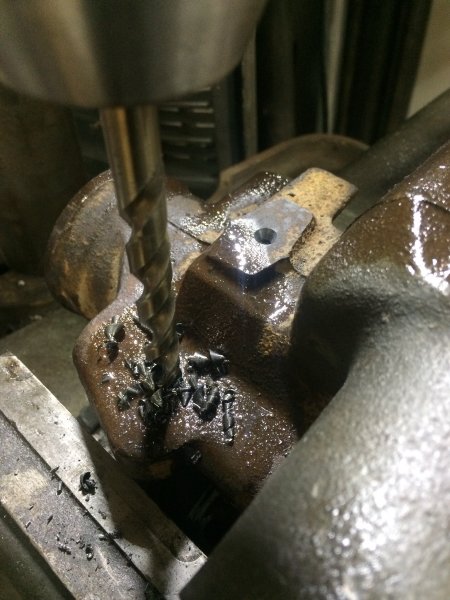
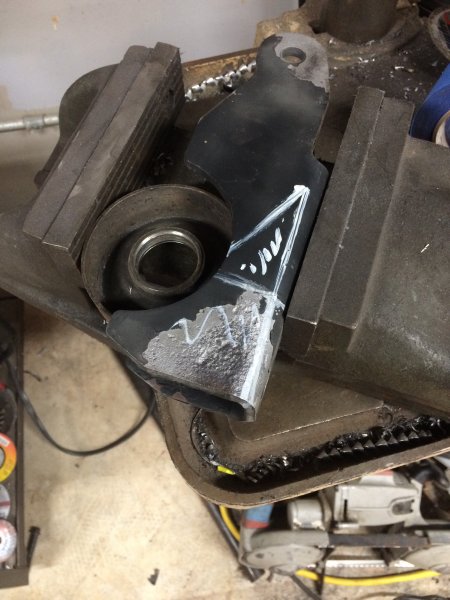
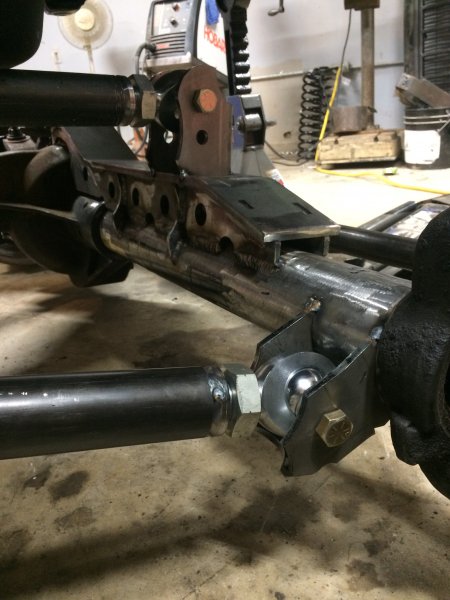
Got the upper link burned in. Had to knot h the frame to more easily access the upper link. I am considering welding in the cross member since middle drops out so I can remove the trans. The idea of two bolts holding the control arms, trans and tcase doesn’t seem safe to me The opening for the control arm but was to small for a nylock nut. A carbide endmill makes quick work of that Also used the stock superduty shock mounts for mine just cut and altered them to be welded on instead of u bolted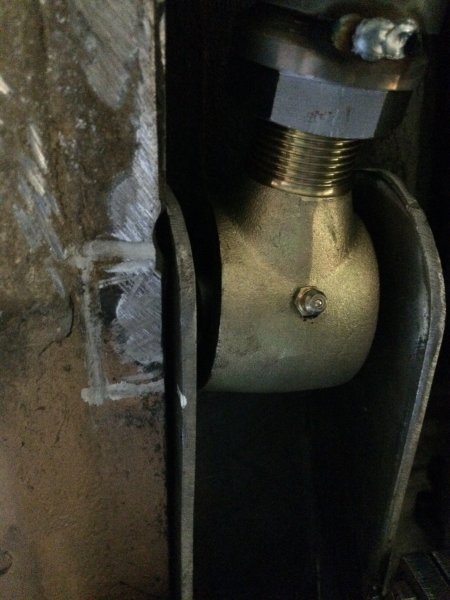

-
Superduty MJ
dustyinthedirt replied to dustyinthedirt's topic in MJ Hardcore Tech: Epic Journeys to Greatness
It’s resting on jack stands but only barely you can see how straight the coil is now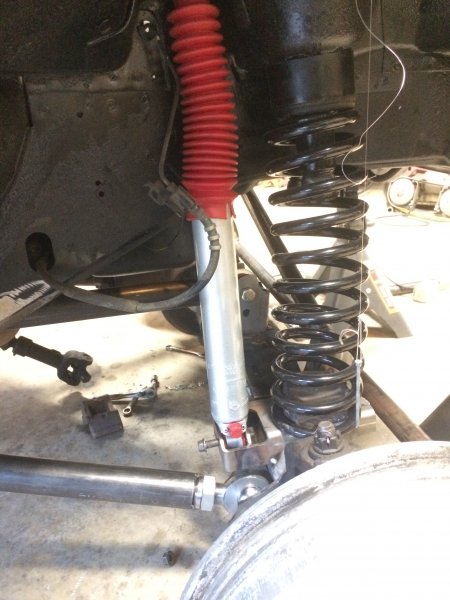
-
Superduty MJ
dustyinthedirt replied to dustyinthedirt's topic in MJ Hardcore Tech: Epic Journeys to Greatness
At that moment the front was pushed about two inches forward from where it should have been. I had to recut my links so it could go back so they where straight. They bow out passenger to driver a little though cause of the way the truss is made -
Superduty MJ
dustyinthedirt replied to dustyinthedirt's topic in MJ Hardcore Tech: Epic Journeys to Greatness
Thank you! I can’t wait to see it move. I’m hoping by the end of the week I’ll be able to order driveshafts -
Superduty MJ
dustyinthedirt replied to dustyinthedirt's topic in MJ Hardcore Tech: Epic Journeys to Greatness
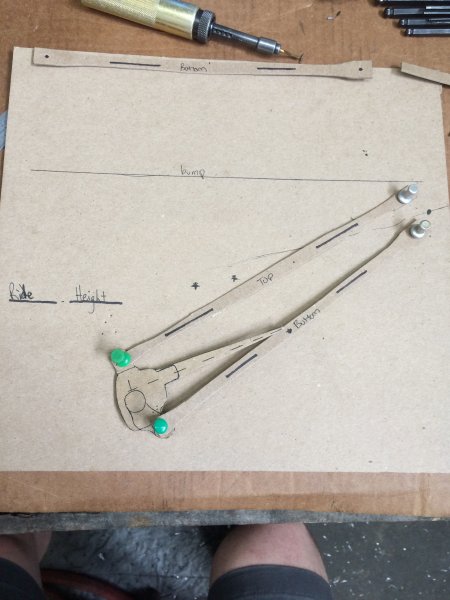
Made up a diagram to show how the pinion moves through articulation. I couldn’t wrap my head around it otherwise

-
Front 3 link question
dustyinthedirt replied to dustyinthedirt's topic in MJ Tech: Modification and Repairs
thanks for the input! What about a good caster angle? I checked the the caster before pulling the stock axles off and they where around 6.8 didn’t match between the two. I have read that I wanna around that number to drive this on the highway. Which is the end game. Drive to the trail/park wheel the snot out of it and hopefully drive it home -
Front 3 link question
dustyinthedirt replied to dustyinthedirt's topic in MJ Tech: Modification and Repairs
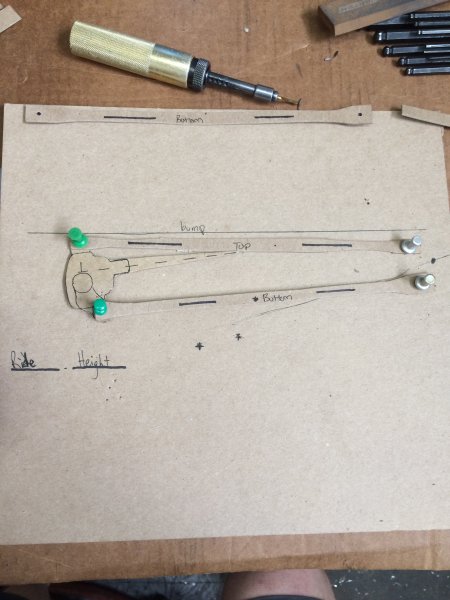
So I made up this little chart while at work. The top link is a little longer then the bottom. It’s sorta to scale... 1/4.5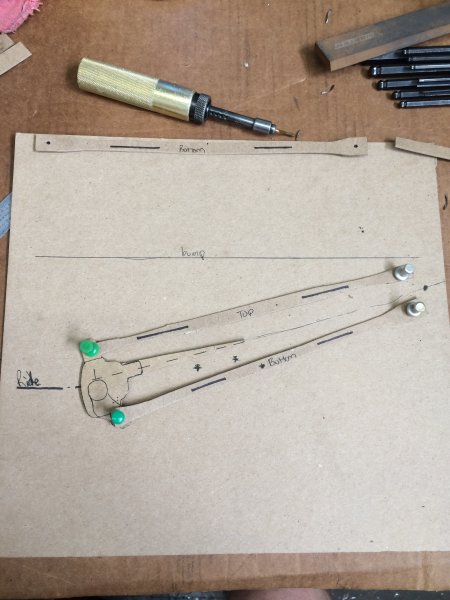

-
Front 3 link question
dustyinthedirt replied to dustyinthedirt's topic in MJ Tech: Modification and Repairs
thats pretty much exactly what I was looking for. I am gonna draw it out this evening and. Get better measurements. To try and see what happens with the pinion -
As I’m setting up the front three link I started noticing the top bar is going to be equal to/greater then the length of the bottom two. 3/4” to a 1” longer. I’ve never heard of anybody having the upper bar longer. But I’ve also never heard of anybody saying you can’t do that. I know on a equal length 3 link the pinion stays pretty constant in pointing at the Tcase. If the upper bar was longer wouldn’t it push the pinion up during full droop. And keep it relatively flat during full bump? Somebody please enlighten me on this. Before anybody states it, I am not following the 70% rule for the links.
-
Superduty MJ
dustyinthedirt replied to dustyinthedirt's topic in MJ Hardcore Tech: Epic Journeys to Greatness
The links/mounts and coil buckets have all been tacked into place. I’m using a Johnny joint on the body side and a Heim on the axle. The axle sits about a inch to far forward and there isn’t much adjustment left on the joints. I’ve got to cut the tacks loose from the links pull the inserts out, cut a inch off and reweld. the springs sit about two inches further out left to right then stock so they have a litttle lean in them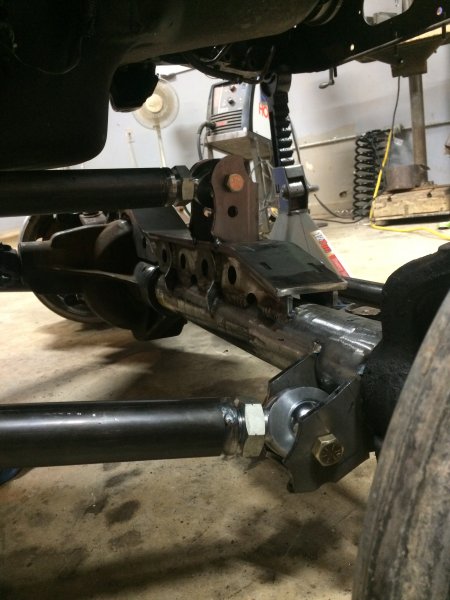


-
Superduty MJ
dustyinthedirt replied to dustyinthedirt's topic in MJ Hardcore Tech: Epic Journeys to Greatness
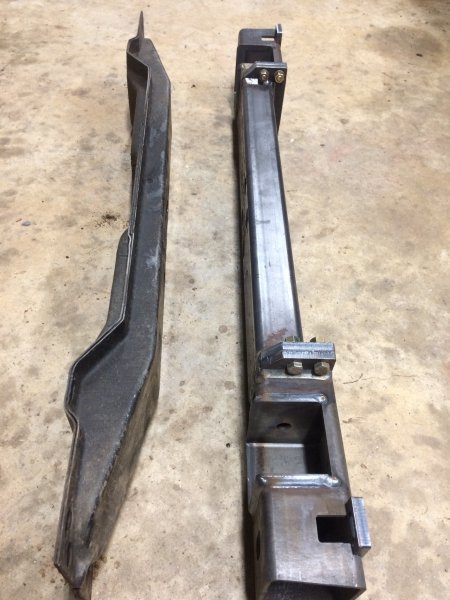
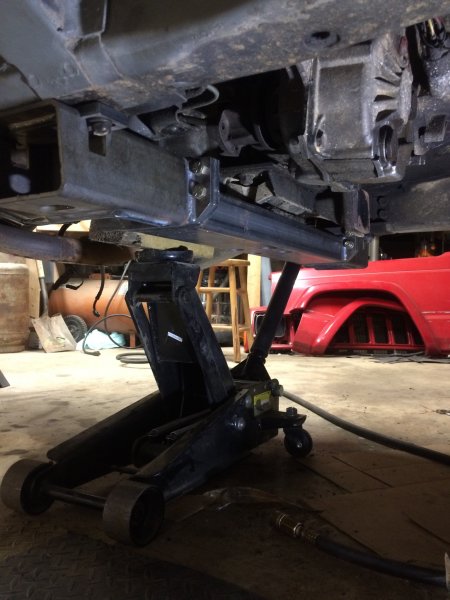
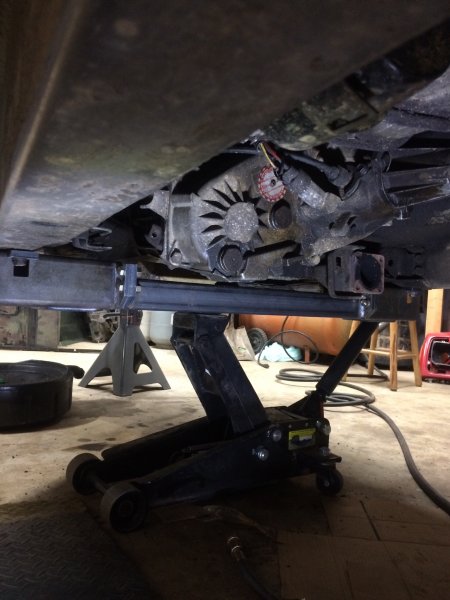
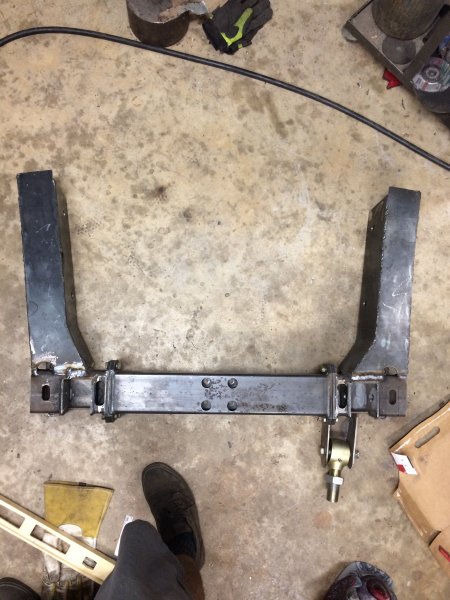
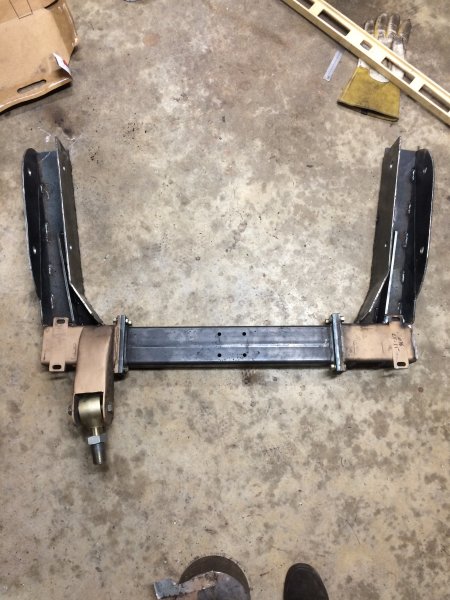
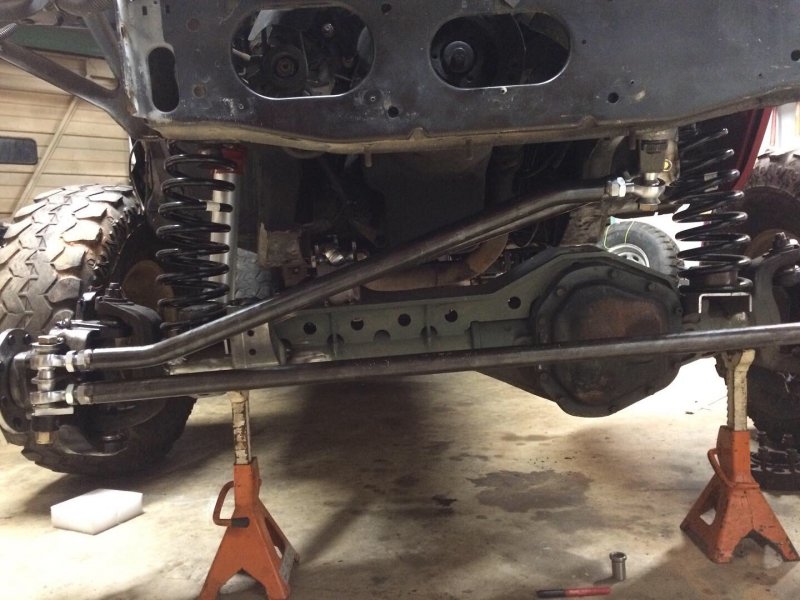
The mounts for the links on the crossmember come out Straight with the body. I need them to be a little angled to match the axle side of the links. Since the axle is almost 10” wider the control arms are pretty wide on the axle. The crossmember is around 28” center of link to center of link and the axle side is close to 43” center of link to center of link. I was able to get the rear sitting on its own weight on the sterling 10.5, pinion angle set and for big racks on each of the u bolt eliminators. We only had to jack the truck up and set down 8 times before we knew it was straight. I have a string run down the side of the truck off the back wheels trying to square the front with the rear.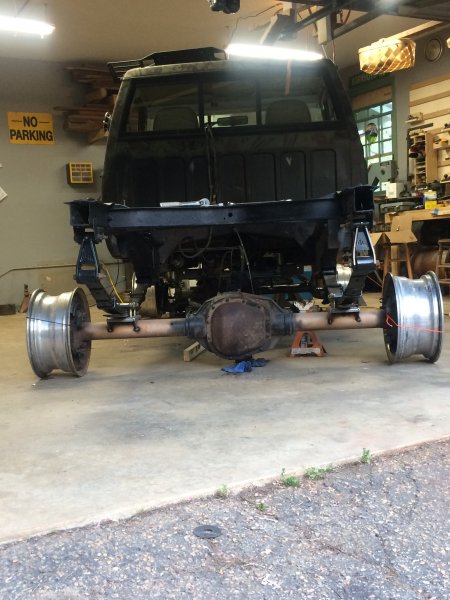
-
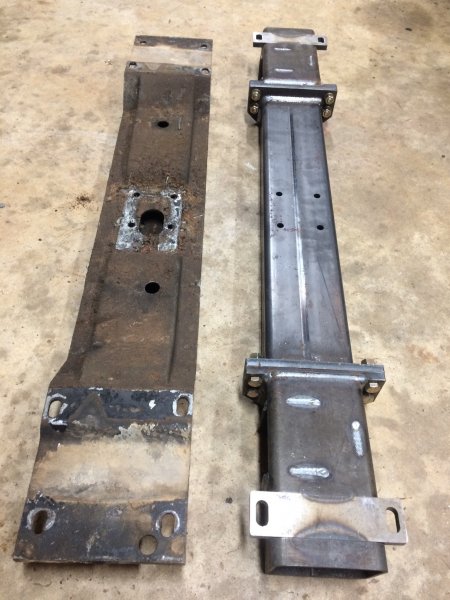
Superduty MJ
dustyinthedirt replied to dustyinthedirt's topic in MJ Hardcore Tech: Epic Journeys to Greatness
Clayton off road 3link crossmember is pretty nice. I’m gonna stitch it to the frame since there are only two bolts holding it and it is gonna have some serious stress on it. I can remove the middle section to drop the transmission. It is about a 1/2 inch lower.