

CGCWO
-
Posts
439 -
Joined
-
Last visited
Content Type
Profiles
Forums
Gallery
Everything posted by CGCWO
-
random informative picture thread
CGCWO replied to maddzz1's topic in MJ Tech: DIY Projects and Write-Ups
Does anyone have photos of the correct wiring for the AC Compressor on a 1989 2.5L. All my parts are there but the PO disconnected the electrical wires. -
Sounds exactly like mine, all the hoses hooked up, but the wiring disconnected. I don't mind the Florida weather, but I would like to have the AC going by the summer.
-
Couple of questions. I am trying to get all my under the hood electrical and AC/compressor electrical re-wired stuff back to near factory. The PO jacked up some of the wiring. If you have AC could you possibly snap a pic of the routing and connections for the wiring?
-
#1 choice gray, 2nd black.
-
Looking for a small center console for my 2wd, 4sp. I have the necessary blanks to go into the console.
-
My 89 2wd 4sp swb, originally gray now OD green going back to gunmetal gray is loaded with options compared to some of these. P/S, AC (not currently working), aftermarket radio, slide in beadliner (going away for Rhino liner)...to funny to think what were options that are standard items now. Our 2010 JK was a special order with hard top and manual doors/windows. Would never have a Jeep with a removable top and electrics in the doors.
-
Little update, not much on the underside or mechanical front, but the paint prep is progressing. Started with the roof, bed-rails, knocking the OD green off and getting down to the original paint. Needless to say the PO did not do a very good job of prepping for the OD green. Using 220 grit I have been able to make pretty good progress. Once I have all the OD green off and everything primed, then the plan is to wetsand the primer and get it all ready for a gunmetal gray top coat. Hope to pull the bench out this week and refresh the springs and foam. won't get anytime to work on it this weekend due to family commitment (niece is getting married). Here are the most recent pic's....not happy with the behind the cab panel, but it will work for now. Image Not FoundImage Not FoundImage Not FoundImage Not FoundImage Not FoundImage Not FoundImage Not FoundImage Not Found
-
Thanks for everyones replies, I have to agree with Warrior. After getting a good look at the seats in the Ranger and the lack of a welder too much work for the 64/40 and I am guessing the Ranger buckets have basically the same mounting. So the hunt goes on for some buckets from another Jeep model of maybe the Dakota buckets like Dadinator has. For now I'll be pulling the bench out again and adding some support to the springs and additional memory foam under the original cover. Trying to get rid of the sitting in a hole feeling of a 26 year old seat.
-
2003 Ranger Extra Cab.
-
I measured the base of a 60/40 Ranger split bench mount today, D/S from door opening to hump is 17". MJ is 14", so that is 3" too wide. Might work with a decent mod. I am trying to figure out if its worth the trouble. I have a line on a set of gray Leather buckets and center console with brackets, the pics look real good and the asking price is reasonable at $150 for all of it. Maybe I will give it a week to see if I really want to try this and he may come down on the price if I let them set for a few more days.
-
Has anyone attempted or been succesful putting a set of Ranger/Explorer bucket seats in their MJ? Looking for advice.
-
I am running General Grabber AT2 30 9.50/15's on my 2wd SWB, w/1.75 coil spacers and AAL. I picked mine up through Discount Tire on-line with free shipping and $70 rebate...mounted and balanced at the local WalMart and I was rolling down the road for $468.00 all in.
-
Panama City Beach in central panhandle.
-
One more side view...
-
Pic's as promised, since it didn't happen if you can't see it. Stock Steel wheels I have 5 of them...that need a home. Yes I know Bump Stops are missing, working on a solution.
-
Thanks to another member here my blower will now push air out of all the vents. Had a disconnected vacuum line inside the dash. There is a "T" that connects to the switch that controls the flappers. I am guessing that the PO or I knocked this loose when either removing his radio or me installing mine.
-
interior Blower only Blows to Defroster
CGCWO replied to CGCWO's topic in MJ Tech: Modification and Repairs
Problem fixed, took about 15 mins to track down a vacuum line that was disconnected at the switch on the back of the control unit inside the dash. Thanks for giving me some direction. -
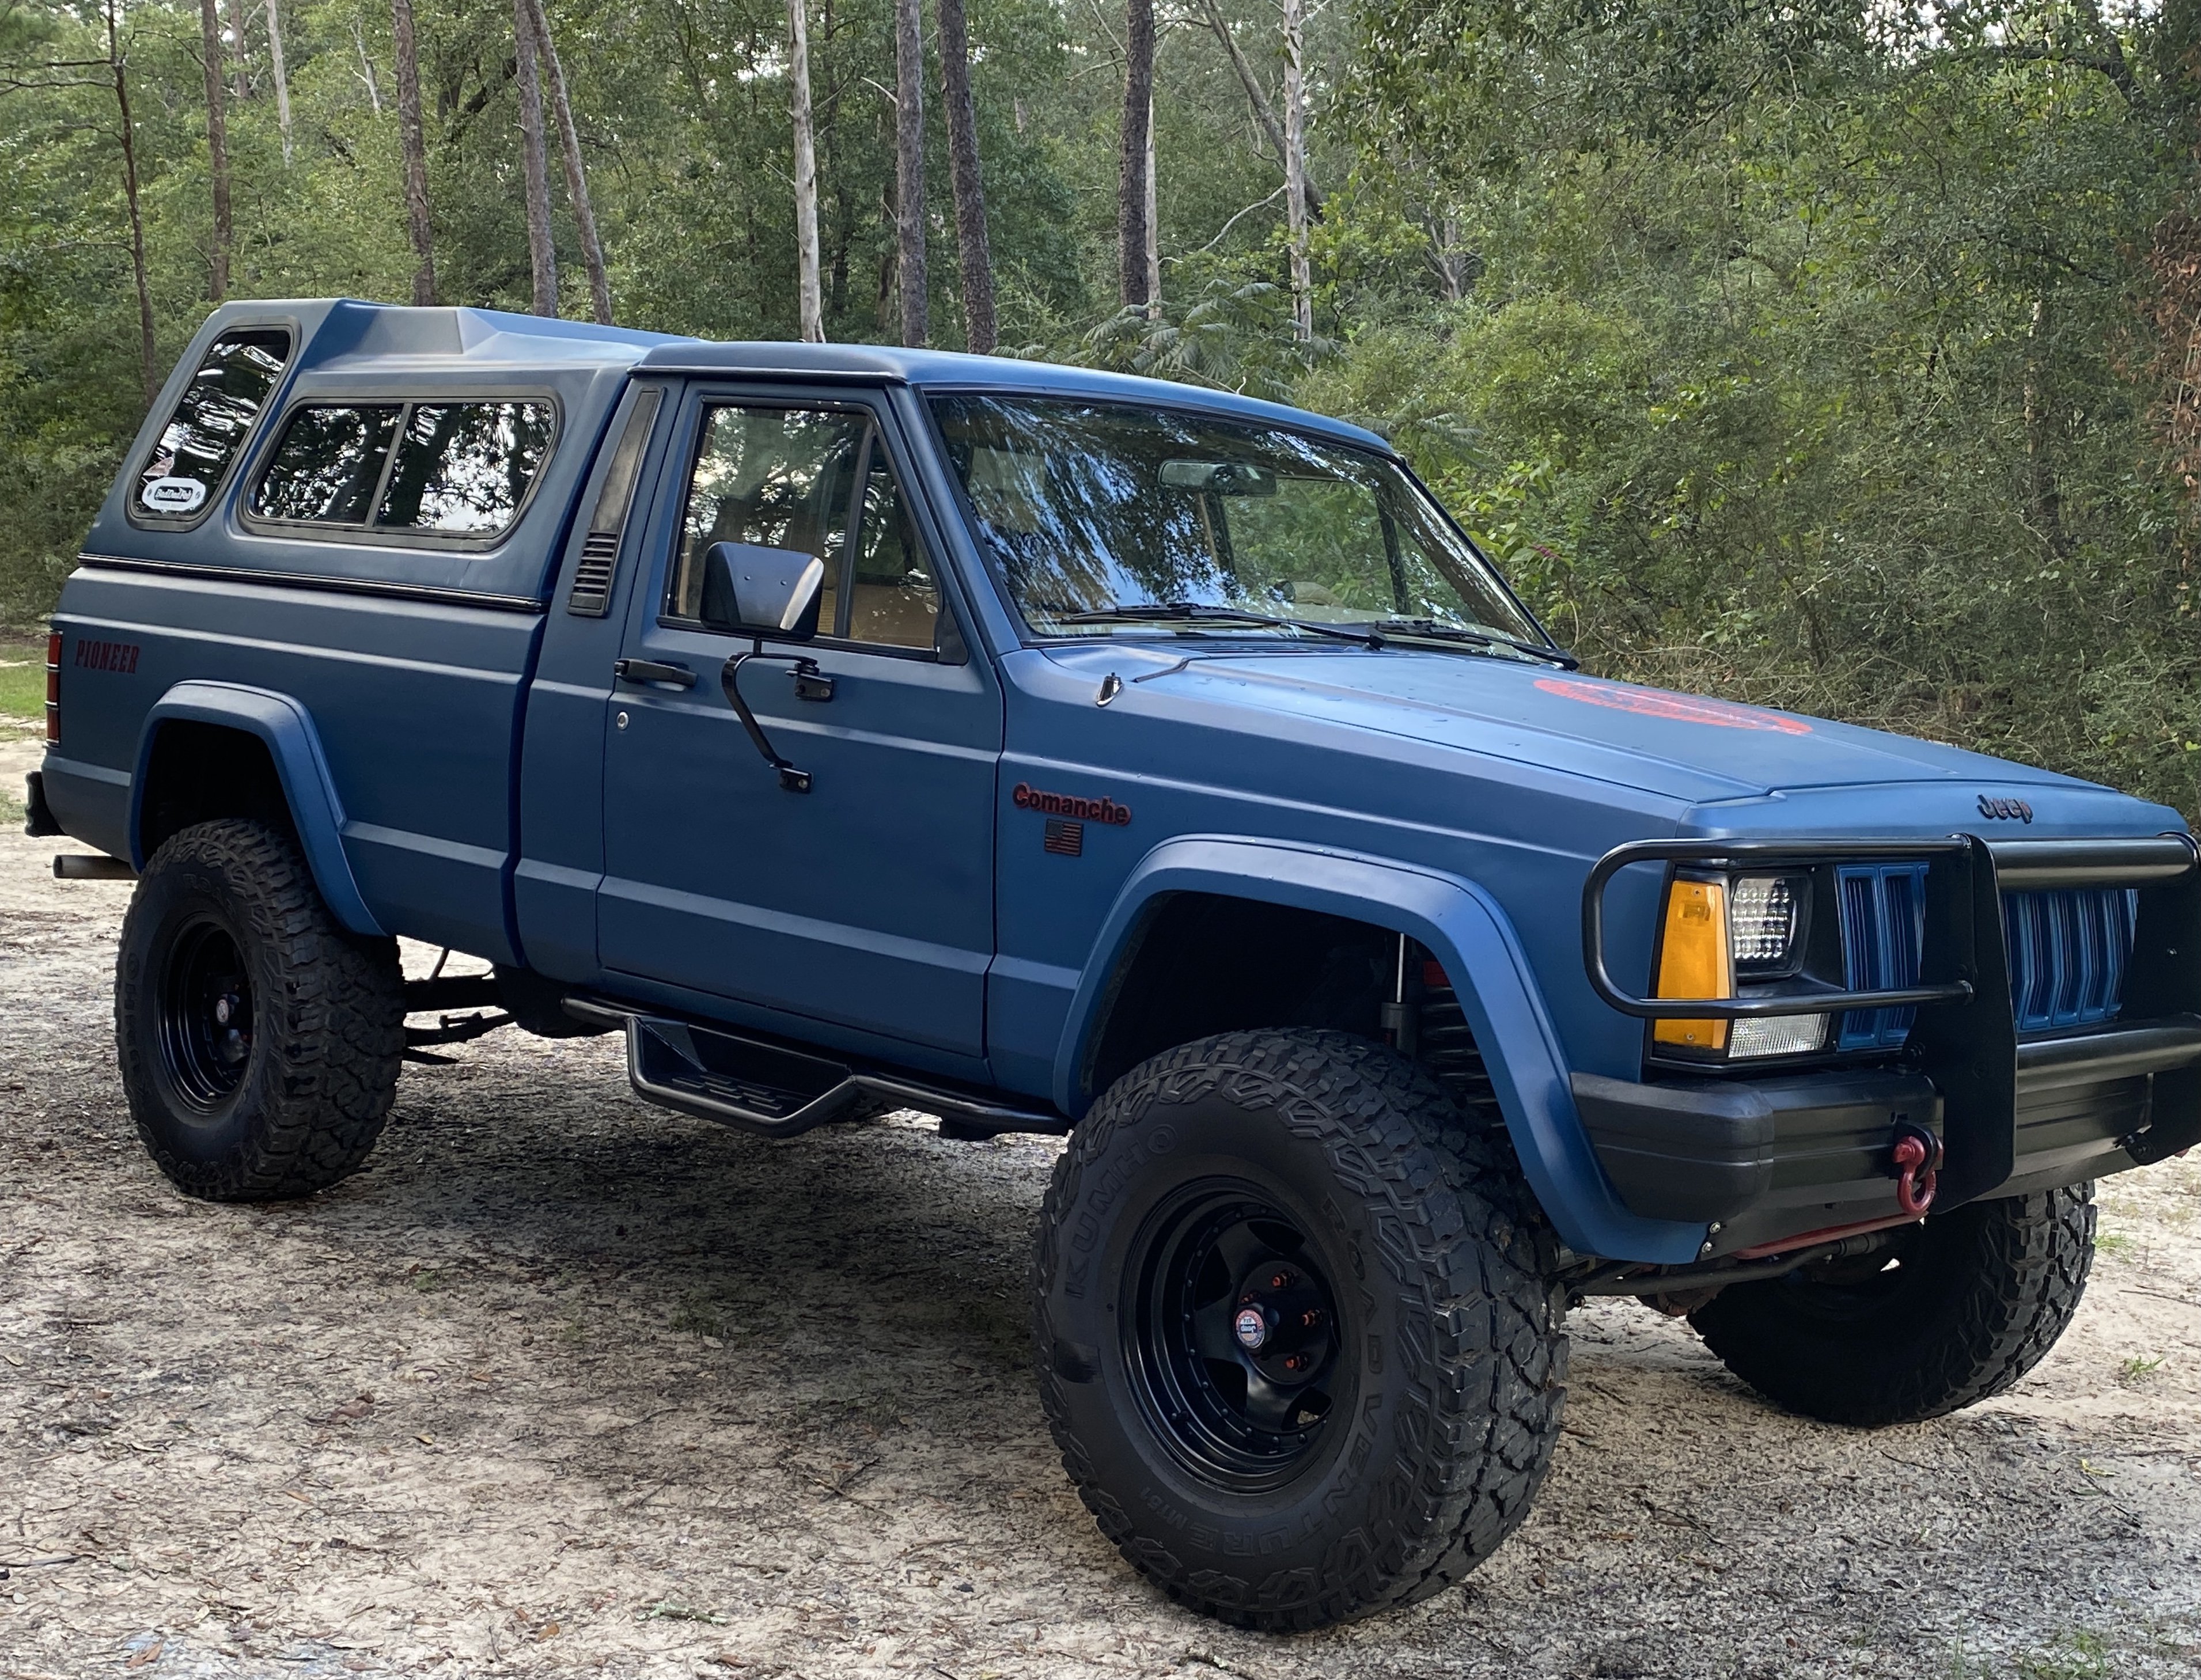
Just paid $1500 for a 2wd, 2.5L 2wd short-bed, body what i'll call very good, paint awful, interior fair, mechanically good and stock suspension. Prob paid a bit to much, but almost impossible to find one in Florida that isn't eaten up with rust, cut to H3LL for bogging or already restored/modded to owners taste.
-
interior Blower only Blows to Defroster
CGCWO replied to CGCWO's topic in MJ Tech: Modification and Repairs
Thanks, much easier than disassembling the dash. -
Few exterior and interior pics posted a couple of days ago. Big news today, new windshield was put in today, not more cracks or chips to look through.
-
Anyone have an idea where I should start? AC compressor is disconnected, but would still like to get some air circulation in the cab, but no matter what position the switch is in I only get air from the defroster vents.
-
Really like the Logans Metal Works front bumper and just checked their website, bumper is currently on sale $159 if anyone is interested.
-
Squeezed in a little under carriage preparation for the undercoating after cutting the grass this afternoon. Been in the dog house for the amount of time/$$ I've been spending on the MJ. Built a custom tail pipe from some flex pipe and some universal pipe hangers. Still getting a rattle from the exhaust, sounds like its in the muffler, will be investigating in the near future.
-
Exterior Photos Before Another before and another before Image Not Found After tires and wheels Image Not Found One more with new tires and wheels. The discolored paint is from the rain... I'll get some interior pics and exterior with the coil spacers installed in the next few days. Last weekends up grades included new radio, 1.75 inch coil spacers and Rustys RX100 shocks for the front. Truck now sits pretty level, droops a little on the drivers side front about a 1/2 inch. Tie rod ends are in the garage and Rusty RX100's for the rear. Truck already had a rear add-a-leaf. So glad to get the Monroe Gas-Matics off the front, hopefully new shocks on the rear will smooth out the ride some. No need for 3/4 ton truck shocks on this little DD. Original truck color was what I call gun metal grey, trying to decide on the next color to go with the grey interior.
-
Image Not Found