996xj Posted July 16, 2024 Share Posted July 16, 2024 Hello everyone! Here is my introduction post to the build This is my 1987 Jeep Comanche Pioneer! As some may know, a few months ago, I began the process of swapping everything from my 98 XJ into my 87 MJ. Just like my last post, I made a dumbed-down to-do list: Preparation and Disassembly: Strip the MJ completely, including interior, drivetrain, and accessories. Use labeling, bags, and photos for organization during disassembly. ✅ Sheet Metal Work: Modify the firewall to fit the XJ components. Patch holes, resize openings for the fuse box and steering column, and seal the firewall properly.✅ Dash Mounting: Fabricate new bolt holes and tabs for mounting the dash. Weld braces onto the firewall for upper dash mounting points and steering column support.✅ Under Hood Accessories: Move accessories like washer bottle, ECU, cruise control, and wiring harness from XJ to MJ. Install under-hood wire harnesses, vacuum lines, brake lines, etc. HVAC Box: Install the HVAC box without the engine in place for easier mounting.✅ Drivetrain Installation: Drop the drivetrain into place, check motor and transmission mounts, and measure for driveshaft compatibility. Interior Insulation: Optional. Add insulation to the interior, especially the roof, back of the cab, and floor. ✅ Wiring: Transfer and label wiring harnesses from XJ to MJ. Install bulkhead connectors, route looms, and connect various electrical components. Interior Reassembly: Install trim, console, bench seat, and other interior components. Fuel: A few options here. (1) In-line pump (2) Use an adapter ring for the XJ fuel pump (3) Swap MJ tank for Dakota or TJ tank. Continuing from my last post: Once I had the thing down to a shell, I started prepping the body. This included any/all rust repair, swapping the firewall from the XJ to the MJ, paint, rust prevention - and just for fun, sound deadening. Almooost factory Wanted to freshen up the trim while the weather was nice... Before: After! Por-15, sound deadening, and carpet padding (old stuff was TOAST) Bought a (dirty) parts Jeep! Carpet flip Cut to size and molded to fit! Bench seat ready to go in Test fitting! Windshield delete New dash mounts, bolts, and steering column support in Dash paint matching... DASH TEST FITTING!!! Now I'm moving on to the wiring and under hood accessories. The harnesses were not the nicest, and since time/energy isn't an issue - I'm tearing it all apart and re-sleeving while I figure out what I do/don't need. Somewhere between wiring and fuel, I'll start to drop the drivetrain in. This, funnily enough, should be the easiest part. As for fuel, I'd like to test out something different. I plan on running an in-line pump, instead of an adapter for the XJ pump/MJ tank or swapping the tank out for a Dakota/TJ tank. I've swapped to in-line on a few of my diesel trucks - and thought I might as well give it a go with the MJ. I'll keep my post updated as to what I end up doing here. Feel free to let me know if you've got questions or advice! I'm always open to chat about my projects Link to comment Share on other sites More sharing options...
eaglescout526 Posted July 16, 2024 Share Posted July 16, 2024 I am not a fan of 97-01 swaps, but I am enjoying what you’re doing to the newer interior to make it match an older color. Link to comment Share on other sites More sharing options...
Salvagedcircuit Posted July 16, 2024 Share Posted July 16, 2024 Very cool! You may find duct-tape crimps along your wiring harness journey. They look like the attached photos. They are indeed stock and vary in quality. Sometimes there is a brass ring that is compressed around other wires into a but-crimp. Other times its just 3 wires pinched together. The crimps are usually tight but sometimes there is a loose one. I de-taped mine and looked for any corrosion. If there was none, I just soldered over the crimp. I used paste flux and 63/37 solder. I then covered with liquid electrical tape. If there were signs of corrosion / cut strands, I just clipped off the region, added heatshrink and resoldered. Most of these wires are small enough gauge that a standard 70w hakko / weller soldering iron will do the business. Don't waste your time with the 35w and less irons, they are terrible. Link to comment Share on other sites More sharing options...
996xj Posted July 16, 2024 Author Share Posted July 16, 2024 1 hour ago, eaglescout526 said: I am not a fan of 97-01 swaps, but I am enjoying what you’re doing to the newer interior to make it match an older color. Thank you! I wanted to pay homage to the original by keeping the medium blue and bringing in the old-school steering wheel Link to comment Share on other sites More sharing options...
996xj Posted July 16, 2024 Author Share Posted July 16, 2024 1 hour ago, Salvagedcircuit said: Very cool! You may find duct-tape crimps along your wiring harness journey. They look like the attached photos. They are indeed stock and vary in quality. Sometimes there is a brass ring that is compressed around other wires into a but-crimp. Other times its just 3 wires pinched together. The crimps are usually tight but sometimes there is a loose one. I de-taped mine and looked for any corrosion. If there was none, I just soldered over the crimp. I used paste flux and 63/37 solder. I then covered with liquid electrical tape. If there were signs of corrosion / cut strands, I just clipped off the region, added heatshrink and resoldered. Most of these wires are small enough gauge that a standard 70w hakko / weller soldering iron will do the business. Don't waste your time with the 35w and less irons, they are terrible. That's so interesting I just finished de-taping everything last night and didn't come across any duct tape - just a LOT of shrink tubing on the ends LOL. Thanks for the advice though! This should be a fun journey! Link to comment Share on other sites More sharing options...
Salvagedcircuit Posted July 16, 2024 Share Posted July 16, 2024 The duct-tape crimps may only be a 87-90 AMC building technique. The crimps either went away with the engine harness c101 connector removal in 1990 or some chrysler engineers checked themselves into a local clinic after analyzing the cherokee / comanche assembly procedure. Good luck with it! Link to comment Share on other sites More sharing options...
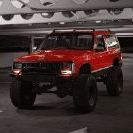
996xj Posted August 7, 2024 Author Share Posted August 7, 2024 Update Post! Found the first photo I got of the MJ Found & restored some seat belt loops Pulled my door card collection out of storage Quick refresh... Partial install/test fit Squatted the MJ Just kidding... Quick 98 axle swap. Well, it was "quick" until I saw how crooked the lower control arm bracket was Fabricated some replacements! If it holds, it's gold Took a breather and (finally) found a canopy! Fun fact: Long Bed Toyota Hilux canopies are a perfect fit for the LWB Comanche Scored a complete set of MJ flares at Pick n' Pull and primed them white. Haven't quiiiite gotten around to the Olympic White yet Installed the axle & replaced the pads and rotors Cleaned up the bay and prepped for the drivetrain test All clear! Pulled the valve cover off... Results were not great. Kept ripping to check the block out. Not the prettiest. Finally paying the price for my budget build LOL. Other than a little build-up, the block seems to be in good condition. Compression on all cylinders is better than none. Kept my head up and got to cleaning it up. Already looks quite a bit better. Dropped the head off to have the head and valve seats machined yesterday. Dropped some change on new top-end parts and prepared for the rebuild. Also went ahead and treated myself to some engine enamel Last-minute Facebook Marketplace steal: Got a crazy good deal on it since the quarter of the grill was broken. Any suggestions on fixing this? Might run it on the Comanche, since the white matches and it's already a bit of a Frankenstein's Monster... Haven't decided quite yet. That's my three-week progress update! Link to comment Share on other sites More sharing options...
Awesome Posted August 7, 2024 Share Posted August 7, 2024 Just my opinion, but that grille was the ugliest thing to ever sit on the front of a Jeep until the "angry eyes" thing started happening. Sell it for profit and get a single beam header. Link to comment Share on other sites More sharing options...
Salvagedcircuit Posted August 8, 2024 Share Posted August 8, 2024 Woah what an update. Nice job on the dual diaphragm booster + master. That is the best bang/buck combo In terms of the cracked grill, I have had some great success plastic welding broken plastic parts with a soldering iron and stainless window screen mesh. I attached some photos. a simple 70w soldering iron is enough. The mesh just melts into the back in a few seconds. It isn't going to make the crack seam on the front completely vanish, but it greatly closes up the crack and prevents further damage. The repair is also unnoticeable from the front side. Curious, what did you use to refresh the door cards? The rear axle welds look nice, reminds me that I should finally grab that rear axle from the manual liberty at my nearby junkyard. Rear discs hubba hubba hubba. Link to comment Share on other sites More sharing options...
996xj Posted August 8, 2024 Author Share Posted August 8, 2024 5 hours ago, Awesome said: Just my opinion, but that grille was the ugliest thing to ever sit on the front of a Jeep until the "angry eyes" thing started happening. Sell it for profit and get a single beam header. Ha! I've got both, but I kinda love how derpy the quads look I'll have to clean the dirty adhesive stripes off and test fit it to see how I feel about it Link to comment Share on other sites More sharing options...
996xj Posted August 8, 2024 Author Share Posted August 8, 2024 Quote Nice fix on that! I've got two sets of the blue B pillar trim, and I couldn't even GIVE it away because of the cracks I'll have to take my soldering iron to the back of it and see what I can do... For the door cards (and a LOT of the interior) I had a paint shop make some custom mix SEM paint. Redid my Cherokee's interior black in February of last year and it's withstood quite a bit of abuse with no issues. It'll run you about $30-$40 a can, but it is worth it. Speaking of rear axles, I've still got the Chrysler 8.25 with 3.07 gearing off the 98... I've been kicking rocks thinking about doing the work to swap the rear out... I kept telling myself the only rear swap I'd do would be for something with disks but I'm torn! Link to comment Share on other sites More sharing options...
eaglescout526 Posted August 8, 2024 Share Posted August 8, 2024 32 minutes ago, 996xj said: I had a paint shop make some custom mix SEM paint. Landau black works just as well if not a dead ringer for the OEM black. I say run the Waggy header. Theyre fun and unique but the side markers are impossible to find. Link to comment Share on other sites More sharing options...
Salvagedcircuit Posted August 8, 2024 Share Posted August 8, 2024 1 hour ago, 996xj said: Nice fix on that! I've got two sets of the blue B pillar trim, and I couldn't even GIVE it away because of the cracks I'll have to take my soldering iron to the back of it and see what I can do... For the door cards (and a LOT of the interior) I had a paint shop make some custom mix SEM paint. Redid my Cherokee's interior black in February of last year and it's withstood quite a bit of abuse with no issues. It'll run you about $30-$40 a can, but it is worth it. Speaking of rear axles, I've still got the Chrysler 8.25 with 3.07 gearing off the 98... I've been kicking rocks thinking about doing the work to swap the rear out... I kept telling myself the only rear swap I'd do would be for something with disks but I'm torn! My lower dash was cracked in multiple spots from the previous owner's sloppy CB radio install, but after the plastic welding it's nice and straight. The hairline cracks give it character lol. I've read a bunch on here about people having luck with SEM paints. Cool. I think I just got lucky that my door cards cleaned up with melamine / mr.clean eraser. Nearly all the marks vanished and the melamine left no residue or staining. I covered up the botched speaker hole with slightly larger 5.25in Goldwood metal speaker grill covers and the result is pretty clean. They clear the window cranks and take some abuse when my foot accidentally hits them, which works for me. I'm definitely going KJ liberty rear axle purely because they are slightly wider to match up the front / back wheel tracks, have the complete disc setup and have the same rim bolt pattern. I previously purchased the ~$800 teraflex disc conversion kit for D35 / D44 and after looking it over, it was not worth the effort, especially on earlier non C-clip axles. I returned the kit. This thread was very helpful to me: Link to comment Share on other sites More sharing options...
996xj Posted August 16, 2024 Author Share Posted August 16, 2024 Mini Update! Took a week to get my head back from the machine shop... In the meantime, collected parts, did a Pick n' Pull run, and worked on the tow pig (very long overdue) Oil, filters, rotors, and pads (it's flying!) Got a ton of junk at Pick n' Pull: Dash/Firewall Insulation Electric Fan Mishimoto Radiator & Hoses Coolant Bottle Power Steering Pump (mine was cracked) Got the call that the head was ready on Wednesday night and IMMEDIATELY got to business Taped, sleeved, and plugged holes (I couldn't NOT paint it) Some little extra touches too Dropped it on and chucked the head bolts in Time to assemble! Sooo much nicer Rotated and torqued to spec Popped the valve cover on top... I'm not bolting it on until I decide whether or not to polish or paint (I've had a week to decide and still can't pick). Definitely fence-sitting on white or chrome (trying to keep it as 80s as possible ) Next time you see me, I'll have the C8.25 swap DONE, engine wiring in (holding myself accountable), and a shiny valve cover on! Link to comment Share on other sites More sharing options...
Salvagedcircuit Posted August 17, 2024 Share Posted August 17, 2024 Nice work! Also, finding a Mishimoto radiator in the JY - the Jeep gods must have been with you that day. Dang! Link to comment Share on other sites More sharing options...
Drahcir495 Posted August 20, 2024 Share Posted August 20, 2024 Great work. Coming along nicely. I also like the 2 tone paint scheme. Link to comment Share on other sites More sharing options...
eaglescout526 Posted September 7, 2024 Share Posted September 7, 2024 Ok this might seem incredibly odd but my wife stumbled upon one of your instagram reels by means of facebook. The waggy header looks good on it! Link to comment Share on other sites More sharing options...

Recommended Posts
Create an account or sign in to comment
You need to be a member in order to leave a comment
Create an account
Sign up for a new account in our community. It's easy!
Register a new accountSign in
Already have an account? Sign in here.
Sign In Now