996xj
-
Posts
14 -
Joined
-
Last visited
Content Type
Profiles
Forums
Gallery
Everything posted by 996xj
-
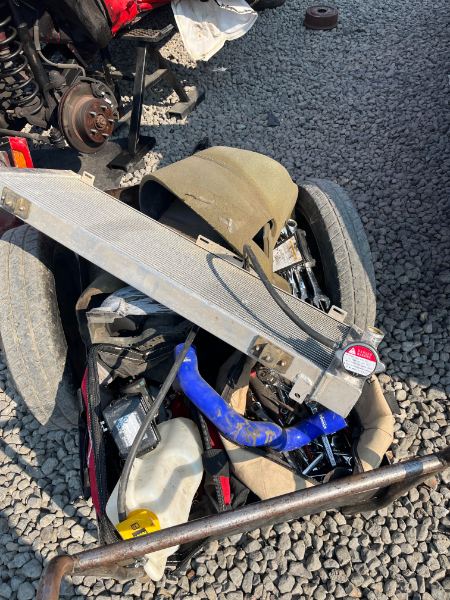
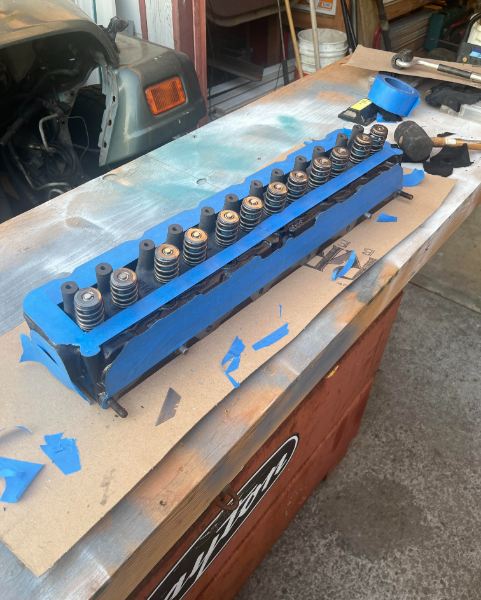
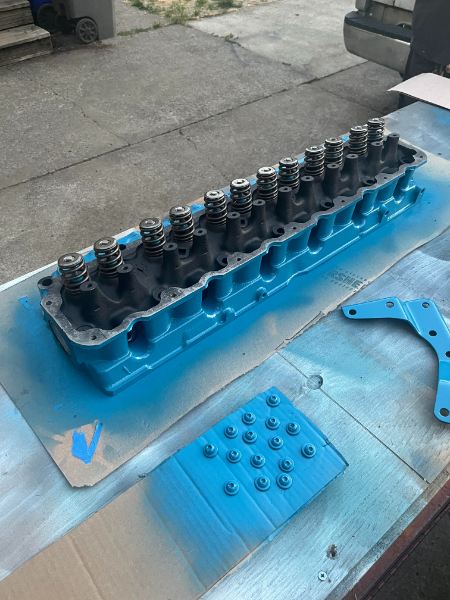
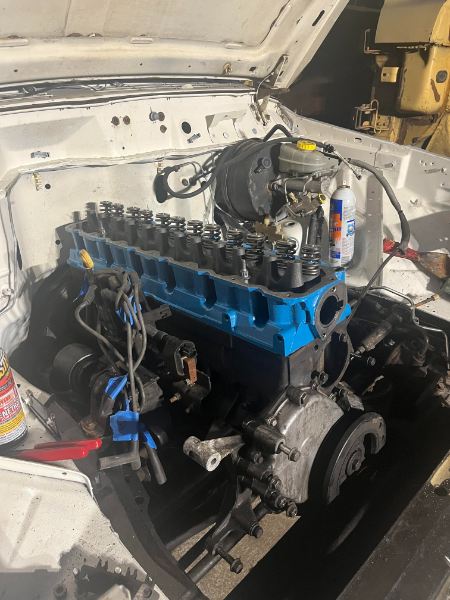
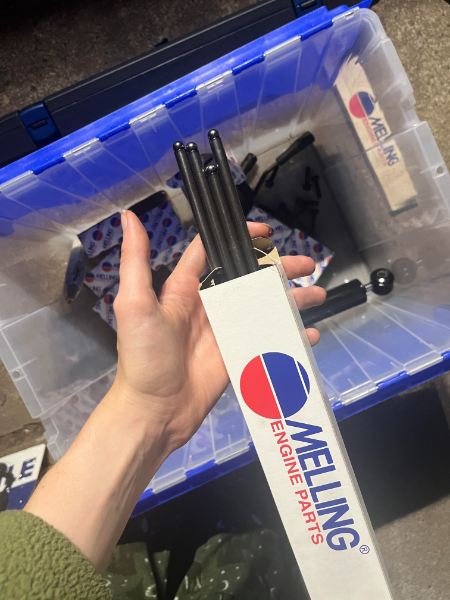
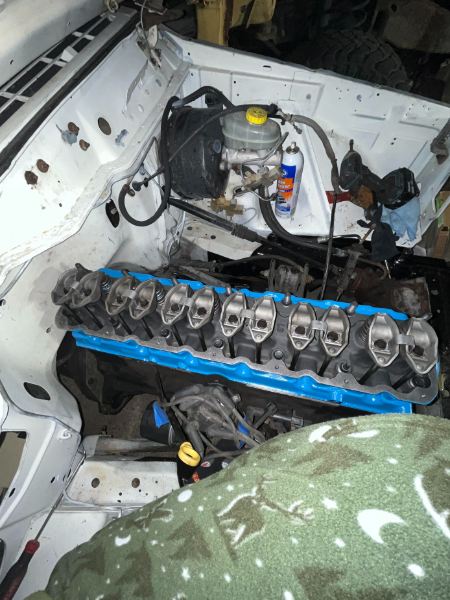
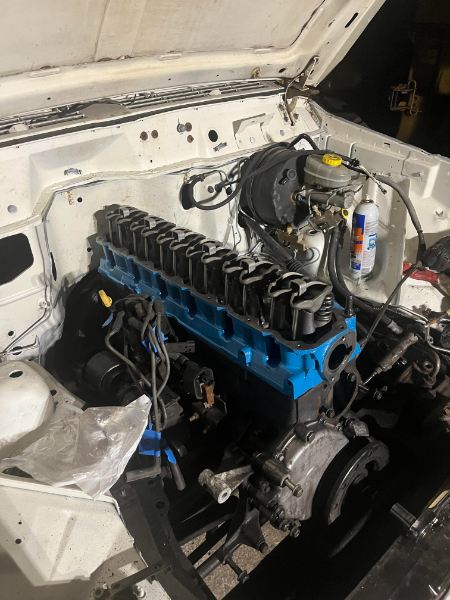
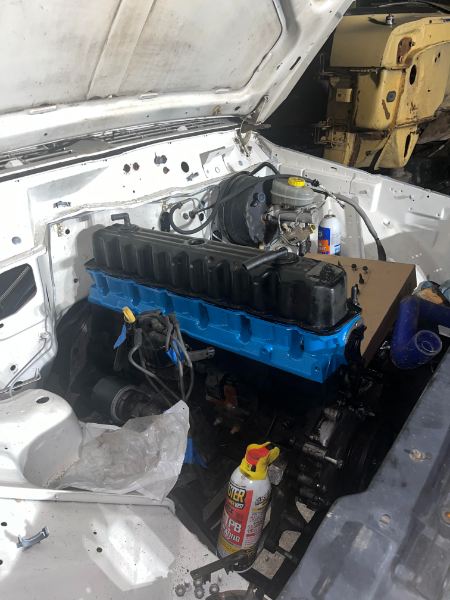
Mini Update! Took a week to get my head back from the machine shop... In the meantime, collected parts, did a Pick n' Pull run, and worked on the tow pig (very long overdue) Oil, filters, rotors, and pads (it's flying!) Got a ton of junk at Pick n' Pull: Dash/Firewall Insulation Electric Fan Mishimoto Radiator & Hoses Coolant Bottle Power Steering Pump (mine was cracked) Got the call that the head was ready on Wednesday night and IMMEDIATELY got to business Taped, sleeved, and plugged holes (I couldn't NOT paint it) Some little extra touches too Dropped it on and chucked the head bolts in Time to assemble! Sooo much nicer Rotated and torqued to spec Popped the valve cover on top... I'm not bolting it on until I decide whether or not to polish or paint (I've had a week to decide and still can't pick). Definitely fence-sitting on white or chrome (trying to keep it as 80s as possible ) Next time you see me, I'll have the C8.25 swap DONE, engine wiring in (holding myself accountable), and a shiny valve cover on!
-
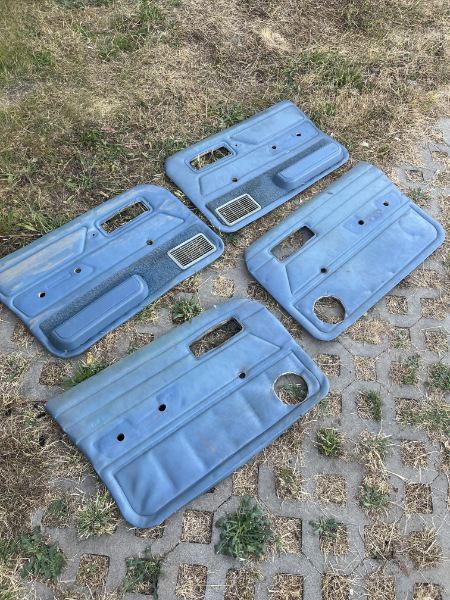
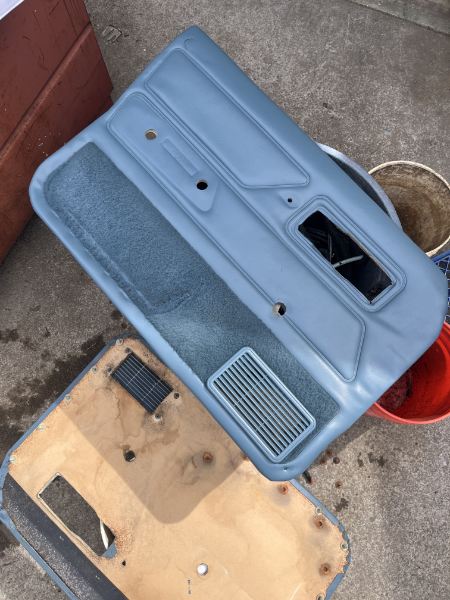
Nice fix on that! I've got two sets of the blue B pillar trim, and I couldn't even GIVE it away because of the cracks I'll have to take my soldering iron to the back of it and see what I can do... For the door cards (and a LOT of the interior) I had a paint shop make some custom mix SEM paint. Redid my Cherokee's interior black in February of last year and it's withstood quite a bit of abuse with no issues. It'll run you about $30-$40 a can, but it is worth it. Speaking of rear axles, I've still got the Chrysler 8.25 with 3.07 gearing off the 98... I've been kicking rocks thinking about doing the work to swap the rear out... I kept telling myself the only rear swap I'd do would be for something with disks but I'm torn!
-
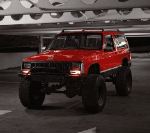
Ha! I've got both, but I kinda love how derpy the quads look I'll have to clean the dirty adhesive stripes off and test fit it to see how I feel about it
-
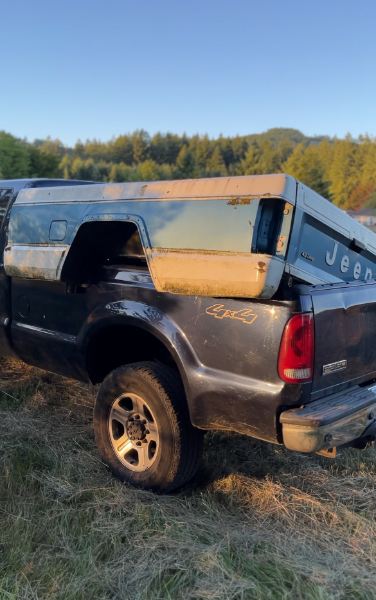
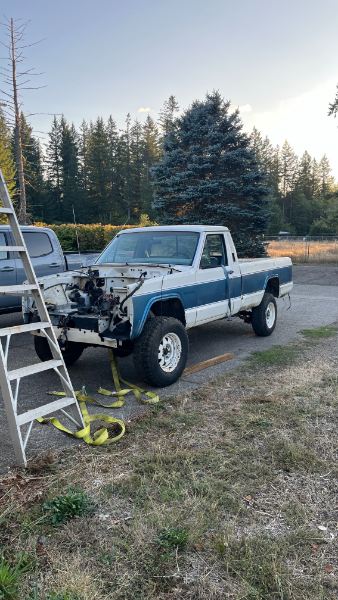
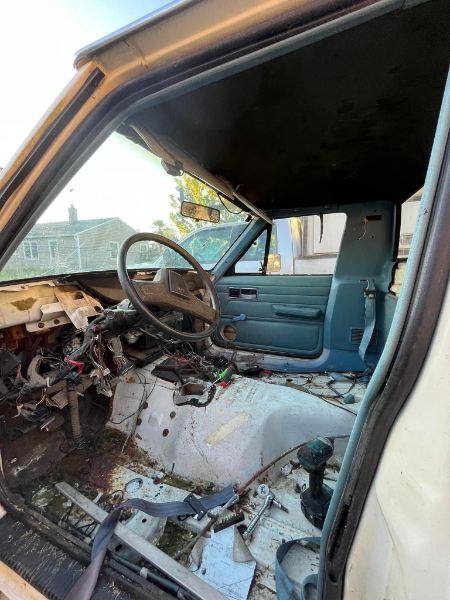
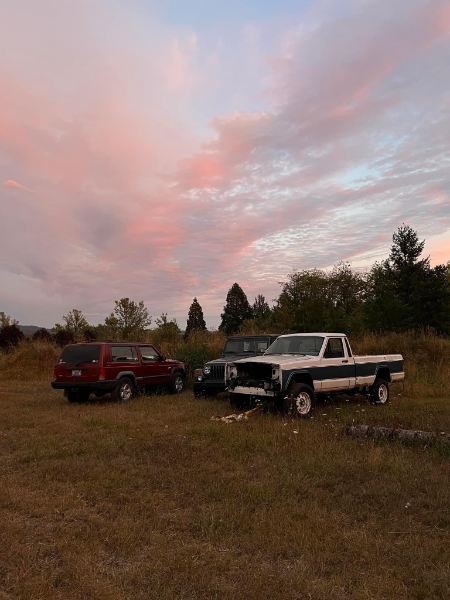
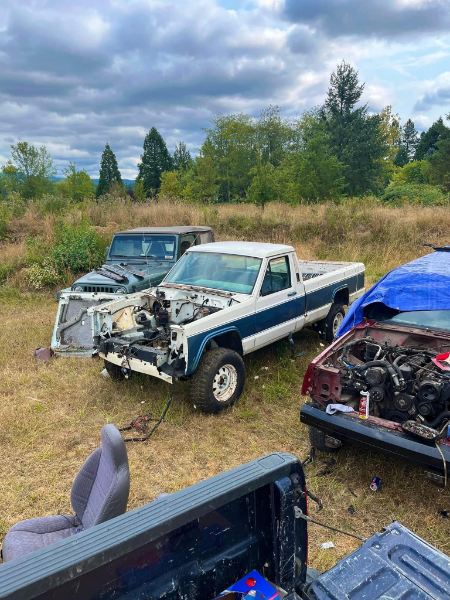
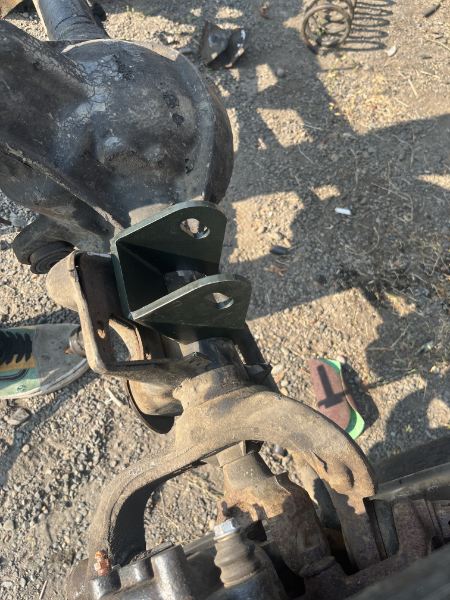
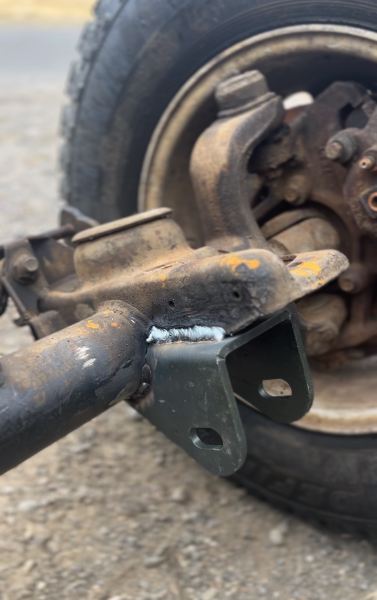
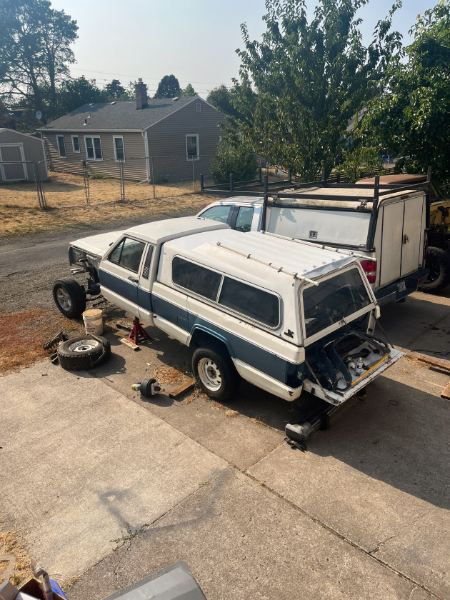
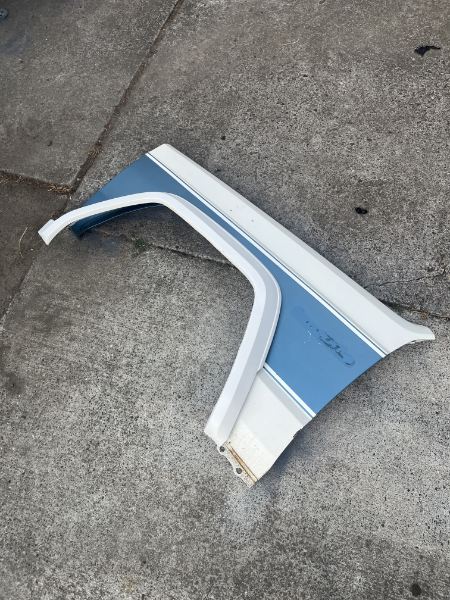
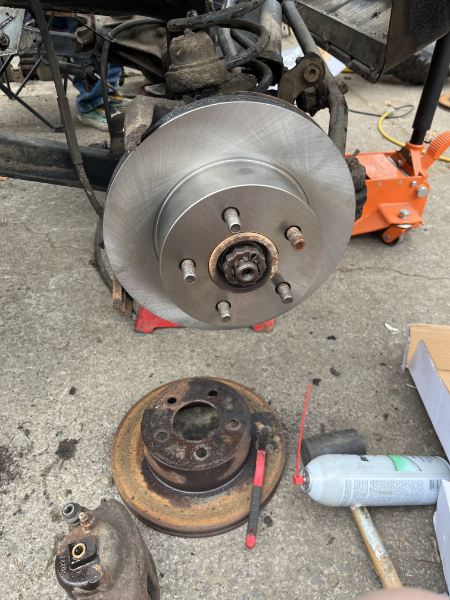
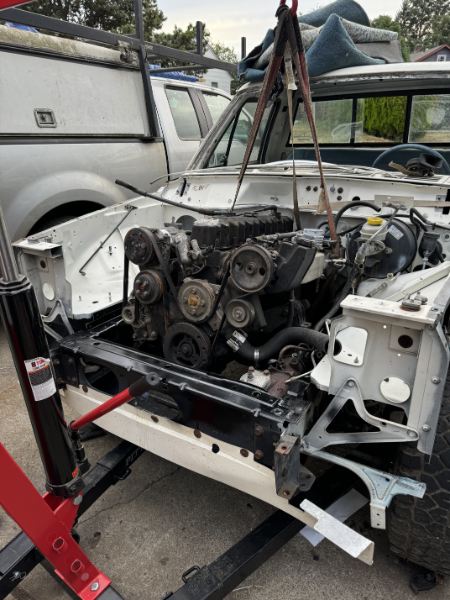
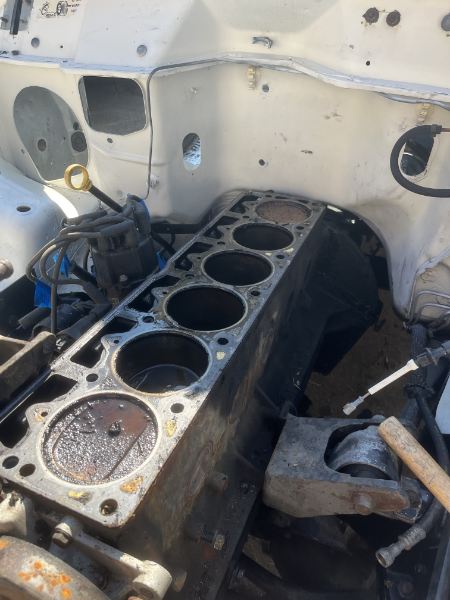
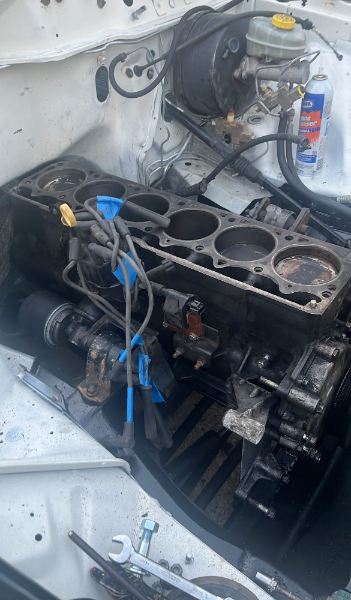
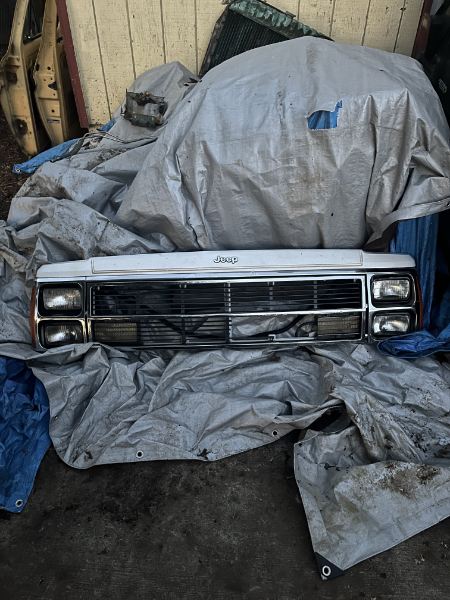
Update Post! Found the first photo I got of the MJ Found & restored some seat belt loops Pulled my door card collection out of storage Quick refresh... Partial install/test fit Squatted the MJ Just kidding... Quick 98 axle swap. Well, it was "quick" until I saw how crooked the lower control arm bracket was Fabricated some replacements! If it holds, it's gold Took a breather and (finally) found a canopy! Fun fact: Long Bed Toyota Hilux canopies are a perfect fit for the LWB Comanche Scored a complete set of MJ flares at Pick n' Pull and primed them white. Haven't quiiiite gotten around to the Olympic White yet Installed the axle & replaced the pads and rotors Cleaned up the bay and prepped for the drivetrain test All clear! Pulled the valve cover off... Results were not great. Kept ripping to check the block out. Not the prettiest. Finally paying the price for my budget build LOL. Other than a little build-up, the block seems to be in good condition. Compression on all cylinders is better than none. Kept my head up and got to cleaning it up. Already looks quite a bit better. Dropped the head off to have the head and valve seats machined yesterday. Dropped some change on new top-end parts and prepared for the rebuild. Also went ahead and treated myself to some engine enamel Last-minute Facebook Marketplace steal: Got a crazy good deal on it since the quarter of the grill was broken. Any suggestions on fixing this? Might run it on the Comanche, since the white matches and it's already a bit of a Frankenstein's Monster... Haven't decided quite yet. That's my three-week progress update!


-
That's so interesting I just finished de-taping everything last night and didn't come across any duct tape - just a LOT of shrink tubing on the ends LOL. Thanks for the advice though! This should be a fun journey!
-
Thank you! I wanted to pay homage to the original by keeping the medium blue and bringing in the old-school steering wheel
-
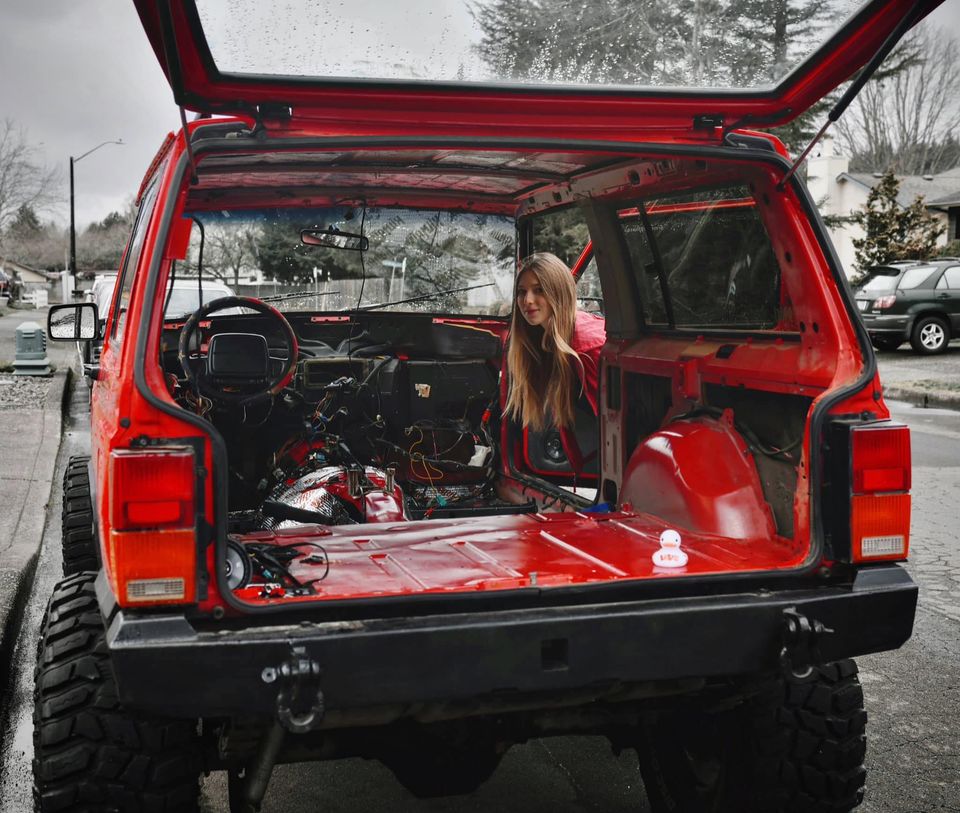
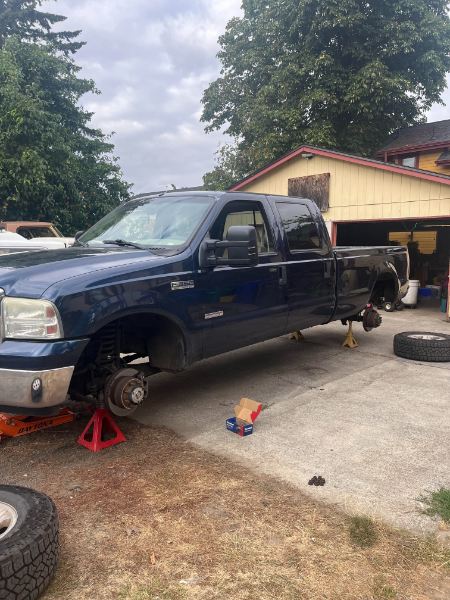
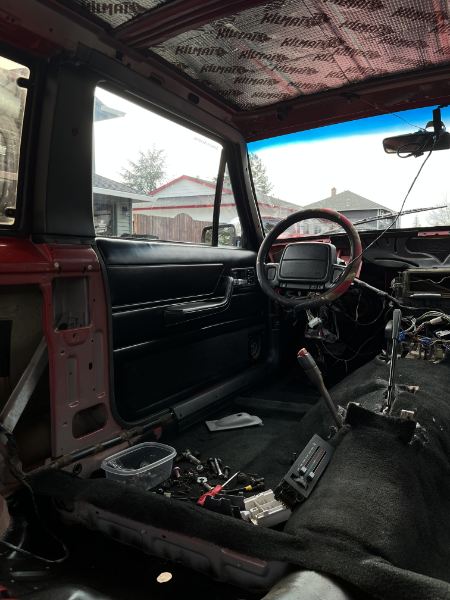
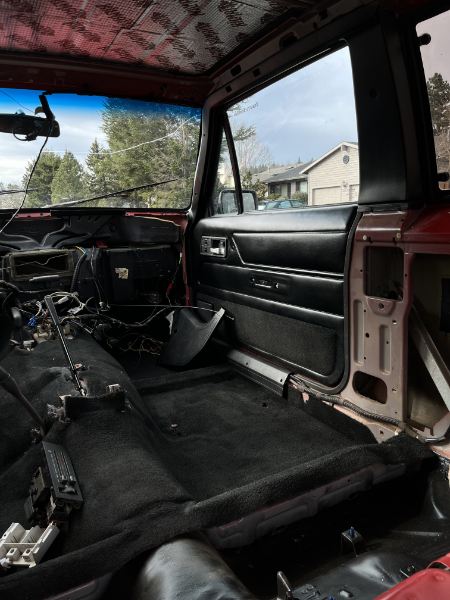
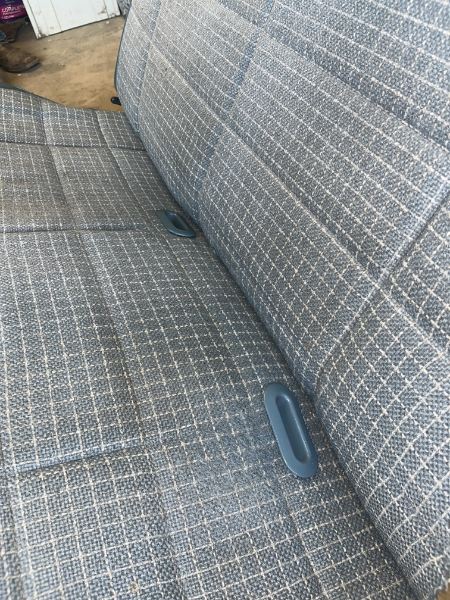
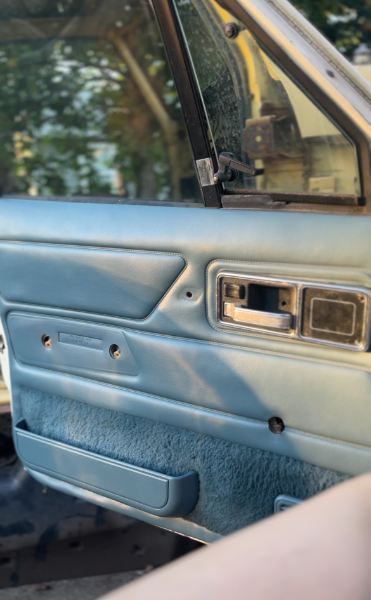
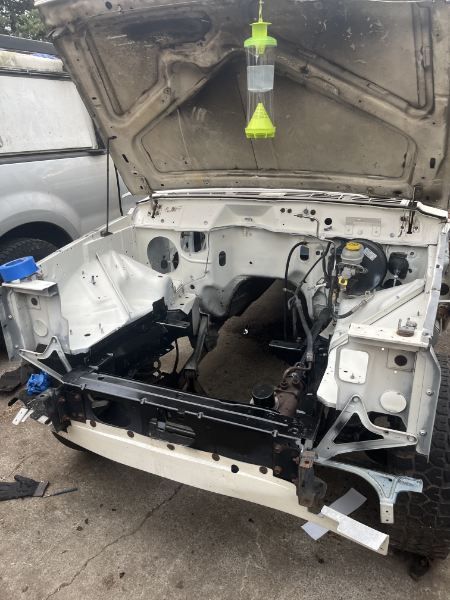
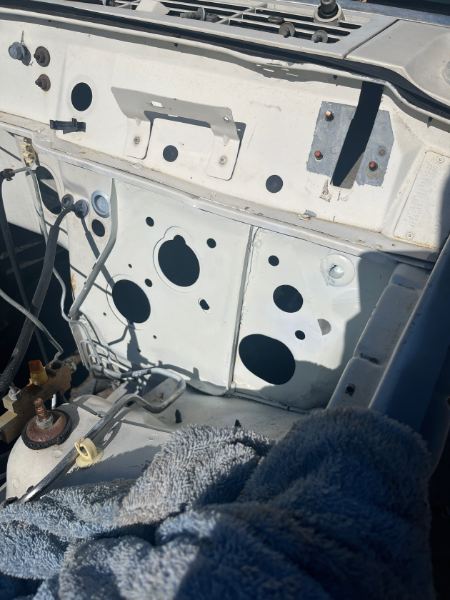
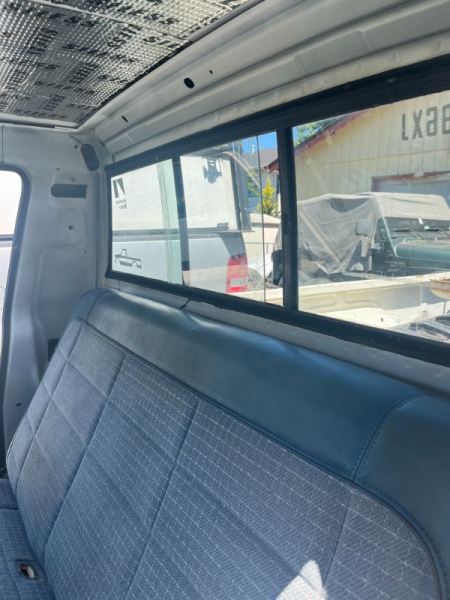
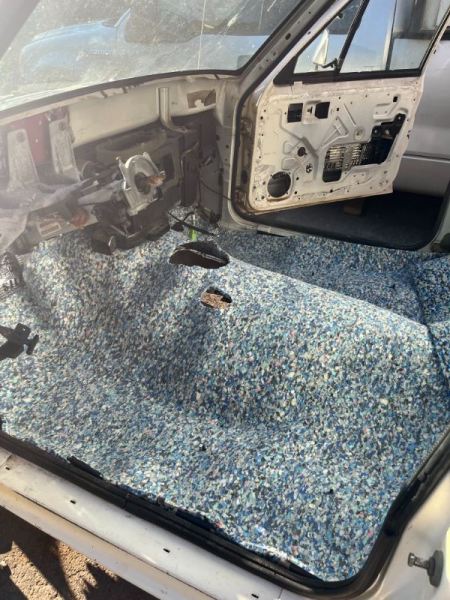
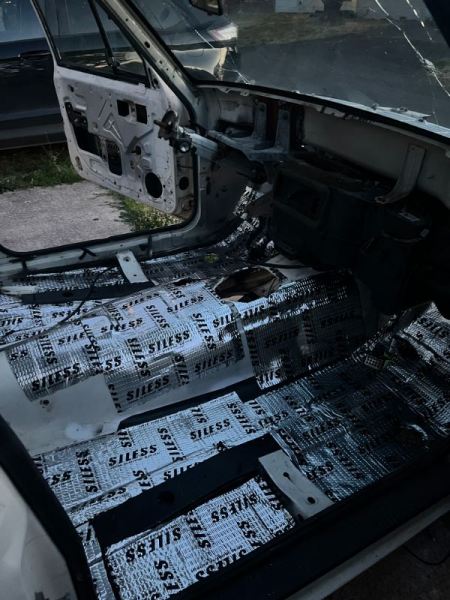
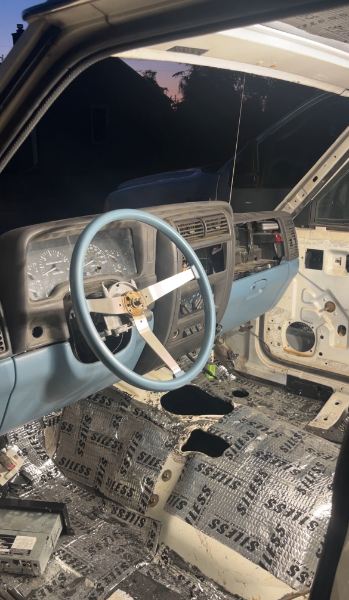
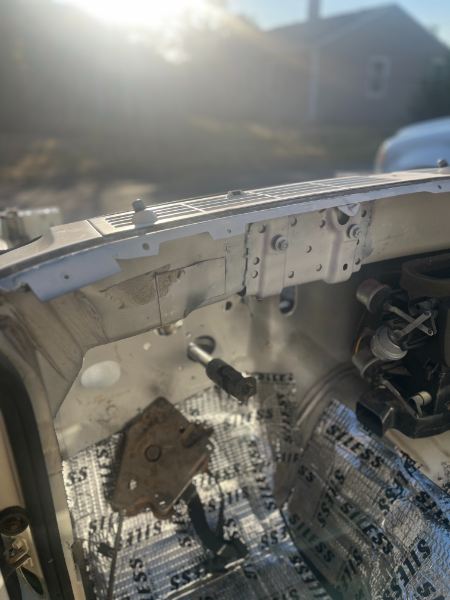
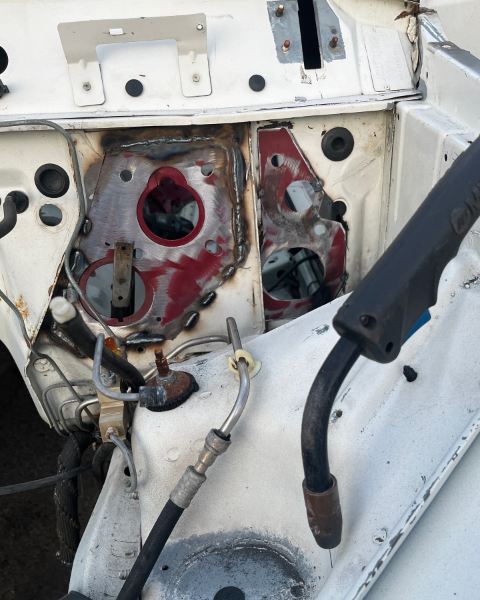
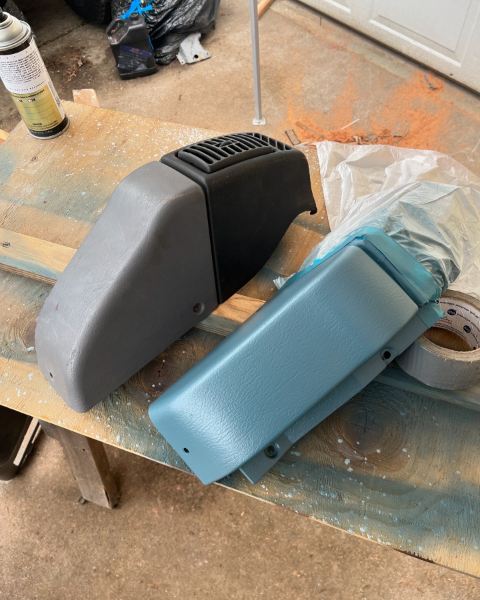
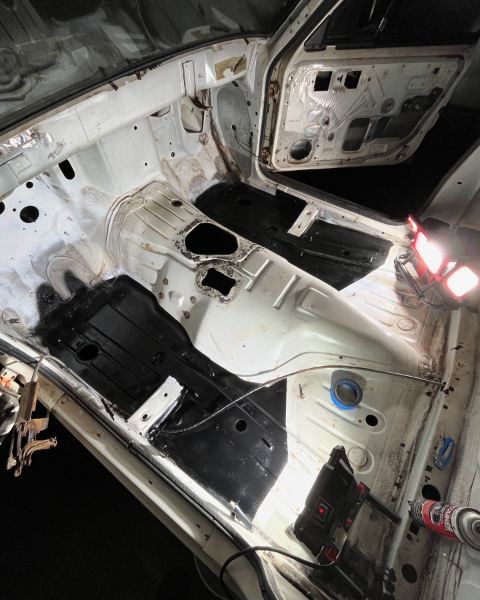
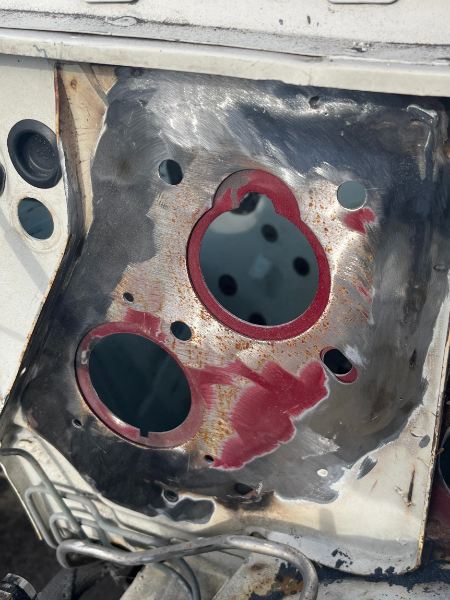
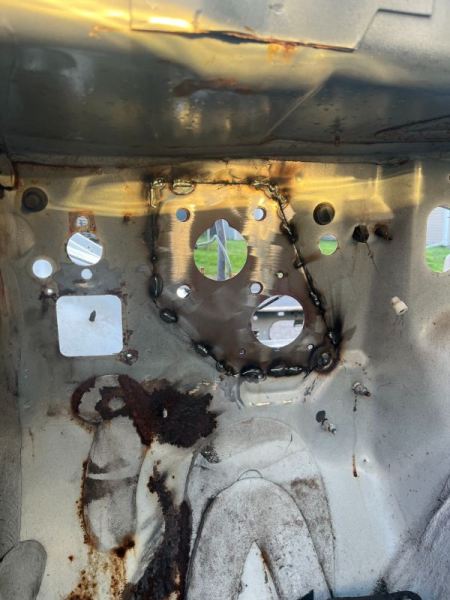
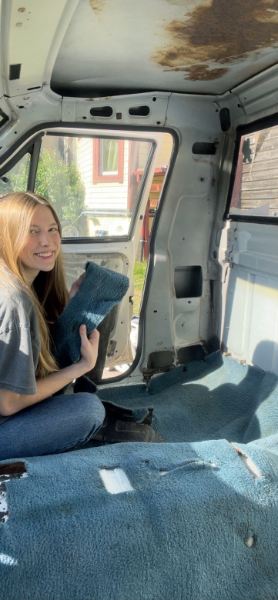
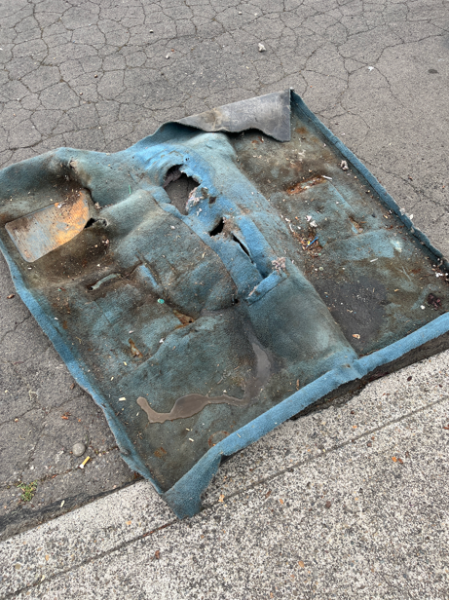
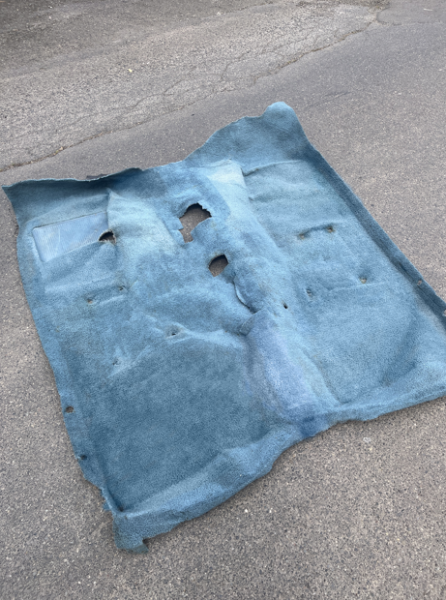
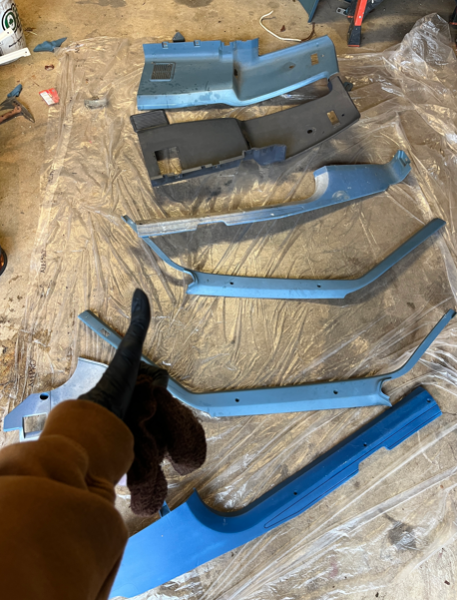
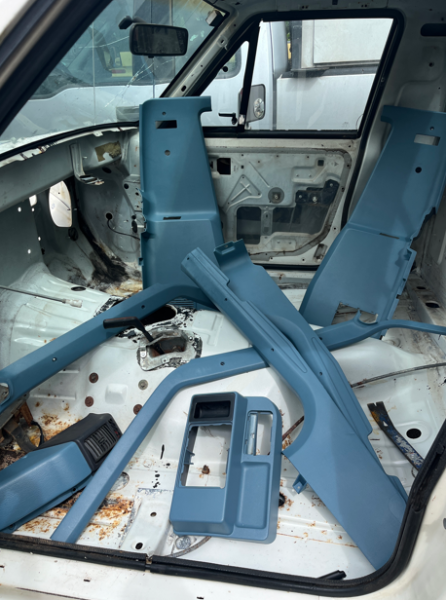
Hello everyone! Here is my introduction post to the build This is my 1987 Jeep Comanche Pioneer! As some may know, a few months ago, I began the process of swapping everything from my 98 XJ into my 87 MJ. Just like my last post, I made a dumbed-down to-do list: Preparation and Disassembly: Strip the MJ completely, including interior, drivetrain, and accessories. Use labeling, bags, and photos for organization during disassembly. ✅ Sheet Metal Work: Modify the firewall to fit the XJ components. Patch holes, resize openings for the fuse box and steering column, and seal the firewall properly.✅ Dash Mounting: Fabricate new bolt holes and tabs for mounting the dash. Weld braces onto the firewall for upper dash mounting points and steering column support.✅ Under Hood Accessories: Move accessories like washer bottle, ECU, cruise control, and wiring harness from XJ to MJ. Install under-hood wire harnesses, vacuum lines, brake lines, etc. HVAC Box: Install the HVAC box without the engine in place for easier mounting.✅ Drivetrain Installation: Drop the drivetrain into place, check motor and transmission mounts, and measure for driveshaft compatibility. Interior Insulation: Optional. Add insulation to the interior, especially the roof, back of the cab, and floor. ✅ Wiring: Transfer and label wiring harnesses from XJ to MJ. Install bulkhead connectors, route looms, and connect various electrical components. Interior Reassembly: Install trim, console, bench seat, and other interior components. Fuel: A few options here. (1) In-line pump (2) Use an adapter ring for the XJ fuel pump (3) Swap MJ tank for Dakota or TJ tank. Continuing from my last post: Once I had the thing down to a shell, I started prepping the body. This included any/all rust repair, swapping the firewall from the XJ to the MJ, paint, rust prevention - and just for fun, sound deadening. Almooost factory Wanted to freshen up the trim while the weather was nice... Before: After! Por-15, sound deadening, and carpet padding (old stuff was TOAST) Bought a (dirty) parts Jeep! Carpet flip Cut to size and molded to fit! Bench seat ready to go in Test fitting! Windshield delete New dash mounts, bolts, and steering column support in Dash paint matching... DASH TEST FITTING!!! Now I'm moving on to the wiring and under hood accessories. The harnesses were not the nicest, and since time/energy isn't an issue - I'm tearing it all apart and re-sleeving while I figure out what I do/don't need. Somewhere between wiring and fuel, I'll start to drop the drivetrain in. This, funnily enough, should be the easiest part. As for fuel, I'd like to test out something different. I plan on running an in-line pump, instead of an adapter for the XJ pump/MJ tank or swapping the tank out for a Dakota/TJ tank. I've swapped to in-line on a few of my diesel trucks - and thought I might as well give it a go with the MJ. I'll keep my post updated as to what I end up doing here. Feel free to let me know if you've got questions or advice! I'm always open to chat about my projects

-
I'm a little late to the party, but this is AWESOME looking!!! Definitely keep us posted on how it turns out - I'm crazy about the two-tone!
-
Good read on the Bushwacker flares. Looks like they fit the Comanche as well (with a bit of trimming), but leave a small gap on the bed.
-
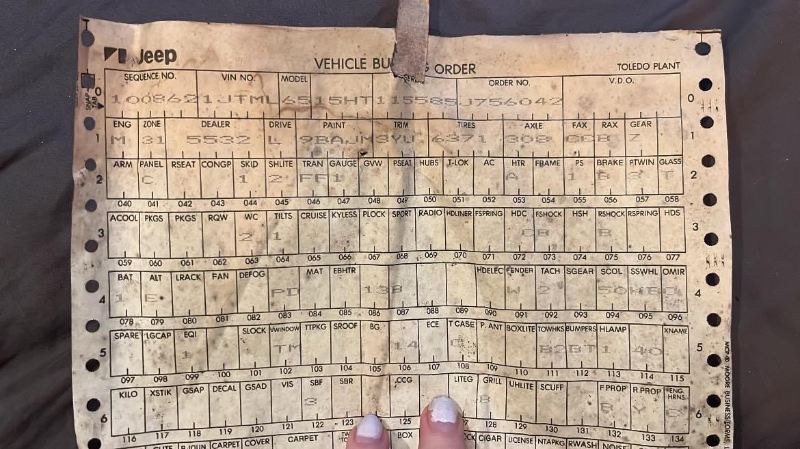
Thanks! Definitely been having fun rebuilding it. That build sheet is awesome though! And in great condition
-
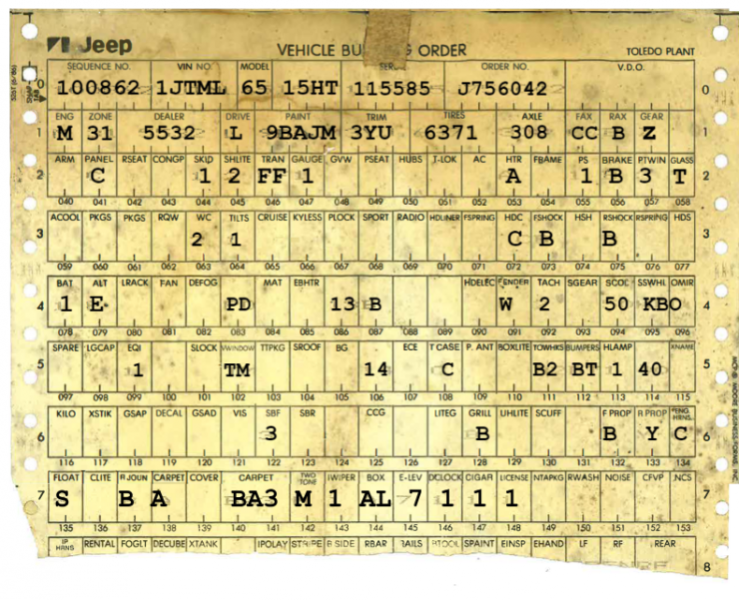
That's awesome! I requested an official build sheet from Jeep, but the one they sent me wasn't accurate at all Thanks for the info!
-
Oh, that's awesome! I've updated my post, but I'll go ahead and shoot him the originals too
-
Thank you! The sheet's a bit moldy (and ripped in half), but still pretty neat. I'll probably scan it tomorrow and update my post with a clearer version of it
-
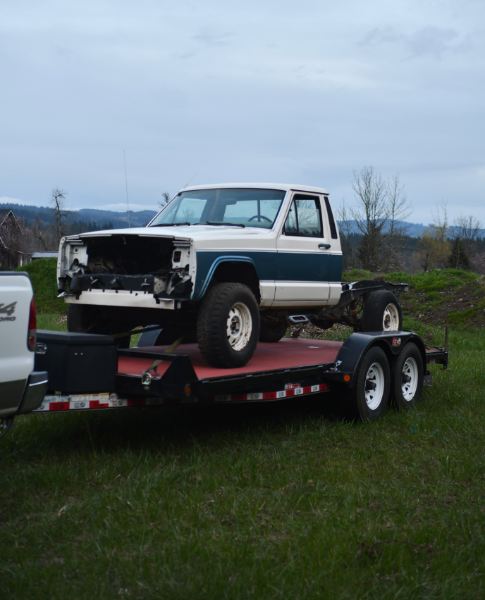
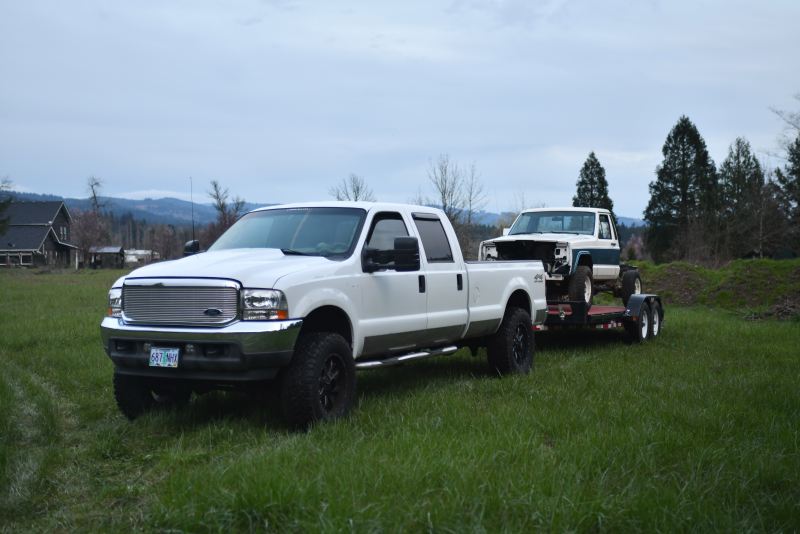
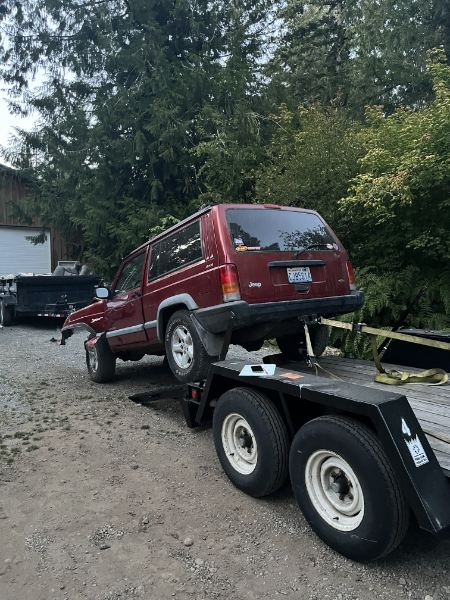
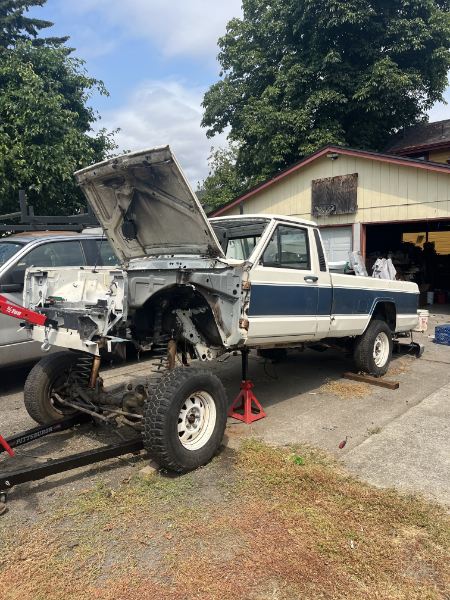
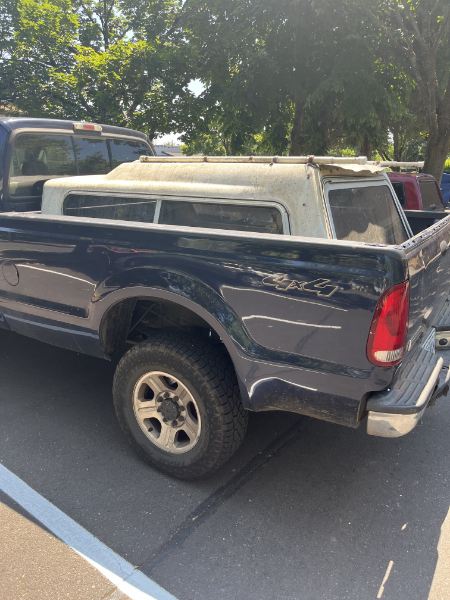
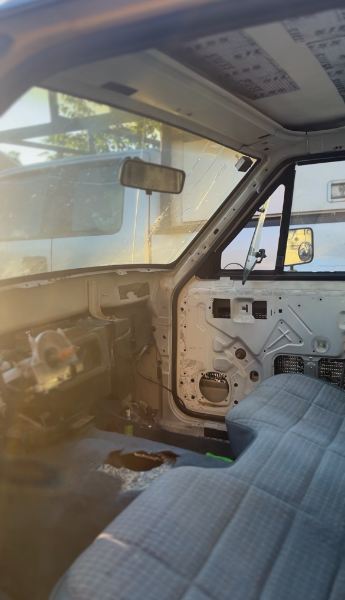
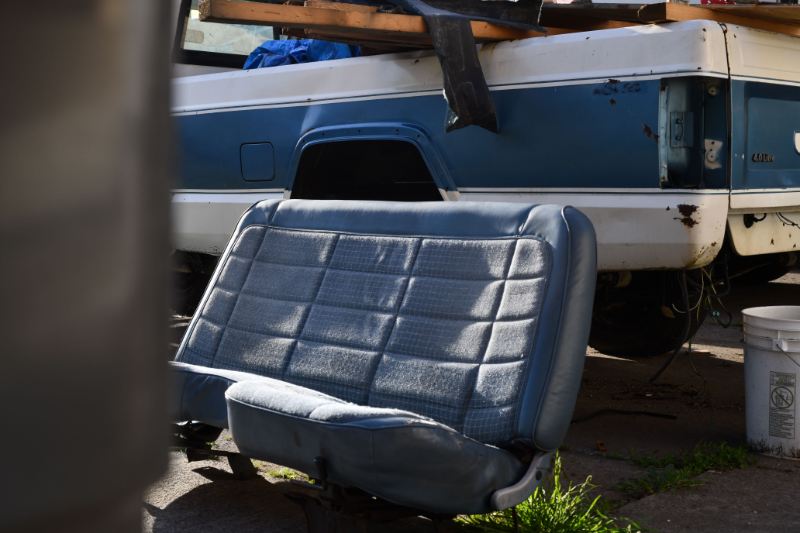
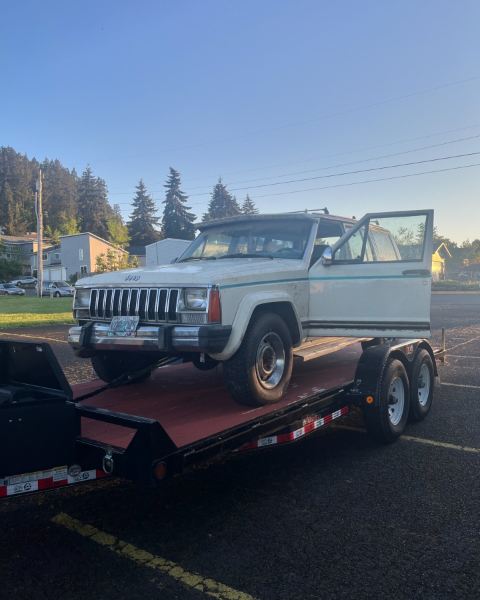
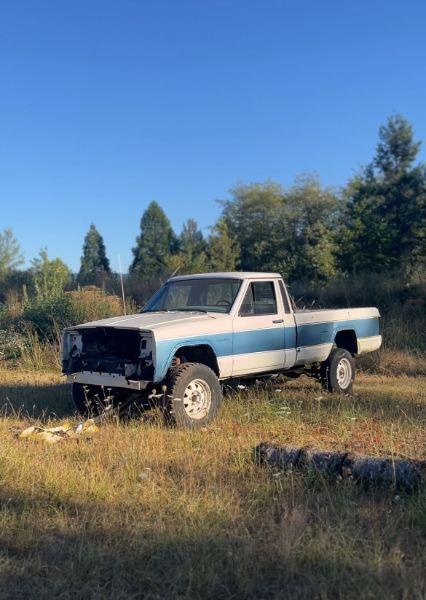
1987 Jeep Comanche 4.0L AMC, 5 Speed Manual, Floor Shift, Part-Time 4WD 7.0' Bed, D30 & D35, 120" WB Hello! My name's Bree and this is my white and blue 1987 Comanche I bought the cab from a friend a while back and planned on building a rock bouncer. Coincidentally, found the original bed (and the original owners!) on Marketplace a few months later and, of course, had to pick it up. Another couple of months went by and I found a totaled 98 XJ with 120k on the 4.0 and an AX15. The plan has since changed and is now to fully restore it with a twist. I came across one too many perfect coincidences, and the white and blue trim is just too cool. I'll be keeping the blue interior plastic, door panels, original blue bench seat, and keeping the body completely stock. As for its "guts," I'll be swapping in the dash, wiring/electronics, fuel, accessories, and drivetrain from the '98. This past weekend, I completely gutted the '98 and scrapped what I couldn't get rid of. This coming weekend, I'll modify the firewall and test-fit the drivetrain. If anyone's at all interested in the conversion, I made a dumbed-down to-do list: Preparation and Disassembly: Strip the MJ completely, including interior, drivetrain, and accessories. Use labeling, bags, and photos for organization during disassembly. Sheet Metal Work: Modify the firewall to fit the XJ components. Patch holes, resize openings for the fuse box and steering column, and seal the firewall properly. Dash Mounting: Fabricate new bolt holes and tabs for mounting the dash. Weld braces onto the firewall for upper dash mounting points and steering column support. Under Hood Accessories: Move accessories like washer bottle, ECU, cruise control, and wiring harness from XJ to MJ. Install under-hood wire harness, vacuum lines, brake lines, etc. HVAC Box: Install the HVAC box without the engine in place for easier mounting. Drivetrain Installation: Drop the drivetrain into place, check motor and transmission mounts, and measure for driveshaft compatibility. Interior Insulation: Optional. Add insulation to the interior, especially the roof, back of the cab, and floor. Wiring: Transfer and label wiring harnesses from XJ to MJ. Install bulkhead connectors, route looms, and connect various electrical components. Interior Reassembly: Install trim, console, bench seat, and other interior components. Modify A-pillar trim if necessary for a proper fit. Fuel Tank: Install a new tank without a slosh pan, use an adapter ring for the XJ fuel pump, and relocate the charcoal canister for emissions compliance This is how it's currently sitting (minus the steering column & wiring). I'd like to have a more satisfying end to my post but I'm only now getting around to prioritizing the build. I document a lot of my work on my Instagram if anyone is interested in the progress. The door label has been lost to time, but I do have the original Vehicle Building Order: The car's still under the original owner's name. After meeting him and chatting, I filed for a lost title and am getting everything signed over. Located on the Columbia between Oregon and Washington. Feel free to let me know if you've got questions or advice! I'm always open to chat about my projects