MiNi Beast Posted September 16, 2020 Posted September 16, 2020 18 minutes ago, jdog said: All the ones on a black cluster that I tried to remove the needles broke off Well be more careful.
Big_Mark Posted September 23, 2020 Author Posted September 23, 2020 Ha ha Thanks guys. O.k. I made some more progress yesterday, pulled the old fuel pump and discovered why the fuel gauge didn't do anything: Evidently you need a sending unit and a float or something Thanks to mtscompany.com for having new, in stock sender/pumps shipped for $159. model # JPSU-6P4.0 shown in photo above. Then I spliced in a new fuel pump sender pigtail into the harness to unf*** the POs mess, and discovered I was out of gas as the low fuel ight came on (yea!) I added 3 gallons (what I had laying around) and the fuel level indicator rose and the light went out. Super stoked to have a working fuel gauge again. My Scrambler fuel gauge only ever "worked" when it was my daily driver I ran out of gas more that once, I got good at adding fuel on the 520 floating bridge, ha ha ha. At any rate my "last" electrical project of Summer (now fall) will be replacing the wiper motor so I can have all the speeds, not just slow. I've learned a lot about this truck and have squared away lots of gigs along the way. Thanks for all the help gang, I'm sure to need more during the next phases as they come along.
MiNi Beast Posted September 23, 2020 Posted September 23, 2020 glad to hear. living on the edge they call that. i always carry extra fuel myself.
Pete M Posted September 24, 2020 Posted September 24, 2020 yeah, I guess the float is kinda important.
Big_Mark Posted October 11, 2020 Author Posted October 11, 2020 More headway and just in time for the endless gray season! I installed a rebuilt wiper motor and a new wiper delay switch and lever (to git rid of the last visual vestiges of Cruise Control ) also a wiper control module from Deadjeep.com I now have fully functioning wipers! I followed the wiper mechanism rebuild guide found on this site and all went well! I did go through 2 wiper control modules before getting one that worked but the gang and deadjeep.com sent out the 2nd of free of charge and no questions asked, super awesome! Last part of that system is on the way from Ebay a used, not broken wiper fluid bottle. I have one and the pumps are good but it has a smashed in top. Not sure how that happens but I guess it does in the bushes lolz. I still have some work to do on the cab lighting but overall I'd say I'm done working on electrical and will move onto the brakes next, then the engine itself. Thanks to everybody here, this site has been a goldmine of info and support, can't wait until I get the old Heep on the road!
Big_Mark Posted October 18, 2020 Author Posted October 18, 2020 So I swapped out the oil pressure gauge today and now the gauge is working, not sure if it's accurate but it is indicating 40Lbs pressure, I sure hope is accurate, I'll take that! Also for whatever reason my buzzer has decided to start working as well evidently instead of having new electrical issues existing ones are fixing themselves I'll take it
Big_Mark Posted October 20, 2020 Author Posted October 20, 2020 O.k. since we are about to start with actual cold weather I did a massive ADD workfest on the Jeep today. 1. I got the broken temp sending unit out of the head (well pushed in, will fish it out later) and installed a new one, viola my gauge is working! ALL OF MY GAUGES WORK >>>>>>MILESTONE<<<<<< 2. Screwed the filler hose bracket to the body of the bed, it was just flopping around before 3. Put my WA state plate on, hung the Montana one in the garage cause that's where old plates go! 4. Fixed the leak in my new washer bottle, had to swap out one of the pumps from my old bottle. 5. got my drivers kick panel light working, the connectors were in need of a cleaning. 6. popped in my ashtray from the junkyard run last week. Then I actually drove the Jeep on the road, it tracks well but is still in need of a brake job, that the thing I'm procrastinating but I kind of blew through the piddly things so I guess that's up next. I know it's going to be some work and $$ the drivers rotor has visible groves in it so yeah..... Anyways I'm glad to have all the creature comfort and street legal stuff out of the way and functioning. BTW after driving the Jeep on the road my Oil pressure leveled off at 20-22 PSI, more of what I expect from a straight 6, the engine temp got to around 190-200, will continue to monitor that as I drive the thing around more..after the brakes are working properly All around feeling like a happy Jeephead again!
Pete M Posted October 27, 2020 Posted October 27, 2020 need more pics! don't forget when you bleed the rear, that the prop valve has a special procedure to bleed the emergency line.
Big_Mark Posted January 24, 2022 Author Posted January 24, 2022 Took a bit to find this thread but here's some updates. I have the Comanche up and running. I ended up having to secure the fuel pump to the new armature/sending unit/pickup tube with hose clams since the new piece did not have the top keeper part and my old unit also didn't have it. Once I secured that my fuel pressure problems ceased! New Gas Tank Replaced valve cover gasket Front and rear brakes are serviced and working All lights, gauges and accessories work as expected with the exception of my wipers they are still really slow overall, but the intermittent, off, low and high settings all work, they just seem a bit sluggish. Motor and T-case mounts have been replaced, that was easier than expected. During the motor mount swap I discovered that my oil filet adapter was leaking like crazy so I replaced those 3 gaskets, now the leak has stopped. I'll watch the oil stains on the oil pan to see if it stops leaking now, if not I should be able to pinpoint the leak easier. I need new tires. The BFG AT's are old, hard and not good for pacific NW wheeling. I want to get 32" of 33" Iroks but they are currently back ordered like everything else these days so that's on hold for a bit. I discovered I needed tires on the inaugural wheeling tri on Jan 1st 2022, boy my current tires were practically useless in deep snow. but my heat works!! At any rate now I have the car up and running, it has decent on road manners and starts', stops and runs as expected. Now I just need to keep driving it, work out any new issues that come up and start making it more comfortable inside, perhaps stop the leaking from everywhere along the roof, find and fix that squeel, squeek that I think is coming from the speedometer cable and so on. I'd add some photos but from the outside the Jeep looks the same, only now it's streetable! More to follow!
Big_Mark Posted January 25, 2022 Author Posted January 25, 2022 Some pics! Under the hood is looking better. In the dark waiting for the TJ to get unstuck in the snow/ice entrance. I'd drive back in to help but then they'd have to help me get back out for sure! Last pic at the lookout. I had to be towed up the last hill climb due to lack of tires. Next year I expect to be able to drive up that snowy hill!
Big_Mark Posted January 25, 2022 Author Posted January 25, 2022 P.S. I'm all through Cruiser54s steps, and it's running great! (Ground the grounds with grounded Grounds! )
Pete M Posted January 29, 2022 Posted January 29, 2022 yeah, tires are everything in the snow. but it looks like you had fun!
Big_Mark Posted February 7, 2022 Author Posted February 7, 2022 Since "ole' Jeepy" is up and running now I decided to formalize things, before: Something was missing, let's see from the other angle... In case you missed it: It's official I have a "new" Jeep!!!!
Big_Mark Posted February 7, 2022 Author Posted February 7, 2022 Also I got my braided brake lines on there FINALLY!! FP Before: Same After! The rear brakes were such a sh**sh** that I didn;t even taek a picture, here's the afterez... Next rear plans are to do something about the shocks. They are NOT secured well to the frame/unibody and I'm not sure how optimal this placement is. Also I thing some valves need to be oriented in one direction or another. Mine is in the "another" category. There's always something, the good news is I was able to put the freaking axle tube brake lines into the correct positions so they are secure. nothing worse than loosing a brake line in the middle of deep mud/water with random stick/logs floating around in there. They tend to rip stuff off that isn't secured properly. For transparency, I didn't set up the rear valve like this, it came that way. I wanted to put it back where it belongs but the shocks are in the way so I am leaving it for now. I did use a coat hangar to wire the valve lever into the middle/neutral position so it would provide unloaded bias. Not sure it's working but it's not "bad" either. Anyways the tinkering continues!
Pete M Posted February 8, 2022 Posted February 8, 2022 were those leaf perches moved to the MJ width?
Big_Mark Posted February 8, 2022 Author Posted February 8, 2022 7 hours ago, Pete M said: were those leaf perches moved to the MJ width? I don't know the Jeep came this way, what's the MJ width? I'll measure to find out.
Pete M Posted February 8, 2022 Posted February 8, 2022 42 center to center I think. chances are they are XJ width. you're going to want to change that before you eat the bushings on one side and the axle shifts over.
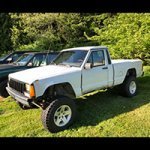
Big_Mark Posted February 9, 2022 Author Posted February 9, 2022 On 2/8/2022 at 2:06 PM, Pete M said: 42 center to center I think. chances are they are XJ width. you're going to want to change that before you eat the bushings on one side and the axle shifts over. I didn't measure perch to perch because my shackles seem to line up straight Can you identify these springs? Is there a leaf added in there. Never having seen a stock pack I don't know what I'm looking at. Here is the profile of the Jeep parked on my flat driveway The rear look a little high, but this is as low as the leafs will go since the PO went through much effort to do this: Good gawd, the booty fab is strong here! From what I can gather the front is a 4-6" lift, possible ProComp, maybe Ruff Country. What I'd like to do is pull these leaf s out and replace them with stock length shackles and leaf packs that will make the Jeep sit level, any ideas what I have and what I should look for to fit the bill?
Big_Mark Posted February 9, 2022 Author Posted February 9, 2022 I got the center console back in the car: Also I "fixed" the hole in the floor! "I hear banjos playing in the distance......." I too can do booty fab Once I fix the cab leak (I think it's the bed light) I'll make a more permanent fix to the floor situation and perhaps even install some carpet!
Big_Mark Posted September 16, 2022 Author Posted September 16, 2022 Well I’ve made some improvements since the last post. Lots of little things, dash lights, wiper switch, ignition switch with key, passenger door power window switch install (it works!!), beat dents out of body, doors, painted rust, floorboards and the interior is back in! But the latest major improvements are a new exhaust and catalytic converter installed and hung high! The old exhaust was just cobbled in and would BANG BANG BANG on the floor when I went over bumps in the road, had no tail pipe and superheated the floor under the passenger seat because the muffler was 1” below the floor board, which is not good for setting groceries on. Now it’s properly hung, and it all dumps out under the truck right in front of the rear axle with a tail pipe. The muffler is attached to the body in 3 places, I love it and it is much quieter. Then I discovered there was a leak in the windshield lower drivers’ corner, my plan (being cheap and all) was to rock the windshield out of the frame, apply some “goop” then set it back in. Well, that didn’t go so well, and the 2 cracks that traversed the windshield turned into a web o’cracks over the whole thing, so I got a pro to come out and drop in a fresh one. Seal is fixed so my dash will now stay dry, and I can see out of the front of my Comanche proper. These two things were done right before my two maiden journeys, which were to be overnight to the Suiattle River out of Darington WA. This is 100 miles away from my house, and is mainly forest and gravel logging roads.
Big_Mark Posted September 16, 2022 Author Posted September 16, 2022 Then a trip to eastern WA over the Naches pass (on the trail) which is 200 miles round trip with 50 or so miles of it being hill climbs, tight trees in high desert conditions. As it turned out my friends decided lets do Naches first then go to the river second. Sure why not, it’s all or nothing anyways! Great news the Comanche did great, even with 20 year old BFG AT’s (not Kos even) and open diffs. Here is my Jeep buddy Rob three wheeling on a spot I just flexed over (longer wheelbase + 6” lift help’s lol) Here’s the gaggle of parked trucks at the top of the entrance hill climb to the Naches trail on the West side. I always have to laugh at any wheeling pics from the Naches, they always look like a bunch of trucks parked on flat roads. Trust it’s not flat getting to that point. Here’s my camping mode. I bought the tent a few years ago. It works great and I finally figured out how to set it up and strap it down. Granted a proper ground tent is easier to set up but this is what I have these days. And it keeps me from going “night wheeling” which is good for everyone involved! One of the things I fixed after the Naches trip was my lighter outlet. It would heat up the lighter but wouldn’t charge a phone with the adapter, so I had to improvise, cause that’s how we Jeepers do! BTW the fix was to bypass the wiring harness, once I jumped to direct power from a vacant port in the fuse block (there are lots, some are switched some aren’t!) and a ground to “Cruisers” under dash ground point it, AND a proper disassembly and cleaning of the outlet it works perfectly now. The only “issues” I had on this trip were: 20 mpg on the highway / 10 mpg on the trail, that’s not to shabby nor is an issue, I was really surprised how well it did on the hwy, 5th gear is good. Pretty sure my tcase chain is stretched, whenever I was going up hills there was a rotational click, click, click that went faster in low and slower in high range that disappeared altogether in 2wd. At some point I was driving on a logging road in 2 wd, but the road had fresh loose gravel on it so I put it in 4wd high range, well the clicking got louder and louder then BAM! Something wadded up then let loose. The good news it I still had 4wd and the noise stopped (or was greatly reduced) so hmnn…… is it broken? On the way home I pulled over to the side of the pavement to air up and discovered a weeping drip coming from the passenger side of my radiator (near the top) so I topped off my coolant and drove home watching the temp gauge closely. Good news is no news! I made it home without issue and the weeping seems to have stopped. This is my next project. Here are some views from the trail as seen from the cab This pic has Mt Rainer in it, but it’s obscured by clouds. Top of the ridge heading to Funny Rocks, yeah its off camber No comment, just beautiful! More beauty! Dust, it was dusty boy is it nice having doors, windows and a windshield, in my Scrambler I had none of that and just ate dust! If you want to go to Naches you can access it from Western Wa Hwy 410 leaving Enumclaw WA, head up 410 (towards Chinook Pass) then just after the “town” of Greenwater make a left onto forest road 70 for about 10 miles then there’s a left fork (unmarked) where you drive up 200’, air down then turn right up that steep entrance hill! From Eastern WA Yakima to Cliffdell on 410 then head up Milk Creek Road to get to the ridge.
Pete M Posted September 23, 2022 Posted September 23, 2022 love the bed tent! back in the day I really wanted one of those. then I filled the bed with a rollbar and supplies and had to settle for ground versions. lol

Recommended Posts
Create an account or sign in to comment
You need to be a member in order to leave a comment
Create an account
Sign up for a new account in our community. It's easy!
Register a new accountSign in
Already have an account? Sign in here.
Sign In Now