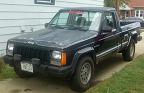
Dechion Posted February 19, 2011 Posted February 19, 2011 Ok, so how many of you out there have snapped off a door hinge? Always seems to be the top hinge on the drivers door, right? Well guess what, it happened to me. One thing I ill own up to up front, though the repair is exactly the same on an MJ, the pix I took are from when I did the repair on my daughters Cherokee. Same door, same hinge, same repair kit, but the one on my MJ is still holding up. Also, bear with me. This is the first project I have tried to document, and the pix are too close up, and too large. I'll take better next time. Anyhow, moving on... It all started with something that looked remarkably like this: Actually, it still had a fender and such on it when I started this whole process. For what it's worth, you can actually do the entire repair by just removing the door. Her lower hinge bolts were not going anywhere however, and rather than risk snapping them off in the door I opted to go at it from the fender side instead. It worked, but was more work than just popping off the door if you can get it off. So, seeing what I had to work with I did a bit of research. I found a Chrysler Tech bulliten that listed a repair kit for the problem. Actually two different ones. (Tech Bulletin 23-017-02 dated 5/20/02) The first (Mopar part # 05083060AA) is for a weld that is starting to give way, but still holding. I used the second one, it is designed for repairing hinges where 75% or more of the weld has failed. (Mopar part # 05083061AA) If I could have just taken the door off instead of half the front of the Jeep I guesstimate the repair would have taken about 2-3 hours, including readjusting the door and such. So I go to the dealership and drop $35 on a part and wait for it to come in. While I am doing that I pull off the old hinge and clean it up a bit. A few days later her comes my kit. Two plates, four rivets, and five screws. Damn, $35 sure does not go as far as it used to. Now here is the part where I kinda goofed up. I didn't take nearly as many pix as I should have. It pretty self explanitory how it all goes together though. First I threw a few little crappy tack welds onto the hinge, just to hold it in place while the bracket gets installed. Yes they are ugly and would likely fail if a mouse sneezed on them, but they served thier purpose. It's hard to do better when you can't find your welding helmet. Moving on... Put the two halves of the bracket on finger tight in the only place it will fit. Starting with the top hole in the fender side of the bracket, drill it out with a 17/64 drill bit. Then using a heavy duty riveter (I had to rent one locally, cost like $5 for 4 hours) pop in the top rivet.It will pull in the bracket a bit. Before drilling out the bottom rivet hole you are going to want to pull out the door closed switch, otherwise you will drill right into it. You don't have to take it all the way out if you are careful, just loosen it up and shift the wires to the side. When you are done with those two rivets your brace should look like this. Now, go ahead and put your door switch back in, otherwise it will just be in the way. Tighten up the screws that hold the two halves of the brace together at this point. Since one half is already hard mounted, we want to make sure the other side is ecxactly where it needs to be before we start drilling more holes. Once that is done, go ahead and drill the last two holes for the rivets that go on the door side of the bracket. When those are in place it should look like this: If you had it off, or just disconnected the top hinge like I did, reattach the door. Make sure you use the new flat headed screws for the door as well, they give the clearance for everything to close. Other than readjusting the door hinge to close right you are done. A pretty simple repair really.
Boots Posted February 23, 2011 Posted February 23, 2011 Great write up. :thumbsup: Mabe we should do this before it breaks, that way with the bracket, it will be twice as strong.
Dechion Posted February 24, 2011 Author Posted February 24, 2011 Thats my plan, both on the passenger side door of the Cherokee and both doors on my MJ. The kit for reinforcing the hinge so it doesn't fail at the weld only requires the plate on inboard side of the hinge to be riveted, so you don't even have to take the door off. Drill two holes, tighten five screws, put in two pop rivets. Sounds like about a half hours work to me.
anthony Posted February 27, 2011 Posted February 27, 2011 thanks .. i didn't even know that part existed :)
SubSonic Posted March 6, 2011 Posted March 6, 2011 Hmm, when my Cherokee hinge broke I just welded it back again. :dunno:
camjeep3 Posted March 7, 2011 Posted March 7, 2011 whoever owned mine before me did the same thing. and its coming off again. the metal is too thin to have the hinge with all the pressure on it

Recommended Posts
Create an account or sign in to comment
You need to be a member in order to leave a comment
Create an account
Sign up for a new account in our community. It's easy!
Register a new accountSign in
Already have an account? Sign in here.
Sign In Now