Scottanchee Posted September 26, 2009 Share Posted September 26, 2009 Hi all , I am building a 88 mj basket case 4 cyl here is a link to the build on our jeep club web site in Nova Scotia http://nsjc.proboards.com/index.cgi?boa ... read=26502 I just bought a rubi 44 front and 8.8 rear for it and 35 in BFG KM 2's . I am gonna flat deck it , with 6 cyl auto swap ( working on getting a 241 or for it too ) , and long arms Link to comment Share on other sites More sharing options...
vaquaro Posted September 26, 2009 Share Posted September 26, 2009 Howdy from the other coast , are you planning to post on the Canadian :Canadaflag: section as well eh? Link to comment Share on other sites More sharing options...
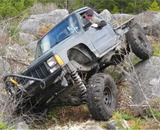
driverdave Posted September 26, 2009 Share Posted September 26, 2009 nice for over 400k mikles, hell mine looks like it went swimming and its an '89 with 86k. can't wait to see more pics as you go. Link to comment Share on other sites More sharing options...
Scottanchee Posted September 26, 2009 Author Share Posted September 26, 2009 Howdy from the other coast , are you planning to post on the Canadian :Canadaflag: section as well eh? I havn't found the canadian section yet Link to comment Share on other sites More sharing options...
Pete M Posted September 26, 2009 Share Posted September 26, 2009 It's in the wheeling/meet-n-greet section: viewforum.php?f=22 Link to comment Share on other sites More sharing options...
vaquaro Posted September 27, 2009 Share Posted September 27, 2009 Howdy from the other coast , are you planning to post on the Canadian :Canadaflag: section as well eh? I havn't found the canadian section yet It's just to your left when your looking at the north pole , ends where the sun sets on that other ocean ( also it's in the C.C. Meet 'n Greet ) :fool: Link to comment Share on other sites More sharing options...
Scottanchee Posted September 27, 2009 Author Share Posted September 27, 2009 Howdy from the other coast , are you planning to post on the Canadian :Canadaflag: section as well eh? I havn't found the canadian section yet It's just to your left when your looking at the north pole , ends where the sun sets on that other ocean ( also it's in the C.C. Meet 'n Greet ) :fool: WOW , you know we don't talk like that " EH " ? :shake: To the left , looking at the north pole , is the PACIFIC OCEAN , on the west coast , You know , where B.C. is . I live on the Right coast , the Atlantic ocean :dunno: :rotfl2: :thumbsup: Link to comment Share on other sites More sharing options...
vaquaro Posted September 27, 2009 Share Posted September 27, 2009 PM me I'll try to explain it to you Link to comment Share on other sites More sharing options...
Scottanchee Posted October 4, 2009 Author Share Posted October 4, 2009 Started the rear frame , box work Before pix I cut out the factory x member , so I could tuck the new tank up nice and high . Its a plastic tank from a 99 XJ Welded in some plates so I would have a good mount for a couple cross members / gas tank mounts . Its 1X2 3/16 wall The top of the frame was kinda soft , so out it came This is what was inside the frame :o Welded in some 1/8 X 4 in Started the main box rails . 2X2 1/8 wall The risers 1/4 in plate 3 X4 and 2X3 tubing 1/8 wall The 2 cross pieces are going to be the mounts for the roll bar . Its 2X2 1/4 wall , I am gonna gusset it tomorrow Link to comment Share on other sites More sharing options...
Scottanchee Posted October 4, 2009 Author Share Posted October 4, 2009 Pics of the finished floor Painted the back of the cab and the roof I really like the flat black , can't wait to paint the rest of it . Today I start to make the box and install the gas tank Link to comment Share on other sites More sharing options...
Darren Posted October 4, 2009 Share Posted October 4, 2009 Tube fenders? Link to comment Share on other sites More sharing options...
Scottanchee Posted October 4, 2009 Author Share Posted October 4, 2009 Started the frame werk of the bed . Made it from 1.5 X 1.5 3 /16 . Welded in a piece of 1.5 sc 40 riped length wise for the outer edge Shocks are going to mount to this one Can't figure out if I want the back of the box tapered , Originally I wanted to tip the outer ends back just a bit , so I could built the bumper right to the box I think i am leaning to just leaving it square or just tipping the corners back 2-3 in Still have to figure that out , mount the gas tank , build the tow tabs and receiver / hitch , rear bumper . I have the roll bar to do and build the sides , But I am in no rush for that OHhhhhhhhhhhh and a new to me t case showed up for it too ;D Link to comment Share on other sites More sharing options...
freakjeep93 Posted October 4, 2009 Share Posted October 4, 2009 thats whats inside my framer too I'm just gonna run a lance from a wash truck down and blast er out. truck looks awsome man Link to comment Share on other sites More sharing options...
vaquaro Posted October 5, 2009 Share Posted October 5, 2009 Pics of the finished floor Painted the back of the cab and the roof I really like the flat black , can't wait to paint the rest of it . Today I start to make the box and install the gas tank I like the louvered hood idea and the double rock rails (yours or PO ? ) I see your no stranger to metal fabrication and welding :thumbsup: :popcorn: Link to comment Share on other sites More sharing options...
reson46 Posted October 6, 2009 Share Posted October 6, 2009 Can't figure out if I want the back of the box tapered , Originally I wanted to tip the outer ends back just a bit , so I could built the bumper right to the box I think i am leaning to just leaving it square or just tipping the corners back 2-3 in I think it would function much better tapered. Plus I think that would probably look pretty good. :thumbsup: Did you use a grinder to split the pipe in half? Willy Link to comment Share on other sites More sharing options...
Scottanchee Posted October 6, 2009 Author Share Posted October 6, 2009 Finished the box , and ended up doing it the way I was originally going to Had to add a piece in The new angle for the corners LOL the new rear bumper ::) Gas tank install , its from a 99 XJ :D Making the cradle Test fitting the straps Gussets Various pieces , custom made for the tank install Upper cradle done Trying to figure out the location of the tank We had to drop it down 1.25 in to for the filler hoses to clear between the deck and the frame And now the tank straps Made these up for the straps . Adjuster is 3/8 treaded rod , welded to a piece of pipe , with 2 nuts on either side , to weld to the cross members , with the same to weld the strap to for the other side Tara made up the angles for the straps to be welded to ,and the adjuster to go through Bent the straps to fit the basic shape of the bottom of the tank , and welded everything in place LOL put the ratchet strap on the wrong side of the cross member ... Its now installed 8-) Its tucked up nice and high Next is the bumper/ end of the box Link to comment Share on other sites More sharing options...
Scottanchee Posted October 6, 2009 Author Share Posted October 6, 2009 Thanks I lovered the hood and made the rock rails . Both the rock rails and the sides of the bed have pipe that have been cut in half using a grinder And to answer and older question , I am not sure if I am going to build tube fenders for the front yet or not Link to comment Share on other sites More sharing options...
reson46 Posted October 7, 2009 Share Posted October 7, 2009 Both the rock rails and the sides of the bed have pipe that have been cut in half using a grinder Nice job. That takes a steady hand. I like to think I'm pretty good with a grinder, but I'd probably go cross eyed attempting to do that. :thumbsup: Willy Link to comment Share on other sites More sharing options...
Scottanchee Posted October 9, 2009 Author Share Posted October 9, 2009 Last night I Started the rear bumper section of the Flat bed Then today got it almost done And primed Gonna fill in the tire side of the outer part of the bumper , Then it will be time for the cage and sides Link to comment Share on other sites More sharing options...
Scottanchee Posted October 10, 2009 Author Share Posted October 10, 2009 Picked up a 60/40 black bench seat from an 06 ford ranger , to replace the wore out stock bench And picked up an 2001 exploder 8.8 with 4.10 gears with an open diff Link to comment Share on other sites More sharing options...
driverdave Posted October 11, 2009 Share Posted October 11, 2009 looks awesome so far, I wish I could weld. Link to comment Share on other sites More sharing options...

Recommended Posts
Create an account or sign in to comment
You need to be a member in order to leave a comment
Create an account
Sign up for a new account in our community. It's easy!
Register a new accountSign in
Already have an account? Sign in here.
Sign In Now