CornFed
-
Posts
72 -
Joined
-
Last visited
Content Type
Profiles
Forums
Gallery
Everything posted by CornFed
-
I had just put a new battery in mine a few months back. Turn around and it wouldn't start the first cold day we had but when it was warm out it was fine. Never even hesitated. Put a new battery in again and it fires up fine in the cold. May not be your problem just trying to trouble shoot.
-
Was it particularly colder when it didn't want to start, than it is now that it will start?
-
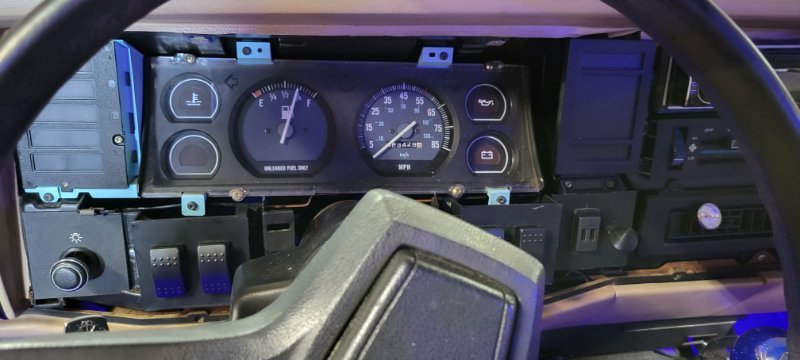
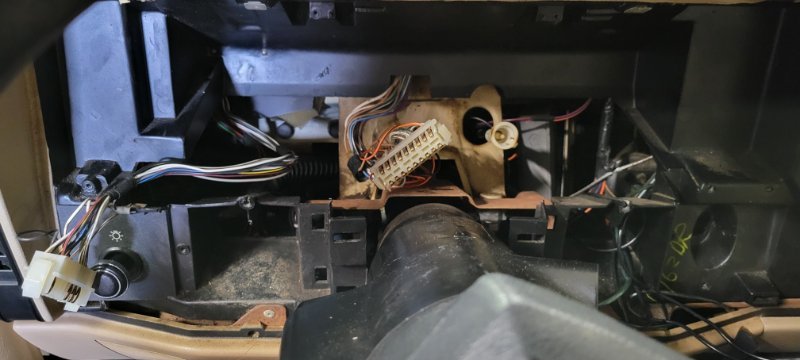
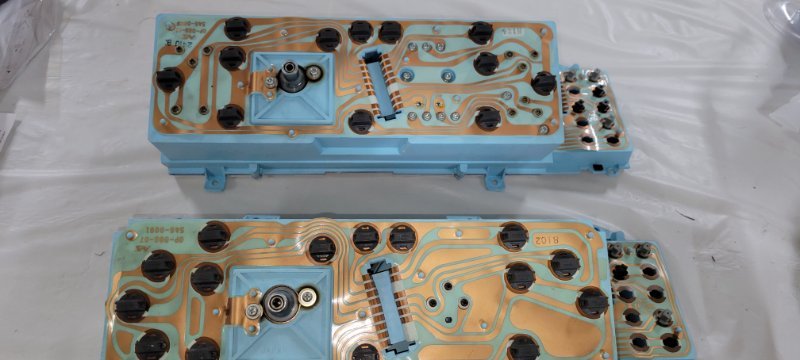
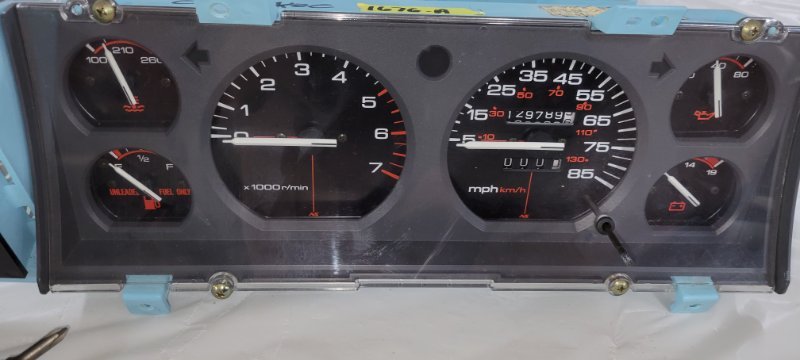
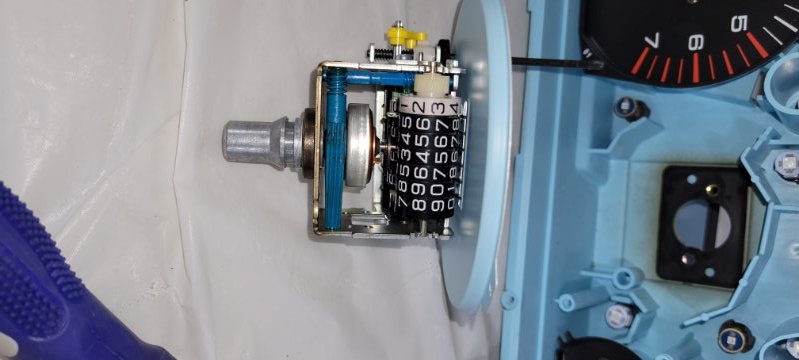
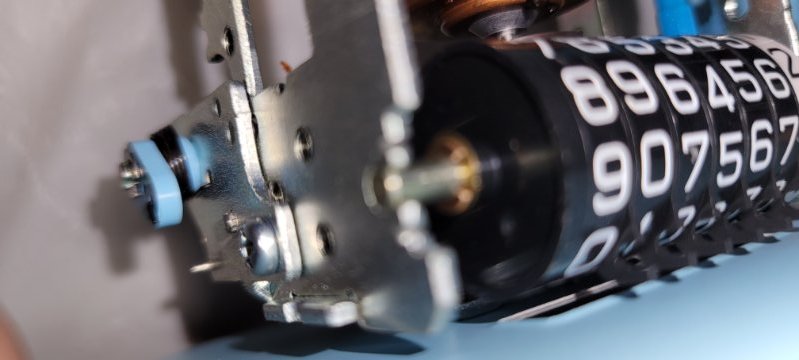
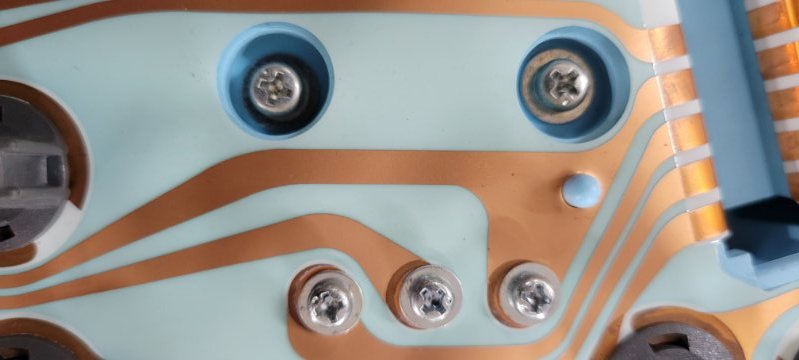
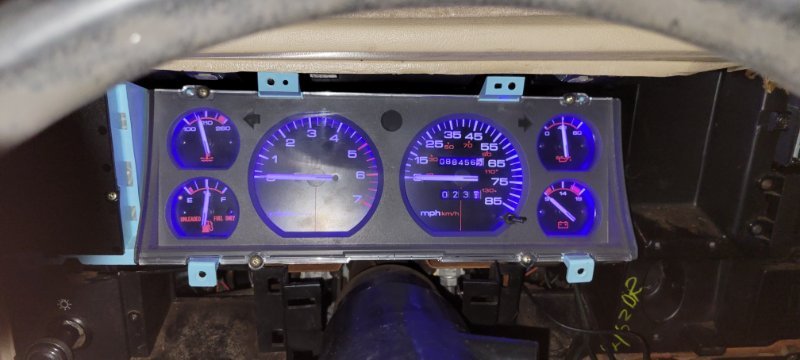
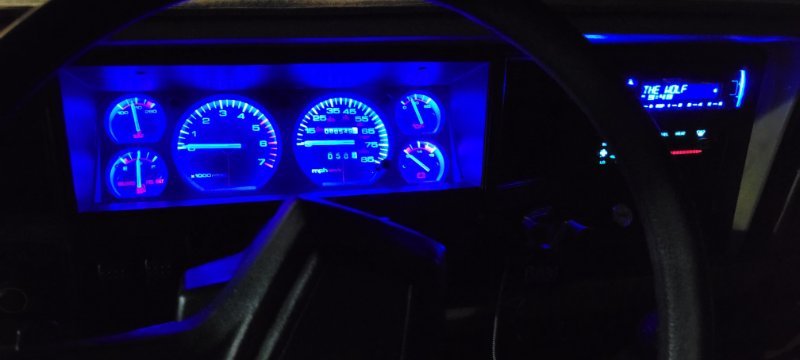
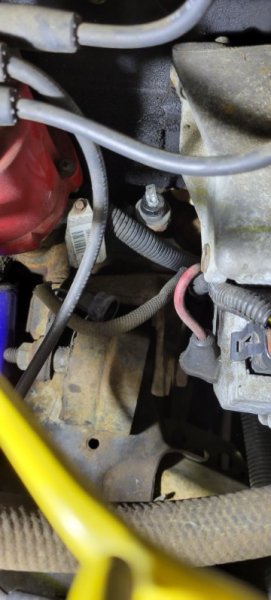
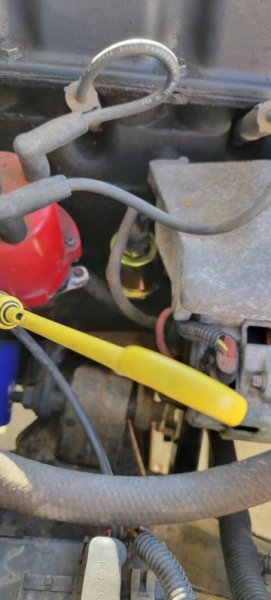
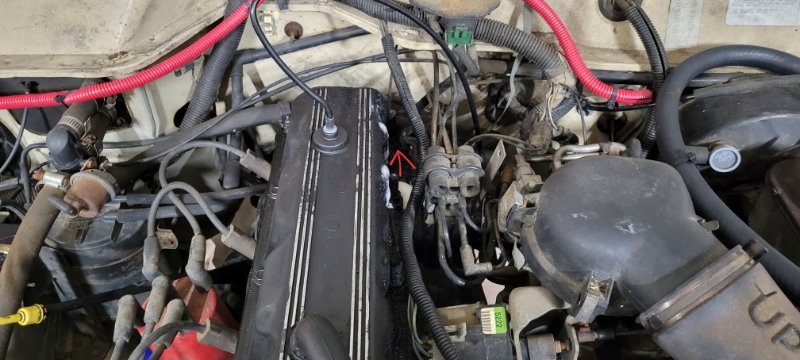
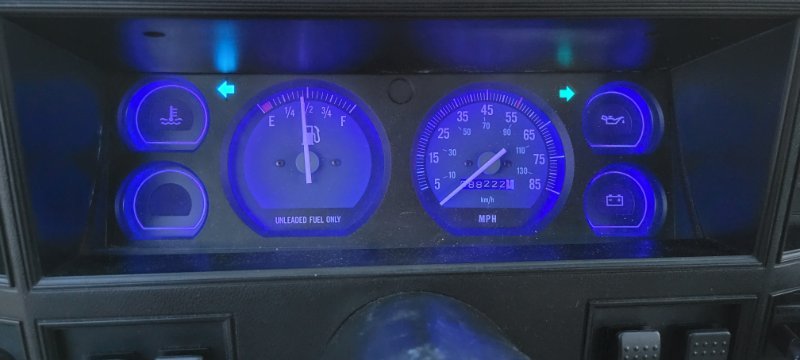
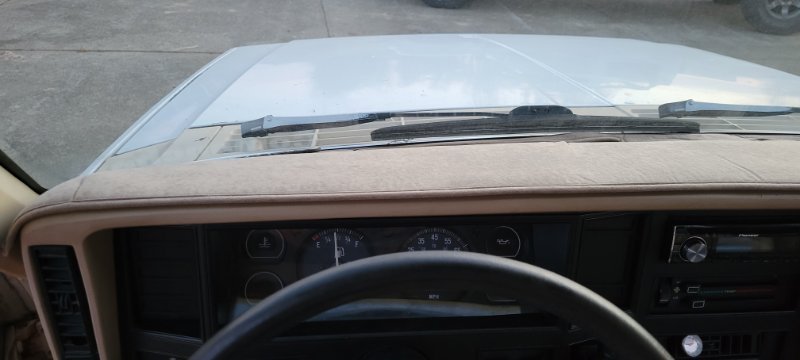
Good grief it's been longer than I've aimed for it to be since my last update. So I've noticed a problem with my Just Empty Every Pocket. I'm spending all my money on small projects and most of what I've done you could argue isn't even necessary. The problem this presents is I'm not saving money for new leaf springs lift kits or the 4x4 swap and new tires. Now that doesn't mean much of anything to me because I'm stupid. I just hope someone else listens to my advice there. So I'm gonna start a very long and detailed post that was easy enough to do and it's the cluster swap for the 2.5l which has been covered In great detail before so if you want to pass on reading this one. So I as a lot of us do had dummy lights in my 2.5l and it's something I can't stand because I like being able to see if my vehicle is acting a little off. So I seen a nice cluster set in very good condition on ebay and ordered it. In preparation for it to come in I also went to the local o'reillys and ordered a coolant temp sensor (TS199) and oil pressure sensor (PS155). Once they came in I parked the truck in the garage overnight and waited for morning. So morning came and I pulled of my dash bezel. It's a easy enough job a few screws and a very tender touch with a non tilting steering colum. I slide the bottom out first then the top in baby steps and it should gently slide out. Another tip I picked up on the forum was to use a peice of wax paper to prevent it from scratching the steering colum. You'll need to remove the switch panels, clock and, the 12v plug panel as well. Top of the clock panel has a hidden screw to loosen not remove and it'll easily slide down out of there. Six screw hold in the gauge cluster once removed carefully slide the cluster out. You'll need to reach in with your right hand and unclip the speedometer cable. It's easy to do as it only takes one hand to do. The cable will slide off freely when uncliped. Now you'll have more room to maneuver to unhook the electrical plugs. I find a small screwdriver to gently pry on the clips works best. They'll pop loose there's a total of two one is behind the computer panel and one is in the center of the cluster. Then the cluster comes out free. Now for me personally with my cluster pulled out I took the time to swap my leds over from one to the other. The dummy cluster was on the bottom and the new to me cluster was on top. Those are almost all 194 bulbs. I prefer blue but to each there own. Now on to the important stuff. You'll probably want to calibrate your tachometer and reset you odometer to the original miles on your truck. So I'll walk you through that too. There's only four screws holding on the faceplate of the dash and a little rubber cap for the trip reset. I reached in behind the reset switch and held it while gently pulling on the rubber cap it came off beautifully. Next remove the screws and the faceplate comes off in your hands. Now I'm writing this up in the order I done it in. To remove the speedo there's two screws on the back where the cable hooks in and one on the front right corner of the gauge faceplate. It'll slide out freely once unscrewed never force anything in a 32 year old truck. Now comes for the single most difficult part of the whole dang swap. You have to remove a little cooper colored c clip on the left side of the odometer when looking at the face plate. I used a set of small hook screwdrivers and a lot of patience this took longer than any other single project. DO NOT LOSE THE CLIP. I put it into a sandwich bag so it wouldn't get lost. This may not be legal to do so do this at your own risk. However as far as I know of if your doing it set to original miles of the truck it is in and not changing it for resale purposes its legal to do. Now you just roll the odometer to your mileage. In my experience I went right to left and rolled it one at a time while looking at the faceplate. You do this by sliding everything on the left over to the left. Roll the daily where you need then go left one by one. I included everything even down to the 10th of mile. Next then I simply took a pair of needle nose pliers and reinstalled the c clip. Then just put the speedo back in like it came out. The tach isn't necessary yet however I knew mine would need calibrated from the 6cyl to the 4cyl. There's a total of five screws holding in the tach remove those and it falls out. Those screws pitcured below please note that photo is uploading upside-down. The empty housing once it's removed. That photo was accidentally a vertical picture and I apologize. You can also see my leds installed. Now I am not a professional. Do not adjust the tach unless you are certain it isn't in calibration for your vehicle. I however had read on the forum here that if you turn this dial all the way to the left it would be for the 4cyl. This did not prove to be true in my experience. If I done it again here's how I would do it. I'd go to my local parts store and have them hook a computer to it and tell me what rpm it's idling at. Then calibrate the tach from there. I however didn't do that because it would make sense. I done the trail and error method. With it all the way to the left I'd have to practically redline the motor to see movement on the tach. So I continually tried it until I got it very close by ear and am happy with it. I turned it all the way to the right and back up by about a 1/4 of a turn. So basically I flipped it from where it was to the opposite side and then down just a fuz more. Please note another vertical picture my phone wasn't cooperating. Now in-between my initial attempt at calibrating the tach and the final version of it. I swapped my sensors over. I didn't want to start the motor until the cluster was in and didn't want to put it in until the sensors where swapped. I started out with the coolant sensor. Simple unplug and unscrewed the old switch sensor and install the new temp sensor. Easy to get to use a deepwell socket and all goes great. Next is the oil switch replacement to an oil pressure sensor I used a adjustable wrench and had about a 1/4 turn each time. Be very careful here according to members here it likes to snap off so I must've gotten lucky. Unscrew the old sensor from the engine block. If you need help finding it look at the top of the motor look just to the right of your distributor. You should see it. Then a 3/4 inch deepwell will install the new one. I had mine unplugged in this photo. Notice the dipstick in the photo as reference point. Now then assuming you have the tach calibrated reinstall the cluster. I did it without putting the faceplate back. I just plugged everything up I didn't even screw it back in. Take it for a test drive make sure all the gauges read right or appear to. Then put the faceplate back on and screw the cluster in. Put the switches clock panel and 12v plug back in. In that order. Or you'll have to remove something to do it. Then just push the dash panel back into place and screw it in and you'll be ready to go. My lights arent near as bright or as blue as the picture always make them out to be.

-
Yeah i remember someone asking that too. If I remember right it was in other cool stuff. I don't remember who.
-
Yeah but isn't that just the black plastic dash replacement?
-
Yeah pass along the Junkyards info if you don't mind. I'll give them a holler and see what they'd charge to pull and ship. I do appreciate the help.
-
Yall ever just browse Amazon and go man wouldn't those look cool. I'm not seriously considering buy them. They're led headlights that also have any imaginable color you could want.
-
I know I wouldn't mind having me a steering wheel like that. I've always thought it looks better than mine. But I'd like a chrome and wood grain probably because I've been thinking of getting a wood grain dash bezel.
-
I'm assuming your not parting it out with shipping are you? Looks like a Junkyard. I live in ky so I don't plan on driving out that way.
-
I wonder if I can get it redone? If I ever pull it I'd like to either replace it or have it redone.
-
Like I said it's the only time I believe I've ever misspelled it. I guess that goes to show I should've proof read if better.
-
Well bad part is I just got home and checked the receipt. It's wrong on that to so I'm pretty sure I made the screw up. I might give them a call this week and see if I can order just the glovebox piece and fix that, dagummed idiot.
-
The bad part is I don't think I've ever misspelled it, now that would make this a first if i did. So what I'm trying to see if I can view the order so it'll show exactly what I wrote. Then see if covercraft will replace it if it was them who made the mistake which I highly doubt is what happened.
-
If you hadn't pointed that out. It would've taken me forever to notice. Call it a typo. Adds value or something. Dang it
-
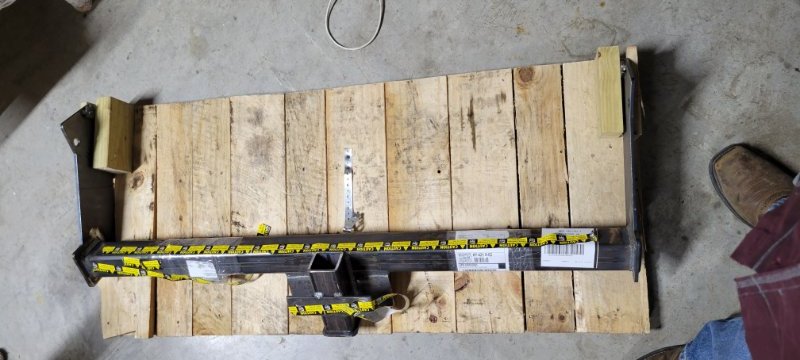
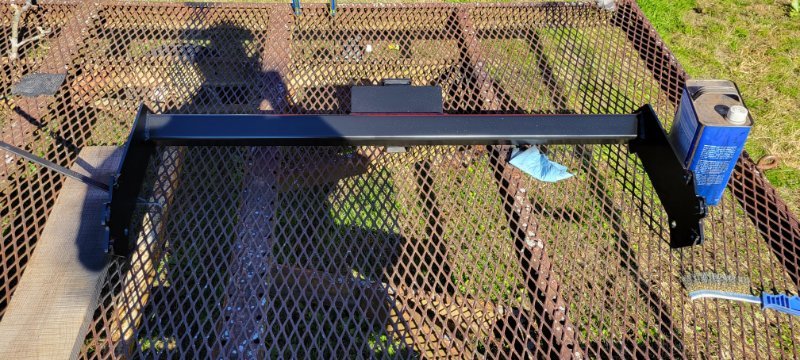
Thought I'd do Krusty a favor and leave a review here on the hitch. I got mine in packaged really well on a nice wooden pallet. Now as he'll tell you they don't come painted and I actually appreciate that because it would let you color match it to the truck. I went with plain primer and gloss black. Now i will complain about ups being a bunch of sissies because that yellow tape you see all over it is a warning that products weighs over 70lbs. The only reason thats a problem is because it was pain to remove. Anyone with common sense would look at a steel hitch and say thats gonna be heavy. Now I wound up taking mine to a shop to be installed because my exhaust had to be reworked and I didn't want fight with it to install it with my exhaust in it's original place. In overall conclusion I would definitely order another one. It's a really high quality hitch that I'm convinced would rip the truck in two before it'd break. Price was about average to me for what I would expect a store bought hitch to cost if you could find one. The one complaint I have is that the bolts sent with the hitch to me aren't worth having. I'd only use grade 8 bolts on a hitch so if it was me I'd replace those bolts as soon as I got the hitch. I'd highly recommend one though if you're looking. I couldn't be happier with mine. The truck just looks better with it on there.
.jpg.b81a5223fdc4ed237a2d03e5ae5e9c46.jpg)

-
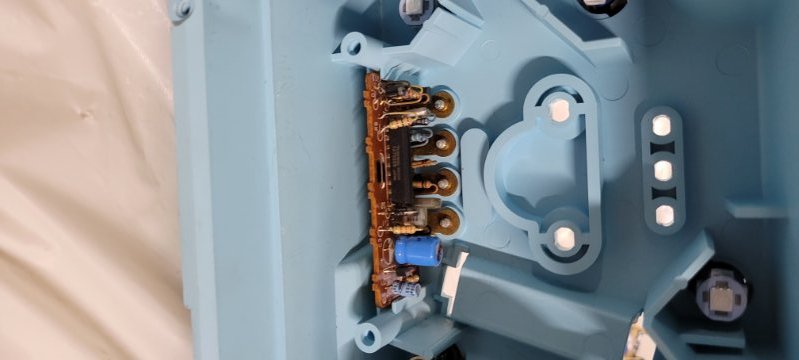
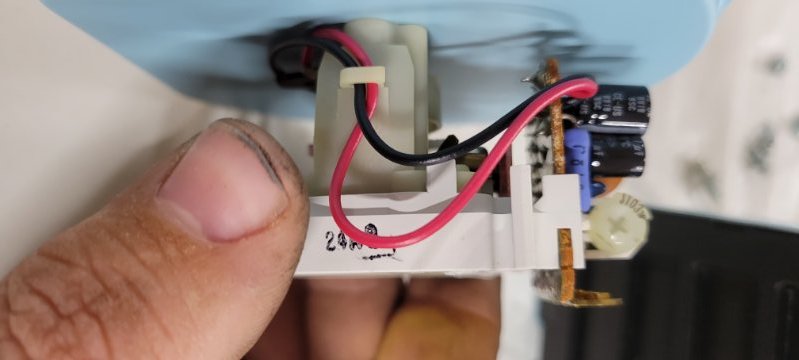
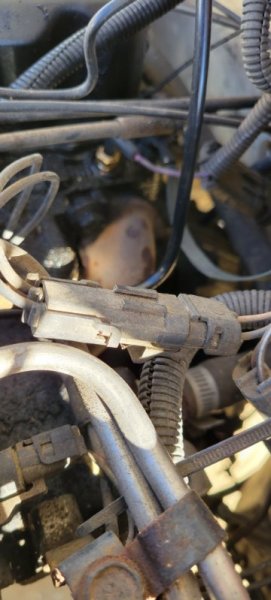
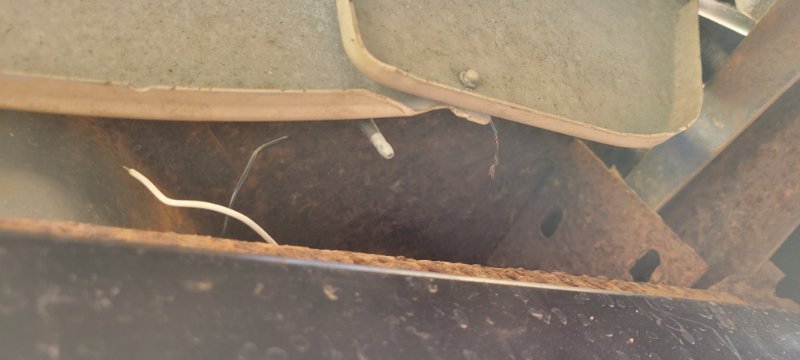
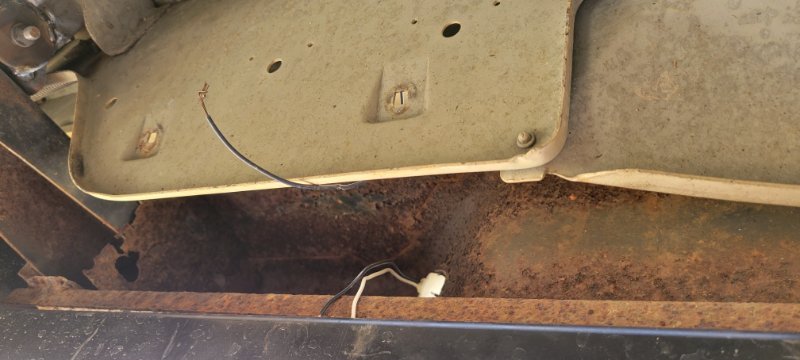
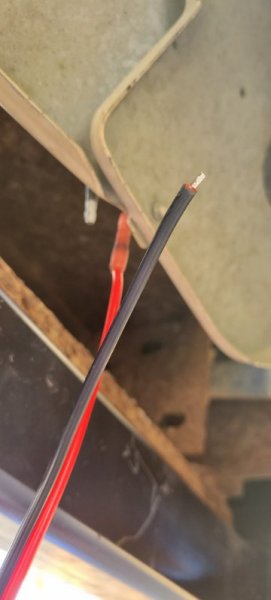
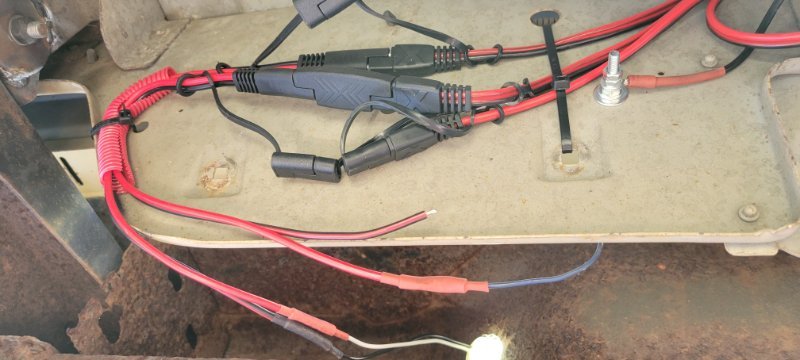
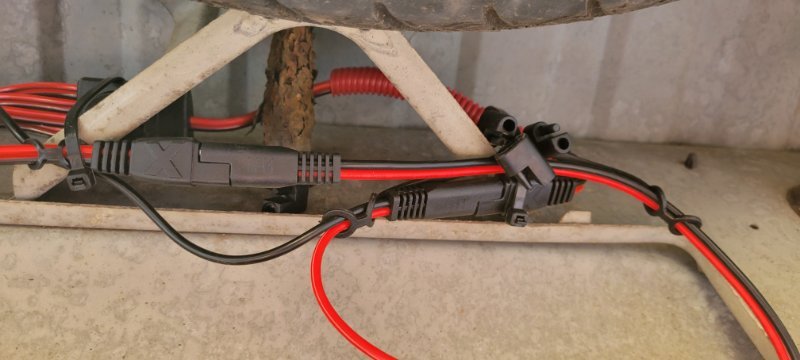
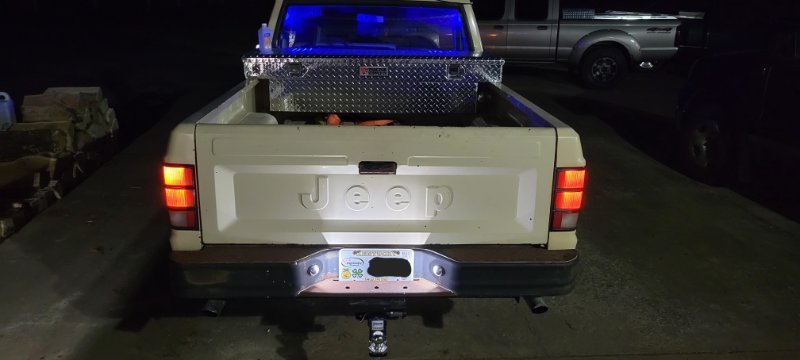
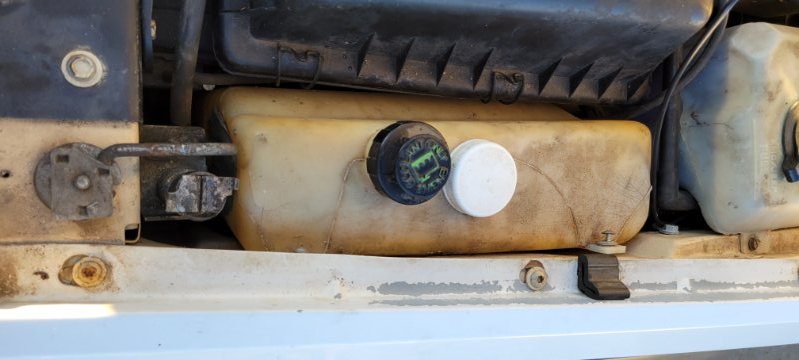
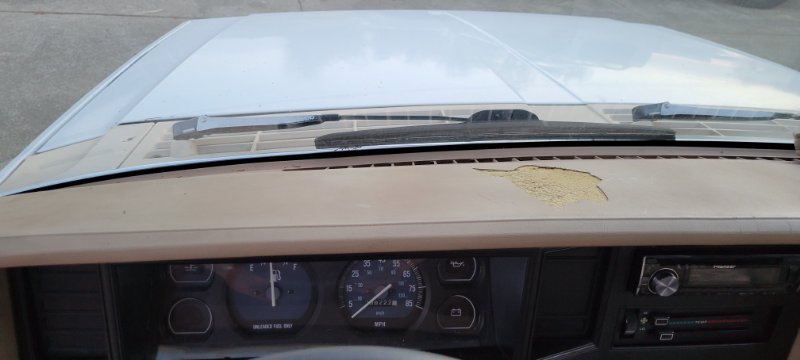
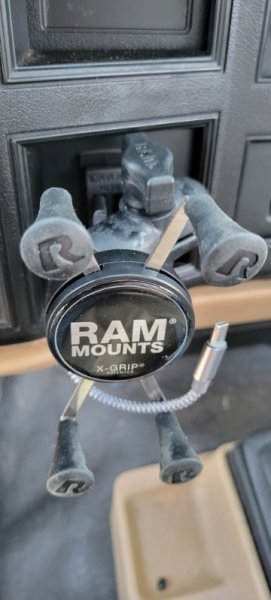
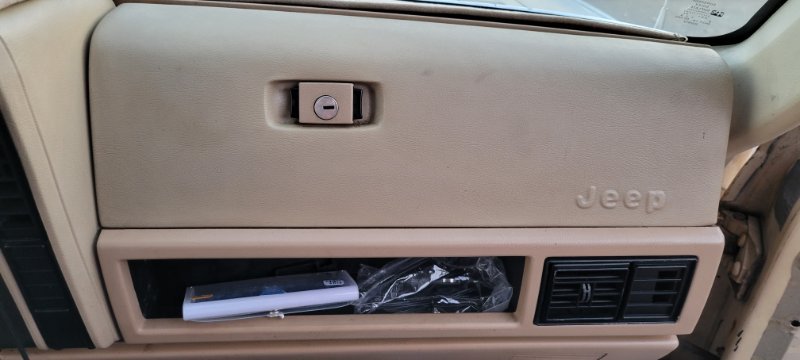
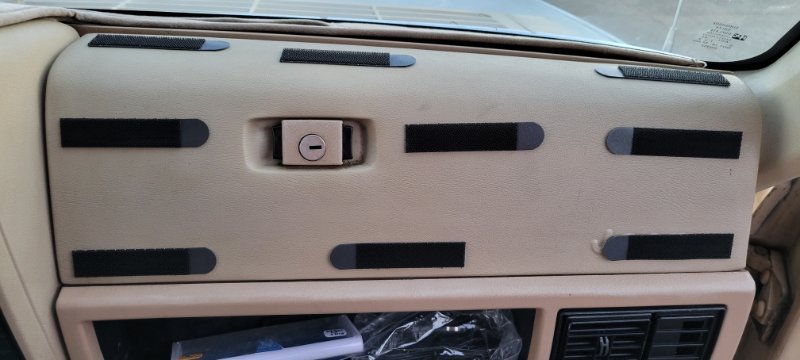
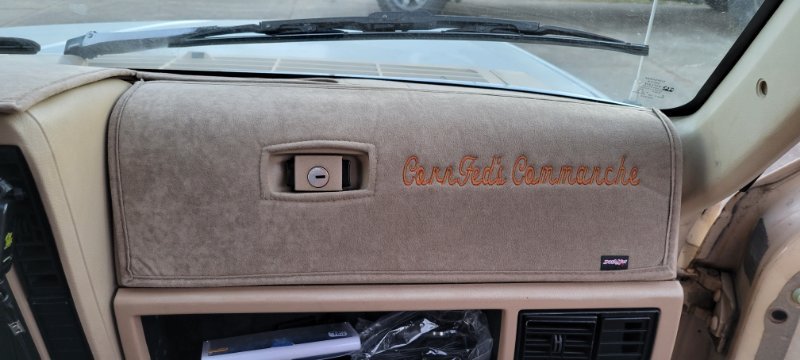
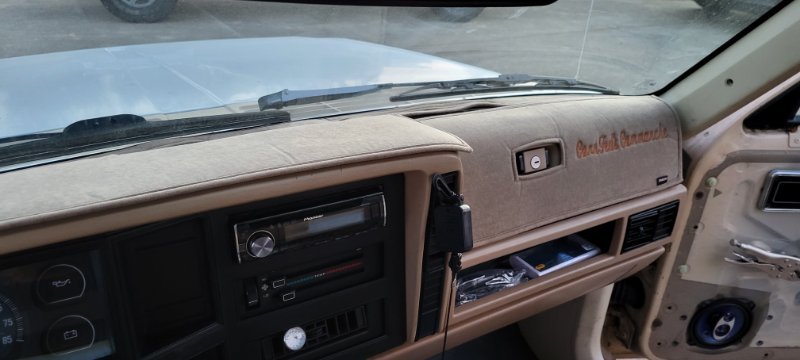
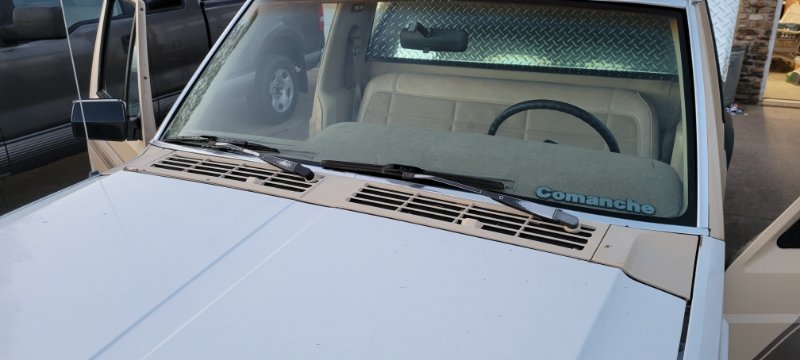
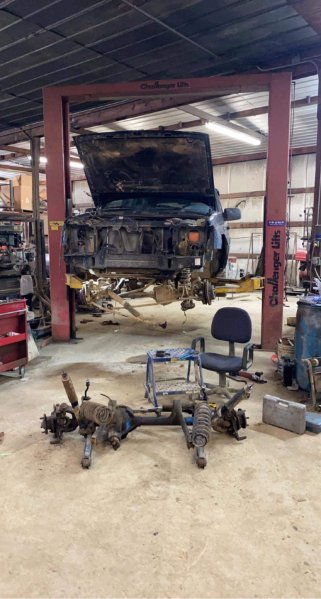
It's been a long week and an uneventful one at that. I can honestly say after I've completed my work today I've ran out of projects for the time being that I have parts for. The only thing holding me up now is money. However I have one planned ill talk about a little later. I started off today lying on my back on the concrete driveway. It'd sure be nice to have a lift kit and bigger tires so I'd fit under it on a creeper. When I first started driving I wired up new lic plate lights it worked fine until I had exhaust put on then I think he broke my homemade wiring. So today I fixed it and did it "right" The white black wires are from the lic plate lights and the blue ones are to and from the taillight. The red hot wire here runs into the blue hot wire from taillight harness on the driver side. I ran the ground to the right side and used an existing bolt hole to ground it out. The top plug in the photo goes to my right side lic plate light. The next plug runs to my passenger side taillight. The exposed wire is a ground wire but It was taped up. You can see my ground wire that I tan to an existing bolt hole in the photo as well. The main harness plug is on the far right thats my hot wire coming on from the bottom of the picture. The only other plug you see Is one that loops around to my left lic plate light. The finished product looking fine as wine. Those led plate lights light up the Jeep logo on the tailgate real nice. Next I took a break to rest my back and stand up a spell. I pulled a handful of caps off a old Cadillac we had sitting in a field to see what would fit and I got lucky the coolant cap fit my resivor. I will pull the year and model one day and put it on here somewhere if you can buy them new. Went back to wiring after that and put in my 4way relay so that they'd work. Quick and easy just like when I did the turnsignal relay. These make it so that I can run leds everywhere on the truck including the dash lights. Excuse the fact that my right turn signal has a green tint to it. I'm hoping it'll wear off like the left one did. I installed my new phone mount today and coincidentally had my a nice mad spell when the old one came off and took the dash with it. I was hot ill be here to tell you because that dash was perfect. I'm using a 6in charger cable running from a usb port. The plate that it all mounts to was made by @m2bandit Ive grown real fond everything I bought. With a phone in the mount it can be angled so that you won't touch it In 1st gear even if you completely cover the shifter with your fist. I really like the location of it too for the truck as well. I still wasn't done for the day because I has to cover that hideous flaw in my dash now and I'm still a might bit upset about it too. I ordered a dash mat and it's the reason I relocated my phone mount to begin with. I did provide some of my own velcro to mount it with however it does come with some. To start with I prepped with rubbing alcohol. Then I added velcro to the glove box real well because I didn't want it to be lose anywhere since it'd be the most noticeable. Then I forgot to get a picture of the main dash mounts for it because I'm an idiot. So we will skip to the finished product with monogramming CornFed's Commanche So that's got me mostly out of projects. If you look closely you'll notice my passenger door panel is still off its crank window went out. If you rolled it all the way down it wouldn't roll back up because its stripped out. However if its up about a quarter inch out of the trim it will. It's temporarily fixed so that I can roll it up and down and it not get stuck. I stuck a 2x4 under the window track so it'll stop on it. I'm trying to find a replacement I just need to call a mechanic I know who also has a Junkyard. Then I'll put the door back together. Next on my list that I want to fix just need to order a kit. I want to put me some bed/toolbox lighting in. All I need to do is order me a led under glow kit and slap it In. Only reason I go that way instead of just a plain bed lighting kit is I want it to be able to change colors. I may order a kit this week. I'll definitely wind up looking I just ain't done it yet. I'm waiting on capital to buy a donor xj for the 4x4 swap. I find them all day long for sale I just don't have the 6 to 800 dollars to spare right now for the donor. Especially because I'll still have to find a Ax5 transmission for the comanche 2 5l motor. It's looking like anyway I go ill have to regear the axles out of any donor cherokee to 4.10s. So dang. Yet that has us up to speed on all projects hope everyone reading this enjoys my ramblings.
-
I don't think this will fix it but when you slide the vent rod wiggle it up and down when it's on the setting you want. I've done that to mine before to get it to work.
-
Best photo I have from his ad. However he kinldy scared me off. He doesnt know what ratio is in either axle. When he got it the front axle was snapped in half. So he went and grabbed another one from the Junkyard. Which concerns me because who knows if the ratios match.
-
Interesting ad says Dana 30s but I suppose it could be wrong. How hard is it gonna be to get 4.10s? 4cyl Jeeps aren't that common.
-
How can I easily tell what gear ratio is in an axle? I can't remember which axles is it most people on here say to avoid dumping money into? Found a 95 cherokee being parted out. With Dana 30 front and rear under it. Depending on what gear ratio it has might get it. If it's recommended by yall on here.
-
In your opinion then what years would be better than others? I'm going Junkyarding tomorrow because my passenger side manual window regulator broke today. So I'm going shopping and I might upgrade to power windows ain't sure yet.
-
I want to apologize for asking what had already been awnsered I'm sure of yet try as I might I can't find the awnser. I want to do a 4x4 swap onto my 2.5l Comanche. I'm trying to find a donor cherokee for both axles only. If I have to source an Ax5 for the 2.5l separately I will. My question is what years can I use the axles out from under a Cherokee for the swap? I want as little work to do as possible so just unbolt and bolt up would be preferable. I know my rear drive shaft will have to be modified by a shop to fit and I'll have to find the front drive shaft with the Ax5. I do plan on continuing this thread when I inevitably do the swap. But I'd first like to find a donor jeep and I figure it'd be best to have it sitting in the field vs a Junkyard. Edit to add because I'm stupid. I've currently got an 89 Comanche with the 2.5l Ax4 2wd short bed. Since I'm changing transmissions anyway I'm going to go from the 4 speed manual to the 5 speed manual. I know I can use an Ax15 but from slight browsing on here it seems that would be much more complicated.
-
Let's see I've got both switch panels to replace factory. I just ordered the cig panel and radio mount last week. The only thing I ain't got because I don't ever plan on needing it is the clock replacement panel and I've considered getting it incase you ever stop selling them.
-
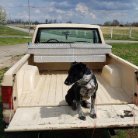
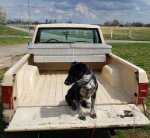
Thanks it's one of my two pride and joys. The other being my dog.
-
https://arbusa.com/jeep-cherokee-1984-2001/bumpers-protection-equipment/ Can you order it direct from arb?