

rosco11
-
Posts
218 -
Joined
-
Last visited
Content Type
Profiles
Forums
Gallery
Everything posted by rosco11
-
This Comanche project is getting exciting.. Time to lube it up! Cheapo gear oil temporarily in the front and the good stuff for the rear 8.8. Also added Yukon friction modifier for the limited slip. Put in a few gallons of gas and we might if this thing will start up! Sent from my Pixel 3a using Tapatalk
-
Drilled and tapped the new location for the Comanche front brake line mounts. Went with Rusty's Off Road extended brake lines front and rear drop line. Got them all hooked up and ready for fluids! Sent from my Pixel 3a using Tapatalk
-
While beefing up the Comanche front end, I decided on the Dirtbound off-road high clearance steering and Rusty's HD Track Bar. Got everything painted and installed. Still have some steering adjustment to make but for now it's at a high awesome level! Sent from my Pixel 3a using Tapatalk
-
Thanks Pete! Sent from my Pixel 3a using Tapatalk
-
One more picture of the Comanche while it's out of the garage. We rolled it back in, reconnected the fuel pump and sending unit in the new gas tank. New vent valves and grommets. Then refreshed the ground behind the drivers side rear taillight and replaced the taillight screws with new hardware Fuel tank valve grommet - Crown Automotive 52018823 Vapor Valve Seal https://www.amazon.com/gp/product/B00B8X49CS/ref=ppx_yo_dt_b_asin_title_o01_s00?ie=UTF8&psc=1 Fuel tank valve - MTS Part no: 5360058 https://www.morris4x4center.com/valve-fuel-vapor-5360058.html Gas tank - AM Parts "1988-1992 Jeep Comanche (MJ) 18 Gallon Gas Tank for Models with 113"" Wheel Base" https://www.am-autoparts.com/products/fuel-tanks/AM-12430211.html?m=439&y=1991 Sent from my Pixel 3a using Tapatalk
-
Thanks WahooS! Rolling on Mickey Thompson MTZ 285/75/16s and ProComp 16x8s Sent from my Pixel 3a using Tapatalk
-
Huge day for the Comanche! So exciting to see it with all 4 wheels on after 2 years being in the garage. We had to roll it out to reassemble the bed and adjust the new bed spacers. We put the old tie rod on and rolled it out by hand. Got some help from the family and placed the bed back on and bolted it down.. I think it looks awesome! Sent from my Pixel 3a using Tapatalk
-
This was probably the easiest project of the whole thing for the Comanche. We replaced the factory aluminum steering gear spacer with Rusty's Off Road heavy duty steel spacer. Since the steering was already disconnected we took out the 3 big bolts of the gear box, moved it out a few inches, grabbed the old spacer and replaced it with the new. Torqued to spec! Took about 1.5 minutes Sent from my Pixel 3a using Tapatalk
-
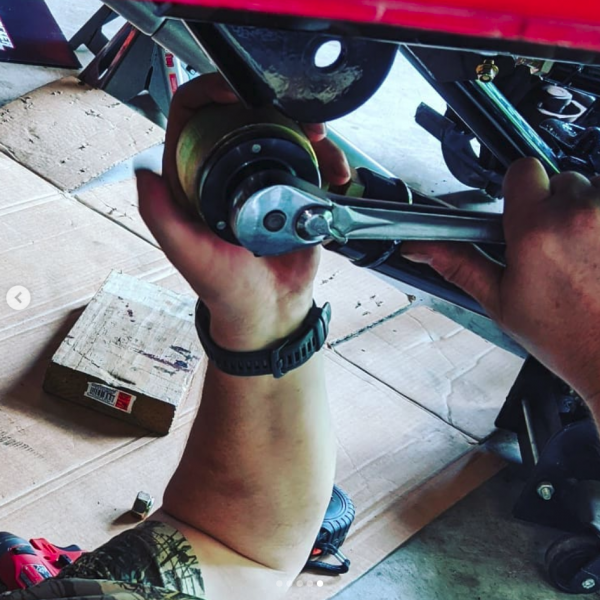
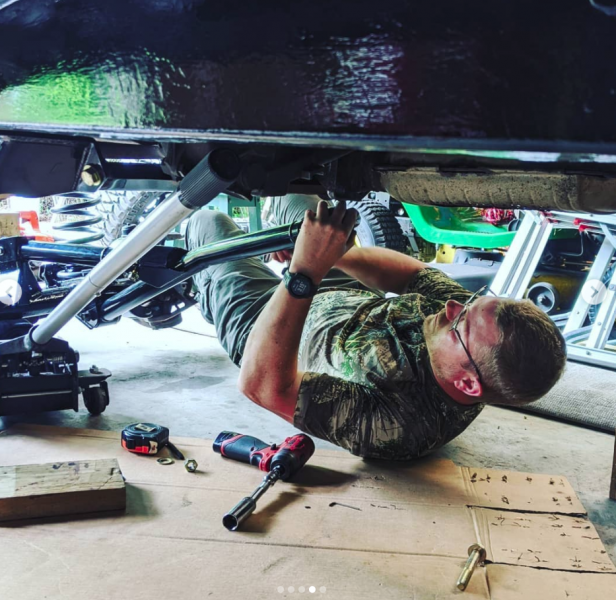
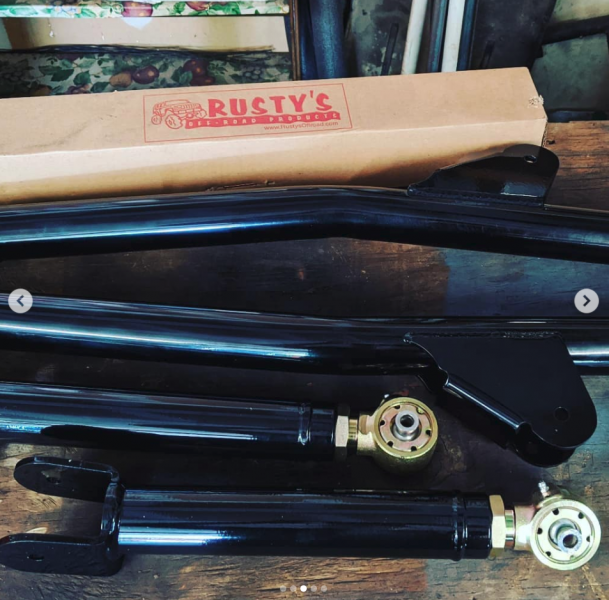
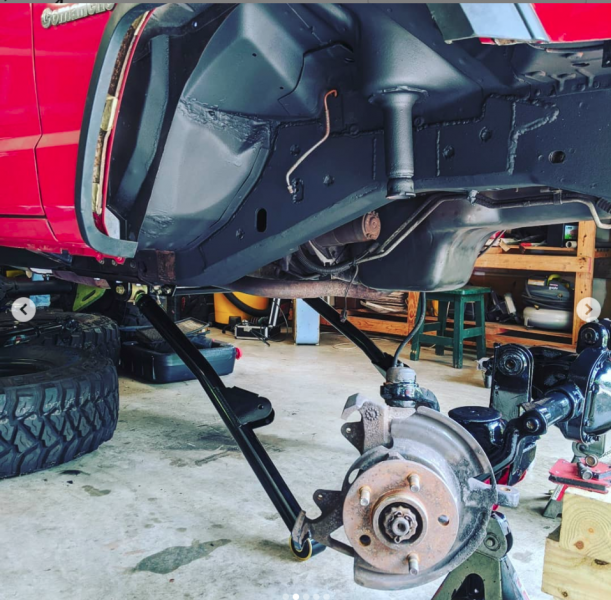
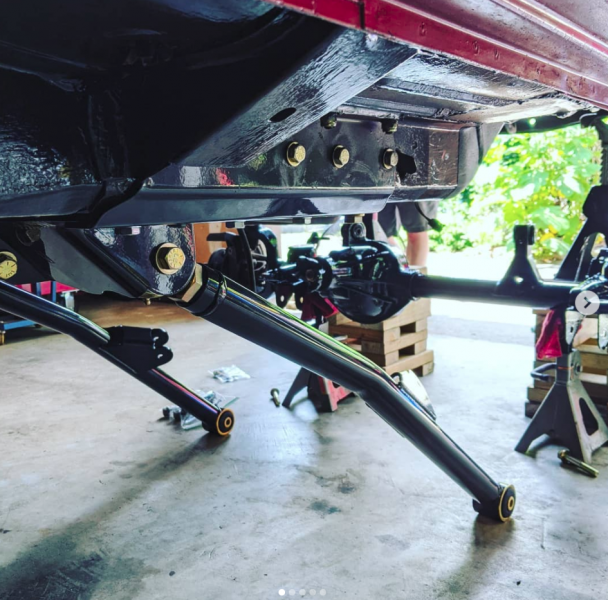
Finally assembling the long arm lift on the Jeep Comanche! This is Rusty's Long arm high clearance upgrade kit and crossmember designed for the Jeep Cherokee XJ. It is super beefy and well designed!
-
Thx JMO! Sent from my Pixel 3a using Tapatalk
-
Haha.. Yeah it looks that way.. and it was as I was a mess under there trying to line it up! Sent from my Pixel 3a using Tapatalk
-
Thanks WahooS..! Sent from my Pixel 3a using Tapatalk
-
Getting that front axle and brand new 6" springs under the Comanche! Sent from my Pixel 3a using Tapatalk
-
My brother helping trim the fenders just right on the Comanche! The type of front bumper makes this a necessary step.. Nice work! Sent from my Pixel 3a using Tapatalk
-
"Wendy"- 88 Jeep Comanche Build
rosco11 replied to Swampy's topic in MJ Hardcore Tech: Epic Journeys to Greatness
Nice work! Sent from my Pixel 3a using Tapatalk -
A few little touch ups after the topcoat drys and the front axle will be ready to close up and back on the Comanche! These LubeLockers are awesome in place of gasket maker! Sent from my Pixel 3a using Tapatalk
-
We were on a tighter timeline to get the front end of the Comanche put back together, we had multiple projects happening at the same time... My amazing mom offered to help me primer and paint the front axle! Trudie rocked it! Sent from my Pixel 3a using Tapatalk
-
After the Comanche battery tray inner fender turned into a major restoration project, I decided I might as well get a new battery and a major cable upgrade.. these from Ksuspensionlifts are awesome and so we'll made. My terminals were not in good shape. I replaced them with the military style. I refreshed all the grounds. The ground from the back of the engine to the firewall was a beast to get in there, but lots of trying and finally got it done.. Good project! Sent from my Pixel 3a using Tapatalk
-
The Comanche frame stiffeners (JCR Off-road) are done! They welded in very good. Then we hand brushed the stiffeners, unibody and fenders with Rusty Metal primer and finally.. an awesome topcoat of 3M rubberized undercoating. That stuff went on so good! However, you have to move quick.. it'll empty the whole can in just a minute. Once I got the coverage and speed down. It looks awesome Sent from my Pixel 3a using Tapatalk
-
The Comanche unibody and frame stiffeners are prepped and final fit. To prep I used bare metal primer on the insides of the stiffeners and rusty metal primer on the unibody. Once we got it all mocked up I hit the edges with a wire wheel to clean up the weld areas. Started welding them in. It's so much nicer welding to the thicker unibody metal vs all the thin patches and rust resto I've been doing. Actually got to run a few good hot welds instead of stich welding or just spots. Can't wait to see this project finished up! Sent from my Pixel 3a using Tapatalk
-
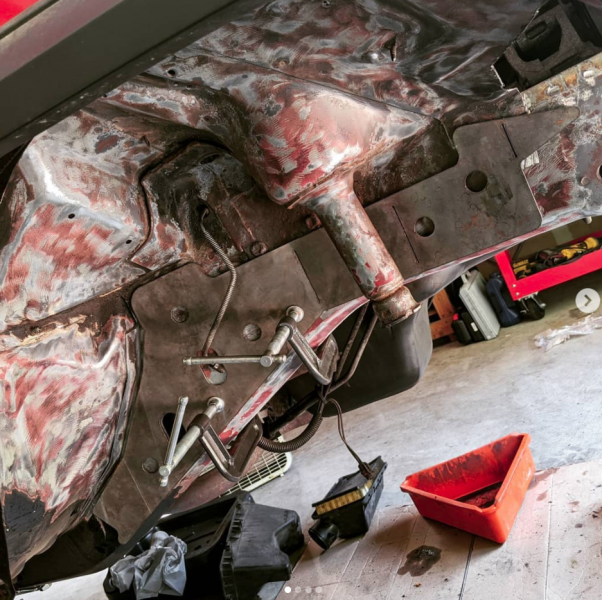
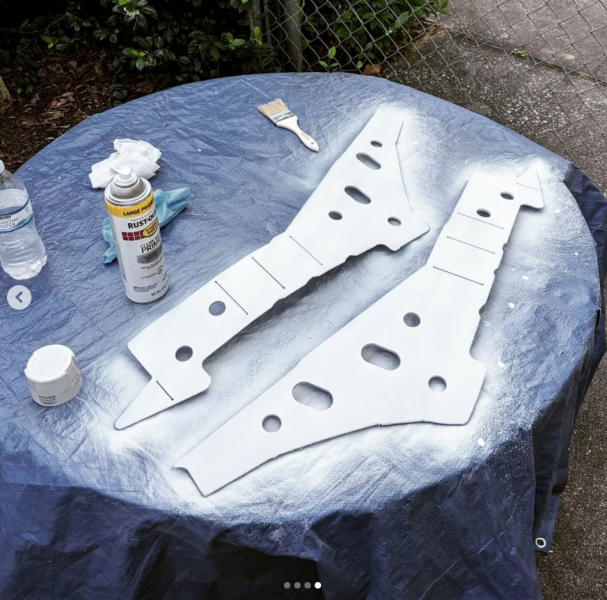
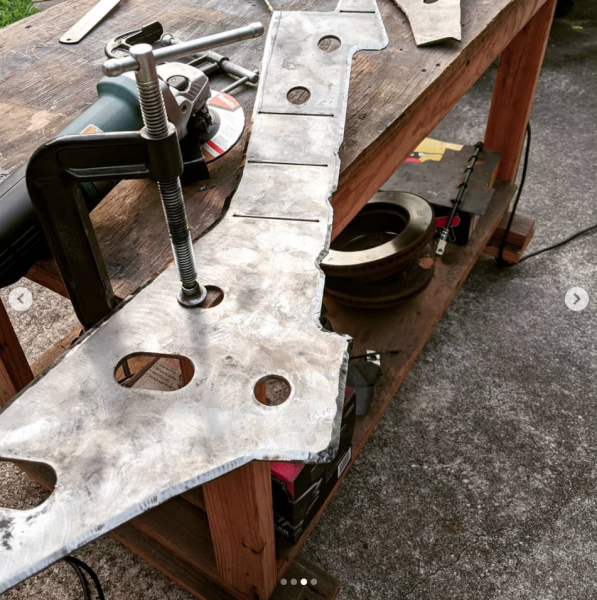
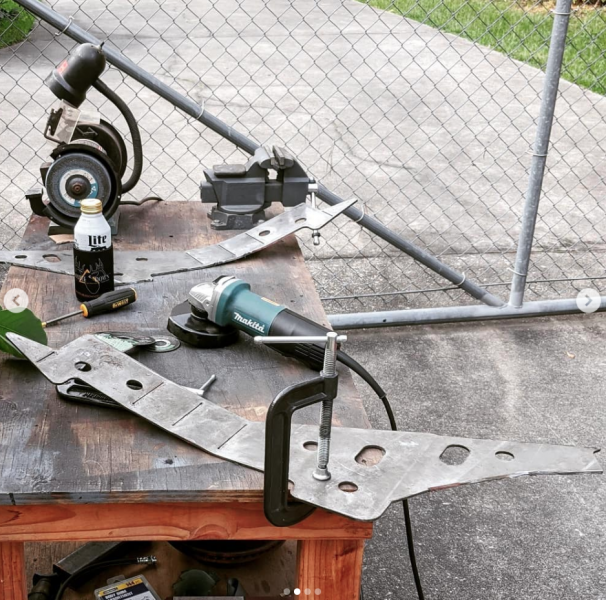
With the Comanche rust-free (fingers crossed) it's time to move forward building it up. We have the front axle out and will take advantage of the extra room to add frame stiffeners to the unibody front frame section. This area receives quite a bit torque due to all the steering being connected here. I went with the JCR front section stiffeners and 3/16" steel. Used a wire wheel to work on all the very bad rubberized undercoating in the fender wells. Got it cleaned up nice and now we are mocking up the stiffeners. Clamped them down and beat them to shape with a dead blow hammer. They came out pretty good and fit nice
-
Haha! That's the truth! Sent from my Pixel 3a using Tapatalk
-
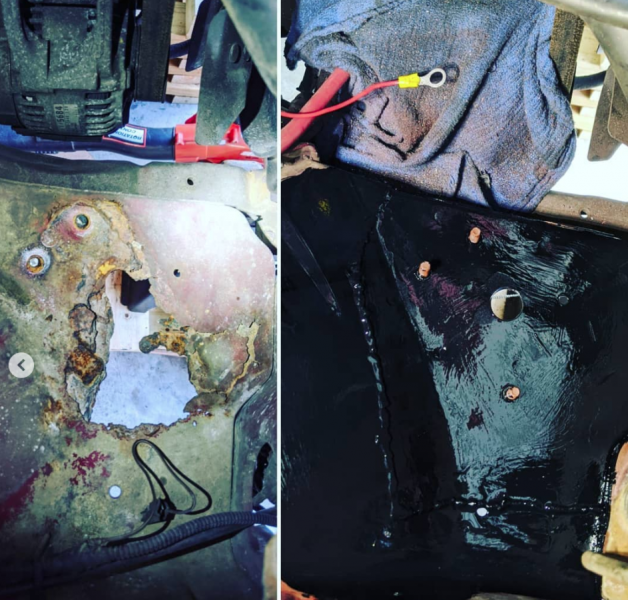
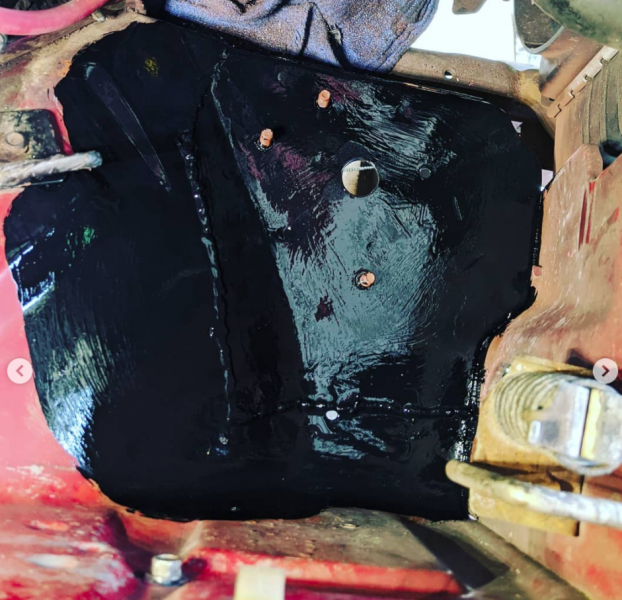
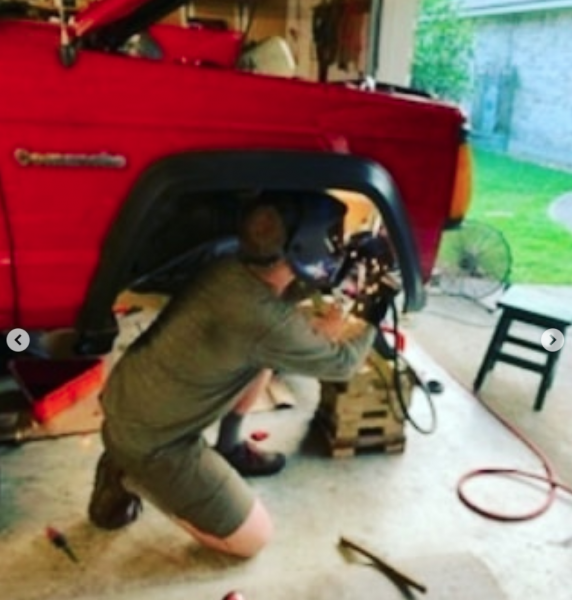
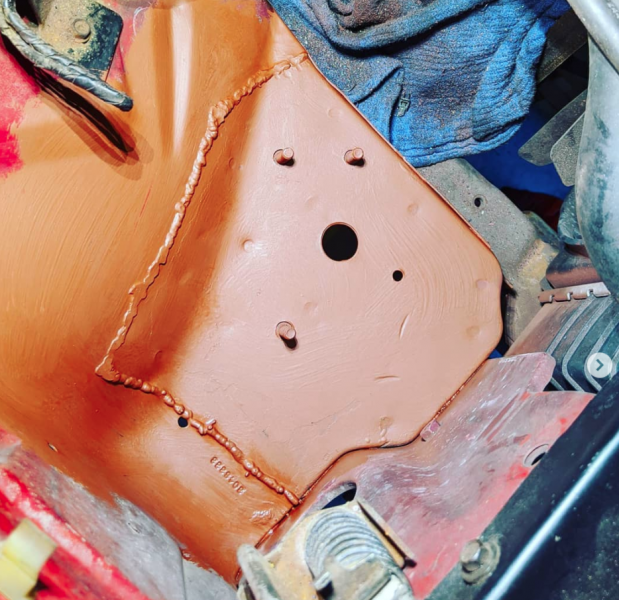
Got the Comanche battery tray all welded in. Recoated it with Rusty Metal primer and then with rust-oleum pro enamel and an added hardener. I had cut out the template for the new piece using the old and because the sides were crushed in, I was off a bit. I had to weld fill some gaps around. I was a little worried about some of the gaps but it actually turned out really great considering. Battery tray project done!Biggest news of all.. that is the last major rust project on the entire truck. We are done fighting rust and cutting metal and fabricating fixes!
-
On the Comanche battery tray project, I carefully cut out the bad, started prepping the new peice to put in. We got it coated with Rusty Metal Primer. Next step is to prep for welding and get it done! Sent from my Pixel 3a using Tapatalk
-
For the badly rusted out battery tray on the Comanche we found this good looking donor Jeep Cherokee at a junkyard in Tomball. My brother and I used a battery powered die grinder with a cut off wheel and cut out the battery area. Man, it was hot but the piece we got was so solid. Can't wait to clean it up and finish the fabrication and replacement! Sent from my Pixel 3a using Tapatalk