

holeski
-
Posts
154 -
Joined
-
Last visited
Content Type
Profiles
Forums
Gallery
Everything posted by holeski
-
Anyone Build an MJ Bed Trailer?
holeski replied to holeski's topic in MJ Tech: Modification and Repairs
I made some good progress over the last few days. This is where I stopped Thursday. I didn't take any pics from Friday. Here is the end of the frame rails cleaned up. I made two of these brackets. Would have been faster to just cut flat plate and weld it, but I thought this was cooler. -
Anyone Build an MJ Bed Trailer?
holeski replied to holeski's topic in MJ Tech: Modification and Repairs
That last on is high tech. :yes: Thanks guys, they are all a help. -
Anyone Build an MJ Bed Trailer?
holeski replied to holeski's topic in MJ Tech: Modification and Repairs
Things are a dime a dozen here in Alaska and unlike the East coast( I'm from NJ) They don't use salt on the road here. The two red ones I have I bought for $700 for both. I also had another on I bought for $700 all running, not well but running. I have a few other buddies building them too. Now parts, even from XJ's are impossible to find in any junk yards. Our bodies stay in great shape, but the cold kills mechanical things like motors and drivetrain. When I was living in Bremerton WA( just outside Seattle) I use to go to this one bone yard. They had a load of MJ's back there. Some in nice shape body wise. I show up one day to see that they are all gone so I ask the owner. He told me he never sold parts off of them, but the XJ sold stuff like crazy so he crashed them and sold it for scrap metal. I told him that they where identical up to the cab and he looked like he saw a ghost. Peat that one you posted is Rad, i really like how he used the subframe. I wanted the cab for another project or I would have done that also. Really I searched the site, must be because he didn't spell trailer correctly. If you guys come by anymore send me the links please. -
Anyone Build an MJ Bed Trailer?
holeski replied to holeski's topic in MJ Tech: Modification and Repairs
Can everyone not see the photos? Here is the thread on my sight, might be able to see the pics there. http://norakor.com/simplemachinesforum/ ... sg8914#new I am planing to use the area under the bed for things like maybe gas tank or water tank. -
Anyone Build an MJ Bed Trailer?
holeski replied to holeski's topic in MJ Tech: Modification and Repairs
Thought more of you guys would be interested in this project or would have made one. Might not look like I did much, but I have planed out a lot of what I need to do. I also looked around at some of the parts I had laying around. I plan on mounting a spare tire, propane tank, jerry can(most likely for water) and a battery on the tongue. I also have to racks I might try to add in there some where. One is a cargo rack for a wrangler, fits a cooler real well. I mounted the 30" Mud Rovers I took off the MJ since no one seems interested in buying them from me. The Tacoma camper shell is like a few inches to short. right now I have $0 into it and hope to get it rolling without spending anything. -
Anyone Build an MJ Bed Trailer?
holeski replied to holeski's topic in MJ Tech: Modification and Repairs
I could set up a hydro quick lock system and set it up to turn with a center lock. similar in rear steer on rock crawlers or monster trucks. OK one thing at a time. This is to be a zero dollar project. -
Anyone Build an MJ Bed Trailer?
holeski replied to holeski's topic in MJ Tech: Modification and Repairs
Here is what I'm working with. I am about ready to go cut now. I would like to make the back half into a camping trailer or something like that. The cab I want to build a truggy out of my spare parts. I was thinking about leaving the gas tank attached to the bed to carry extra gas on trips. The other thing I was wondering is if I could take the front 2wd axle, lock the outer knuckles and use that for the trailer axle in place of the Dana 35. -
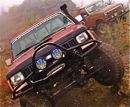
Was wondering if anyone here has built a trailer out of an MJ bed. I have an extra MJ I am thinking of taking the cab, placing it on an FJ 60 frame I have and truggy the rest. I would like to make a trailer out of the bed for my other MJ.
-
hood vents on my XJ How I vented the MJ hood for the scoop
-
About 1.5-2" tall at its highest point. This was off a ford mustang, I found it when I was living in Seattle and had it on my XJ. It wasn't functional when I got it, but I made it work for real, just go to the junk yard and look around. I can't do that here in Alaska nothing worth a crap in the junk yards here.
-
was going to put a hood scoop on the MJ to help with the cooling. I had the opening facing forward on the XJ. I am wondering which way the opening should face to be most useful? The WRX had it facing forward, but I have also seen then facing the windshield. If the opening faces the windshield it should let hot air escape at slow speeds, but push air in off the windshield at higher speeds. I think. So the question is does anybody know for sure and which way do you think looks the best?
-
Staun Internal Beadlocks Install
holeski replied to holeski's topic in MJ Tech: Modification and Repairs
The ones we used we sell for $162.00 each plus shipping. -
Staun Internal Beadlocks Install
holeski replied to holeski's topic in MJ Tech: Modification and Repairs
Yes we run around 30 psi on the street. The beadlocks are kept at 50psi the tire can have up to 45psi in them. -
Staun Internal Beadlocks Install
holeski replied to holeski's topic in MJ Tech: Modification and Repairs
There I was able to make it so you can just click on it as a link and the photo will open in another window, but I can’t not insert them due to the file type the web hosting makes them. No it works on some forums and some it dosen't. The photos don't have jpg. or gif. so on as a subfix. -
Sneak peek of what’s to come!! http://norakor.com/gallery/main.php?g2_ ... alNumber=2
-
Here is another XJ/MJ Bumper we did. This one is for my wife’s XJ and houses a 10,000 lb Bulldog winch with wireless remote installed. Here are some more bumpers http://www.holeproofindustries.com/Fab% ... umpers.htm To see the build up of it check out here http://norakor.com/simplemachinesforum/ ... topic=85.0 You might have to register to see it.
-
Staun Internal Beadlocks Install
holeski replied to holeski's topic in MJ Tech: Modification and Repairs
I know this forum doesn’t support the format of the photos. I’m sorry, to see them you will need to copy the address and past it in the browser or visit us here http://norakor.com/simplemachinesforum/ ... opic=188.0 You will need to register to see it though. Again sorry for that. -
Who's using steering reinforcement plates or braces?
holeski replied to 88MJay's topic in MJ Tech: Modification and Repairs
We design all of our bumpers with similar reinforcing plates. It makes a differing in how steering responds on most XJ/MJ -
I will never buy or recommend a Warn winch to anyone. Crap, crap and crap customer service. We see Warn winches come back to our shop a dozen a year due to problems. I would recommend either Superwinch or Bulldog winches. Only two types we have never seen problems with. Here is my wife’s 10,000 lb Bulldog winch in a bumper we just built for her. We love it. I have the Superwinch Epi9.0 on one of my MJ and that is great. I have a Warn 8,ooo lb on my YJ and it’s been to the shop 3 times for brake problems, not due to use.
-
No they are not the same. The rubi 44 are not true Dana 44 housings. If you need gears PM me and we might be able help you out with a good price.
-
We have the RC 4.5” on our 88 and it’s smooth as can be. We love it. We offer get deals on Rough Country also. Let us know if we can help out. Here is some info on it from our site. http://www.holeproofindustries.com/our% ... esting.htm
-
We can order surplus part for RHD XJ’s. Check wit us here or on Norakor.com. Good luck finding what you need.
-
Wouldn't it be perfect if we could apply high pressure right at the tire's beads, independent of the pressure in the balance of the tire? Staun's Internal BeadLock™ does exactly that. It is literally a specially reinforced mini-tube right next to the bead. Very simply put, a Staun Internal BeadLock™ divides the innards of a tubeless tire into two air chambers. The one nearest the beads holds rubber to metal. This means the remainder of the tire's air space can confidently be inflated or deflated to any pressure you desire bearing blowing it, up of course. We installed a set or #SBLN151012 Staun Internal Beadlocks with 15x10 steel rims and 33x12.5R15 tires. http://norakor.com/gallery/main.php?g2_ ... alNumber=2 Wheel preparation and hole placement are critical to the success of the install. Tools Required Drill 8mm drill bit Drill Punch 12mm Spanner (wrench) 14mm Spanner (wrench) Special Replacement Valve (Included with beadlock) French Chalk (Included with beadlock) Valve Core Removal Tool Deburring Tools (files) You will need to start with a clean rim with no tire mounted. If needed, dismount the tire and clean the rim. If rock rash is present, file or smooth out with a flapper wheel on a 4-½ “ grinder. Inspect rim for trueness and suitability. Only one-piece steel or alloy rims can be used to mount the Staun Beadlocks on. Seek the help of an off-road or qualified tire shop if you need help. Holeproof Industries is a authorized dealer and qualified installer of Staun Products. http://norakor.com/gallery/main.php?g2_ ... alNumber=2 Mark the beadlock valve hole with a center punch. The best position for the beadlock tube valve stem hole is 6” to 8” (15cm to 20cm) circumferentially (left or right) from the standard valve stem and 1” to 2” (25 to 50mm) outboard from the center of the rim. As far inboard as practical, but not in the exact center of the rim. http://norakor.com/gallery/main.php?g2_ ... alNumber=2 Drill your pilot hole, then with the 8mm bit re-drill the valve stem hole. You should use some cutting oil on steel rims. Using a rat tale file clean the hole of any burrs. Ensure that the inside and outside hole surfaces are reasonably flat and parallel to accommodate both tube vale stem O-rings and less than ½” (13mm) thick. Make the deburr chamfer face no larger then 0.070” (1.8mm) to properly receive the tube valve stem O-rings. Both the inside and outside surfaces should be flat, clean and smooth to the touch. Make sure the outside of the rim bead area is smooth, clean and free of debris. A file and wire brush will help with this. http://norakor.com/gallery/main.php?g2_ ... alNumber=2 Using the chalk provide in the kit, dust the supplied inner tube. Also dust the inside of the beadlock case and the back of the air channel flap. Remove the old air valve. Fit the special valve included in the kit into the rim's valve stem hole. Make sure the groove runs parallel with the edge of the rim. Don’t over tighten, or the seals will be damaged. http://norakor.com/gallery/main.php?g2_ ... alNumber=2 Fit the back or inside bead to the rim, either manually or using a tire mounting machine. When lubricating the tire beads for mounting, do not use soap or detergents since they may re-wet and allow the tire to spin on the rim in use. It is suggested that only water or a window washing product be used. Using wooden blocks, or the help of an assistant, elevate the tire off the rim to give you greater access and working space. Insert the back bead of the beadlock case and move the air channel in line with the replacement valve. Minimize the use of tools to fit the beadlock beads over the rim. This may stretch and damage this part of the beadlock and void the warranty. Install the tube carefully starting with the valve stem being pulled though the drilled hole. Make sure the tube doesn’t come in contact with any rough or sharp surfaces. Feed the rest of the tube around the rim inside of the beadlock case making sure not to twist the tube. Place the O-ring, washer and nut on to the valve stem but do not tighten down. Place the air channel flap between the tube and the wheel. Ensure the tags are pulled up and sitting flat against the rim. http://norakor.com/gallery/main.php?g2_ ... alNumber=2 Install the rest of the inner beadlock case bead until in place, don’t worry if it is a tight fit. It will fit with some assistance, but do not over force it or you may stretch it. Run your hand around the beadlock and make sure the inner beads are sitting flat and are not folded under the rim or tube. http://norakor.com/gallery/main.php?g2_ ... alNumber=2 Next fit the outer bead of the tire, making sure you always finish at the vale stems. Pull down the tire bead and check that the air channel flap and valve stem are in line. Also make sure the air channel straps are not between the tire bead and the rim. They must be under the tire bead and between the rim and beadlock. Now tighten up the valve stem on the tube. http://norakor.com/gallery/main.php?g2_ ... alNumber=2 Using a remote air chuck, inflate the tube to pop the tire beads on the rim. Large tires fill slowly when compared to the relatively small beadlock tube. Get acquainted with the filling the beadlock slowly or you may burst. Never exceed 50 psi (3.3 bar) in the beadlock tube. If the beads do not seal with 50 psi in the beadlock add more air to the tire not the tube. Add approximately 30 psi to the tire after the beads have seated on the rim. Remove the valve core and check for good airflow through the valve. Completely deflate the tire, then remove the tubes valve core and deflate the beadlock. If you do not have good airflow the beadlock channel is seated in the wrong place and you must break the tire down and try again. If both the tire and beadlock deflated properly, reinstall the cores and inflate the beadlock to 50psi and your tire to its normal pressure. Tire pressure can be no greater than 5psi less than the beadlock. http://norakor.com/gallery/main.php?g2_ ... alNumber=2 The maximum beadlock pressure is 50 psi and must always be at least 5psi higher than the tire pressure. Wheels with the Staun Internal Beadlock system look no different than any other wheel, except there is a second valve stem. They are street legal, help to prevent blow outs, and act as run flats saving expensive rims from damage if there is a flat. Thry are able to be balanced the same as any other tire. Anthony Rizzo of American Tire & Auto in Fairbanks, Alaska helped us in balancing them. http://norakor.com/gallery/main.php?g2_ ... alNumber=2 Perfect balance with the Staun Beadlock installed in the tire. Mater of fact out of 5 wheels 4 took fewer weights to balance with the Staun Beadlocks than without them. Our ride home was 65% better than before. http://norakor.com/gallery/main.php?g2_ ... alNumber=2 Our special thanks go out to Harry Lewellyn of Staun Products and Anthony Rizzo at American Tire & Auto. http://norakor.com/gallery/main.php?g2_ ... alNumber=2 http://norakor.com/gallery/main.php?g2_ ... alNumber=2 Staun Products can be purchased through Holeproof Industries Holeproof Industries 907.490.2477 www.holeproofindustries.com sales@holeproofindustries.com Staun USA Inc. 949.645.7733 www.staunproducts.com harry@staunproducts.com Anthony Rizzo American Tire & auto 3101 S. Cushman St. Fairbanks, Alaska 99701 907.450.1258 www.americantire.net
-
Here is another one I just did for my wife Jeep. Still need to add tow points and paint. http://norakor.com/gallery/main.php?g2_ ... alNumber=2 http://norakor.com/gallery/main.php?g2_ ... alNumber=2 I start aother one today for our shop MJ. I can't get the photos to hotlink. :redX: You can also look here on my forums. http://norakor.com/simplemachinesforum/ ... topic=85.0
-
Well the cage would be around $700-$1000 to make plus shipping. It would be cheaper for me to cut, bend and notch to fit but not weld for shipping. Now if you drove up here to the shop I would cut you one heck of a deal. So come visit. If you are really interested we could get some shipping weights and quotes for a $25.00 fee that would be put toured the cage if you ordered.