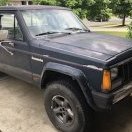
moongah Posted October 15, 2019 Posted October 15, 2019 I'm planning on repainting my 88 MJ back to the original Dark Baltic Blue Metallic (HQ9). I'll be doing the prep and paint at home using my HVLP but this will be the first vehicle I have painted. I have a few rust spots that I'll weld in patches. I'm looking for advice in a couple of areas: 1) Anyone have experience with color code HQ9? Who did you order from and how true was the color? 2) Advice on prep/paint process. I don't want to do the 37 step Eastwood process on youtube but not a rattle can job either. What's a reasonable middle of the road? 3) Any differences in prep for mix of new metal and existing painted metal? 4) From actual experience, how much paint was required for a LWB? 5) Are there any original diagrams for logo placement? I've seen some differences in opinion in the forums especially regarding the 4x4 logo and Pioneer logo. I think I have all the correct parts just want to get them installed in the original locations. Thanks in advance. https://comancheclub.com/topic/59780-1988-jeep-comanche-rebuild/
rylee144 Posted October 15, 2019 Posted October 15, 2019 I got that color code for my tailgate Matched well. Got it from westco. Only did the tailgate so I got 1 spray can, wasnt cheap.
fiatslug87 Posted October 15, 2019 Posted October 15, 2019 pm an email address and I'll send you the '87-90 parts manual pdf that shows all the graphics and emblem locations (section 23). also look at this:
Smokeyyank Posted October 17, 2019 Posted October 17, 2019 Proper Prep and a clean area to work in are HUGE! Honestly if you want it look semi decent it takes a lot of work. It will make or break your results. The paint is only going to be as good as the surface you spray it on. So if you outside and stuffs blowing everywhere it will be impossible to get a good paint job. You don't need to have a fancy booth but a sealed off work area and limited positive airflow are key. Also you'll need to be mindful of the temp and humidity. Basics are going to be...... Repairing/replacing any old rust. If you're going to be welding in patch panels take your time because you can warp the metal. Sand off all the old clear coat. You don't need to bring it to bare metal(except wherever you're welding) but need to get rid of the clear along with any old decals or old glue. Once you got the bones right you're gonna need to put filler in the necessary spots. For the any patches you'll need a heavier filling bondo. Try to keep it around 1/8th of an in no more than a 1/4. Any small areas a skim coat is sufficient. Then it's just sand, fill repeat until its smooth and level. So assuming you got all the rust areas fixed, dings gone and a smooth surface you're going to mask anywhere you don't want paint. Remove the parts the you can to make life easier. Getting some good masking tape makes a world of difference. Once its masked you're ready to shoot primer. First should be a good fill primer. Probably 1-2 coats. Then block sanding everything to nice and smooth. If you notice any areas that are wavy or need some more body filler touch those up any repeat with primer sand again until smooth. Once you have a good base of filler primer and have block sanded move on to a thinner finish primer. Again spray a coat block sand. You'll need to be moving up in grit. Make sure to keep the surface clean and not letting dust sit around. Now you're ready to paint. Make sure to put and inline dryer and proper pressure regulator. Temp, humidity, paint and tons of other little variables go into how you'll mix it. Once it's in the gun focus on spraying in long, light coats. Try to limit your wrist movement and focus on just moving your arm. Once you have 2 coats down. Move on to wet sanding with a block moving to a higher grit 800-1000ish. Spray 2-3 more light coats wet/block sand again moving up again. Finish up around 2k grit. Once your paint is down and its smooth final part is clear. Same as above for paint but clear isn't as forgiving for runs. Spray and wet sand. 2-3 coats is all you'll need. Wax it up and enjoy the shine! If you want to cut steps it's the block sanding. That really adds the depth and smoothness to the finish. The rest you really can't cut corners or simplify unless you go with a 1 stage paint.

Recommended Posts
Create an account or sign in to comment
You need to be a member in order to leave a comment
Create an account
Sign up for a new account in our community. It's easy!
Register a new accountSign in
Already have an account? Sign in here.
Sign In Now