Dirteatr717 Posted March 2, 2014 Posted March 2, 2014 You sir are a perfectionist for sure, maybe ill lend you my truck for a week :D I've searched around for those European marker lights and can't seem to find where to buy them.. I've seen them on team Cherokee years ago but can't find them on there now, Got a link? Keep up the great work!
RockMJ Posted March 3, 2014 Author Posted March 3, 2014 Hey man, thank you but she is far from being where I am happy with her haha. I have looked at several vendors over time and they seem to carry them then not carry them. At any rate, I got them from Quadratec and I have included the links here -> (DS / PS). So I stayed true to my word and am sorry I did. The moon roof restore turned out to be an absolute nightmare not because the job was difficult, but everything seemed to fight me tooth and nail. Seemed like it was just one of those damn days where you cannot win no matter what. Anyways, the job entailed getting the moon roof out and stripping it off all the urethane, household caulk, dirt and grime, old seal, and flaking powder coating. Lesson learned, when you are in a pinch and do not have a professional grade caulk gun do NOT purchase one from Advance Auto. I was in a hurry and did not want to go back home to get my good one and I paid the price big time. Two minutes into using the Advance one the handle bends in half rendering it useless. I love throwing money away. Yippee! Because of this I had to apply the urethane with a flat head screw driver and smooth it in with my finger. Not the way you want to do things. Onto the details... Started the day with popping the old moon roof out. Glad I never drove the Jeep because it was barely in there and I was able to remove it with almost zero effort. Removing all of the old, dried up urethane was relatively easy but the fun started when trying to get all of the household silicone caulk off. I wished I kept the PO phone number so I could ask him what he was smoking the day he decided to do that and if he had any left lol. The glass, moon roof frame, and roof were coated in caulk that refused to let go. The stuff was on there and on there good. I managed to get most of it off the roof and all of it off the frame and glass. Thank God! They had laid the stuff on so thick I had to cut the glass away from the frame and pick the seal out piece by piece. Once all of that was done I got down to stripping the frame for paint. Most of the powder coating flaked off with a single pass of the stripper blade but some sections I had to hit heavily to get it off. To this point I was into the project about 3.5 hours and I was finally at the point I could start disassembling the hardware from the glass and frame and start prepping for paint. The underside of the glass had some ancient purple tint on the glass that I also took off and cleaned the glass up. That old tint glue is a royal pita to get off let me tell you! I was able to get the hinge brackets off the glass but the handle portions would not come off so I had to paint the pieces still attached. Had a bit of a tough time trying to figure out how the seal went into the frame, but I finally figured it out. The old seal was of no help so I had nothing to reference but it went in easily. Stuck a bead of urethane around the frame to hold the seal in place then hit the bottom of the frame. Really sucked scooping the urethane out with a flathead and applying it and smoothing it with your finger. I hope I put enough on the frame to seal it to the roof but time will tell. All in all, its a big improvement over what was there and for it costing me around $65.00 in parts and an afternoon of work, I consider it a success. Onto the pictures! What I started with... Cleaned these up so they would seal up nice and tight! I still need to clean the old stuff off the roof but I was running out of time to get everything done. Next time! Pretty happy with the results! I think you can probably tell that by all of the pictures lol. More to follow. RockMJ
RockMJ Posted March 4, 2014 Author Posted March 4, 2014 Over the weekend I tracked down the latches I will be using when designing the drawer and storage system in the bed of the MJ. Took me a good while to track down ones I was happy with and locking for that matter. These things are really nice and are called marine grade slam latches if anyone is curious! Found two options so I will have to order up one of each and see which fits the overall flow better. Option #1 Option #2 Both are basically the same design and concept but quality and durability are important to me here. These being flush mounted will allow for a nice smooth surface to sleep on. The idea in my head is slowly transitioning into reality. And I mean, really, really slowly. Still progress I suppose. And on a similar note, I found the brake pedal rubber pad I ordered to replace my worn out one. Ill have to install that tomorrow when I am up at the Jeep. RockMJ
Guest Posted March 5, 2014 Posted March 5, 2014 :popcorn: Loving the build so far. Funny story, I actually seem to remember seeing this very same truck for sale about the time you picked it up, I'm assuming. I was actually going to go look at it myself! :yes: I wish you all the best in your endeavours with this Eliminator. Getting to drive it around after so much work is such a great feeling. This gets me motivated to hurry up and finish mine so I can stop driving around the Grand Cherokee. :brows: :wrench:
RockMJ Posted March 5, 2014 Author Posted March 5, 2014 :popcorn: Loving the build so far. Funny story, I actually seem to remember seeing this very same truck for sale about the time you picked it up, I'm assuming. I was actually going to go look at it myself! :yes: I wish you all the best in your endeavours with this Eliminator. Getting to drive it around after so much work is such a great feeling. This gets me motivated to hurry up and finish mine so I can stop driving around the Grand Cherokee. :brows: :wrench: Its a good possibility! She was for sale outside of Orlando and listed on Craigslist about a year ago. I am glad you didnt go look at her because I would be without an MJ haha! I saw a picture of your two Jeeps together. I did not realize you have a 9'er as well! I regret ever selling mine and here is the reason why... She was one hell of an amazing Jeep and it still kills me today that I let her go. You live and you learn right? On an MJ related note, I will be ordering up a host of parts soon and I will be picking up my set of Moab's this Friday. Slow forward progress but progress none the less. More to follow. RockMJ
RockMJ Posted March 5, 2014 Author Posted March 5, 2014 Looking back at those pictures made me get all nostalgic. I won best of show at the Jeff Daniel's Jeep Show 2009 with that 5.9. Ahh, memories! RockMJ
RockMJ Posted March 6, 2014 Author Posted March 6, 2014 Things for the MJ currently on order: - Energy Suspension Complete Master Suspension Bushing Kit - Fuel Pump Assembly - Coil Spring Isolators - Coil Spring Spacers (BB) - OEM Moog Trac-Bar - Putco Headlight Harness H4/9003 - Harmonic Balancer - Serpentine Belt - CPS (Not bad, but replacing all the sensors) - Replacement Fan Shroud - Floormats - Windshield Trim Clips - Topper Clamps & Gasket Ill be picking up the Moab's this Friday and hopefully be able to snap a few pictures of them. Its been about 8 months since I have seen them and I cannot really recall the condition of the wheels. I know the tires are shot and I recall the wheels being in pretty decent shape. Either way, plans are to refinish them in a gunmetal color so condition of the paint is a moot point. This weekend I plan to get a few more things painted and cleaned up as well as hopefully installing the harmonic balancer, serpentine belt and CPS. Once the fuel pump is in I am confident the Jeep will be smooth as silk. After all of this is done, next things to tackle are the exhaust system and finish the interior (headliner, replacement trim plastic caps, speakers, speaker baffles). More to follow! Edit: I ended up cancelling the order for the XJ fuel pump assembly and just buying the individual parts to rebuild mine separately for much cheaper. Ill be doing a small write up on the process of swapping it out as well as the part numbers and parts used for the rebuild. I did pick up the Bosch unit with an Airtex strainer as well as a lock ring kit to make life easier. Part Numbers: Bosch 69302 Fuel Pump Kit Airtex FS104 Fuel Pickup Kit Spectra LO01 Lockring Kit w/Seal RockMJ
RockMJ Posted March 7, 2014 Author Posted March 7, 2014 Got my hands on the "new" wheels last night. Still have to get the fifth one but I am pretty happy with the purchase. The tires are 265's so it will give me a good idea as to fitment on the MJ. As you can tell from the picture, the tires are junk and some off brand I have never heard of, yet they are still better than the ones currently on my MJ. Go figure. Plans for this weekend are to install the new harmonic balancer, new serpentine belt, new coil spring isolators, new coil spring spacers, and new tracbar. Its going to be a busy Saturday for me but I will hopefully have help to get it all done. I will likely test fit the Moabs and bald tires to get an idea how I like the 265's on there with the 2" BB. If the tires fit pretty well I can focus on getting some Bilstein shocks under the Jeep and move onto the bigger things. Not planning any lift other than a spacer for the front and re-doing the OEM suspension with all new bushings and parts. I also think I figured out the roof rack system for on top of the Leer. I will have to update this when I have more information. More to follow. RockMJ
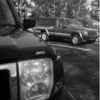
Wrz Posted March 7, 2014 Posted March 7, 2014 Looks good here's a pic of mine with the moabs and 265 cooper a/t's so you have an idea I can take a side shot if wanted, all I have currently is this one
RockMJ Posted March 17, 2014 Author Posted March 17, 2014 Well, its been a busy two weeks for the Jeep and myself. Between work, writing music, and working on the Jeep I have not had a moment to stop and think about just how busy I have been. Pretty tired actually. The upside to all of that is that the Jeep has gotten that much closer to driving. This past weekend I did the front polyurethane bushings for the entire front suspension including new sway bar parts minus the bar itself. Only things left to do are install my upper axle bushings with the new Moog units and replace the shocks then the front end is entirely gone through and updated. I also took some time to adjust the NSS so my reverse lights consistently work. Might end up taking the NSS down to disassemble and clean as the Jeep will not start in neutral (never has) without some jiggling of the linkage. Not that big of a deal right now since she starts up everytime, but it would be nice for it to function as normal. I also spent the weekend prior putting in the front coil spring spacers, OEM isolators, Moog trac-bar, harmonic balancer, new idler pulley, and new serpentine belt. I also cleaned up all the pulleys while everything was apart as well as the AC compressor clutch so its finally not sticking anymore. The Jeep runs and idles beautifully now without any weird noises coming from the motor. Even being exhausted after all of this these past two weeks I can sit back and enjoy it all. Next things on the list to tackle before she is road worthy are the rear suspension bushings, Bilstein 5100 shocks at all four corners, front bumpstops, OME steering stablizer, Bosch fuel pump, and front upper axle Moog bushings. This is all the purely mechanical parts I have left to tackle before she is up to my standards of "good enough" for driving. Once this stuff is out of the way I will focus on the cosmetics of the Jeep. I did, however, get the Leer topper adjusted, bolted down, and un-dented the aluminum back door so it closes properly now. All is well and the camper is happy to be a permanent part of the Jeep! I did not really take any pictures of the front suspension project this past weekend as I was working by myself to re-do the entire suspension. Maybe if I had a third arm I could have snapped some more pictures. Trick to getting the old bushings out was to core them like an apple with a hole saw (1" and 1.25" sizes) then pry the rubber bushings out. Doing this enables easy mode and you can move onto Level 2: Reinstall lol. More to follow! Correct me if I'm wrong here, but the sleeves should not just fall out of the bushings right? Had that happen on two of them. Probably helped contribute to the Jeep handling like a rudderless boat lol. RockMJ
RockMJ Posted March 17, 2014 Author Posted March 17, 2014 Looks good here's a pic of mine with the moabs and 265 cooper a/t's so you have an idea I can take a side shot if wanted, all I have currently is this one Thanks a ton man! I didnt see this post until now. I got the 265's on without any fuss and all that was required was a 2" spacer up front. Jeep sits perfectly level and looks proper. I will have to get it out of the garage and snap a few pics. Maybe actually wash it for the first time as well... RockMJ
RockMJ Posted March 18, 2014 Author Posted March 18, 2014 Nothing exciting, but I guess if I am doing a build thread I might as well document the small things. New brake pedal pad is installed lol. I also put my new rubber Rugged Ridge floor liners in. I had them in my last MJ and they did the job for a good price. At some point ill update the thread with all around photos likely after I wash it. More to follow. And yes, for the observant, the lower bolt for the gas pedal is broken off. Not sure when or how it happened but it wasnt there when we went to take the carpet out. Need to make a note to replace that before I forget! RockMJ
RockMJ Posted March 18, 2014 Author Posted March 18, 2014 I will be replacing the engine oil pump, rear main seal, oil pan gasket, and checking the torque on the bottom end in the coming weeks. The engine has become relatively quite except on start up. I am getting a ton of chatter from the top end until the oil reaches everything so my guess would be the oil pump isnt doing its job. After replacing the oil pressure sending unit my pressure reads about 40 under acceleration and drops to 25-30 at idle. If I start the Jeep, get the chattering and it goes away and shut the Jeep off and restart it there is no noise and it sounds absolutely perfect. On initial starts after sitting for a while it sounds horrendous. Better than it was but certainly not acceptable. That will be my next big chore after getting the suspension finished and fuel pump in. More to follow. RockMJ
RockMJ Posted March 18, 2014 Author Posted March 18, 2014 Decided to take a video of the engine chatter for you all to hear. Pretty sure its just a worn out oil pump but maybe someone else has some input that I was unaware of. Link below. https://www.facebook.com/photo.php?v=10152055566634998&l=7723704266444105533 RockMJ
Pete M Posted April 19, 2018 Posted April 19, 2018 all the pics are gone. anyone have a contact for him? he hasn't responded to email.

Recommended Posts
Create an account or sign in to comment
You need to be a member in order to leave a comment
Create an account
Sign up for a new account in our community. It's easy!
Register a new accountSign in
Already have an account? Sign in here.
Sign In Now