Stacks Posted May 10, 2014 Author Posted May 10, 2014 The intake manifold is being replaced. Just need to wait for the replacement to get here. Hehehe... it's kind of a novelty to have a rig that fires up almost instantly when you hit the starter after the extended crank time necessary on the RENIX engines. Not sure if I can get used to that or not!! lol Larry
Stacks Posted May 15, 2014 Author Posted May 15, 2014 The intake manifold came off this afternoon and will ship back to Clifford tomorrow and the replacement will ship this way tomorrow also. I did a quick short video of it starting and running before I took the intake off. Hopefully I can get it to post here. The audio isn't real good for some reason but... oh well. The stacks aren't hooked up yet so it's just running thru the mufflers.
Stacks Posted May 30, 2014 Author Posted May 30, 2014 Finally have a throttle and trans linkage setup that works for both... at the same time even!!! lol Had to rotate the carbs 90* and fab up a complete new linkage. This puts the float bowls where Weber recommends too!! The last auto trans rig I owned was my first car, 1956 Ford 2 door, 292cid. back in 1967. It will take a bit to get used to an auto trans again! Headed to get a small sheet metal brake today so I can make the hood scoop. Only about 30 miles on it so far.
Stacks Posted June 22, 2014 Author Posted June 22, 2014 The scoop finally arrived and is mounted for now. Now I can get the MJ out of the garage and into the rain and move on to another project for a bit. Have a few more things to do on the MJ, floor boards, front drive shaft, (needs to be shortened) rear axle seals and bearings, (seals leaking) finish axle disconnect, fabricate a new console and install emergency brake cables. Oh.. and paint... no idea what color it will end up; probably a dark metallic brown or metallic black. Either color with yellow accents/stripes. I will also re do my add on gauges to look a bit less mickey mouse. Function over form for right now!!
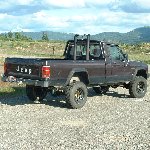
Lowly Posted July 20, 2014 Posted July 20, 2014 Okay was looking at your roll bars did you make your tie down bracket from scratch? I am thinking about doing my own roll bars and wanted to know anything more about your tie down bracket. Dimensions, or measures, anything really thanks.
Stacks Posted July 20, 2014 Author Posted July 20, 2014 Unfortunately I don't have dimensions on the one I built. I did it as I went. On the second page of my build thread is a graphic of the factory hold down bracket. It is three pieces. Well four if you count the bedside plate that fits the ribs of the bed. I didn't find that til after I had made mine. The location that it mounts to is already on the frame. That is the part that is circled in red in the photo. I built the bottom section of my roll bar with the bed side 'foot' and drilled the holes in it and then made the rest to fit. About the only dimension I could get for you would be the hole spacing on the bed side 'foot'. Just measured the foot. 4" wide left to right and 5" long front to back. The front edge is approx 5/8" from the front of the box and 1/4" from the side seam. This keeps the bed drain exposed. Hole spacing front to back is 3 5/8" and the holes are 3/4" in from the inside edge. Spacing left to right is 2 3/4" and 1/2" in from the outboard edge. The foot is 5/16" plate as is the bracket underneath. Used that cuz that is what I had in my scrap pile. lol No idea how heavy the factory bracket is. Someone should pipe up with that info. The bolts thru the foot are 3/8" stainless and the rest of the hardware is stainless too. Don't remember the size for the ones underneath. Alignment is a bit touchy cuz you are lining up three holes when you put the bolts thru the bed so be careful on your dimensions there. The spacing you use could be different from what I used so no biggie to use what fits for you. My roll bar is just cosmetic, 2" black iron pipe with 3/16" wall thickness. Definitely not adequate, I don't think, to be a real functional roll bar. I hope I've reached an age that I don't get to test it!! lol I do seem to be a bit more wussy these days when I'm out playing in the hills and rocks. If you have any other questions give me a holler and I'll do my best to answer them or point you to where you can find the answers. Have fun!! Larry
Lowly Posted July 21, 2014 Posted July 21, 2014 Thanks very helpful last thing did you take the bed off to install the tie ins? I was poking around underneath mine and on the driver side with the gas tank and all seems pretty hard to do unless you take the bed off.
Stacks Posted July 22, 2014 Author Posted July 22, 2014 I didn't take my bed off. If you look again, all the bolts are outside of the frame rail so the gas tank does not interfere at all. The factory bracket that is already there sits pretty much on the center line left to right and front to back of the bedside foot.
Stacks Posted February 5, 2015 Author Posted February 5, 2015 Long overdue on an update... my apologies. I have about 3000 miles on the new motor. Still fussing with timing and advance curve a bit. Broke down and bought a wide band A/F ratio gauge. I have all my 'extra' gauges mounted but they need to be cleaned up some before I can bring myself to show them to you guys. It was very much function over form initially! lol Yes... I'll admit I'm a gauge freak. I've added 6 more gauges besides the factory ones. Several are duplicates but monitor from different locations on the engine. I've added a vacuum gauge, A/F gauge, mechanical oil pressure gauge, mechanical engine temp gauge, mechanical trans temp gauge, and a volt meter that reads straight from the battery. I've got the scoop blocked off for the winter to keep snow out of the engine compartment. Just used black duct tape but will figure something out that is more permanent for the purpose. Also plan on re-doing the bolts that hold the scoop on. Want to run them up from the bottom and use brass acorn nuts on the top just for cosmetics. The rust issues in the floor boards are fixed. Just looked for pix but I guess I didn't take any. One of the next projects is to build a console cuz the Hurst shifter that came with the trans sits quite far back, the rear of it's housing cover is between the front edge of the MJ bucket seats. I need to re-do the front axle mechanical disco. I prefer using it cuz I like to use 2 Lo for putting along on woods roads. Been looking for rear fender well liners but may just sand blast them and use under coating or Herculiner or some such. Still contemplating going to 3.73's. My peak torque is now a bit higher than before and I do have some 31x10.50's I could put on it later. Actually the mags and tires off my TJ. :) Working on ideas for skid plates for engine/trans/Tcase. Looking at adding more diamond plate below the front bumper to help protect the steering stuff etc. Most of this is warmer weather stuff. Yeah... I know... I've become a wuss when it comes to working in an icy cold garage unless it's absolutely necessary!!! lol There's also the issue of all my other hobbies. Been fussing with my little 7x10 mini lathe, reloading ammo for the coming gopher season, playing with the ATVs and working on the mechanical drawings of the stuff I've built for the MJ etc. And... working on the design of my version of a Gerstner wood machinist's tool box. Whew... being retired sure can keep a body a little busy!! lol Hope everyone has a great spring!!! Larry

Recommended Posts
Create an account or sign in to comment
You need to be a member in order to leave a comment
Create an account
Sign up for a new account in our community. It's easy!
Register a new accountSign in
Already have an account? Sign in here.
Sign In Now