MancheKid86 Posted March 26, 2010 Posted March 26, 2010 lol, rustoleum will do the trick then, and looks atleast twice as good as por 15 :thumbsup: plus comes in more of a variety :shake: **EDITS** i noticed that you front cross member is missing? are you replacing it with a stronger one? even though it doesnt look like much support, it is a crucial piece
wannabeMJ Posted March 26, 2010 Author Posted March 26, 2010 lol,rustoleum will do the trick then, and looks atleast twice as good as por 15 :thumbsup: plus comes in more of a variety :shake: **EDITS** i noticed that you front cross member is missing? are you replacing it with a stronger one? even though it doesnt look like much support, it is a crucial piece yeah I took everything out to fix and repaint the truck I'm also putting a 4.0L instead of the old 2.8L so Ill be changing the rad (will take the cross member from the donnor)
wannabeMJ Posted March 27, 2010 Author Posted March 27, 2010 I started on the floor pan today iknew it was rusted but not that bad I started to grind and cut the floors here is a couple of shots of what it looks like now PS Image Not Found REAR PS Image Not Found front PS Image Not Found tranny hump Image Not Found I still have to finish tommorow before I can start to weld I'm glad I won't have to do the PS I will give it a good sanding to after I'm done with the angle grinder (god I love working with that tool) then Ill start cutting the pieces do you guys have any ideas for the support beam it seams pretty bad :dunno:
Automan2164 Posted March 27, 2010 Posted March 27, 2010 What did you use to clean up/ prep the frame? Rob L.
wannabeMJ Posted March 27, 2010 Author Posted March 27, 2010 wire brush on a angle grinder and a degreaser witha lot of elbow grease I was lucky the rear frame had no rust on it unlike the the cab :wall:
wannabeMJ Posted March 27, 2010 Author Posted March 27, 2010 well the passenger side is all done and awaiting for paint tommorow here is a final look I also repaired a small part on it because as I grinded and sanded it started to makes holes I don't have pics of when I welded the piece but its all good and the white stuff is seam sealer Image Not Found
wannabeMJ Posted March 31, 2010 Author Posted March 31, 2010 I got to say when I bought my mig welder i wasn't sur but with the progress I made with my welds today I'm quite happy with it (and my welds) I finished the flooring today I've put seam sealer so its got to dry tonight and I will paint it tommorow well I'm gonna paint the whole flooring here is how it went first the cut out piece for it these are the holes that I made to spot weld it (verry good trick one of my buddy told me to make this easyer) after I started welding finished welding with the seam sealer at the end
wannabeMJ Posted March 31, 2010 Author Posted March 31, 2010 tommorow should be a busy day I will paint the floors and if it dry fast enough I might have time to put the insulant that I saw in an other post viewtopic.php?f=7&t=16945&p=230673&hilit=insulation#p230673 about mid page and I also got the bubblewrap insulation with the foil on each sides Hope you guys enjoy this post for my truck so far
wannabeMJ Posted March 31, 2010 Author Posted March 31, 2010 some pics of what I've done this morning
wannabeMJ Posted April 2, 2010 Author Posted April 2, 2010 pics doesn't seem to wanna go on what the hell :redX: can an admin tcheke this they work on a nothyer forum ..........
wannabeMJ Posted April 2, 2010 Author Posted April 2, 2010 well I reedited all the pics they should work for now and here is what i did today I bought these copied an other member of CC and here is what I ordered
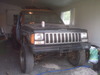
wannabeMJ Posted April 3, 2010 Author Posted April 3, 2010 today I worked on the rear end putting the AAL on but alone ( my friend didn't show up to busy getting laid ) so with a lot of :wall: and a lot of and some more of :fs1: I manage to take the leafs appart and put the AAL on and put the tires back on tommorow I'll be doing the front coils and LCA and maybe putting the new ''used'' 35'' to see what will be the final height of the truck AS soon that I will be done with the whole thing I will post something in the DIY section well I started with a 4.5'' lift but will probably end up with a 6.5'' if I can't fit the 35's here's a pic of what it'll look like and see if the truck will still fit in the garage door lolllllllll
wannabeMJ Posted April 18, 2010 Author Posted April 18, 2010 after being gone away for the last 2 weeks I started working on the truck again I strated taking apart the XJ I got all the interior out and started painting all the parts Image Not Found and I also got the carpet out of the XJ to put in the MJ I know its not a perfect fit but it'll do the job just fine the only prob was that the damn thing was soaked lolllllllll so I got to let it dry before I put it in Image Not Found and I also took out the white backing that looked like a giant tampon
Automan2164 Posted April 18, 2010 Posted April 18, 2010 What kind of paint did you use on the interior panels? Rob L.
wannabeMJ Posted April 18, 2010 Author Posted April 18, 2010 trim paint for plastic I used the same stuff in my YJ and it lasted since I builted it 3 years ago it dosn't scrach or peel so far so good and it looks great I don't know about colors but I like black interior and it will cover any colors so I go with black trim and grey carpet and seats since I can't paint those lolllll
wannabeMJ Posted April 18, 2010 Author Posted April 18, 2010 here is the dash that I just painted 5 min ago Image Not Found and here is the paint that I use Image Not Found
wannabeMJ Posted April 25, 2010 Author Posted April 25, 2010 Today I use the great temperature we had in Alberta to good use me and my budy for calgary came down to give me a hand with this so we finished taking everything off the motor in the XJ to pull it out the only major prob we encountered was the passenger side motor mount bolt was entered from the back but the oil filter is in the way so we ended up taking the whole bracket off to take the motor out on this one we can see what we fished out what a nice catch ho and by the way thats me and finaly the engine is in with a bit of :hmm: and some :wall: but luckily I had a late 86 so no massaging the fire wall
wannabeMJ Posted April 27, 2010 Author Posted April 27, 2010 as I'm reputting everything together I also encounter some probs first the tranny support wasn't the same so had to change that prior to installing it then I remembered that the bolts sheared right off so I was kind of :hmm: but then after putting the cross member on the tranny, I noticed that it didn't fit at the same place anyway then I tought that I bought a tap set :banana: gonna put it to good use for the first time then I redrilled and tapped here's what it look like then I was pissed at my cordless drill and went and bought a cord one but didn't have time the next day to finish more to come soon as I finish to install all the wire harness and the front end
wannabeMJ Posted May 1, 2010 Author Posted May 1, 2010 today I'm replacing 1- the timming belt 2- the water pump 3- the thermostat housing hopefully everything will go smooth
wannabeMJ Posted May 4, 2010 Author Posted May 4, 2010 got to work this weekend on the truck did pretty good things changed the thermostat the water pump and the timming belt I also installed the rad had to do major mods to the front end to fit it in there this is what I had to cut to fit Image Not Found Image Not Found both side had to be cut about 5'' to fit the rad on top of what is already cut in the other pics with the rad in and the bumper Image Not Found the new timming belt Image Not Found
wannabeMJ Posted May 4, 2010 Author Posted May 4, 2010 some more pics comming soon with the work ill do this week

Recommended Posts
Create an account or sign in to comment
You need to be a member in order to leave a comment
Create an account
Sign up for a new account in our community. It's easy!
Register a new accountSign in
Already have an account? Sign in here.
Sign In Now