

krustyballer16
-
Posts
2301 -
Joined
-
Last visited
-
Days Won
6
Content Type
Profiles
Forums
Gallery
Everything posted by krustyballer16
-
 And I got these lasered out at work today :) 2 front bumper brackets (light duty), 4 hitch plates (2sets) and 1 set of leaf spring perches for an axle swap for my brother in laws comanche.
 -
My dad has read all the reviews and fixes and ways to set em up and we've tried it all. It goes into I think 4 low but then won't move. Have to get underneath and move it on the Tcase. If I woulda looked into it more I coulda made the whole set up myself. But thought this would Dave some time and hassle...I don't know though. We'll mess with it more in a couple weeks when I get it back.
-
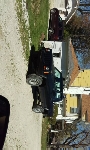
finally took my truck to the painter's today! my dad still has to go and sand some of it but hopefully itll be done in a couple weeks! yay
-
my dad got the RedlineTuning hood struts put on this week. it was simple and they work pretty well. he also installed the boostwerks transfer case shift linkage. as it is right now I'm not really that impressed with it. very hard to shift and they said it might require modification of their linkage. it might eventually get worked out right but as of right now,....ehhhh.... in put an inline fuel/water separator filter. it sat down pretty far below the frame (probably not anymore than filters on factory diesel trucks) but i didnt know how it would be with this truck (rocks flying up at it). so i made a little surround for it. just used 2 self tapping bolts i had from a JCR bolt kit got my seat reupholstered too...
-
Thanks. And all the body work is my dad. I just welded it all in (some of the hard part) and he's made it all look great! There's actually not as much Bondo in it as I thought we would need with all the dents in the bed and with replacing cab corners and rockers. I'm happy with it so far.
-
here is the factory flare next to the one i shaved the ridge off of (looks rough in the picture, its been sanded more and smoothed out) here are all the holes that showed up on one flare after i sanded the ridge off... i found some "adhesion promoter" to spray on the bare flares then put bondo or something in to fill the holes and smooth it out. old update.... our painter is busy for the next couple weeks so were gonna sand all the dark grey sealer off down to primer and finish up a few small things before it goes to paint. its getting there, slowly, but its moving along.
-
And I never really noticed it that much before but the truck is 4" higher in the rear than the front. according to the wheel wells. With 235s, from the top of the tire to the wheel well where the flare mounts is 13.25" of clearance. The front has 9". The truck just looks so much more massive now than I remember it being... Lol. Idk what the best solution is to make it more level...remove a leaf or add a coil spacer...
-
I don't have any pictures yet, because they aren't done yet. One of them had a couple air bubbles in the mold and they showed up when I shaved them down. So gotta figure out a way to get rid of them... And I used an 80 grit wheel on a grinder first to get pat of it down then a 2" 36 grit pad on an air grinder to get it pretty flush then I used 150 and 320 grit sand paper to get it pretty close.
-
And I really hated to do it but I shaved the rear fender flares to match the front new style flares....
-
so I'm probably one of the few people (if not the first) that has had to modify their hood catch... modified/factory the catch was hitting the front most bolt head of the hood catch "striker" and wouldnt go down inside the hole under the striker without pushing it over. and the hood was where it needed to be at (as square on every edge as it was going to get) so i cut the catch arm off and moved it back 1/4" so now it hits perfectly in the center of the striker and hole. I'm guessing its from my truck being wrecked in the front and everything got set back just a little bit. which brings us to my next modification... drivers side front bumper mount. the bumper needed to go down 1/2" and out 1" so i had to make new holes in the mount. (don't mind the 2 round holes. i wasnt thinking and went the wrong way the first time) the holes running up and down in the pic are the new holes. and on the top holes i had to cut the side of the mount and bend it back. since this pic i have welded up the old holes and around where i bent the side down. good to go now! the rest of the truck is mostly put back together to paint (body panel wise) and its going to the painter this week!!!
-
indiana junk yards have been good to us. i think we have 5 or 6 good pairs and a couple that would be ok as replacements if we were to sell any.
-
1997 cherokee windshield in a comanche?
krustyballer16 replied to dirtyoldjeeper's topic in MJ Tech: Modification and Repairs
Would anybody know how much shipping would be for that trim from Denmark back here? It won't let me see the shipping cost until I "commit to buy"... -
1997 cherokee windshield in a comanche?
krustyballer16 replied to dirtyoldjeeper's topic in MJ Tech: Modification and Repairs
Does anybody know if you can buy just the 97+ "gasket/trim" anywhere? When I had my new windshield installed they used a rubber piece but it was massive. Like 1.5" wide or more (the original is about 1") and it looked horrible. My windshield isn't any good any more so I was wondering if I could find the right rubber trim I'd give it to the glass company when they install my new glass. -
I uncovered her yesterday for the first time in a couple months. We moved her into the garage to paint the door jams and where the hood meets the cowl. Little sneak peak of the color (this was the hood) all the cutting in is done and now just gotta reassemble it and take it to paint.
-
do you have pictures to better explain the difference in hitches. i gave the drawings from earlier in the thread to a process engineer at work to draw up and next week when my 1/4" sheet comes in, ill have some of the side plates/ brackets cut out. i did make a modified version that drops the cross support down 1/2" to clear my bumper i built because my factory hitch i have was almost touching the bumper. ill also have front bumper brackets and stock mj spring perches cut out.
-
97+ swap fenders with older flairs??
krustyballer16 replied to krustyballer16's topic in MJ Tech: Modification and Repairs
Not the fender itself. Lol but I figured it out guys! I was looking at it wrong! They haven't been on it for so long I forgot what side those brackets went on. Duh! -
97+ swap fenders with older flairs??
krustyballer16 replied to krustyballer16's topic in MJ Tech: Modification and Repairs
I drilled an extra hole in the mount and put another. stud and drilled a hole in the fender to match. But my concern is that the cut fender now doesn't. have a hold down at the bottom edge in the front. It's only got the factory mount hold down like 3" from the end....I'm worried about the flare catching wind and ripping off or just look like it's dangleing there. -
Here soon, when the lasers at work have time, I'll have a few sets of these cut out along with front bumper mounts in 1/4".
-
97+ swap fenders with older flairs??
krustyballer16 replied to krustyballer16's topic in MJ Tech: Modification and Repairs
Yay! PMd -
97+ swap fenders with older flairs??
krustyballer16 replied to krustyballer16's topic in MJ Tech: Modification and Repairs
You sent them to me. But no pics of how you bolted them on or cut them or anything -
Our 87 Project "Prime"
krustyballer16 replied to kateindeed's topic in Member Projects: Your Comanches
how did you mount the older flares on the newer flares? -
97+ swap fenders with older flairs??
krustyballer16 replied to krustyballer16's topic in MJ Tech: Modification and Repairs
anybody else??? ive searched and searched and can't find any good pictures or details. i cut the flare mounts to the length of the fender but discovered that the fender won't be bolted down at the bottom at the front closest to the bumper end cap.... -
IMO, for the price, the quality isn't quite there... Some of the cut edges are jagged and uneven. And some of the welds look crooked and put of place and the starts and stops aren't as clean as they could be. I'm just picky when it comes to me spending that much money. Thats why I build stuff myself. That way if it's not perfect, I don't have a lot in it and it's my fault. I like the looks and design though. Good start. Hope to see more.
-
Yes. Top line is vacuum out. Middle is oil in. I think it Ts in with the turbo oil line too. I can't quite remember or picture it. And bottom is oil return, it goes down below the turbo and Ts into the turbo oil return and into the old dipstick tube on the side of the block.
-
There is oil running to the vacuum pump too.