Greenjeans
-
Posts
216 -
Joined
-
Last visited
Content Type
Profiles
Forums
Gallery
Everything posted by Greenjeans
-
Check out my thread in “cool other projects”… I used a 700r4 to keep everything simple. Carb and no computers or sensors of any kind was my reason for a 700r4. (88 s10 donor).. A stand alone controller for a 4l60 is super expensive. A 4.3 in your case is a good option if you already have a good motor. Wayyy more transmission options. 241c transfer cases are plentiful and very strong. The early 4.3’s used a carb and aftermarket manifolds are out there. Headers for an s10 may work. I’m betting a motor mount for an s10 4.3 may fit your frame or be easy to mod. If your 4.3 is a later one with TB, or multi port fuel inj etc, you are going to need the 4l60 and an s10 wiring harness. swaps are fun but be prepared for money you had no idea you’d be spending 😁
-
👍👍👍 perfect!!
-
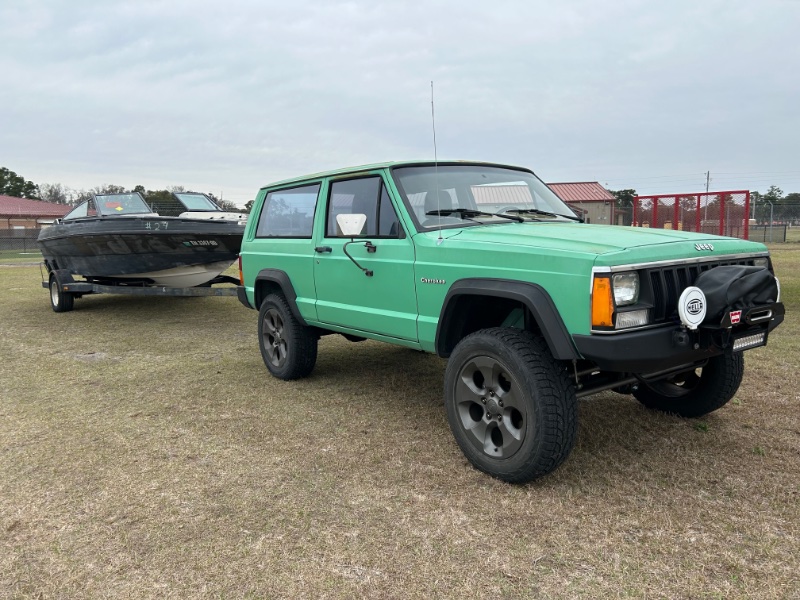
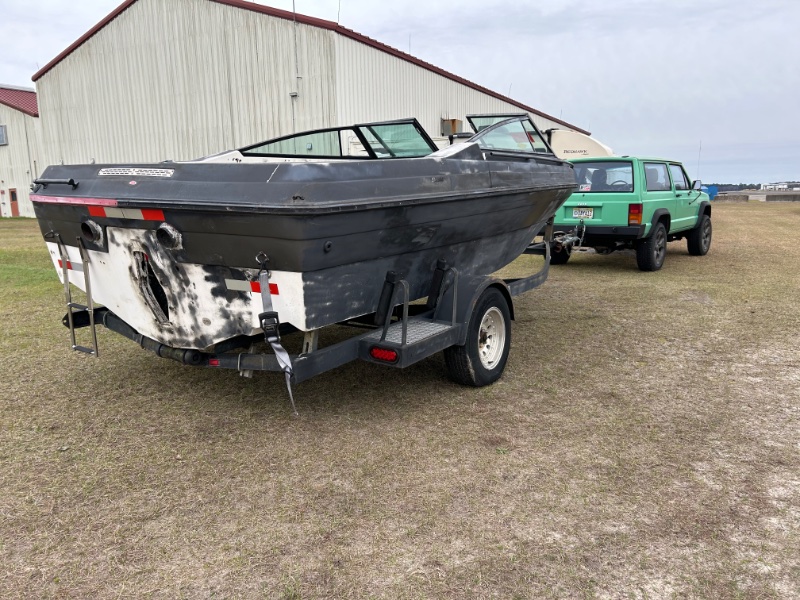
Well I had pretty much no plans to tow much with this jeep but I bought this boat at an abandoned vehicle sale for $100…it’s junk and headed for the dump. I only wanted the trailer to make a cheap flat bed out of it.. I didn’t have to go far and I went very slow 👍 so no problems…
-
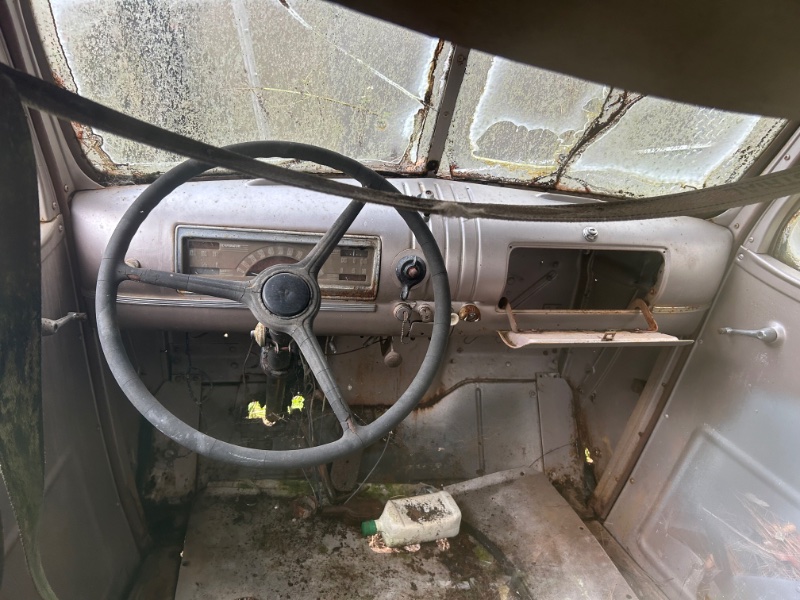
Grandpa's 1940 Chevrolet Pickup
Greenjeans replied to 89 MJ's topic in Member Projects: Other Cool Stuff
That’s a good looking truck! My dad was born in 1946 and over the years has picked up a couple cabs. I’m trying to talk him out of this one as he doesn’t build much anymore…. It needs, well…. Everything…. I may build it into a rat rod when I retire…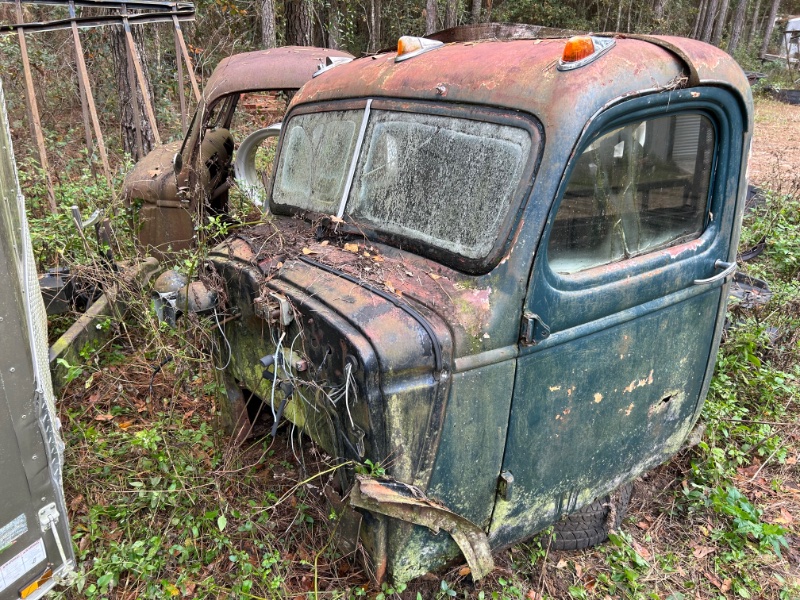
-
5x5 bolt pattern with WJ swap
Greenjeans replied to Swampy's topic in MJ Tech: Modification and Repairs
My measurements have me right at 4” but it’s all junk yard parts so it may not be exact. They are Rusty’s 305 front springs out of a junked TJ.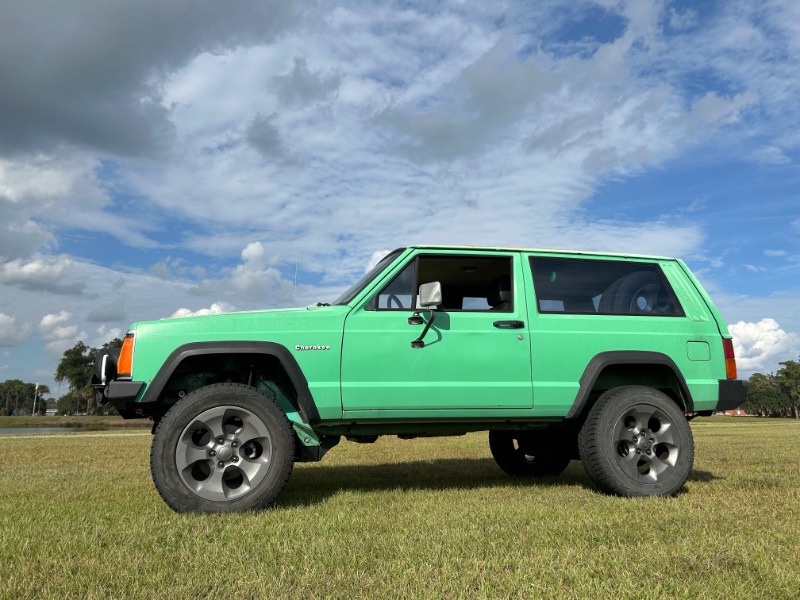
-
5x5 bolt pattern with WJ swap
Greenjeans replied to Swampy's topic in MJ Tech: Modification and Repairs
Sorry I’m not much help. I used wheel spacer/adapters on mine. ‘99 HP D30, WJ knuckles, JK wheels. Weld on 1/4” spacers.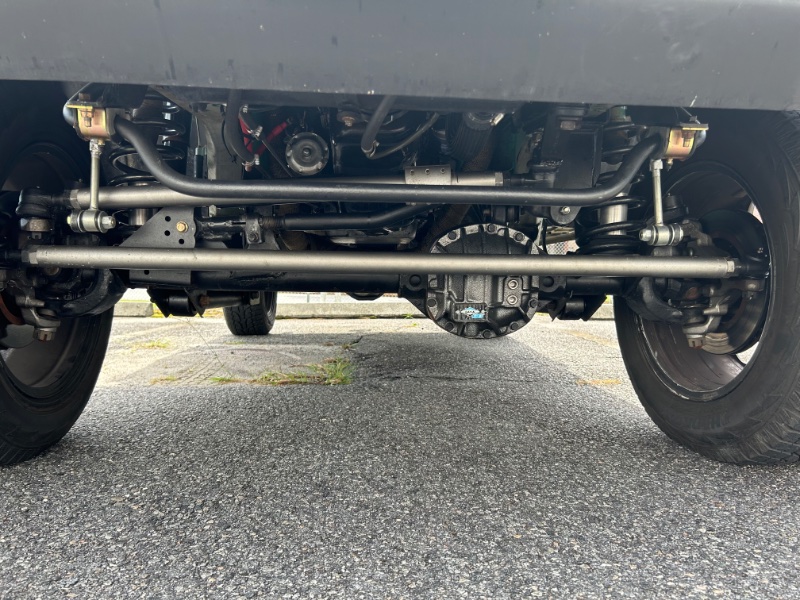
-
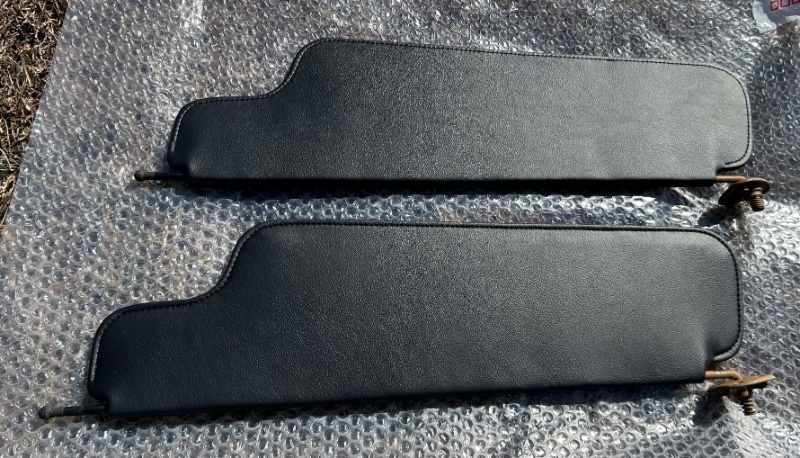
Sunvisors finally recovered by a local upholstery shop. Not cheap but I’m very happy with them. Now I just need to rattle can the hardware and get them installed.
-
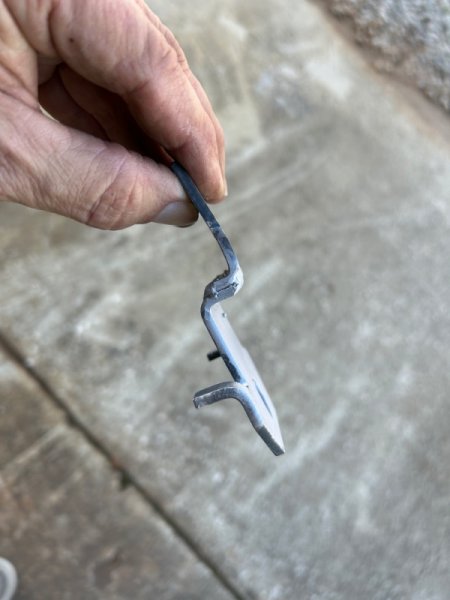
Probably so.. if I had it to do all over again I’d fab up something myself using my original brackets.. with my original brackets and their “generic” shoulder belt kit I could probably get it done ..but after modifying the provided bracket and driving it today, I can say that the retractors work as they should and I finally felt safe and legal 👍
-
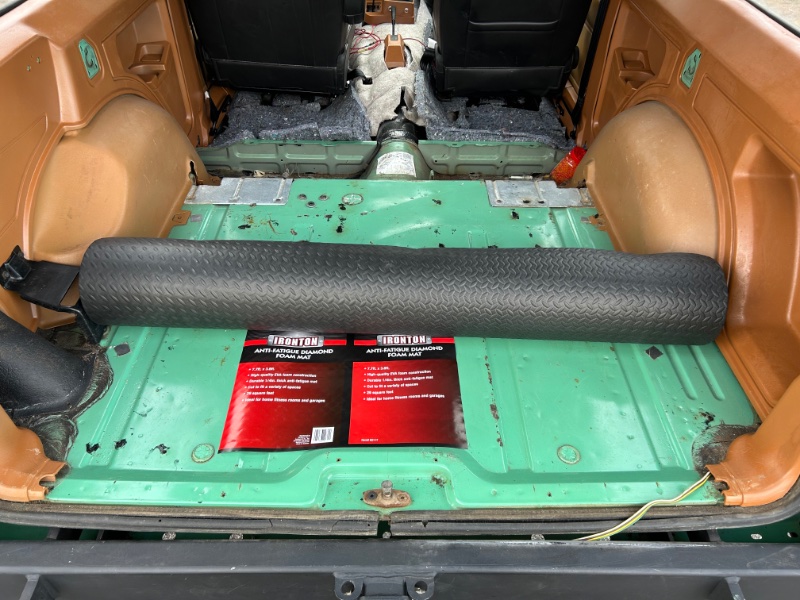
Tossed the table top and found this foam floor mat at Northern today by chance. $25, much cheaper than the fancy weather tech type. Just right for my needs. I just need to use the old one for a pattern. Not today though, too cold under the palm trees here…
-
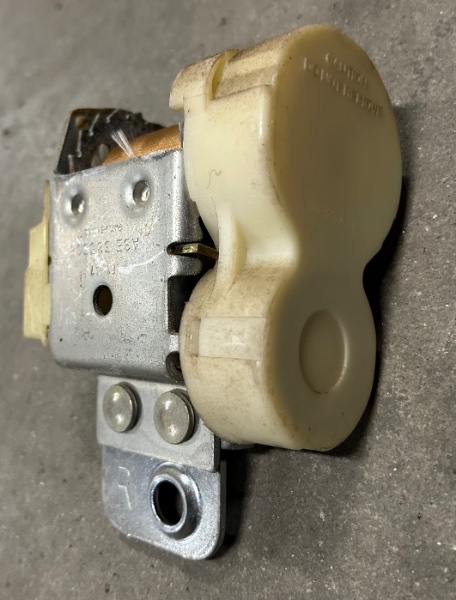
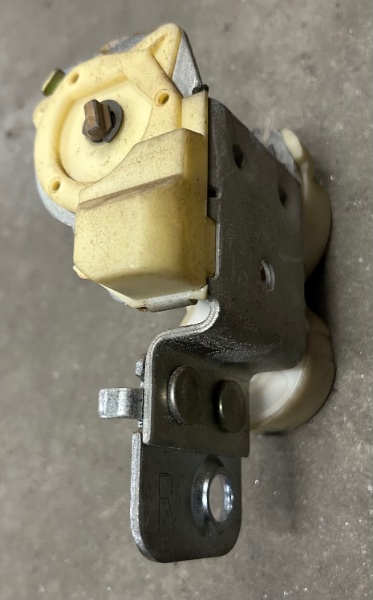
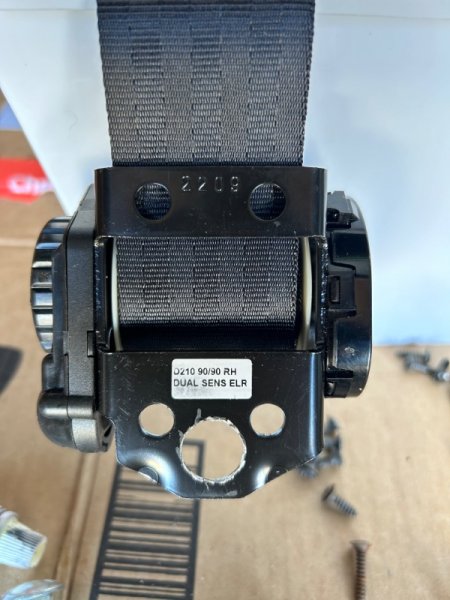
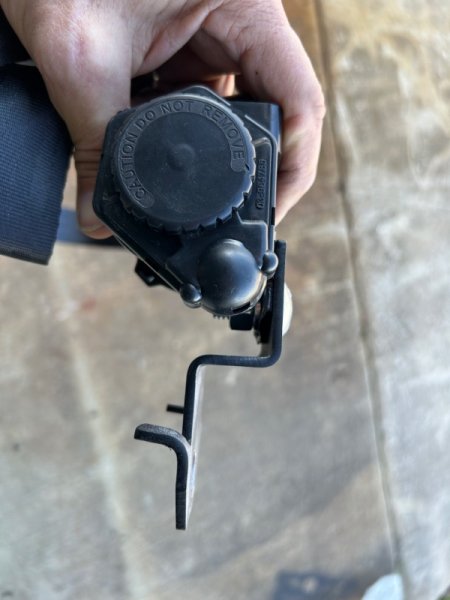
So just for posterity and preservation of history: I present the original 1986 XJ belt retractor …. You can kind of see now where they were trying to go with their “Z” shaped bracket.
-
Retractor part number. If you can fabricate, you can cut the brackets off your old retractor and weld or bolt them to these cheap retractors. The buckle end/female end would also have to be dealt with..
-
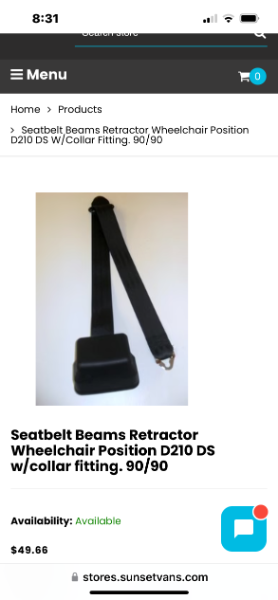
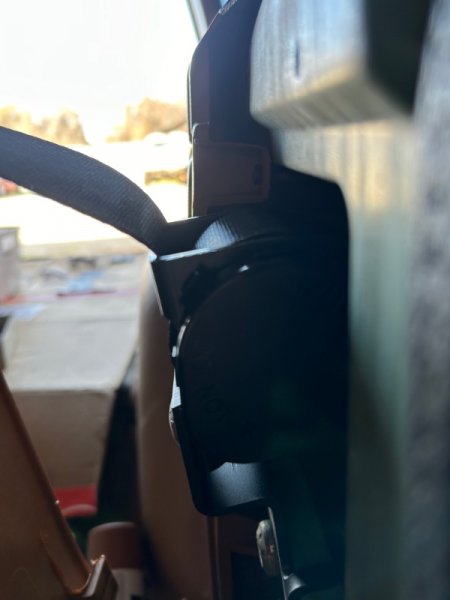
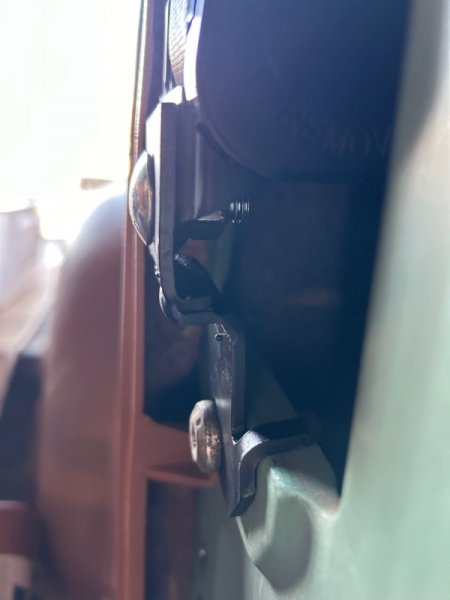
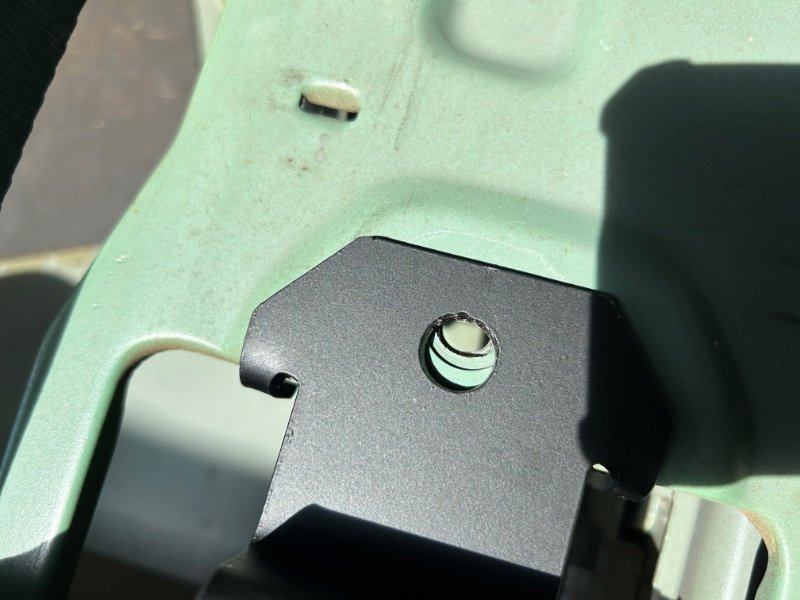
OK, sorry for the novel but I wanted to go back and talk about my seat belts for anyone out there in TV land like myself that just HAS to do something about their seat belt situation.. my originals didn’t retract and were disgusting.. It may have been possible to eventually find some belts in a junkyard that would have adapted to my XJ. I did actually find a mint black set from a GM car and thought that I was going to use them. However, what I didn’t know was that retractors are designed to work (inertia reel) mounted either horizontal or vertical (like ours). The ones I got at the junkyard were mounted in the rear dash area of a sedan. The retractor will not function mounted vertical. So what junkyard options “may” work? Possibly a small pickup or SUV if you have time to research the mounting bracket etc before you go to the trouble to get them out of a junk car.. So what new options are there? Not many…. I ended up ordering a set from seatbelt planet. I think they were nearly $300, which is crazy until you consider the alternative.. no seat belts. My life is worth $300.. I called the vendor and was told that these belts were outsourced to a vendor in Florida.. that should probably have been a red flag but I’m not too smart sometimes 😁. I received the belts in about 3 weeks because they are “built to order”. Ok cool. I have already posted a picture of the bolt hole for the mount that didn’t line up... After much consideration, I decided it wasn’t a big deal so I carefully dremel’d the hole out until the bolt would go in. Snugged the bolt down, everything is fine…. Until I went to put the trim back over the retractor assembly. The assembly stuck out a good 1/2” due to the shape of the mounting bracket offset. It’s difficult to explain but the retractor has to sit into the bulkhead so your trim goes back on flush over it. No way, no how that was happening. And the bracket can’t just be bent inward, the retractor will then contact the sheet metal and won’t retract. I basically had to cut and weld the bracket to get it in there “sort of” flush. The offset is just bent wrong on the bracket. when I took the bracket off for modifying, I can see the part number for the retractor they used (and see where they enlarged the bolt hole). A hit on the Google pipe turns it up as a aftermarket seat belt used in the back of a handicap van. Just a $50 assembly (that’s a retail price, they are probably getting them cheaper in bulk) with a custom/wrong bracket attached. As well as they sew a make end on and provide a matching female end. Synopsis: don’t buy these unless you are ok with mods out of the box. Can you buy the handi-van version and bolt it in for a lot cheaper? Probably not, as it is most likely configured differently. Can you use the handi-van version as a starting point (swap the config, make a mount bracket etc)? Sort of….. you would still have to deal with the male buckle and female receptacle on the floor…. And yes I did send pictures of this to seatbelt planet. Mums the word and I kind of expected that. Liability…. I decided to go ahead and modify these. My welding is at least as strong as the sheet metal it’s bolted to. And at least I finally have seatbelts..
-
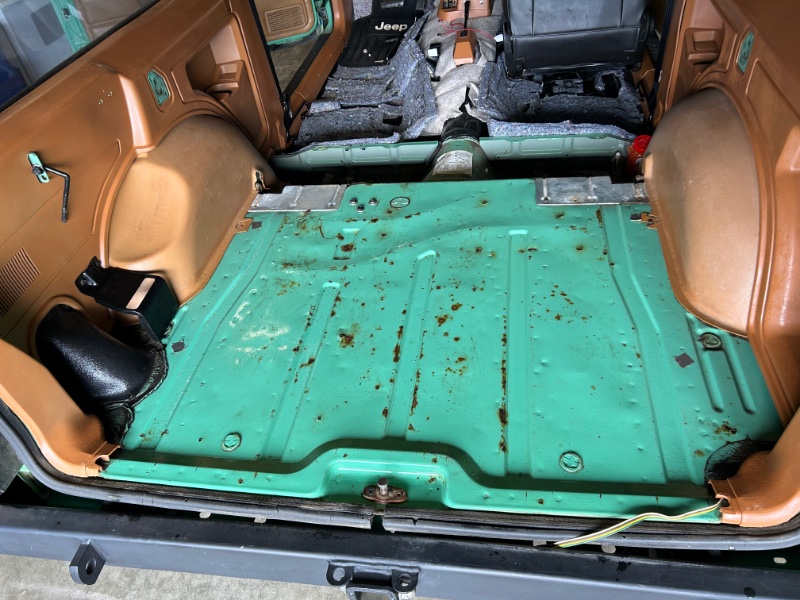
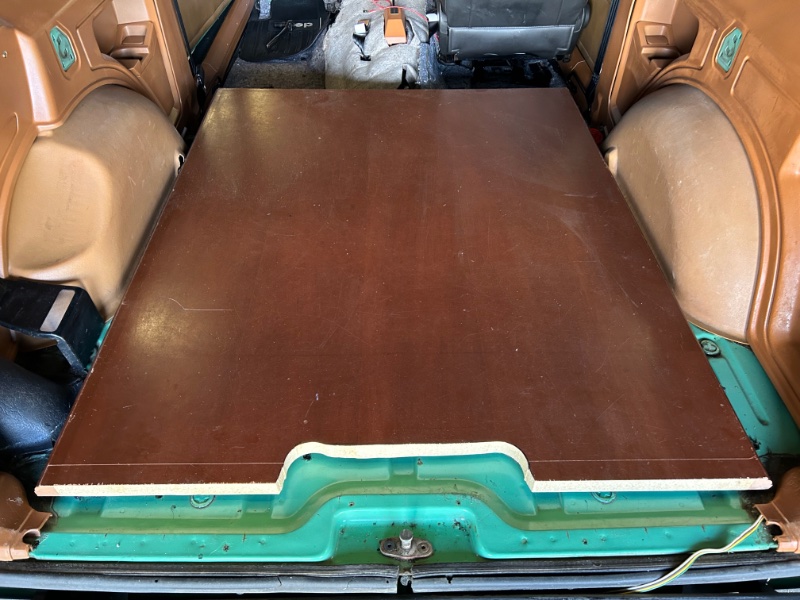
Well I took out the factory vinyl mat from the rear compartment for the first time since owning this Jeep today. A few rust spots, and about a dozen non factory screw holes were found. I treated the rust with Ospho and rtv’d the holes. I cut an old table top and tossed it in there temporarily…. I don’t really like it and plan to get a “cargo area weather mat” from Quadra tech at some point. Don’t mind all the jute padding, I’m going to order a vynil mat for the front later this summer. Anniston Auto Carpets shows one for the 4 door, but everyone on the 2 door Cherokee FB group says it’s the same 🤷🏼. I also added a 1/4 resonator pipe in the exhaust and the droning is gone. Cruising with a “full interior” is a lot quieter now as well. I do not plan to run the back seat so the area under the “back seat” will be for the Jack and a small assortment of tools.. I also changed the toggle switch mount because it was hitting the trans tunnel once the seat was installed. Good news is the heated seats work!

-
In the gun hobby it’s called “50 shades of FDE”. Having a bunch of flat dark earth parts from different manufacturers is just the way it has to be and it’s fine 👍 I’m not painting these door panels. The next guy who owns it can 😁
-
One more note that I need to get out of the way now before all of the plastic is reinstalled… the color on this kick panel is the new repainted color for most of my interior plastic. I know a sharp eaglescout eye will notice that it doesn’t match the beautiful original door panels. I won’t spray the door panels because they are too nice and I like the original color (honey?). I selected “camel” from the Krylon fusion collection for all my plastic trim because it’s available at Walmart for six dollars a can. And it was the only thing that I could find local that was a close match. Their tan was too close to an FDE and had no red or brown tint so it was too far off. We’ll see how this looks completely installed. Either way, I won’t be respraying all that plastic trim any time soon..
-
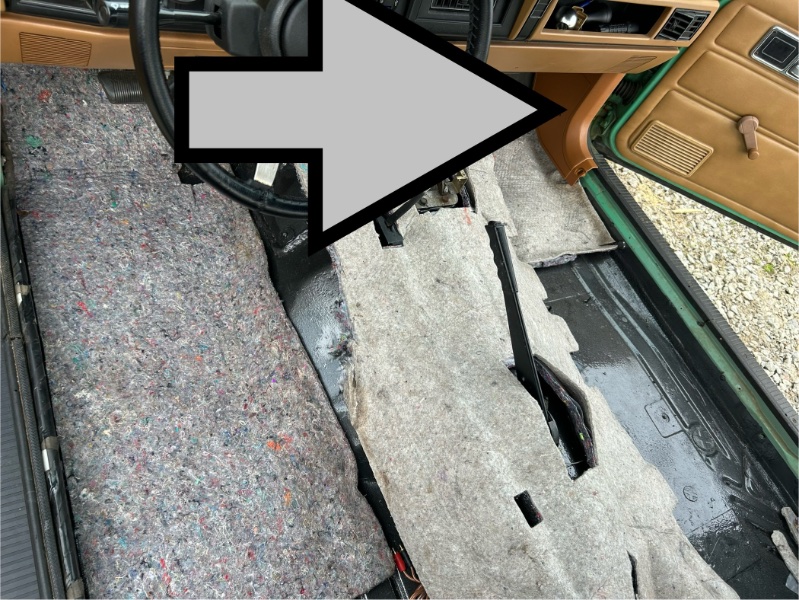
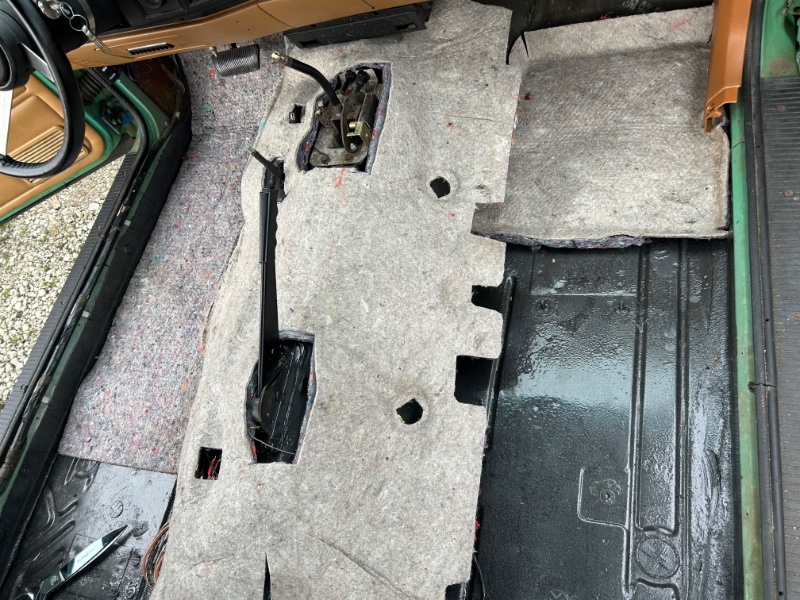
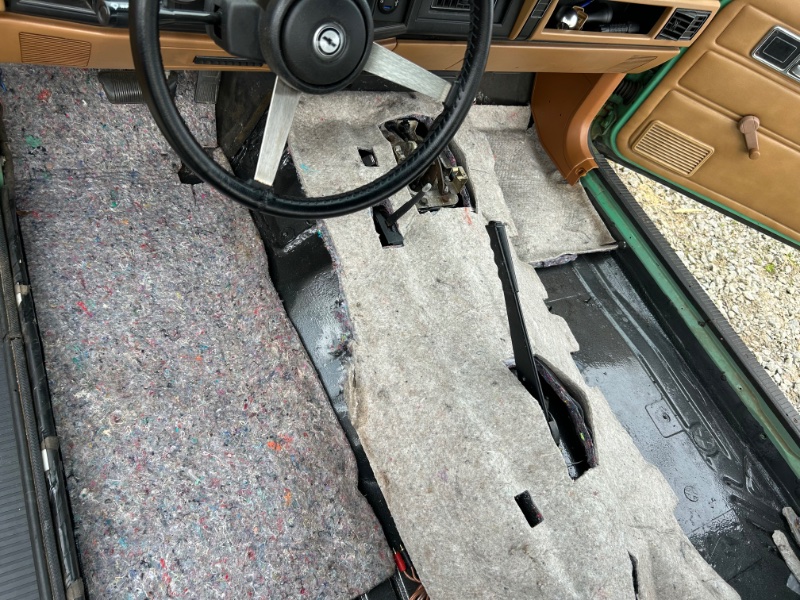
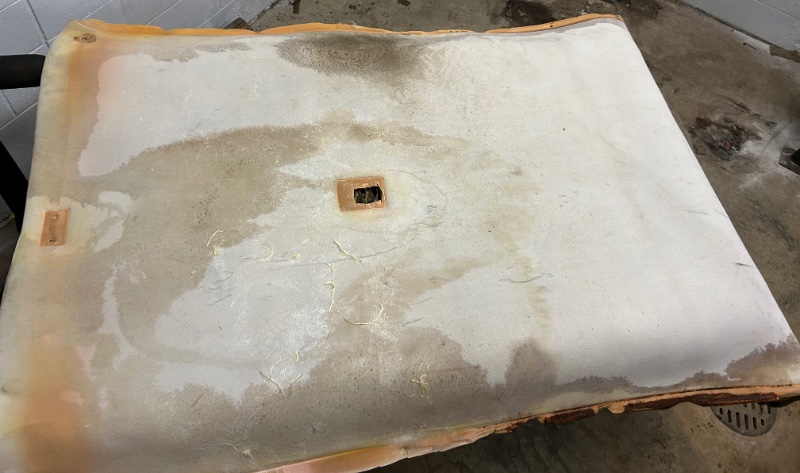
I got exactly one piece of plastic installed and realized that I’m going to have to make decisions on this flooring situation. I wanted to salvage the old factory rubber mat but it’s got a good bit of tears in the wear areas mainly from removal. The area over the tunnel wasn’t too bad and that’s actually what I wanted most to reuse just to hide the mechanicals. The foot wells, I really wasn’t worried about, I’m just going with floor mats for now. The jute padding on the back side of the original mat is disgusting from moisture exposure. I’m going to work on getting it off and see what I can salvage of the original mat. I did score some jute padding from the 2016 Chevy Sonic when I got the seats. I cut what I had into a section to cover the tunnel and pass footwell (water does leak in there occasionally…). Alittle trim here and there and this is what we have so far… second thing I have to deal with is these repro seat belts have the hole slightly off enough that the bolt won’t go in. I’ll have to modify the hole a little. The guy told me straight up that these were coming from a vendor in FL and his company wasn’t actually making these. Seatbelt Planet was the website I got them from. I would recommend against this product but options for these are pretty limited 🤷🏼.
-
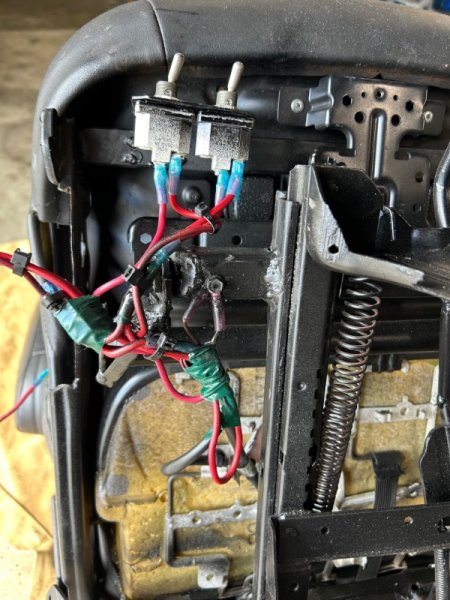
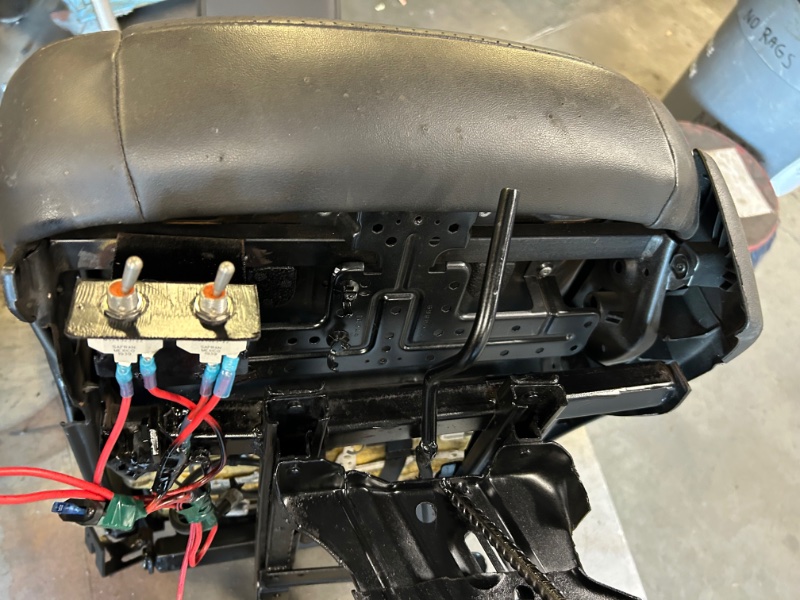
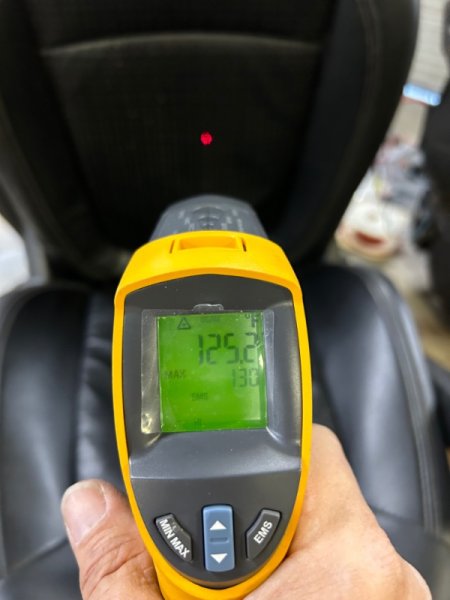
Took a day to work on the seats (again?!?). No just squaring away the heaters. May as well before I put them back in since winter is about 2 months long here and I won’t need them after that. I basically wired them to run on full power any time they’re on, and one switch for each seat. Just flick them on and wait for your butt to catch fire, switch them off. My asvab score was too low to get into any electrician ratings so y’all pray for my wire work. As always “use lots of fuse”. Now on to the interior plastics as it hits a high of 47 tomorrow ☹️
-
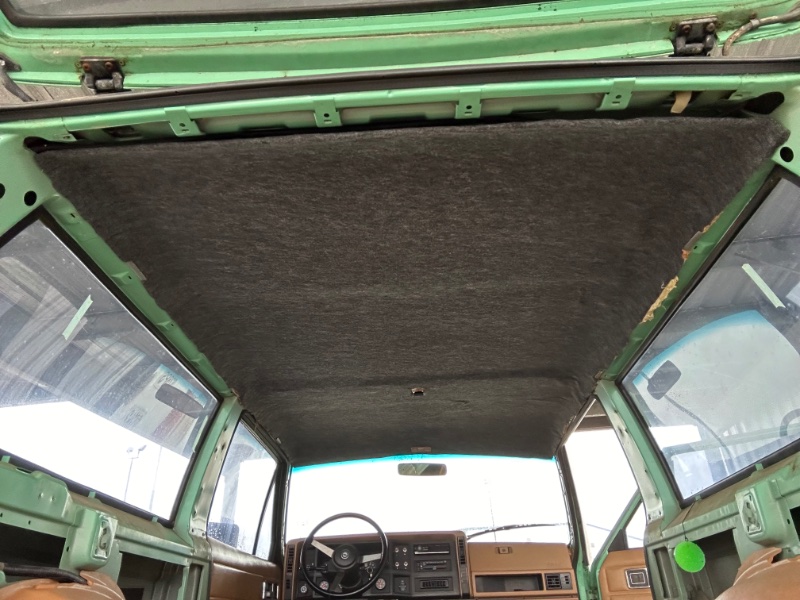
Headliner day. Not a project I was looking forward to. There was a hole in the roof where they had a wire run through for a light bar. It had a badly deteriorated rubber plug in it and was seeping water for who knows how long.. I used JB Weld to glue an aluminum plate to both sides of the hole. the cardboard “backer” was in bad shape but dry and I worked with it.. I made a few repairs to that cardboard backer and applied gray felt with 3M “90” adhesive. Felt came from Joannes Fabric store, about $22. As usual I did it all by myself and did a ok job I think. It’s not a perfect job but I worked with it as best as I could. Picture is of the original material.. and the redid headliner. Next task is to put all of the plastic parts back in. One day at a time..
-
280ZX Hood Vent Install
Greenjeans replied to Comanche County's topic in MJ Tech: DIY Projects and Write-Ups
Looks good! -
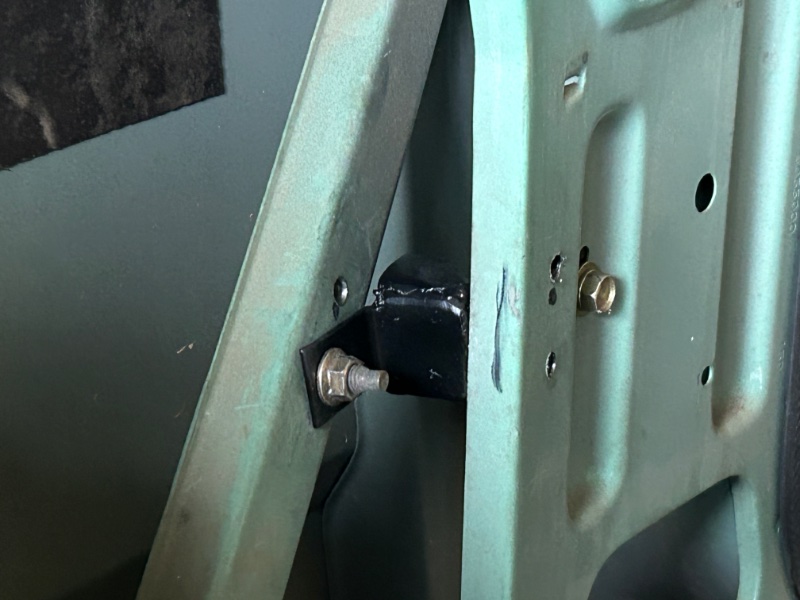
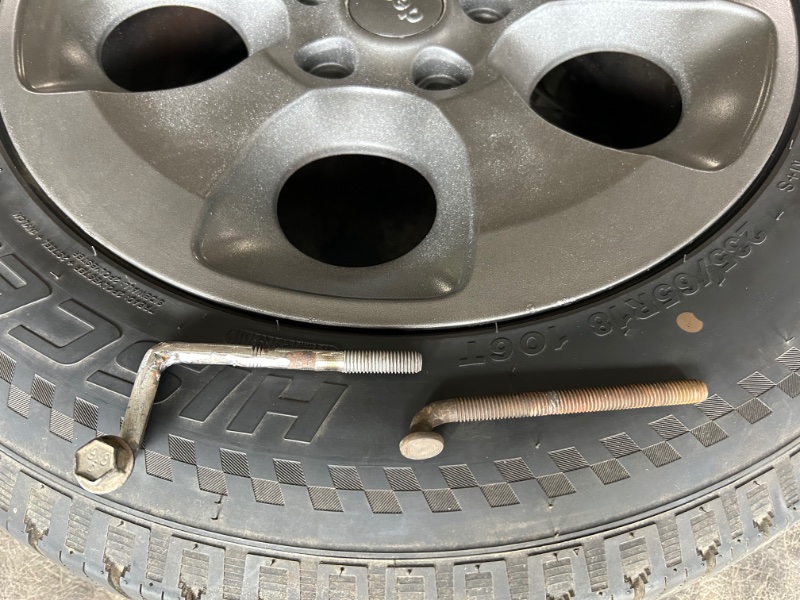
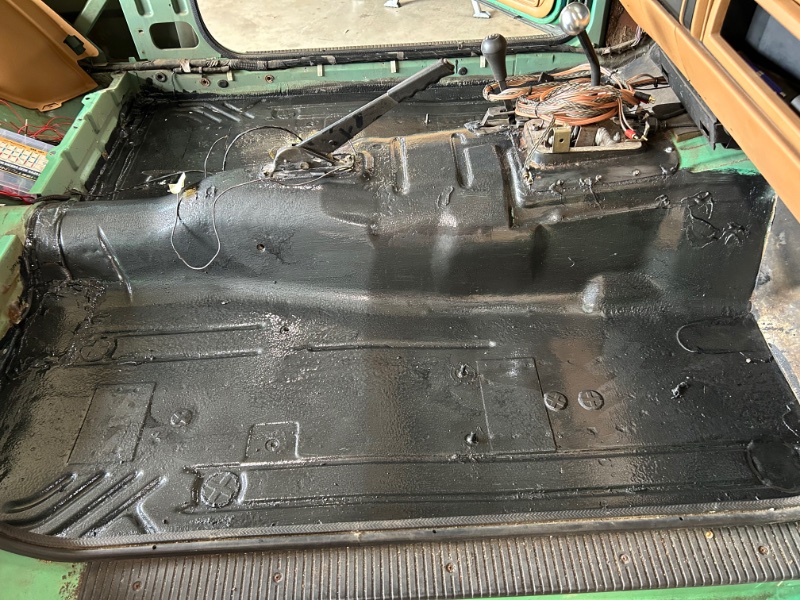
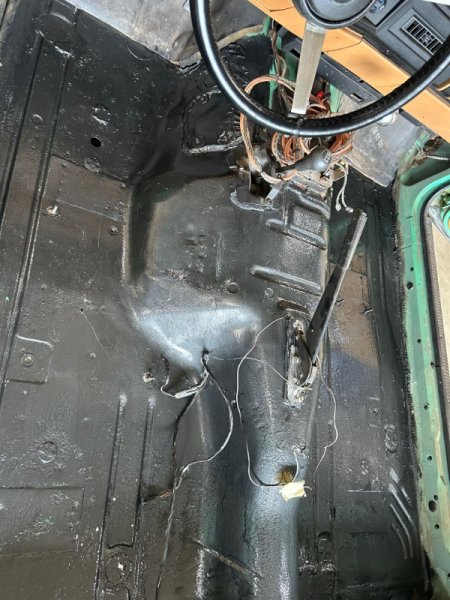
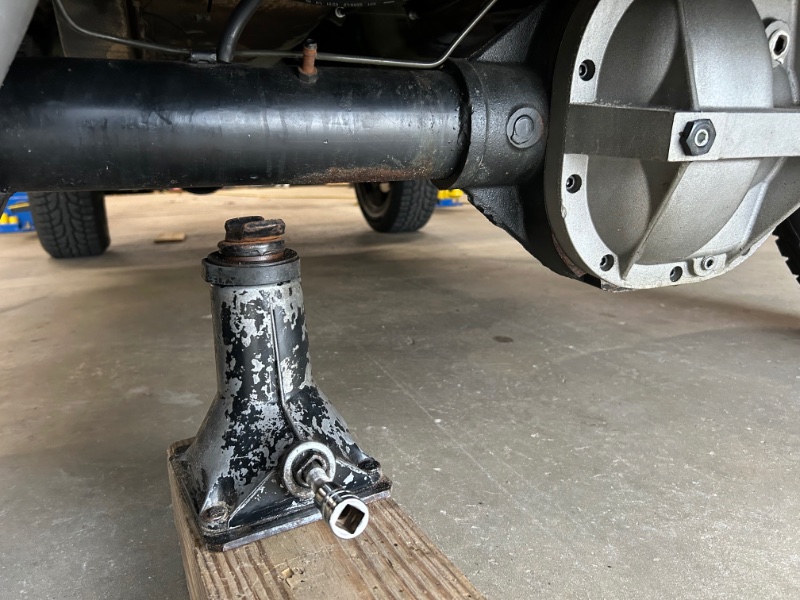
I haven’t posted much lately, but I do work on the Jeep almost every day even if it’s just for a little bit. Today I painted the floor after treating some rust speckles with Ospho. There are a few pin holes but I will fill them with rtv. The paint used was Rustoleum black hammered metal. I’m real happy with it. When I removed the interior last winter, The original rubber mat developed some tears coming out. I about cried, because it looks so good and was in great shape (I thought). It’s just so old and an archaic rubber compound probably that it got brittle over time. The jute padding that was under it from the factory was waterlogged. And so I am not sure what I will do about all that at this moment. I think my plan is to save the portion that goes around the shifter under the console down the transmission tunnel. And just use rubber mats where your feet go. If I could buy a brand new factory rubber mat, I would do it in a heartbeat. I do have a slight water leak occasionally in the passenger foot well. Only after a heavy rain when the jeep is parked “nose down”. It never happens unless it rains good. So I think it’s one of those seals in the cowl area and I’m not going to work on that right now. So rubber mats and metal floor at this time. I don’t think I would ever put carpet in here, but who knows. I have some very tiny sheet metal cracks in the striker post area. I don’t know if it’s because of the design, or the fact this door had so many problems (see my previous door repairs) and a previous owner was just slamming the crap out of it. Or maybe a little both. but I have read somewhere that the earlier two doors did not have good reinforcement behind the door jam. And the later models were updated to add reinforcement to help support the striker post area. I do not have any pictures or access to a later model two door to see what they might have done at Chrysler. So I made a bracket to connect this support and this other sport. I have no idea if this is gonna help at all. But while I have it open and the seatbelt is out is the time to do it. By the way, I bought the reproduction seatbelts and they look OK not awesome and especially not awesome for $300 but what are you gonna do? I also finally modified a threaded bolt that holds the spare tire in. The original bolt was not designed for a tire and wheel this tall, so it was barely holding the spare in and allowing it to move around, etc. I did not have a bolt that was long enough, but I cut, bent and welded a long one that I had. I also added a little extra length and it works very well and is long enough that if another wheel was put in here with the different offset, there’s plenty of thread. lastly, I got a decent jack at u-pull-it that was in a big 1979 Ford van. You can run it up and down with a long rod or lazy man way with a Milwaukee impact. With a piece of 4x6 wood it’ll lift the Jeep and fits where the factory jack was (no back seat). It’s super beefy and has no hydraulics to worry about. Oh and it was only $7. 👍
-
One of y’all buy this so I’m not tempted to start another project 😁 📸 Look at this post on Facebook https://www.facebook.com/share/QVwPgMtV6kjvu2aC/?mibextid=79PoIi
-
$1000 project in SC
Greenjeans replied to Greenjeans's topic in Craigslist/eBay... i.e. Not Your Stuff
Someone got a good deal 👍 -
📸 Look at this post on Facebook https://www.facebook.com/share/AsiNZjQBYmJNBHft/?mibextid=79PoIi
-
I told the glass shop to order a ‘99 windshield for my ‘86 (XJ) and also a rubber gasket. It was $300 installed.
-
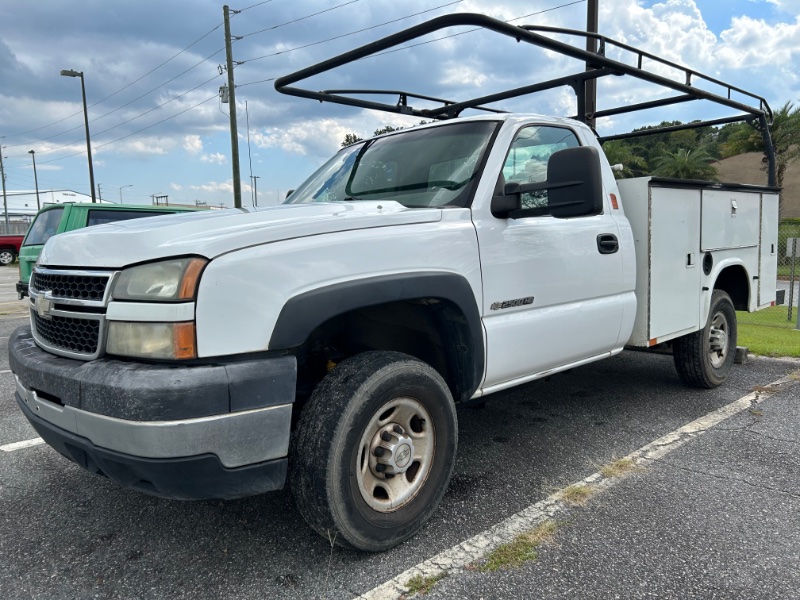
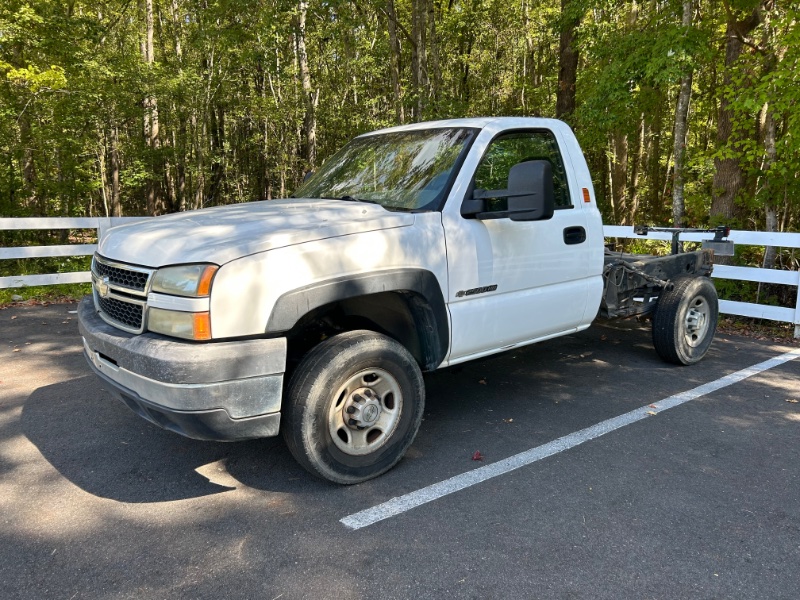
I thought that I had added this info to the notes a few weeks ago but I don’t see it so here goes.. I checked my fuel economy and I’m sure this isn’t exact but it looks like I’m getting 11.25 mpg. This is 80% small town/city driving and 20% country highway maybe at 40-50 mph. That’s a 29.5” tire, 4:10 gears and a 700r4 (lower first gear). Spirited driving most of the time trying to break stuff 👍 I have yet to install the front drive shaft. I don’t know how that may change the mpg. My use of 4wd will be rare in this vehicle and I’m still shaking it out before I install that (soon). I did recently pick up a retired utility truck that needs a good bit of love. 2007 C2500 with 6.0 and 4l80e (2wd). 285k miles…I sold the bed off of it and I may tinker with it some but I’m trying not to jump in too deep until the XJ’s interior is “sorta almost” finished.