Greenjeans
-
Posts
216 -
Joined
-
Last visited
Content Type
Profiles
Forums
Gallery
Everything posted by Greenjeans
-
I learned a lot watching Nickintime, bleepinjeep, and a bunch of random stuff. of course my favorite is my own channel but it has nothing to do with Jeeps…🔫
-
I wouldn’t try to list them all, way too many. 40 years with a license and the same number of years as a mechanic. I will list my two favorite Jeeps so far: 77 CJ5, 304 V8 and 3 speed. Headers and glass packs with turn out pipes on each side. I thought I had an AC Cobra with side pipes. Loud and a brute in the local state park wash outs. Champion of mud puddles, and my 8 year old little sister never smiled like she did riding in that Jeep. Good memories. 67 Jeepster Commando, Buick Dauntless V6, 3 speed. All original. It only had a driver seat when I got it so my girl friend rode a tool box on the passenger side 😀 That one goes in the column (long list) of vehicles I should have kept. I have some pretty good pictures of that one somewhere but I have not found them in a box yet.
-
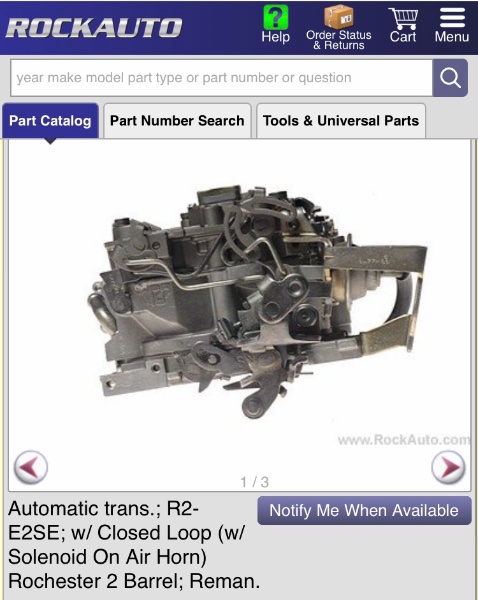
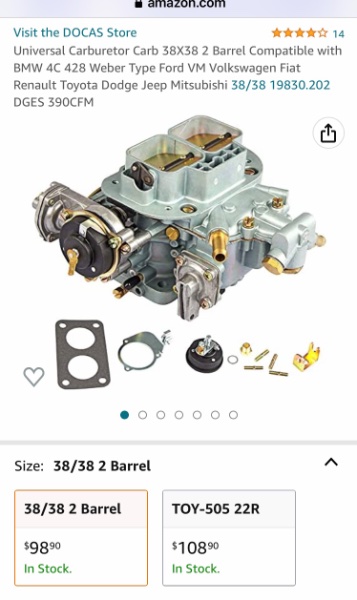
I tried to check that data on Rockauto but they list no carbs for the 2.5 and this for the 2.8…
-
Rochester E2SE “Varajet” if my notes are correct. As far as I know, the Weber 38 DGES is the only one that will drop right in for a replacement. Or a rebuilt Rochester which would be a fools errand in my opinion. In the past 11 months, I have seen one Edelbrock RPM or Torker manifold, this is not a two piece manifold, it is a one piece manifold for the 2.8. They are rare…It was on eBay and it’s sold for almost $300. If you could chase down one of the Edelbrock manifolds and let’s say you already had a holly sitting around then that would be a viable path for replacement. But to buy the Edelbrock manifold and then buy a Holly, you would be into it alot of dollars. The weber kit that I bought was around $500. Just for kicks, search the Weber 38 knock off on Amazon.
-
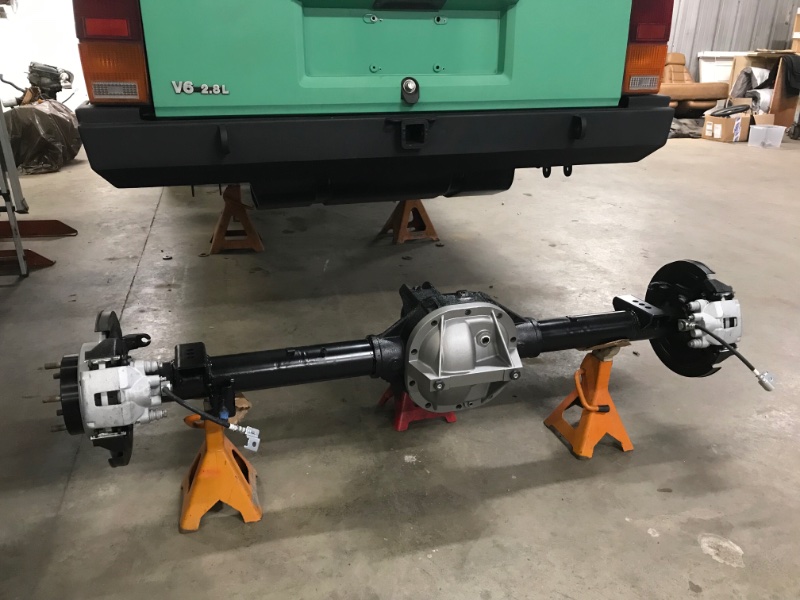
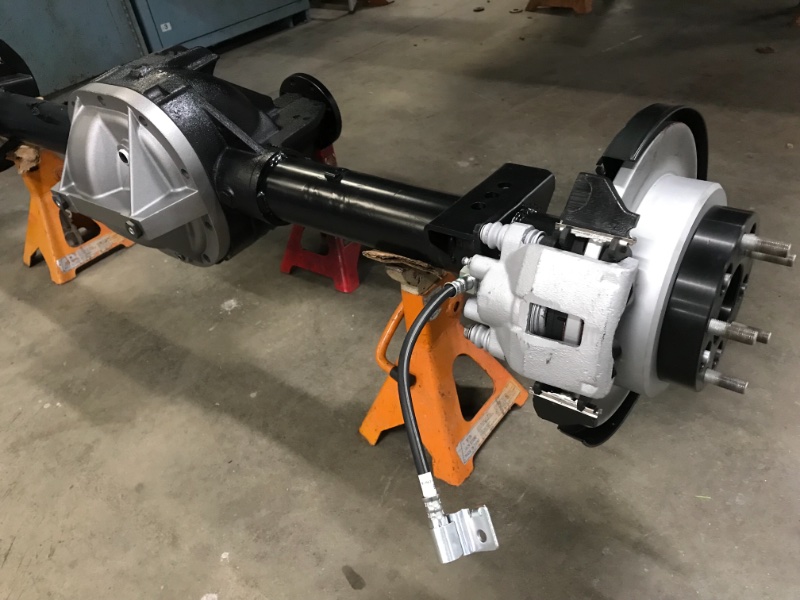
Got the 8.8 all tidy”d up and ready for install. I put new carbon clutches in and new spider gears, axle bearings and brakes. Hopefully it won’t howl and will stop. That axle cover is an SVO knock off from the Amazon. I realize that this Jeep probably won’t spin a tire in wet grass but ya never know if we might add a couple cylinders in the future…
-
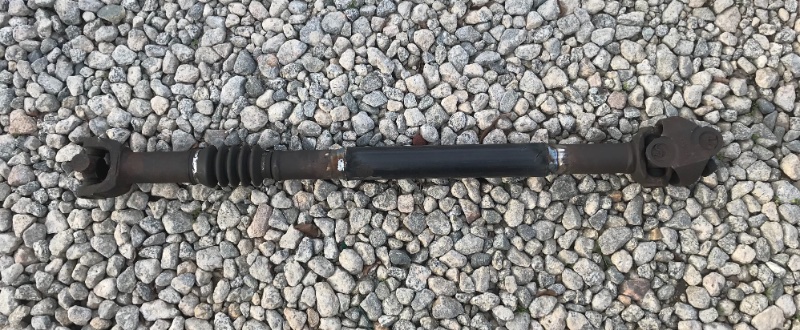
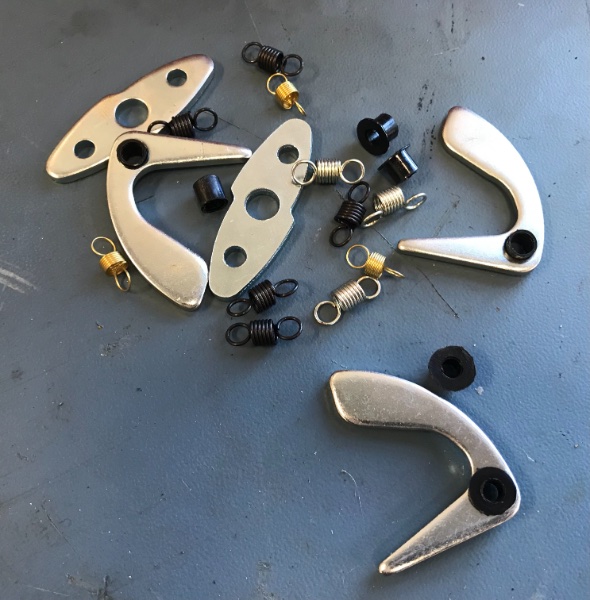
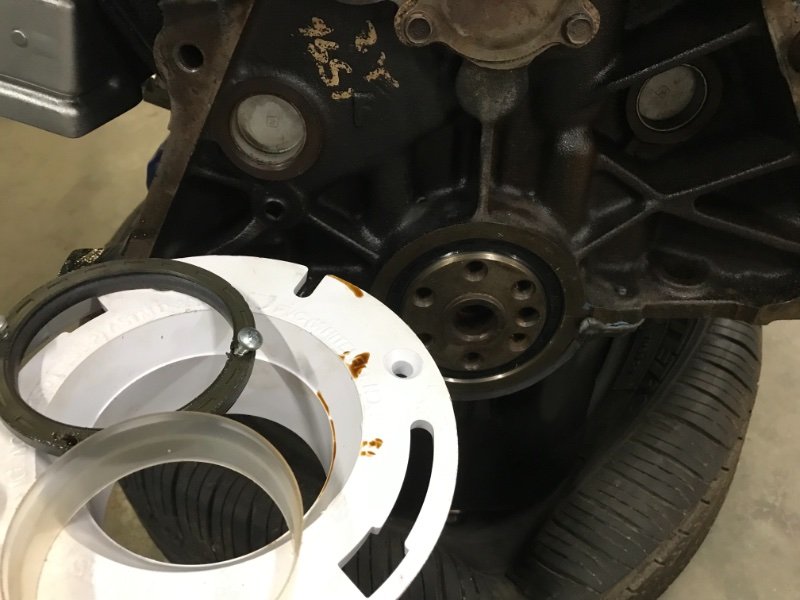
I got lucky on the front driveshaft because the factory XJ one will work fine. However on the rear I needed a 37 inch driveshaft and the grand Cherokee is 33 inch. So I had already picked this one up from the junkyard. I stretched it from 33 to 37 with a piece of pipe sleeved around it to stretch it and welded it up. I realize this is a back up drive shaft/driveway driveshaft to get it around the yard for initial start up. Of course it is not balanced but before I buy a custom driveshaft, I thought I would just use this one temporarily. I also rebuilt the distributor. I had ordered a recurve kit from jegs just to play around with. BTW, that is more than one kit in the picture. The first one they sent was half incomplete so they sent me out a second one. Nothing in the kit works except for the springs on this distributor. Looking at the factory weights, they are marked 37 and the vacuum canister is marked 20. So I’m wondering if this means the 2.8 was designed to have 57° total for timing. Does anyone know the answer to that? I bought the new electronic parts from rock auto and this AC Delco lower pick up coil was the last one the distributor had. The box was all beat up. I could not find a new vacuum can anywhere. This one tested fine so I am reusing it. The distributor had an enormous amount of end play. I ended up putting a .058 shim in to get it to around .015 of end play.

-
You bet! I am real tempted to take the trans, straight front axle, D35 rear axle, driveshaft, shifter etc etc and build a pre war speedster with them. I’m studying a YJ rear frame section to start it off …But I don’t know if the wife will put up with another project vehicle for awhile 😁
-
I turned it back in for the core deposit. I saw your ad looking for a fly wheel and I’m pretty sure I still have it. However I also still have a 2wd transmission that I’m trying to sell and if it does not sell I might need that flywheel for something. I’ll give you the fly wheel for free if you come buy the transmission 😁
-
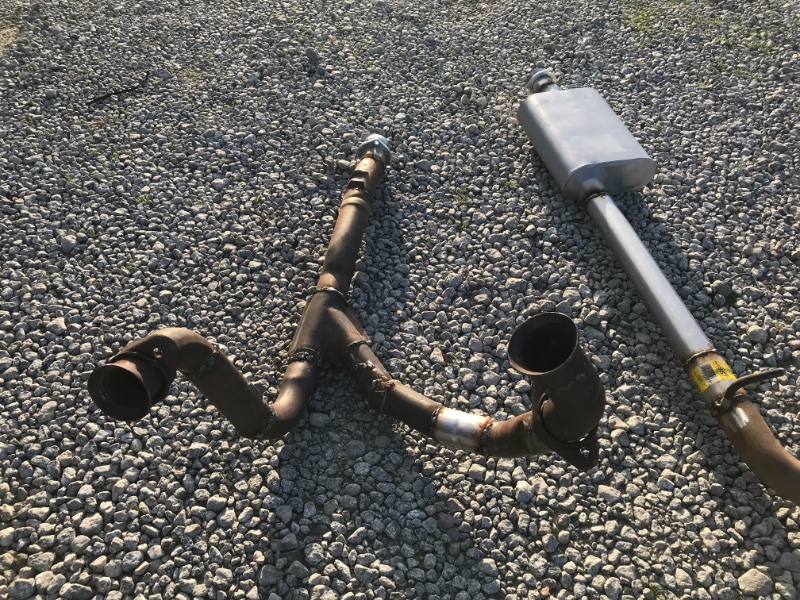
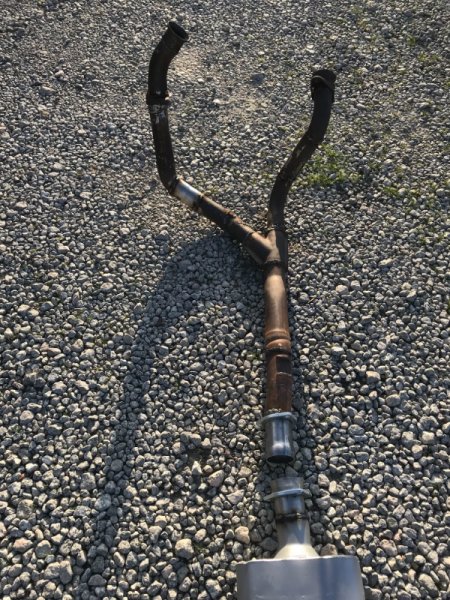
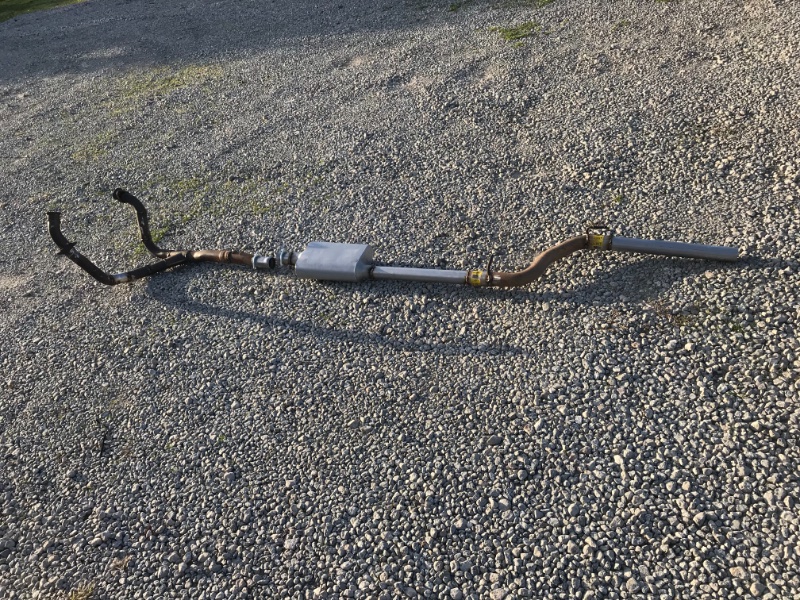
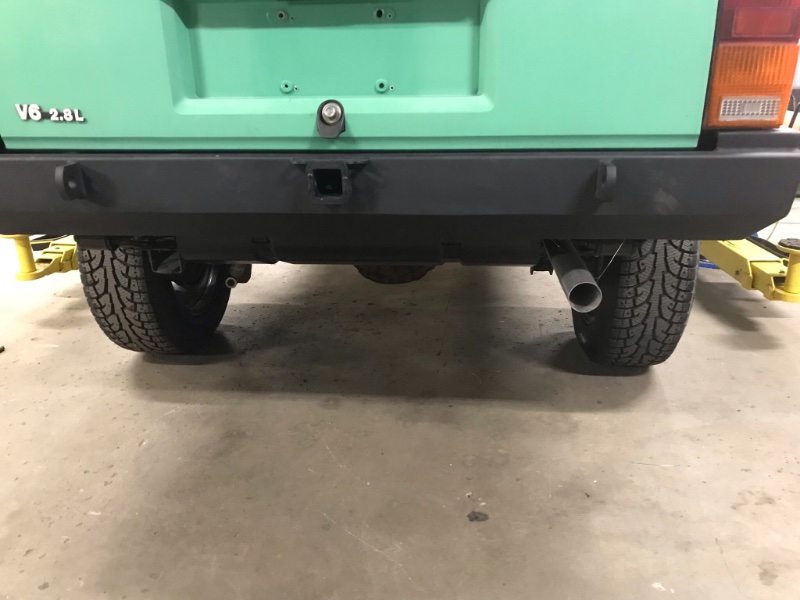
Pulled the Frankenstein exhaust out and finished welding it up. The DIY-pipe was made from random pipes from the JY. A new Flowmaster knock off from Jegs. Fabricating the Y pipe was a royal pain in the keister.. I used 2.25” pipe coming down from the Camaro 3.4 manifolds then y to a 2.5 pipe. It clears the front driveshaft and the y section will drop out the bottom with only the removal of the crossmember. The back section can be removed just by unbolting, removing the rubbers and a little finagling it out. Next I will wire wheel the whole thing and paint it so it lasts a bit longer.
-
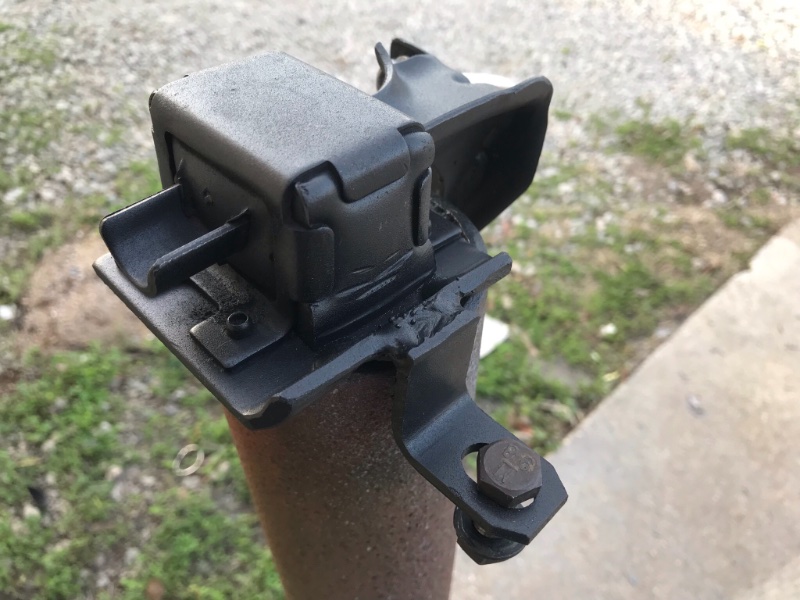
I used the original exhaust hanger on the crossmember but modified it a bit. Complete system is tacked all the way out the back. Next I’ll pull it off, finish up the welding and paint it. That Y pipe was a challenge to say the least…
-
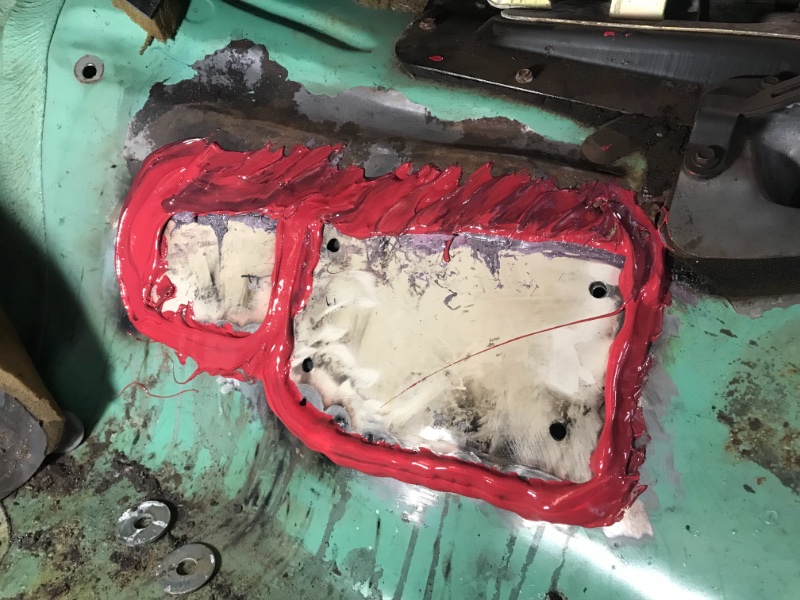
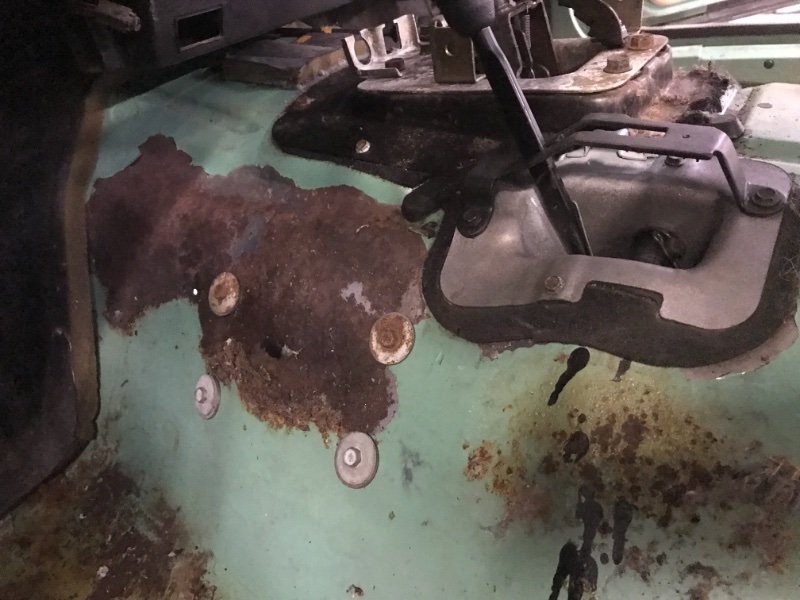
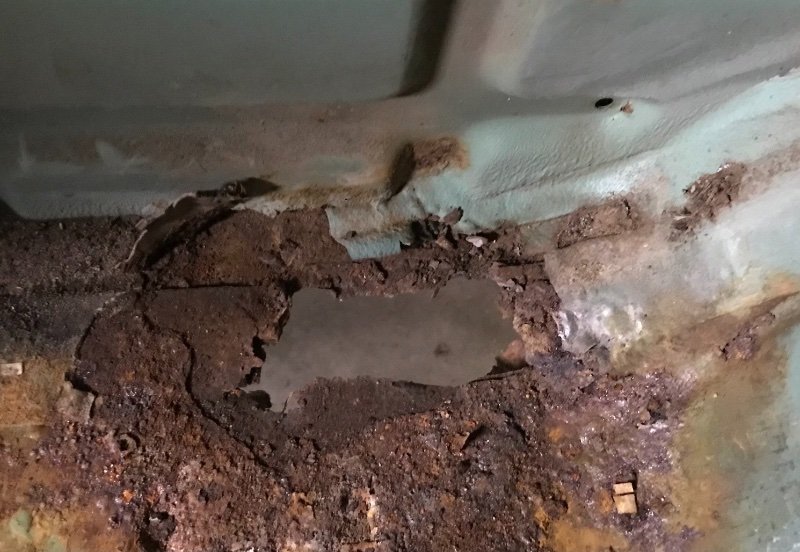
Ospho’d the rust, tacked in a patch panel and seam sealed the heck out of the area that had a couple of holes next to the shifter. It ain’t pretty but it should be sealed up good. Started working on the exhaust…. This could be the most challenging part of the whole project. I’m using a bunch of random exhaust scraps to go from the Camaro 3.4 exhaust manifolds (2 1/4” pipe) down to a 2.5” main pipe and muffler. Lots of cutting and grinding and welding. Not fun. Back at it tomorrow..
-
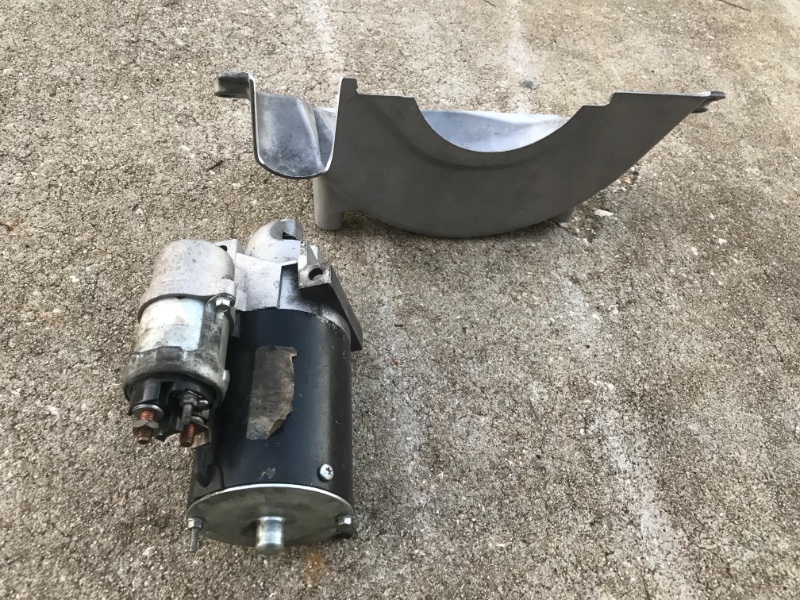
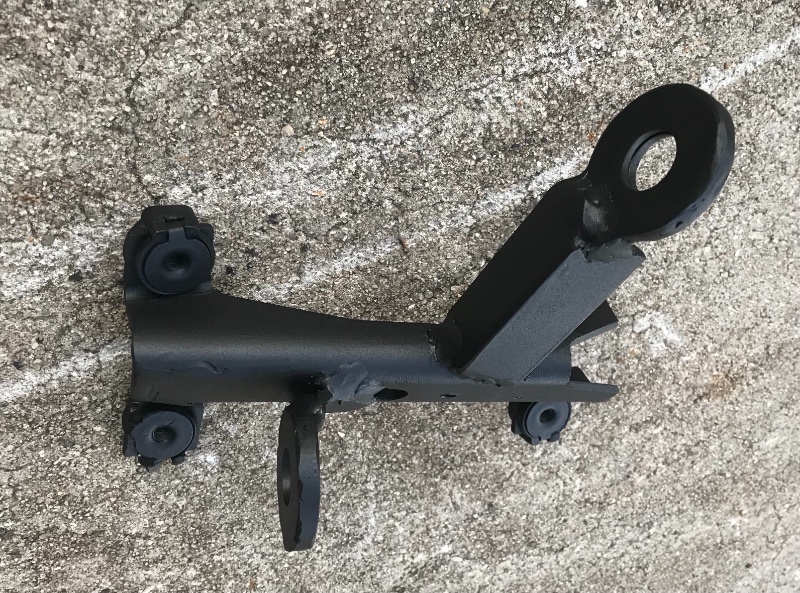
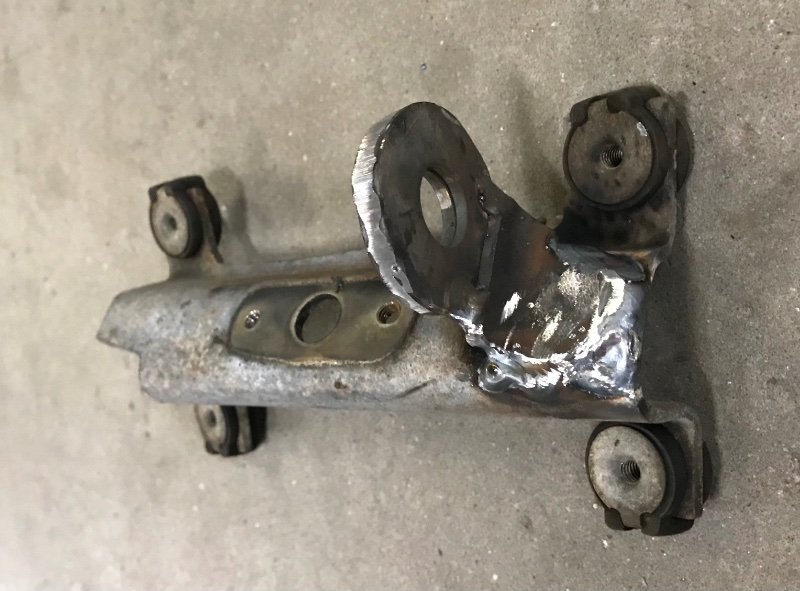
94 Camaro starter meets 88 S10 converter dust shield. Open up the hole about 8 inch to get the starter to fit in there. I think I was in about the 12th grade before I found out that cars came with a dust shield. In my early years of Mechanic work, I did not see any cars that had one still in place. Camaros, Novas etc went faster without one 😁. This one is cast aluminum and I blasted it and clearcoated it so it’s going back on. next is our Novak knockoff bracket built on the original transfer case shifter rod bracket. Originally I was going to use two separate brackets as they did but with my transfer case and transmission that is not going to fit up in there. So this bracket will hold both ends of the Morse cable. I will get a better picture once it is installed. And yes I have rust in the floor where this bolts in so we will be working on that this weekend because the floor needs beefing up where this bracket will be mounted….
-
Got one more part in. A big one. I had to let air out of the front tires because the Jack wouldn’t go up high enough to get it in. Those six bolts were a pain! There was a little ear on the top that I shaved off just to keep a goodly amount of clearance from the floor pan. I have no idea why the bottom picture is posting upside down 🤔
-
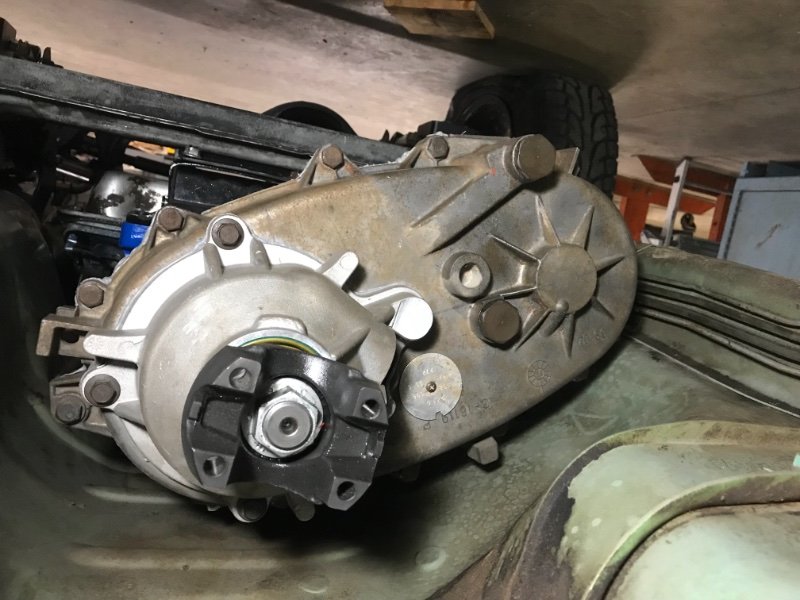
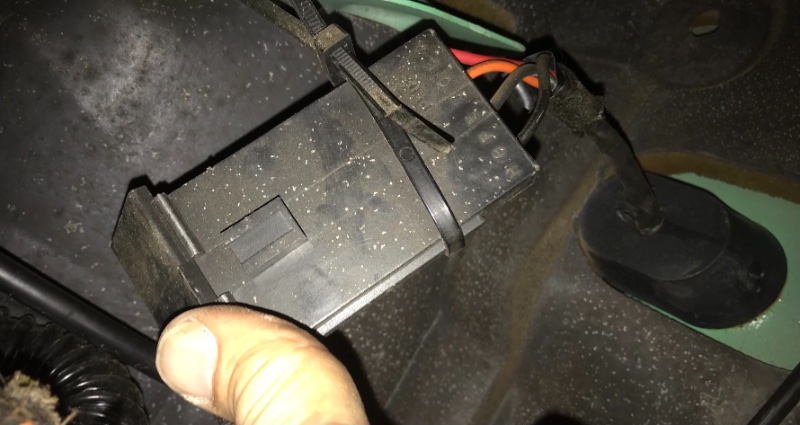
2000 hour timer module is what I believe that thing under the dash is. I plan to neuter the wiring harness of any unnecessary crap soon and that module is on death row…. Still working out small punch list items. Transfer case may go in next…
-
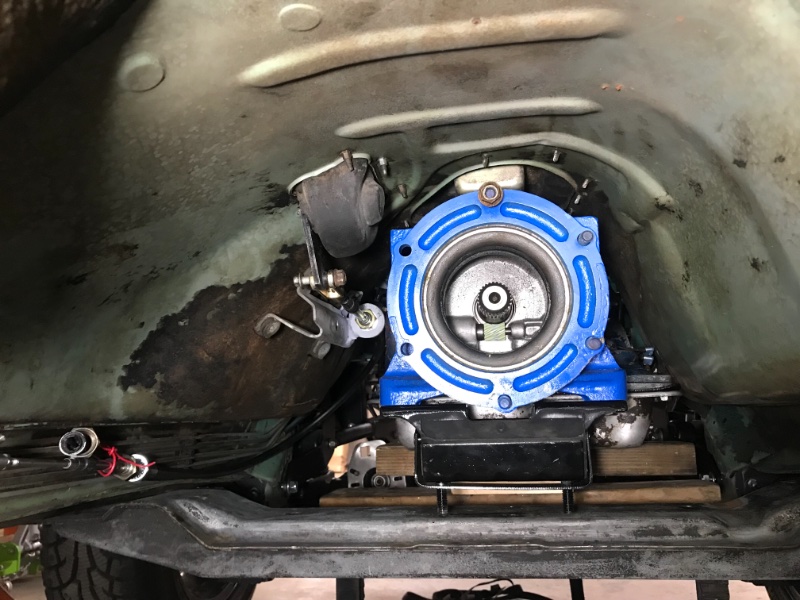
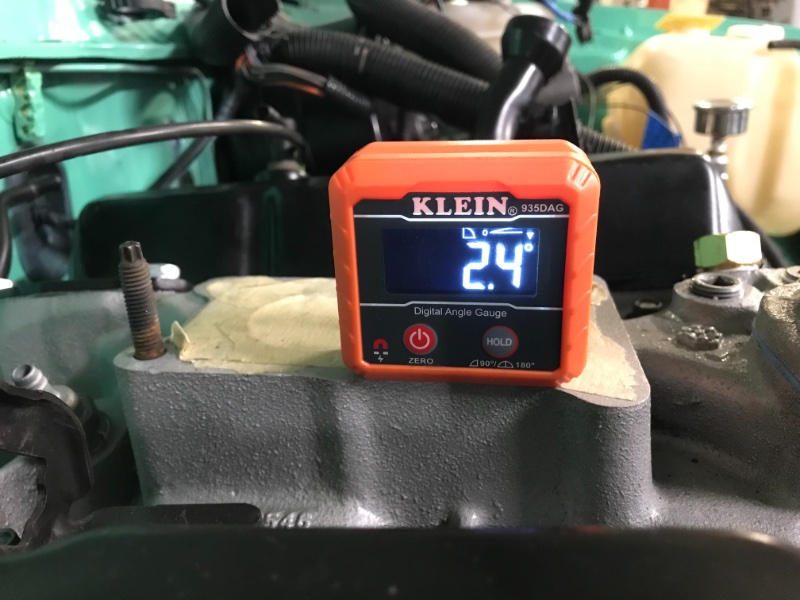
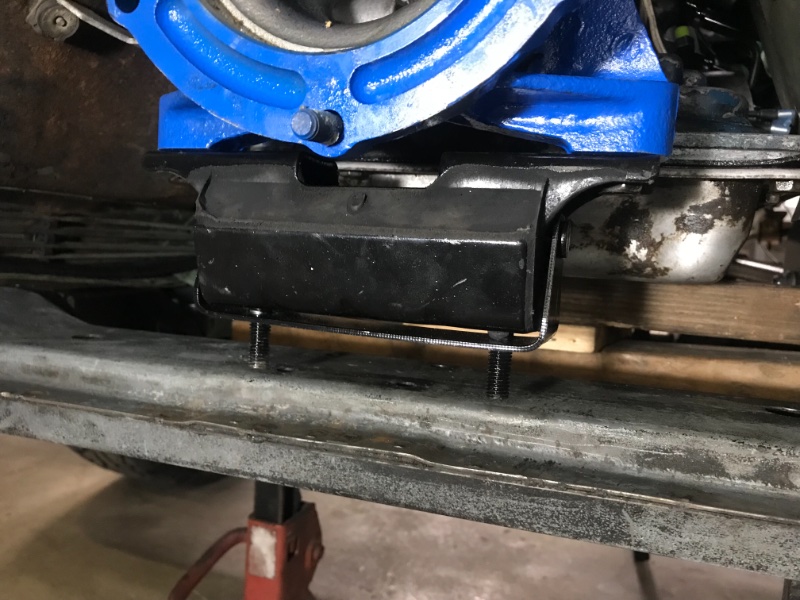
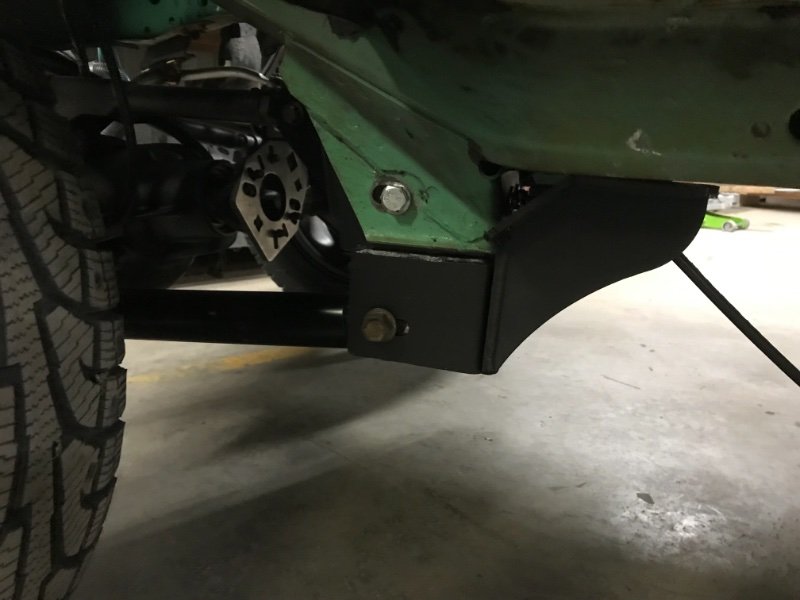
Here is the 700r4 in the tunnel when I got it dropped in. It’s all bolted in straight now. I had to pull it over to the drivers side a little with a ratchet strap. I took a ‘95 Chevy truck crossmember and cut a piece out, welded that to piece of scrap metal and drilled the bolt pattern to match the Jeep crossmember. No picture of it all bolted down yet. I am at -2.4 degrees tilted back on the carb mount surface so I’m going to raise the tail of the trans a bit next week. Taking a break for the weekend.
-
Is this for the VHS player?
-
I’ll get a good one tomorrow. Thanks!
-
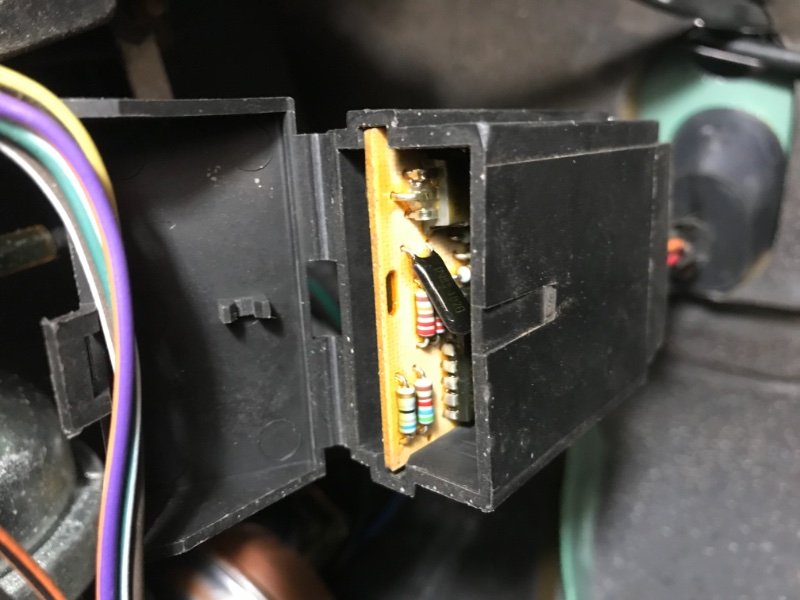
For you experienced 2.8 guys, what is the relay box module thing that is inside the firewall behind the big rubber plug? Orange and pink wires and maybe a couple other wires on it. I will be going through the entire engine compartment wiring harness at some point but I was just curious what that thing is. Looks like some 1980s electronics. And I’m sure whatever it is I don’t need it. That plug in the firewall looks like a good spot to run my Autometer gauge wires etc. through…
-
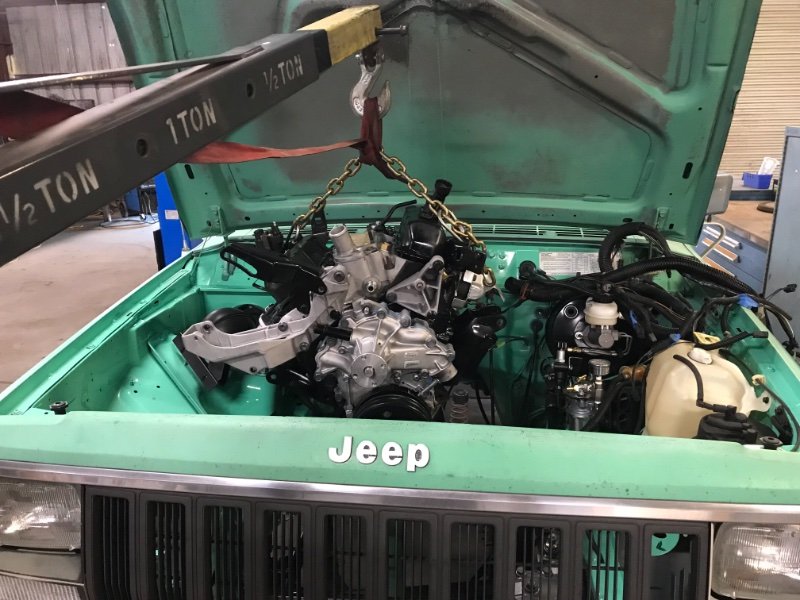
Trust me, I’d do several things more thoroughly if I had a better shop arrangement …. I need to get this thing moving under its own power, then I can do smaller projects at a slower pace. Dropped the 3.4 in today, 700r4 going in tomorrow along with adapting the factory crossmember to the 700r4.
-
I almost forgot about the rear cam cover gasket and the new rear main seal. Couldn’t put them in till I got it off the engine stand. Any plumbers in the house? Special installation tool came from the toilet spare parts drawer…
-
99 XJ shifters literally bolted right in. Test fit looks good for off brand Novak bracket 😁. Although I did find a little more rust and right in a convenient spot 🙄. Floor pan restoration will have to wait.
-
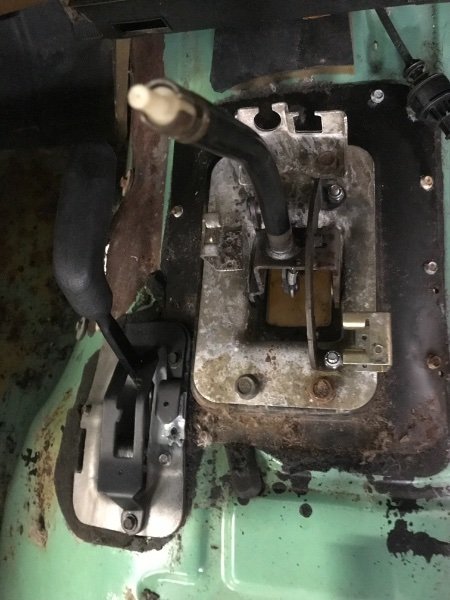
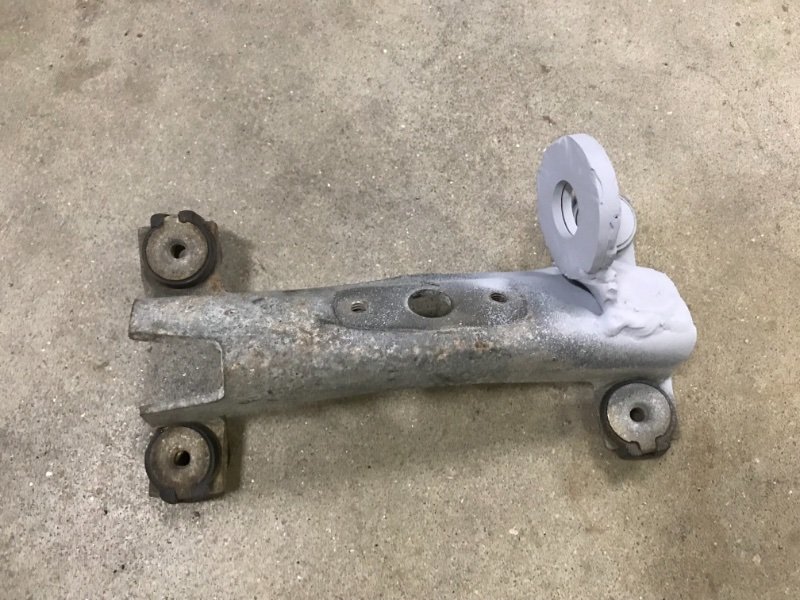
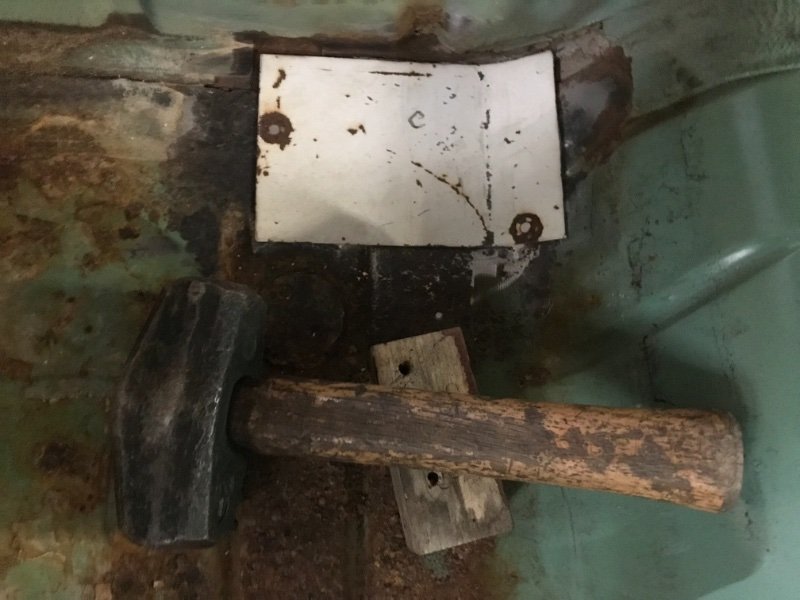
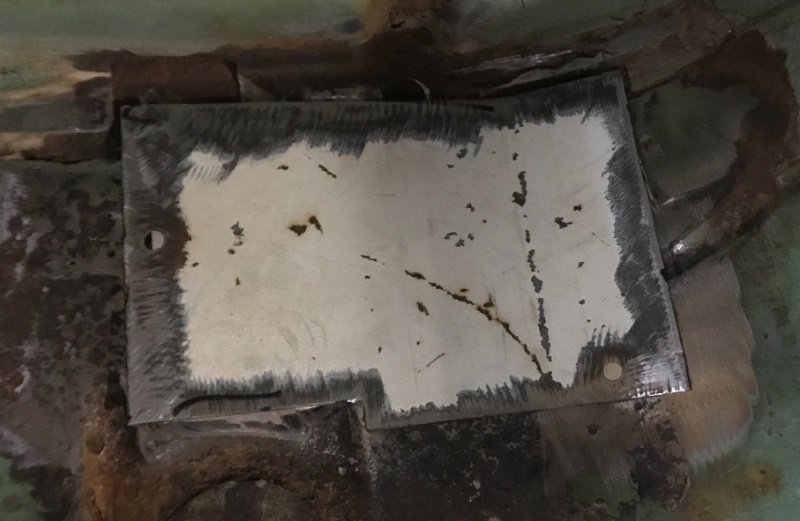
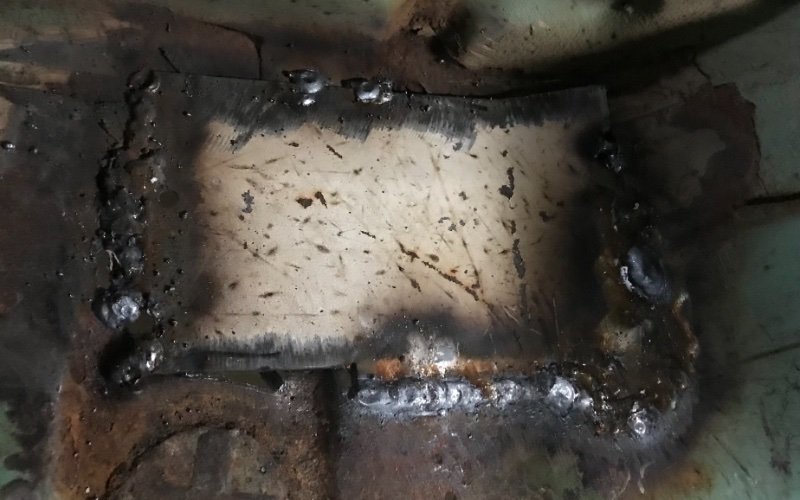
**edit, first bracket pictured this bracket was removed and I made my own version of the “Ozzie” or whatever linkages for the transfer case. I modified a factory transfer case linkage bracket that goes in the trans tunnel by just welding some big mongo washers together then to a piece of angle iron, then to the bracket itself. This will hold the shifter end of the Morse cable. Home made version of the Novak kit. I used one of my old motor mounts, cut it up and fabbed a bracket for the transfer case end of said cable. my rusty hole over the muffler turned into a picture of Nevada after trimming it out. Old sign or washing machine side (?) used to make a patch panel. Booger welded it in, will seam seal it on another day.
-
how many miles on your truck's factory engine?
Greenjeans replied to Pete M's topic in MJ Tech: Modification and Repairs
245k on this 1986 XJ 2.8. Compression was still good but it leaked everything. 3.4 going in soon!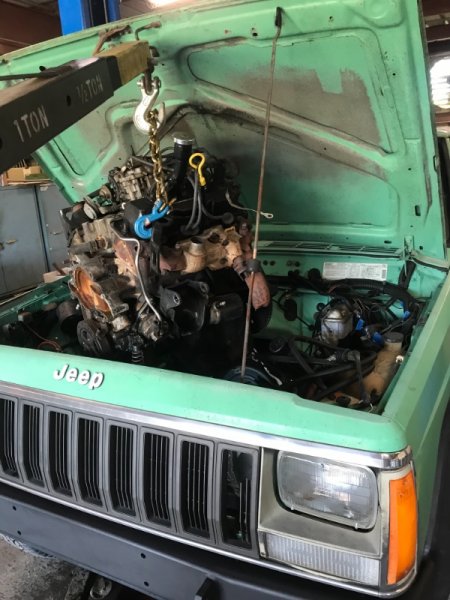
-
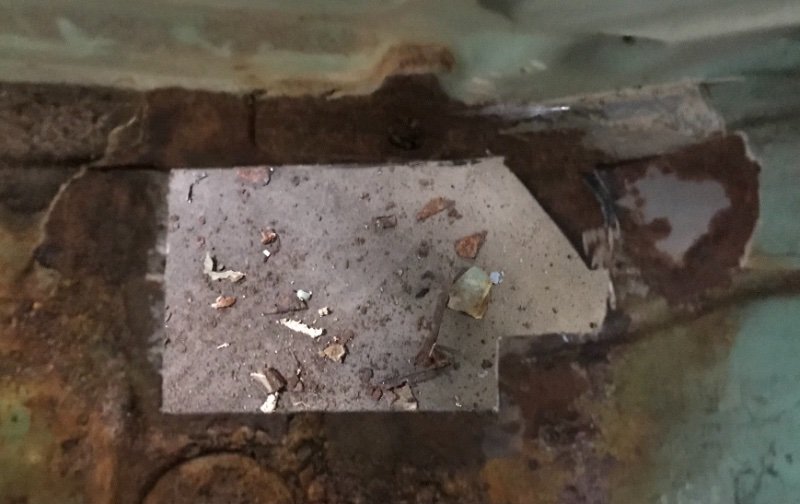
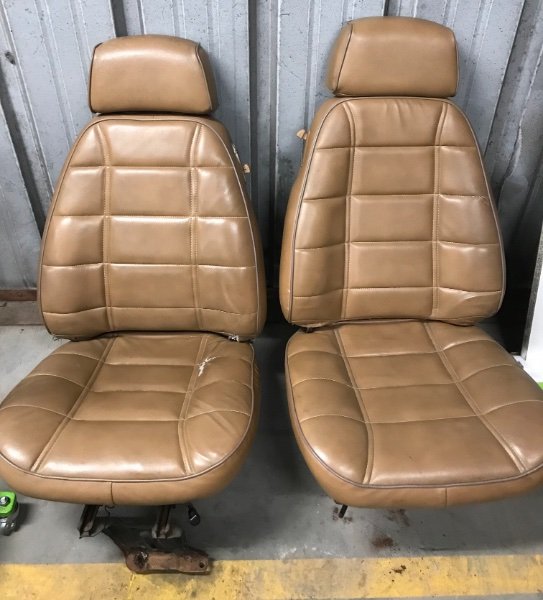
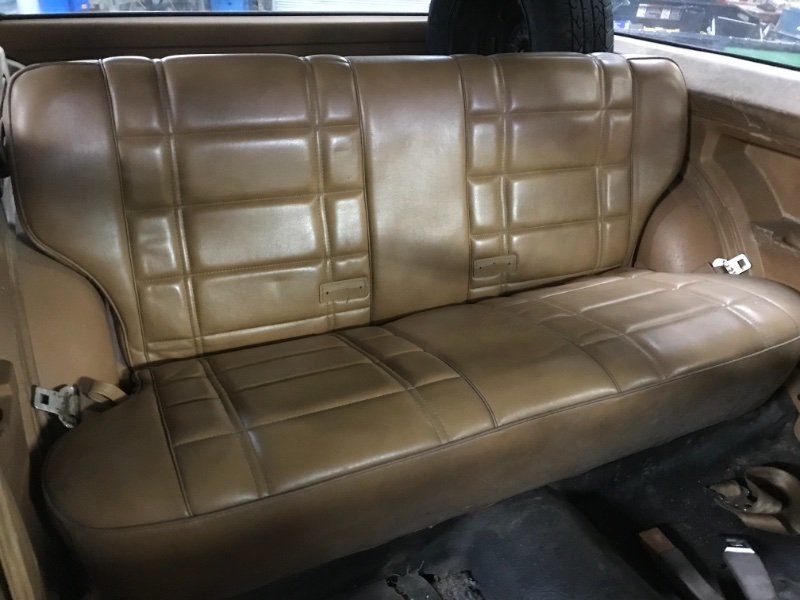
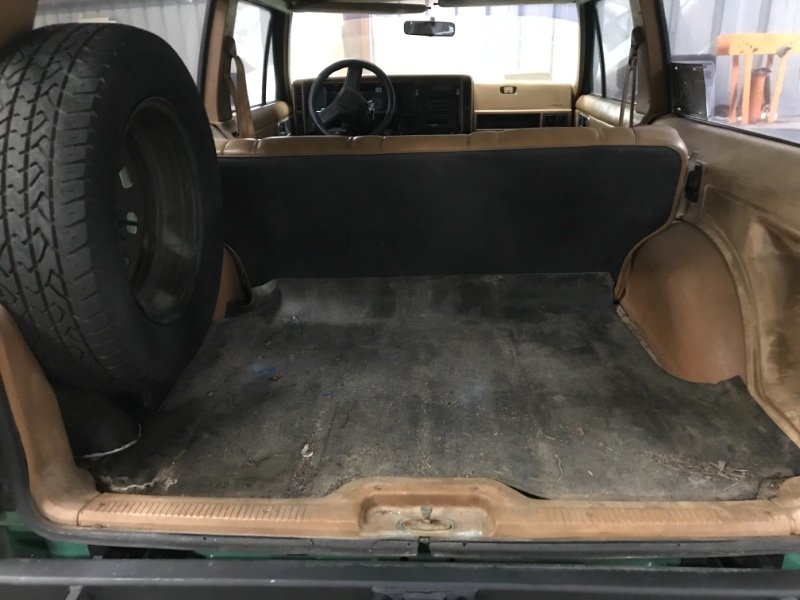
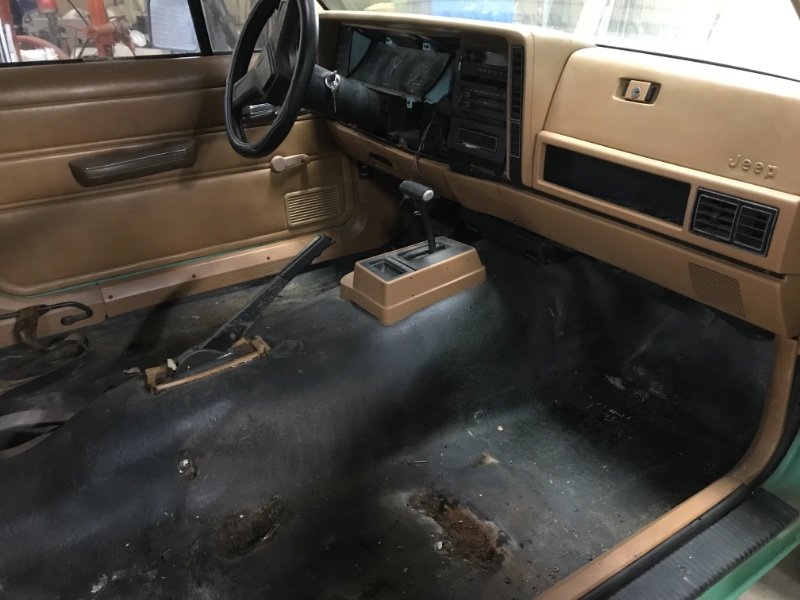
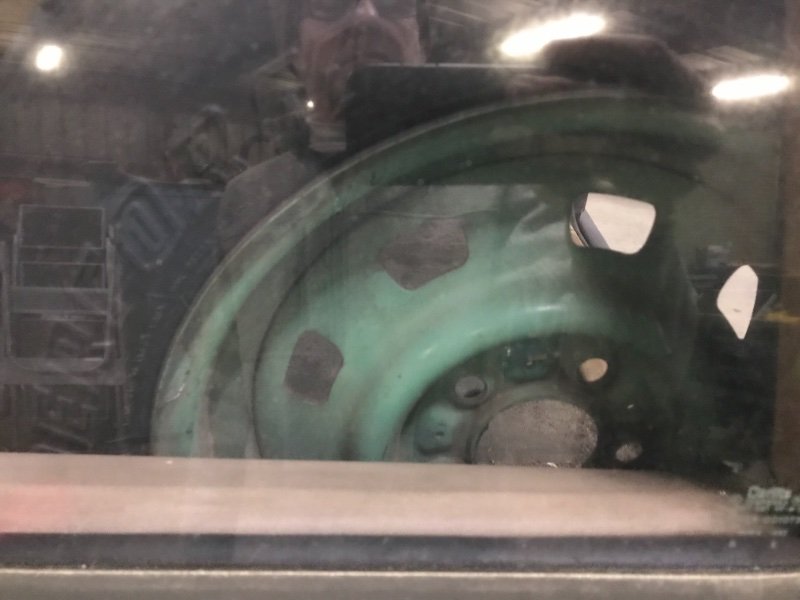
First off merry Christmas to everyone! I think my engine transmission and transfer case are finally ready to go in to the Jeep. But before I put them in I had a couple little projects need to be addressed. I wanted to put drop control arm brackets on the front because the control arms had a hideous angle and the ride was really bad. I went with the Amazon specials and they are apparently an exact copy of the rough country. They probably actually make the Rough Country in the same plant. But they do not have the rough country logo cut into them that I did not like. Like every project it took twice as long as I thought because the frame side bracket needed some grinding etc. no two vehicles are identical I will just say that. Otherwise they fit perfectly. And after adjusting the control arms about three times I finally got 6° caster. There’s no drivetrain in it, so it’s a good starting point is the way I figure it. And it was very easy to do when you can Literally sit on the floor in the transmission tunnel. The next housekeeping issue is I need to repair the only hole in the Jeep. It is above where the muffler was originally. Passenger rear floorboard. It’s not a big hole but needs to be done now before I move forward. I also have not inspected the floor with the factory mat removed yet. It might need a little primer or something here and there. I know most of these things leak and this one is no different. I also need to install the transfer case shifter and the 99XJ automatic shifter. The front seats are not in terrible condition but they are also not in great condition. One of them leans back to far couple of mechanisms don’t work very well and there are cracks in the driver side vinyl. So I’m really not sure what I’m going to do for front seats. If I could find an NOS covers or afford a real upholstery job I would reuse them. The backseat is about mint. Going to put that decision off for a while so I can focus on the drive train. In the old days, most of my hot rods had a milk crate in them to sit on at some point and this one will be no different. The vinyl floor mat is a little fragile but I definitely plan to save it. Repair a few splits with some adhesive or something. If they reproduced these I would buy a new one but I would imagine this is XJ gold and not replaceable. Original spare is green. Maybe all of the wheels were green. I cannot find any pictures of a USFS Cherokee that is this old.
-
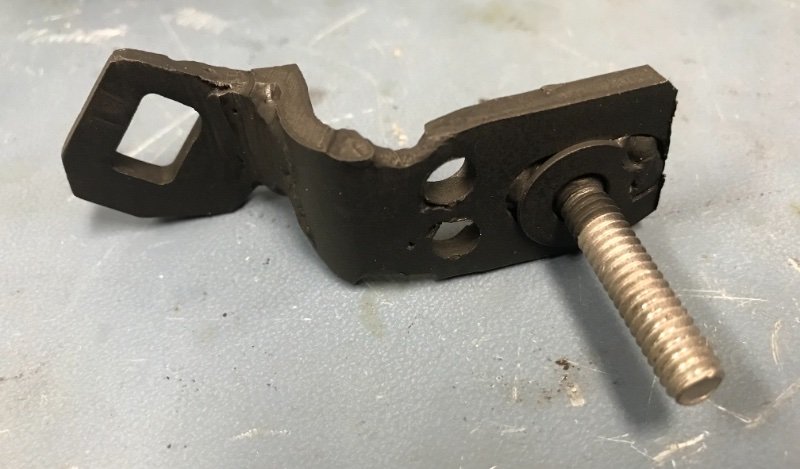
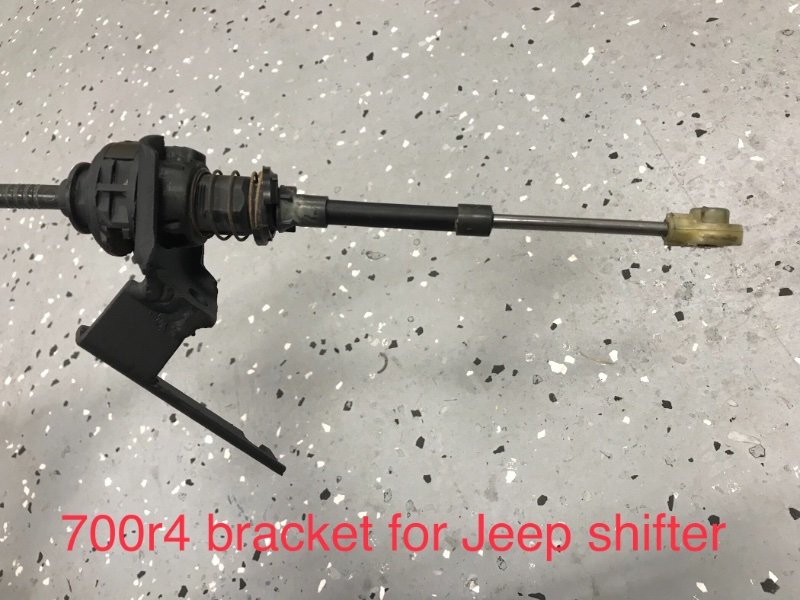
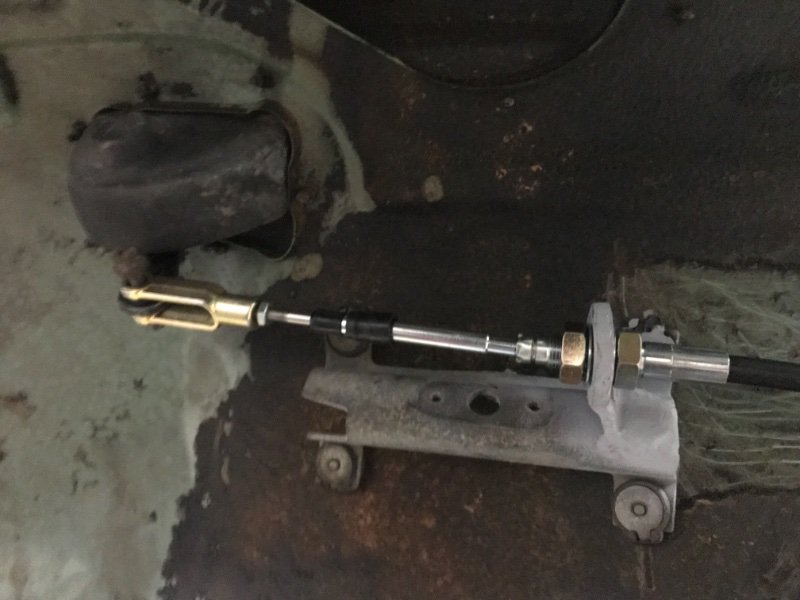
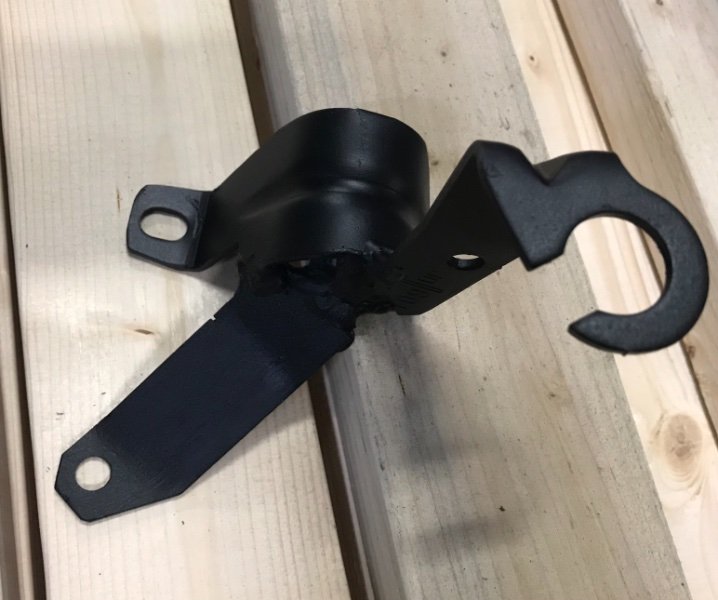
700r4 brackets for use with Jeep shifter and cable. Look sketchy but work great. The arched bracket on the shifter was removed by drilling out rivets, grinding more travel clearance where arrow points. Then bolt the bracket back on with 1/4” bolts. This added travel allows you to get to 1st gear (D/3/2/1). When I get to the shifter install in the console I’ll have to figure all that out. I got a 99 XJ shifter so I could use a cable instead of 1986 shifter rod arrangement.