

Smash6
-
Posts
57 -
Joined
-
Last visited
Content Type
Profiles
Forums
Gallery
Everything posted by Smash6
-
If anyone wants an up close look, I'm in the area and can help.
-

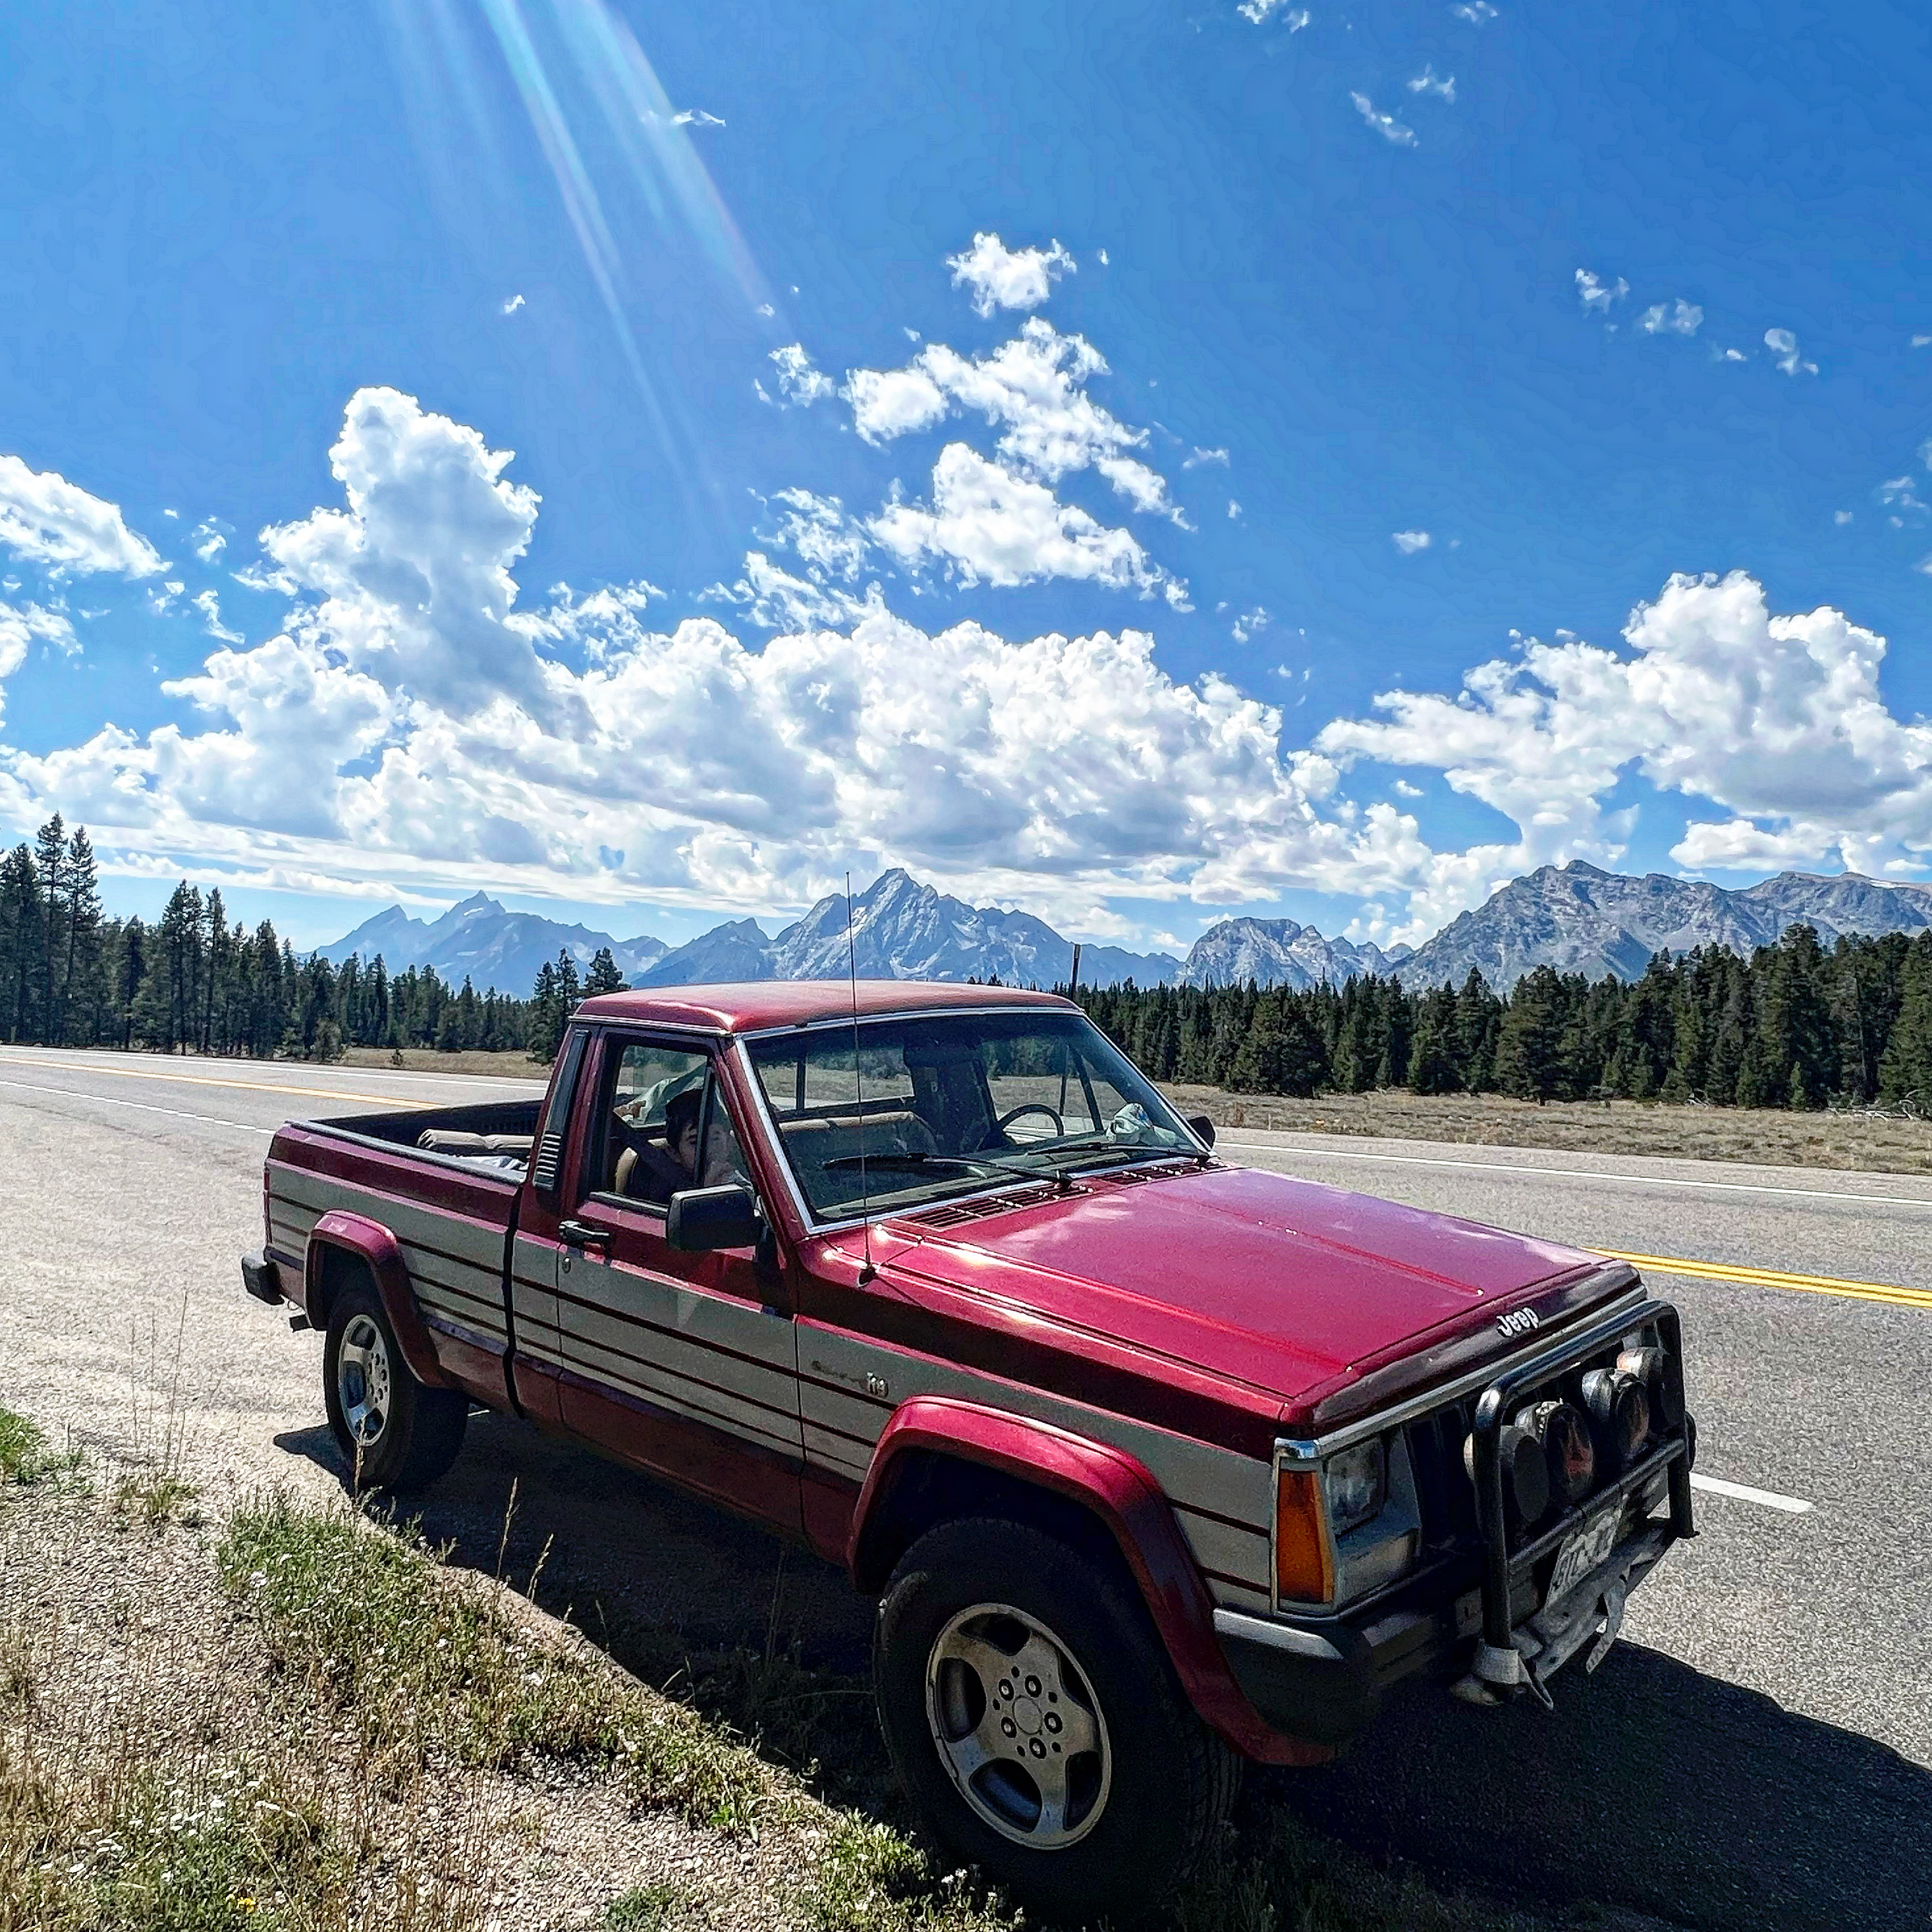
87 Comanche Bucket-O-Bolts - son's first car
Smash6 replied to Smash6's topic in Member Projects: Your Comanches
The Comanche won a trophy at the local Jeep show today!
-
Hanson Offroad Comanche Rear Bumper
Smash6 replied to Kedosp's topic in MJ Tech: Modification and Repairs
That's a beautiful bumper. I can't wait to see it mounted. As for the wait time - I have Hanson bumpers on my LJ and they are very, very well made - I'd happily wait for their products. -
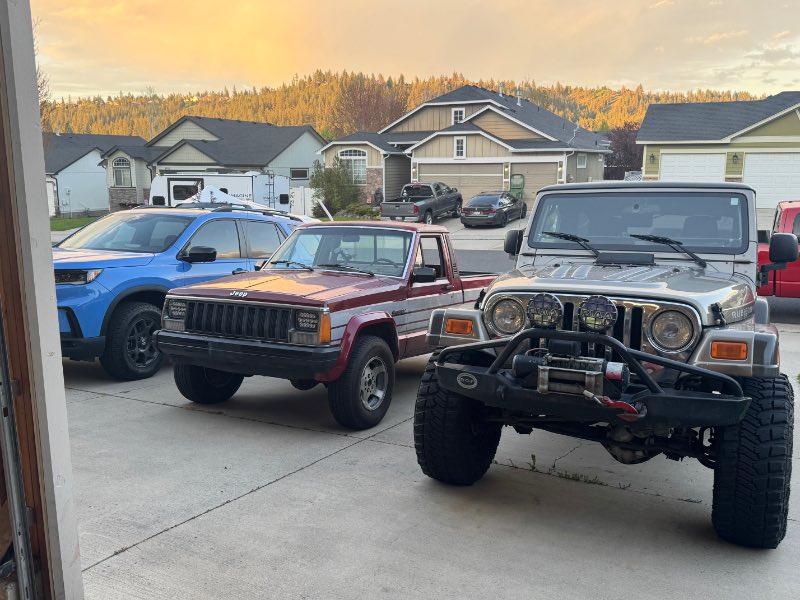
Sweet rig!
-
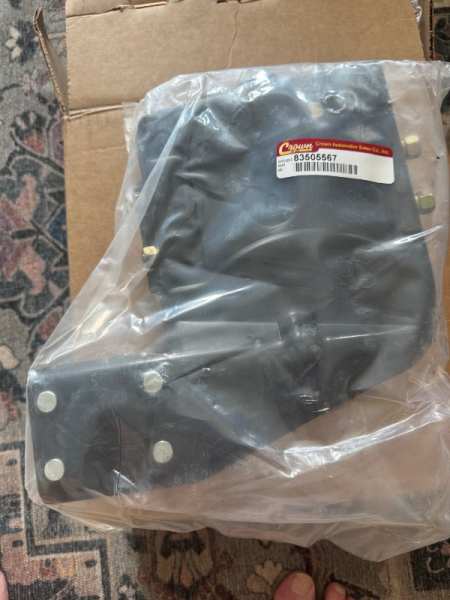
This mount is brand new and at the time I purchased it, very back ordered. I went a different route so this has never left the bag it was shipped in. See the link below for product information. $60 Shipped anywhere in the continental US. PayPal/Venmo/Zelle https://www.jegs.com/i/Crown-Automotive/077/83505567/10002/-1?gad_source=1&gad_campaignid=19684926646&gbraid=0AAAAAD6OBRFvUaC9_Zs1TViNYrtCBeCEq&gclid=CjwKCAjwwpDQBhAuEiwAa-4Wo3WxPP0-nhz1ORJAWCTqci8E5ggFBt78sY45ETw-rzN7ykNIcZqjiRoC8IcQAvD_BwE
-
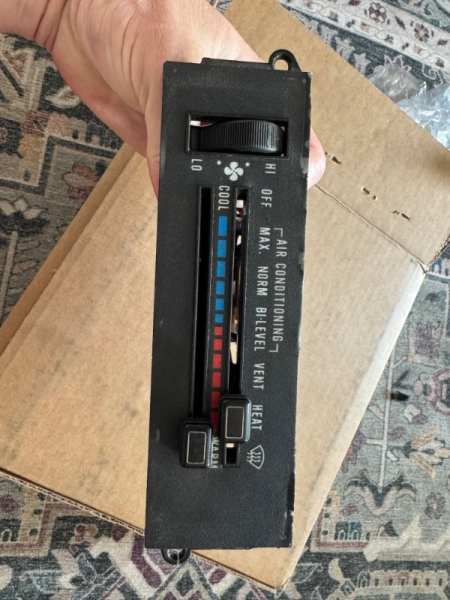
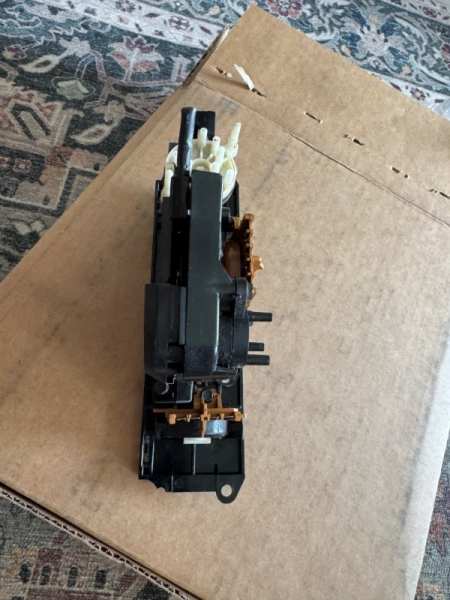
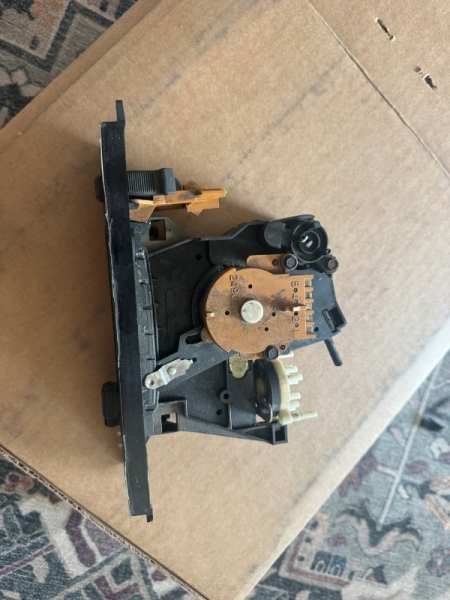
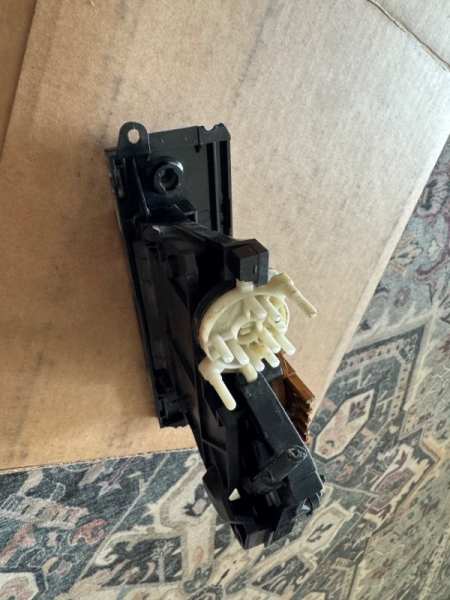
AC HVAC controller. Untested, but all levers move things as they should. Has two mounting ears broken off. All levers move smoothly and connectors are solid. $20 + shipping from 99224 Paypel/Venmo/Zelle.

-
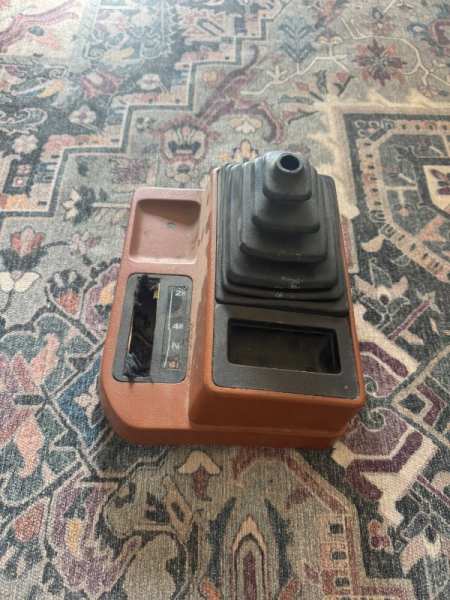
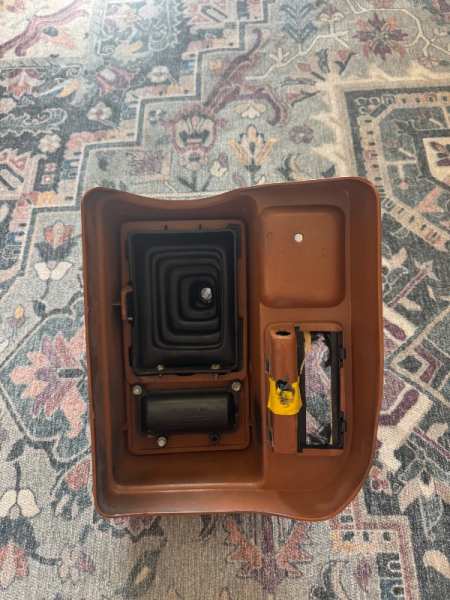
Center console in pretty descent shape. $40 + shipping (from 99224) I accept PayPal, Venmo, or Zelle.

-
87 Comanche Bucket-O-Bolts - son's first car
Smash6 replied to Smash6's topic in Member Projects: Your Comanches
The headliner is the last part of the interior puzzle. It’ll get there. In the meantime, the Comanche left the garage for the first time in 6 months. It ran like a dream and the best part, it doesn’t smell like old cigarettes anymore. My son was beaming.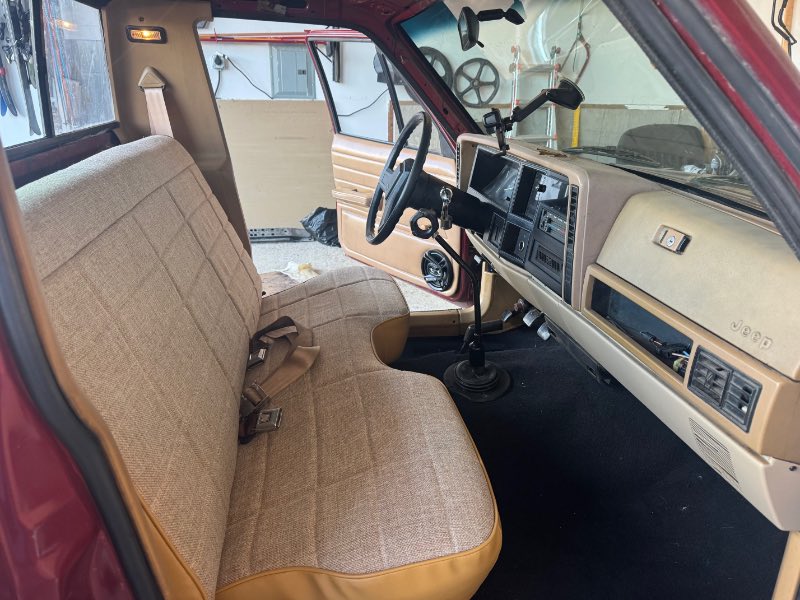
-
87 Comanche Bucket-O-Bolts - son's first car
Smash6 replied to Smash6's topic in Member Projects: Your Comanches
I managed to epoxy the cable sheath back into the retaining clip on the HVAC head unit which allowed me to get most of the dash back together. I need to sand and repaint the lower dash piece, then the dash will be pretty complete.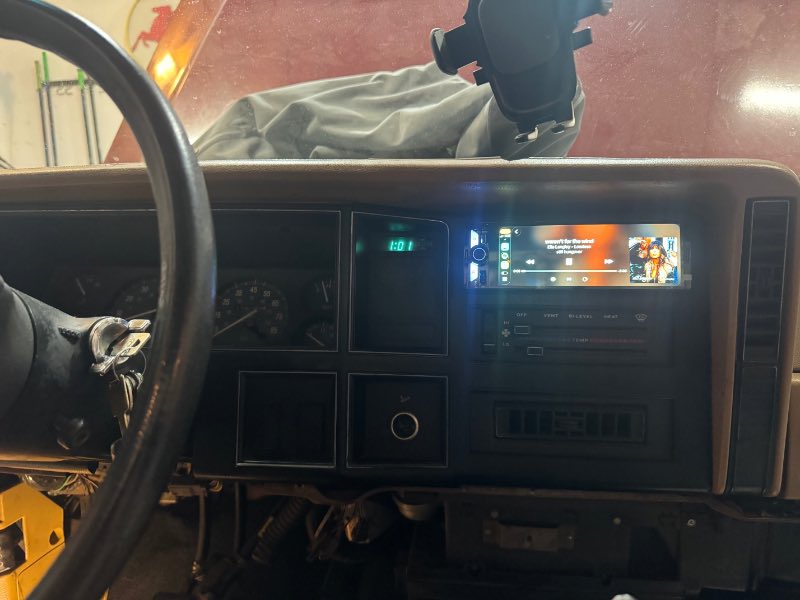
-
hvac temp control cable
Smash6 replied to watchamakalit's topic in MJ Tech: Modification and Repairs
I managed to epoxy the cable sheath back into the HVAC retainer clip. I’m hoping it’ll hold. So far, it’s working well. -
hvac temp control cable
Smash6 replied to watchamakalit's topic in MJ Tech: Modification and Repairs
I found this cable which looks very familiar to the Comanche cable. https://www.dixierestorationdepot.com/product/Detail.aspx?s=DM00062&srsltid=AfmBOoq5QFKxfuZzZ6RO1p2_80jJECdVAr7MwKfPlP1XPfCztDr7f-yC -
87 Comanche Bucket-O-Bolts - son's first car
Smash6 replied to Smash6's topic in Member Projects: Your Comanches
More interior bits are in. Today’s big problem is that the blend door cable sheathing has separated from the plastic bit on the HVAC control rendering the cable inop. I did find this one and am wondering if it’s the same cable… https://www.dixierestorationdepot.com/product/Detail.aspx?s=DM00062&srsltid=AfmBOoq5QFKxfuZzZ6RO1p2_80jJECdVAr7MwKfPlP1XPfCztDr7f-yC Today’s big win was getting the Raybuck seat cover on. We added 1” high density foam as well as some foam in some high use ruined spots (under the driver’s @$$) to revive the seat cushion. It looks great.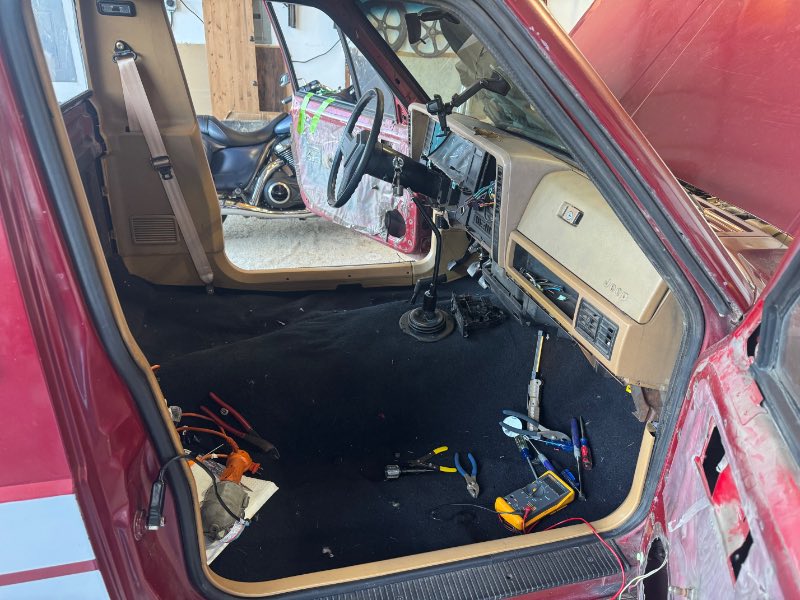

-
hvac temp control cable
Smash6 replied to watchamakalit's topic in MJ Tech: Modification and Repairs
So my outer cable sheath came apart and I can’t get the cable to work properly now. My cable is solid core. I'm trying to find somewhere to purchase a new one. -
87 Comanche Bucket-O-Bolts - son's first car
Smash6 replied to Smash6's topic in Member Projects: Your Comanches
A lot of wire chasing and the new stereo works as it should. A PO hacked the old harness way back in the dash. It’s sorted now.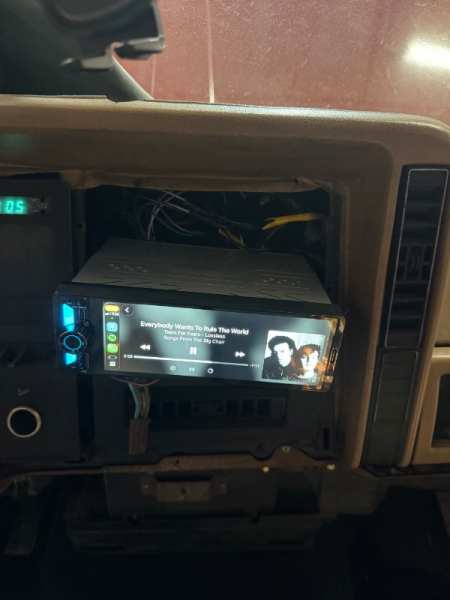
-
Soak it in PB Blaster. Give it a day and soak it again. Use a wire brush and clean that nut and stud up. Then see how the nut looks. It looks like you have a vinyl floor, so be careful with using heat. Using the wax trick (google it) may work out for you and doesn't require as much heat as turning it red hot with a torch. Good luck!
-
87 Comanche Bucket-O-Bolts - son's first car
Smash6 replied to Smash6's topic in Member Projects: Your Comanches
The courtesy lights now work as they should. 6.5” speakers in the rear using heavily modified boxy Jeep adapters. The Raybuck seat cover and foam has arrived and I’ll get that together soon. Progress is slow, but it’s progress!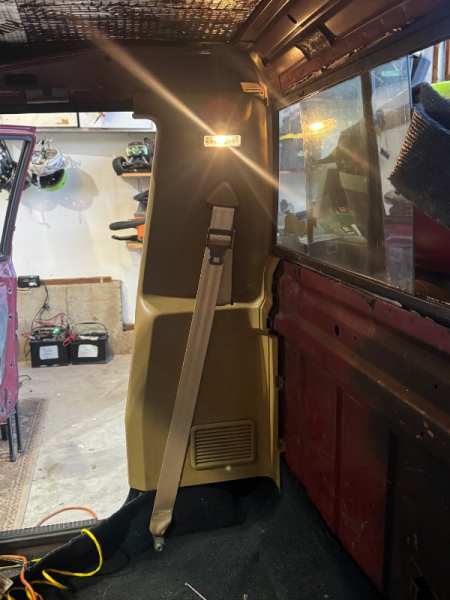
-
I looked at that, but I'm not sure it'll follow the contour of the floor properly. Appreciate the thought.
-
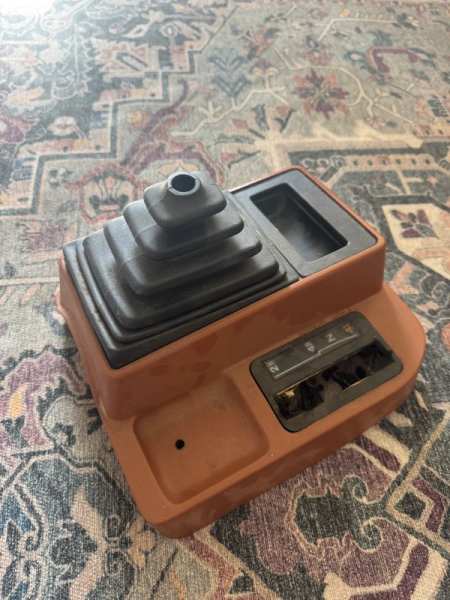
I’m looking for a shift boot for the 4wd shift lever. With my current setup, I can’t run a console. Has anyone used one off a ford truck or something similar? Link below for an example. https://www.ebay.com/itm/317773193736?chn=ps&norover=1&mkevt=1&mkrid=711-166974-028196-7&mkcid=2&mkscid=101&itemid=317773193736&targetid=2274951440814&device=m&mktype=pla&googleloc=9033697&poi=&campaignid=21169638466&mkgroupid=161124236057&rlsatarget=pla-2274951440814&abcId=9402633&merchantid=5070431118&geoid=9033697&gad_source=1&gad_campaignid=21169638466&gbraid=0AAAAAD_QDh-ZSBUc4jWPVKLkKitaqKLb2&gclid=Cj0KCQjw1ZjOBhCmARIsADDuFTCUWYAsBHJy59zUwybMBWfCtGhTVRQISzwLNdgmREEFsyO4qp4IALoaAkudEALw_wcB
-
87 Comanche Bucket-O-Bolts - son's first car
Smash6 replied to Smash6's topic in Member Projects: Your Comanches
I got the seatbelts back and they look great. The courtesy lights are wired in. There wasn’t any voltage because there wasn’t a fuse! The door jam switches are testing bad so I ordered two new ones. I’m not convinced that they’re the issue. The lights come on with the headlight switch but that’s all. I likely have bad switches and a bad ground. Installed a new headlight switch (that sucked!) and the dash lights now work very well. Some other minor odds and ends done tonight. Every night I start with a goal and have so many smaller things to tend to and never achieve my goal, but I can see the end.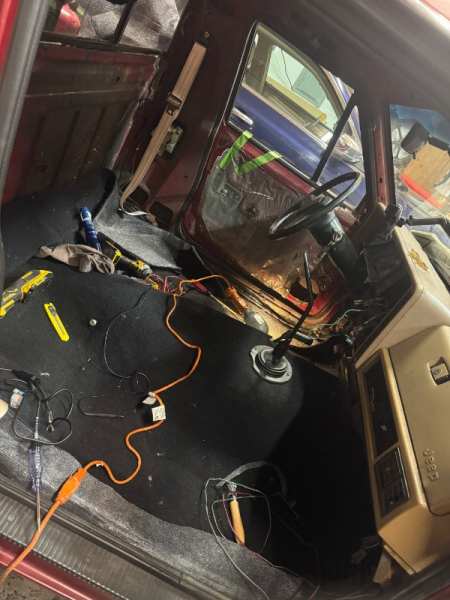
-
87 Comanche Bucket-O-Bolts - son's first car
Smash6 replied to Smash6's topic in Member Projects: Your Comanches
1. Courtesy Lights: My next struggle is the courtesy lights. I'm not seeing any voltage to the courtesy light plug. I'm struggling to find a wiring diagram for the lights. If someone has one, it'd be very helpful. 2. Heat Controls - We got the new HVAC control unit wired in and I can now adjust the fan speed and temp, but I can't change the vents (I'm assuming it's vacuum). 3. Stereo - I had planned to throw a Chinese apple play unit, but I'm going to put the old Kenwood in. The harness is hacked all to hell so I need to unfornicate that mess. 4. Seat Belts - I sent the seat belts out to Safety Restore. They should be back this week. I'm hoping the new webbing and restored springs make them like-new again. 5. Seat Cover - I ordered a new cover and foam from Raybuck. I'm hoping that it'll be here in a few weeks. 6. Cup Holders / Center Console - I can't figure out a center console solution right now. In the future, I may find someone who can 3D print something awesome. For now, I'm trying to figure out a cupholder solution. I'm thinking two pistons on connecting rods bolted to a plate, that's bolted to the floor. Also open to ideas. -
87 Comanche Bucket-O-Bolts - son's first car
Smash6 replied to Smash6's topic in Member Projects: Your Comanches
Carpet is mostly in. When the rest of the interior goes in, I’ll finish trimming the carpet.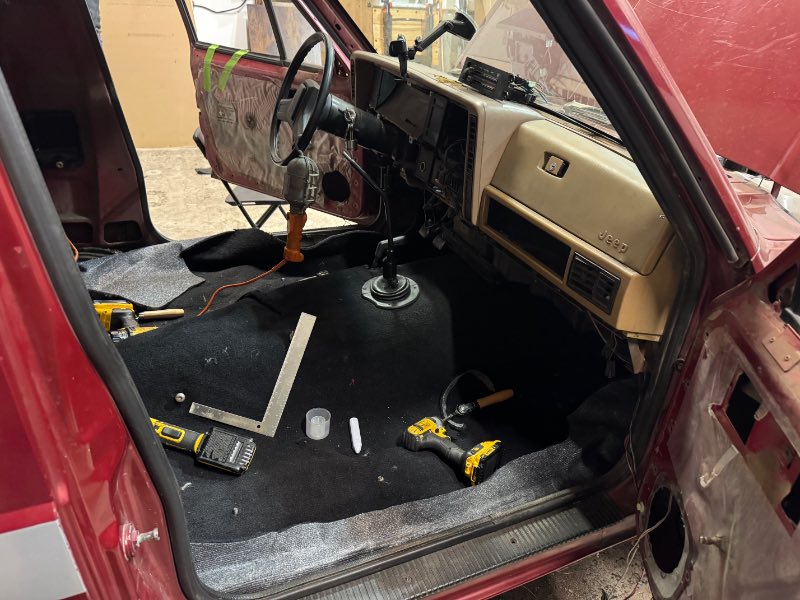
-
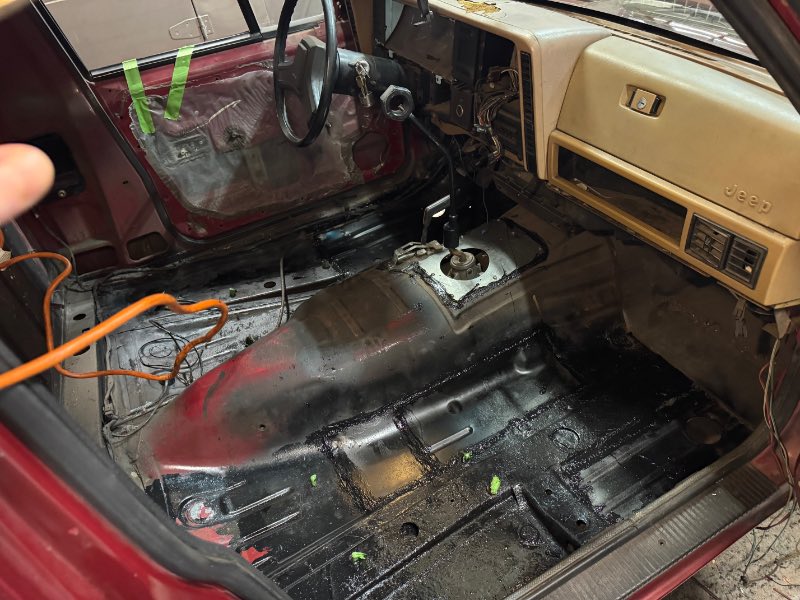
87 Comanche Bucket-O-Bolts - son's first car
Smash6 replied to Smash6's topic in Member Projects: Your Comanches
-
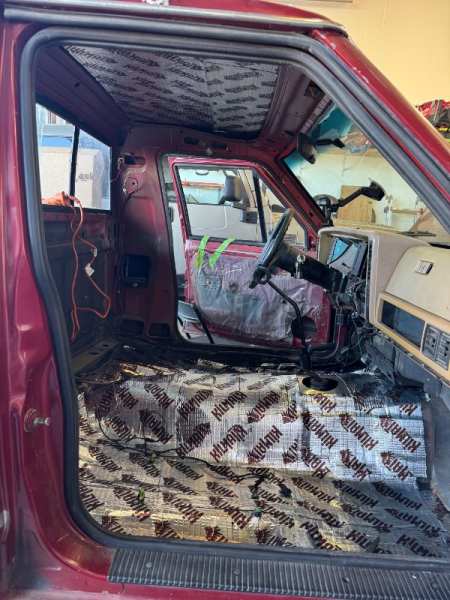
87 Comanche Bucket-O-Bolts - son's first car
Smash6 replied to Smash6's topic in Member Projects: Your Comanches
Sean sealer down. Hopefully sound deadening material goes in tomorrow.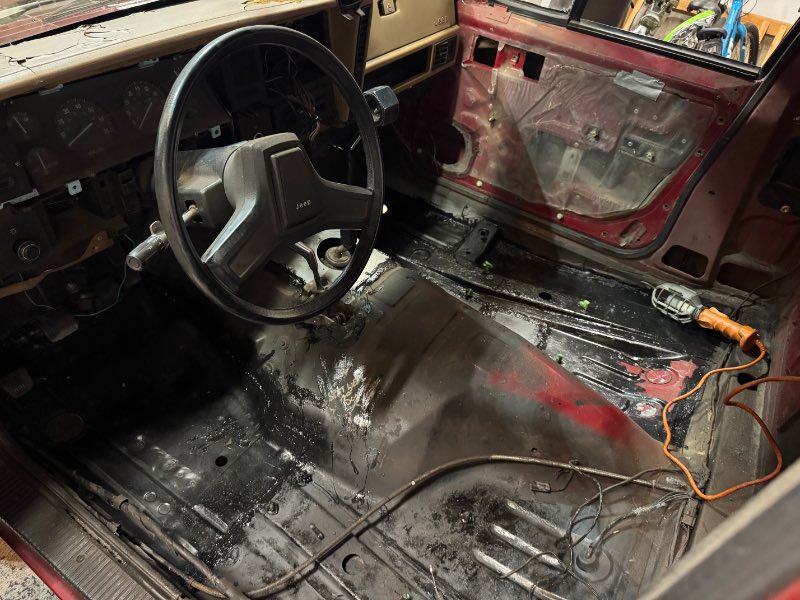
-
Great looking rig! I'm rebuilding my interior - I'd love to see some pics of your interior.
-
This is an awesome project! We had an 04 with the 4.7L and I loved that rig. It was amazing and I regret selling it. Out of our 4 Grand Cherokees, that one was my favorite. Can't wait for more updates!