

Elwiscon
-
Posts
174 -
Joined
-
Last visited
Content Type
Profiles
Forums
Gallery
Everything posted by Elwiscon
-
No-weld floor pan replacement
Elwiscon replied to Elwiscon's topic in MJ Tech: Modification and Repairs
True, makes sense, but as I stated, i don’t have the skills to weld floor pans , I ve heard it takes skill to weld thin panels. The unibody frame rails were clean and rust free, so thats a great thing, may provide enough structural support. For additional safety May be a good idea to spot weld it sometime before i finish the floor. As far as i know 3M and other bonding adhesives are great if properly applied. Saw a video on youtube a while ago of a guy doing the same repair with Gorilla Constrution adhesive! Thanks for pointing it out -
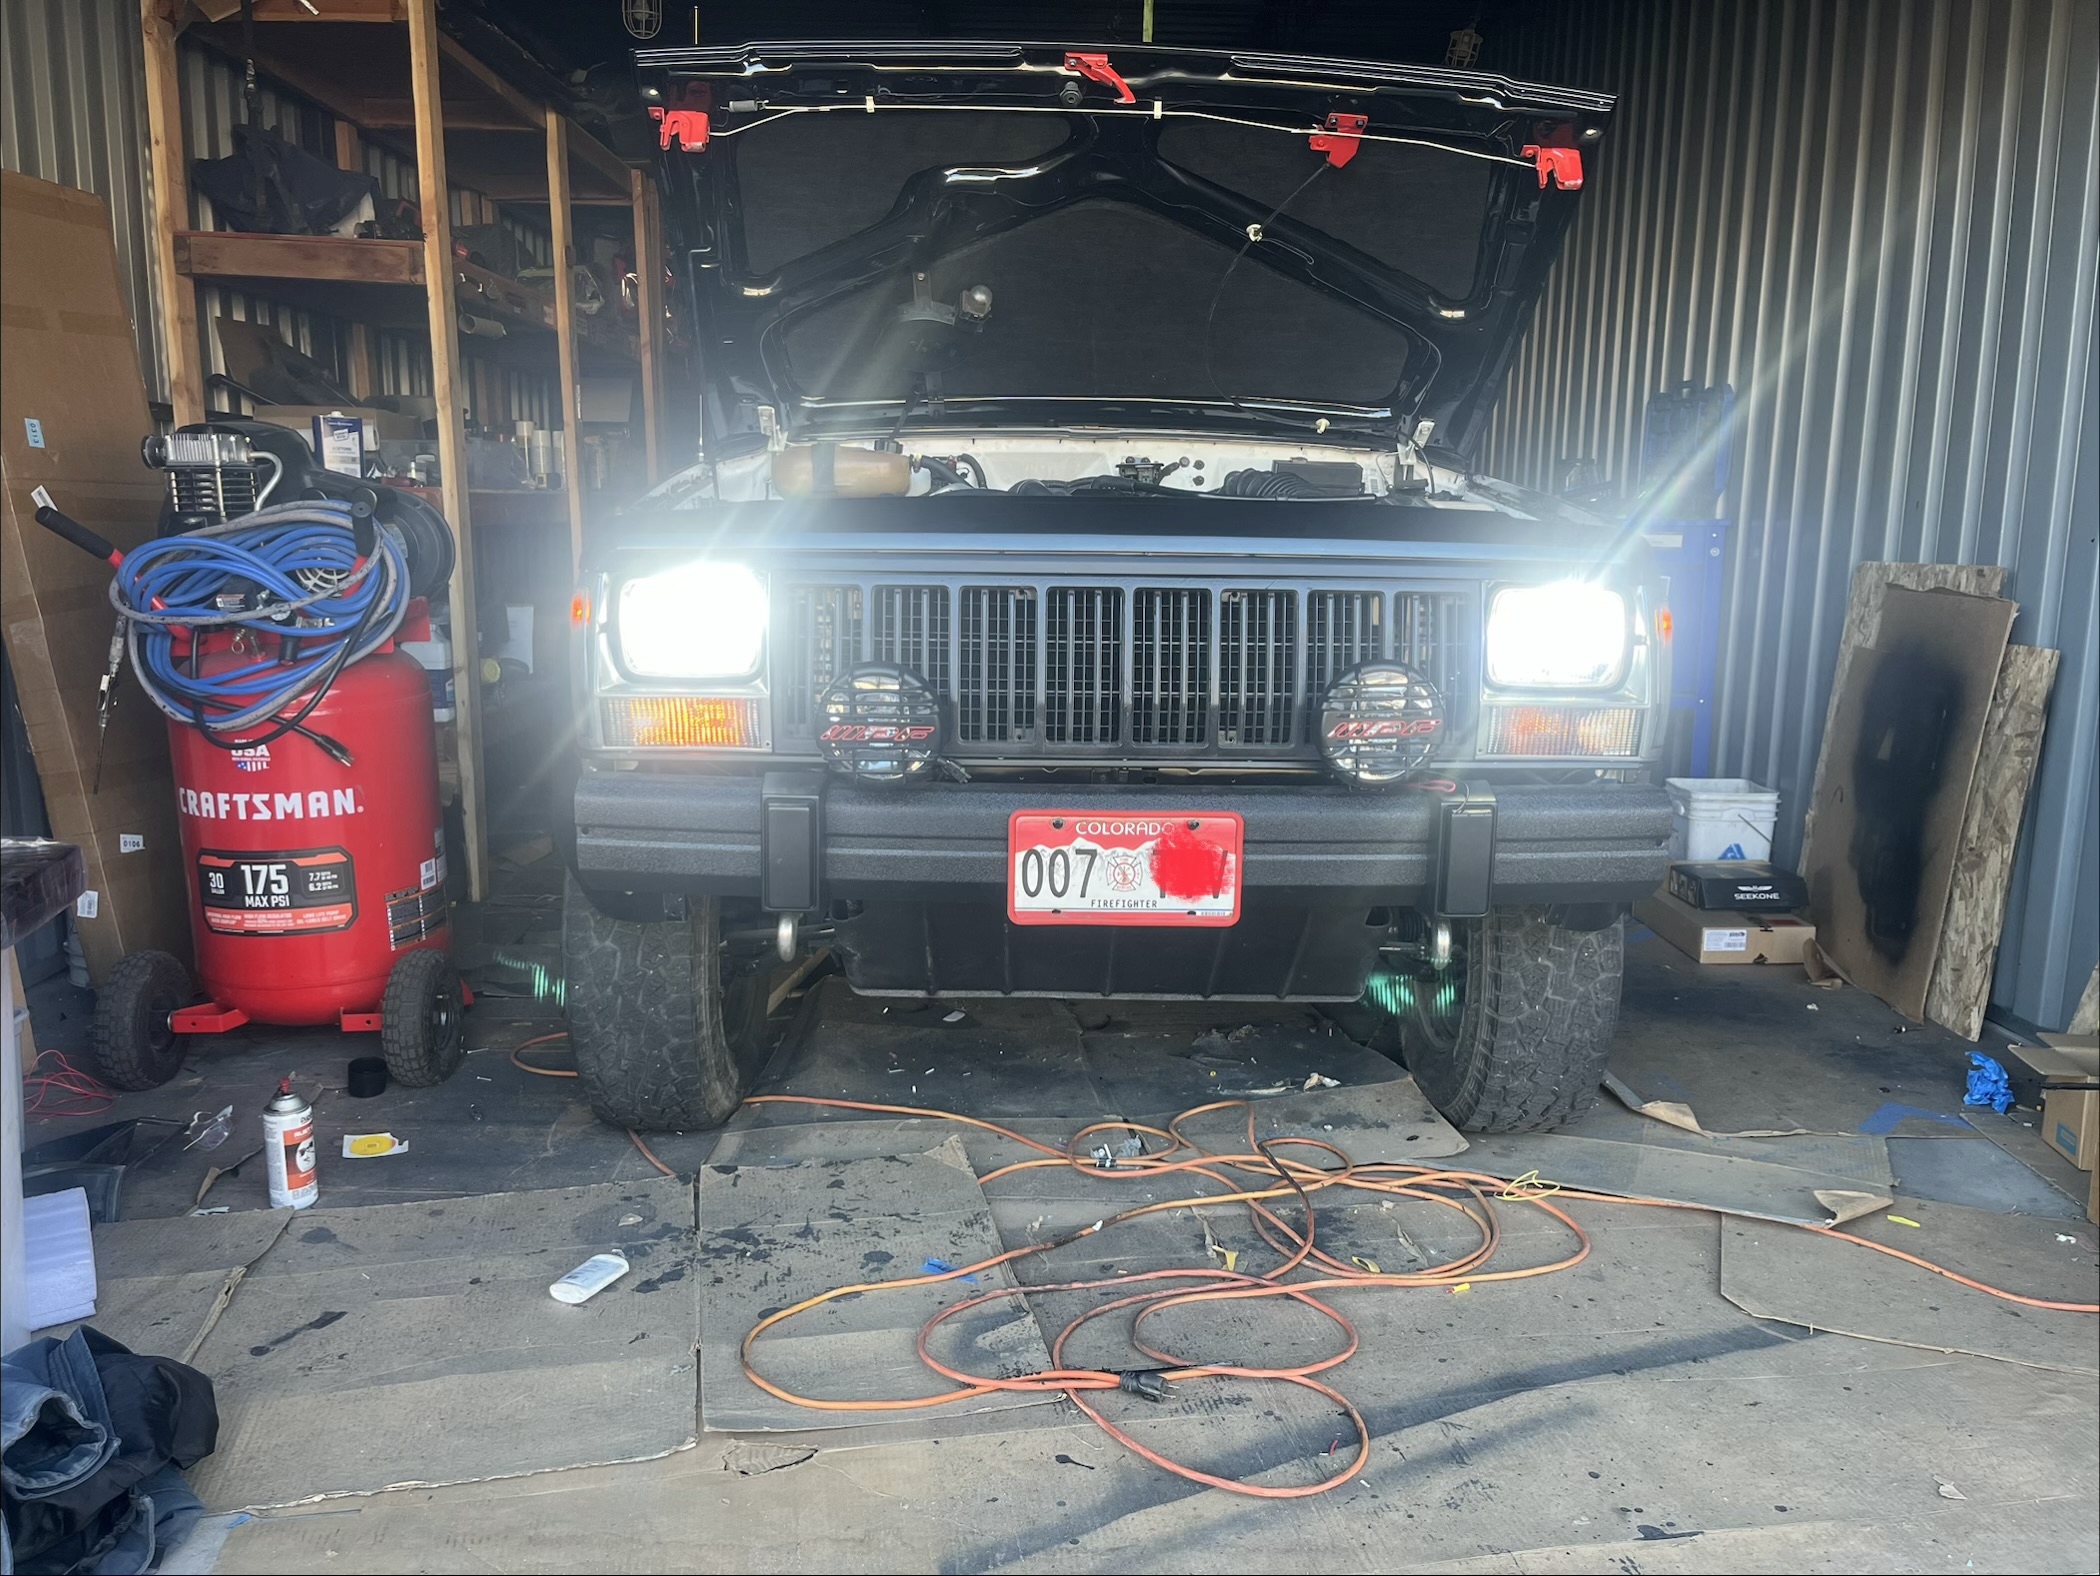
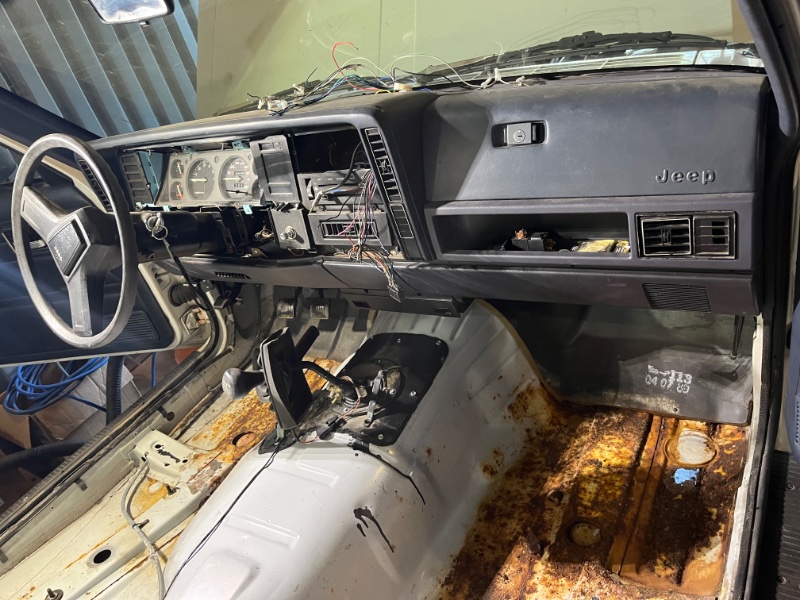
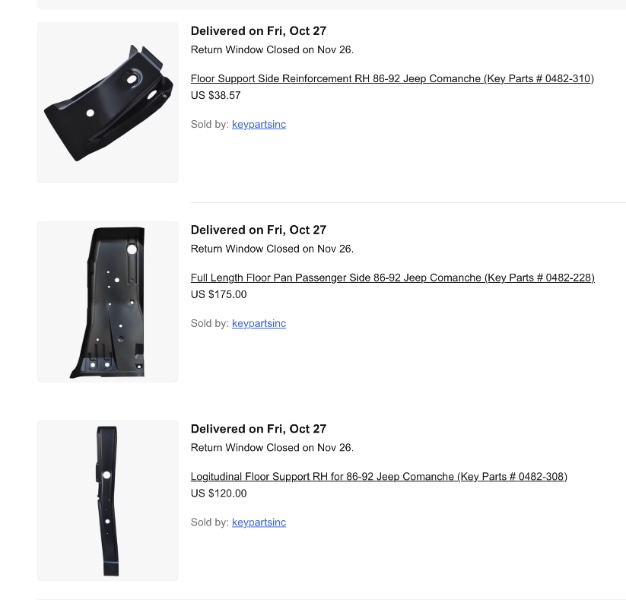
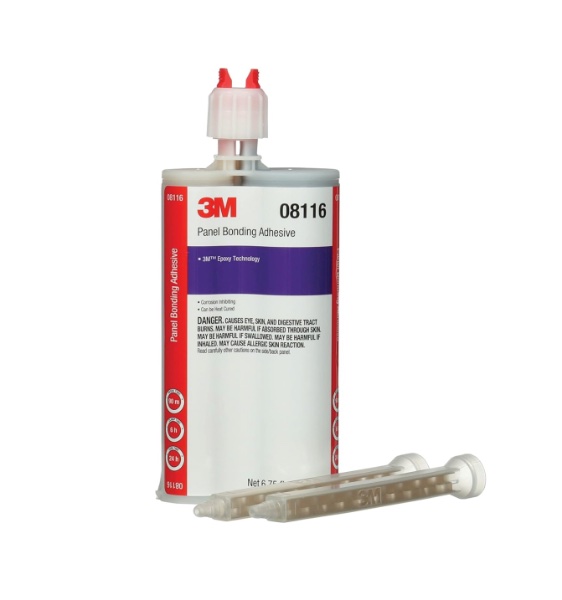
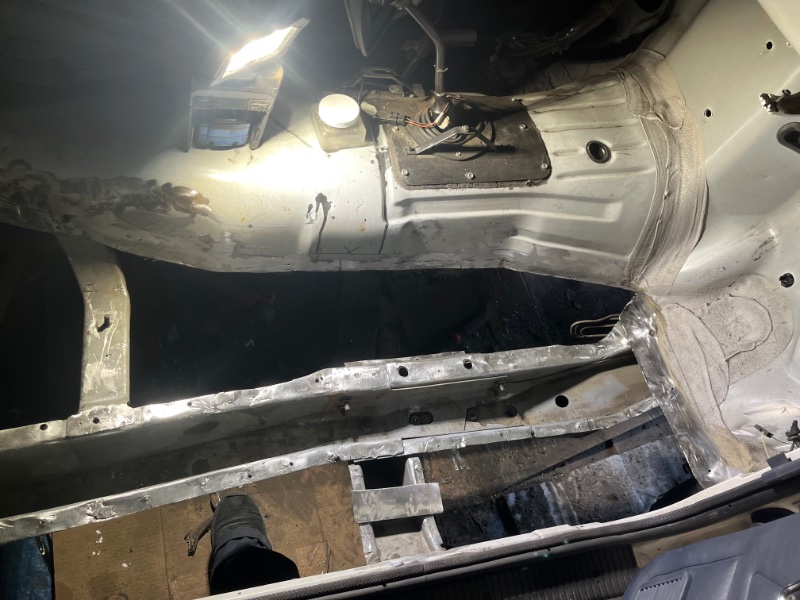
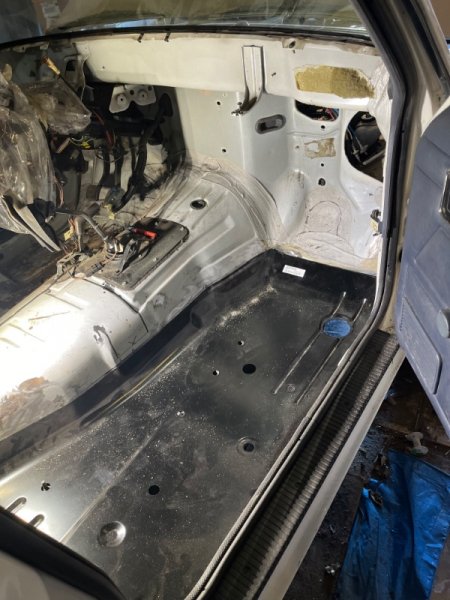
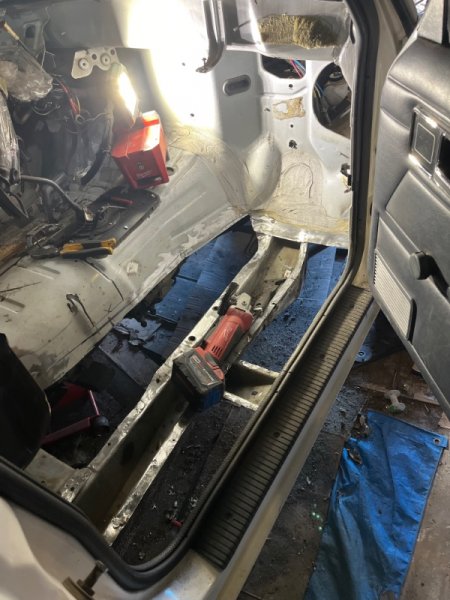
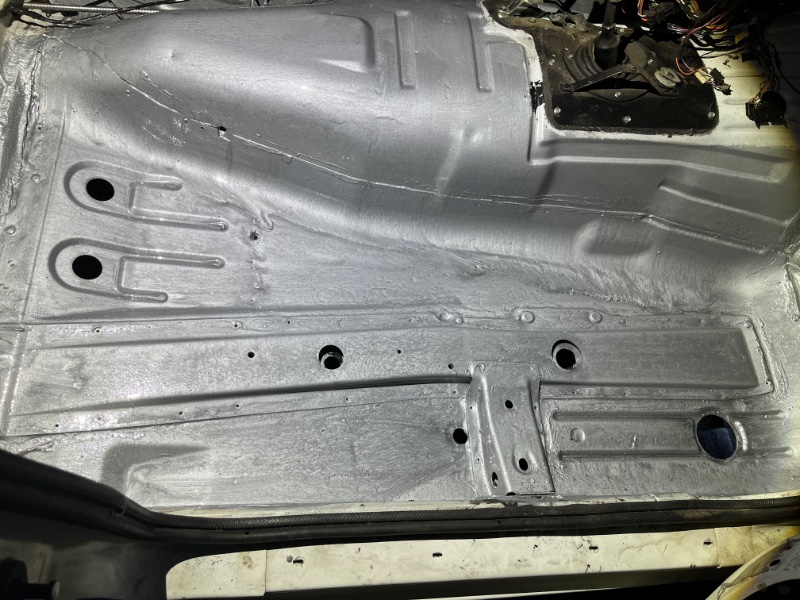
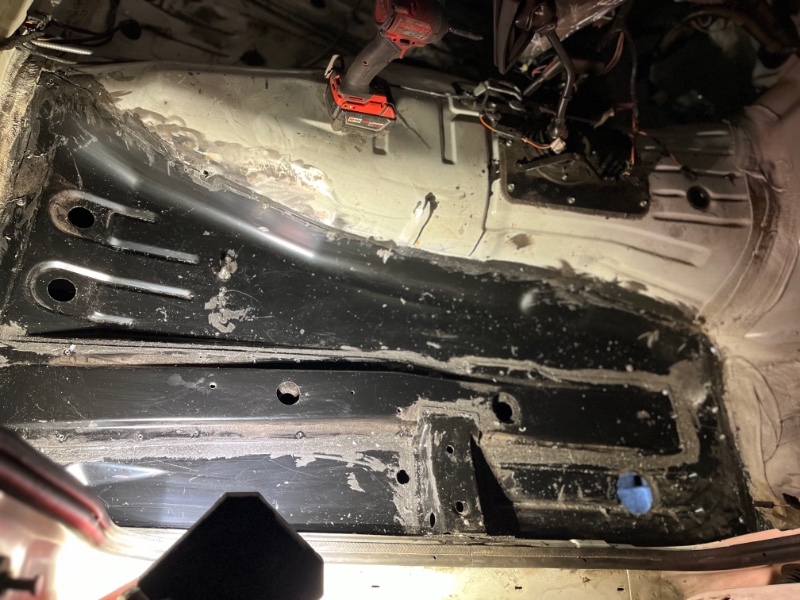
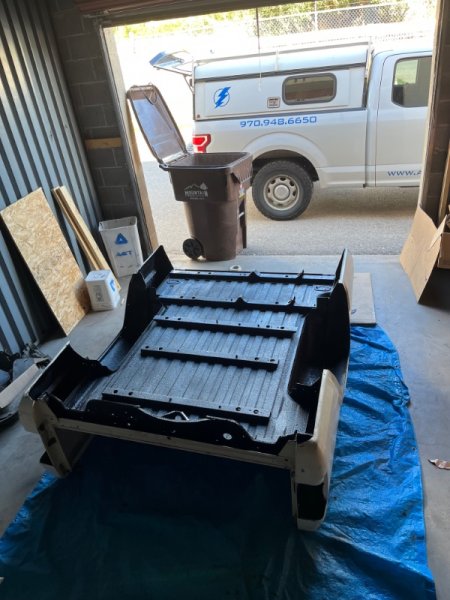
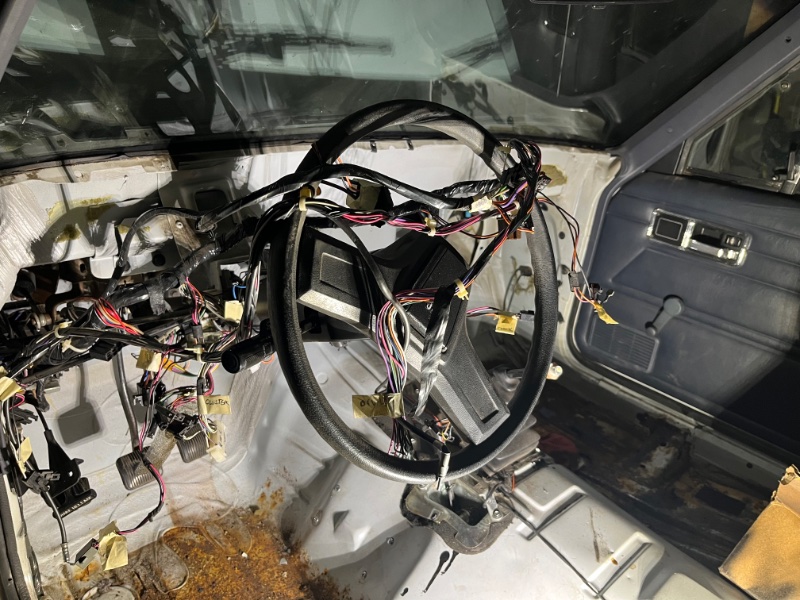
Like most MJ’s and XJ’s out there, my 89 had the usual rusted passenger side rust, luckily the driver side only had surface rust. When I bought the truck, i only saw a few small “easy to fix” holes from underneath, when i removed the seat and vinyl flooring i found out that the rust was worse than i expected, the seat stud broke off and the bench seat bracket just crumbled, the unibody cross member was also severely rusted, Did some research and decided to replace the whole floor pan, based on reviews and availability, I bought Keyparts components. See pictures. The hardest part was removing the spot-welded cross member, got me an air chisel and it made a difference, and since I do not have a welder or the skills i went with 3M panel bond and self-tapping screws. I was generous with the adhesive, so i ended up using 3 tubes, with a little leftover to seal gaps and seams. I could’ve replaced the rusted area only but I decided to replace the whole floor pan. I’m not a body technician by any means but I think i did a decent job, hopefully it will hold up. Here’s some basic steps/tips to tackle the job: -WEAR SAFETY GLASSES! I was working under the truck and took mine off for a minute, i got a small drop of 3M adhesive on the corner of the eye, it stings, burns and irritates, i washed it off for a few minutes and it still burned for a while, didn’t go to the doctor as it got better the next day. -Get an air chisel, plenty of blades for the angle grinder, if you’re leaving the dash and interior pieces while working, cover them, as the hot metal shavings from the grinder may leave burn marks. In my case the interior is gutted except for the steering wheel so no need to protect other plastic components -If doing the drivers side remember to remove or protect the fuel lines under the truck -Once the carpet/vinyl is removed, clean/wash the floor, lay the new pan and outline it with a sharpie, measure 2-3 times, before you start cutting, leave 1’ to 1.5” on the existing panel edges, especially front and tranny tunnel to give the new pan a join surface. -when you’re ready to install, remove rust/paint on the mating areas (existing floor, unibody frame) and new pan, i used a small wire wheel and a flapping disc to expose bare metal. -Check fitment several times, look for bends, dents, etc. -When ready to apply glue, clean bare metal mating surfaces with alcohol, acetone, etc. -Read instructions on the adhesive, load tube in caulking gun, then start applying, I started on the truck rather than the new pan, WEAR GLOVES, then use a stick/putty knife/finger to spread the adhesive, be generous, best to use too much and have a strong join than have problems down the road for not using enough. -Set pan on frame, check for fitment, slight bending on the new pan may be necessary for a perfect fit, check all mating surfaces, some goo should spill. -If everything checks, start driving 1” self tapping screws, pre-drilling the holes with a small bit as you go should speed things up, don’t worry about the adhesive curing, it takes several hours to set and 24-36 to fully cure. Start on one corner and work your way up, I started on the rear corner near the door and worked my way towards the front and tranny tunnel, if that makes sense. -if there’s adhesive spilling underneath run a finger on the seams to seal it and minimize water intrusion and eventual rust. -Let it cure a day or so, then remove screws, panel should be “welded” by now, you can do the floor supports following the same steps, when you remove the old support save the nuts, you’ll need them for the new floor support. Make sure you measure the seat stud holes on the opposite side (drivers in my case) and match on the new support, glue it on, measure again then use screws again, let cure. -Once it cures, remove screws, fill holes (i used JB weld). -Sand off dried excess adhesive (wear dust mask/respirator), prep to paint/finish if desired. In my case I used gray POR15, I will coat it with Raptorliner when I get a chance, will follow up with pictures, I will also raptorline the bottom side as well. -I plugged the holes with electrical KO seals and JB Weld, I will post pictures -I will install new grade 8 bolts/studs for the seat bracket, can’t remember the size, More pics to follow! Other tips are welcome!

-
Installing ac in a non ac manche
Elwiscon replied to Warthog's topic in MJ Tech: Modification and Repairs
Cool! Send a pic including the back connectors, I think i’ll take the 92 as the HVAC box came from a 91 Cherokee, my MJ is an 89. -
Installing ac in a non ac manche
Elwiscon replied to Warthog's topic in MJ Tech: Modification and Repairs
HVAC panel? I may be interested in a dash HAVC control with AC, do you have pictures? How much shipped to 81623? Thanks -
Installing ac in a non ac manche
Elwiscon replied to Warthog's topic in MJ Tech: Modification and Repairs
I’ll be doing the same to my non-ac comanche, don’t really need AC but it’s one of those “nice to have” options. My HVAC box was cracked when in took the interior apart so found a donor HVAC box with the evaporator and the vacuum lines, just need the AC dash controls and the rest of the parts under the hood. Vintage Air sells a lot of XJ-specific parts (lines, condenser, fittings, dryer, compressor, etc), I may go that route so I can use the newer refrigerant and for reliability with new parts. I’m re doing the whole interior so may as well have it ready for future AC, hopefully it isn’t too much hassle to add it later on. I may have to add a fuse and a relay, will look into it once i have the time to keep working on my 89. -
AC install on a non-AC Comanche
Elwiscon replied to Elwiscon's topic in MJ Tech: Modification and Repairs
It doesn’t have an electric fan, I’ll be adding one in the future. Thanks for the info! -
AC install on a non-AC Comanche
Elwiscon replied to Elwiscon's topic in MJ Tech: Modification and Repairs
Found this diagram but don’t know if it applies to Renix MJ’s. I’ll look for those components on my MJ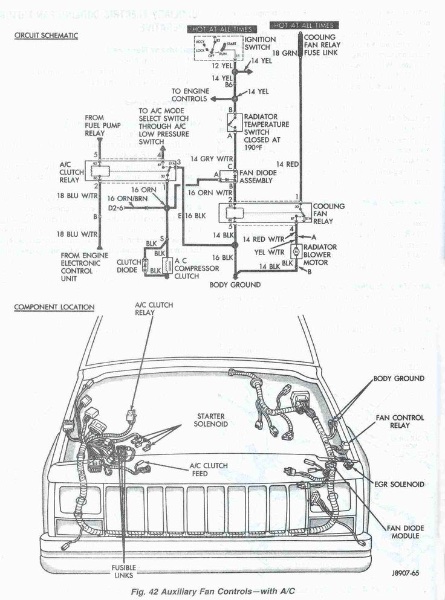
-
AC install on a non-AC Comanche
Elwiscon replied to Elwiscon's topic in MJ Tech: Modification and Repairs
I’ll be doing some custom wiring in the cab (grounds, future heated seats, bed lights, fog lights, powered subwoofer etc) so don’t I mind running additional wiring. I’ll look for the unused connector, now that you mentioned I think i have seen a 2-wire connector near the washer bottle. -
AC install on a non-AC Comanche
Elwiscon replied to Elwiscon's topic in MJ Tech: Modification and Repairs
I’ll look at the electrical diagrams, hopefully i don’t need a complete harness, I don’t mind making my own harness/relay, unless there’s pre-existing wires. Where does the harness connect to? I sent an email to vintage air, they may have the lines, compressor etc. I think it’ll be better to get all those under the hood parts new instead of used from an older XJ. Thanks -
AC install on a non-AC Comanche
Elwiscon replied to Elwiscon's topic in MJ Tech: Modification and Repairs
4.0, -
I searched and couldn’t find a specific thread/topic, but has anyone been able to retrofit an AC system on their non-factory AC Comanche? I stripped out the whole interior to fix a floor pan and do some other work, the HVAC box was cracked so I got a used one with an AC evaporator off of a 96 XJ, so I think I’ll be adding AC if it isn’t too much hassle, at least have everything AC-related installed in the interior and eventually do the lines, dryer, compressor etc under the hood.Just don’t want to take the interior apart once I have it re-assembled. As far as I know i will need the climate control with the AC controls and the HVAC box with the evaporator, which I already have, just need to get a new evaporator. Aside from the obvious evaporator and HVAC panel what else needs to be done?, Do I need a new renix computer with the AC option? Any electrical components (relays, etc)? Has anyone done it? Jeepair.com have most if not all the under hood components individually but not as a kit. I don’t mind driving the Comanche without AC once I have it fixed but having AC will make it even more enjoyable. What would it take? Thanks
-
Heater core recommendations
Elwiscon replied to Elwiscon's topic in MJ Tech: Modification and Repairs
Thank you I will order one, -
Best internal frame anti rust coating?
Elwiscon replied to 512tr's topic in MJ Tech: Modification and Repairs
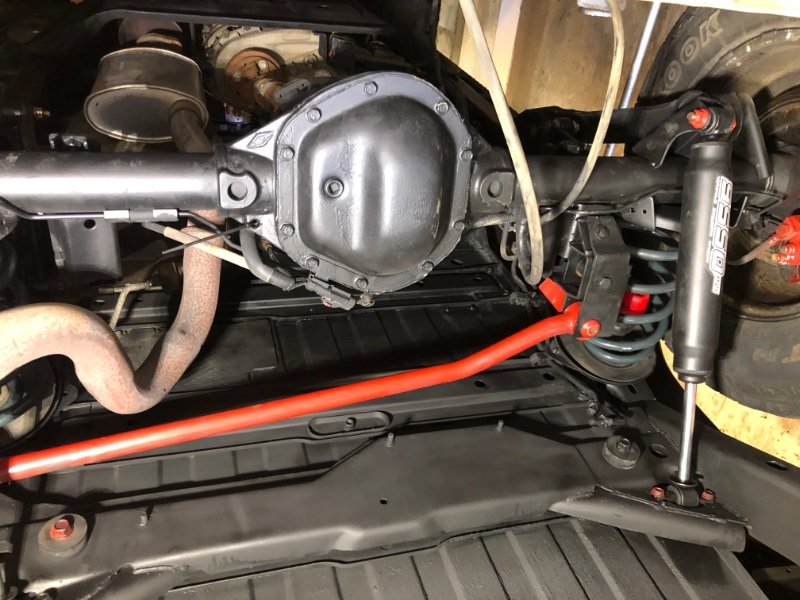
My underside wasn’t rusted, but I removed the bed and other components, removed the light surface rust and factory undercoating, sprayed it with Raptorliner and etch primer to protect it from rust, I sprayed the axle and other components with Duplicolor chassis paint . I will be using POR15 and raptorliner for the front once i replace the rusted out passenger floor pan. For the interior of the uniframe I will be using the Eastwood spray paint that comes with a tube, I used it on my LJ wrangler and it still looks good after 3 years. I used Eastwood, raptorliner and Duplicolor Chassis paint on the LJ, I have driven it off road, mud and snow and it looks good, I usually pressure wash it after driving it on mag chloride during the winter, I try not to drive on it though.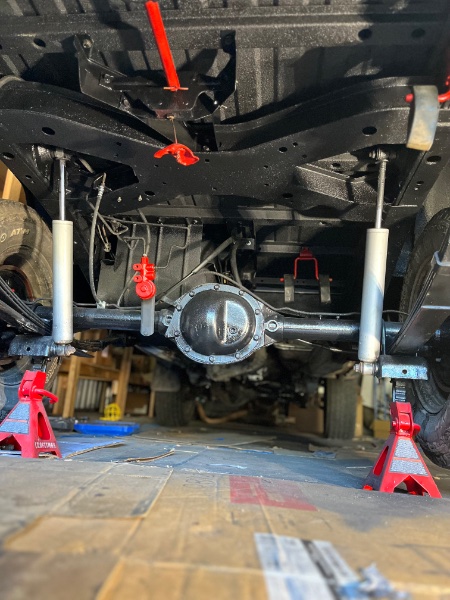
-
Heater core recommendations
Elwiscon replied to Elwiscon's topic in MJ Tech: Modification and Repairs
Thanks for the advice, I will be replacing as many parts as I can while doing this, you’re probably referring to the vacuum actuated valve. Along with the heater core I will replace the heater and radiator lines and the mentioned valve. Previous owner installed a new radiator a couple years ago so it will stay for now. Living in Colorado can’t be without a good defroster/heater. I’m fixing up my MJ to be driven year round. -
Heater core recommendations
Elwiscon replied to Elwiscon's topic in MJ Tech: Modification and Repairs
I know, not only on auto parts, I have been an electrician for 22 years and have noticed the same trend, great brands years ago have been producing a lot of crappy parts lately. Do you have a brand/website? All I’ve seen so far is aluminum and some of those aluminum cores have really bad reviews, I don’t mind paying a little extra for brass, as replacing the core isn’t fun, and since my MJ will be a daily driver in most cases living in Colorado heat is a must. -
Heater core recommendations
Elwiscon replied to Elwiscon's topic in MJ Tech: Modification and Repairs
I was looking at the spectras on Amazon and other forums, they have really low ratings for leaking and failure. I think NAPA is using 4 Seasons, at least locally. -
Replacement jute/carpet padding
Elwiscon replied to acfortier's topic in MJ Tech: Modification and Repairs
I'm planning to get ACC carpet and padding on top of Dynamat or Lizard Skin for noise/heat reduction -
Heater core recommendations
Elwiscon replied to Elwiscon's topic in MJ Tech: Modification and Repairs
I’ll look into it, where did you find it? do you have a part number? Thanks -
I’m sure this question has been asked a bunch of times, just can’t find a definitive answer. I’m gutting out my MJ’s interior to fix some rust, add wiring, dynamat etc. I figured it will be a perfect time to replace the heater core, as preventive maintenance more than anything, and because when i bought the truck and drove it home on a chilly night the heater air was barely warm so it could be the core or something else. I’m assuming the current core is factory as the heater box still had the strap and the core seems to be brass. I’ve read and seen youtube videos in regards to heater cores on MJ’s/Xj’s, a lot of people recommend brass/copper heater cores over aluminum as aluminum cores are prone to premature failure and as you know a leaky heater core to replace is a real PITA once the dash is assembled. Most if not all online retailers have aluminum cores. Only a couple smaller manufacturers have copper units but can’t get ahold of them, based on other members experiences should i get an aluminum core? If so what brands, I’ve seen mixed reviews on different brands, does anyone know of a website where I can get a brass unit? Any brands i should avoid? Thanks
-
Thanks, I’m planning to have my welder friend spot weld those areas and somehow seal it with a quality seam sealer, POR15 and a couple layers of raptorliner. I’m planning to restore this truck and drive it for many years. I already lined the underside of the bed and X-Frame, it came out great

-
Yes, I will definitely make sure there’s no water leaks before I dynamat it. I will take my time and make it right.
-
I'll check out Lord Fusor, a good panel adhesive, rivets, POR15 and raptorliner should prevent or at least reduce rust on the floorpans.. , I was very lucky not to find any rust on the wheel wells when I bedlined the underside.
-
Thanks, found those parts on eBay, already ordered them. I will be removing the dash and HVAC box next week, I'll check those areas for water intrusion, may apply some sealant and/or double-sided heavy duty tape before I re-install the blower and other firewall penetrations. I'll roll POR15 on the floor and raptoline it, I may do the fire wall as well and cover it all with dynamat or other sound deadener.
-
Thank you, I may use just panel bond, but spot welding makes sense,
-
Thanks, I will definitely check/test everything before applying the adhesive. I'm thinking about using rivets or bolts/nuts to provide additional clamping. Definitely don't want to ruin the floor plan or the Comanche's structure with a welder, I don't have one or the skills to use one, I would practice before tackling something like this.