
howeitsdone
-
Posts
691 -
Joined
-
Last visited
Content Type
Profiles
Forums
Gallery
Everything posted by howeitsdone
-
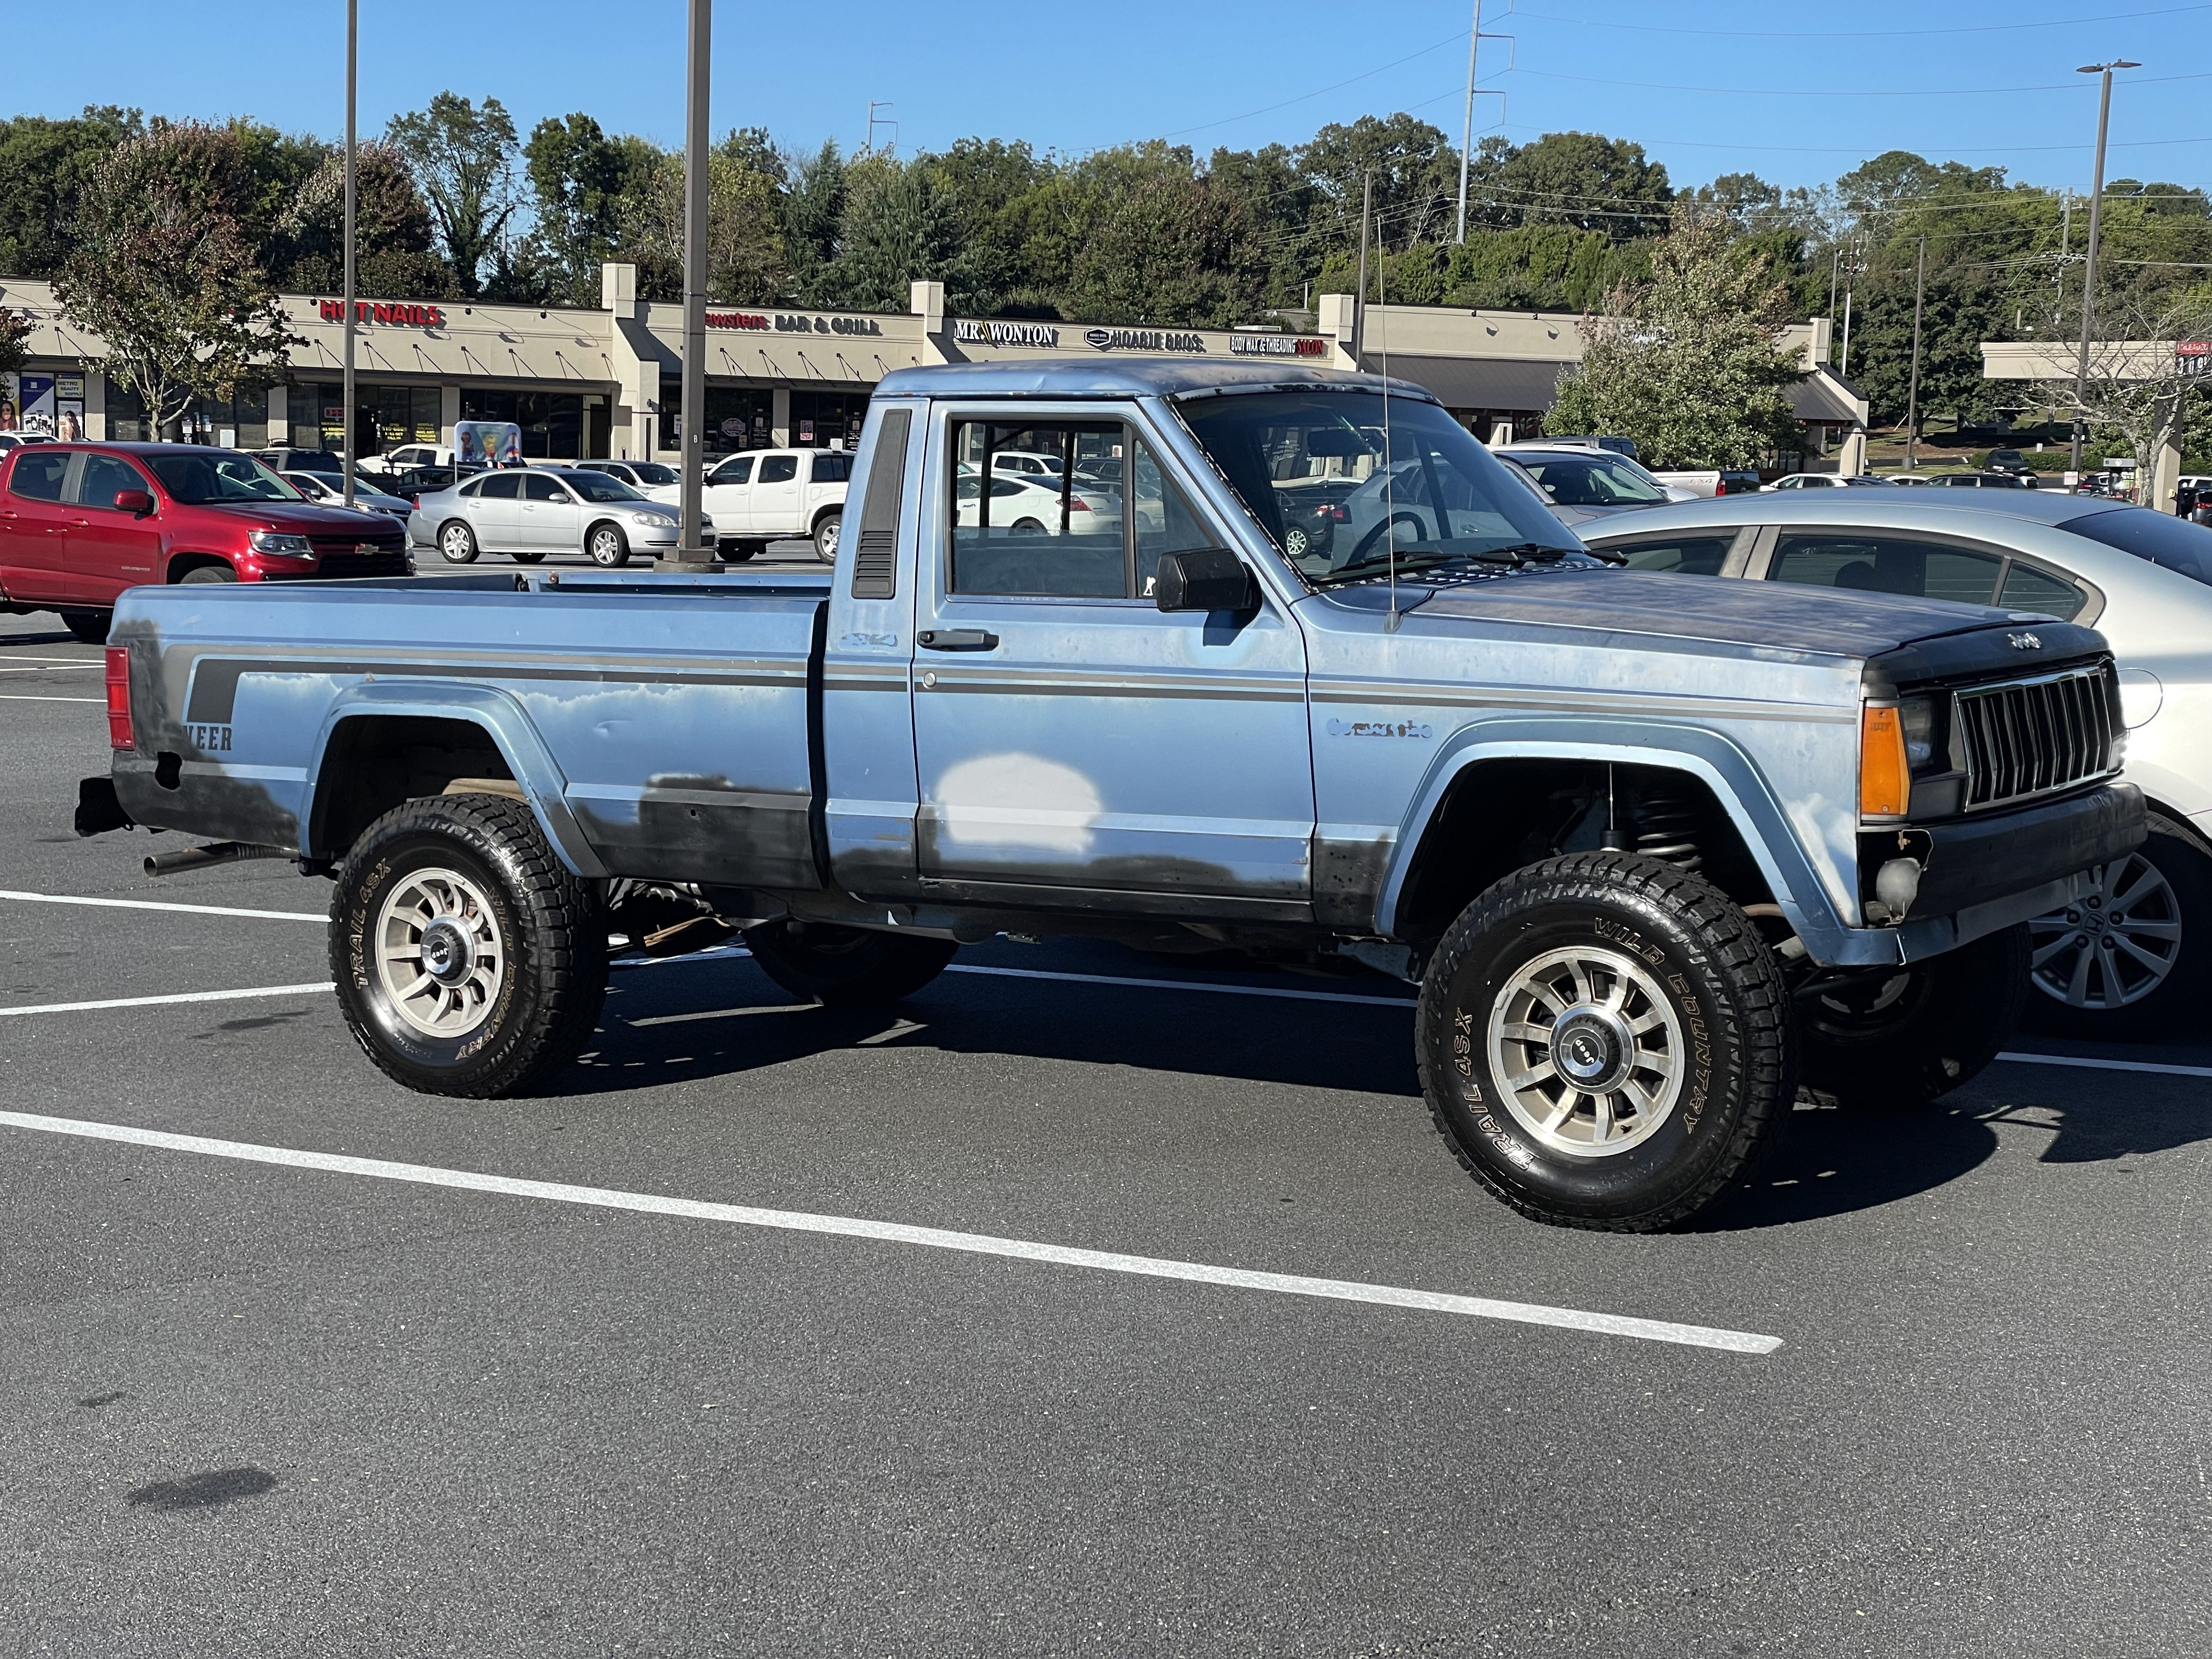
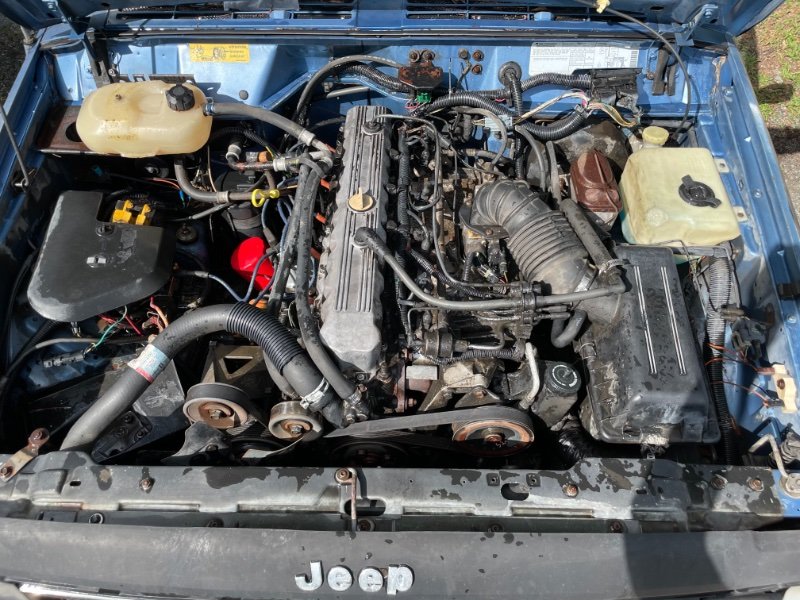
Nice looking truck! Get ready for something always leaking Most of these motors leak oil in 3-main places: Valve Cover, Oil Pan/Filter Adapter, and Rear Main Seal. I'm currently restoring one that has almost 300k miles and the amount of crud covering everything is unreal. The first step is to clean (I know, it sucks) as much of the front as possible if you want a good chance at diagnosing any leaks that aren't vacuum or otherwise.
-
‘88 to ‘98 D30 brakes
howeitsdone replied to howeitsdone's topic in MJ Tech: Modification and Repairs
Thanks guys, good to know. Ended up not getting that axle since there was a front driver's impact at the wheel. With my luck I don't need to take the chance. -
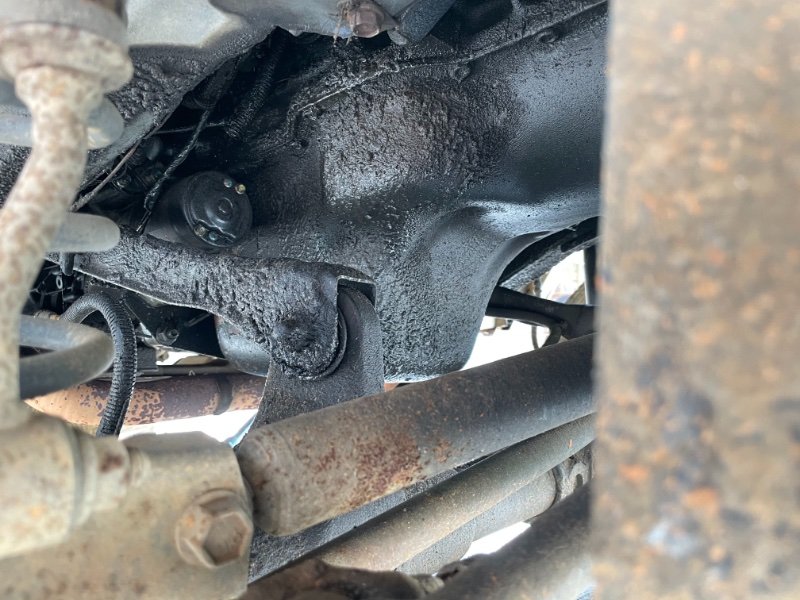
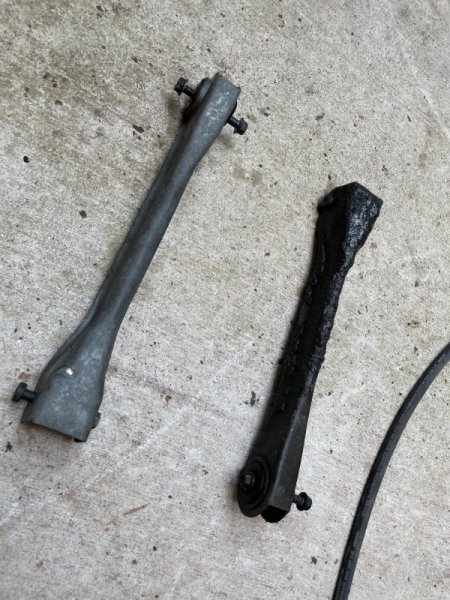
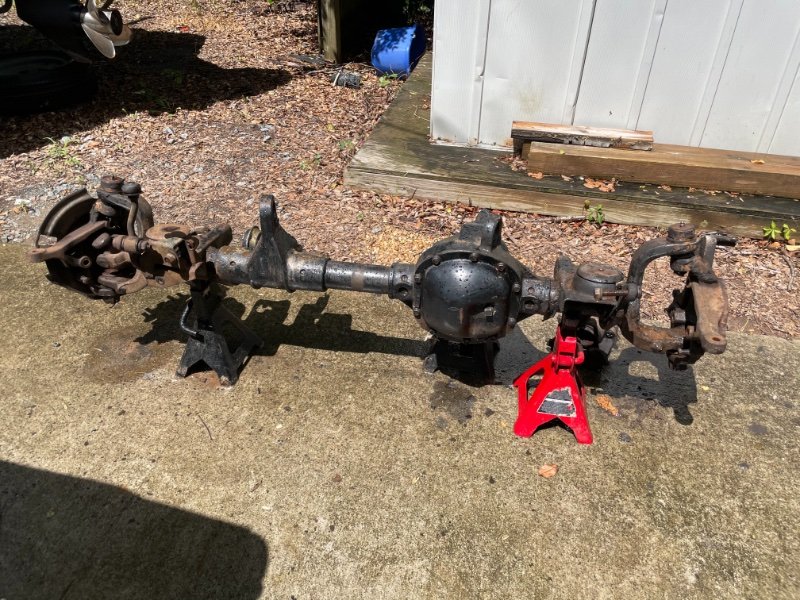
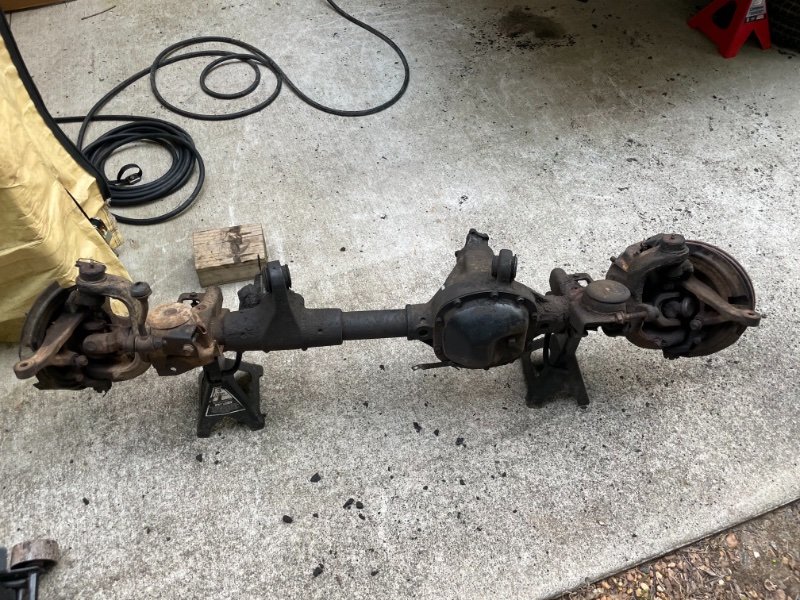
Well, the XJ at the JY had a front left impact direct at the wheel. I decided not to take the chance and work with what I have until another opportunity comes along. So I took off the UCAs today and look at the difference of a washed up one vs what it looked like! Unfortunately I tried to remove the bearing the wrong way so I also crushed one... Since I already have the new bearings, I'll just bend it back and buy some new ones after we're back up and running. The axle cleaned up too. Not quite done, but I wanted to get most of it cleaned up. Most of the scratches and removed paint are from my steel brush. I'm sure it was very clean under all of that crud. Look! A CAD! Who would've thought And I FINALLY got the passenger side hub & axle assembly out!!! No joke, 2 hours straight of constant heat, banging, sliding, banging, heat, etc... you get the idea. I know my neighbors hate me, but I'm on cloud 9 at this point so I don't really care. The driver's side came out within like 15 min. Go figure! I told myself I wouldn't order new hubs unless I got the old ones off. So that, and a beer, are my rewards. Huge thanks to my brother who brought me his 10# slide from the shop. Not the right size claw, but still managed regardless. The aftermath

-
Looking at a front axle swap to a ‘98 D30. What are the differences in the brake system? Specifically asking about the brake pad size and rotors. Asking because I purchased everything for the stock axle, but have decided to upgrade. I need to return all of those parts and buy new ones if different. Is there a post that contains a comprehensive guide to every axle and different nuances between the years? Not just the main differences, but even the smaller items that can or can’t interchange.
-
That's the plan. I'd rather clean it up and try to sell to someone who's looking for one and make up some of the cost back. Certainly may need some bushings first. I wonder though...
-
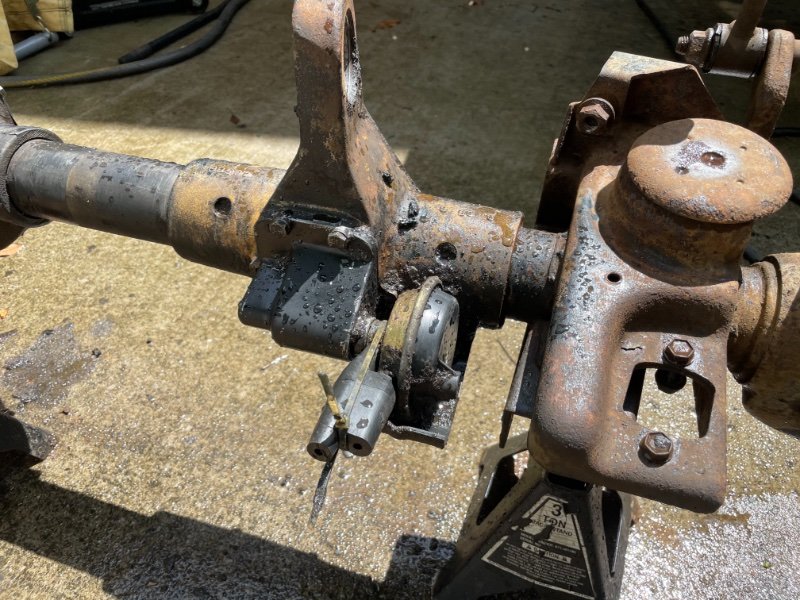
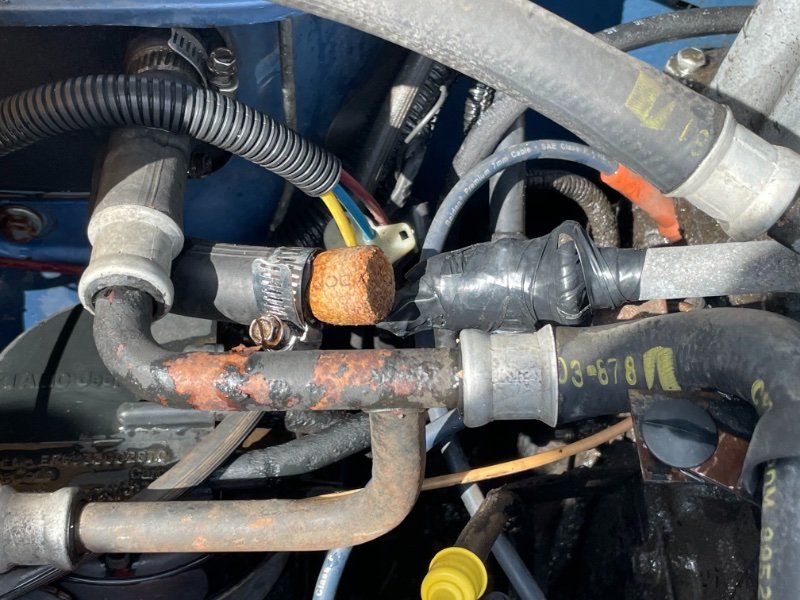
The vacuum motor was even more Ewe. Safe to say I don't think 4x4 actually worked And if it did, God bless this indestructible hunk-a-junk
-
Aaaaaaaaaannnnndddd Drumroll Please! Just got that stupid hunk of metal out of there. Headed to the JY tomorrow AM to look at a 1998 XJ front-end with 3.55 gears. I think that's a great idea that I have honestly never heard of before (since I'm a newb). So thanks Pete! They're asking a premium at about $350 so I'll try and show up with cash and talk them down. Shoot, for the shafts alone they wanted $185... So I said screw it, there has be be at least 150,000 less miles on this one, and I know I'll need to regear at some point due to the tire size, so let's upgrade. I've got everything for the brakes (assuming I can use the same pads and rotors), just need new U-Joints. But I don't want to count my eggs before they hatch, so I'll drive down there tomorrow and inspect it before they remove it. If that doesn't work, I know there are a couple other yards within about a 1:30hr drive that also has one. Just aren't open on Saturdays. Plus, I've decided to swap the rear for the 8.25 when I get to it. Those are only $200 around here and all I'll have to do is move the leaf mount (so I've read). Boy, is she ugly. The Joint at the driveshaft literally fell apart in my hand. Road-Ready!

-
Rusted Hub Assy | Can't remove
howeitsdone replied to howeitsdone's topic in MJ Tech: Modification and Repairs
Unfortunately I have the entire front end apart so can't use this method. Thanks for the insight though! Next time for sure. I think so. I believe propane won't get that hub hot enough (700) but I can at least give it a go. Would you do this in conjunction with a specific tool? There are quite a few pullers out there. -
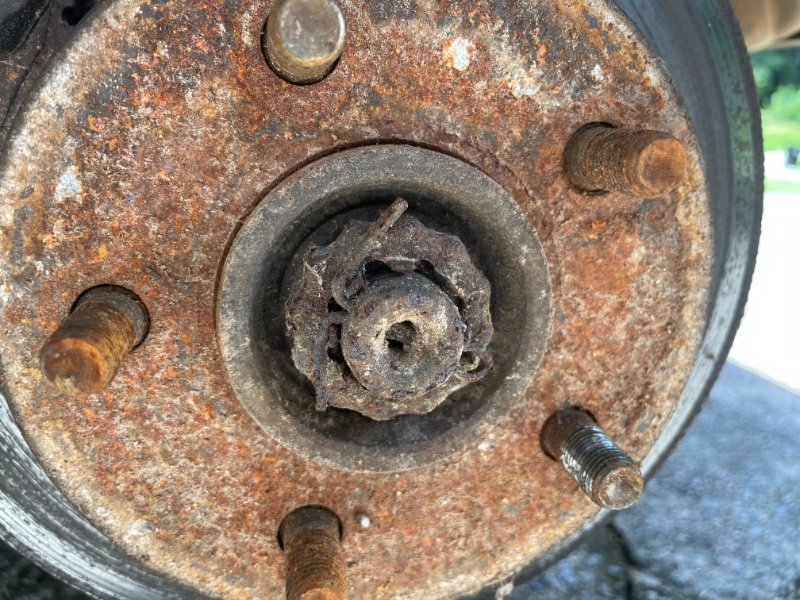
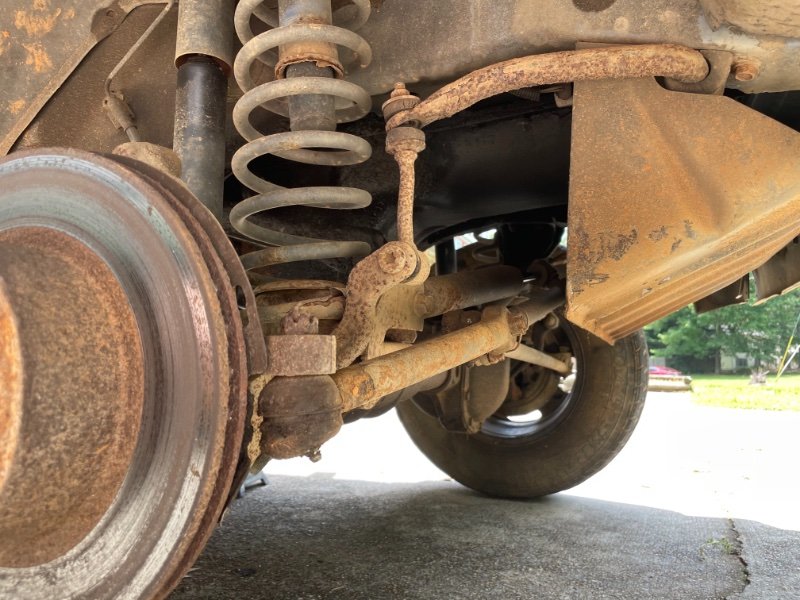
Hi all, So I've removed the 3 bolts on the back of the knuckle, the caliper, and axle nut. I started taking the BFH and lightly tapped around the hub to loosen. Didn't work. So then I tried using a punch on the back side. Didn't work. My last resort was putting the rotor on backwards and taking the BFH to earn it's name. Didn't work. Actually it started chipping the rotor so I stopped. Everything has been sprayed down continuously for a couple of weeks now. Is there a particular tool anyone could recommend for a rust bond this bad? I'm going to replace the hub at this point, but I don't even think the old nut & bolt trick will work.
-
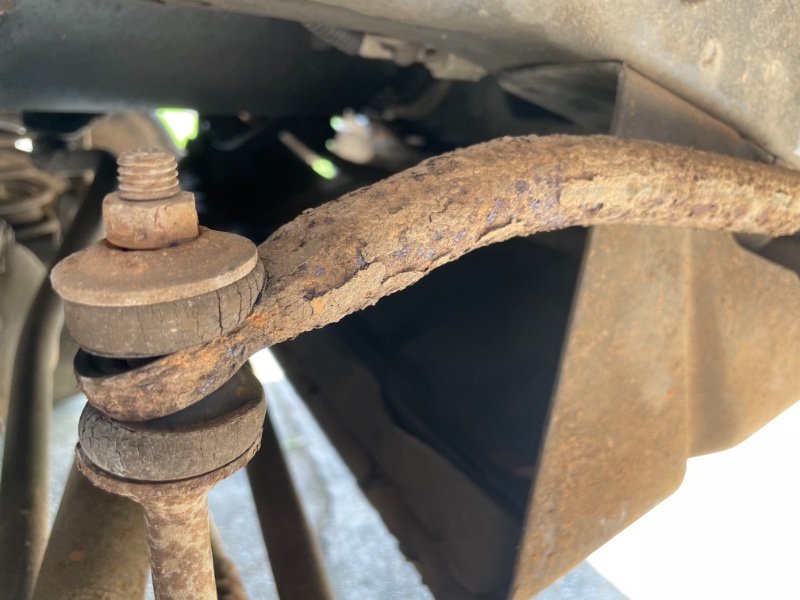
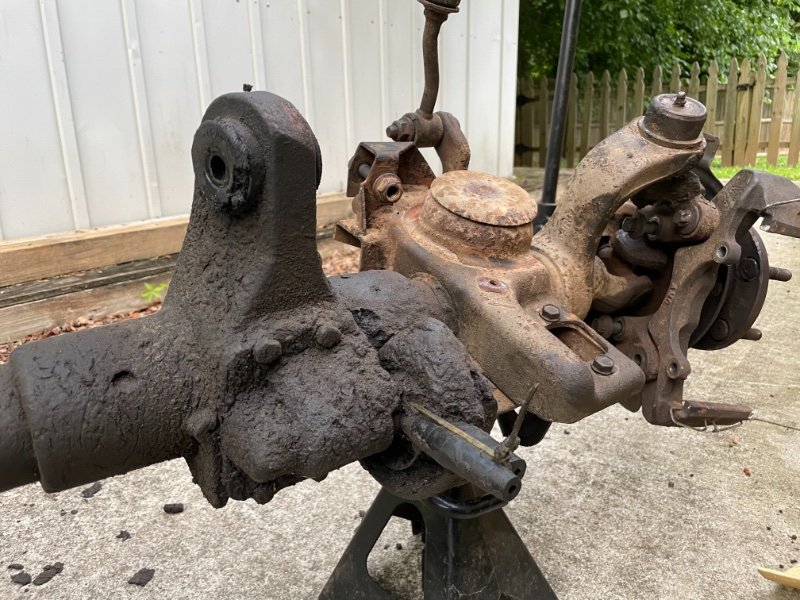
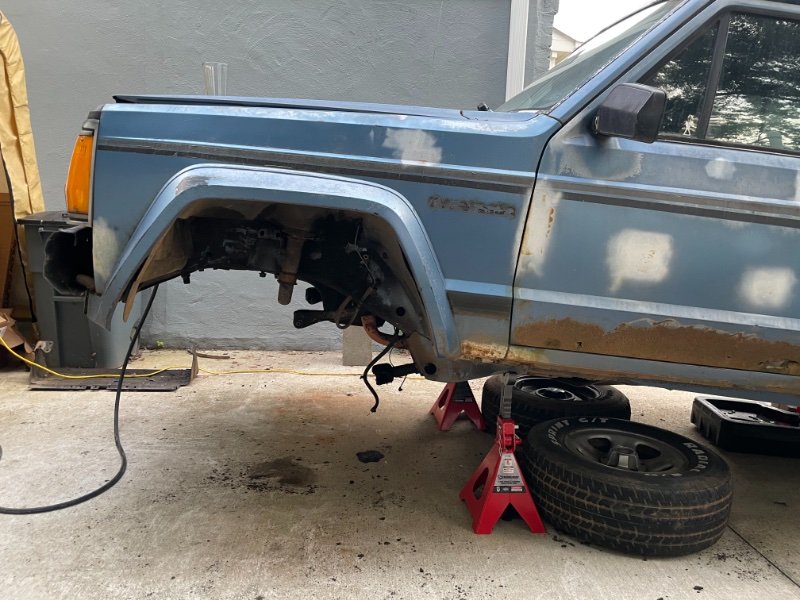
Small update: After a lot of rain, I was able to get back to work on the front-end removal. Most things came out fairly easily with a bit of force, however did break a couple bolts and stripped the upper caliper bracket head on the driver's side pretty bad. Not even a socket extractor is working. Fortunately, I can probably just leave it for now. I'm very stuck on the hub & axle shaft currently. Nothing I do seems to be affecting the rust bond this thing has. Since I'm replacing the rotors, I turned it around, bolted it back on, and gave it a lot of whacking with the BFH. So much so that it began to chip off and wasn't really safe anymore. When I tell you I'm almost to the point of purchasing another D30 and swapping, I think that's an understatement. But there's no telling if the Control Arms and strut mounts will come off at this point. I'm going to drown everything in PB blaster all week. Not like I haven't already done so... I also accidentally ruined the passenger lower caliper bracket bolt by not having it in enough when trying to get the hub bolt off with the flathead/wrench. Now the tip is no longer threaded... So I'm searching for two of these now. Had to break out the air impact gun which I should have done to begin with. Thankfully the pitman arm was about the easiest thing to have removed so far. I purchased a tool off Amazon that is almost exactly what the Snap-On tool looks like.
.JPEG.507683fe00d1ff8a10abc5fdfb9b3361.JPEG)
.JPEG.073c15a7df24b4f6685ff8c79895d631.JPEG)
.JPEG.cfe91e4a0bc37bc9e3cecce305516bd8.JPEG)
-
RENIX Engine Harness Falling Apart
howeitsdone replied to howeitsdone's topic in MJ Tech: Modification and Repairs
Got it running today by re-attaching that wire. What is the inline fuse rated at? It currently doesn't have one. I'm sure that's important... -
Not sure. It should arrive next week. Here's the link: https://www.roughcountry.com/pitman-arm-6605.html
-
RENIX Engine Harness Falling Apart
howeitsdone replied to howeitsdone's topic in MJ Tech: Modification and Repairs
I'm sure that's part of the issue, but I'm curious if the diagram is accurate. I'm a visual learner so this helps me learn better. -
The RC 4.5" comes with a track bar lowering mount, thus relocating it's mounting point.
-
RENIX Engine Harness Falling Apart
howeitsdone replied to howeitsdone's topic in MJ Tech: Modification and Repairs
Thank you both. I will try to source one from a yard. I'm not too worried about the C101 as I don't mind cleaning. But I can also solder, so there is the "one day". In trying to diagnose the ignition, does this diagram look right? I made it from what I think is happening. *Top is when the ignition is set to "ON" *Bottom is when turning the key over *Dotted lines are what's happening when ignition is turned in those places *Solid lines are constants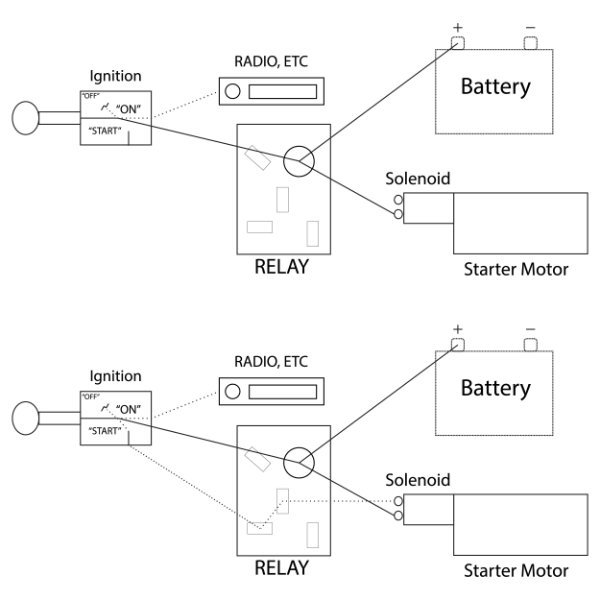
-
RENIX Engine Harness Falling Apart
howeitsdone replied to howeitsdone's topic in MJ Tech: Modification and Repairs
Must be 87-90, right? (RENIX) -
I just purchased the Rough Country 4.5. It comes with most items for the front and the AAL + Shackles for the rear. Haven't installed yet as it just came yesterday. I also purchased the pitman arm, tie-rod, & track bar. The non-essential, unless you plan to crawl it a bit, is the beefed up tie-rod and track bar. Although, a lot of folks upgrade to the V8 ZJ parts anyway to save a bit of $$$. Don't really need much else depending on what you use the Comanche for. And as ghetdjc320 mentioned tire size, depending on what you choose, the gearing may need to be changed depending on how large your tires are and whether you're M/T or A/T.
-
Fully electric comanche
howeitsdone replied to Spooky.truck's topic in MJ Tech: Modification and Repairs
Make sure to follow Rich Rebuilds on YT. His crew does Combustion to Electric and vise-versa as well as a lot of Tesla work. Some of it may be Tesla specific, but it helps get an idea of how everything is working. Could probably pick up some good info there. Looking forward to seeing what you come up with! -
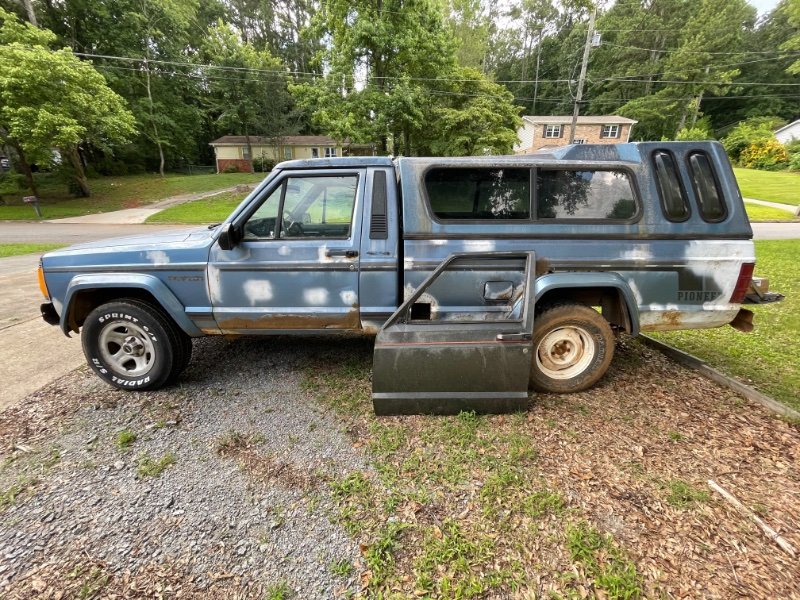
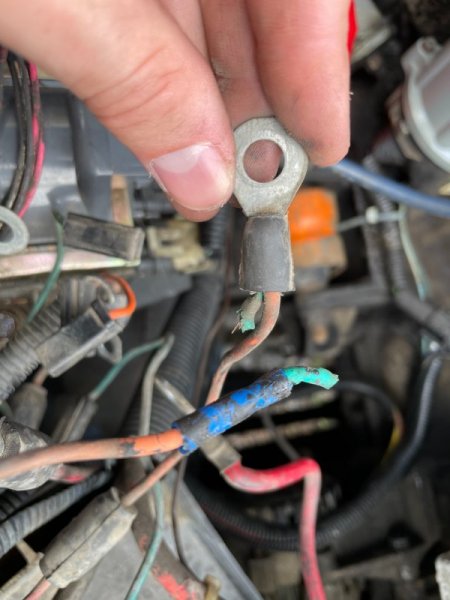
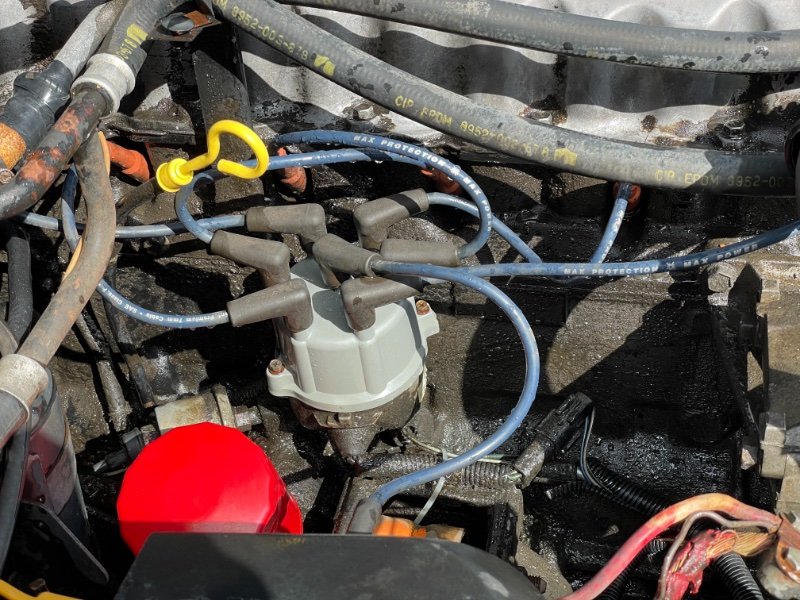
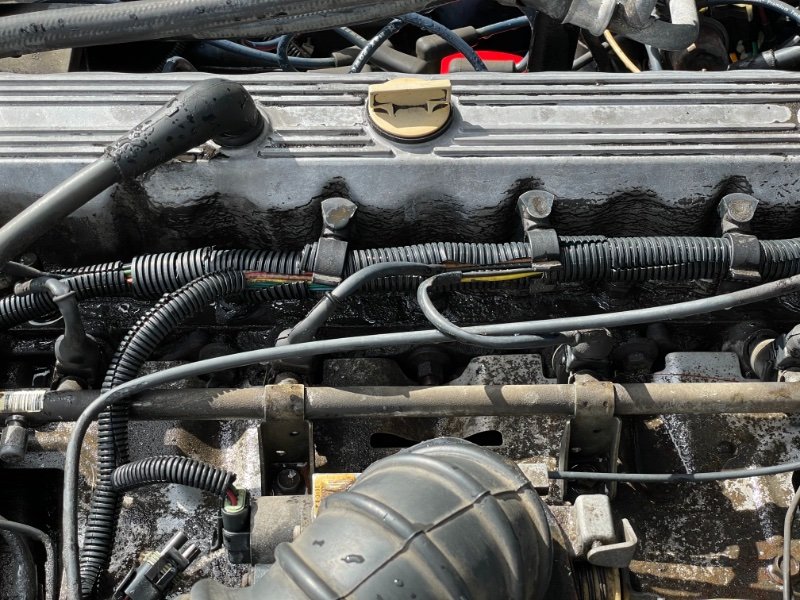
My '88 is not doing well today. Yesterday I removed the battery and cleaned up the engine bay. Lots of degreaser, scrubbing, and then water from the hose. Today, after about giving it 20 or so hours to dry, I go to start it and just a good ole' click. Starter is at the bottom and takes a bit of water anyway (plus I banged the starter and solenoid a bit with no result) so my initial go-to was the ignition relay. Thought maybe some water got in there and needs replacing. So I removed and inspected. Tried to clean up the terminals just in case and then I reinstalled. Well a wire was so dry it just came right off of a connector that goes to the hot stud. Now my ignition does nothing. No radio, etc... So thinking maybe that was the hot wire to the ignition module. Now, I'm finding a ton of wires with bare wire showing (a few strands already broken) and many that were pinched at some point and are pretty dry/cracking. Sure, I could go into each one and replace sections with new wire and some butt connectors. But I'm hoping there could be a solution to swap to a different harness from a similar year XJ that may be in decent shape. So many of these wires have already been repaired once or twice. I've also got 10+ connectors not connected to anything and have no idea what modifications may have been done. Or potentially if Chrysler just left connectors for components that would otherwise come on another model/trim. My 2012 GC is like that. TL:DR What harness will swap in plug-n-play to an '88 4.0 M/T?
.JPEG.f0ae347ff630c2c7f9be88a4a5b45378.JPEG)
-
1988 Comanche Pioneer build
howeitsdone replied to SCJ Steve's topic in Member Projects: Your Comanches
Making me drool I've been following your approach for a while. My plan is to do a lot of the body & frame opposite. Currently in the process of getting completely upgraded & parts replaced. Then I'm taking the bed off and doing much of the same as you. I'm extremely impatient with this sort of stuff. The way I figure is that it's already rusted, and if the body isn't done within a few months it won't get much worse due to my location. But the patience you have... very jealous -
novanut1964 1987 comanche project
howeitsdone replied to novanut1964's topic in Member Projects: Your Comanches
Body looks really good! -
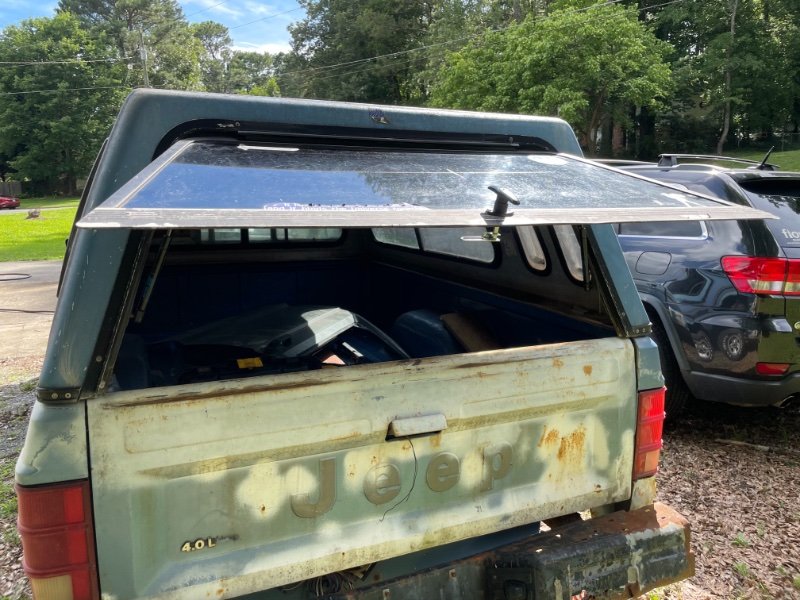
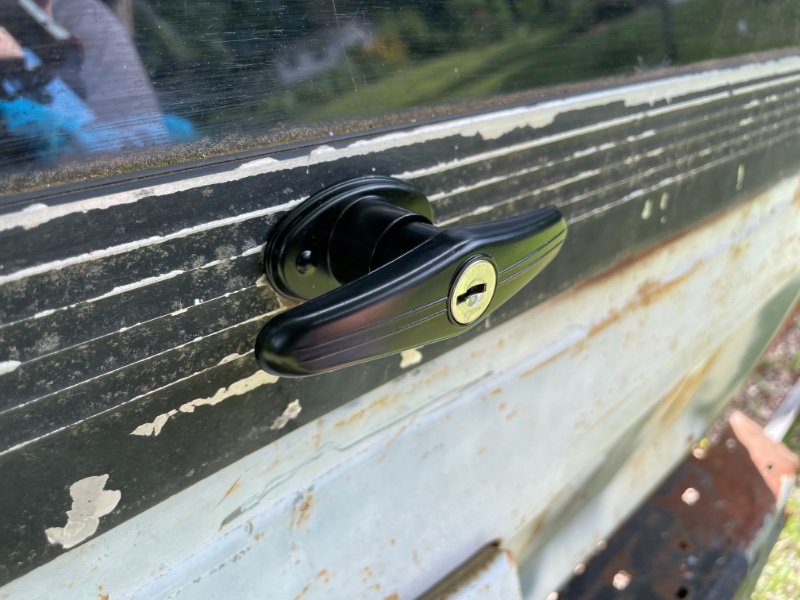
Decided to tackle the engine bay today. Forgot to take a "before" photo Believe me when I say that this thing is GUNKED up. No telling how long that VCG has need to be replaced. The water pump was literally buried in oil. Having a hard time with the walls of the block though. I'm using a heavy degreaser at a 4:1 and it's just not budging. Been taking brushes to it for the last hour or so. I'm going to continue to spray and rinse and see what happens. Whoever did the heater core bypass really took "put a cork in it" and gave it new life I also went ahead and replaced the broken lock on the shell. Had to drill out two holes and fits like a glove. The only problem I ran into was that the shocks I bought for the window are way too short (13"). That's what I get for watching a YouTube video... I'll order larger and wait to return these while the new ones come in.
-
What a great question! Scratching my head over here... The P-PO lived in CA and drove it all across the country camping and settled in NC. He put the square holes into the bed of the truck. I'm assuming to cut out the really bad rust. Then all he did was spray all of the bare rust to attempt to keep it from spreading (the white areas). It was also reported as a total loss from collision back in 2014. Can't find out for the life of me where though. It could have been totaled because you can't find new body parts though, but who knows. Rear bumper is slightly mangled. Then the PO that I bought it from just had it sitting in the woods in Hiawassee. No idea how long he had it for as I forgot to ask. He bought it as a parts vehicle for his Comanche, but didn't end up needing it. I think the most time-consuming and stressful part will be the welding for sure to fix the rust. The driver's floor is gone.
-
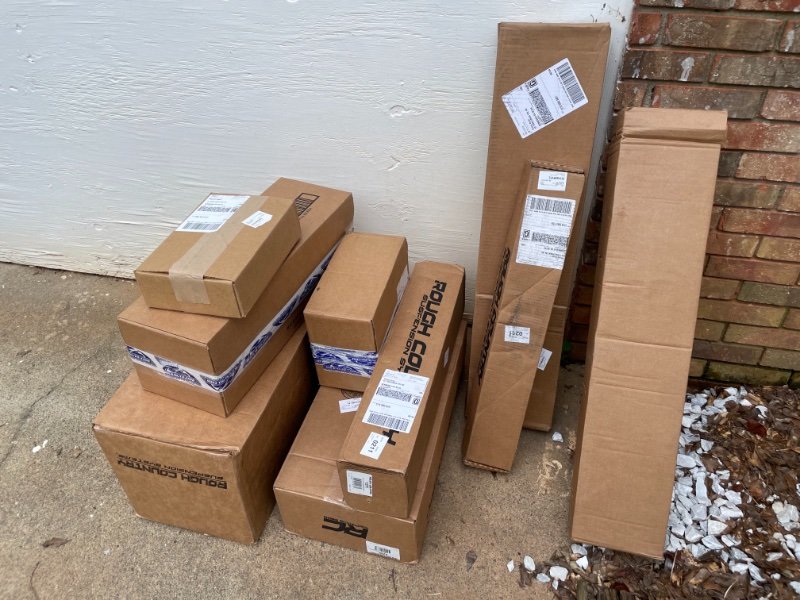
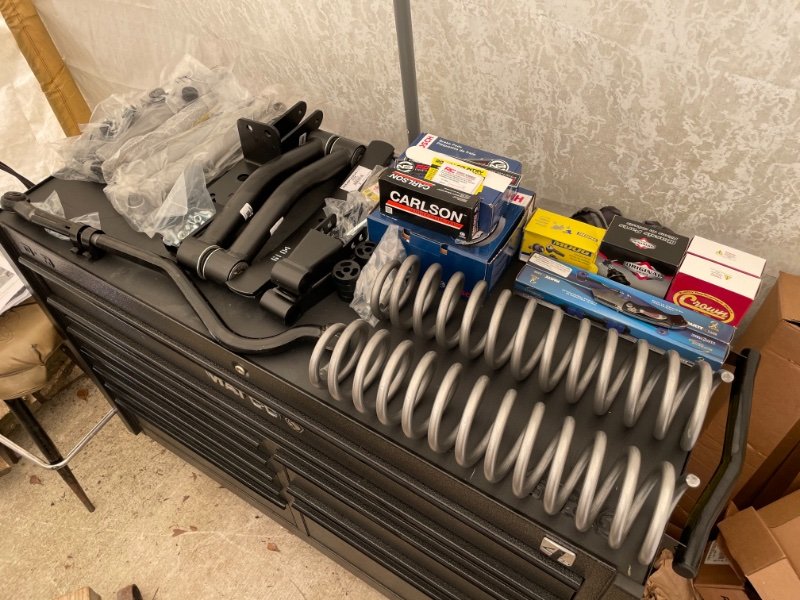
I haven't even unboxed everything yet I certainly have my work cut out for me. Pitman arm is the only part of the lift that didn't show up yet. If anyone is in the area, I have beer... Thankful I have a brother who is an auto tech if needed, but the cool thing about these old vehicles is that almost everything is just a bolt or two!...and maybe a couple of choice words...
-
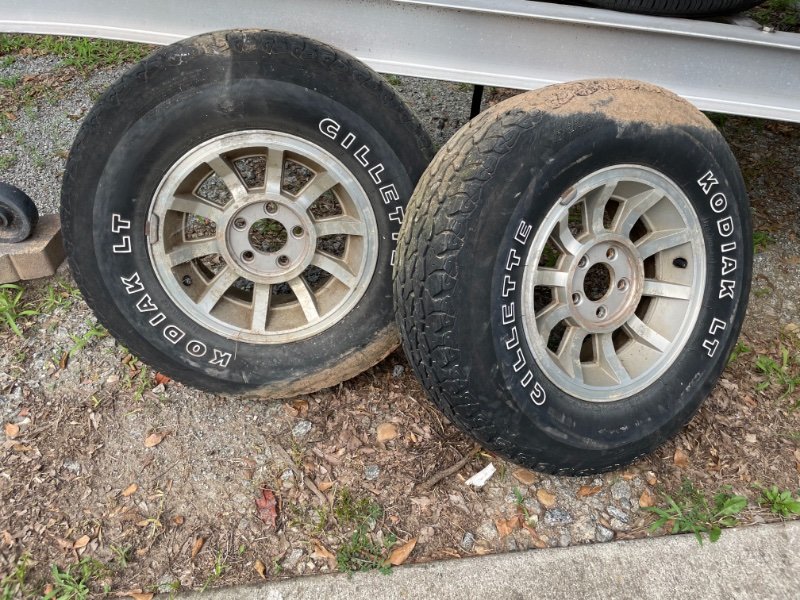
Today I drove what seemed like forever to 2 different junkyards to find a couple of parts. I got a driver's door in great shape from an XJ ($100), and two 10-Spoke wheels ($70) from another yard. Unfortunately no caps, but there is another yard around here that has all 4 with caps, so I'm going to try and offer a price to get two of their wheels and all 4 caps. I would have gotten all 4 from them but they're a bit more expensive at that yard. I also forgot to post, but I ordered a ton of parts for the front as well as the RC 4.5 lift, beefy tie rod, track bar, and stabilizer. RIP My Wallet 2021... Seals and bushings are practically dust! Valve cover gasket is already here. Will change that this weekend with the other parts. I'd say it matches pretty well!