
js33rd
-
Posts
23 -
Joined
-
Last visited
Content Type
Profiles
Forums
Gallery
Everything posted by js33rd
-
dakota 22 gallon tank and fuel pump
js33rd replied to 99Manche's topic in MJ Tech: Modification and Repairs
There is a 98 Dakota at a pick n pull near my house that has everything. Could I take the complete package (just splice in the wiring harness connector from the 98 XJ gas tank) and the ohms and psi match what a 98 XJ setup would be? -
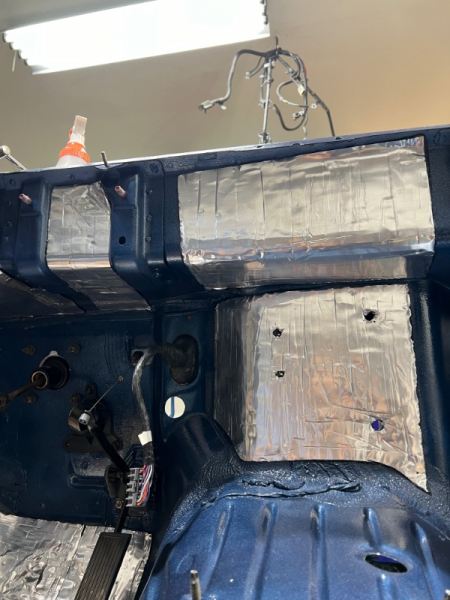
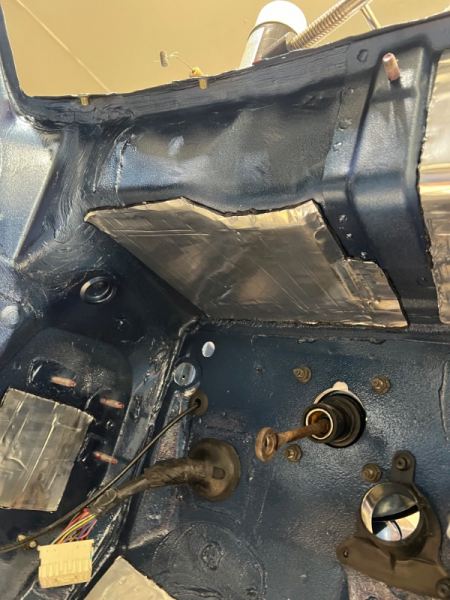
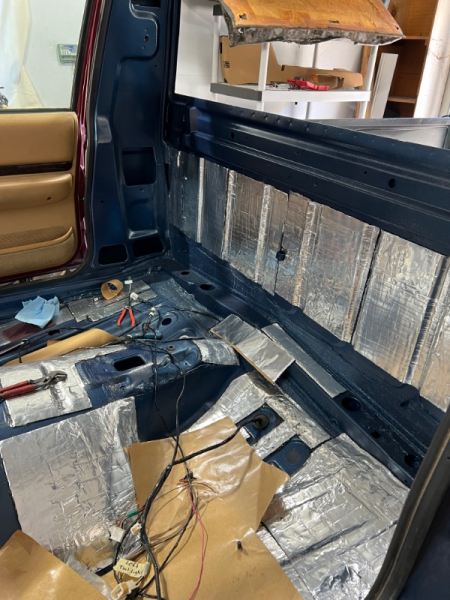
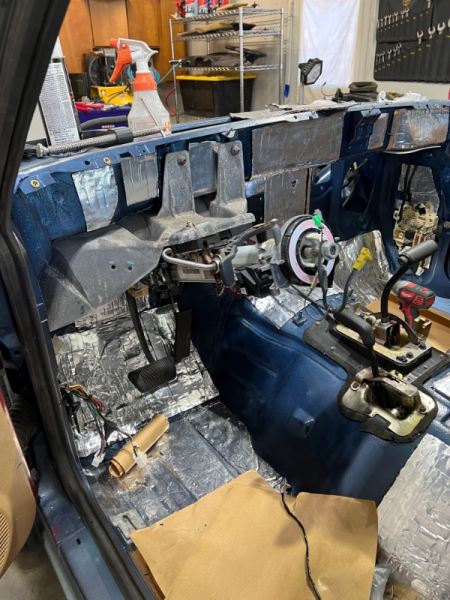
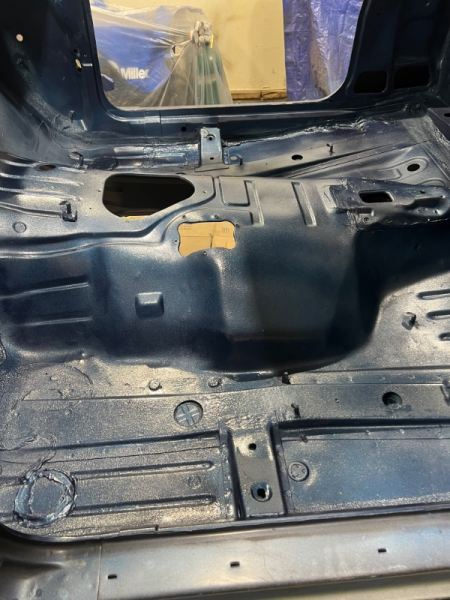
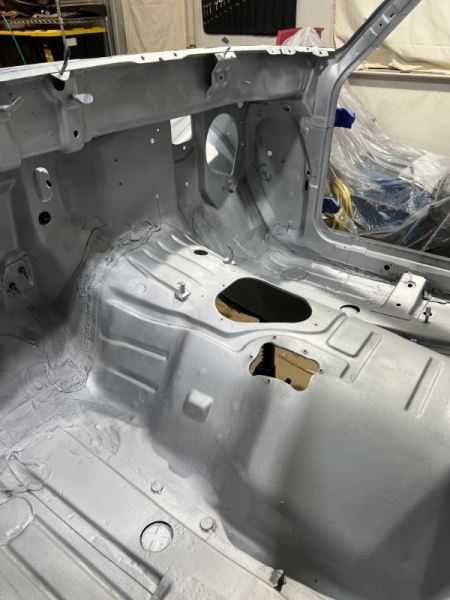
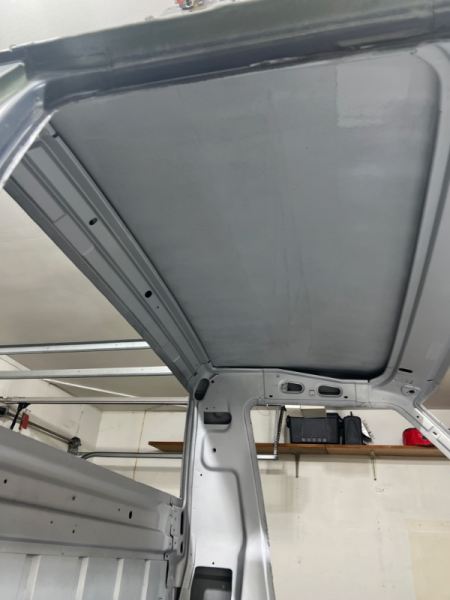
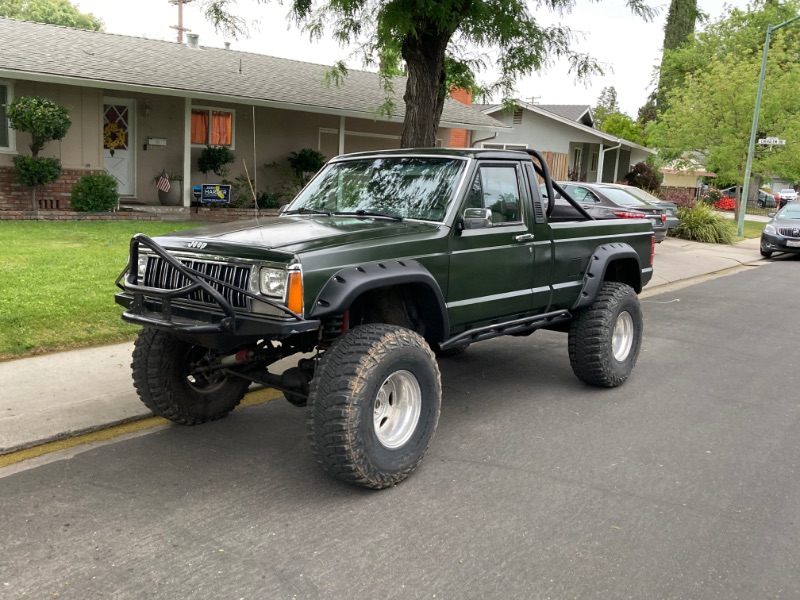
Was finally done with interior paintish. I never really prepped it properly. But the primer is super good. I also left the primer out to sit for 2 weeks waiting for color. But I think the cab will be fine. Anyway… I started sound proofing and putting small interior bits on.

-
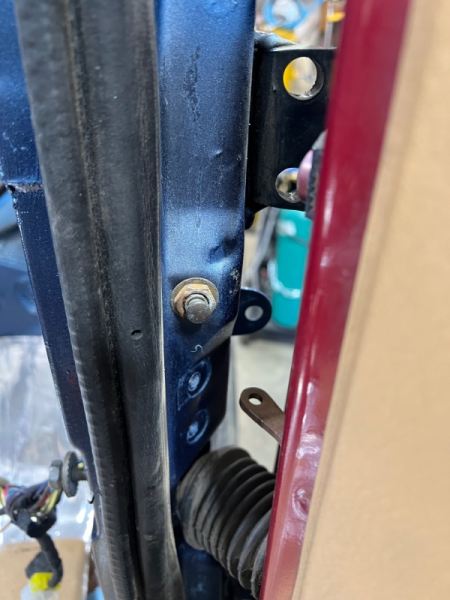
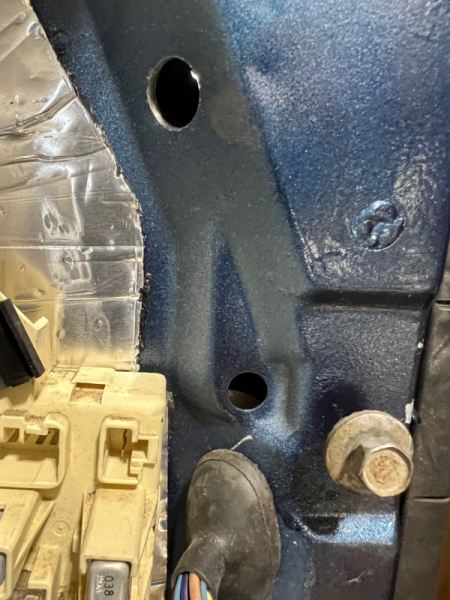
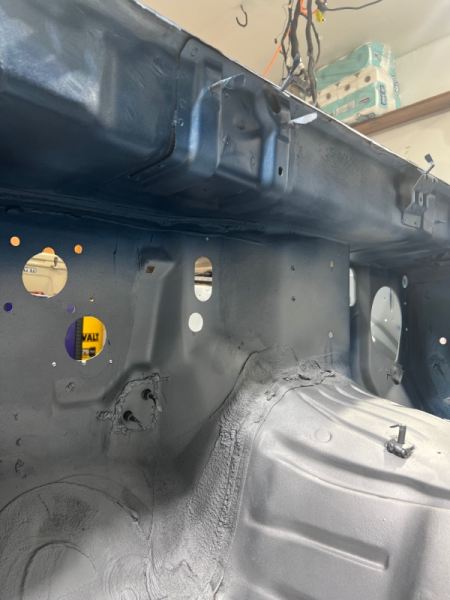
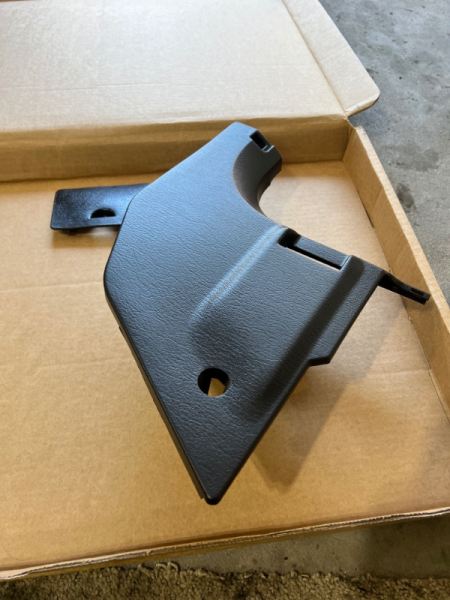
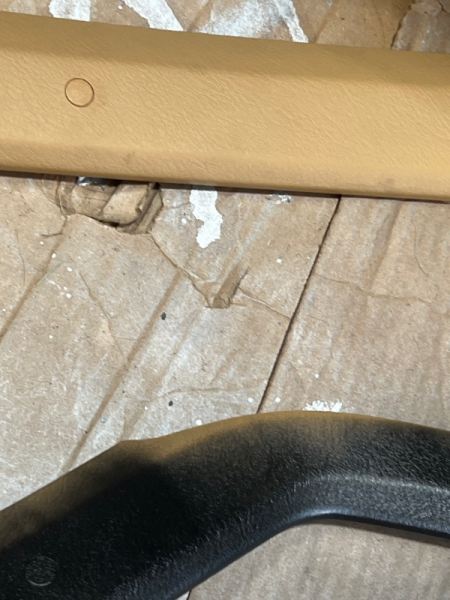
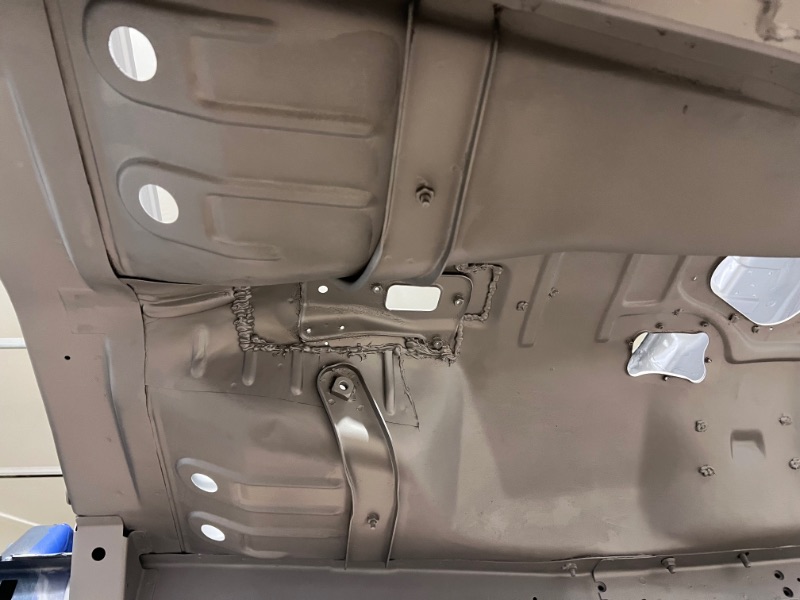
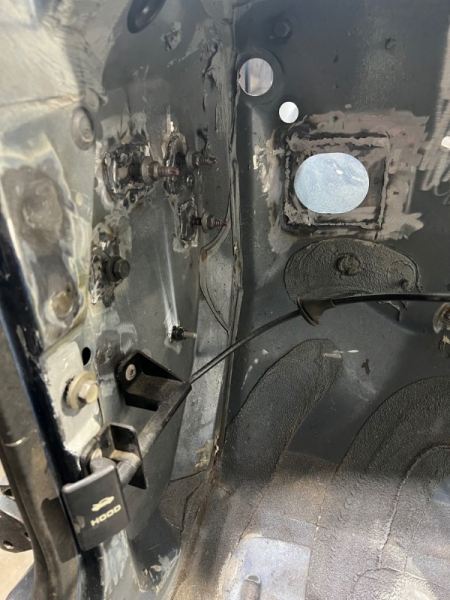
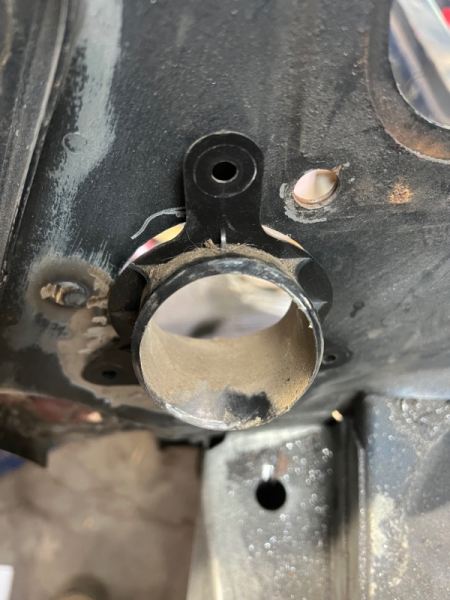
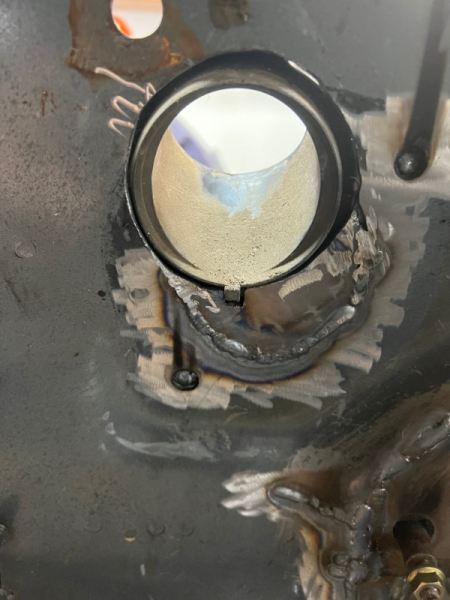
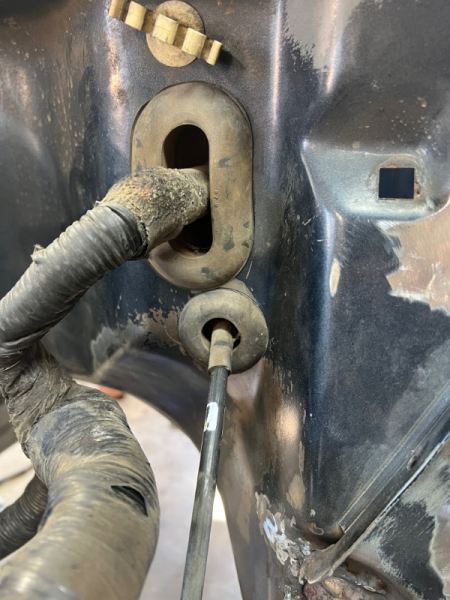
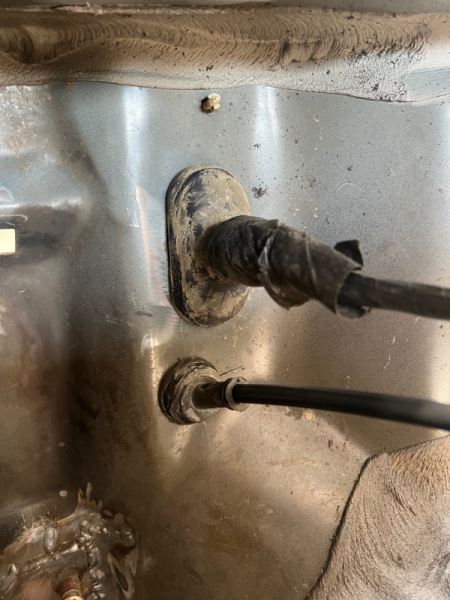
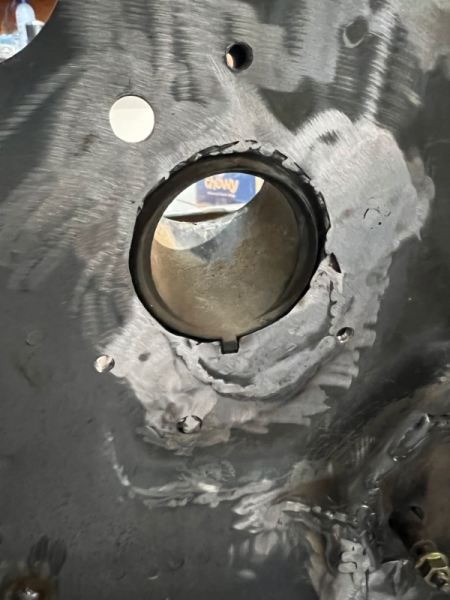
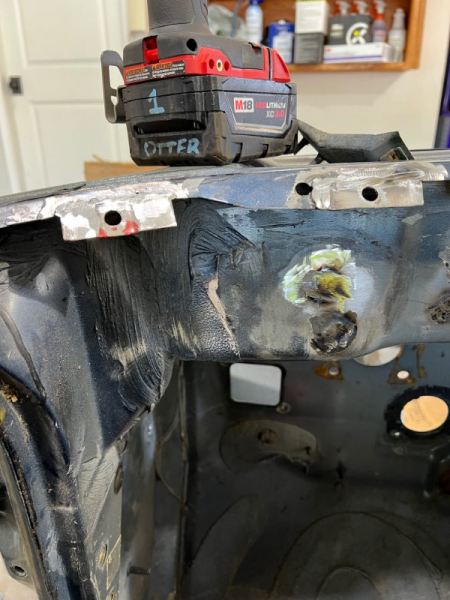
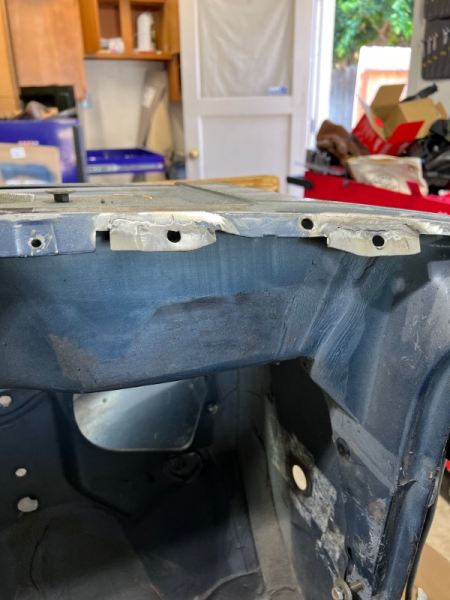
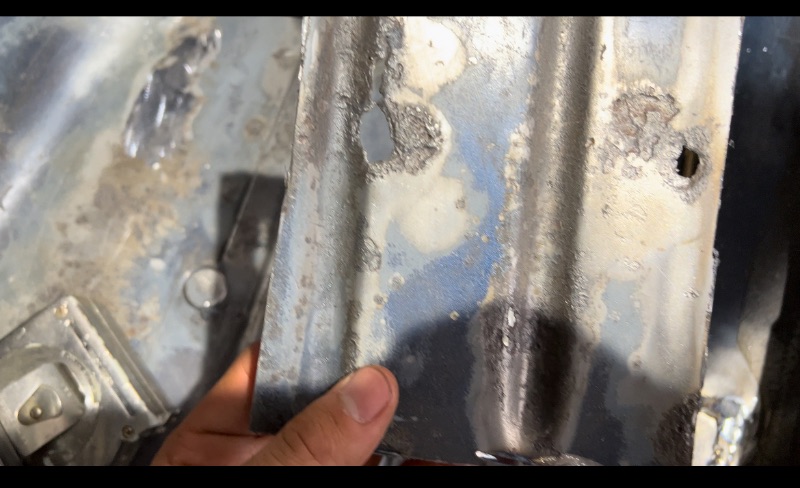
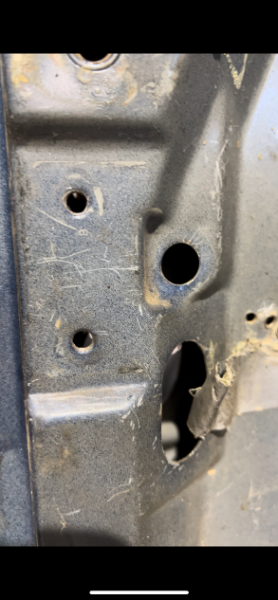
I have never seen this bit of information on any forum. But, the 97+ door wiring harness does not fit into the oval shaped hole in the 88 MJ. It is approximately 1/2” too short and 1/8” too skinny. Secondly the door jam switches have too small of holes. The pass through for the wiring harness is 3/4” on the 98 donor. 1/2” hole for the switch itself. The MJ has both holes too small. As illustrated in the the second picture. The drilled out hole on the top is the size you need. The one below is the stock 88 MJ size.
-
Here it is after 2 or 3 coats of color and 1 coat of clear coat from Mastercoat. It’s called AG111. Really good stuff.
-
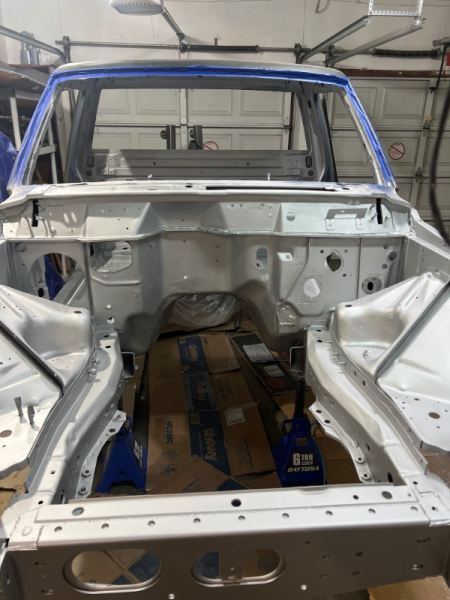
I had a quart of basecoat in the factory color of Dark Baltic Metallic. Well…. It started out good. I had started out in the cab with a light tac coat of color. I soon realized after taking pictures and oogling? the color that I wasn’t going to have enough. So then I didn’t take many pictures of the process while painting after that because I tried to prioritize the places I needed the most paint. The engine bay and frame. I knew to reorder paint it’d be at least a week and the primer would be cured by then. So I colored the heck out of the engine bay knowing I just really wanted a nice engine bay. I left a bunch of spots unpainted. The next weekend after I painted some trim pieces since I didn’t have the color yet.

-
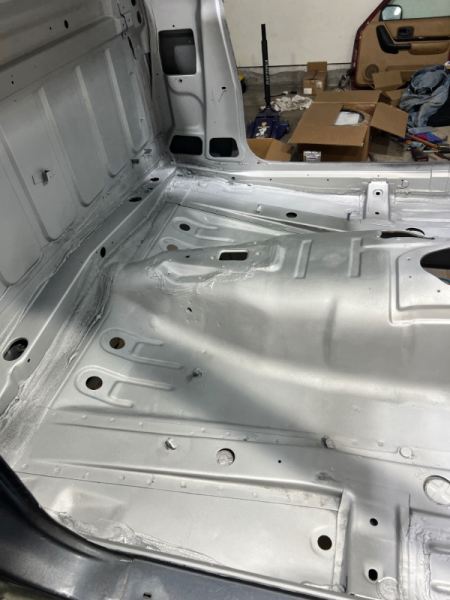
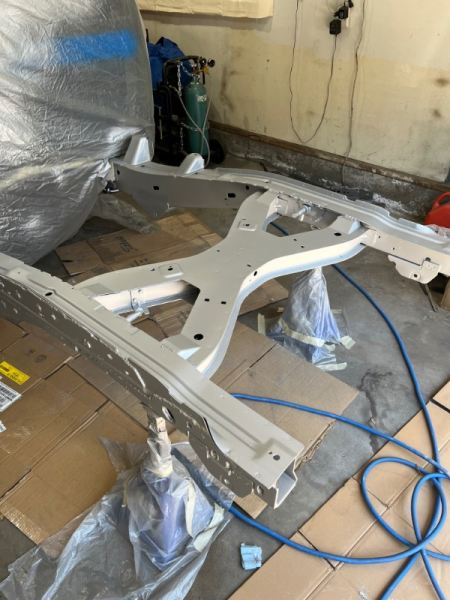
Primed the truck with Mastercoat Silver consisting if 3 coats of I remember correctly. It was a complete mess in the garage. I did nearly zero prep of the truck. Didn’t cover a lot of stuff in the garage. So a considerable amount of things in the garage got silver dots all over them. Not my brightest or fun moment. Oh well we move.

-
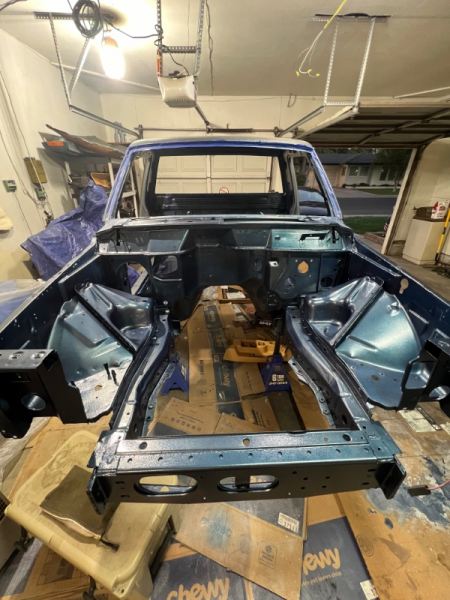
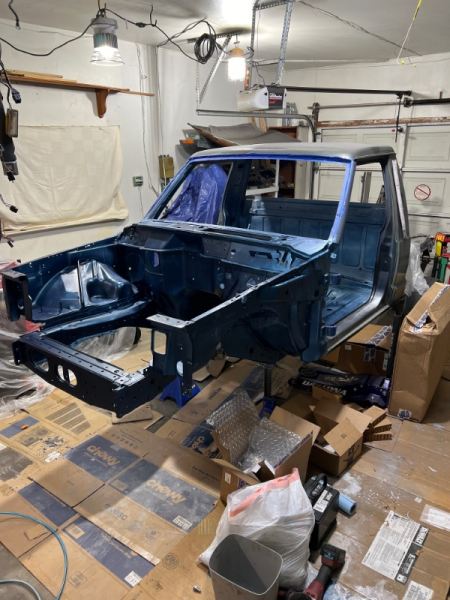
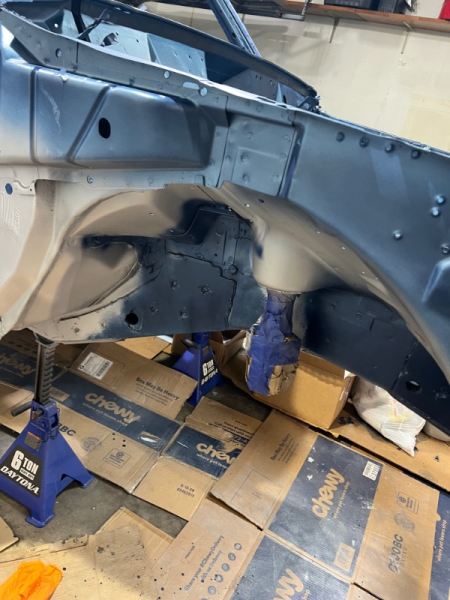
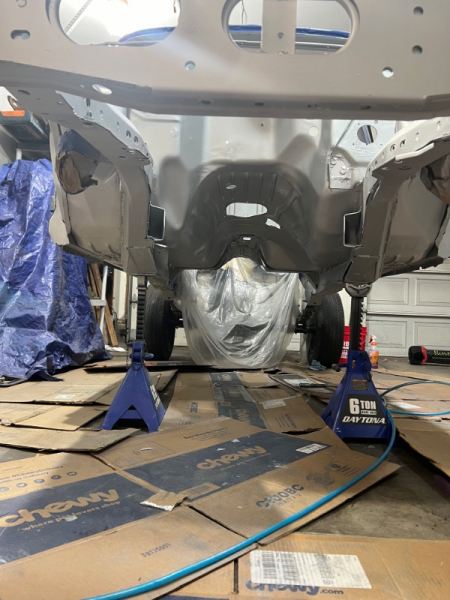
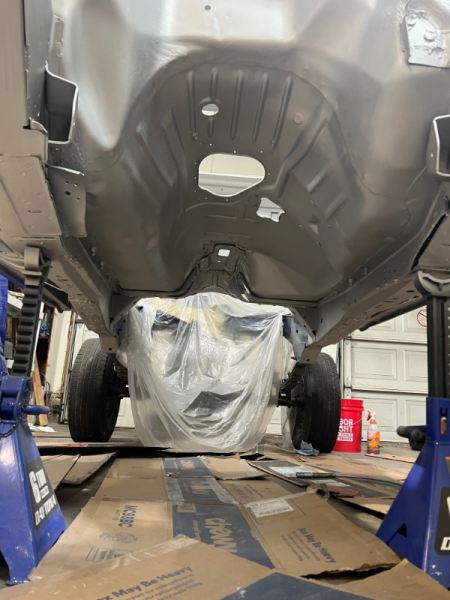
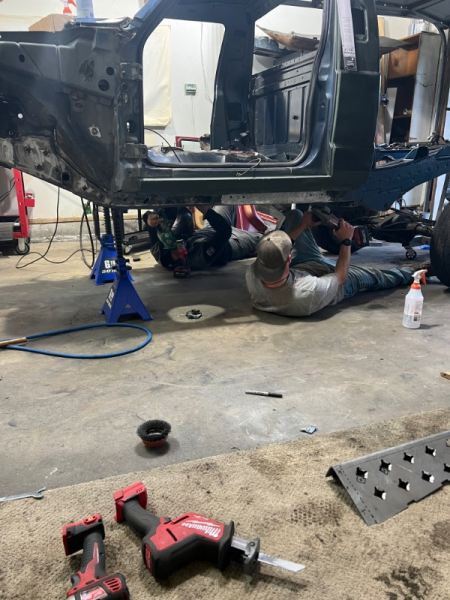
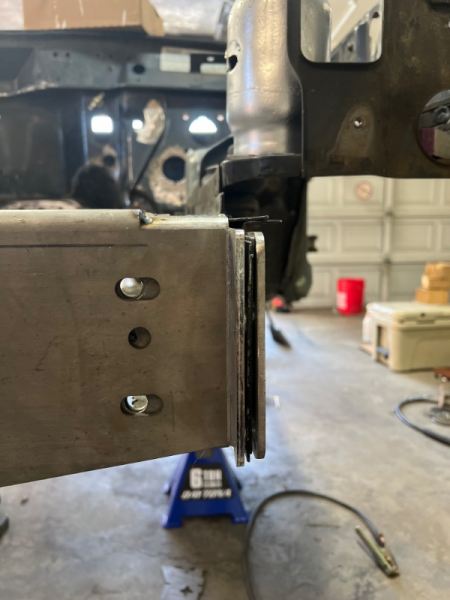
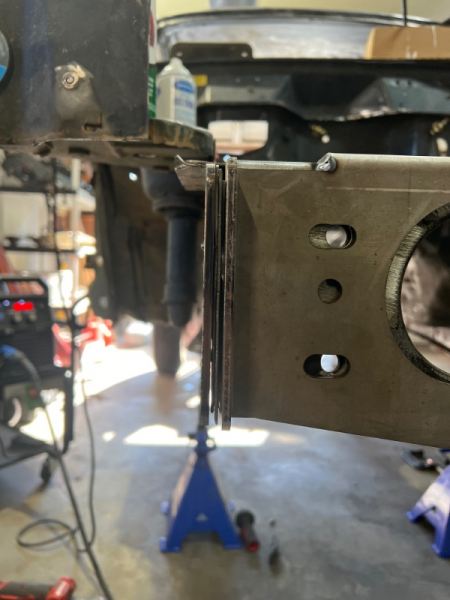
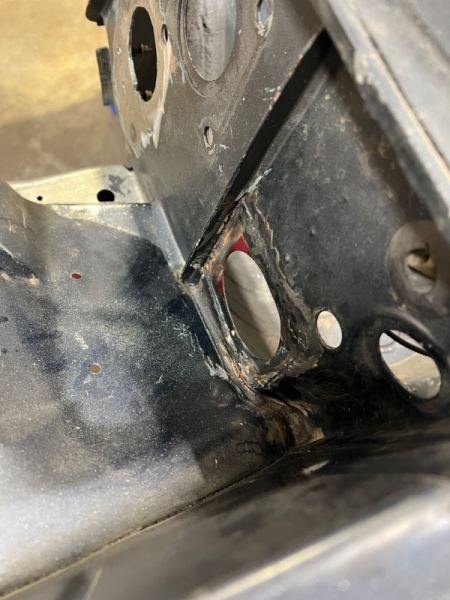
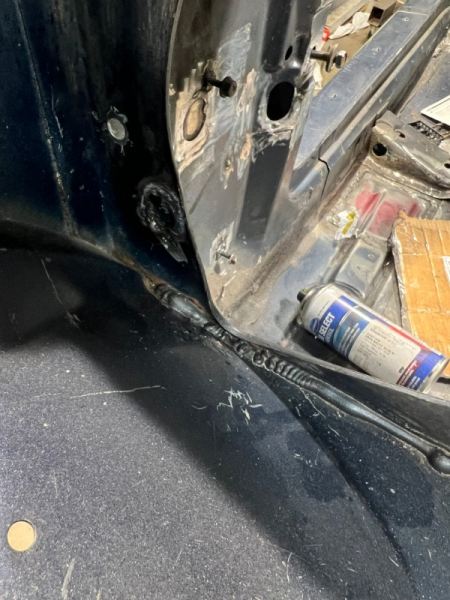
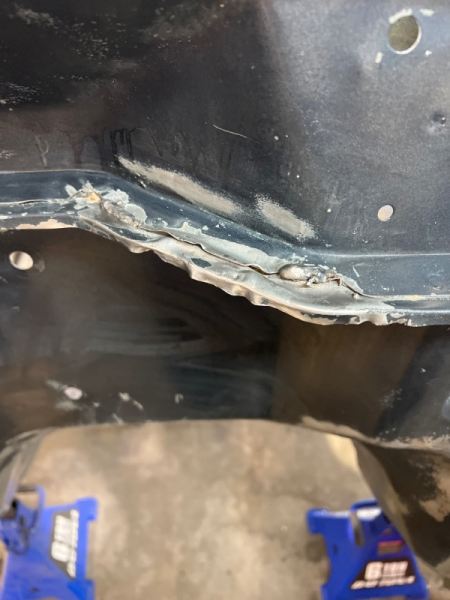
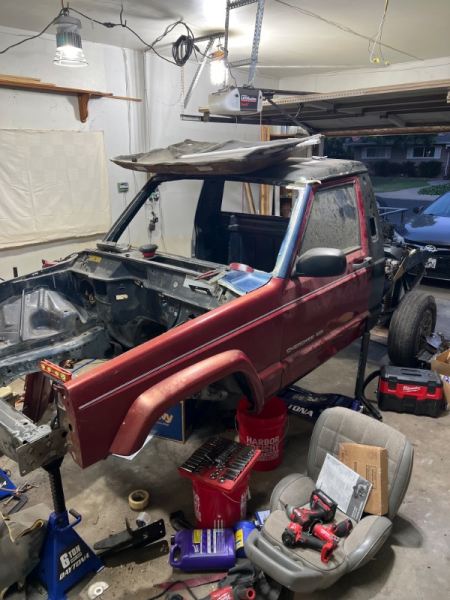
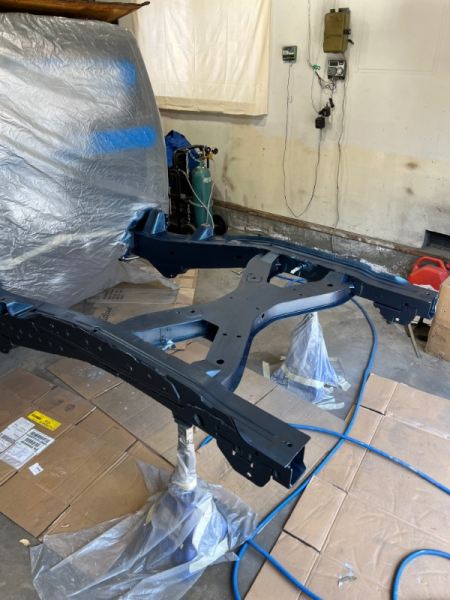
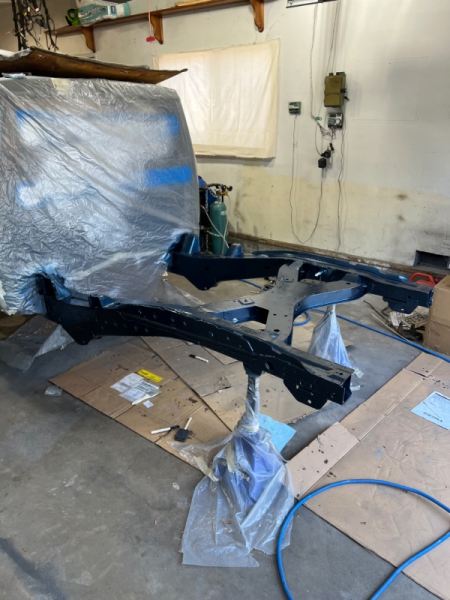
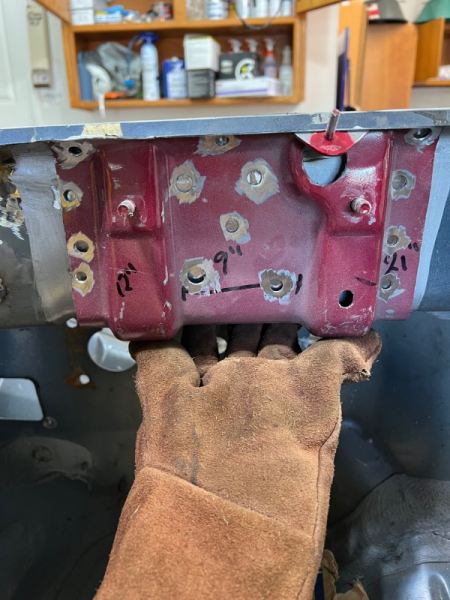
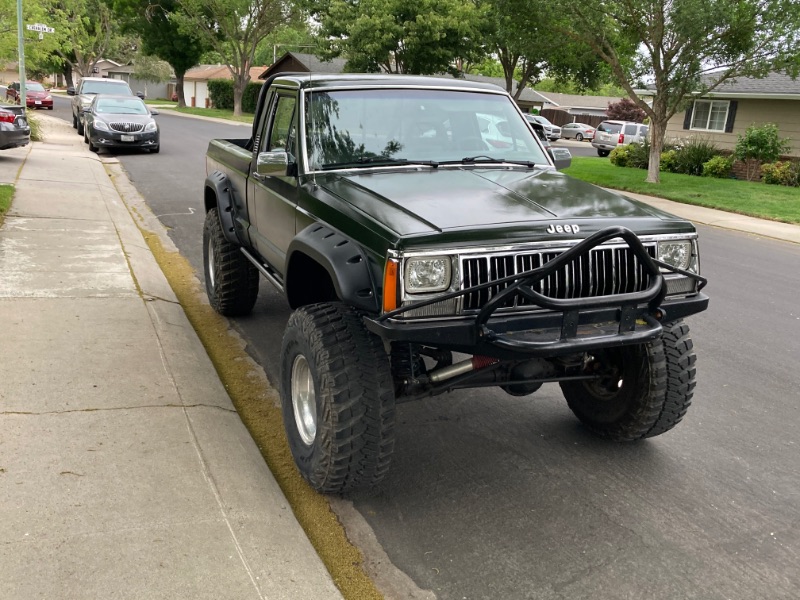
Sorry the photos look horrible on my phone they look decent.* I had a 6 week timeline to finish the swap and get her running under her own power. I got delayed 2 weeks with all the perfectionist fab work. So this weekend I said I can’t get all the rust and I can’t make sure I thought about every step ahead so I don’t have to back track. So I had some friends come over and help weld the frame stiffeners. quite the gap… Some rust and bent steel from my first time pulling a motor. Fixed up the hood latch. It sits below where the MJ one would sit. I ALSO THINK I FOUND THE LEAK THAT CAUSED MY RUSTY FLOOR PANS!!

-
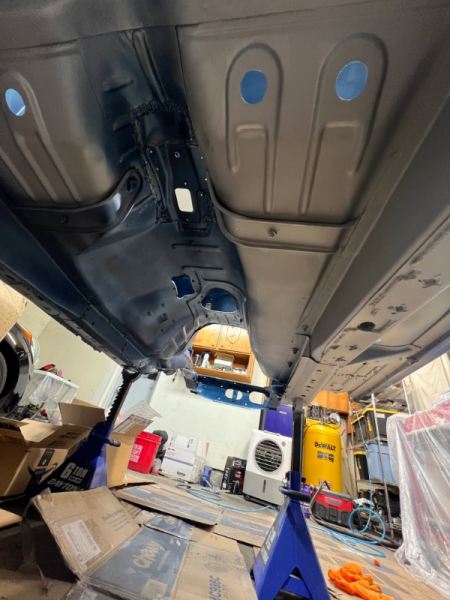
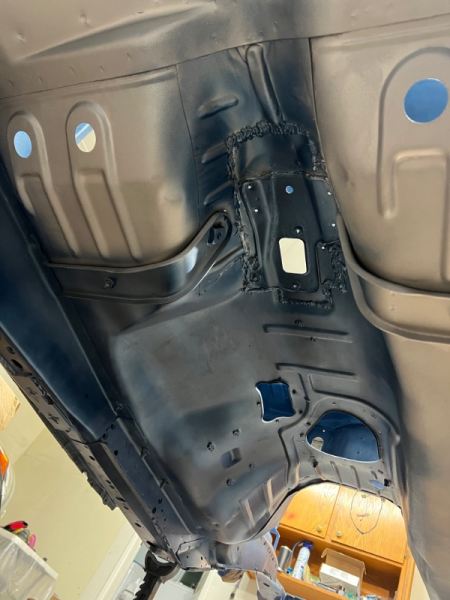
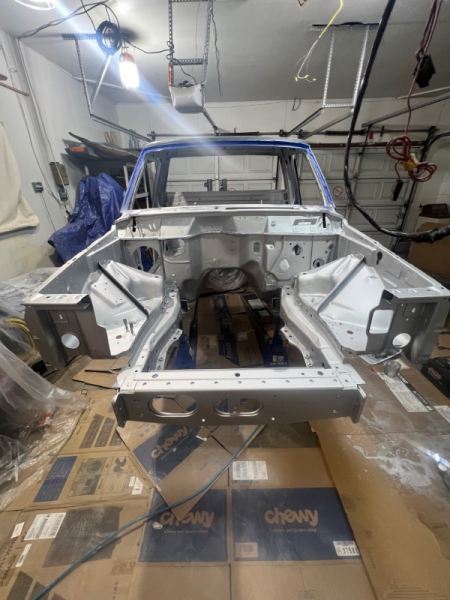
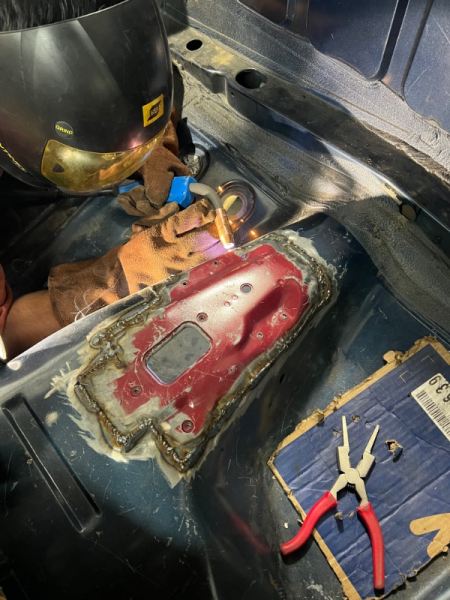
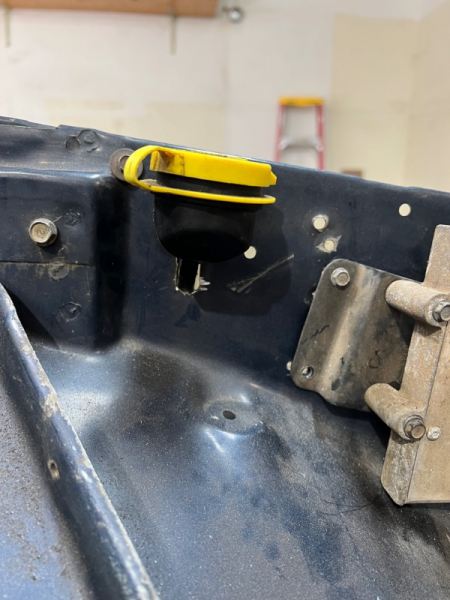
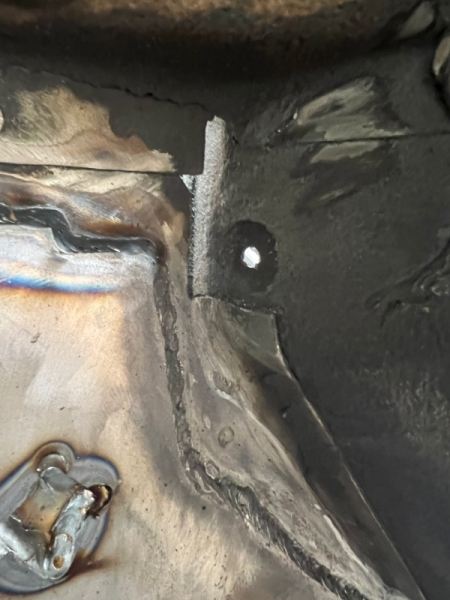
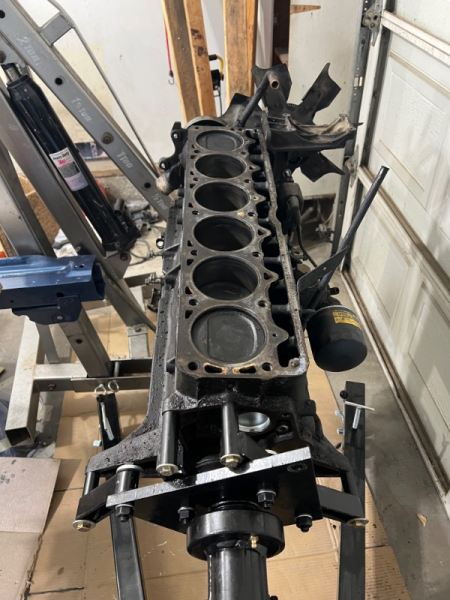
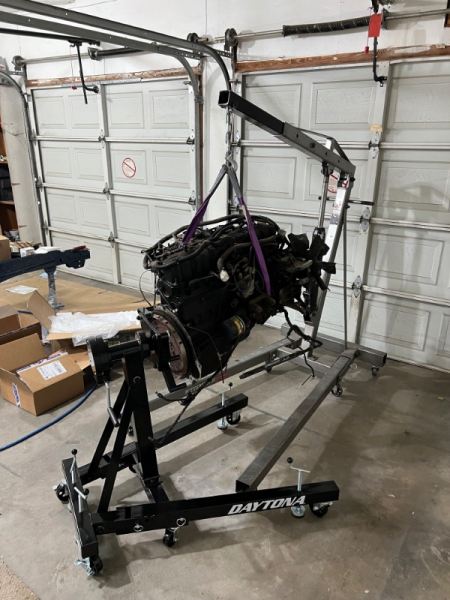
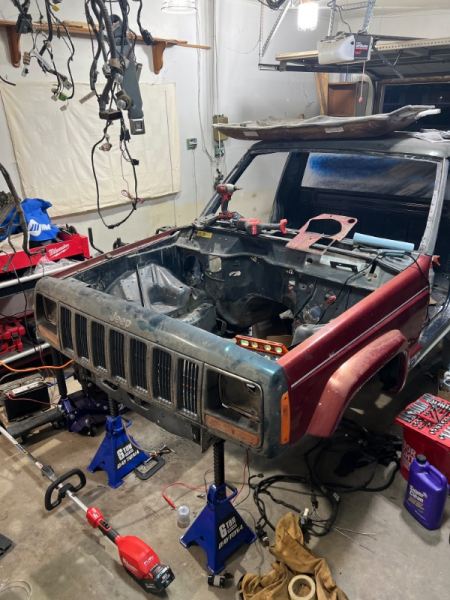
I last left off with pulling the 4.0 and throwing the 44 in the rear. I did a ton more fab work. Including patching various unnecessary holes made by the previous owner, plating the front of the frame/unibody(the Dirtbound frame stiffeners aren’t the best fit but I got them cheap), fixed the steering column hole in the firewall, and other various things. I also accidentally cut a hole in the front of the frame cutting off some frame stiffeners for a steering brace I’ll pick up soon. I did fix it however. 16 gauge sheet metal for a frame. I took the 4.0 to a local Jeep mechanic to get it refreshed. It looked really good on the inside so I’m hoping the camshaft, rings, bearing, or whatever he said he’s gonna do to it works out. Idk I’m not knowledgeable on motors. Getting there was one of the sketchiest things I’ve done in a while with a vehicle. For the 97+ swap I had to find a spot for the AW4 shift cable. Thankfully I mocked up the wiring harness to see if there was enough room under the tcu harness pass through. Annnnnd just barely does it sit flush so I know I won’t have a leak. Found that a random plastic push fender liner holder thingy had its own dedicated hole through the floor pan wildly enough. I didn’t like that so I patched it with the welder since I want zero leaks in this if I can try for it. here the steering column fitment issue I had. I freehanded this hole with a carbide bit on a die grinder since I wanted to save the donor firewall in case of an emergency. I didn’t want to mess up donor firewall by putting it in wonky and not lining up. But I corrected the hole so happy. Then had a friend mock up the cemetery console from the 98 donor and the hole for the washer fluid bottle.
-
Sorry everyone I thought I had replied but I must have not hit submit but… I have yet to open the diff up. It’s really stuck on there good. I’ll try to prioritize that once I get to the axles. I’m not sure how to do the pinion angle setup. So that’s my reasoning with going with what it had when I got it. I know for a fact that at least that works. haha I wish too. My dad is now retired and in Athens, Greece at his wife’s family’s villa for half the year. Oh to have nothing to do but fish the Mediterranean. I bet your son will love your help. At 27 my dad did help me drop the transmission from the donor and it was one the best memories I’ll ever have moving forward with the project. However, a week later he left with his fishing poles in his luggage.
-
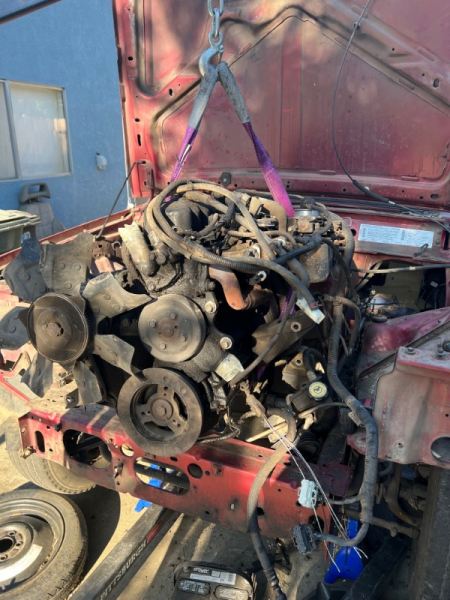
thanks! Pulled the engine and getting it ready for the local jeep mechanic to look it over. I then mocked up the front end for some motivation. I guess it worked a little because I got the rear XJ Dana 44 back on. It’s a welded differential so I’m positive I won’t keep it. I believe I’m going to just weld on the brackets in the correct position for the 8.25 from my donor 98 and see about a stock ride height. 8.5” is a lot of lift. I got the driver door off the donor. Which was a task since it’s parked up near a fence on the driver side. I mocked it up to get an idea as to where the door latch mod needs to be placed.
-
Been a while but I got most of the welding on the interior of the cab. I’ll have to get some more pictures of the welded pieces. I don’t have have them all. I was able to spray the Mastercoat silver primer with my 3m accuspray gun. I then used 3 spray cans of the factory paint to put the basecoat. I thought it was going to take 1 can but… 2-1/2 cans and I barely was able to put down one good coat. Then I topped it off with the Mastercoat AG11 in clear.
-
Woah that’s something I’ve never seen before or even knew existed.
-
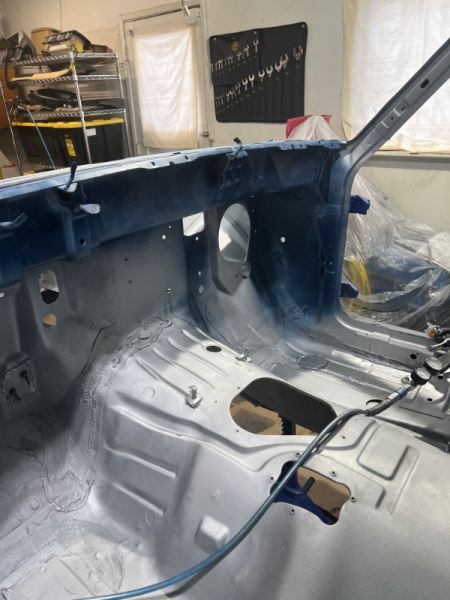
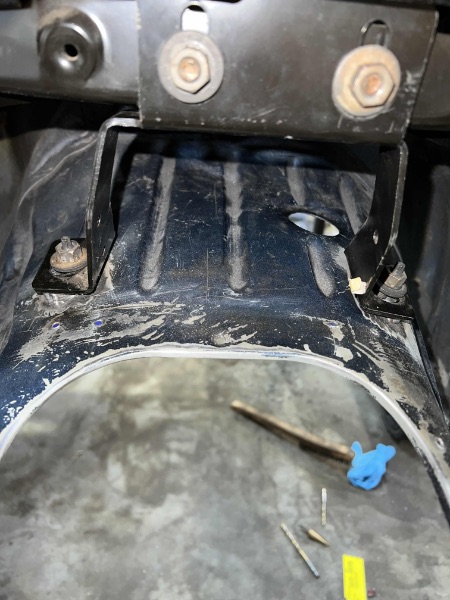
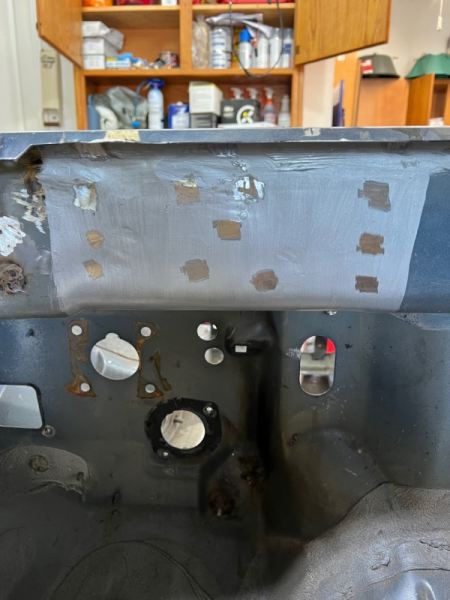
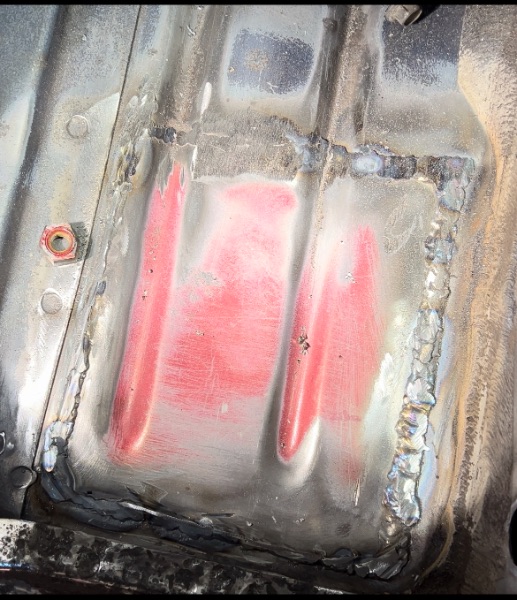
I was able to prep and weld in the left dash mount Friday. I used Mastercoat silver underneath where the mounting bracket would sit. I sanded the paint off where the spot welds would be.
-
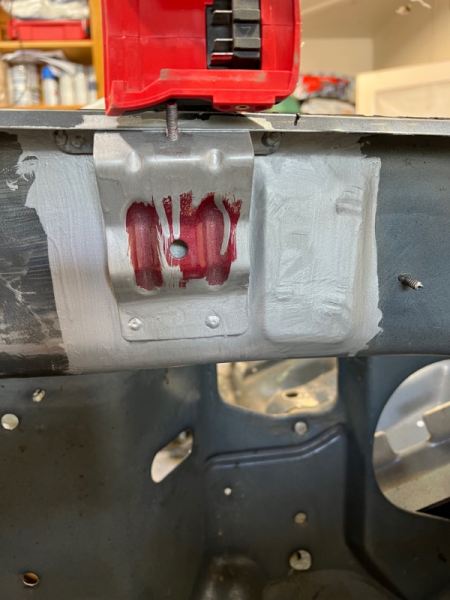
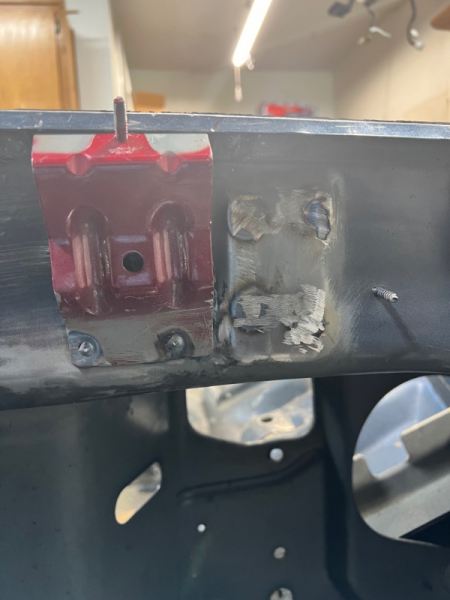
Got the right side dash mounting post welded in. Did a fit up test on the dash this past weekend. Doing a lot this weekend. Will post more of the dash modification from 97+ donor XJ when I’m not outside in 110°F+ heat.

-
Mastercoat is like a super primer. It's mainly used as a primer for chassis undercoat. It is pretty much POR-15 but way better. But, yeah it should be clean metal. So, I'll probably end up using just the epoxy primer.
-
Ok cool. I think my plan is to use Mastercoat silver primer on bare metal, use the Eastwood epoxy primer reduced with urethane reducer at 20% for a sealer, then base, and clear. Should be good to go after that.
-
Yes it has been very fun and a little stressful for sure.
-
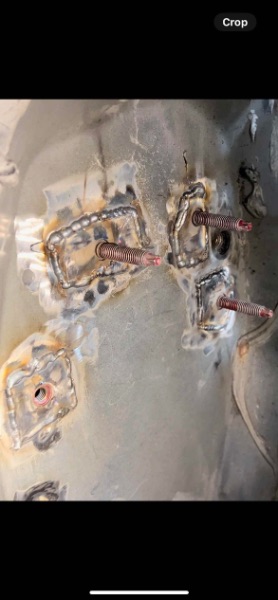
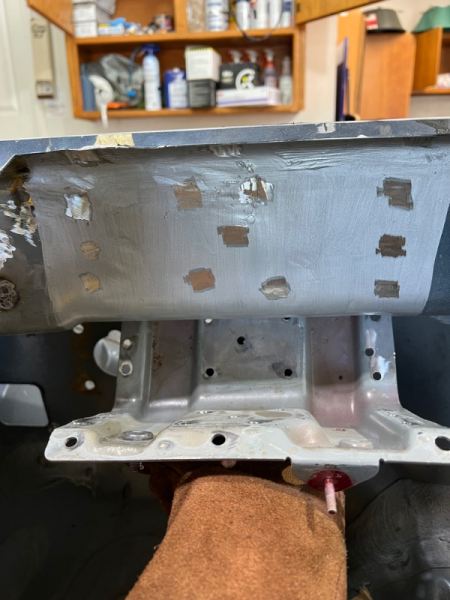
Welding in patch panel for the passenger floor pan. Probably could’ve just added weld material to the floor pan but decided to try something new as practice for the firewall mod. It was a perfect matching piece from the donor XJ anyway so what’s the harm. I cut it all wonky without really taking good measurements. So I had 1/4” gaps in some places. But it’s pretty solid. Next I added the 97+ side dash mounting points. I thought it was going to be harder. But, it was actually pretty easy. It was just a nut tack welded on the donor XJ. Did the same exact thing on the Chief. When putting the bolt back into the driver side nut, I think I cross threaded it. I tried to clean the threads up a bit but don’t have a tap and die set yet. So I eventually ugga dugga’d it hoping for the best. It wobbles a bit now but still tightens up. If anything I’ll just drill out the threads and add a second 1/4 20 nut on the back of the first nut.
-
Someone painted my truck moss green and I am using a red donor XJ... some small sections are going to be bare metal. How do I go about painting the truck back to the original Dark Baltic Metallic Blue? I assume use an epoxy primer where needed and then a urethane for example: https://www.eastwood.com/eastwood-4-1-urethane-primer-black-gal.html ??? Then basecoat and clear?
-
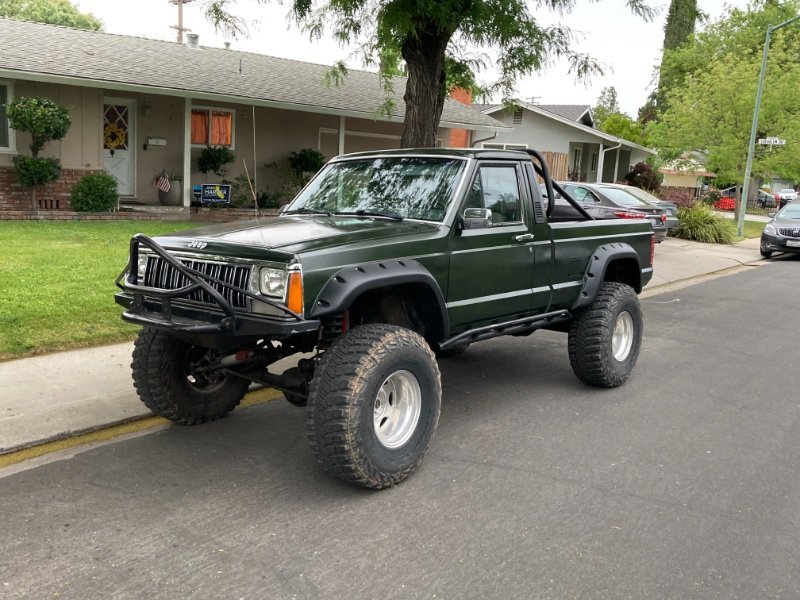
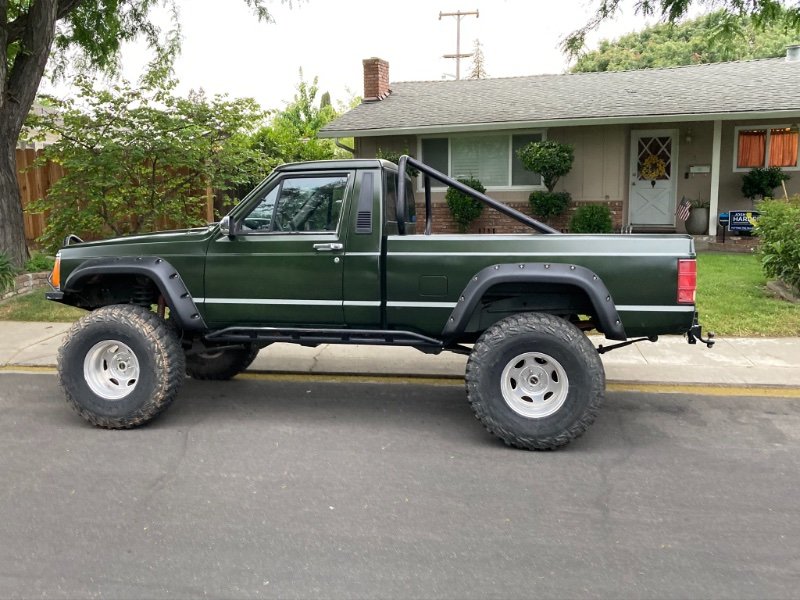
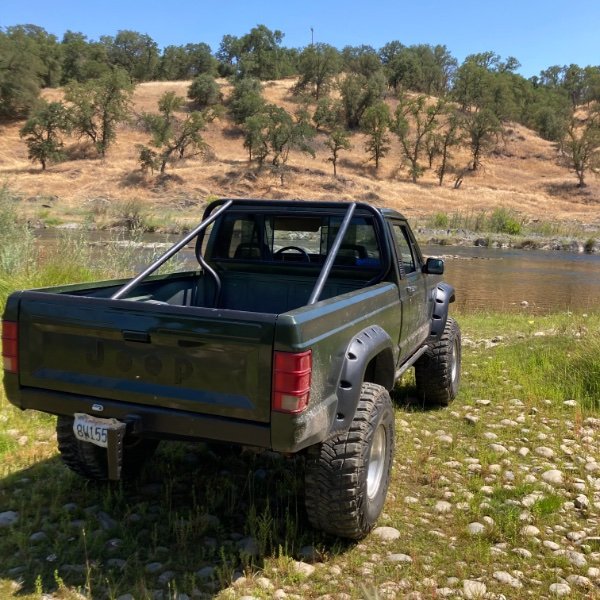
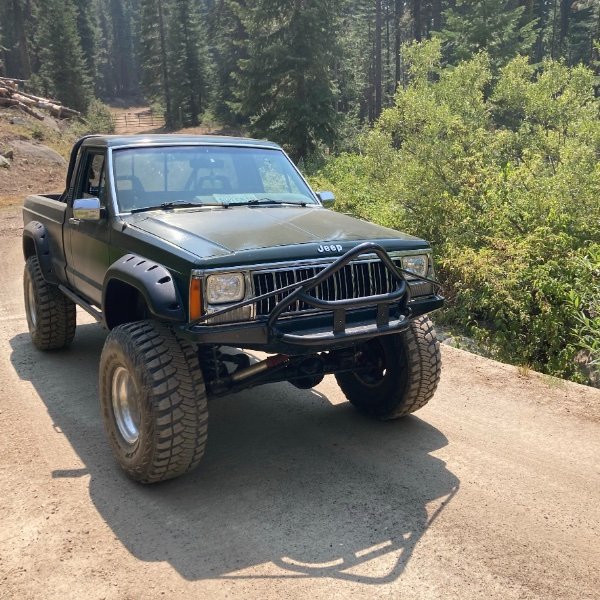
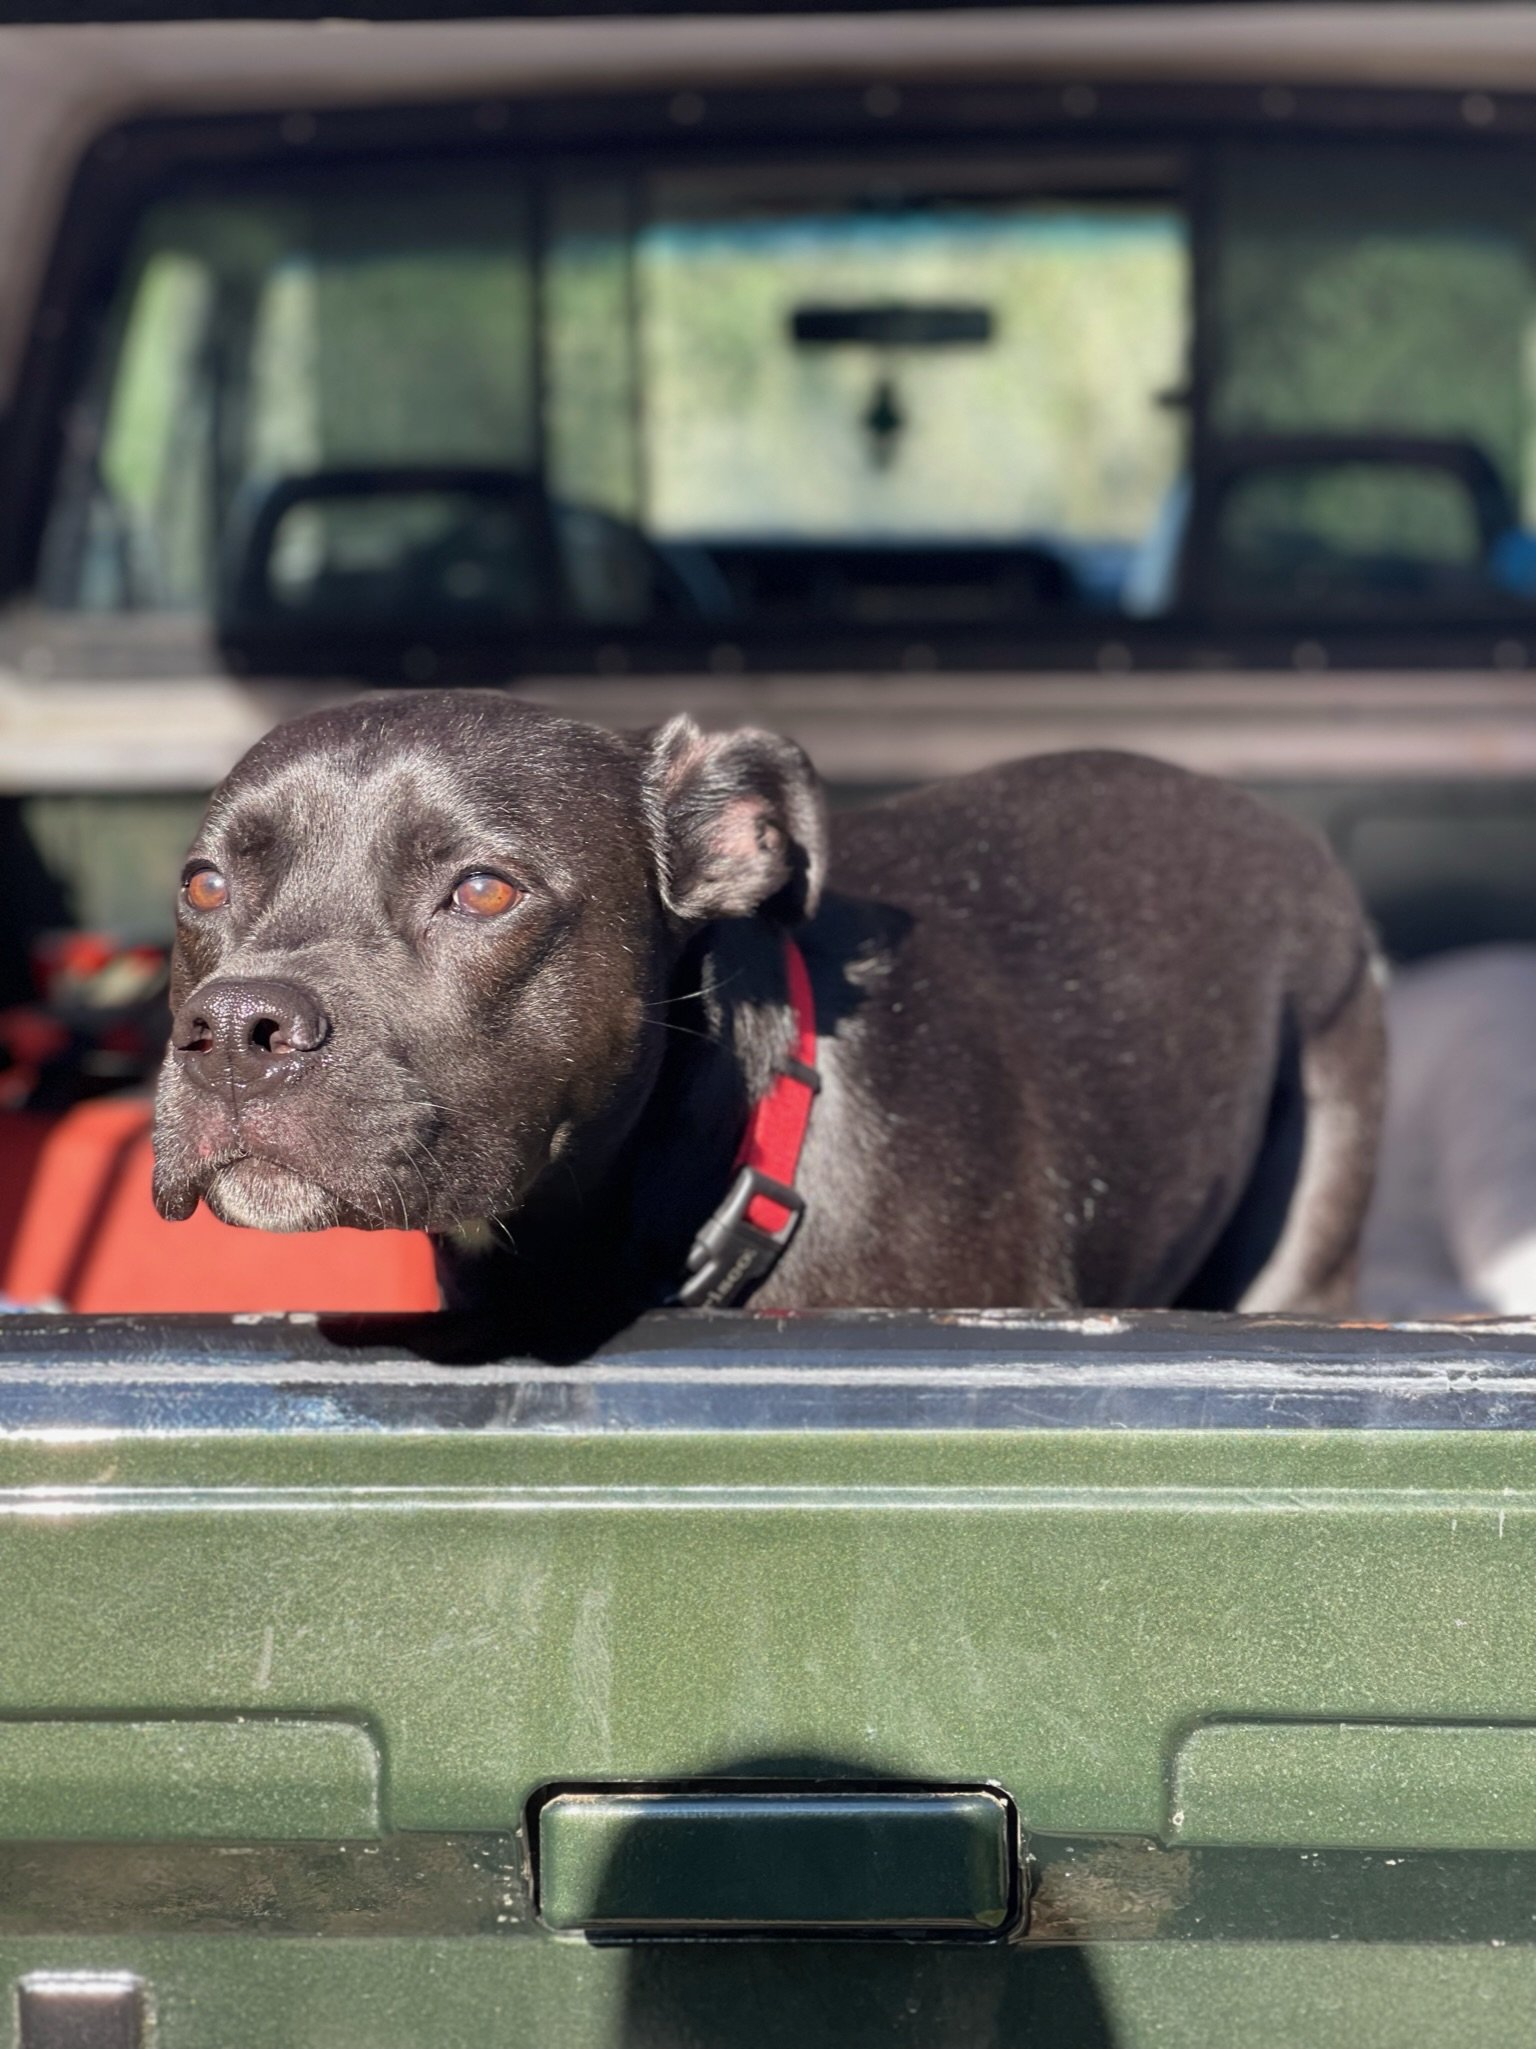
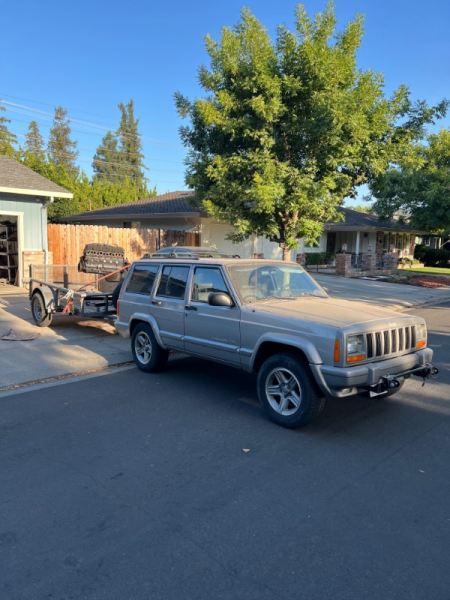
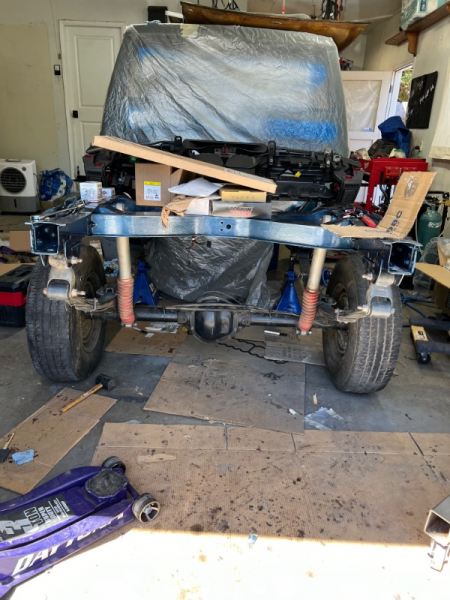
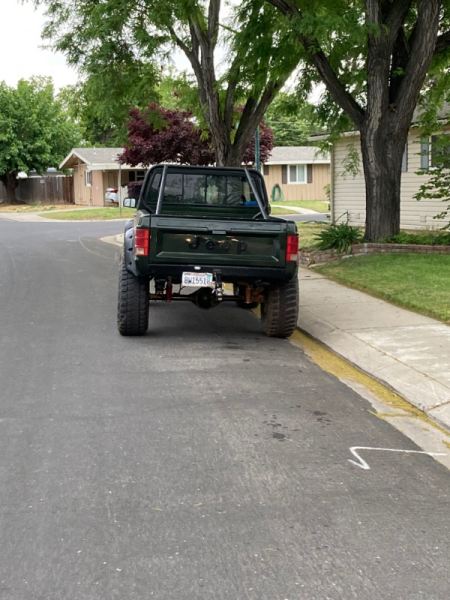
Welcome to the build thread. The Operation is named after my dog named Otter. Got it to go over landing with him. I also like the Chief decals but the truck was originally a 2WD base truck. This is an operation to restore my 1988 Jeep Comanche. Technically when I got it, it was a running truck. Although it was running rough. Leaking everything and drove it home 3 hours from Redding, CA to Modesto, CA on April 24th, 2021. This MJ was rather poorly built. The previous owner was either super lazy or just had someone do the major work and finish work himself. Master brake cylinder went out, e fan wiring shorted somewhere, power steering went out, and welded the rear XJ Dana 44. He had some weird connection held on by blue masking tape. If the connection didn’t touch it’d be a dead truck as if it had no battery. It also leaked at the rear window which is totally not foreshadowing anything at all. :edit: The objective is to 97+ swap it and get it to be able to do the Rubicon and also make it out to different outdoor areas around the West Coast. So anyway here are some pictures
-
This was a good video. Nevada is so big and easily explored by us in California thankfully.
-
Modesto here.
-
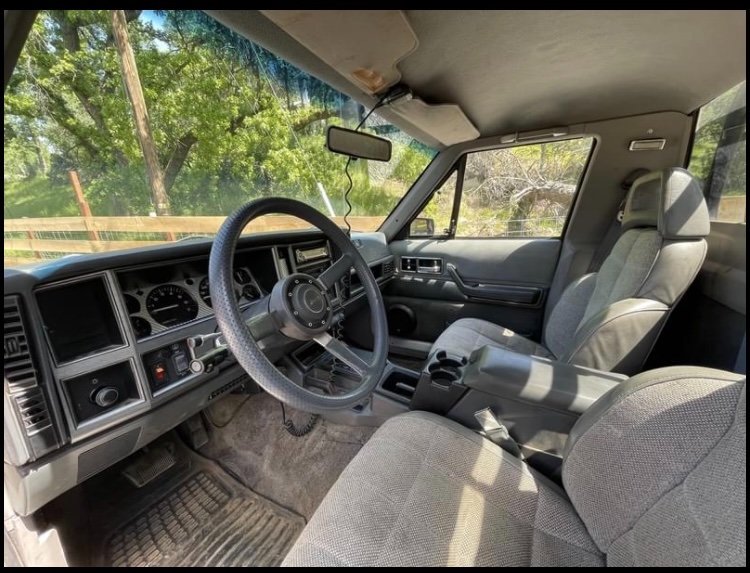
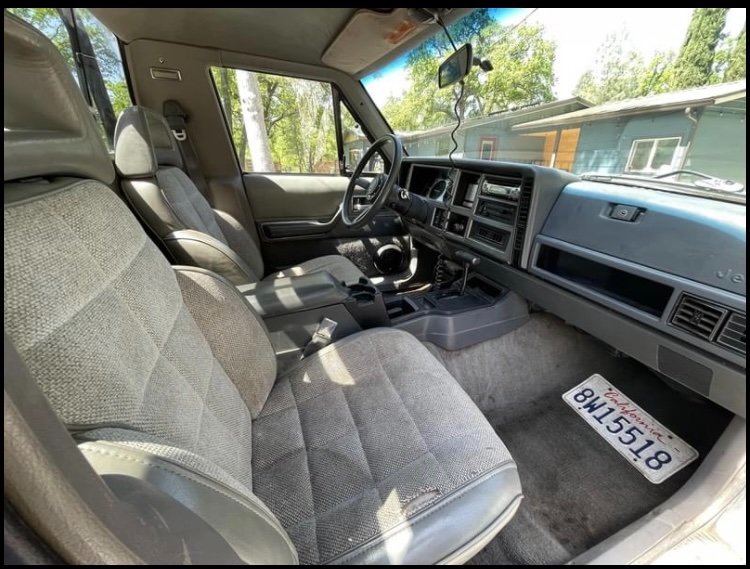
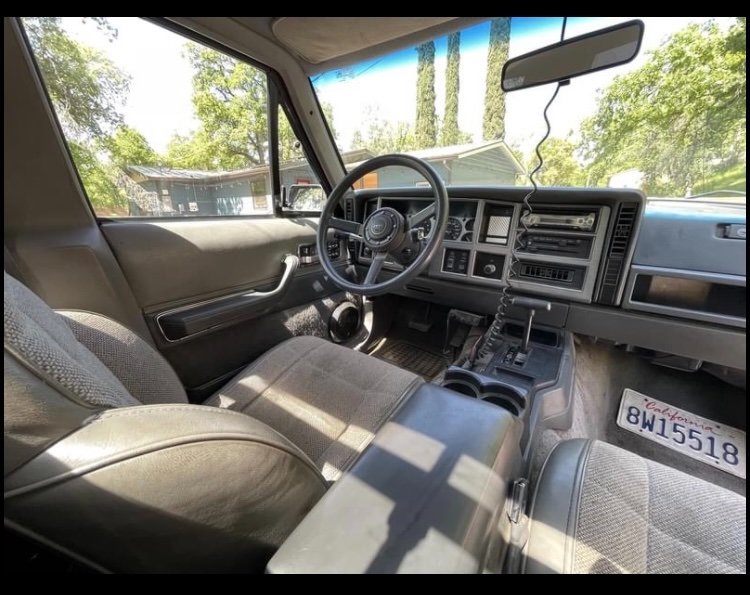
1988 Jeep Comanche Remix 4.0 | AW4 (I assume) | NP231 (I think) | D30 Front | D44 Rear | SWB I have a 4 speed auto and a normal t case. None of that part time stuff. Just 2Hi, 4Hi, N, & 4Lo. I just learned which Danas are which last night* Build Date: Not with the truck but if it on the cab side of the door I can see if I can get it. It has XJ doors on it. Current Location: Modesto, California. Status: Running but has some health issues so a garage princess. Notes: Bought the truck late April 2021/ Early May 2021. Came as pictured with me not knowing anything about Dana or her slew of other off-roading parts/friends. As far as I know it came as a 2WD truck and quite a few owners according to the car fax. I might have to pull that up again. The one main thing I know about Comanches was that powered windows weren’t common to have. So in the facebook ad when I saw it has powered windows I jumped on the chance. Has buckets seats and is floor shift. Didn’t want column shift.. Paint is Moss Green from Chrysler. Thanks for reading and looking!