
.jpg.9041e7eb56b564997d6c519744cdc623.jpg)
CapitalCityPioneer
-
Posts
84 -
Joined
-
Last visited
Content Type
Profiles
Forums
Gallery
Everything posted by CapitalCityPioneer
-
.thumb.jpg.0af09ca5af95ae2ea98759d1d761d598.jpg)
Renix fuel system and HO engine
CapitalCityPioneer replied to thedude4895's topic in MJ Tech: Modification and Repairs
What kind of fuel sending unit would you put in the Manche tank to send fuel to the fuel rail? Sorry for this late reply to the thread!B -
I have a quick question for this thread, even though its pretty old! My Manche has an '01 HO swap into it, electronics and all. I have an XJ tank, but I'd rather reuse the original tank. The HO fuel rail only has one fuel line running to and from the fuel tank, while the old MJ renix tank has both a fuel sending and fuel return line port on the sending unit(fuel tank side). So is it wrong to plug the fuel return line? (I feel it is 100% the wrong choice). If I shouldn't do that, how can I fix this issue? Or am I stuck, and have to use the XJ tank? I saw one posting about cutting into the top of the tank and creating your own mount spot for the XJ sending unit, and I'm not comfortable doing that.
-
Vakarian's Comanche 'Trailbreaker'
CapitalCityPioneer replied to Vakarian's topic in Member Projects: Your Comanches
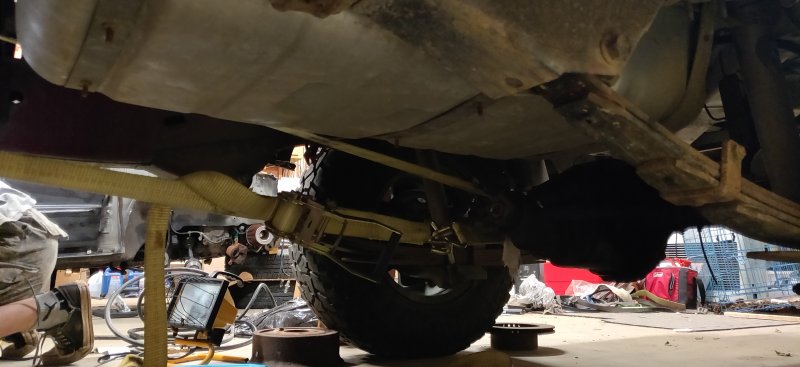
Here is the ratchet strap on the transfer case and transmission to the rear axle! Discussed in the previous wrenching status.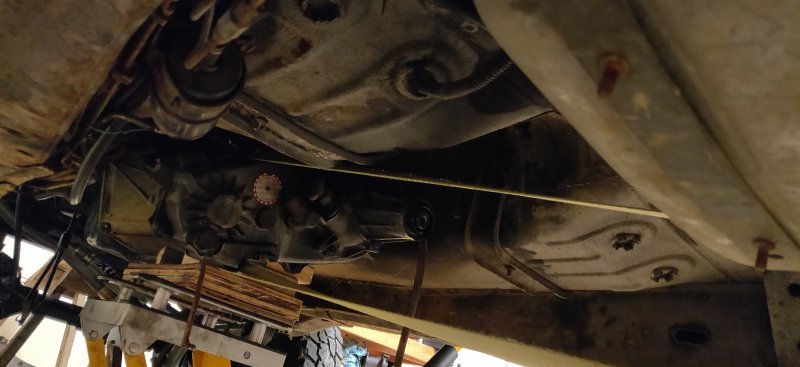
-
@Vakarian
-
88 Eliminator Junkyard Gem
CapitalCityPioneer replied to Vakarian's topic in Member Projects: Your Comanches
Vakarian's other MJ, the red one "Trailbreaker" definitely has a manual, AX-4 trans bolted to the 4.0l. -
Vakarian's Comanche 'Trailbreaker'
CapitalCityPioneer replied to Vakarian's topic in Member Projects: Your Comanches
That's exactly what I said -
Vakarian's Comanche 'Trailbreaker'
CapitalCityPioneer replied to Vakarian's topic in Member Projects: Your Comanches
Hopefully this one comes apart more easily than the Junkyard Gem! -
88 Eliminator Junkyard Gem
CapitalCityPioneer replied to Vakarian's topic in Member Projects: Your Comanches
Who's with me, NEEDS MORE CHROME! -
88 Eliminator Junkyard Gem
CapitalCityPioneer replied to Vakarian's topic in Member Projects: Your Comanches
I can say that getting a brake fluid facial while bleeding the clutch slave cylinder is NOT fun. The dying better Vakarian led me to the sink somehow! Fun times, that truck is definitely in beautiful condition. I'm in awe. Maybe I can get Vakarian to do this in the snow with her....
-
Very true! I got a welder, grinder, and all sorts of tools. Just gotta find metal I can buy for relatively nice pricing bit by bit . Endless construction sites around here in one of the fastest growing cities in the country... Hehe.
-
That's awesome, thanks. I was tempted to make something like that to create a step going down to match the flares, thought it would look nice and actually be super useful in many cases.
-
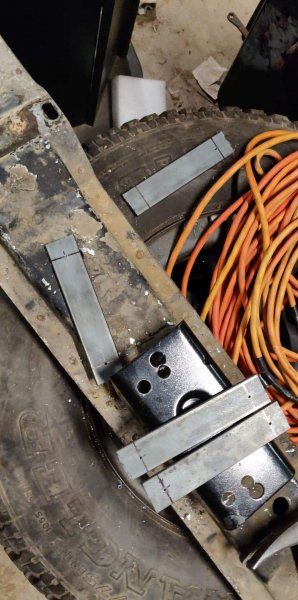
These are awesome. You drilled through the frame, passed the tube through, then welded plates on both sides? Is it a solid rod or a tube? And are the outside guards just square tubing?
-
88 Eliminator Junkyard Gem
CapitalCityPioneer replied to Vakarian's topic in Member Projects: Your Comanches
Got around to putting it up on YouTube, enjoy! -
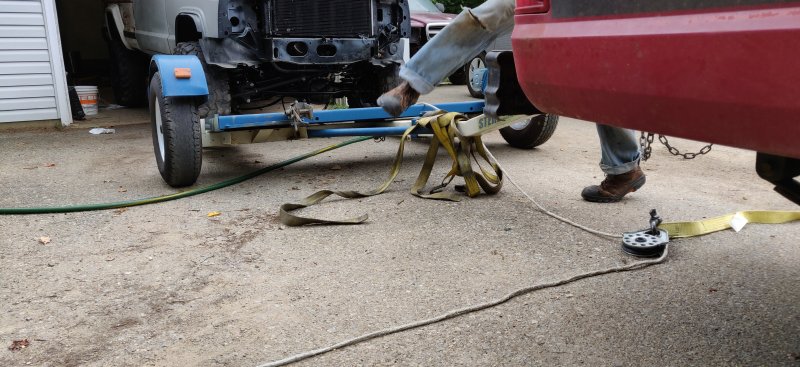
Here is the link to the video, unedited, of Vakarian, my brother, and I winching the truck into my backyard. You will see the incline it had to climb into the backyard and all. The creakign you hear is the garage door post on the left side of the video about half way through, lol! Its all good . Enjoy, skip through as you please to see the action and not the standing around making sure everything is straight....
-
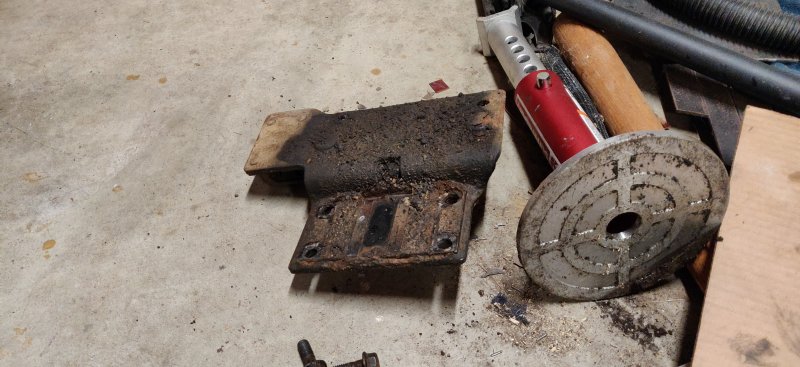
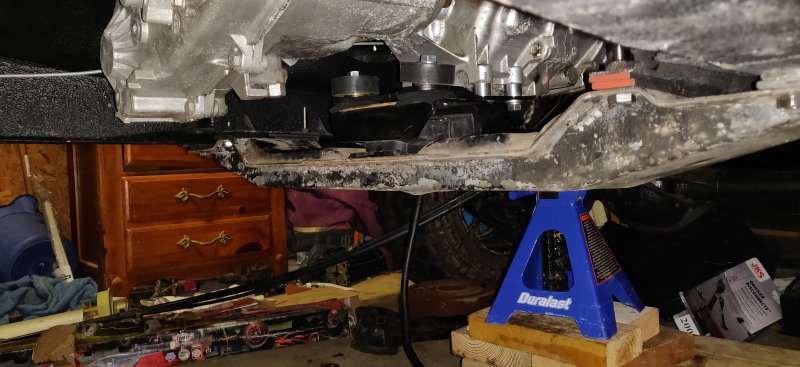
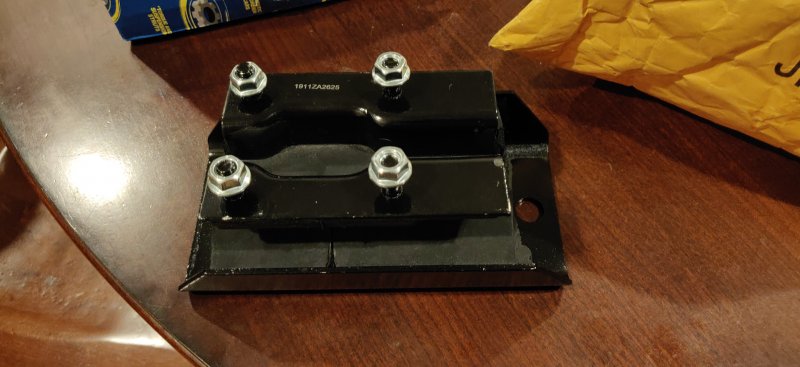
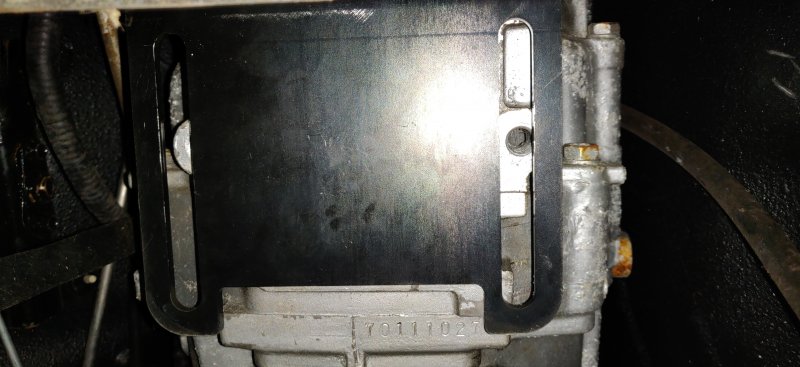
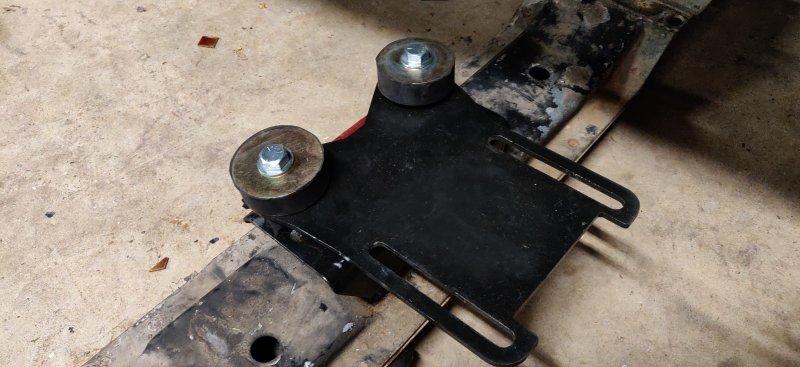
I found this photo just now, this is a photo showing the holes I drilled in the transmission mount, along with the spacers I made for my cross member, to drop it down. I also forgot to mention that. The transmission mount sits too high for the transmission to mount on, with my ORIGINAL cross member. The crossmember here is taken from Vakarian's scrap pile, and has a cut out in the middle where the trans mount goes, dropping it about an inch or so. This still wasn't enough drop, so I cut steel plate to drop the cross member a little bit more. This is the standard steel weld plate you get from Lowes, I used 2 layers and it did the trick for me. I drilled holes through the plate so the bolts went through it, securing it.
-
I have a couple current projects. The first is pulling all the vacuum lines. I have lines that run to nothing right now, and no idea where they go or what they lead to/from. So my plan is to pull the entire vacuum harness and figure out what it is all running to and make sure everything I need is there. The second project is the interior. The PO wanted to convert it all the 97+ Cherokee, but I want to keep the old dash. It looks a lot nicer in my opinion. I guess to mount the Cherokee dash, you have to weld in the new mounting brackets by the corner of the windshield? I haven't looked into it, but encountered that yesterday, and now I am quite the predicament. On a side bar, the rear light wiring harness currently in the truck is different from the stock MJ. I have to figure out where all that wiring leads, so I can figure that out and wire up the rear tail lights.
-
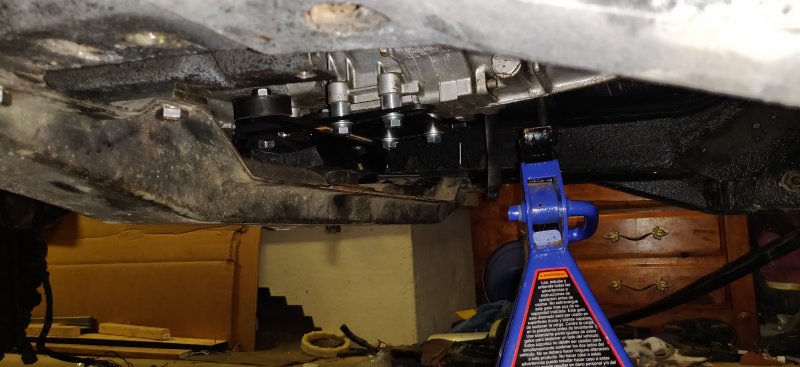
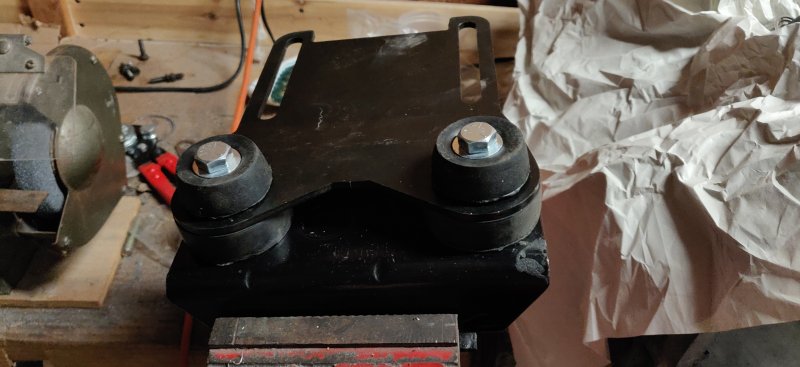
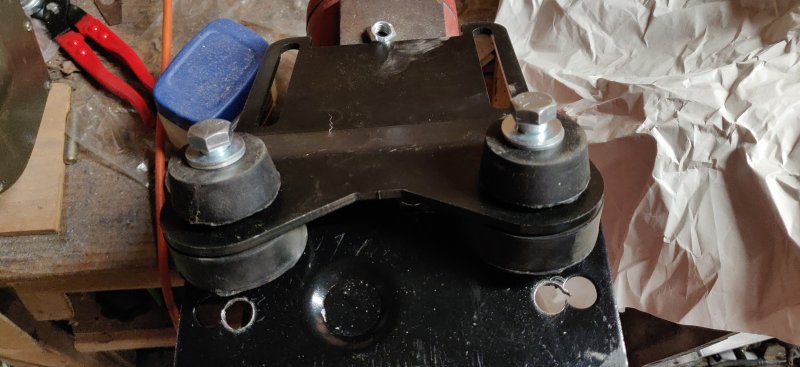
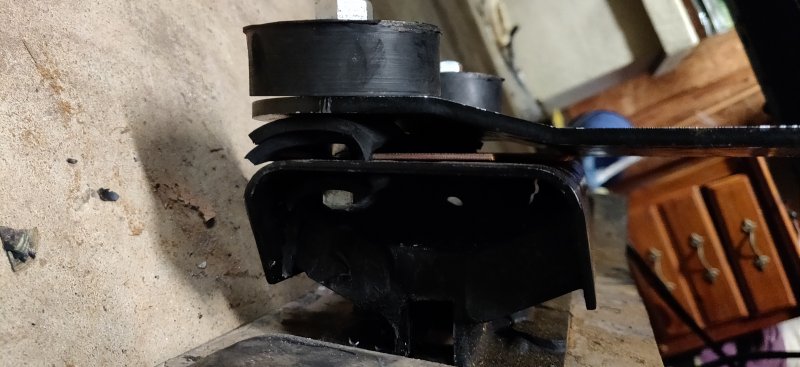
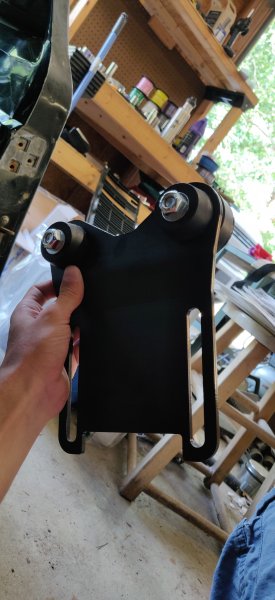
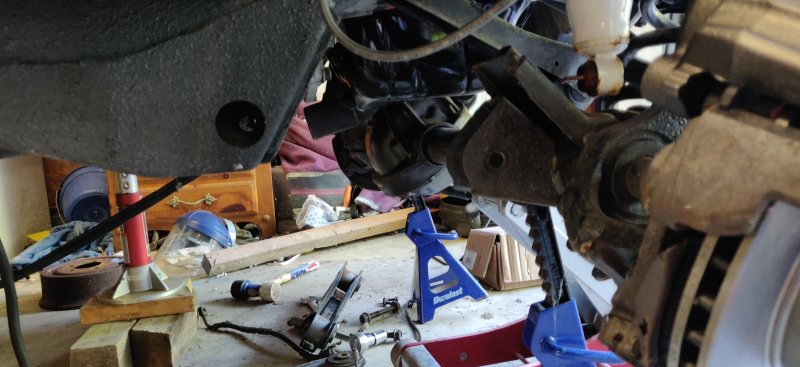
^ Me, hoping you don't judge too hard ^ Jokes aside, the last few weeks I have been going CRAZY trying to figure out how to mount the transmission to the crossmember. The truck was originally a 2wd, automatic, 4.0l. Now its been converted to a 4wd, AX15 manual, 4.0l. Everything I read everywhere says that its a direct swap in, no problems, yada yada. This has been wrong. Very wrong. I bought a transmission mount, the bolts were centered. Doesn't line up to the transmission when on the crossmember. So, I go and buy the trans mount with offset bolts, lines up to the trans like a charm. Then I buy the Novak adapter. Turns out the Novak adapter holes don't like up with the holes on the transmission mount. So I drilled new holes in the trans mount that matched the spacing. Mount it to the crossmember yada yada, and the transmission sits too far back for the Novak adapter to catch it's rear mounting holes! So, after thinking and thinking, I decided to drill holes further back on the transmission mount and move the Novak adapter back. Here are the photos...: 1) Correct bolts offset. 2) Drilled holes to match Novak Adapter. 3) Once mounted in the first set of drilled holes. It didn't work out how I wanted it to, you can see the rear trans mounting hole just barely showing in the slot on the adapter. So I drilled those new holes and....... 1) You can see the Novak sits far back on the trans mount. 2) A mock fitting before bolting everything up tight. 3) I cut up my old fuel line to make rubber "bushings" for the mount, and used a sheet of delrin on top of the transmission mount in between it and the Novak adapter in order to minimize the metal on metal rub, as the Novak dips down in the way I have it set up. If you were considering the Novak adapter, but are afraid of the $100 cost (once including taxes/shipping etc), I really do think it is a good quality product. Could probably make it yourself, if you're a metal worker, but for us who aren't this is the only choice! Buy in confidence.

-
Vakarian's Comanche 'Trailbreaker'
CapitalCityPioneer replied to Vakarian's topic in Member Projects: Your Comanches
Thanks Vakarian! Can't pass up showing this beautiful photo of your baby putting in work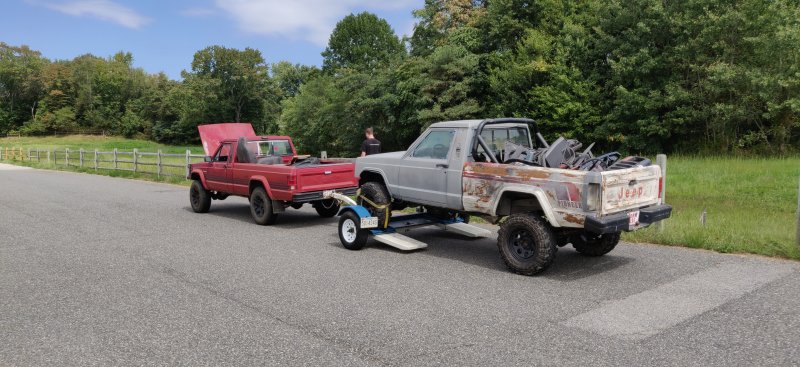
-
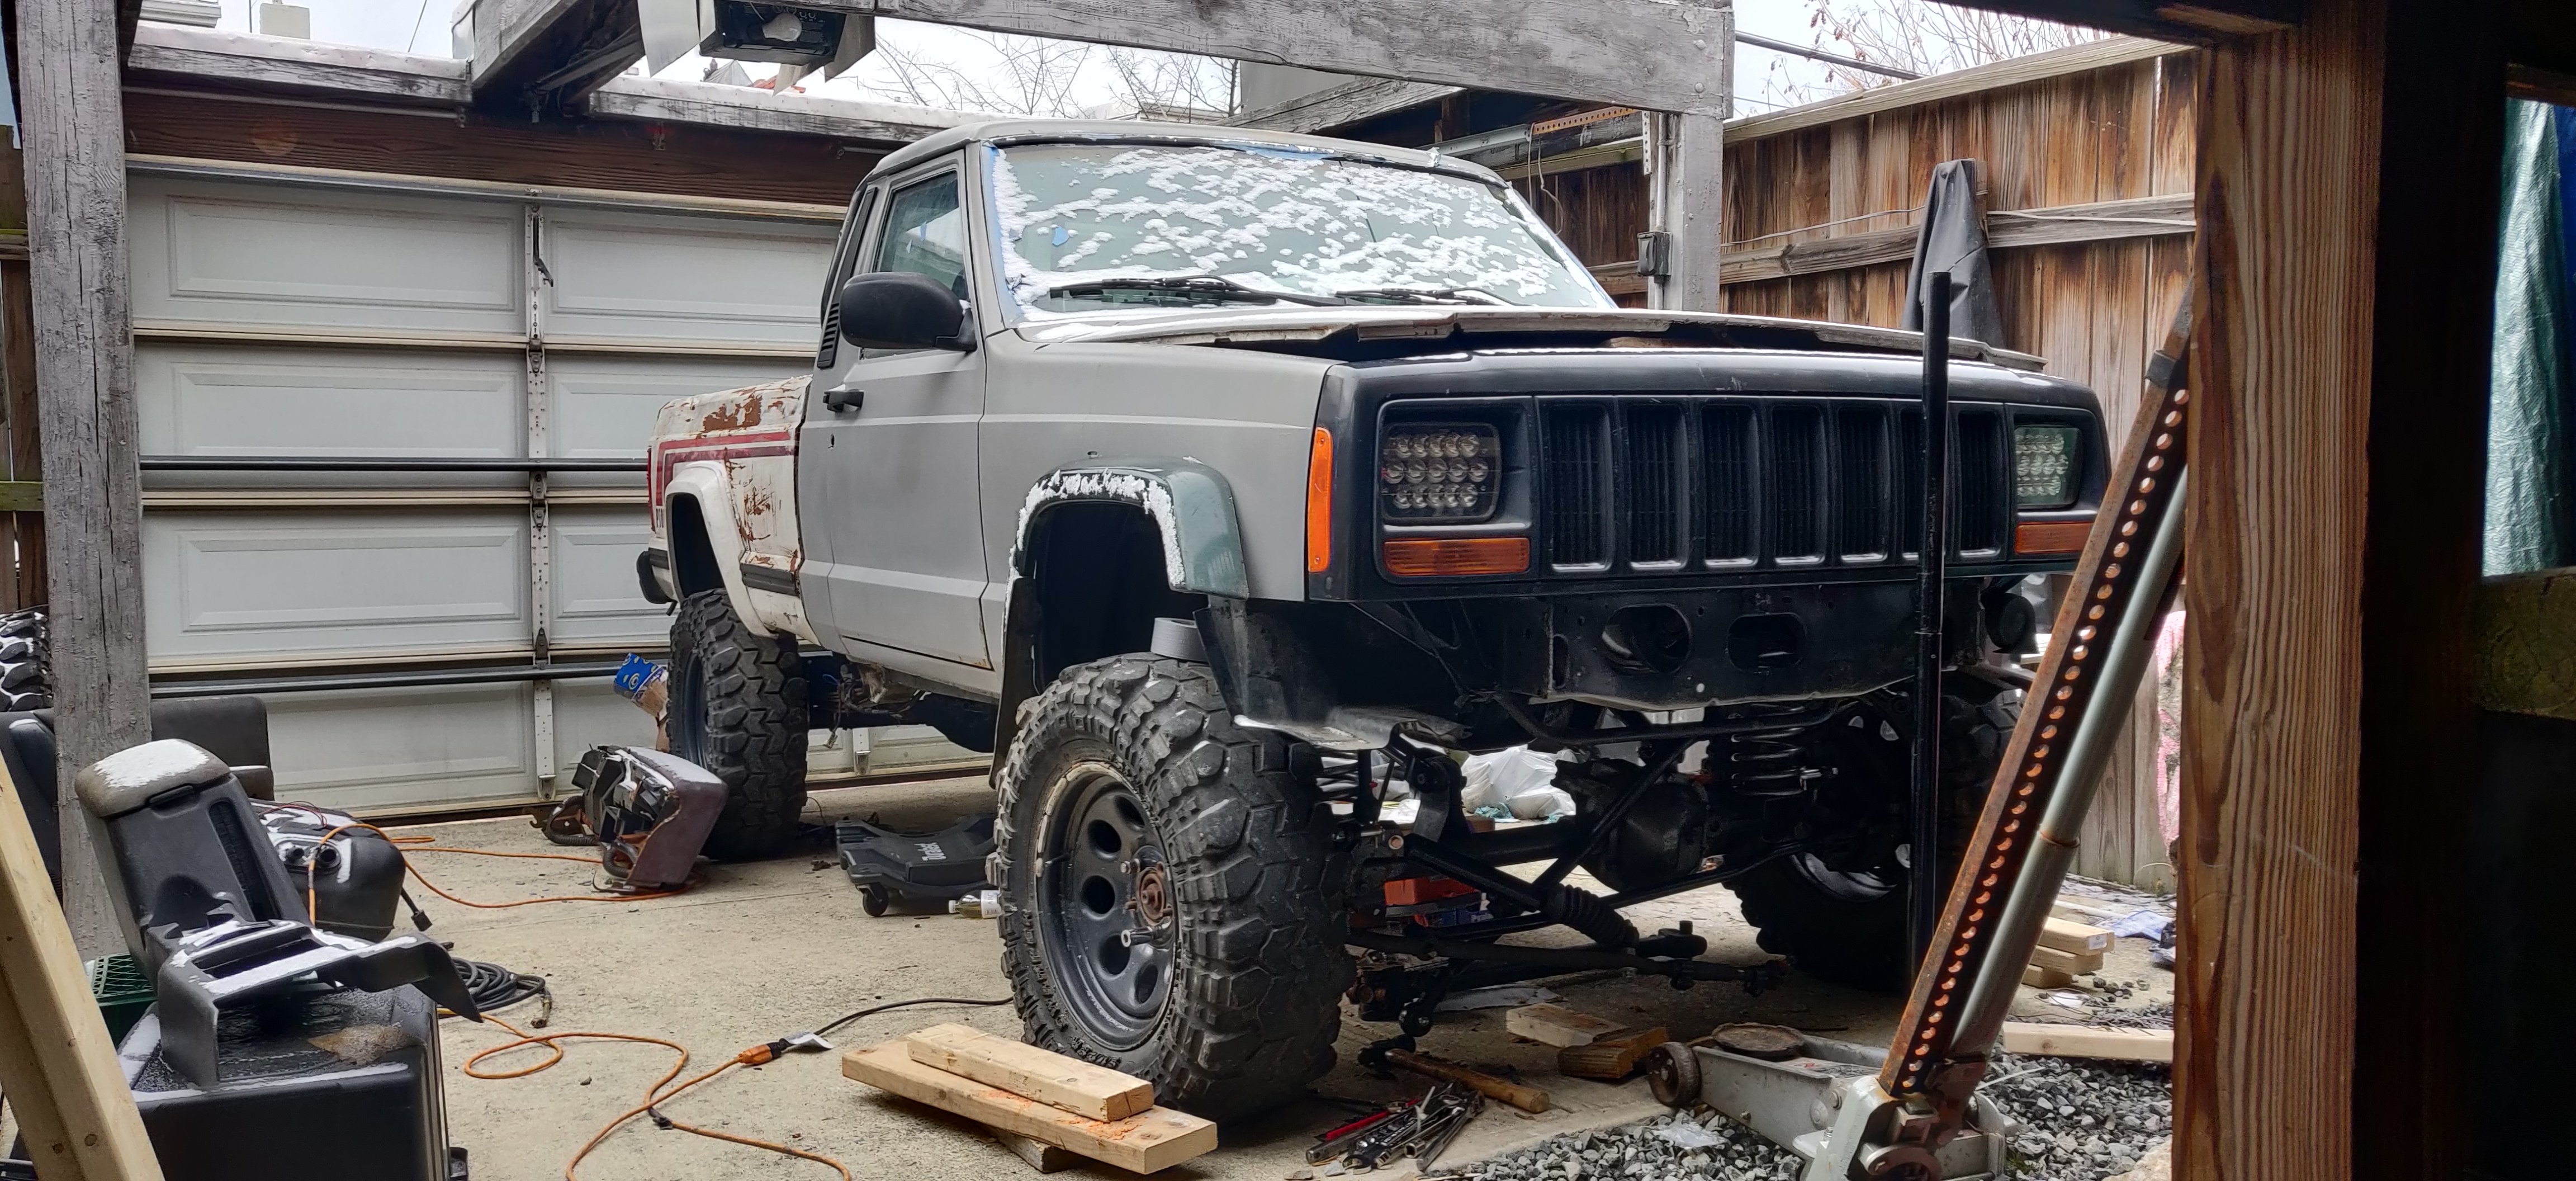
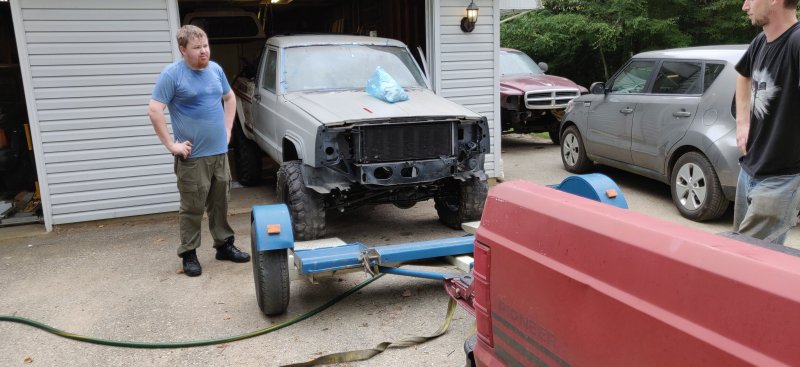
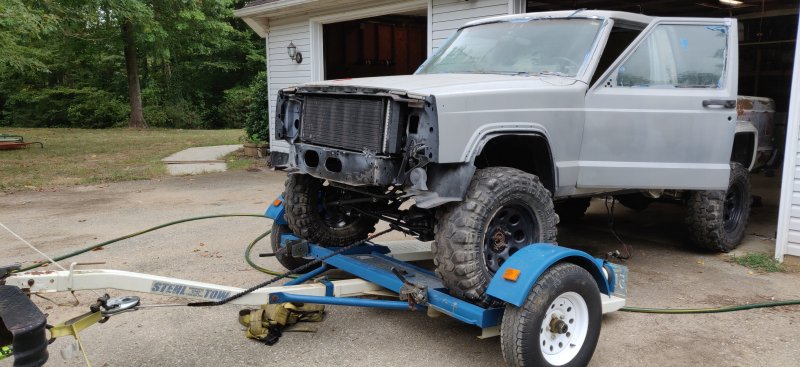
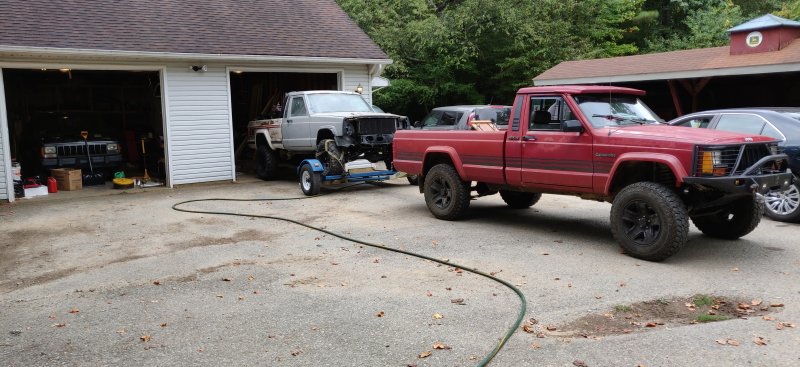
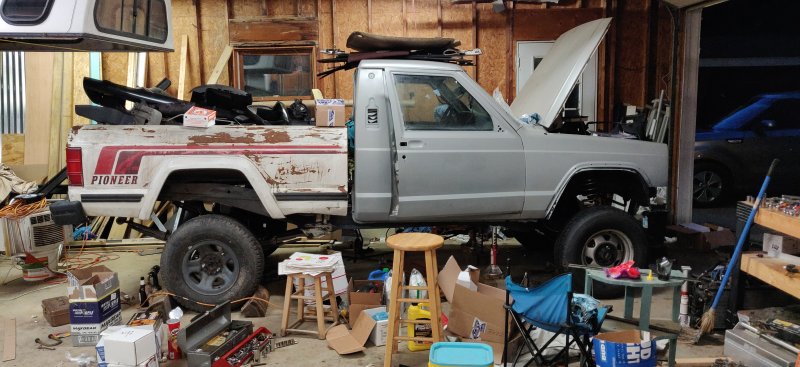
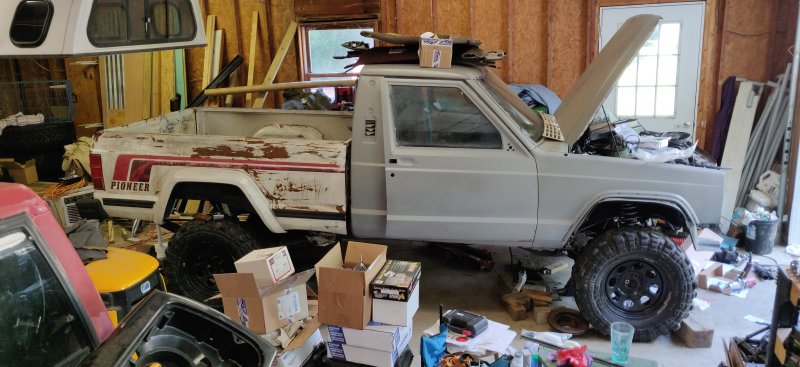
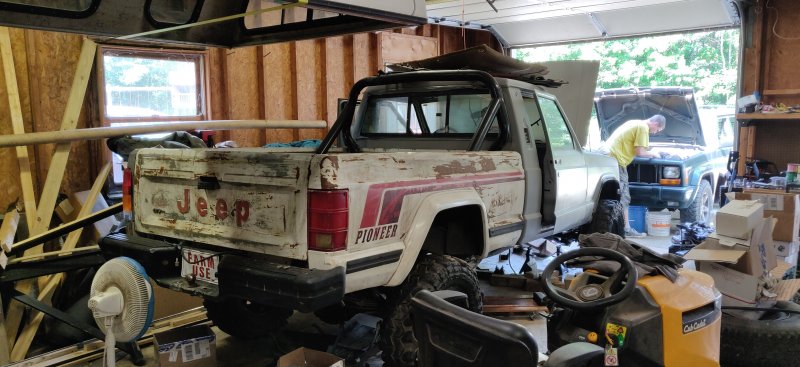
Start it off with a glorious picture. Moved my MJ to my house this weekend, from Vakarian's garage. The major mechanical work was completed, and he is getting married and will be all but gone for the next few weeks (congratulations ), so decided it was time. On the drive up to my house, one dude in a 4dr Wrangler Rubicon pulled up next to us at a stop line, exclamatory about how awesome the sight was! Putting the truck on the dolly was interesting, because it doesn't have its own power yet. So Vakarian's quick thinking with the snatch block and his old winch rope made quick work of it. Getting it into my backyard I thought would be quite the hassle, but Vakarian had no doubts about his MJ's, Trailbreaker's, ability to winch it through a snatch block and 2 shackles! I have a video I need to edit and put on YouTube, to show that process. I was in awe, and no understand the need for straps and shackles while offroading because that was simply amazing . But, because I can't get that video now, enjoy the end result. Aint she just a beauty! Next to the wheel is the original metal front grill. I would LOVE to reuse it, instead of a newer plastic one. However, I believe I am missing a proprietary portion of the grill and piece that surround the headlights. Does anyone know where I could source out this stuff? I don't even know correct terms to google it myself, all I pull up are plain newer XJ front grills!

-
88 Eliminator Junkyard Gem
CapitalCityPioneer replied to Vakarian's topic in Member Projects: Your Comanches
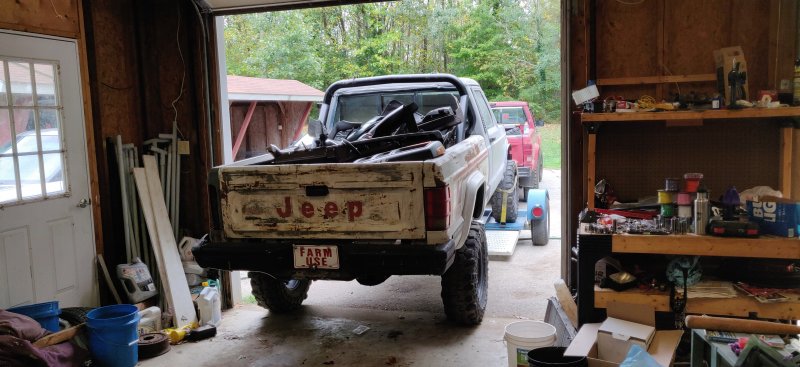
I have to upload that video of us backing it into the garage to YouTube! I forgot. Kind of funny to watch, haha. -
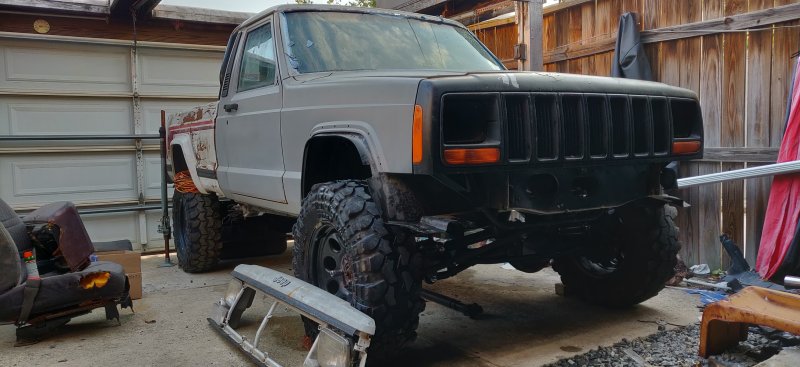
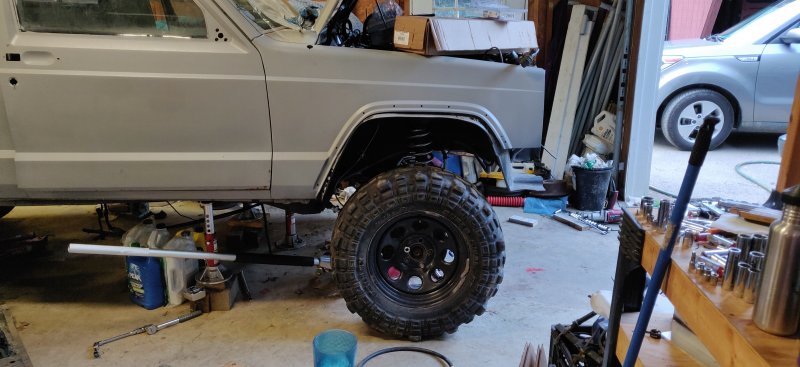
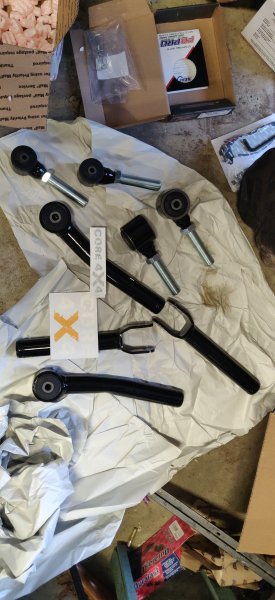
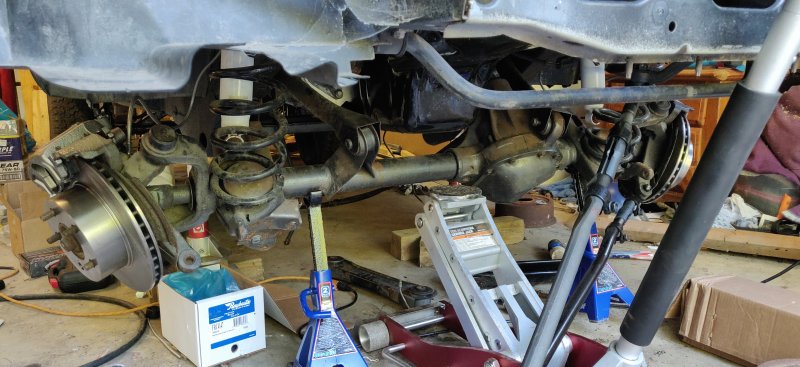
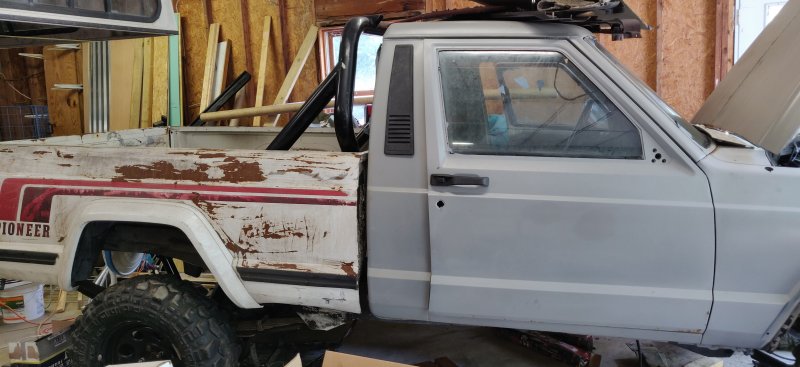
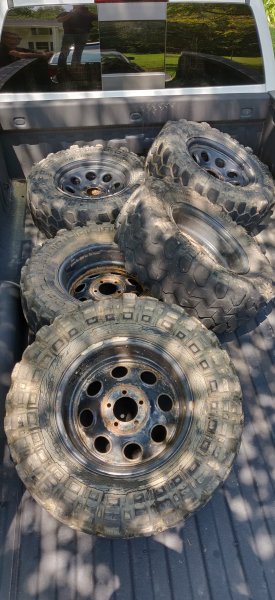
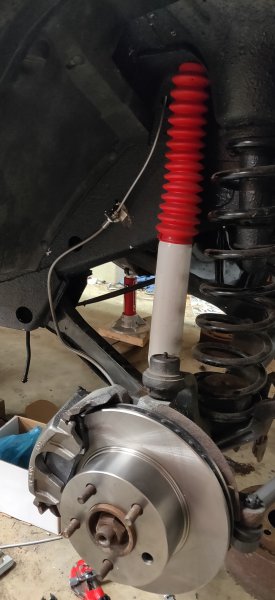
Next update! When I bought the truck it had a 3" lift on the front. After lifting the rear via the spring-over conversion, that 3" was nowhere near okay lol! So this update is about the 4.5" lift on the front I installed, amongst other stuff like new wheels/tires and seating the bed. -------------- So the first picture is of the lift from the side with the new tires, springs, everything installed. To achieve this 4.5" lift I had to buy adjustable control arms, and sway bar links that were adjustable to that length. I also had to buy all adjustable steering components, which will be in the next post. For the control arms, I can't afford a long arm kit at the moment, so I went with the Core4x4 arm kit rated for 0-6" of lift (pictured next). For the sway bar links I went with the JKS adjustable quicker disconnect links, rated for 4-6" of lift on the MJ I think. The springs I traded some gear to Vakarian for a spare set he had in his garage, brand new. Pictured next is the end picture with everything (lift) except shocks mounted. Adjusting those control arms to get them to the required length for the lift was..... An adventure to say the least lol. First bit of advice! DO NOT TAKE BOTH LOWER CONTROL ARMS OFF WITH SPRINGS IN PLACE! Otherwise, this happens. I was very lucky I had the frame of the truck on jack stands.... After a lot of cursing and wiggling, finally got them sort of right. Had to come back the next day to finish the alignment forward-back, but I took a pic to show how goofy it was. This is also a comparison of the new 32" wheels to the old 28"s the truck came on. Next picture is after the wheels were aligned and new wheels put on, along with the bed seated correctly! After emptying the bed to get it seated right, I through the rollbar in to see what it looked like! It's awesome (Vakarian photobombing in the neon yellow shirt). I found a great deal on 5 16" steel wheels, and 32x10.5x16 Super Swamper tires on them. For a whopping $200. They don't have the most tread in the world, but for that price I am far from complaining! Sets me up nicely for the future tires I want to buy. Thanks so much to Vakarian helping me pick these up in his Silverado! These tires look super mean and amazing on the truck, although I'm prepared for the super loud ride to come from them... Haha! Thanks for reading, hope some of this was useful to someone. My next posts will include steering and various other updates!
-
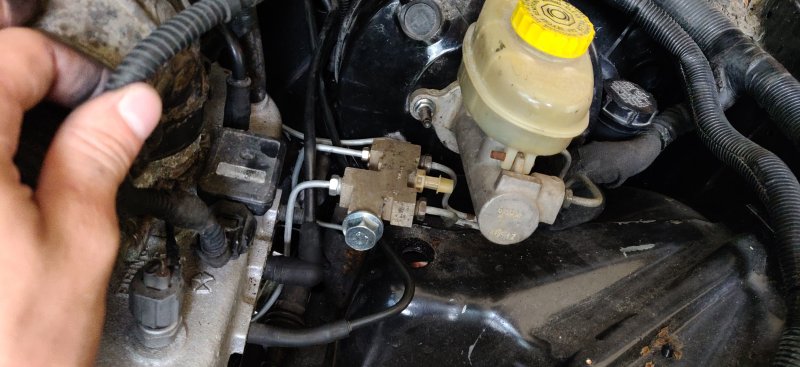
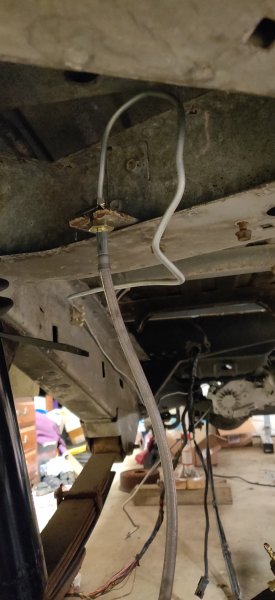
Oh! Here is the picture of the prop valve.

-
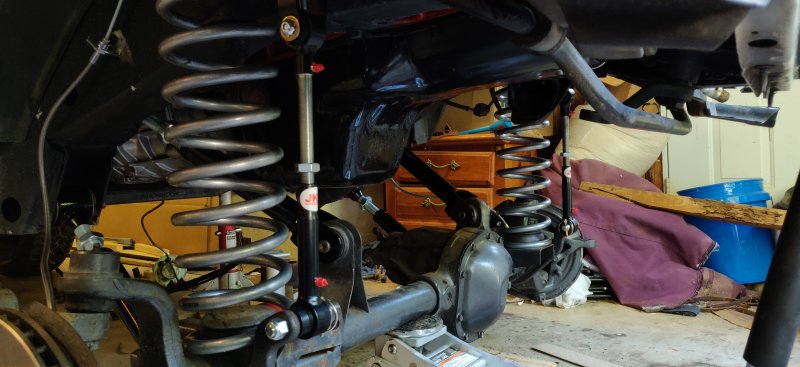
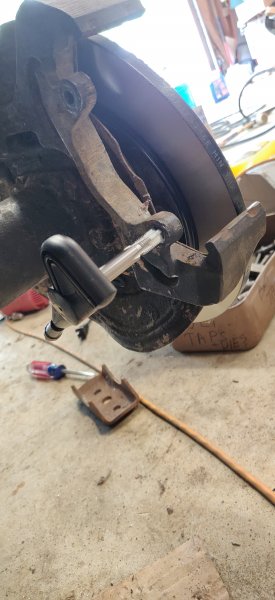
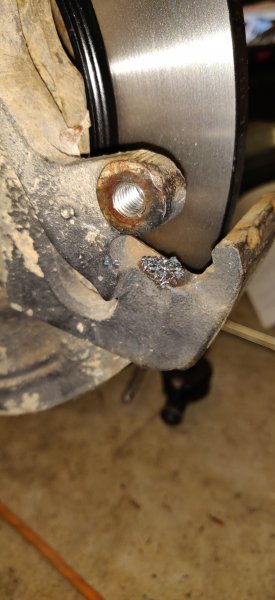
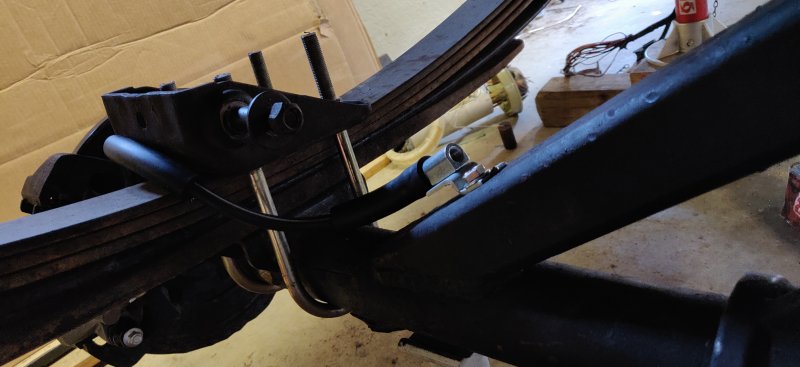
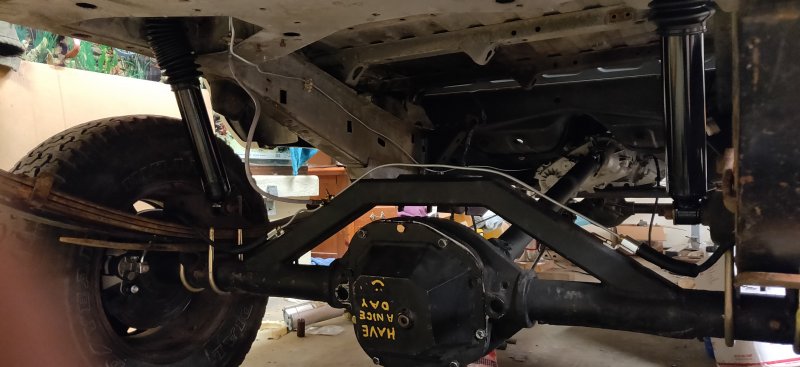
So there's a LOT of updates and incoming pictures. Work got delayed a few weeks back for various mishaps coming about. Hood flipped up on my Integra smashing windshield and roof, then a rod was thrown out the oil pan of my buddies 4.2l in his Wrangler. Fun times. But on to the juicy stuff! This post will be all brakes. ------------- So I ordered all my brake stuff, meaning calipers, rotors, pads, etc. Got a 25' roll of steel line with fittings included for $13 on Amazon, really good deal I think compared to AutoZone and the likes. My rear axle is using Grand Cherokee rotors, and 1997 Ford Ranger calipers and pads, because of the disc brake conversion. My one mounting hole for the rear caliper was stripped, much to my dismay. My roommate came to the rescue, suggesting a Helicoil kit which I'd never heard of, and I highly it suggest if anyone runs into this problem! It is incredibly sturdy and easy to work. The next order of business was to mount the rubber lines I bought to run over the leaf from the caliper. Pictured is the driver side of the rear axle (d44), where the rubber line is mounted to the truss support via tapped hole. The rubber lines are the stock front lines for a Grand Cherokee I believe... So next I had to run the actual hard brake lines. I can say with absolute confidence that I NEVER want to run brake lines again! Lol.... Pictured is the rear brake lines completely installed, including the steel braid from the frame to the axle to allow for the flexing, and the prop valve on the axle. Also pictured are my new Rubicon Express shocks installed on the rear. No longer can I jump on the tailgate and send the rear end up to space! Pictured next is the crazy bends I had to achieve in order to get the rear line to the steel braid mounting point. And the last brake line picture is my front passenger side line, I never got a picture of the driver side line for some reason. Also in this picture you will see the old springs and shocks, lifted for a 3.5" lift. The springs were replaced with 4.5" lift springs, and shocks are yet to be ordered (need to flex the axle and find lengths). You can also see the missing wheel stud, that had to be cut out when I first got the truck in order to allow us to roll it, as it was loose and bent. And at the end of it all, it's time to bleed breaks! Well, last night, I learned the hard way that I should have Teflon taped all my fittings. Next trip to work on the truck that will be my project lol. Random information on the prop valve. I believe it came from a Grand Cherokee, Vakarian can confirm this. The front hole where you see that big silver bolt plugging is a 5/8-18 size for the bolt. I went through hell trying to find the size, and honestly the bolt in it I'm pretty sure is a 5/8-24 that I cranked in with Teflon tape because brass is soft, and I never expect to use that hole again. Oops?
-
Vakarian's Comanche 'Trailbreaker'
CapitalCityPioneer replied to Vakarian's topic in Member Projects: Your Comanches
Had some quick little fun with Vakarian and Trailbreaker this past Friday. Decided to take the hill instead of the road down and up lol! But, a quick little flex action shot....! Enjoy.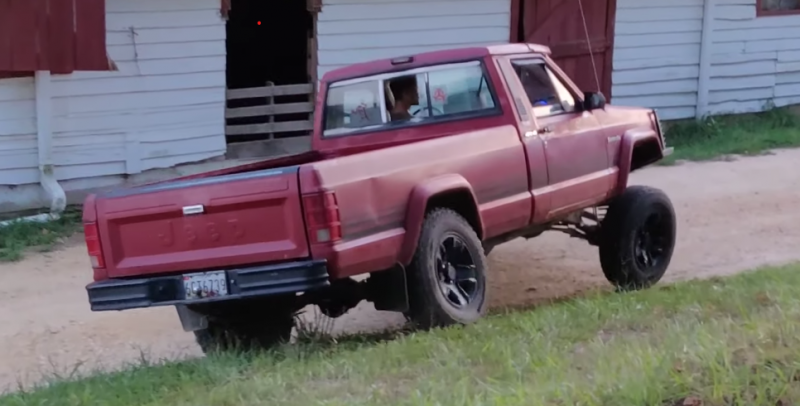
-
I've been taking mad pictures, just haven't sat down to post them up. Lot of updates coming, the truck is near running....!