

GHayduke
-
Posts
319 -
Joined
-
Last visited
Content Type
Profiles
Forums
Gallery
Everything posted by GHayduke
-
Correct! I'm getting ready to try mine soon, I'll try to take some pictures for everyone. I'm going to see if it can be done leaving the factory striker plate in place to avoid drilling more holes in the body to fill. If it works I'll tack weld it so it does not rattle. I'll let you know how it goes... In test fitting the doors it appears you need to use the shims or door hinge spacers. Don't get rid of any of these before your doors are done! I sold a few from the XJ back doors and regret it. I put my MJ spacers in today, so I have the XJ spacers for any needed tuning.
-
I used to build cages with a guy and that thing is crazy tough! I take it you plan on rolling often...At least that's how it's built. I'm not used to seeing windshield halo hoop down bars in the middle accept on non-street driven trail rigs for example...
-
Hayduke's Operation Comanche Repower - 88 To 98 Swap
GHayduke replied to GHayduke's topic in Member Projects: Your Comanches
I got a Rock Auto closeout Dakota/1500 hose & the length is good as I'm only lifting 2-3" right now. However, I cross-threaded the fitting and destroyed the first few brass threads. I ordered another one for attempt two.... Tales of (Axle) Whoa.... I decided to do new front brakes (rotors, pads, lines) on the Dana 30, while at it thought I should change the axle shaft u-joints and unit bearings. The passenger side came apart fine, but the driver side stub axle retaining nut cover was gone. The nut was exposed and is rusted to the point it's hard to make out threads. The shaft & nut seem to have bonded together... Not sure how best to attack this... I think the stub axle is done for sure though... I tried PB Blaster and a map gas torch, then used a lot of breaker bar to no avail.... Thinking of plasma cutting the nut on both sides. Actually a friend pointed out I could remove it all as a unit, but don't know if I could get the axle shaft in a press to separate the two sides then? Any ideas? I also went to do new rear brakes on the C8.25 axle, Decided to do the axle seals, went to pull the carrier center pin retaining bolt and the bolt came almost out, then broke off in the carrier... a first for me, but I hear it's fairly common.... :mad: On a good note I went to the Boneyard to get a fender and maybe a hood. No decent fenders, but I did get a new dash airbag cover, fuel sender unit plug :banana: , and a teal hood, along with some other odds and ends. -
So I went to Tom Wood's Drivshafts website to order my rear shaft and found this:
-
Hayduke's Operation Comanche Repower - 88 To 98 Swap
GHayduke replied to GHayduke's topic in Member Projects: Your Comanches
Excellent, Thanks for the info. -
Project truck suggestion: I suggest a metric tonne longbed with a Dodge Sprinter Mercedes Benz CRD Diesel engine in it. That would be a sweet build..... ( Wish I could afford to do it! haha ) :D
-
Hayduke's Operation Comanche Repower - 88 To 98 Swap
GHayduke replied to GHayduke's topic in Member Projects: Your Comanches
A friend came over to use the welder and plasma cuttter, so I switched tasks to the C8.25 rear axle. I cut off the spring perches and shock mounts, and cleaned up the axle tubes. At one point I tipped the plasma cutter at too much of a angle cutting off a spring perch and gouged the axle tube to the point I made a small hole clear to the inside of the tube causing hot gear oil to shoot out at me..... I wouldn't recommend this! :laughin: No worries, I drained the oil, cleaned the area and welded it shut with the Miller 252 MIG welder. I then ground it and the axle tubes smooth. We then removed the MJ's D35 axle, and I disassembled the spring packs and added the Rancho Add-A-Leaf. It seemed to have about the same curvature as the main leaf at rest: Here's the completed add-a-leaf pack in the forground & the factory pack in the back.... We installed the C8.25 Cherro axle just sitting on the new perches and tightened it down just enough so the axle would not move. We put the wheels back on and dropped the vehicle to the ground and jounced it awhile to settle the springs as stated in the add-a-leaf instructions. I put the old drivehaft in to see where the true shaft end point was off the transfercase. I next cut peice of pipe just shorter than the driveshaft and put it on the axle yoke nut and held it at the transfercase end and had two friends eyeball the angle and adjusted it to straight. We determined the add-a-leaf isn't going to give me more than a inch and longer shackles will be in my future, so we tipped the axle yolk down a hair more to account for this. I then tacked the perches in place. We disassembled and fliped the axle 180 degrees so I could finish welding on the perches. If not happy with the angle I could add degree shims later. When removing the axle D35 I was thrilled to see the shock mounts are on the MJ spring plates so I likely won't need to weld shock mounts on the axle! :banana: I gave the axle a good coat of black paint, Next step will be to pull the cover and axle shafts. Put in new axle seals and new brakes including all new hardware, and button the axle up..... Soon I will need to call Tom Woods..... What are you guys using for a longer rear brake flexline? I'm guessing a line from a taller vehicle? -
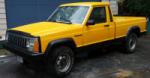
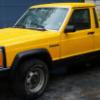
Yep, think that's the color. Mine was a downsize 1990 XJ Wagoneer LTD (below) when I towed a CJ8 too Silver Lake MI. for four wheeling. This is my first poor attempt at using photoeditor/paint to get an Idea of how it could look: What do you guys think of the Idea. I'd go no cap in the summer, and a Black or same blue cap in the snowy months....
-
Hayduke's Operation Comanche Repower - 88 To 98 Swap
GHayduke replied to GHayduke's topic in Member Projects: Your Comanches
Update: I installed the doors last night, I still need to adjust them & don't know what I'm doing. It seams like I don't have enough Shims from the XJ as it only had single thinkless plates or triple thick (three welded together). Now I wish I hadn't included the back door shims with the rear doors I sold... I guess I'll unbolt the hinges and add the MJ shims/spacer plates and go from there... no pics yet, but I don't mind the black doors look for now.... Still need to replace the passenger side fender too. -
Alexia's 1987 To 1997 Comanche
GHayduke replied to Alexia's topic in MJ Hardcore Tech: Epic Journeys to Greatness
Did you drill some holes in the base of the safety box around the fuel cap yet? That would solve your water in fuel issue..... -
The XJ Wagoneer pictured is very similar to the 1990 Wagoneer LTD I had. I'm thinking of doing that paint scheme on my MJ when complete. A buddie suggestes I go to a car graphics shop where they do car wraps and signage. They might be able to make the wood panel vinyle cheaper than buying it for cars. This way they could also just print on the trim/edging, emblems, whatever... I haven't checked it out yet but sounds like a possibility. I'm thinking Deep/dark Blue with wood panels.
-
Fun build! I'll be following your build thread :D
-
Hayduke's Operation Comanche Repower - 88 To 98 Swap
GHayduke replied to GHayduke's topic in Member Projects: Your Comanches
I also worked on the gas tank and almost have it ready to go. I added a brass 3/4 threaded to 1/2 hose angle fitting as the gas tank vent. It's nutted on both sides. it cost around $10 in parts. I then added a stock MJ vent / roll-over valve for the line going to the emmisions box. I plan to better fasten this in before calling it done. This is now by the front handle. I also need to find a new plug because the new 98' Dakota fuel sender unit uses a completely different plug than the 95' or 98' XJ. -
Hayduke's Operation Comanche Repower - 88 To 98 Swap
GHayduke replied to GHayduke's topic in Member Projects: Your Comanches
Interior Update: I worked on cleaning up and fitting the XJ & MJ interior pieces together and got the driver side in. There are a few places I want work on and fit up better but works for now. I used more double bubble foil on the side walls to provide some insulation... some foil is inside the B pillar and some on it.... Another oops, I think I lost the rear wall trim rings the go around the seat belts. I'll likely be hunting those down for awhile. I then realize I'd gotten ahead of myself. I need to fit the rear door latches before I can install the back side walls, So I'll be pulling the one side and working on doors soon. But the headliner is about in & the Back wall looks like is should work well! -
dakota 22 gallon tank and fuel pump
GHayduke replied to 99Manche's topic in MJ Tech: Modification and Repairs
Update on my gas tank project, using a 95' Dakota tank & a 98' Dakota sender. The sender has a completly different plug :doh: so that's a new issue... may be off to the boneyard afterall. I also went fitting shopping last night and got a brass 3/4 threaded to 1/2 inch hose adapter that should work. Here's the tank, fittings, and where I decided to put the breather vent hole. I'm happy with how this vent fitting turned out. I had to grind down the outside nut to not take up so much thread. I was suprised at how thick the plastic tank is. I heated the fitting and tried to screw it into the tank. Good idea but too much heat and I wiggled the fitting going in so the threads didn't turn out great. Back to plan A, use a nut on either side of the fitting... Next I had to figure out the vent line for the Emmisions box. I used a factory (roll-over style) vent from the 88 MJ metal tank. It's a odd fit because the plastic tank it three times thicker, but seems to fit. I'm just a little concerned about it poping out, as there's no good way to lock it in. Unless I somehow glue or strap it in. It fits tight now, but who knows.....any good idea's? Here's how it looks: -
I just went back and saw the hood pictures. Can't wait to see it with the graphics on it! Looks good man! I still don't know what to do for my hood- my sheet metal skills are not that great.
-
Hayduke's Operation Comanche Repower - 88 To 98 Swap
GHayduke replied to GHayduke's topic in Member Projects: Your Comanches
Build progress: I also worked on mating the XJ & MJ interior peices & installing the back wall and headliner Sunday. I'm waiting on the carpet until I get the wiring all functional. I'm missing a relay, etc. for the power seat heaters. I don't want to cover the wiring too much before I know it all works. Note to future builders: Install the 'A" pillar plastics before putting on the dash end caps or you'll be disassembling to assemble later! -
Hayduke's Operation Comanche Repower - 88 To 98 Swap
GHayduke replied to GHayduke's topic in Member Projects: Your Comanches
Operation Cherokee Demise(sounds like genoside but it's not!) ........... Continued... Friday night after retuning from Elkhorn WI. to trade stuff for my new truck topper / cap, we loaded the tow rig with what was left of the XJ and some other bits that are done. I was thinking people behind me must have wondered what I was hauling Saturday AM: I ended up selling over a 1200 pounds of scrap steel. I couldn't see out the back window, but otherwise the Cummins didn't really know it was there.... So much more room in the yard now! I still have to take all the Aluminum & Copper to another yard at some point.... But no more XJ taking up space. I'm now down to three Jeeps. -
Alexia's 1987 To 1997 Comanche
GHayduke replied to Alexia's topic in MJ Hardcore Tech: Epic Journeys to Greatness
Sweet! Nice video, thanks -
98+ Dash Swap Details - Please Provide Info
GHayduke replied to GHayduke's topic in MJ Tech: Modification and Repairs
almost got it... The airbags had deployed in this dash so the passenger side dash cover split at the bottom seem. I'll look for a new one, but for now I gorilla taped the old one back together. I just don't know what held the bottom edge in place. It's likely the airbag as I didn't reinstall it? I could put in the old (and very heavy) shell (from the old one) in if that would hold it in place? It's hard to see below, but it kind of pops up when accessing the glove box. If I could hinge it and weight it... I could make it a second glove box I guess?........... -
dakota 22 gallon tank and fuel pump
GHayduke replied to 99Manche's topic in MJ Tech: Modification and Repairs
Got it, so a little like a mix of gas welding and soldering then. thanks -
Hayduke's Operation Comanche Repower - 88 To 98 Swap
GHayduke replied to GHayduke's topic in Member Projects: Your Comanches
Thanks, I'll do the axle swap first, I just ordered the parts. Now I just need to figure out the shock mounts & If I'll move em or make new ones? Any other advice is always appreaciated! Alexia- Your MJ is also very tall!!! :laughin: I'm trying to keep this truck a bit low so I can still easily load & unload the bed..... If I want to sit up under a Jeep I've got my trail rig :yes: I've already got two trucks that are so tall it's hard to put stuff in the back... MJ is supposed to be my daily driver! -
Any Updates ????
-
dakota 22 gallon tank and fuel pump
GHayduke replied to 99Manche's topic in MJ Tech: Modification and Repairs
Akula69: Nice! How do those HF plastic welders work? Are they run on propane or something? The description & picture did not explain that? Do you melt the new plastic onto the old like waxing skis or join them like soldering? -
Hayduke's Operation Comanche Repower - 88 To 98 Swap
GHayduke replied to GHayduke's topic in Member Projects: Your Comanches
Axle Swap or Gas tank first? pull the truck bed? Should I do the XJ C8.25 rear axle swap first, before putting the gas tank in? (easier to check driveshaft clearance (IF I had a driveshaft). Or do I pull the old axle and fight the 22gal Dakota tank with more room under the truck (on Jackstands no axle) & worry about fine tuning position later? Hmmm. We held the 95' tank up under the truck and didn't see anything that appeared to push the tank toward the axle? I will have to space it down a Inch or 2 though. I've seen some folks work on the axle & gas tank without the bed on the truck (would be nice) but I think the gas tank mounts are on the bed/ not the frame? If this is the case then only the axle could be done..... Maybe someone who has done this before could offer advice?