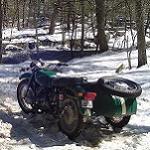
jeepcoma Posted January 9, 2009 Posted January 9, 2009 I think it's about time to start a thread about my truck since I've been doing a few things here and there and have lots more to do. Hopefully I'll be posting lots of pictures as I progress, and maybe now that I actually started a thread I'll get around to sitting down and writing what I do. So far I haven't done a whole lot, just a few little things. First of course I bought the truck from a dairy farmer in NH and drove it home. It had just about everything I was looking for: long bed (I wanted a work/utility oriented truck, not an off-roader) w/ cap in good condition, 5 speed manual, 4x4 (my best winter vehicle at present is my motorcycle with sidecar), and high output 4.0 that has been well maintained along with the rest of the truck at ~140k miles. Overall the body is in good condition, though the interior is trashed because of the accumulated cow poo tracked in. Sadly once I really started cleaning the inside I discovered that under the rubber mats, the floor was still soaked in water, so I'm guessing I'll have at least one floorboard to fix up (judging from underneath the truck too). I will have my friend who owns a body shop handle those repairs since I'm not set up for it, and one large dent along the top of the trunk bed, but I'll be handling all the little dents and dings and few surface rust spot areas. I got the build sheet information from Chrysler and here's what they said: Thank you for contacting the Chrysler Customer Assistance Center regarding the build sheet for your 1991 Jeep Comanche. We appreciate the time and effort you took to write to us. In response to your email regarding the build sheet for your vehicle, we would like to inform you that according to our records your vehicle was equipped from the factory with the following: Skid Plate Group Monotone Paint Kicker/SRT Livin' Loud Audio System 75 Amp Alternator Nickel Metal Hydride Battery Power Front Disc/Rear Drum Brakes Straight Back Bench Seat Carpets - Floor and Cargo Area Mini Floor Console All Manual Transmissions 5-Speed Manual Transmission Command-Trac Part Time 4WD System Dana M30/181MM Front Axle 3.07 Axle Ratio 175MM Rear Axle 4.0L Power Tech I-6 Engine Tinted Glass Windows Tinted Windshield Glass Front Door Tinted Glass Front Left Side Sliding Window Rear Sliding Window Left Painted Mirror Driver Mirror Heater w/Instrument Pnl Ventilation Analog Instrument Cluster 85 MPH Primary Speedometer Var Intermittent Windshield Wipers Cigar Lighter Shift Indicator Warning Lamp Glove Box Lamp Halogen Headlamps Black Front Bumper Black Front Bumper Front License Plate Bracket Black Grille Black Windshield Moldings Upper Door Frame Moldings Belt Moldings Body Color Drip Trough Molding Federal Emissions EVAP Control System All Radio Equipped Vehicles AM/FM Cassette Radio 4 Speakers Power Rack and Pinion Steering 2-Spoke Soft Feel Steering Wheel Standard Duty Shock Absorbers Rear Shock Absorbers Tilt Steering Column Full Size Spare Tire Tire Carrier Winch P215/75R15 OWL All Terrain Tires Michelin Brand Tires 15X7.0 Styled Steel Wheels All Steel Wheels Pickup Box 5 Additional Gallons of Gas Rear Spring Group I There was also a safety recall on the front disc brakes, apparently they aren't properly plated, can corrode from the salt on the roads during winter here, and separate. I took the truck for inspection and failed safety: the parking brake wouldn't hold and the front needed all four ball joints (so they said). Rather than buying new ball joints and having them rip me off to install them, I bought some axles from Twisty here on the forum and they are perfect for me: 3.54 ratio to upgrade my 3.07 stock, the front with a 1-piece 297x axles and u-joints and the rear an upgraded D44 with the same ratio to replace my c-clip D35, w/ Aussie lockers front and rear. I'm excited to put those in but need to replace the seals first, since they are leaking a bit. I also bought some upgrade items from another board member, a full gauge cluster which I've successfully adjusted the odometer on to match the true mileage (I'll try to do a writeup on this, since I haven't seen one for the electronic clusters, only mechanical speedos). Also my tilt column had extreme slack in it (which failed inspection as well) so I bought a replacement to swap in. Pictures and more to come!
jeepcoma Posted January 26, 2009 Author Posted January 26, 2009 I finished my rear axle swap today after way too much time spent on it. Everything that could have been wrong, was wrong. Not to mention, working in the cold sucks. My friend let me use his garage at least, so I was out of the wind, but it's still a cold hard floor to be lying on. Beats my driveway any day though, I'm not complaining. And the combination of our tools meant we had all sorts of ways to screw things ups. I'm not sure where all my pics are at the moment I just grabbed the ones my wife took, but if I don't get around to uploading them now I probably won't ever so here are a few photos and details about this phase of the project. This picture was actually last weekend, my first attempt to do the swap. Here's my truck loaded up with tools, air compressor, the new axles, 4-ton jack, some jackstands, fluids, cleaners, and various other crapola. This is why I love the longbed. First attempt was an utter failure. It turns out that a mixture of cow manure and dirt has properties similar to JB weld when applied to car parts. The death toll was two 1/2" adapters total (one was a few weeks ago when I first got it and thought I'd just pop the wheels off to take a look at the brakes. I just sheared it off on the first lug I tried since I was too lazy to find the right 1/2" socket to do the job) and my favorite 3' pvc pipe breaker bar. Before we new any better, we tired the air impact gun first, figuring the nuts were just on there pretty tight. Maybe they had never been removed in 150k miles though, given everything we went through. Most of the lug nut covers were already damaged which made finding the right socket to fit very difficult, but after a few tries we eventually figured out a system: find a tight socket, drive it on with a sledgehammer so that it can't slip, and then with the 1/2" breaker bar and an additional 4-or-so-foot metal rod prybar on the end we could break the torque on the lug nut. Once they were loose, remove the nut the rest of the way with the 1/2" ratchet, and then the fun part of getting the socket off the lug nut it had been hammered onto. Repeat 10 times. Not sure when this picture was, might have been last week. As you can see, all the lug nuts are off but the wheel is still on. About those wheels. If I didn't know any better, I'd say a friend of mine was playing a practical joke on me and welded the wheels to the axles, because nothing, and I mean nothing, will get those off. I had been PB Blasting all week, but it did nothing. We tried hammers. When the hammers didn't work, we tried bigger hammers. When those didn't work, we torched. We hit from the top, from the bottom, from the inside out and both at once while torching, and every time more PB Blaster. As a last resort, we drove around with the lug nuts off (well they were there to keep the wheel falling off, but they were not in contact with the wheel). I hit every bump, nailed every pothole, did donuts in the parking lot and slammed on the brakes as hard as I could. There's no way I can apply more torque to those wheels than that, so that was the end of it: time to buy new wheels and tires (which I had wanted to do anyway, just not now when I'm completely scrapped for both time and money). I picked up some decent turbine wheels with some decent Hankook H714 tires from board member comanche87 not too far from me in East Providence. He bought an XJ to do a 4x4 swap on his MJ, but didn't need them so I got what I needed to continue my own project. After the trouble with the wheels, it was no surprise that I had problems with some other things. Strangely enough though, it was the little things that took the longest, like trying to get the parking brake equalizer free. The locknut loosed about 1/8 of a turn, then was completely frozen. It was so frozen that when I had a breaker bar on the nut trying to loosed it, the square end of the threaded rod twisted instead. I was trying to save the parking brake cables, but ended up cutting them in the morning. Once I did that, I was able to get a cutting wheel up in there and cut the locknut off the rod, and then wire wheel the rest of it and clean it up. I spent a lot of time doing these sort of things, which is a pain in the butt now when I thought everything would go smooth but is the right thing to do in the end. So anyway I did get the rest off. All the suspension pieces were pretty easy, the spring perches and leaves I had no trouble with. Here I am after a total of about... way too many hours, finally relieved that the old axle was out. Past the point of no return, the only thing to do now is put the new one in. Old axle: New axle: First though, some stress relief: And that's all it accomplished. Me: 0 Wheel: about 4 or 5 Get outta here! These shocks are beat. But re-using them for now. Installation was mostly straightforward, some shuffling back and forth and up and down to get things right, with some minor twists (I did buy the axles from board member Twisty though, so I should have expected it). It was modified for SOA as well as SUA, but the shock mount for the SOA setup blocked the shock from the stock location mount on the passenger's side. Also the hangers I had needed to be trimmed a bit so I could get some sockets over, so that added more time. And at the very end, the long brake line was leaking at the block, which I discovered after bleeding the brakes and thinking I was all excited to finish, and all the hardware stores were closed so I had to wait another day. New wheels, tires, and rear axle. Next up later this week, swapping the front axle!
mvusse Posted January 26, 2009 Posted January 26, 2009 My buddy's 98 Wrangler had those same wheels. They're hub centric and a b!tch to get off. I think we pried them off with a 4x4 braced against a 4x6 propped against the frame, IIRC. Slapped on liberal amounts of never-seize to try to make the next time a little easier.
sinkrun Posted January 27, 2009 Posted January 27, 2009 Nice truck EXACT twin to mine now that the wheels have been changed !
jeepcoma Posted February 9, 2009 Author Posted February 9, 2009 This was a good weekend. I finally got everything ready to pass re-inspection this week (hopefully). Since I bought the truck, I've: replaced steering column *fixed wipers *fixed highbeams *fixed sloppy tilt mechanism (which I failed inspection for, the guy wrote down that the column was about to fall out... fat chance! I wish it had just fallen out when I was trying to remove it at night when it was about 15*F that night) replaced rear axle, stock D35C 3.07 with a D44, 3.55 gears, and Aussie locker. I couldn't remove the rear wheels on my original, so I couldn't get to the brakes, so I had no hope of fixing the parking brakes (which I failed inspection for). Given how frozen the wheels are to the hubs, and just about everything else I've tried to remove, I'm guessing there wouldn't have been much hope for fixing the brakes being easy. Along with swapping the rear axle, I was able to brake free the parking cable equalizer (was solid rust). I actually had to cut the lockdown bolt off with a wheel, the threaded rod was so rusty it froze solid. I had so much torque on the bolt that I twisted the threaded rod. I had to cut the parking brake lines to each drum as well, which wasn't bad because I had replacements. I couldn't get to anything without having the equalizer dangle freely. After I got the lockdown bolt off I was able to clean the rod up with a wire wheel and it's nice and smooth now, I can thread by hand the bolt all the way down. I also had to replace 3 brake lines, the two lines that go to the cylinders, and a 3rd line that's involved with the height sensing valve. It was leaking very slightly (maybe a drip or two after a week of driving) but was ready to explode in a good panic stop. It was probably my fault that it started leaking anyway, I removed the old ball-tab-thingy mounted to the diff cover on the D35, the part that has the rod attach to it for the height valve, I had to do some work to get it to fit the D44 bolt pattern and it ended up way higher than it was supposed to be (I later read, since I didn't think to check where the default height was before removal, that at no load and level the height lever should be parallel to the ground... mine was nearly vertical. It did stop great though!). I also failed inspection for FOUR bad ball joints... complete BS. There is absolutely no slop in the ball joints, which I found out quite easily once I took the front end apart. I'm glad I didn't pay those jerk-wads to fix it for me, they probably would have just taken my money and not even changed the joints. Regardless, I got a matching front axle, a D30 with 3.55s and another Aussie locker, plus upgraded solid 297x shafts and joints (no cad!) and later model disc brakes and calipers. Since the rear wheels were stuck on the axle, and I noticed that one of the tires was leaking, I got a set of wheels and tires, a slight bump in size to 225s which I'm quite happy with. After fixing the parking brake stuff, my assembly just wouldn't hold, so I replaced the unit and after some more troubleshooting got it working great. I had a slight problem, which I figured out, part of the wiring harness was drooping down ever so slightly onto the lever that ratchets the teeth on the wheel, keeping it from fully engaging. Some rerouting of wires and it's working perfectly. Now I can park on hills and not have to carry around wood blocks anymore! Some of the tail lights were out, and of course all the screws were frozen. The previous owner tried the same thing I did, some vice grips on the end which just snapped the head right off. I broke one, but found 3 other already broken still in the fasteners. Some pliers broke those right off and a trip to Autozone got me replacements. Two of the bulbs were bad, I found out why. The glass housing had completely separated from the metal ring it's supposed to be in. Pushing the bulb in and twisting to remove it just left me with the bulb in my hand and the base in the sockets, so I replaced all those. I also bought the wrong license plate lights, it needs the push-in kind not the twisty kind. Figures. But it's all working now and nice new hardware to keep the brake lights in. That reminds me though, I need to superglue the retainers for the license plate light back together... A trip to the dollar store for a bottle of goo-gone made short work of the half-peeled off stickers on the glove box, and I installed the latch for the glovebox, complete with light. I was smart enough to find the key to unlock the box door first, since now I have separate keys for the ignition, doors+glovebox, and don't have a key for the bed cap. Oh well. Stickers! I bought some stickers from jeepsticker.com, great seller btw I think I purchased them via paypal on new years eve or something and they were sent right away. Even got a free one! So, a little thanks are in order to some board members (in order of money spent!). "Twisty"; drove up to his place in northern MA. I bought a bench seat and he included a pair of axles. "comanche87"; not far from me in East Prov, RI, I got the new wheels and tires from his parts cherokee. I'm now an expert on 4wd axle removal and installation, so when you get around to doing your conversion I can sit on the lawn and drink beer while I "supervise" you. "Boilermaker"; I got a steering column, partially working gauge cluster, and the latch thing for the glove box. He even helped me figure out what I was doing wrong with the steering column (Cliff Notes: the column collapses, so if the thing sticking out the end doesn't reach the joint in the engine bay... pull it out, it might be stuck!) "Ed in North Ga."; I purchased a well sealed box of foam, and he threw in an emergency brake assembly for free! All in all, this site has been great. I certainly would be a much poorer and angry Comanche owner if it wasn't for the people here. Two quick pics since it's dark out: New stickers! I think they look nice. I always liked a red and black scheme but since the cap is white, it's going to be red and white instead. Plus that's 2 out of 3 AMC colors, so that should count for something. Pile of old axles. Anyone want them? But two tires, get matching wheels and axles! Might be suitable for a 4wd swap or something thought.
HOrnbrod Posted February 9, 2009 Posted February 9, 2009 Great to see more and more HO builds showing up. Looks like you have a very solid platform to build upon. Great work so far, and I'm looking for a D44 too before I snap another axle with the stroker. :D
Drahcir495 Posted February 9, 2009 Posted February 9, 2009 I enjoyed reading your progress :thumbsup: . "It turns out that a mixture of cow manure and dirt has properties similar to JB weld when applied to car parts." :rotf:
Twisty Posted February 10, 2009 Posted February 10, 2009 I miss my axles :( They served me very well!! I'm glad to see that they're going to be used well though. How did the inspection go with the "new" ball joints? Thanks for posing update pics :wavey:
jeepcoma Posted February 16, 2009 Author Posted February 16, 2009 Yesterday I got a deal from a craigslist ad, $25 for four Sensatrack shocks just about brand new. Not the best shocks I know, but I figured for the price they'd be a big improvement over my stock shocks from '91. And I was right! They were for an XJ though, so the rears aren't an exact match. In addition to having to chop off and remove the different mounting tab, I later discovered I needed to remove the rubber bushing as well. That would have been nice to know from the start because I took particular care to not damage the bushing, when in fact I could have just demolished it. No pics of the old rears, but they were about 10x worse than the fronts pictured above. It was dark and I was dirty and didn't feel like taking pics. Maybe later, but I'm sure you all know what busted old rusty shocks look like. The guy was nice younger-ish kid, lives about 10 minutes away. He had just put a bigger lift on his Cherokee and needed longer than stock shocks, which is why he was selling. We took a ride in his cherokee to pick up the shocks from the house they were at and look at some other stuff he had. He was intersted in the lockers I had, and since I wanted to take a look at the bumpers he had for sale, we then took another ride back there in my MJ. He's got 3.07s in his cherokee and is intetersted in both better axles (30 front, 8.25 rear) and definitely wants a locker. If anyone knows of axles or lockers for sale, I said I'd pass it along. Today I dropped the truck off at a different service station for inspection tomorrow morning. Hoping this goes better than the other shop that was trying to screw me...
jeepcoma Posted February 16, 2009 Author Posted February 16, 2009 How did the inspection go with the "new" ball joints? They failed. I'm taking it elsewhere for a second opinion; I'll know by tomorrow. Technically there is supposed to be no play whatsoever, but from everything I've ever seen, heard, or read, a small amount is OK and normal. After all, it's a metal ball pivoting inside a metal socket, it HAS to move. Anyway, the shop that failed it didn't even notice I had swapped both axles, and didn't seem to believe me when I said I had replaced the entire axle. Furthermore, I looked over the inspection sheet they had printed up, I know some of the things they "checked" were complete BS like the rear brakes etc, since the wheels were frozen to the hubs and the lug nuts hadn't been removed in 10 years. There's no way they took those wheels off to inspect the brakes, and I know they didn't look through the little window on the inside either since I had to dig through an inch of mud to get a screw driver in there and pry them off for the first time. :fs1: to them!
jeepcoma Posted February 19, 2009 Author Posted February 19, 2009 Well some good news. Monday I took it to another mechanic, got a call on Tuesday saying it passed. Big sigh of relief. He did recommend changing the ball joints though pretty soon, so I might do that once it gets a bit warmer and it's more fun to spend a weekend wrenching outside. I had planned on doing the floors and interior too, and fixing some exterior rust and paint, so that's a few decent projects lined up for the summer. We got a bit of snow yesterday too, so it was my first try out in the slush with the new lockers on there. This thing is awesome! After all the stories I've been reading about it being a death trap, I have no idea what the problem is everyone talks about. Can you get the rear end loose? Sure, if you drive like an idiot, but you're likely to crash in the snow with or without lockers in that case. Anyway, it's not the death sentence I was beginning to worry I had signed myself up for. It behaved very predictably and worked great up hills and around tight turns, and I had absolutely no weight in the bed except the cap on. Then I put it in 4x4. Lockers front and rear and this thing literally feels unstoppable. Handling was even better in 4x4 since it pulls as much as pushes, it was very stable and tight feeling. And this is just with some regular tires with lots of tread left, nothing fancy. I do wish I had the old tires on still so I could do a better direct comparison, but with the lockers and 3.55s it's better in 2x4 mode than it previously was in 4x4 with the open diffs and 3.07. Big huge :thumbsup: :thumbsup: on these!
jeepcoma Posted June 6, 2009 Author Posted June 6, 2009 Haven't been doing much work on the Jeep lately, I've been busy with other stuff but I am heading overseas for work for about a month so I will hopefully get these put in today... Metric tonne springs from hellscreek! They appear to be quality parts. My original springs aren't too bad, it rides pretty nice with the new shocks but you can see from some of the above pictures it was sagging a bit even loaded to only about half capacity (when I had both new axles in there plus tools, air compressor, etc). I got the long bed so I can put a motorcycle in there and close the gate, it will be nice for carting the bike to track days, which is the same reason I wanted the MT springs for the heavier load carrying (plus house construction and all that stuff). One step closer to the perfect Jeep I wasn't able to find! It's better to build it up yourself anyway. More pics and before/after shots when I'm done.
jeepcoma Posted June 7, 2009 Author Posted June 7, 2009 Need to go to the hardware store to get new ubolts, but all the hard parts are done. Fighting with the rubber bushing is not fun, the to front mounts took forever and I ended up cutting the bolt off the drive's side. The rear shackles are a pain too because the rubber is frozen so it wants to spring back to the "normal" position, so it's really hard to pull it forward enough to line up with the uncompressed spring. Checking clearance with stock springs... Checking to make sure no one swiped my D44... I took the drums off for a bit more room, noticed this on the passenger side. I don't recall ever having cracked a drum pad, should this be replaced ASAP as a safety concern or is it not really a big deal with drums? It stops great and I don't get any noise, pulling, pulsation, or anything funny from the rear. Stock springs look pretty good after removal, doesn't look like there was any sag. Spring dimensions are the same, which is good, any lift I get in the rear will only be due to the stiffer rate. Once I get it all bolted up I'll see if I need any lift in the front, I think I will try to find some of the stiffer ZJ V8 springs which should be a good balance. And some reinstall pics. Passenger's side in... Both in and waiting to be bolted up.
90eliminator Posted June 8, 2009 Posted June 8, 2009 looks great.... 2 things... I had an 90's cherokee that the wheels were stuck on, I did the same thing you did...drove around...jumped the truck.... beat the fire out of the wheels....nothing....so I used a porta-ram... hydraulic ram used in body repair and put it between the two rims... about 8-10 tons of force and they finally popped... also on the brake pad... you might as well swap it out.... whats it cost.... 10 bucks... maybe 20.... I always buy the gold...or lifetime warranty on pads, cause you will wear through them....and then you just bring them in and they give you new ones for free...... Truck looks great...take care......
jeepcoma Posted June 13, 2009 Author Posted June 13, 2009 Semi-progress today. The ubolts I ordered from Ruff Stuff Specialties came in but by the time I got home from work it was dark and raining and I had packing to do. But after work today I get home before it was completely dark and managed to get the Jeep off the jacks and sitting under it's own weight, although not drive-able. The RuffStuff u-bolts are nice and beefy and 100% heavy duty, but of course they are much thicker than the old ubolts so step was was drilling out the holes in the plates so they would fit. Did that, and was able to get 3 of the ubolts mounted over the axle and into the plates, but the 4th one is diverging so it'smuch wider at the ends, it is more of a V shape than a U, and there's no way I can squeeze it enough to get it through the holes. I thought maybe I could squash it back into a U with a vice but no luck in a few quick attempts. Anyway it was getting dark and I needed to get something done so I just stuck the old one on there and they're all just finger tight and nothing is really mounted yet but like I said it's off the jack stands and is actually resting the weight of the truck on the springs. Maybe some pics in the daylight tomorrow. I'm leaving for a month for work so I'm kinda bummed I didn't get this done before I left, since I was 99% of the way there last weekend but just didn't plan ahead and have the ubolts before I started. Oh well. It's about 1.5-2" higher in the back now.
jeepcoma Posted September 14, 2009 Author Posted September 14, 2009 Have been doing a lot of little fixes and tweaks, but finally got some "big" stuff for my project. Hope to get around to painting the bumper this week.
jeepcoma Posted February 7, 2010 Author Posted February 7, 2010 Haven't posted much in here lately, and no new pics either. But, since the last post, I've done a few maintenence/upgrade type things. First off, after swapping in the MT springs I was getting a horrible clucking from the rear, and determined that the Monroe sensatracks I had swapped from an XJ were now no longer up to the job. With the stiffer spring rate, the rear of the truck rides higher, and the XJ spec shocks were about 1/2" from full travel with the truck unloaded and just sitting there. So any time I hit the slightest bump, or hit the brakes, or basically moved at all, the shocks would max out and hit their stops. Rockauto had a sale on the correct MJ part so I replaced both rears and it made a huge difference in ride quality, comfort, even stopping. Unfortunately I snapped off the threaded portion of the upper shock mount on the passengers side while loosening the old one. The threads must have rusted up a bit and I probably overtightened it at some point because it just twisted right off. Right now it's just running without being bolted in on the top, until I can think of a repair and get around to fixing it when it's not freezing out. I fixed my sticking clutch problem, detailed in that thread, but basically the old clutch master cylinder was completely trashed and jamming up. This was right before New Year's because I had to drive to Boston and back holding down the clutch just enough to keep it from sticking (if I released it), but not too much to ride the clutch, oh and during a snow storm. It was actually quite easy to replace, I saved myself a lot of time by simply drilling out the old roll pin instead of screwing with trying to punch it out. I didn't even have to bleed it. The clutch feels great now, like a whole new truck to be honest. Today I wired up an MSD 6A. I put a 6AL on my Camaro and noticed it helped it start idle a bit better, I was really looking for any sort of boost in mileage but haven't noticed much. Anyway, got one for $50 so the price was right to throw it on the Jeep. Very noticeable difference, from the first time I cranked it. It idles rock steady right from startup, is smoother at idle, smoother at all revs but especially feels better when clutching away from a stop. There's no way I'd pay full price for a brand new unit but they can be had pretty cheap used with enough patience. After that I removed the old sparkplugs (first time doing that since I got the truck a bit over a year ago) and installed Denso TTs. I wanted to install the 6A first to see if it made any difference by itself, and it most definitely did. I'd also replaced the cap and rotor about a month earlier. Now the ignition system is tip top and the HO purrs like a kitten.
jeepcoma Posted May 11, 2010 Author Posted May 11, 2010 Yes I do have the factory leafs. Update on the truck, it's been running great as of late. Have just been doing the little maintenence things, new cap and rotor, plugs, installed an MSD 6A (which was actually a nice improvement). New serpentine belt is on the way. Hauling a bed full of bricks last week convinced me I couldn't keep putting off the suspension repairs (I've been driving with no swaybar), so I got swaybar endlink bushings, control arm bushings upper and lower, trackbar bushings. Ball joints will be next but I wanted to take care of the basics first. Installed the endlinks this weekend and wow what a difference. When I swapped front axles, most of the bushings were pretty beat up, but at the time I just needed to get the swap done and from then on it was easy to put off replacing the bushings. Anyway, one of the endlinks was so worn it allowed enough play that the bolt just sheared right off. Still need to figure out the front end wobble over bumps (precursor to deathwobble it seems), hoping the trackbar bushings cure that or one of the other worn out pieces. And, high speed vibration that I'm getting. Need to fix the rear pinion angle and replace the driveshaft ujoints and see if that fixes it (and maybe the worn bushings too).
jeepcoma Posted March 13, 2011 Author Posted March 13, 2011 Thought I would merge a few of my random threads into my build thread. I created a Part Number thread which contains info on pretty much everything I've replaced. I just finished installing all the following replacement parts, except the ZJ swaybar and the rear driveshaft u-joints (I need to pick up some new straps and bolts first): Front: * ACDELCO 45U0114 Front Axle U-joints (upgraded one-piece shafts w/ 297x joints) There's some confusion on ball joints needed depending on the year of the axle. I'm not sure what's different or what happens if you install the incorrect one. Check out this thread for some part numbers. I chickened out and spent the extra money on the adjustable ball joints which are a universal fit. * MOOG K3137T (Pre-'90)/K3161T ('90+) (nonadjustable lowers) OR K7403 (universal year, adjustable lower); K3134T Ball Joint (upper) * MOOG K3176 Track Bar Bushing * ACDELCO 509610 Steering Damper * MIDMG21102 TenFactory Axle Tube Seals * SKF BR930014 Wheel hubs * Trackbar - Moog DS1235 * Tie Rod - OMIX-ADA #1805208 Rear axle stuff: * Ten Factory Motive Gear MG22135 chromoly axles, studs, bearings, and seals kit * Crown Automotive Retainer #CRO83504190 * Brake Shoes - RAYBESTOS 481PG 10" x 2.5" * Brake hardware kit - CARLSON H7149 To swap in the ZJ sway bar: * MOOG K3171 26mm swaybar bushing (I'm hoping I got the right size) * MOOG K3150 link bushing (I also hope i don't need longer links) Pics later! Next major to-dos are seeing if I can fit up the LT1 electric cooling fans and then floorboard/rocker rust repair.
jeepcoma Posted September 19, 2011 Author Posted September 19, 2011 Floors and rockers are finally fixed, I'll crawl under there tonight and take some pictures. I ordered the floor pans and rockers from Classic2Current. Quality was pretty good, though the shop had some fitment issues. I went with the full length pans (075-46CR and 075-46CL), and they had trouble with the floor braces. The outer rocker panels (070-020) stuck out a bit too far, and also they wished they were longer front-to-rear. I had no inner rockers left and they had to build new ones. All in all it was a very expensive fix (more than I paid for the truck!), but I keep telling myself it was worth it in the long run. Next major repairs are brakes and the bed side panels. I bought some cool tools to do the whole brake job and will do that myself, but will have to take it back to the shop for the bed fix. I think I need to get this done before winter rots the rest of the bed away, but am not looking forward to forking out more cash right now (it'll be $500 just to get the two bedside panels to my door!). But like I said, just focus on the long term picture of bringing this truck back to life... I'm trying to track down a high-speed vibe that wasn't fixed with all the suspension work and alignment. Thought it might be a bad tire since it has that sorta feel to it. So one by one I'm removing a wheel, clean/paint it, and rotating in the 5th tire to see if the vibe goes away. One of the reasons for cleaning the wheels (besides appearance) is to spot problems, it took me a long time to notice my rear seal leaking because the inner wheel was already full of crud. Anyway, while doing this, I discovered the wheel studs on the driver's side were only finger tight! Yikes! Guess they weren't installed with loctite, so I'll fix that up and hope it cures the vibration.
jeepcoma Posted October 4, 2011 Author Posted October 4, 2011 After I did my rear axle upgrade, I just could not get the rear differential to stop leaking. The rear cover took a hit at some point in its life and mangled the sealing surface at the bottom. The damage area was off to the left side of the bottom, the furthest distance between bolts, and it seemed like no amount of gaskets and/or sealant seemed to work. I ended up getting a heavy duty looking cover from RuffStuff Specialties after reading some threads from all over. I would have gone with a RockCrusher cover (in keeping with the Aussie theme!), but thought this matched the style of the JCR bumper a bit better. Not that anyone can see it, but hey. I know it's there. Simple, plan, functional, and tough. Here it is, arrived today and out of the box. Closeup on welds. Beautiful job, but lots of spatter. Inside cover. Cleanup required! Fill plug from the inside. Mating surface and sidewall. Cleaned up and painted. Should get the chance to install it tomorrow (unless it's raining again), pics will follow. One "bonus feature" I'm wondering if I'll get is reduced gear whine. Would be a nice to quiet it down a bit. An update to all my suspension work, I am STILL getting death wobble. Well, now quite death wobble, but probably could induce shaken-baby-syndrome. Went on the highway the other day to pick up a spare AX15/NP231 so I would work on one over the winter, and had it happen TWICE in about one mile, only at around 60 mph. Just picked up a ChroMo tie rod and Moog ends, the last thing that I can possibly replace (except the wheels/tires which I haven't ruled out yet but am trying to isolate by rotating the wheels), then back to realignment. I'm not confident on the current specs, the firestone shop "forgot" to do the before and after printout when I last took it in. I'm guessing they didn't want to bother doing the ball joint adjustment since I was the last one for the day.
jeepcoma Posted October 29, 2011 Author Posted October 29, 2011 Progress this week. Not as fast as I would have wished, but progress still. Lots of little things that crop up, you can either ignore and get the job done or do it right and fix it while you're there. Sucks it's supposed to SNOW today, I need to get this done so I can drive to work on Monday. Anyway, since I won't be working today, I thought I would do some pictures and progress updates. I've got all the parts together for a complete brake system overhaul. 100% of everything is being replaced. See my other thread here. My frame is starting to get pretty crusty as well and I wanted to get that taken care of before the winter. The past two years have just been murder on my truck, I've been watching it get worse as the days go by. I want to take care of the frame because despite the body rot, the frame was remarkably solid, and I want to keep it that way. I decided to try out Eastwood's kit, and so far I have to say I'm pretty pleased with the results. For the rust converter, I used a regular hand pump spray nozzle thing. In retrospect, it didn't work out so well. It was difficult to get even coverage (the mist wasn't fine enough) and I wasted a lot. Brushing it on works very well, or go with the aerosol spray (or put it in a spray gun if you have one). I think overall brushing is probably best if you can reach everything you need to, no waste and easy application. Here's the gas tank painted up. I brushed the rust converter on and then followed with the encapsulator and chassis paint. I think I will paint the lower half silver. I thought of just replacing the tank and pump, but for $350 I figured I'd see how well this works first. Now that I know how to get the tank down, it's a piece of cake (and I have new hangers going in so it should be even easier) if I have to replace the pump. Here's so shots under the bed. I've mainly concentrated so far on the area behind the gas tank, and the main frame. As soon as I get the brake line bent behind the tank I can put that back in, then come back and paint the rest OK but what about the brakes you ask? For the rears, I already had all new hardware except two pieces, so I replaced the wheel cylinders and the drums. For some reason, my D44's vent hole was just that, a vent only. It's from an '88, but my '91 axle uses the vent to hold down the brake like. Last time I was in a hurry so I just zip tied it down, but now I did it the right way. I tapped the hole for the threads (7/16x20) and it's just the way it should be now. Go REAL SLOW with tapping, and use lots of grease to capture all those metal flakes. You don't want that stuff going down into the axle. That surface rust on the drum is from one freaking day of sitting outside. It's painted with Rustoleum High Heat enamel. It's really more grey than black so I'm not real happy with how those turned out. Check out my neat bending job. The roller bender worked pretty well, but for some reason it was tough for me to visualize how the bends were going to go. :hmm: Must have been tired and not thinking straight (no pun intended). I've started on the main line from the rear rubber to the front, but it got dark real fast so I didn't rush it. The Eastwood flaring tool was AWESOME!! Perfect flares in about 5 seconds. Money well spent on a specialized tool. Front brakes are a piece of cake, I got new calipers, pads, and rotors. I was surprised to find the rotors drilled and slotted, I did not know in advance. All my brake hardware is Raybestos Advanced Technology. Again, some surface rust from just sitting out one night. I've used the rust encapsulator where needed but haven't finished with the chassis paint yet. Here are the rest of the brake bits waiting to go in. Booster, MC, and Wilwood adjustable proportioning valve to replace the load sensing unit. I ended up getting the 10 lb valve as well, not sure if it will really do anything (it's generally used when the MC is mounted lower than the caliper) but I figure it can't hurt. I moved a lot of crap out of the way to get the lines out, it's NOT going to be fun bending a new line for the passenger side caliper. Last bit of big news... drum roll please... I ordered the bed side panels from Z&M Jeeps. I showed the pics to my bodyshop that did my floors, and they thought it wouldn't be too bad. My wheel wells need repair too but no one makes replacements for that so it will have to be custom done by them. It's going to be an expensive repair, but hopefully it's the last big body work I have to do. And, I'll have saved an MJ from a slow, rusty death.
89Comanche4x4 Posted October 29, 2011 Posted October 29, 2011 I'm a little confused. do you have perches on the top and bottom of your rear axle?

Recommended Posts
Create an account or sign in to comment
You need to be a member in order to leave a comment
Create an account
Sign up for a new account in our community. It's easy!
Register a new accountSign in
Already have an account? Sign in here.
Sign In Now