ftpiercecracker1 Posted January 26, 2014 Posted January 26, 2014 This is a writeup that can be used with any MJ front clip, but should only be used on MJs that have gone through the Cherokee (XJ) Wagoneer front clip conversion. As some of you may already know, while rare, this is a pretty popular front clip swap for us and cherokee owners alike. This is my 1990 with the factory front clip. This is her after the swap. This is a 100% direct bolt on conversion for 87-92 MJs, the 1986 year model may look the same as all the rest, but it is NOT. While it is possible to put later front clips onto an 86, including the wagoneer, it is much more involved. I know this because i gave my original front clip to a friend of mine with an 86 (SpectorMJ). It was a royal PITA trying to figure out a way to make it work. Anyway. . . . The reason why I suggest to limit this to only Wagoneers is because of their separate High and Low beam lenses. Bottom are low beams, top are high. Because they are physically separated it prevents dangerous temperature levels inside the unit. Unlike on a traditional front clip where both filaments are enclosed in the same sealed unit and have the potential to generate damagingly high levels of heat. Shortining the life span of the light and in the very worst case senerio, start an electrical fire. YOU HAVE BEEN WARNED. Onto the instrutional! You will need: 2 relays with matching relay buckets and pig tails Wire Wire crimpers/cutters Butt connectors Electrical tape Corrugated electrical tubing Heat shrink Lighter This is my relay bank on the drivers side fender. The two in the middle are responsible for the Headlights. The really nice thing about these relays is that they interlock and have mounting taps. So, the wiring. It took me several days to come up with a solution, but once I did it was acutally quite easy to implement. #1 Locate your Headlight connector and unplug it. #2 On the Engine/Body harness section of the connector, locate the solid GREEN and WHITE wires. #3 Trace them back a good distance. A good 10" away from the connector #4 Cut the WHITE wire. #5 Locate the wires on both relays that correspond to the 85 slot and splice them into the section of the WHITE wire that goes to the fire wall, NOT the section that goes to the connector. This is the "signal wire" that will trip the relay. I cannot tell you what color wire because nearly all relays are different. Something you need to be thinking of in the meantime is where you are going to draw your power from and where you are going to ground these two relays. Your "incoming power" (30) and "ground" (86) slots are located here. . . . The part about finding ground and power was easy for me because i have installed a marine grade auxillary fuse box which has both direct battery positive and negative terminals using 4 gauge audio wire. #6 Using one of the relays, find and splice in the "outgoing power" wire into the remaining cut portion of the white wire. If you have done right so far, this portion of the white wire will be going TO the headlight connector. #7 At this point you should have all wires ( 2 incoming power, 2 ground, 2 signal, and 1 outgoing) connected. All that should be left is one outgoing power wire. #8 Now you can splice this wire into the GREEN wire you located at the very beginning. Cut and crimp all three wire ends together. The remaining outgoing power, and the two cut ends of the green wire. In the picture above you can see my connection just above the text box. If you have done everything right, your high and low beams should now come on together when you pull the lever on the steering column to engage "high" beams. Your lows beams will still fuction normally as well. Best of luck, :thumbsup: Ftpiercecracker.
ftpiercecracker1 Posted February 1, 2014 Author Posted February 1, 2014 Blue Seas, you won't be disappointed I promise you that. http://www.bluesea.com/products/category/Fuse_Blocks/ST_Blade Cheaper: http://www.ebay.com/itm/BLUE-SEA-5026-FUSE-BLOCK-SCREW-TERM-BLADE-/251436901678?pt=Boat_Parts_Accessories_Gear&hash=item3a8acea52e&vxp=mtr
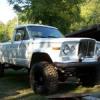
RavenMocker Posted February 12, 2014 Posted February 12, 2014 Can we see what it looks like with the lights on both hi and lo? What does the pattern look like?
ftpiercecracker1 Posted February 17, 2014 Author Posted February 17, 2014 Sh*tty phone = Sh*tty pictures Running lights: Dims/Low beams: Brights/High(er) beams:
81Chero Posted November 16, 2015 Posted November 16, 2015 OH MY GOSH..! Nice write up indeed.. I think that THIS is what I NEED.! May I ask a question? (well, a couple) I was wanting to do 2 of these swaps. 1- to my daily, a 88 comanche with a 97 front clip and 2- A soon-to-be daily that was recently acquired 96 that I just happened to find the same color front from a 99. (that usually NEVER happens) Well, both my 88 and the 96 are 4cyl, manual base models, and don't know if JEEP just put the whole (every option) harnesses in every model 'just in case' to save on labor and mistakes. Well Anywho, I swapped the 99 onto the 96 to find out that since it's the 4cyl, the upper radiator support 'beam' is lower, there is a huge gap. And will have to go back and pick that up from a 6cyl. (also a torx and extension bit to fit the screws. ...dang socialists) Your first pic shows an electrical relay 'station'. Is this YOUR addition like the fuse block you made up on the fire wall? Cause I don't see it on either of mine. Also, as your pic of the 8 pin connector, which ones are for headlights, marker and turns? Can I splice more than one light into a wire without issues? Seeing your pics almost made me throw up a little and get woozie.. If I were to take the time out and take a anti-depressant I could probably understand it. But wiring isn't my first area of response.. If you could post any wiring schematics you may have, that would be just fantastic. I'm going for the 'racejeep' theme here. Need room for the kids and shifting between legs does NOT make me comfortable. Plus, I plan a Magnum 5.2/NV3550 swap to beat on these goobers down here. All that to say that the only dirt that I'll be in will be if I get run off the road by the goobers on their phones, and most all hwy speeds. Thanks. Errol
ftpiercecracker1 Posted November 18, 2015 Author Posted November 18, 2015 Well, both my 88 and the 96 are 4cyl, manual base models, and don't know if JEEP just put the whole (every option) harnesses in every model 'just in case' to save on labor and mistakes. Well Anywho, I swapped the 99 onto the 96 to find out that since it's the 4cyl, the upper radiator support 'beam' is lower, there is a huge gap. And will have to go back and pick that up from a 6cyl. (also a torx and extension bit to fit the screws. ...dang socialists) Your first pic shows an electrical relay 'station'. Is this YOUR addition like the fuse block you made up on the fire wall? Cause I don't see it on either of mine. Yes, the only bank of relays that came factory on MJs are on the P side fender well. 4 in a row. There is sometimes another relay on D side fender well for an electric cooling / air con fan. Also, as your pic of the 8 pin connector, which ones are for headlights, marker and turns? These two links should answer all you questions. http://comancheclub.com/topic/17155-adapting-mj-headlight-harness-to-97-xj-harness/ http://comancheclub.com/topic/19815-97-headlight-wiring-harness-diagram/ Can I splice more than one light into a wire without issues? Under the right circumstances sure. Can you be more specific? What are you trying to accomplish?
81Chero Posted November 20, 2015 Posted November 20, 2015 By "more than one wire" I mean that the '97's plug (for the front lights) has a few more wires than the '96's, just stands to reason that some may splice together. (I just don't understand why they put 2 sockets in the same fixture for the later turn signal housing..) I saw a build by some guy that cut out both sockets in his and just epoxied in a LED bar instead. And of course, can't find the thread.. Thanks for the links. E

Recommended Posts
Create an account or sign in to comment
You need to be a member in order to leave a comment
Create an account
Sign up for a new account in our community. It's easy!
Register a new accountSign in
Already have an account? Sign in here.
Sign In Now