


Yellowoctupus
-
Posts
51 -
Joined
-
Last visited
Content Type
Profiles
Forums
Gallery
Everything posted by Yellowoctupus
-

The Guamster - 5.3LS Longbed
Yellowoctupus replied to Yellowoctupus's topic in Member Projects: Your Comanches
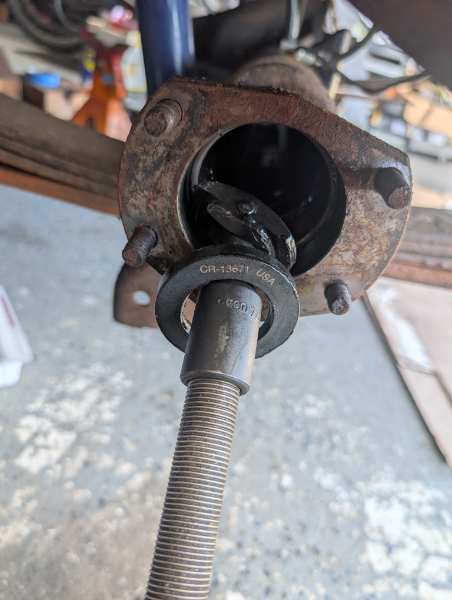
You know, I haven't really given it too much thought in a while, although, I think my new yoke is still leaking somewhere. (I'm Assuming it is at the seal now, not the yoke itself anymore.) I wonder if I could pour some oil resistant Epoxy or a runnier RTV into the bottom of the splines. This is a really long yoke so it would be hard to get in there with a paintbrush. At work one time we had to use a high temperature RTV to insulate heater coils from their electrical connections, and I was able to squeeze it out of a syringe, with interchangeable sized tips. It was laborious but did work well in the end. -
The Guamster - 5.3LS Longbed
Yellowoctupus replied to Yellowoctupus's topic in Member Projects: Your Comanches
Yeah, funny thing. When I went to buy the Lista boxes, they said they had two different people that wanted to purchase them before I got there, but neither could figure out how to pick them up and put them in their truck. I was somewhat dumbfounded that someone was going to buy a toolbox but couldn't figure out how to take the drawers out. Lol. It takes time, but probably strips out 80% of their (ridiculous) weight. I am a huge fan of Lista and Stanley Vidmar tool boxes. I still have a Craftsman workbench my parents bought me when I was about 10, and my grandfather's Snap-On top box from the 1950s, but I have honestly only kept them out of nostalgia. I bought all four Listas cheap enough that selling two pretty much paid for the other two which I kept, and I got to customize all of my drawer selections, etc. -
The Guamster - 5.3LS Longbed
Yellowoctupus replied to Yellowoctupus's topic in Member Projects: Your Comanches
You just don't think about how heavy industrial toolboxes are until you drag four home at one time ... and you're bottomed out. When I get around to replacing springs, I'm definitely getting some that can handle heavier loads. Heavier springs, airbags, something.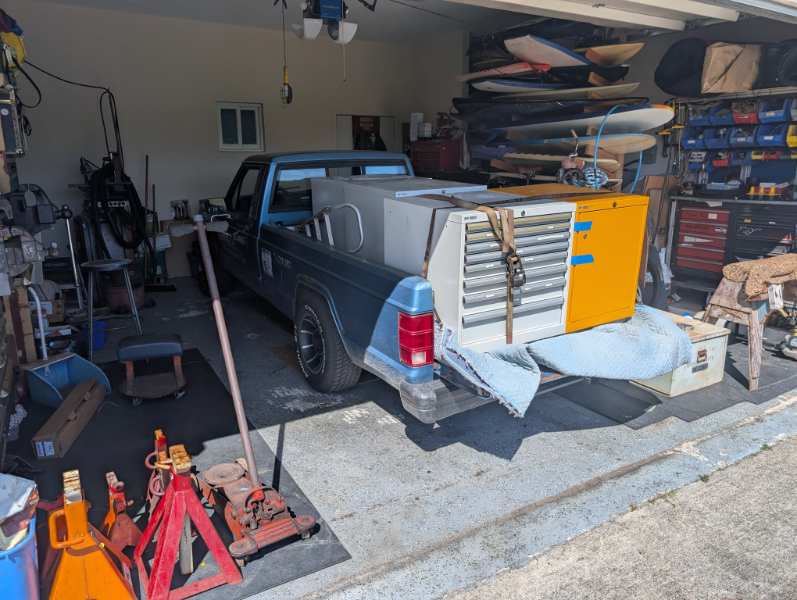
-
The Guamster - 5.3LS Longbed
Yellowoctupus replied to Yellowoctupus's topic in Member Projects: Your Comanches
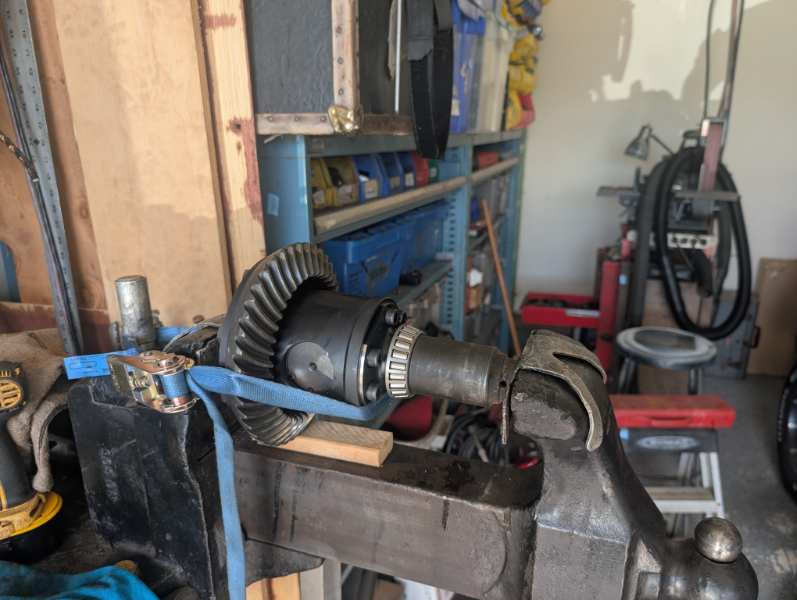
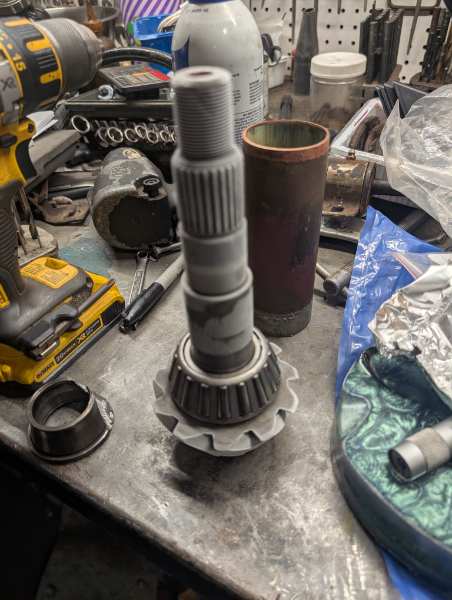
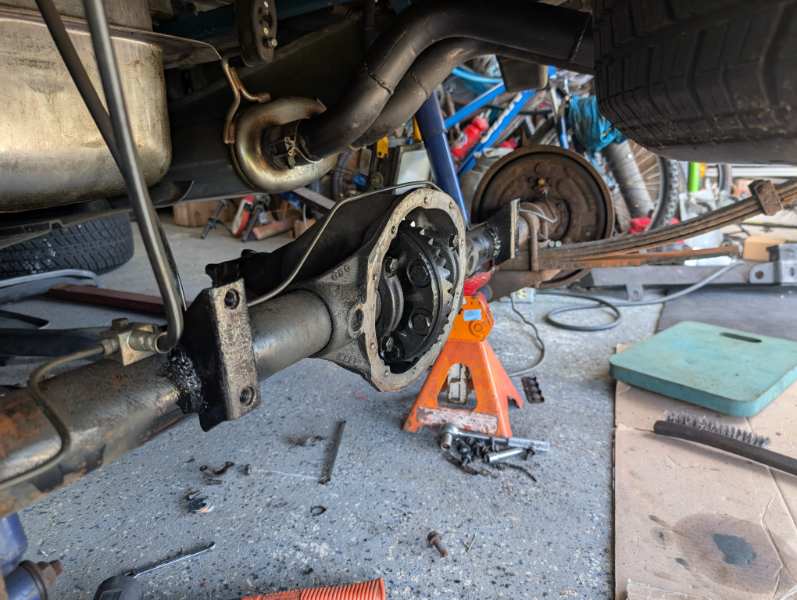
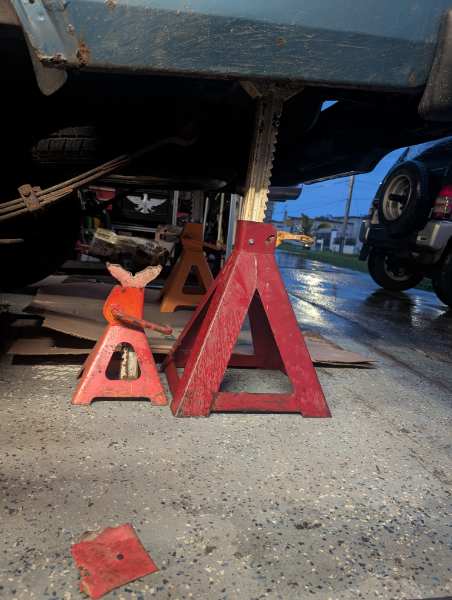
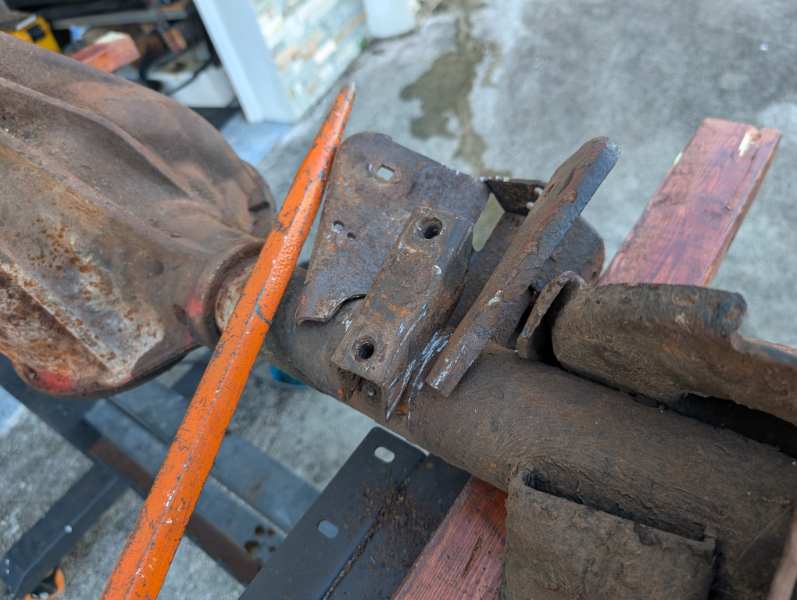
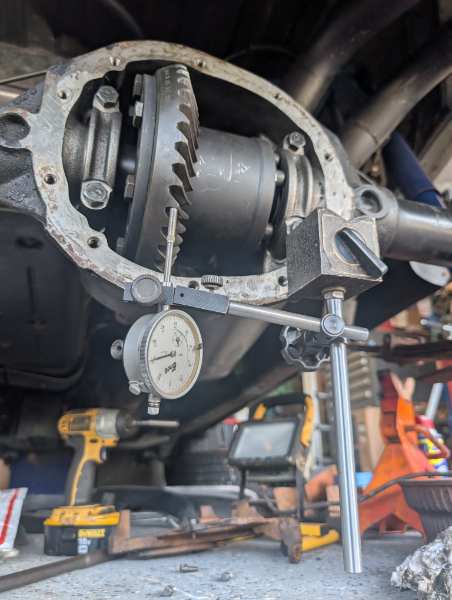
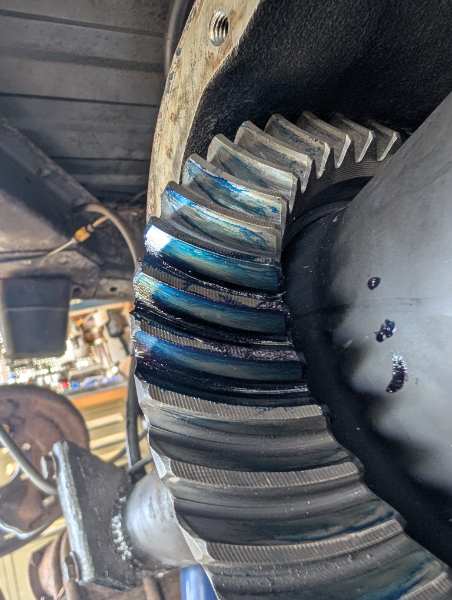
Rear End Saga (probably) Rear end's noisy and leaks at the pinion seal with 3.08 gears (meh). Found a set of gears on a '94-ish Grand Cherokee in the forest, so I pulled them, along with the Spicer Trac Lok carrier. Not sure if I'll bother swapping it in, or try to replace the entire rear end. It'll need new spider gears, bearings etc. In the mean time, I replaced the pinion seal: Spicer 46085 and loosely snugged up the loose pinion nut, but it's still noisy, so I'm sure something's just chewing itself to pieces in there. (Moved this to a new post...here!) Upon closer inspection, the spider gears had some damage, the ring and pinion gears actually looked fine, but the carrier bearings had 0 preload (worn out). If I wanted to use the higher gears, I'd have to get a different carrier, which would mean putting a few hundred into rebuilding the Spicer limited slip I had, OR just get a torsional style locker (seems to be the best bet for the street). Two choices for a Dana 35, Eaton and Powertrax. Typically the Eaton's a little more expensive, but I think the Powertrax had a better warranty , which is why I went with them. No major durability concerns reported from reviews I found online for Eaton or Powertrax, so couldn't use that as a pro/con either. Amazon sent me, instead of my Powertrax unit, as ordered a set of GEARS for a Ford 9-3/4" rear end. To Guam. After calling them, they agreed to refund me my money. Their original response was to pay me something silly like $4 to ship them back. It's a 20# + box, like I couldn't ship them to the house next door for $4. Anyways, I ended up talking to the owner at Quick Performance, who gave me some really good pricing on the limited slip, the carrier install kit (bearings/shims, etc), a solid spacer (for pinion preload), universal joints etc. Probably more money than I would have liked to spend on a Dana 35, but I've got small street tires on it, no c-clips to break, (no spider gears anymore either) so it's unlikely to die anytime soon under my daily driving. It took me a LONG time (like 10+ shim iterations between the carrier /pinion shim sets) but I eventually got a good pattern with good backlash, and good pinion / carrier preloads. Would have been easier to pull the axle I'm thinking, but hindsight's 20/20 they say. Parts: Powertrax Grip Pro GT443527 ZK M35 USA Standard Master Overhaul Kit Model 35 Crush Sleeve Eliminator Model 35 Setup Bearings Spicer U-Joints 5-1310X (non greasable) Here's my END settings: Carrier Bearing, "Gear Side" 0.158" Shim Carrier Bearing, "non-Gear Side" 0.172" Shim Pinion Bearing Shim (located between housing and under outer-race, of inner bearing ) 0.0375" Backlash 0.006" Pinion Bearing crush sleeve eliminator (0.410"+0.030" shims) (located shims towards race, not 'step' in pinion shaft itself). Measured rotation of ~15in*lbs prior to installing seal. (This is close to a few old crush sleeves I measured at 0.440" and 0.480") Final pinion nut torque 190ft-lbs. MY original carrier tag: 8953004770 , 3 08 605324-1 USA Standard Gear Specs: Pinion Bearing Preload: (new bearings) 12-14in*lbs Backlash 0.006"-0.010" Ring Gear Bolts 55ft*lbs Cap Bolts 55ft*lbs Axle seals (inner seals) for "Heavy Duty" axle: Centric 41758000 (non heavy duty 41758001 same OD, but smaller ID). I've only driven it a few miles, but so far so good. No leaks, weird noises etc. It was all rusty so I figured why not flames? Freezing the shaft for a few hours and heating the bearing in my toaster oven at 250F, no pressing required. The axle puller I almost never use came in handy for popping these axles out and the seals. I scavenged the sway bar brackets from a 2004 Rubicon Dana 44 and welded them on my Dana 35 for a future project. I helped my neighbor get his Toyota running and he gave me these King Kong 10 ton Jack stands. Standard 2-ton jack stand next to it for example.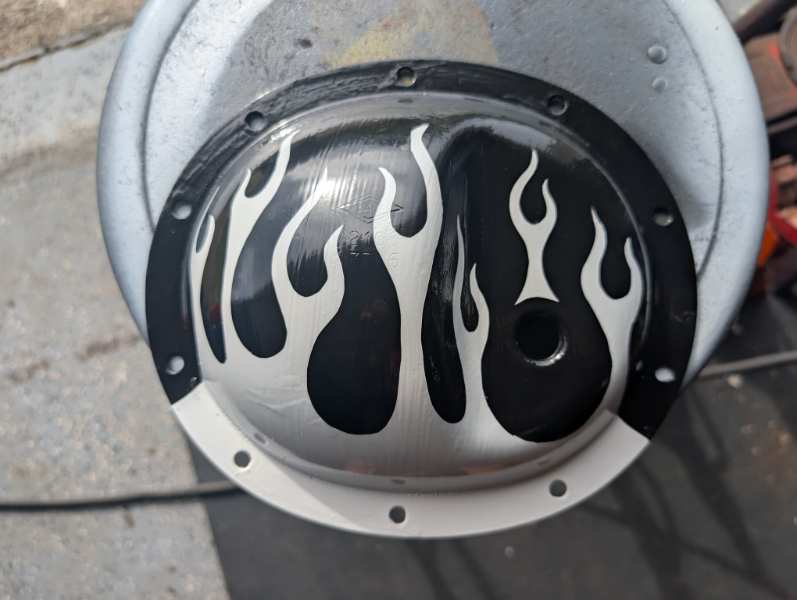
-
Dana 35 Rebuild Questions
Yellowoctupus replied to Yellowoctupus's topic in MJ Tech: Modification and Repairs
Yeah, I saw that setup bearings were super expensive. Was either planning on trying to do what you said, and reuse the old ones, or just buy another new bearing of the same brand/ part number for that purpose. -
Dana 35 Rebuild Questions
Yellowoctupus replied to Yellowoctupus's topic in MJ Tech: Modification and Repairs
Thanks, I wasn't sure how that assembly sealed in the housing, whether they'd get messed up when I pulled them out or not. Sounds good. I'm still not sure whether I should purchase a 2nd inner pinion bearing for setup purposes, and put the pinion shims under the bearing, or press the bearing right against the head of the pinion gear, and shim the outer race to housing for depth. I got my "Powertrax" in today. Yeah, instead they sent me a ring and pinion for a Ford 9.75". Completely useless. Now I have to figure out that mess through Amazon, hope the package doesn't get even MORE damaged going back to Amazon for my refund, and then try to complete the purchase a 2nd time. Not too thrilled about that goof up. They're by FAR the cheapest place for oil changes too. Way better prices than Napa (I recently found). I originally purchased a filter and oil for my wife's car at Napa, it came up to over $60! I think HD was under $40. Not that $20 makes me feel rich, but it's a large % difference. -
Off road noise!
Yellowoctupus replied to TheMaddTitan13's topic in MJ Tech: Modification and Repairs
If you think it springs or some other dry spot, next time you go out wheeling bring a can of WD-40 with you, and then just liberally spray down one area at a time. Like spray down one leaf pack, try to get it to creak again and if it keeps creaking, go to the other leaf pack, and then just keep moving around on sway bars, bushings etc. Etc. It's a little tedious, but I have found metal on metal rubbing that way in the past. -
Dana 35 Rebuild Questions
Yellowoctupus replied to Yellowoctupus's topic in MJ Tech: Modification and Repairs
Anyone? I'd like to get some parts on order as soon as possible, I would greatly appreciate any advice. Thanks! -
Dana 35 Rebuild Questions
Yellowoctupus replied to Yellowoctupus's topic in MJ Tech: Modification and Repairs
So, I haven't completely torn down my rear end (I did pull the trigger on the Powertrax carrier however)... but I'm trying to get my bearings/seals/shims on order for the install and am a little confused. 1. The R&P I am using is from a ~94 ZJ, and it has the crush sleeve. I thought I read that the non-c clip axle assemblies had a solid spacer/shim assembly, rather than the crush sleeve. Is this correct? I'm not seeing that variation listed in the Dana Spicer parts manual, although they do list the c-clip/non c-clip variations. 2. Do Dana 35 pinion shims go between the head of the pinion and the inner bearing, or between the inner bearing race and the case? I'm pretty sure I have at least 1 shim between the pinion and inner bearing, but the Dana Spicer parts manual shows them going between the case and inner race. 3. For the carrier bearings, on the ZJ rear end I pulled out only those large cast iron 'shims' , if I purchased a carrier shim kit, where would they go? It seems like there'd be no room for them, unless the new carrier was produced intentionally 0.020" (+/-) narrow to allow for shimming to get the pattern right. Unless those factory shims are a weird 2 piece precision shim set? I didn't measure them to see if they were the same. 4. I wasn't planning on replacing the axle bearings and seals at this point, unless I find them to be worn when I pull them out. Will I have any issues (sealing, etc) with popping the axle assemblies out, and popping them back in? (I have a slide puller and the adapters, etc.) -
Dana 35 Rebuild Questions
Yellowoctupus replied to Yellowoctupus's topic in MJ Tech: Modification and Repairs
Ah, bummer. Yes, that's exactly what I was afraid of, the journal size being different. I was surprised I didn't find this answer on the interwebs doing a Google search. Maybe not that many people running non-c-clip rear ends to have this question come up... Thanks for the quick answer though. PM me if there's anything you're looking for up at Lujans. -
Dana 35 Rebuild Questions
Yellowoctupus replied to Yellowoctupus's topic in MJ Tech: Modification and Repairs
Post revival... hopefully making a decision one way or the other this weekend after a trip to the junkyard, see what they want for a complete rear end, if there's something there worth grabbing (disc brake 31 spline limited slip 8.8, some similar Dana 44 variant). Does anyone know if I ever needed a replacement axle, COULD I swap in a non-c clip axle? (It's unlikely I'd need one, as the bearing doesn't ride on the axle shaft, and I won't have mega traction (slicks etc), but it would be nice to know if they're conveniently similar enough to work. There's fewer and fewer of these non-c clip rear ends out there if I need a replacement axle someday. Might sway me to a swap if I can't get an axle in the future. -
FYI, make sure they're EPDM orings for DOT3/4 compatibility.
-
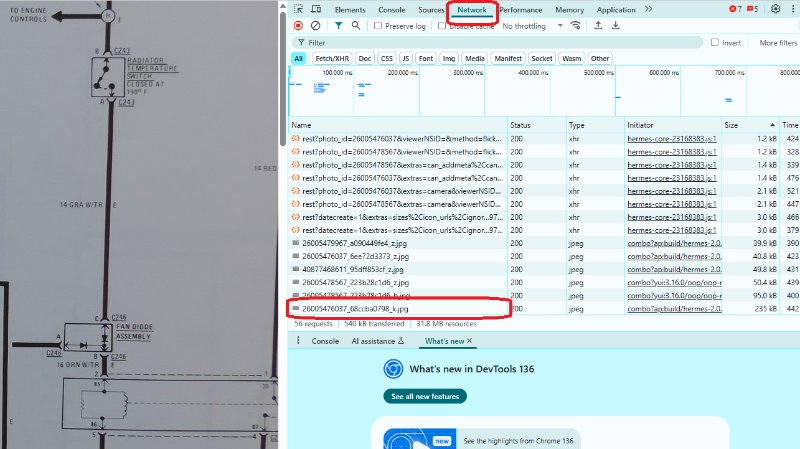
FYI, If one wants to download the FULL SIZE photos from this post, (directions for Chrome browser users): 1. Click on the photo you want (or right click, Open in New Tab) 2. flickr.com will open with the photo selected 3. in Chrome, go to settings, more tools, developer tools (or the keyboard shortcut is CTRL+SHIFT+I) 4. Select the 'Network Activity" tab 5. hover over the photo, you'll get a magnifying glass, click to magnify 6. Now, under the network activity, you can sort by size, and you'll see one that ends in a .jpg. 7. Rt click the .jpg line, open in new tab and it should be the FULL resolution version, which is MUCH larger than the one displayed on CC, or available on flickr to download. 8. To get more photos, you can simply click the 'next photo' arrow in this album and repeat steps 5-7. After I've gotten a few files, the list in the network activity panel gets long; you can sort by file size, which helps make more sense of the list. This is a pretty valuable trick I've used periodically over the years.
-
The Guamster - 5.3LS Longbed
Yellowoctupus replied to Yellowoctupus's topic in Member Projects: Your Comanches
Never would have thought of a leak here. (Where the welch plug is pressed into the slip yoke.) I think I have to revisit the RTV again (it's not 100% stopped leaking) with the driveshaft removed so I can goop the sealant in there better, or maybe use JB Weld if I can clean it well enough.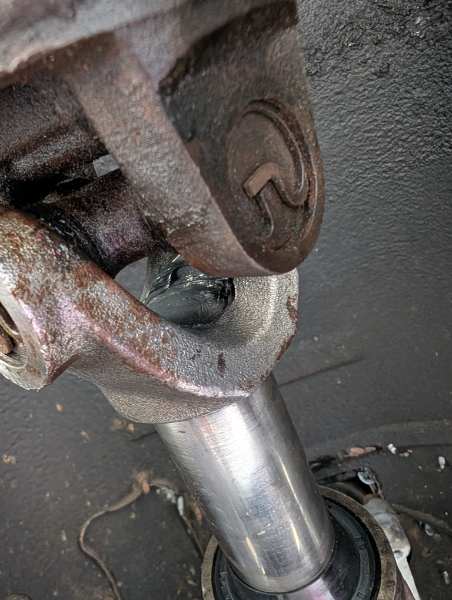
-
The Guamster - 5.3LS Longbed
Yellowoctupus replied to Yellowoctupus's topic in Member Projects: Your Comanches
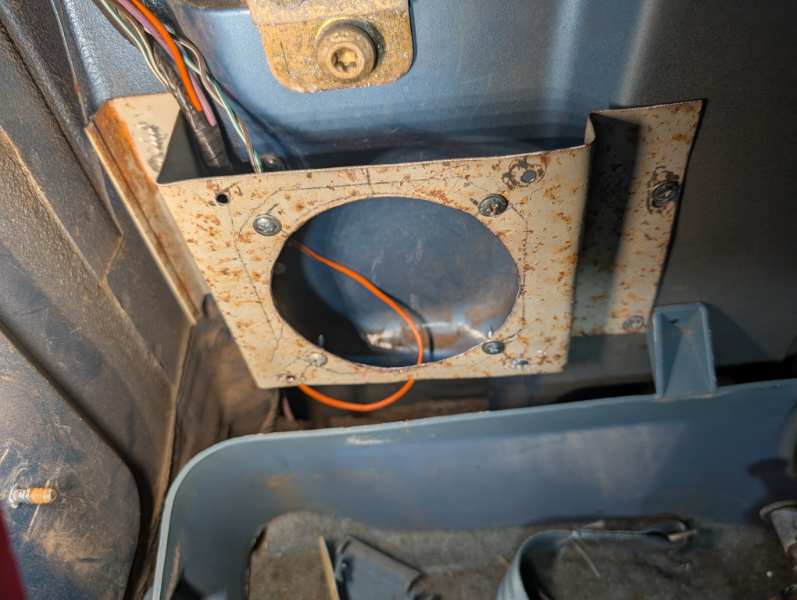
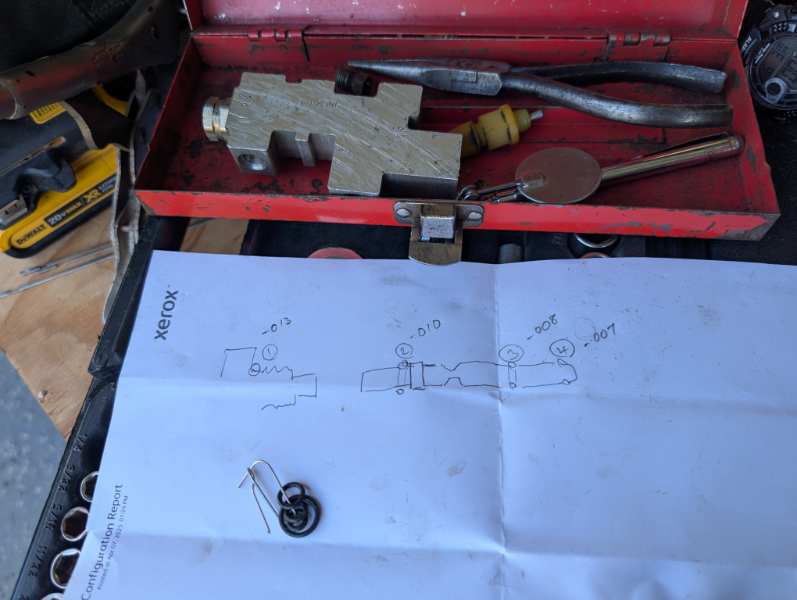
Got my subwoofers in and rear speakers installed. Makes that stock AMC radio sound better than it is! I had some 4" Panasonics which someone had put under the dash (poorly), so I put those in the b-pillar trim. In the doors, I put in some speakers (Boston Acoustics??) from some home speakers, and the subs are no-names that I picked up in high school. To put it into perspective, I graduated in 2003, so they're, like a fine wine, "well aged". Seeing how long it took to make a simple sheetmetal bracket, I would suggest if you've got $40 kicking around to just purchase the brackets that are made by one of our fellow MJ'ers, but I had some sheetmetal, and it wasn't a bad project, just a time sucker. Bent wire template showing rear clearance. I took off 3/8" but still didn't have to cut into the Jeep sheetmetal for the magnet clearance. Yes, of course I used a rusty desk drawer I found on the side of the road for these brackets. And no, I did not paint them. If it rusts away inside my truck, I will have bigger issues to worry about. I'll post up the sketch out of my notebook with dimensions, should someone else also want to waste a bunch of time making their own speaker brackets :) Kinda funny that AMC had the wires there, the original stereo has a R/F fader knob, but they never bothered to put in the rear speakers or brackets.
-
The Guamster - 5.3LS Longbed
Yellowoctupus replied to Yellowoctupus's topic in Member Projects: Your Comanches
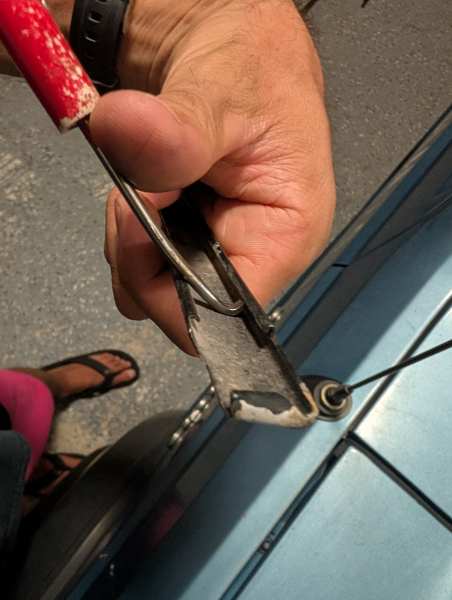
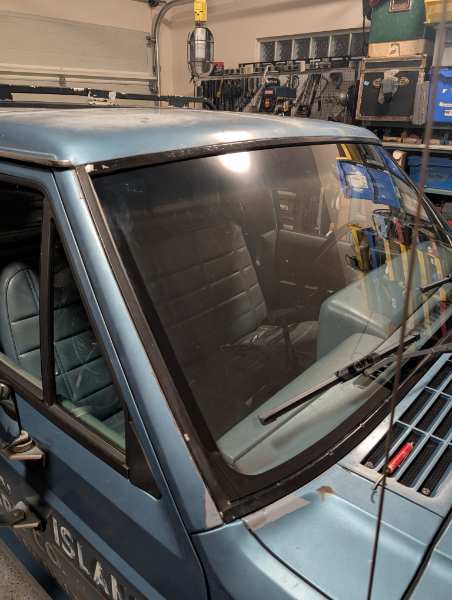
Finally put my windshield trim back in place! Shout out to @ghetdjc320 who travelled thousands of miles to bring me this trim! The stock trim snaps in place on plastic clips, but somewhere along the way, when I was straightening out the bends/dents in my original trim, I flattened out the little hook/ bend which mates to the plastic clips in the sheetmetal trim. A little heat on a promotional screwdriver and now I have an odd trim tweaker. Just one more in the big box of weird custom tools.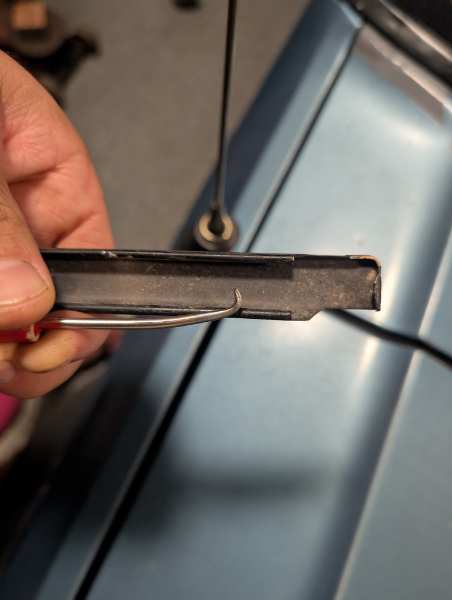
-
Project “Tomahawk”
Yellowoctupus replied to ghetdjc320's topic in MJ Hardcore Tech: Epic Journeys to Greatness
All four of us!! There's strength in small numbers!! -
Dana 35 Rebuild Questions
Yellowoctupus replied to Yellowoctupus's topic in MJ Tech: Modification and Repairs
I already have the Trac-Lok, with the 3.73 gears. I only posted that guy's eBay link as he claimed it would fit c-clip and non c-clip D35's. Of course, the used one I have needs the clutch pack / spider/side gear rebuild kit. IIRC, that's about $250 on Rockauto. So the same should be true for the Trac-Lok? It's backwards compatible? Just want to be 100% sure before I pull the trigger on getting bearings, etc. I'll probably put new bearings and seals everywhere (axles, pinion, carrier) , unless they look pristine. It'd be nice to do this only once. The ZJ pinion bearings do look perfect. I know they're cheap to replace, and I may end up doing it for peace of mind, but it's tempting to try to just swap in the whole pinion/bearing assembly and see how close the pattern is before re-shimming, etc. -
My '87 NON c-clip rear end is getting noisy (haven't popped the cover off to investigate, but wouldn't be surprised if it's related to the leaking pinion seal....). On a related note, I just got a c-clip trac-lok 3.73 carrier/pinion from a mid-90's ZJ. I searched around a bit, and while I THINK the answer is that I can use the entire ZJ carrier assembly in my MJ, has anyone actually confirmed this will work? Before anyone jumps on the "SWAP OUT THE D35" bandwagon, that's easier said than done right now (I have done a handful of Ford 8.8 swaps in the past, but with no 220v welder, limited parts supply etc.... I'd like to consider my options. Additionally, this is for a 2WD street truck with 235/70/15 (28") tires, FYI. There's someone selling a complete, new Dana/Spicer Trac Lok on eBay and he seems to have the most definitive answer so far:
-
The Guamster - 5.3LS Longbed
Yellowoctupus replied to Yellowoctupus's topic in Member Projects: Your Comanches
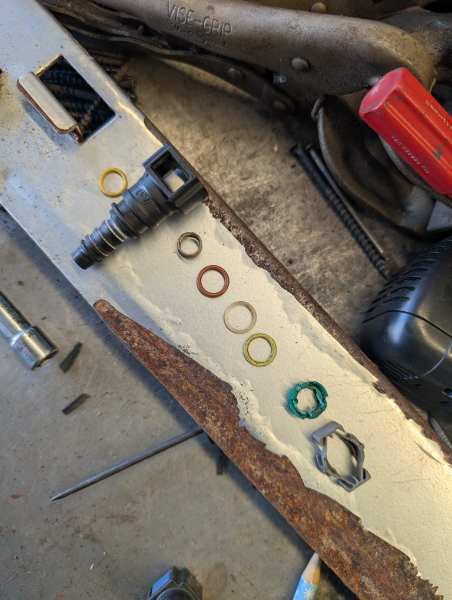
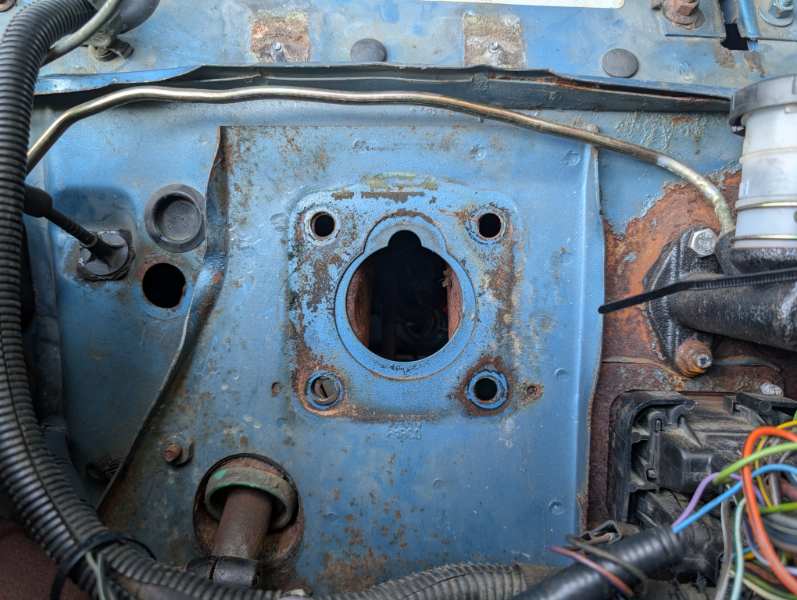
A few weeks ago I got a fuel leak behind the intake manifold, turns out it was the Jeep quick disconnect o-rings. Of course, nothing available at Napa, or any other local parts stores (are you noticing a trend here??) but I had a few quick disconnects I had salvaged over the years that just HAPPENED to have the right size seals in them. Talk about lucky.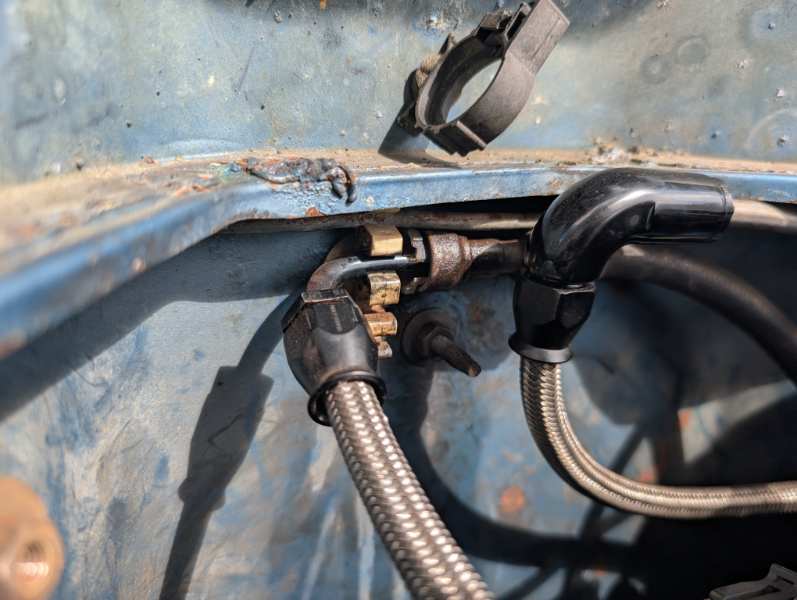
-
The Guamster - 5.3LS Longbed
Yellowoctupus replied to Yellowoctupus's topic in Member Projects: Your Comanches
1. Thanks for the compliment. 2. Guam's been an interesting experience so far. We lived in Hawaii for a few years, and I expected it to be the same, in my head. In some ways it's similar, but in many other ways, it's not. So far people are real friendly though, so that's cool. 3. I've only owned one car that had AC before, so It's not the end of the world not having it (and I lived in Redding, CA where it would be over 115 during the day!) but since it's 95% done, it will be nice to have it completed. I also picked up a Guam Bomb out of my neighbor's backyard, a '95 Mini Pajero 4x4, turbo 660cc. Great for an island with a low speed limit as I don't care how much boost 660cc has, it's never going to be fast! -
The Guamster - 5.3LS Longbed
Yellowoctupus replied to Yellowoctupus's topic in Member Projects: Your Comanches
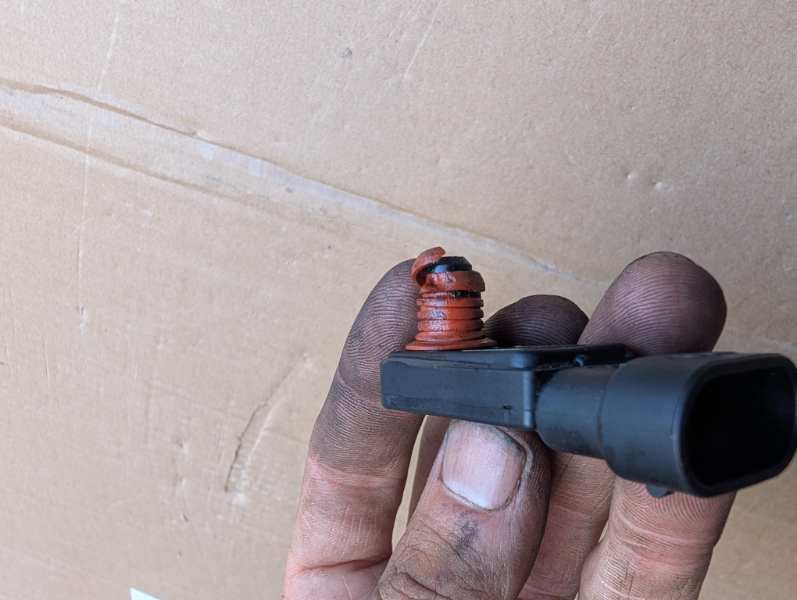
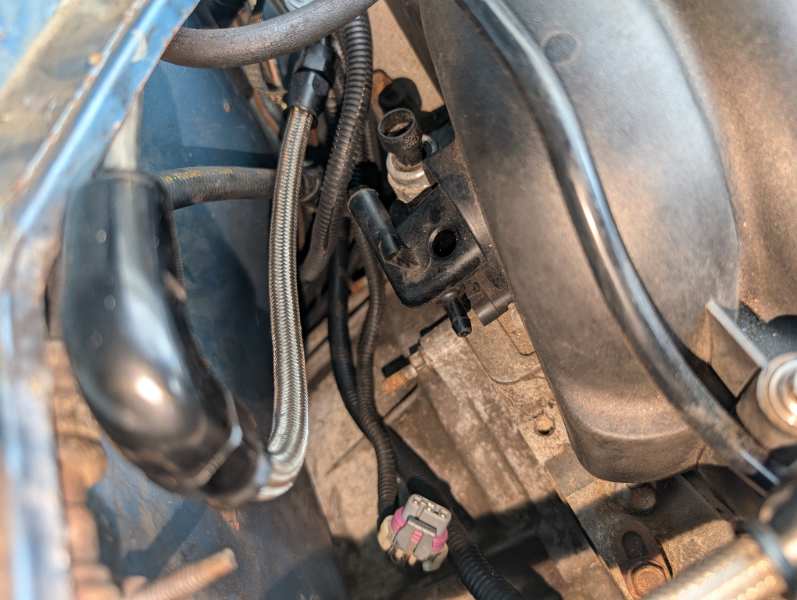
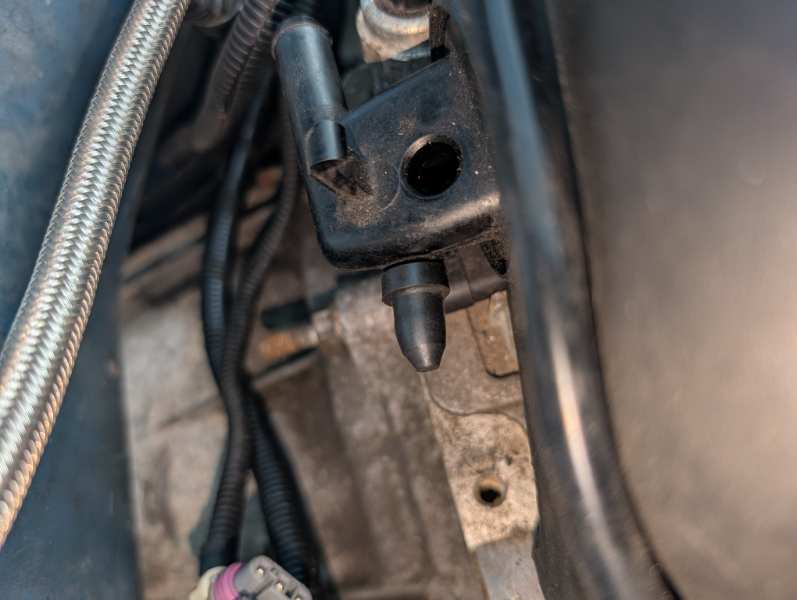
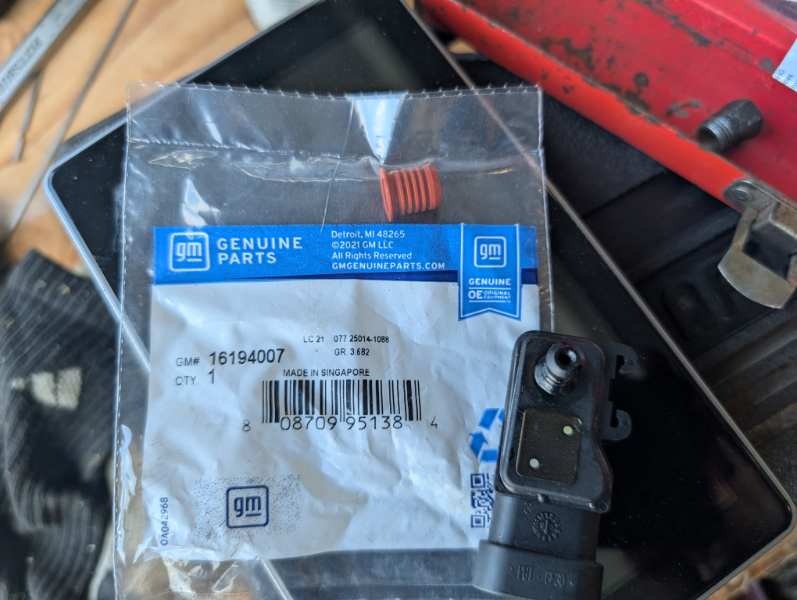
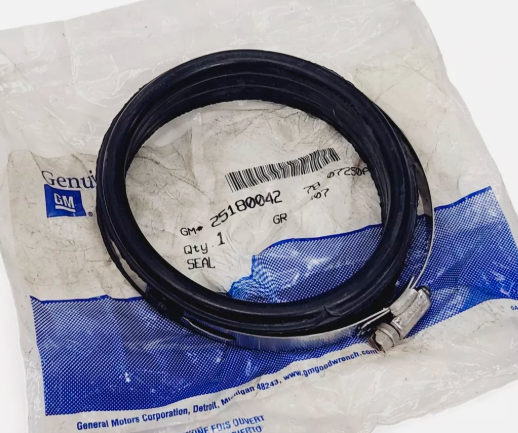
Been troubleshooting a few rough running issues, found 3 vacuum leaks!! 1. The intake boot from the MAF sensor to the TB was maybe oil soaked from it's previous life and the rubber got kinda gooey and split. (GM PN: 25180042). The original boot is bonded to the plastic intake tube, however after it's pried/cut off, the new boot is sandwiched on and it's all held tight with the hose clamp. Different than the original design, but seems to be working fine. 2. MAP sensor seal was ripped AND the little 'barbs' were all compressed on one side. It was VERY loose in the intake. (GM PN 16194007 for the LS1 intake) 3. I completely missed blocking off this unused port until I replaced the MAP sensor seal. Oddly enough I found a rubber cap IN MY DRIVEWAY that I have no idea what it came off of but it fit perfectly on.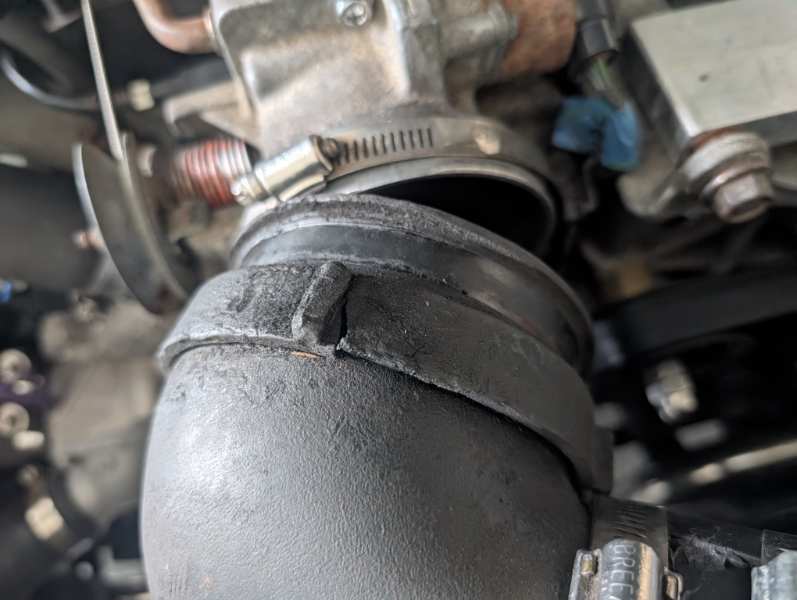
-
The Guamster - 5.3LS Longbed
Yellowoctupus replied to Yellowoctupus's topic in Member Projects: Your Comanches
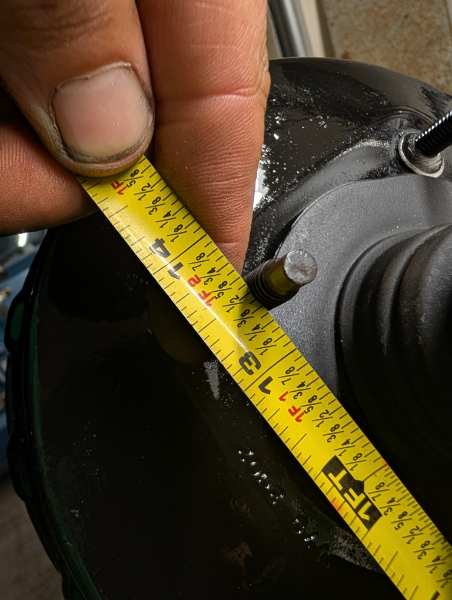
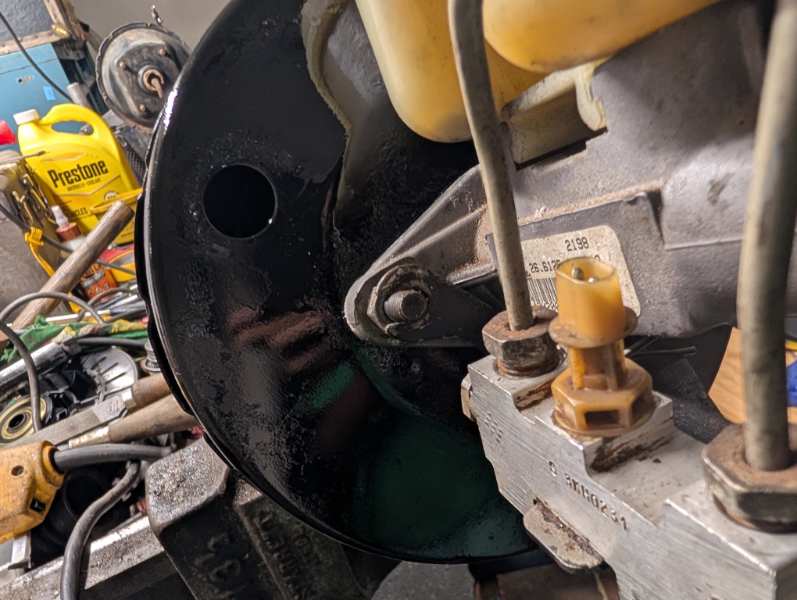
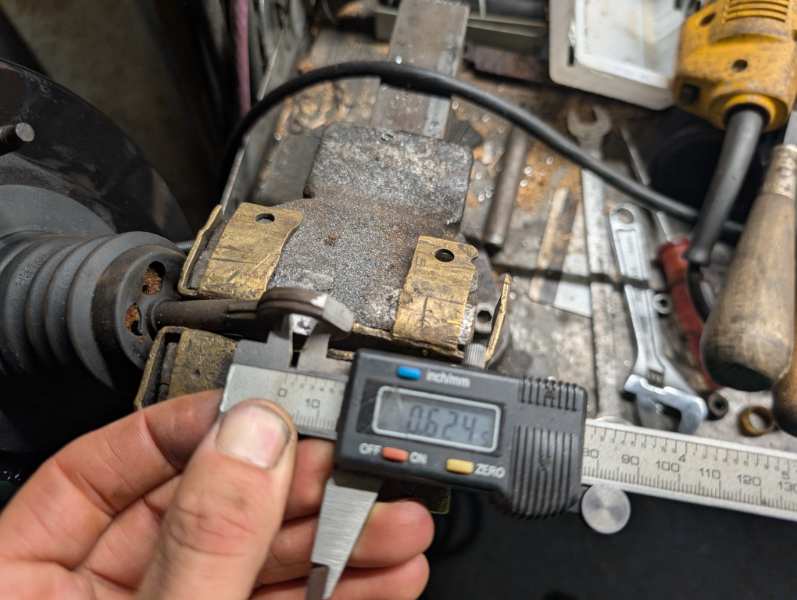
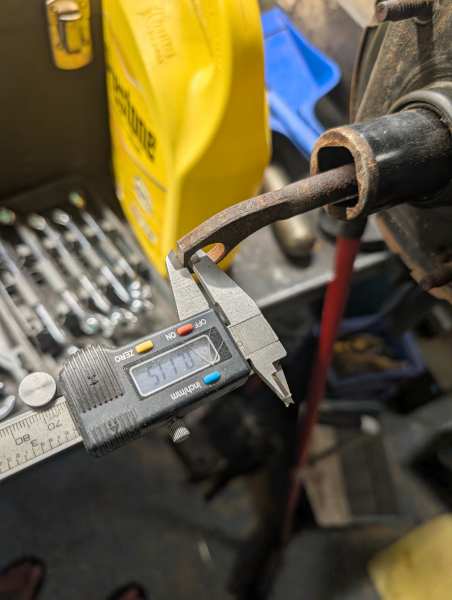
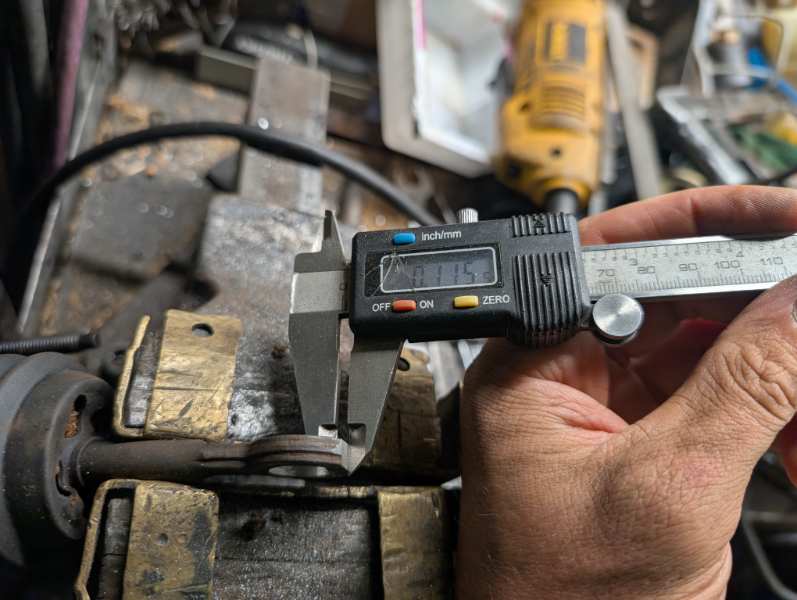
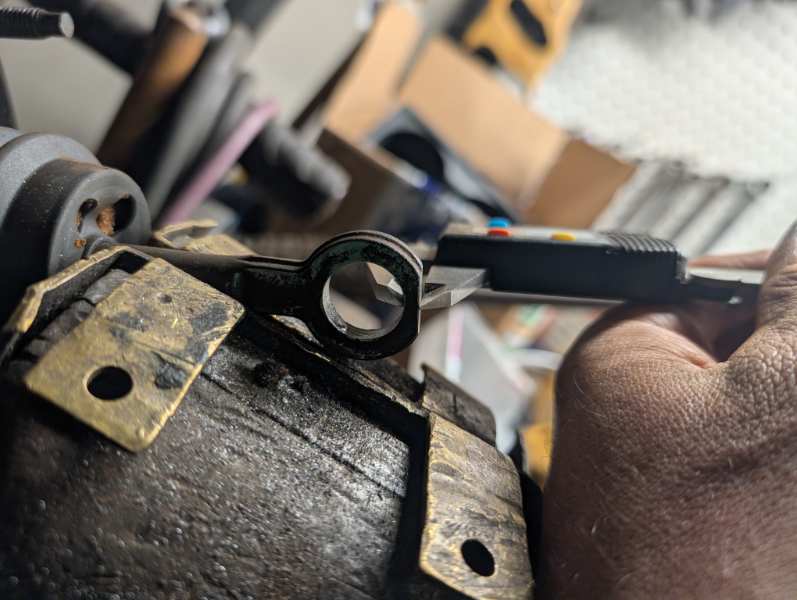
Brakes I had 2 major brake issues that came up at the same time, so I went to the junkyard, loaded up on parts and tore into it earlier this week. Good excuse to upgrade. My booster was leaking (drawing air through the pedal side), and the combination switch ( proportioning valve looking gizmo) was also leaking a lot of brake fluid THROUGH the plastic threads for the switch. I initially was going to simply replace the o-rings in the combo valve, but couldn't get any in the correct material on island without waiting for (possibly) another month. The hydraulics store I went to checked the o-ring sizes off a chart (they didn't actually measure them) but said they were the following sizes: Additionally, they MUST BE EPDM. Not Buna, Viton, etc. Take those sizes listed above with a BIG grain of salt as the girl behind the counter had NO idea what EPDM was, which surprised me seeing all of the seals / o-rings etc that they DID have. Anyways, since they didn't have the right seals, I instead bought a dual diaphragm booster from a 2000 WJ Grand Cherokee (this one was a 4.0 with ABS, don't know if it makes a difference). I also used the master cylinder from the WJ, however got a proportioning valve from a late model XJ (2000??). I removed my stock, load sensitive proportioning valve, and removed the 'return line' that goes into the nose of the stock combination valve. There are two modifications you have to do to make the stock brake lever/brake light switch work with the WJ booster, which is to drill the booster pushrod out to 5/8", and a flat needs to be filed on the end of the pushrod to make the light switch work. The distance from the EDGE of the 5/8" hole to the flat is 0.115" I know some folks grind this, but I would caution against grinding as some of those same people took too much off, or said their lights still didn't work (again, either uneven, too much removed, too little removed etc). It took me AT MOST 5mins to file it flat by hand. The XJ proportioning valve bracket will fit on the WJ master cylinder if the holes are cut into slots: The booster hole pattern on the XJ is SLIGHTLY different from the WJ (MJ=3-3/8" WJ is probably ) however the fact that the WJ booster has smaller studs (WJ-M8 vs MJ-3/8") means the studs on the new booster still slide through through the stock firewall holes. The pinch seam above the booster AND to the sides need to be massaged to clear the WJ booster. I over massaged the passenger's side initially. Oops. At first, the master cylinder, which is pretty tall looks like it will hit the hood, but it does not. I believe the WJ push rod is ~1/8"-3/16" longer that the MJ pushrod, which combined with the brake lever mechanical advantage, makes the pedal sit a bit higher than stock (~3/4" higher than the clutch pedal?). Not too bad, but not level with the clutch pedal like I'd have expected. Some washers or a spacer between the booster and the firewall would fix it. I may fix it later; I'll see if it bugs me much driving. In summary, the brakes work GREAT. Way better than the stock, correctly bled setup. The fronts lock up before the rear, and it feels well sorted out. (And I don't have do to that crazy MJ bleeding procedure ever again!!!)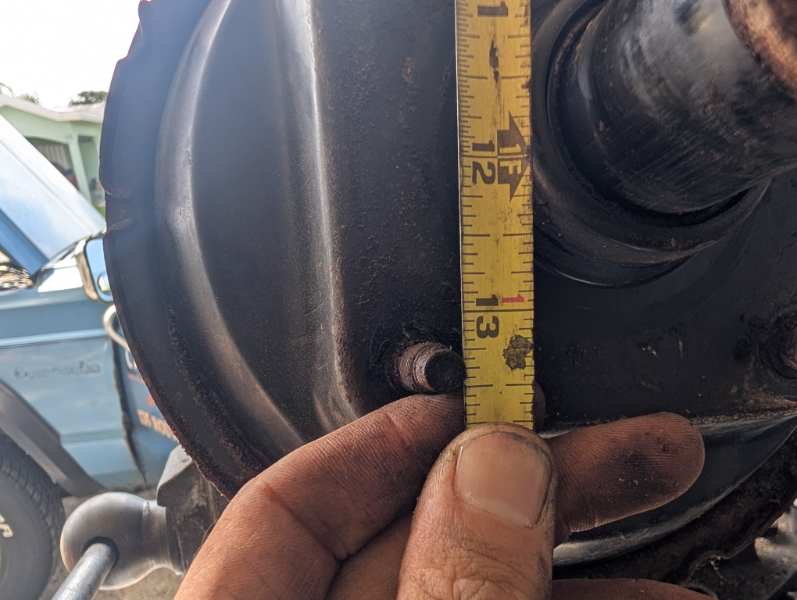
-
I'm interested to hear what sizes or dimensions someone comes up with for replacements, mine has started leaking out of the switch port, which can only mean the orings are shot somewhere. I'd like to get them on order well in advance of rebuilding it, as it's my daily driver and the orings are likely to take a few weeks to come in.
-
Carbon Canister Confusion
Yellowoctupus replied to Yellowoctupus's topic in MJ Tech: Modification and Repairs
Ok, gotta love this 80's seat of your pants style documentation! Thanks for the explanation. I have mine tied into a solenoid operated valve on my swap engine, but the Chevy has both a Vapor Canister PURGE Solenoid Valve AND a Vapor Canister VENT Solenoid Valve. I'll have to sort out the GM side of things as I have the canister PURGE valve hooked up, but no canister VENT solenoid valve at the moment.