.png.80cc04448f6f3893bcd8d9f0db3b1f66.png)
Greentoy
-
Posts
67 -
Joined
-
Last visited
Content Type
Profiles
Forums
Gallery
Everything posted by Greentoy
-
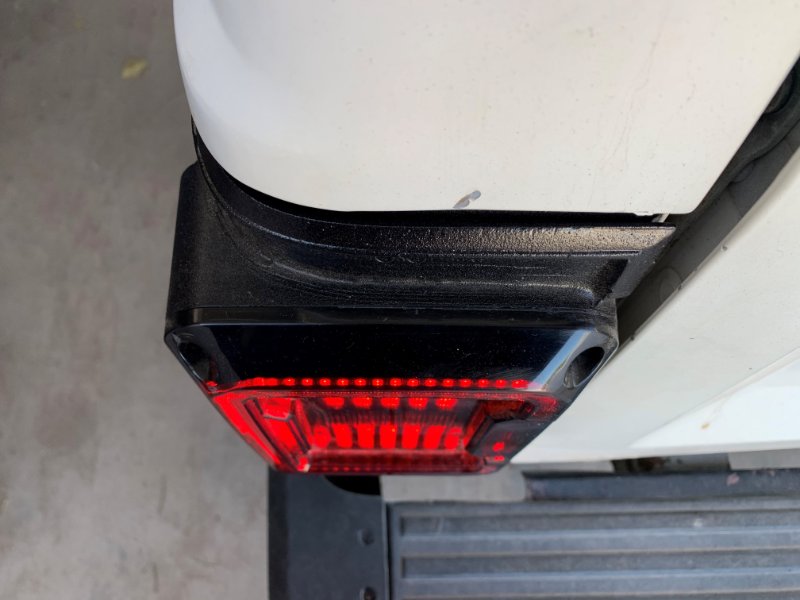
Coolwind57, That's pretty much correct. The mounting tab on the back of the watertight wrangler lenses matched up perfectly with part of the rear housing allowing a small bolt and locknut to be used to fasten it securely. I used a black adhesive caulk (Flex seal) to fill the small gaps in the cutout, then taped off the new lenses and shot the whole thing with spray bedliner to match the texture on both pieces while adding durability. I wish I had taken pics or video during the process, but the fact is that even I am amazed at how well they turned out.
-
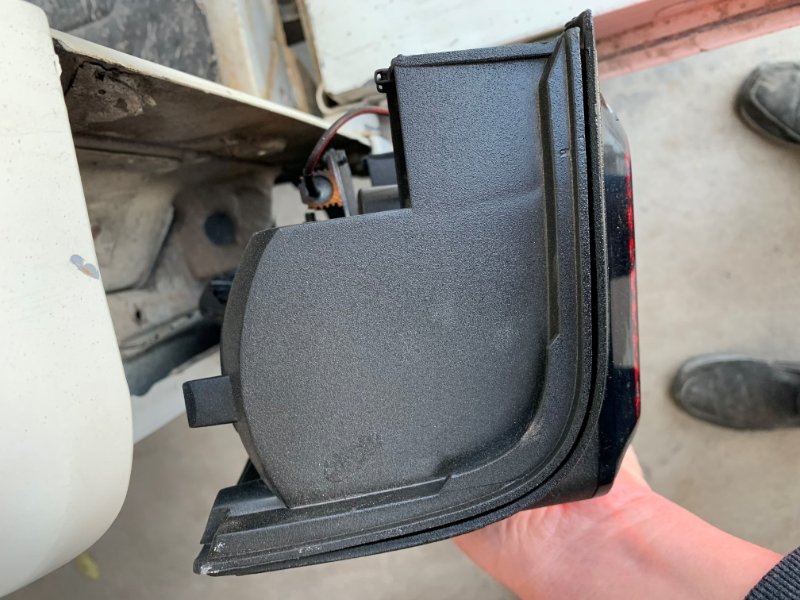
Coolwind57, I used the original cracked tail lamp assemblies as a sort of adapter for the wrangler lights. I did not cut any sheet metal and retained the original mounting screws so I could easily go back to oem later if desired. Sent from my iPhone using Tapatalk
-
.thumb.png.510e6c40fdd269fd1684292718cf94b9.png)
Let’s discuss taillights
Greentoy replied to ghetdjc320's topic in MJ Tech: Modification and Repairs
KoopaKid, Yeah, mine were both broken and covered in tape when I got the truck, so I didn't have anything to lose. -
Yeah, I was starting to get a bit frustrated this week. Now I can move forward with other stuff. :)
-
I didn't think to take a photo of the back of the cluster. I should have. We are always learning, as long as we are willing to learn I suppose.
-
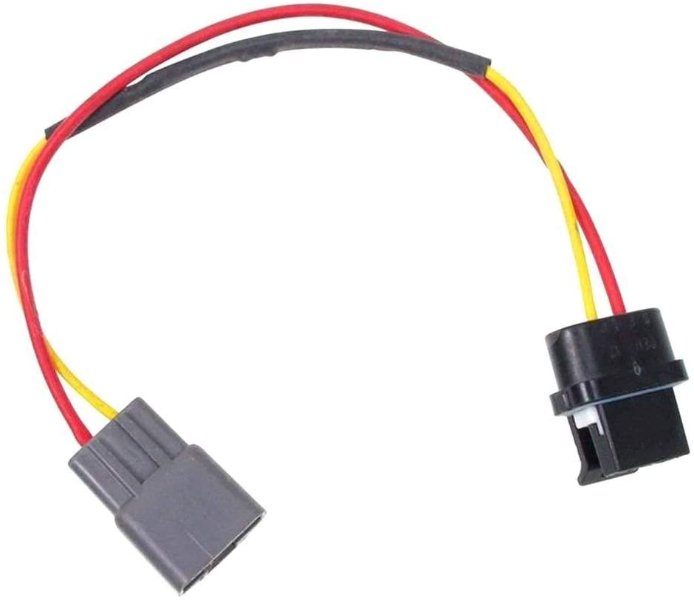
This is the part you need on the yellow wire. You will need to cut out the yellow wire, crimp the side that has the black connector to the tan wire and the other side to an ignition 12v circuit ( I used the diagnostic link input wire)
-
Ok, so today I got the new alternator installed and still no charging I wanted to explain what I figured out to possibly save someone else the trouble in the future. I figured that I needed to go back to the cluster swap again because that's when it started acting up. Everything I read online as well (as everything I've been told on the forums) is that the Tan wire dead ends at the cluster with gauges and is only used on the cluster with dummy light. The yellow wire did not change and tested good at alternator pigtail. I pulled the cluster again and inspected it more closely where the tan wire goes in at the back. Turns out that the tan wire goes into a diode built in to the cluster assembly that has an ignition power on the other side. This diode takes the place of the dummy light circuit and acts as an exciter to the charging circuit in the alternator. It is required for the alternator to charge. The tan wire does NOT dead end at the cluster as the diagrams show. Rather than disassembling the cluster which can be done without that much trouble, I opted to install a new diode inline between the tan wire in the harness and the ignition feed that runs in to the diagnostic connector under the hood since they are right next to each other. I ran down to the parts store and picked up a Standard connector adapter(part #S792) to use the diode from it (old chevy style). Crimped and shrink wrapped all connections, and now the alternator charges fine. I think I'll just keep the new alternator installed and keep my old one as a backup. Now that we are charging again, I can resume my cruise install and move on to the A/C system before spring.
-
I am kind of surprised that no parts store in my city of 1 million people had the alt in stock (new or reman)
-
Alt tests good on bench (O'Reilly's) but not on truck. I was trying to figure out what terminals they use for testing, but no one seems to know. I do have another alt on the way just in case.
-
Yes, that's what's weird since most GM systems require an exciter signal from the Lamp wire, but the diagram shows a dead end on the tan wire on the gauge cluster setup while utilizing the traditional exciter setup on the idiot light cluster.
-
I have the electrical manual. Alternator is definitely not producing while on the truck.
-
That's what I figured. Continuity is good at the fusible link A. I checked that before my original post and again this morning.
-
I apologize for my stupid questions in advance. I am new to Renix jeeps. Most Gm CS130 alternators use the PLFS connector where only the S (sense) wire and the L (lamp) wire are used but it seems the Renix system uses only the L (lamp) connection (tan wire) and the F (field) connection (Yellow wire on mine.
-
Yes I have.
-
Yes, verified at the battery.
-
Some additional information if it helps. The alternator worked fine before the cluster swap. The alternator shows good when tested on the bench at O'Reilly's. I put a diode in between a switched 12v on the tan wire as some have suggested in other forums and still no charging. Yellow wire does have 12v ignition power. I do understand from the 88 electrical manual that the tan wire should not be needed with the gauge pack, but it seems weird that mine just quit after the swap. I ordered a new alternator just in case and it will be in tomorrow. Maybe the good test at O'Reilly's was false?
-
Jdog, Great idea, the truck is an 88 with a 2.5. Sent from my iPhone using Tapatalk
-
Good afternoon All, Ok, so I just swapped my cluster to get rid of the dummy lights last week and I realized today that my battery is not charging anymore. I have 12v (ign on) at the sense (yellow wire) and good continuity from the output wire to the battery. My question is on the small brown wire on the alternator that used to go to the light. Is this wire an exciter wire like the old gm ones or only for the light? I have no voltage reading on that wire now after the swap (key on or off). I know it went to the negative side of the charge light before, but the schematics for the gauge cluster doesn’t show anything for that wire now. Thoughts? Should a setup an exciter wire with diode for it? Maybe alternator just quit, but it seems weird to have occurred right after swap.
-
Yeah, that was the other speed bump.
-
I watched several videos about this too including this one. HaHa. My problem was that even my bulb housing behind the bulbs was damaged on my oem lenses, so I would have to make both halves of the clamshell.
-
Yes, a sheet metal adapter that curved with the bed lines would be awesome. I saw a few of these with the trailer lights in them, but didn't really care for the final product
-
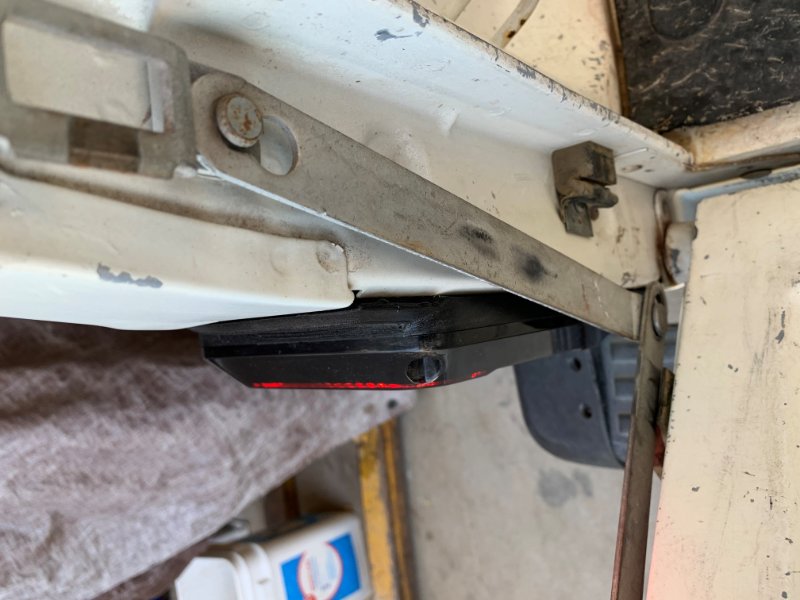
Dzimm, I took some photos from top looking down and the reality is that with the proper adapter you could bring even the JK light that I used even deeper into the available space in the truck bed. I actually chose to leave mine out a bit to have that side marker stick out a bit from the body like the gladiator tail lights do. I looked at a bunch of different tail light options before choosing the JK lights for my experiment.
-
MercManche, I was thinking that sheet metal or a good quality 3d printed plastic adapter bracket would look great!
-
Tex06, I figured that I had nothing to lose by trying, and I ended up happier than I thought with the results. :)
-
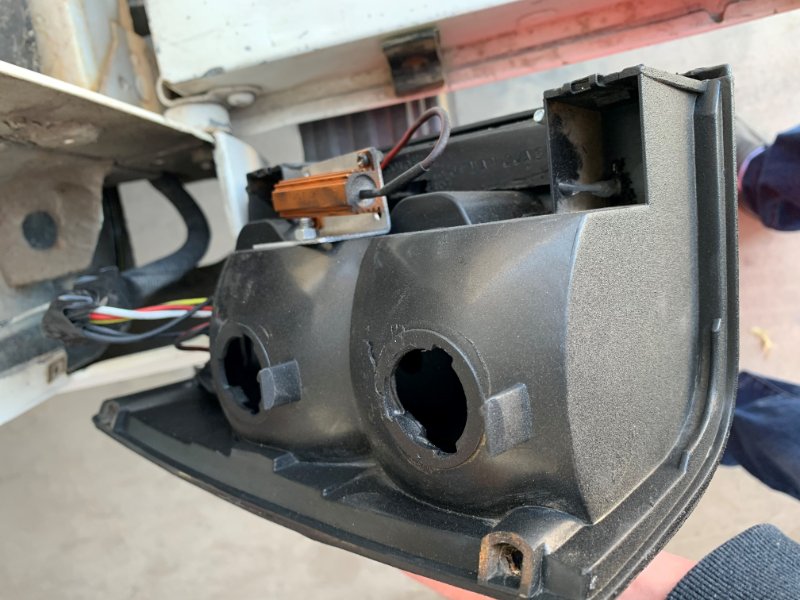
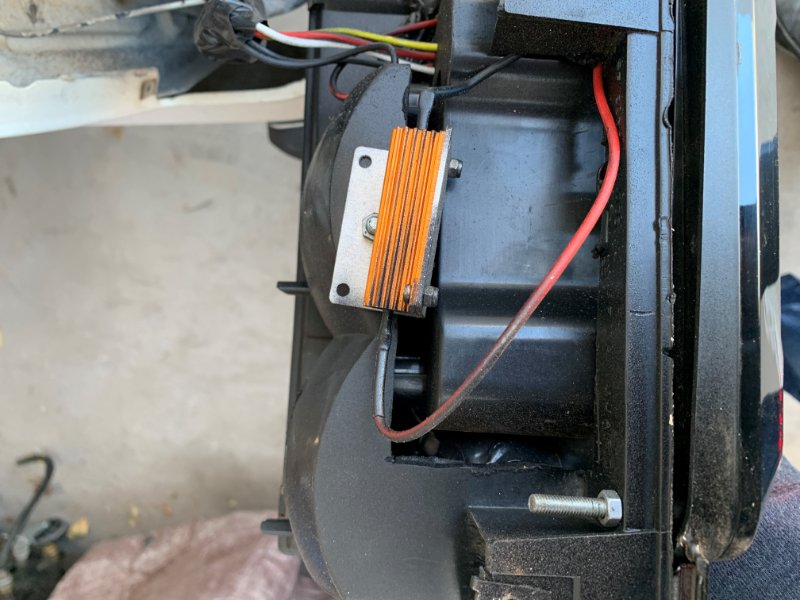
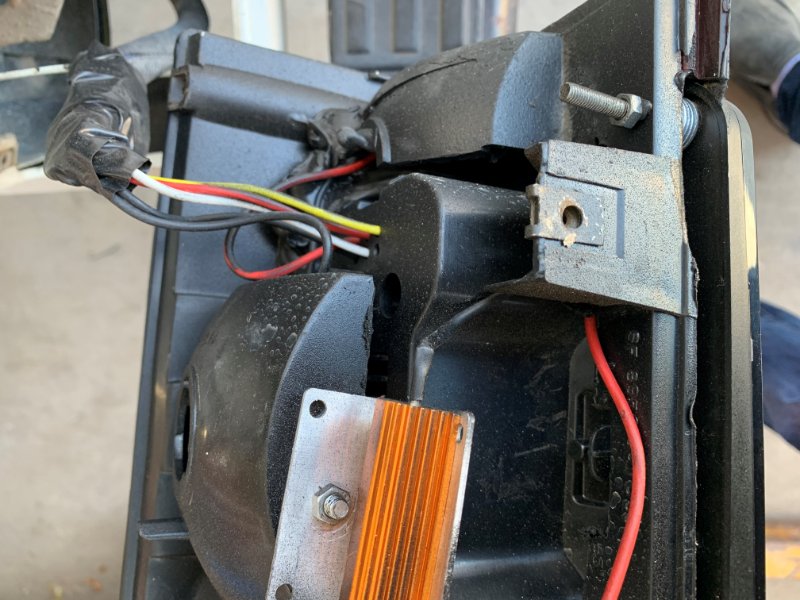
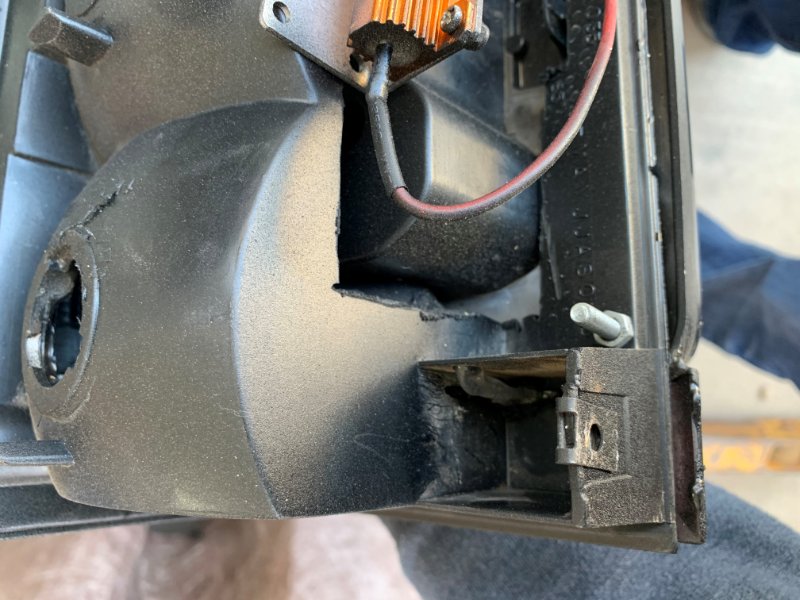
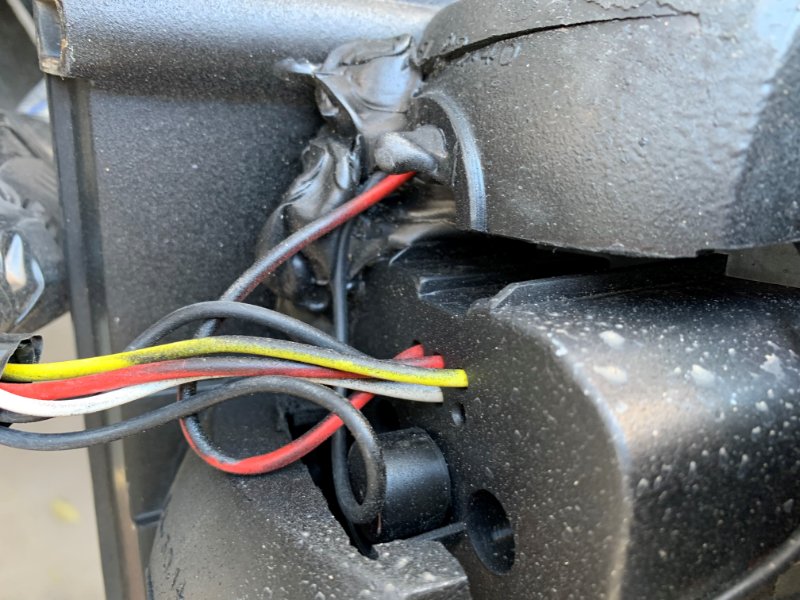
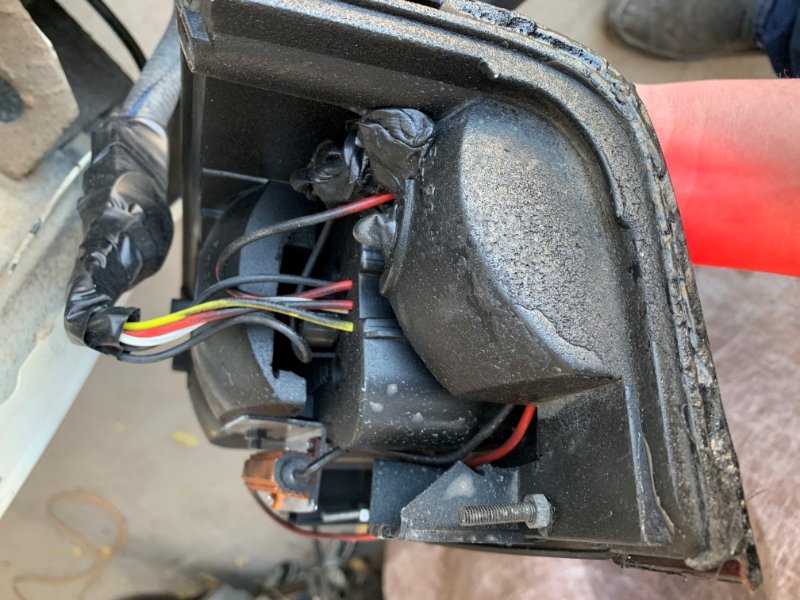
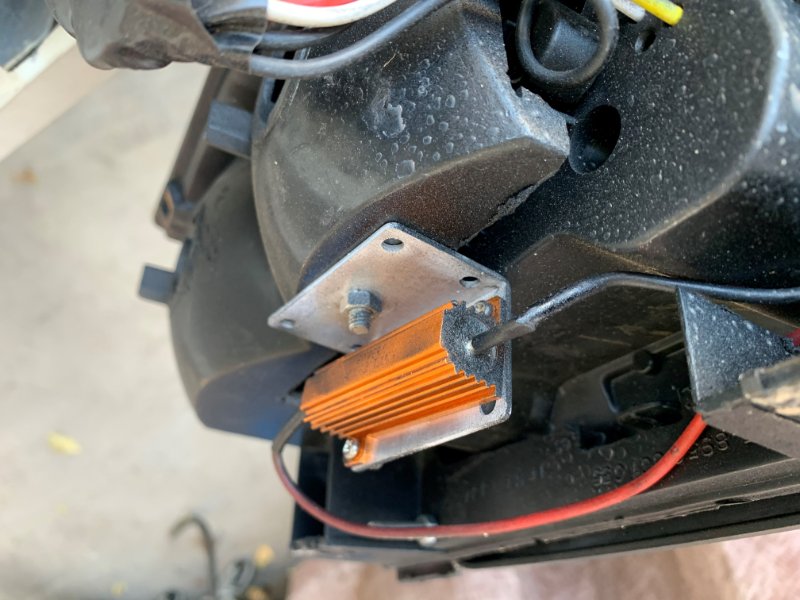
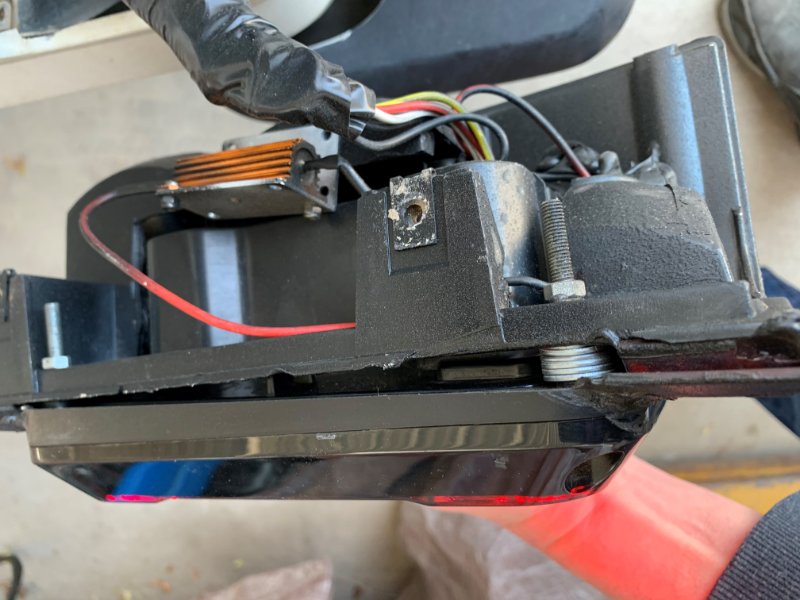
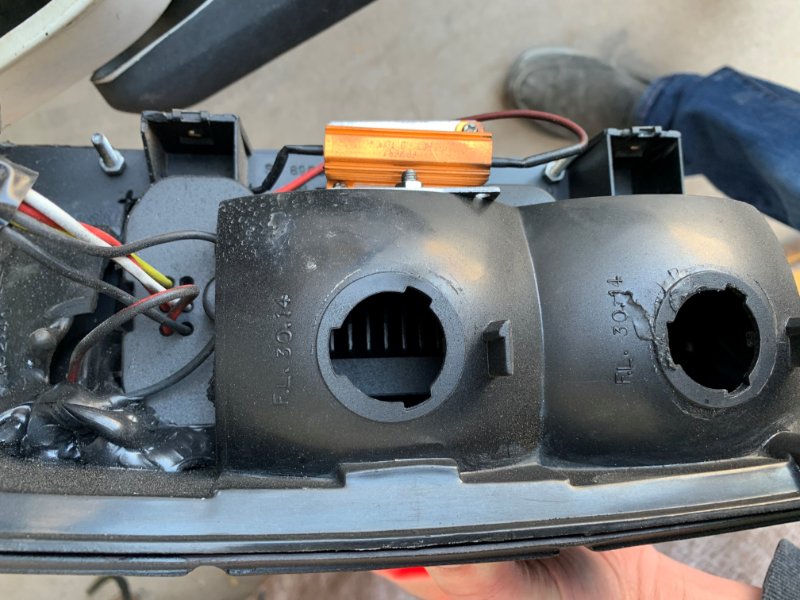
Big Dan, Sorry it took a bit with the holidays to get back online. Here are some additional photos with the tail light assembly off the truck. In hindsight, I should have taken pics all through the process. I guess it was all just an experiment for me from the start. Hopefully it shows clearly how I mounted everything as well as the cuts that had to be made to the original lens (the JK light is waterproof already, so I wasn't worried about that). You will notice that I had to use some washers to adjust the slightly different angles from the JK body on 1 of the 2 outside mounting screws. The longer screw in the back that I mounted the resistor to is the 3rd mounting point of the JK lens as well.