

USAFAGumby
-
Posts
237 -
Joined
-
Last visited
Content Type
Profiles
Forums
Gallery
Everything posted by USAFAGumby
-
Finally installed the new comanche diesel gas tank. I used the diesel tank because it does not have baffles inside which provides clearance for the use of a stock intank XJ fuel pump. Next waiting on funds for new springs! If you want to buy the old tank or fuel sender unit off me let me know, the tank did not leak and the unit was working fine last spring when I pulled them.
-
Bed back on today! Body lined up really well and the wheel wells didn't have any major warping which I am very happy about. I am a bit worried about the pushpins I used to hold the shims to the frame. The bed is resting on them instead of the shims so they may shift with time. I'll just keep tightening down I guess. Very excited with how the rear is coming along. Starting to look like a truck again!!
-
I'm trying to keep the blue paint you see in the pictures, It's nothing specific just a blue that MAACO had at the time. If it gets too damaged during this rebuild I may repaint it but for now it is fine.
-
So long since I have updated but a lot of work has been done. First I cut and welded in some new wheel wells. They are aligned the best I could but I suspect the bed sides will be crooked when I finally get it back on the truck. More fender body work to follow for certain. I was trying to save as much of the body paint as possible. Still worried about mounting flares. Then i sent it off to be sand blasted. They sprayed one line onto the paint on the side of the bed, but otherwise I am very happy with the results. Found some more pin holes that I welded closed. The metal may be a little thin but it isn't a critical spot on the bed so I think it is fine Finally the big day! First metal prep then 2 coats of POR15 on every surface I could get a brush on. I also prepped the cab side of the bed and POR15 that just like the back of the cab to get rid of all the previous red on the truck. I even got down in the tail light holes. After that was done I used Eastwood's Internal Frame Coating with the 360deg wand to get into the frame rails of both the truck and the bed as well as under the wheel wells. I used 4 bottles total so several coats. I'm pretty sure rust will no longer be a problem for me! In a few days it will go back onto the frame with all new hardware! Hopefully it looks good and all goes well. Next step is springs and rear axle!
-
Just ran into the same problem myself. They are bed spacers. I'm going to use this set. https://www.amazon.com/Deluxe-144-Piece-Body-Shim-Assortment/dp/B00YN6XZAE/ref=sr_1_1?ie=UTF8&qid=1529531084&sr=8-1&keywords=body+shim+kit&dpID=51bbAdsE86L&preST=_SY300_QL70_&dpSrc=srch
-
Anyone know where to find some new bed shims or what they are called? Ive looked for bed pads and spacers too and got nothing. If i can't find any new ones i might have to make some i guess. Thanks! Sent from my SM-G930V using Tapatalk
-
Very scary but necessary day today. Plan is to make my own wheel wells and make them smooth so even if there is rubbing it is safe. Also plan on going with the Notch Customs flares as I won't have to paint the bed sides since the flares go all the way up to the body line. POR15 on the bottom of the bed next after new custom wheel wells!!
-
October 2017 - USAFAGumby's 1989 Comanche 4x4
USAFAGumby replied to Automan2164's topic in Comanche of the Month (MJOTM)
They are bushwhacker flats for a 2door cherokee. Fronts fit perfect but the rears leave a bit of a gap near the body line. Take your time and line them up better than I did and they will look great! Sent from my SM-G930V using Tapatalk -
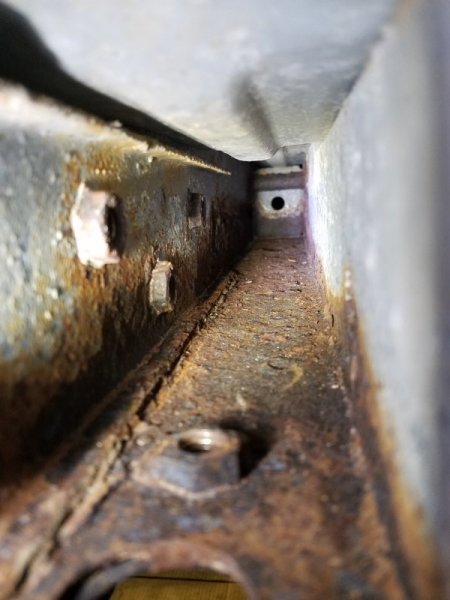
Finished grinding the frame and bought a welder. Made a quick welding cart for practice and pretty happy with how it turned out! Didn't bother with the degreaser because I ground away so much crap. Used about a quart or two of metal prep and rinsed it off. The directions aren't super specific about how to apply it but I think the idea is to make sure any loose residue is washed off. Finally POR15 day! Used maybe 1 quart of paint overall for 2 coats so I would not recommend buying the 2 gallons that I bought but I'm super happy with the results. It dries almost paint gun smooth even though I brushed it on which I think is due to the curing process. Hopefully I did good enough prep work and I will have a solid platform for years! That last picture was about the worst of the rust which I also couldn't really reach an angle grinder in there or much wirebrush. The POR15 looks like it adhered well with all the prep I did and I believe two coats is enough. Next step is the bottom of the bed which needs significant rust repair, wish me luck
-
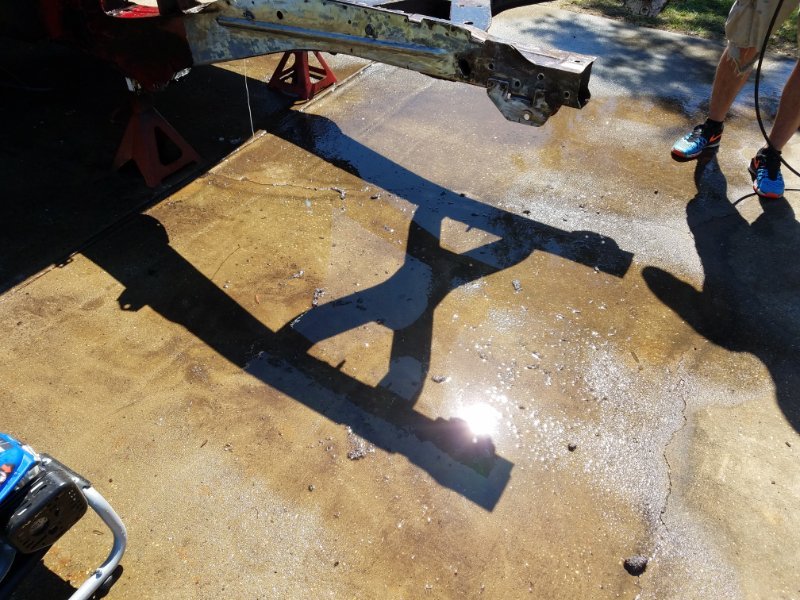
Bought a pressure washer and cleaned out the frame. Evicted one old mouse nest and pounds of dirt and rust. Still some in there but I'm happy enough to move onto my next step. Next plan is to finish grinding down the rust to a relatively smooth surface. Then I'm going to weld some of the joints, suspension mounts and such for reinforcement. Not sure if i want to get the T&M frame stiffeners or not. Finally I'm getting eastwoods rust inhibitor spray with the frame rail nossle to get deep into the frame. Then POR15 everything I can reach. Any tips are appreciated! Sent from my SM-G930V using Tapatalk
-
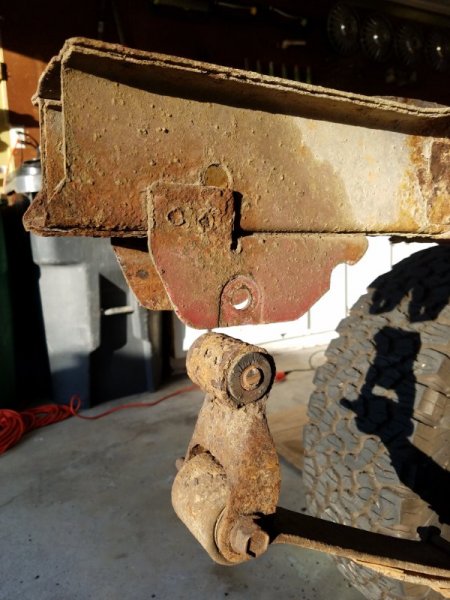
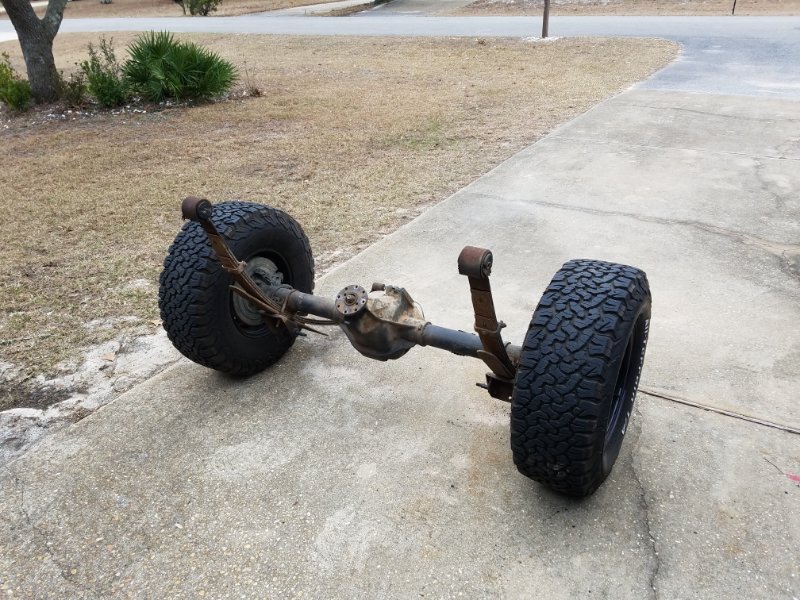
Major progress. Had to cut all the leaf bolts because they had seized to the bushing sleeves. Next up is prepping the frame for paint! Sent from my SM-G930V using Tapatalk
-
A box truck?! That's commitment, and we'll done being able to make all that happen in a parking lot! Another work day is done. Gas tank, e.brake, exhaust, driveshaft, and brake lines all gone. Next step is probably gonna be rolling into driveway and prepping the frame for paint. Sent from my SM-G930V using Tapatalk

-
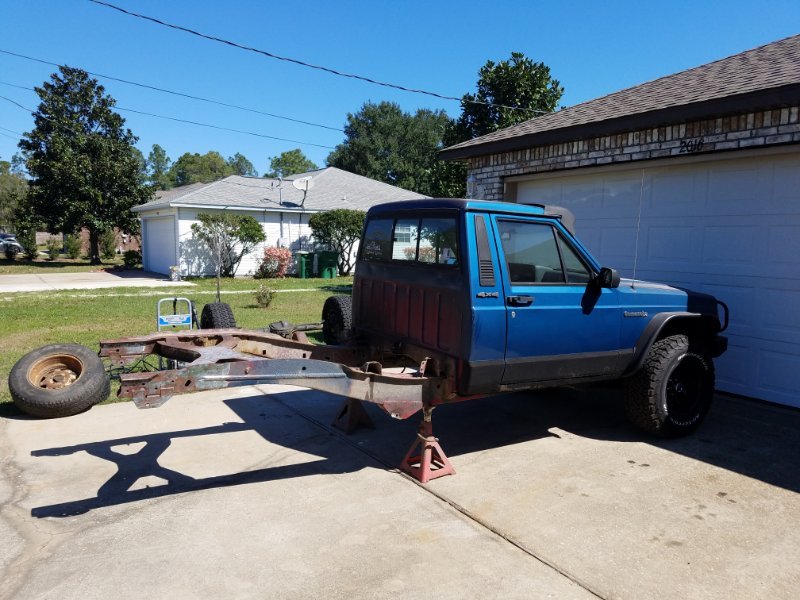
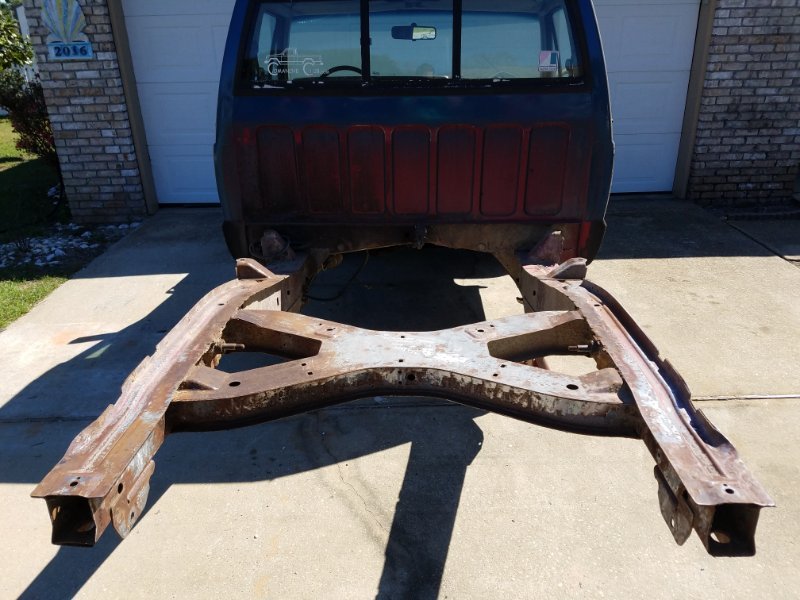
Finally got the truck in the garage and not a day later out comes the bed! Not pictured but the bumper brackets, shocks, bump stops, and some other extra equipment is gone too. Next is gas tank, e.brake, exhaust and finally rear axle. Having my own place to work is amazing but not having tools like what was at the auto hobby shop is not amazing. Slowly building up a respectable tool collection. Ignore the wonderful Maaco paint lol Sent from my SM-G930V using Tapatalk
-
They were Ankor I think? Autozone replacements and they fit fine. Seemed pretty cheap but there is no more torque motion so I'm happy! Also thanks, I was glad it wasn't divided too. Jeep will be moving in next week most likely.
-
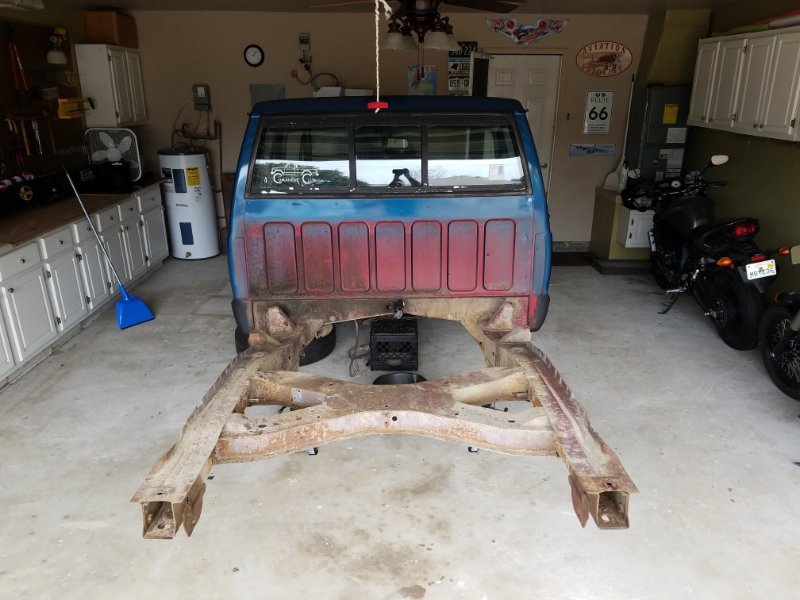
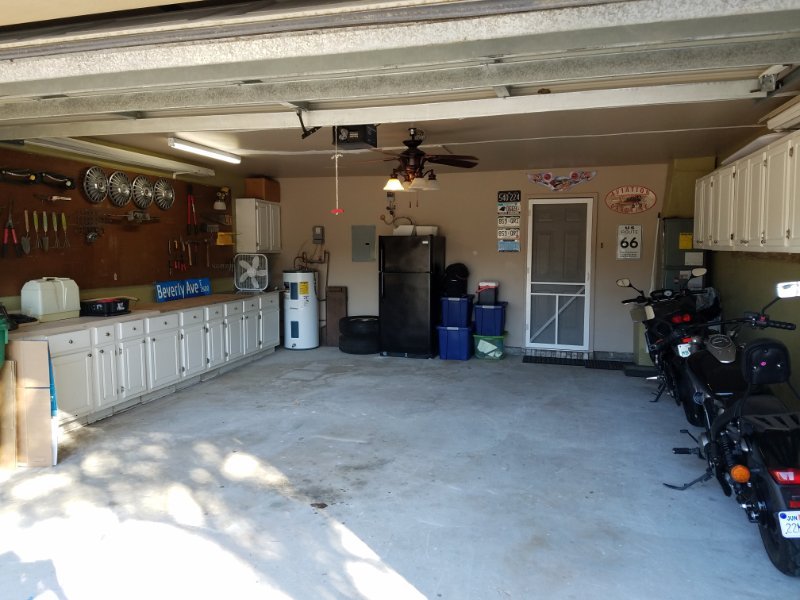
Big news! Bought a house and ensured I got a 2 car garage! Say hello to the beginning of lots of work on my truck. Can't wait to get started, finally having a place to really tear apart this truck will be very helpful. Got a 2000 Durango as a daily driver and work will commence soon! Don't mind the bikes, they are my roommates. Yamaha FZ8 and honda shadow. Ended up not taking the Jeep on the trip up to NC so no worrys with the suspension issues. Sent from my SM-G930V using Tapatalk
-
Agreed, I drove on it all this weekend and it never moved despite the shimmy so perhaps that isn't it. I couldn't feel any shake in the control arm when it was on jacks either so I'm gonna go with it. Passenger side appears normal otherwise. We'll see!? Sent from my SM-G930V using Tapatalk
-
Found the cause of my shimmy on the highway. Rounding out the lower front right control arm body mount. Causing a clunk when accelerating and decelerating. Trip back to NC for break next weekend and won't be able to fix it before then so I tightened it down and will keep an eye on it for the trip. Sent from my SM-G930V using Tapatalk
-
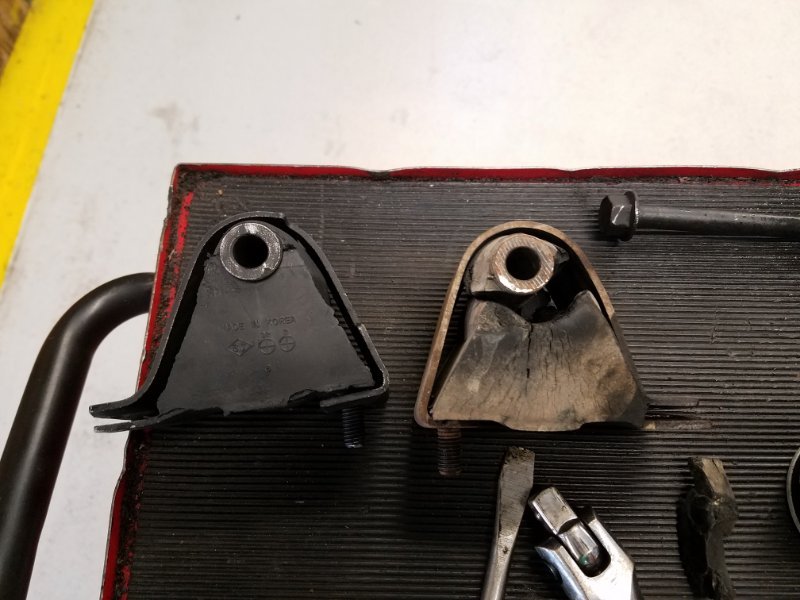
Old motor mounts both looked like this. Lots of little maintenance done in prep for another road trip. Exciting news coming soon around Christmas. Sent from my SM-G930V using Tapatalk
-
Holy cow that's incredible. Yeah the road is about 10ft from where I parked and I didn't go any further because of what I heard. What do you do for the AF?
-
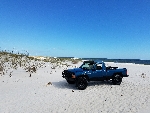
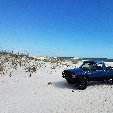
Johnson Beach on Perdido Key. There's nowhere near Pensacola I've found that lets you drive on the beach, this one I only drove out and took the pic.
-
Finally got around to cleaning up and taking a picture on the beach! Also had some spare time and finally made this diecast Comanche out of a Johnny Lightning Cherokee. Used a Dremel to cut the back off and grind down the rear seat. Super glued the rear window back on and painted it up to look like mine and tried my best to be detailed.
-
October 2017 - USAFAGumby's 1989 Comanche 4x4
USAFAGumby replied to Automan2164's topic in Comanche of the Month (MJOTM)
Thanks everyone! I should be dropping an air frame soon and moving to a more permanent location (hopefully one with a driveway and garage). Big plans in the future, thanks for keeping this site up and running -
I graduated in 2016 and thank you! I'm here for combat systems officer training and my follow on assignment is still up in the air for now.
-
THOR cowl intake installed! Looks great and sounds pretty cool. There is a quite vacuum noise like most people have pointed out, as well as a slight whistle when the throttle is open a certain percent, but when at wide open throttle under load it sounds amazing!! :rock on: Throaty kinda noise right into the cab. Time will tell if all that gets annoying. I capped off the vacuum lines from the fuel vapor canister and the smaller one from the intake. The preheat intake tube I cut down and left open. Any ideas on how to cap off that pipe? So much room for activities! I'm thinking dual battery, but I'll leave it open for awhile. Also, since I have a bored throttle body I had to order a spectre flange adapter and a different coupler. Both those combined gave me plenty of clearance along the valve cover and still room under the hood. The largest hole saw I had cut this and I ended up having the cut all the way up and down the cowling to cram the cone filter from THOR in there. It will fit! Also may have figured out what was wrong with the shaking and vibrations I was getting around 60mph. I thought maybe death wobble was coming back but now I believe the new culprit is the G2 wheel spacers I had on. Both front and rear cross threaded and broke studs in the year they were on the truck, while also causing problems with my front hub, and possible my rear bearings/diff alignment. The grinding noise continues but I believe it was damage from having these crappy wheel spacers on. Time will tell if the shaking has stopped.
-
Looks great! Really has come a long way in a year! I completely support the blue lights, paint, 97+ swap, and intake (all things I have been looking into) . :MJ 1: .