

Comanchel0ver
-
Posts
81 -
Joined
-
Last visited
Content Type
Profiles
Forums
Gallery
Everything posted by Comanchel0ver
-

Tylers Daily 4X4 Build
Comanchel0ver replied to Comanchel0ver's topic in Member Projects: Your Comanches
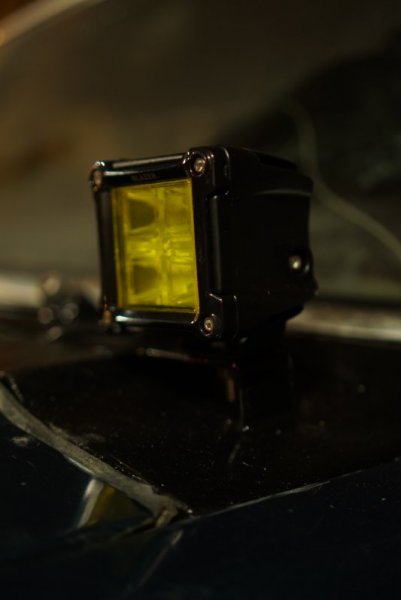
Fabbed up some quick brackets and welded them to the cab, ran the wiring through the cowl under the hood and bang! Ditch lights.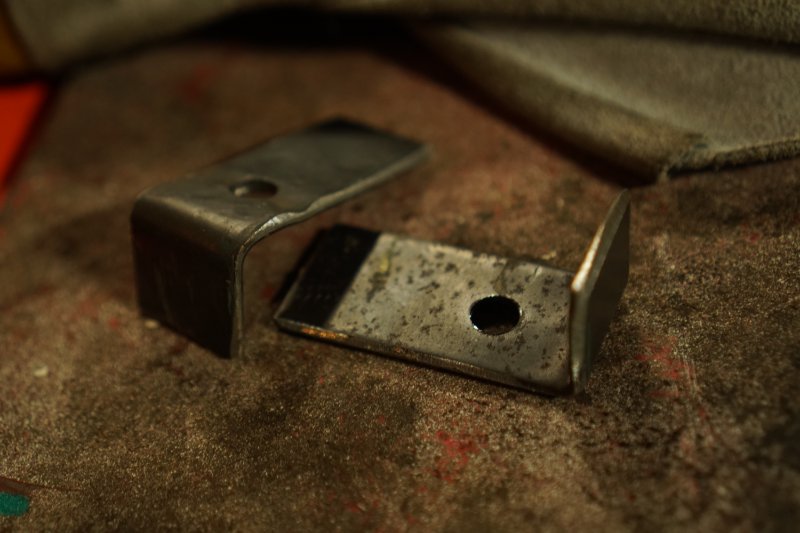

-
Tylers Daily 4X4 Build
Comanchel0ver replied to Comanchel0ver's topic in Member Projects: Your Comanches
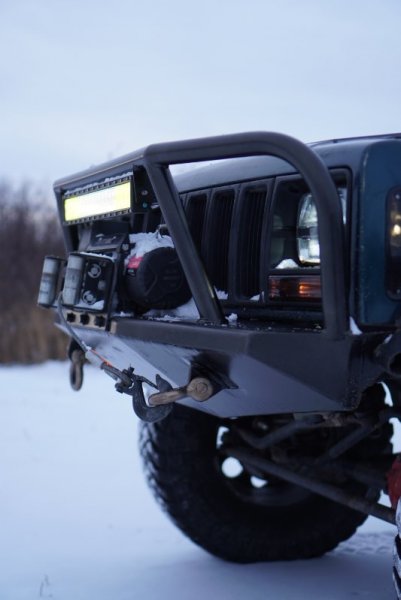
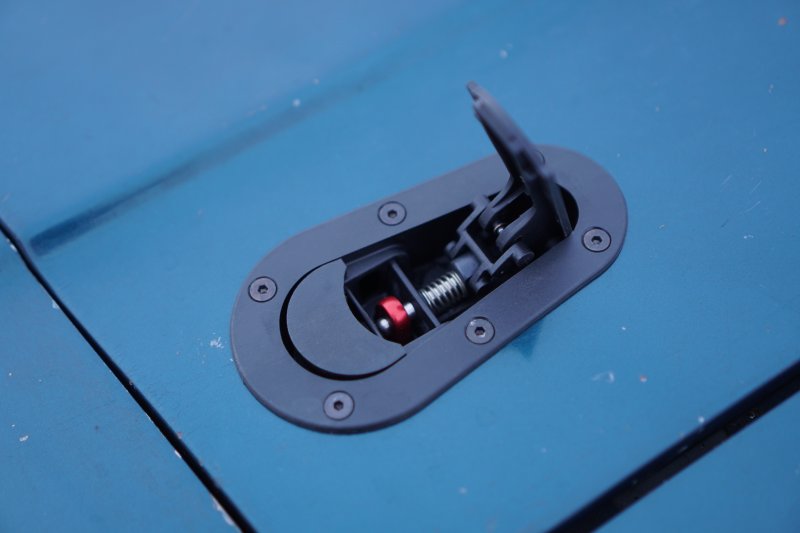
Installed a set of aerocatch hood pins. 10/10 for both looks and pain in the @$$ to install. Painted the bumper.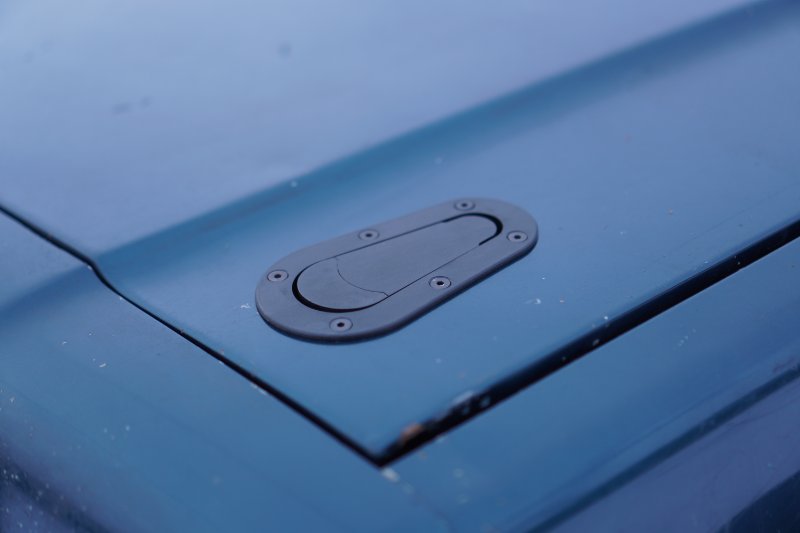
-
Tylers Daily 4X4 Build
Comanchel0ver replied to Comanchel0ver's topic in Member Projects: Your Comanches
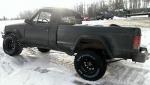
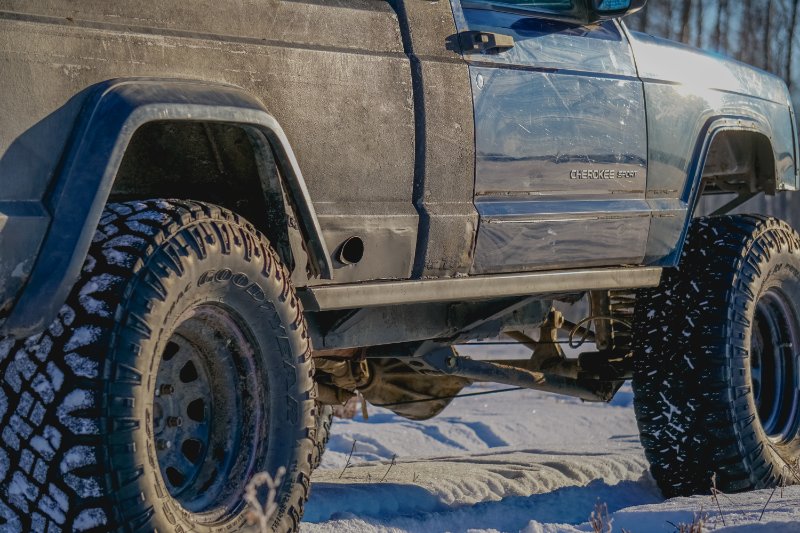
Added a bullbar, lightbar and mounted my winch to the new bumper. Put on a set of 35x12.5 Maxxis RZR MTs on aluminum rims. Wheeled it all summer long in the mountains.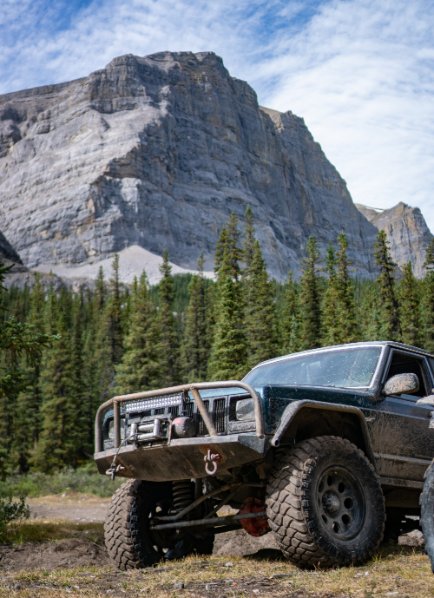
-
Tylers Daily 4X4 Build
Comanchel0ver replied to Comanchel0ver's topic in Member Projects: Your Comanches
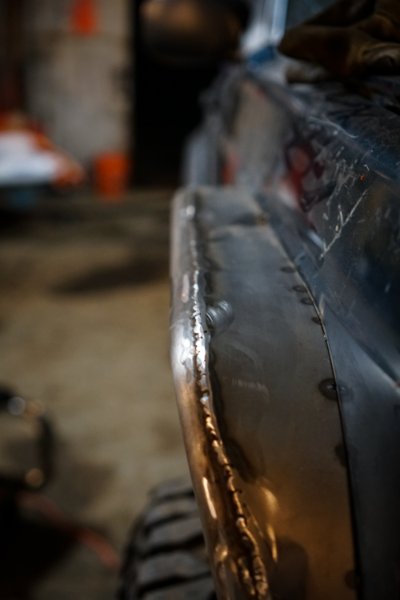
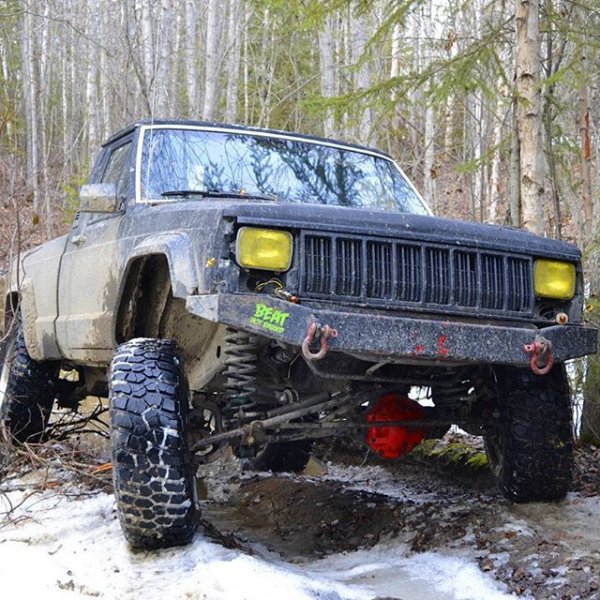
Installed a front bumper my brother fabbed up and added 1.75" .120 wall tube fenders up front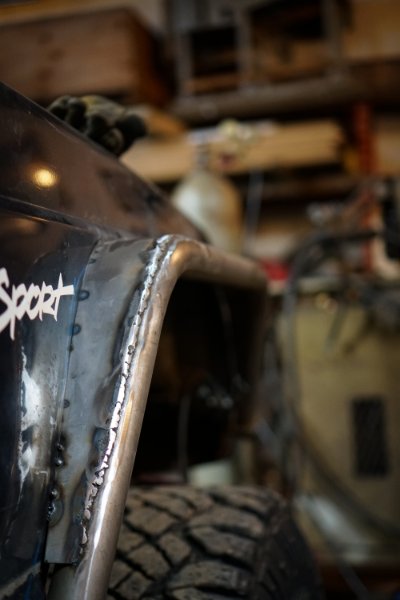
-
Tylers Daily 4X4 Build
Comanchel0ver replied to Comanchel0ver's topic in Member Projects: Your Comanches
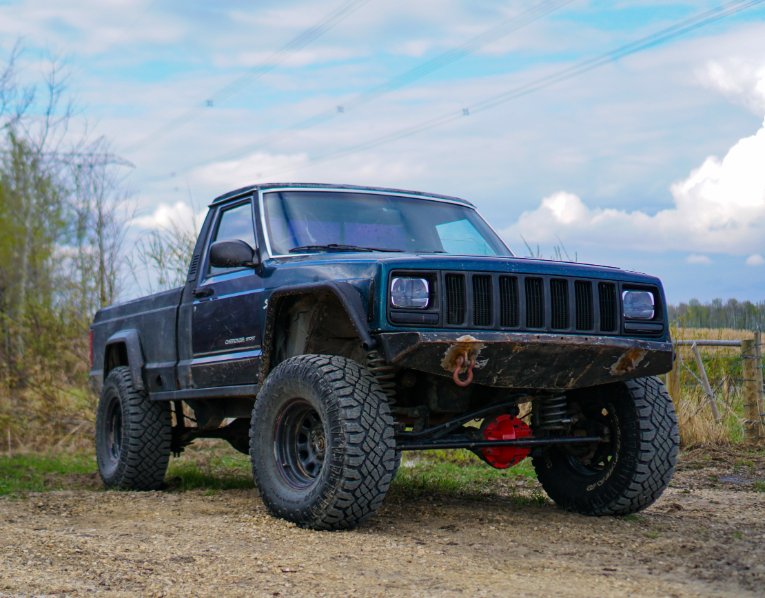
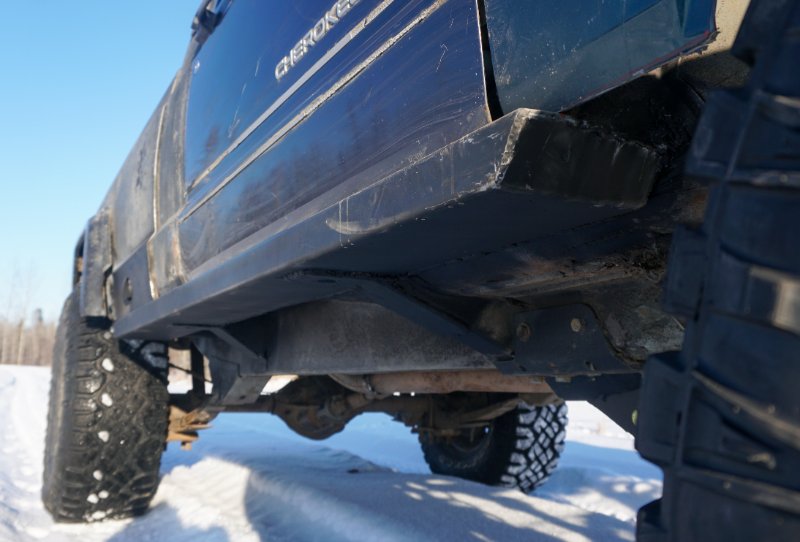
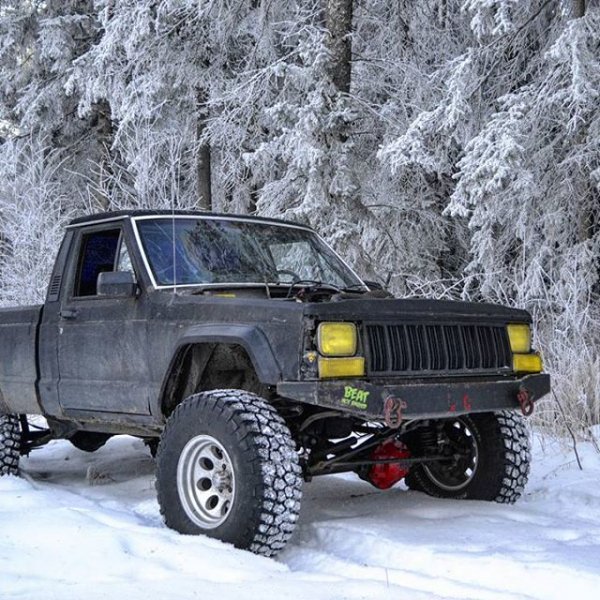
Bringing this thread back from the dead! Still have the ol girl trying to drive it more and more on the street and abuse it less. did a 98+ front clip with knockoff ebay trucklites and cheapo smoked signals/corners. cut out my rotted out rockers and welded in 2x6 .120 wall box, routed the exhaust through the rear fender.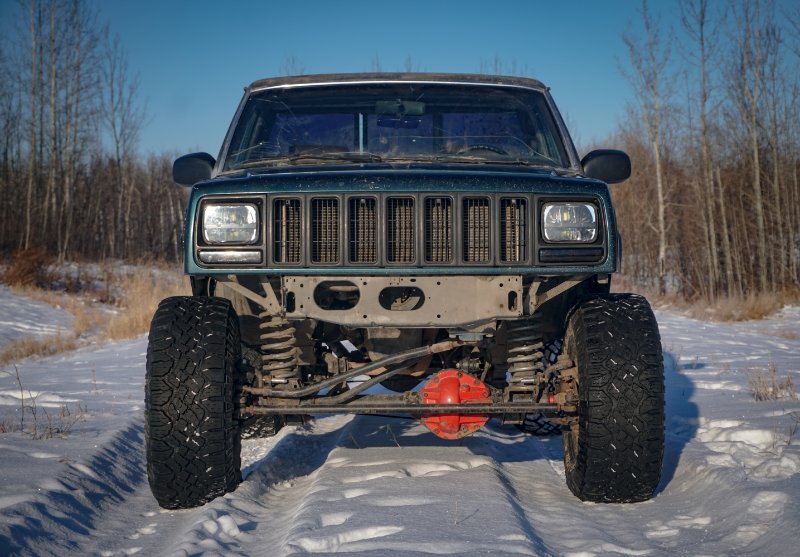
-
2 and 3 for sure
-
Tylers Daily 4X4 Build
Comanchel0ver replied to Comanchel0ver's topic in Member Projects: Your Comanches
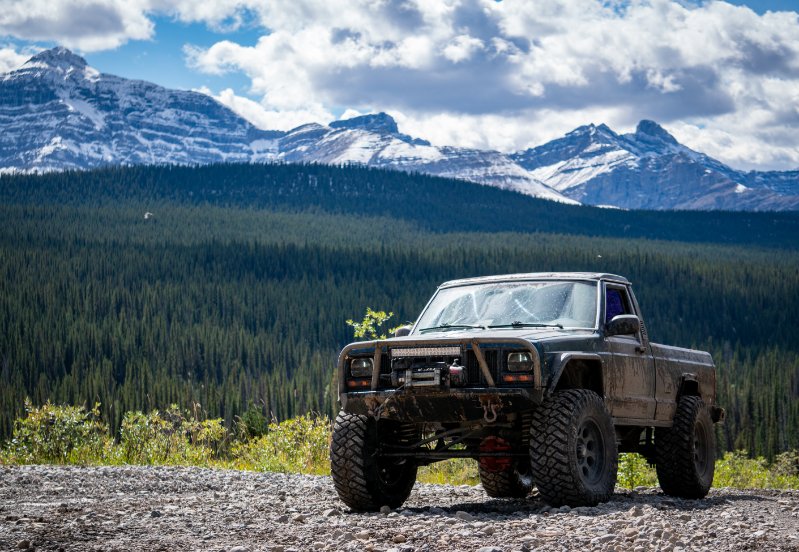
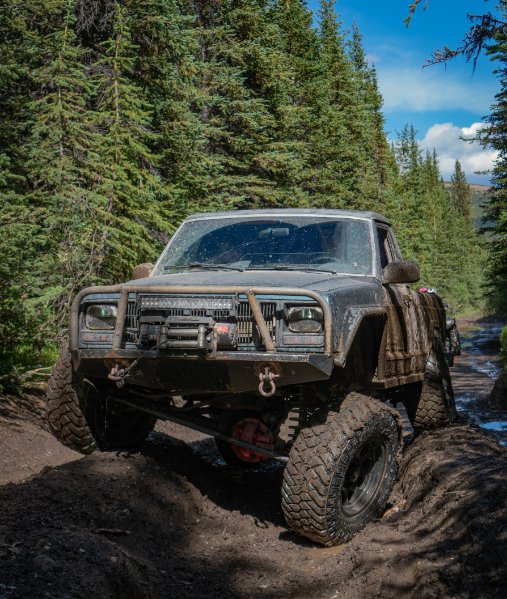
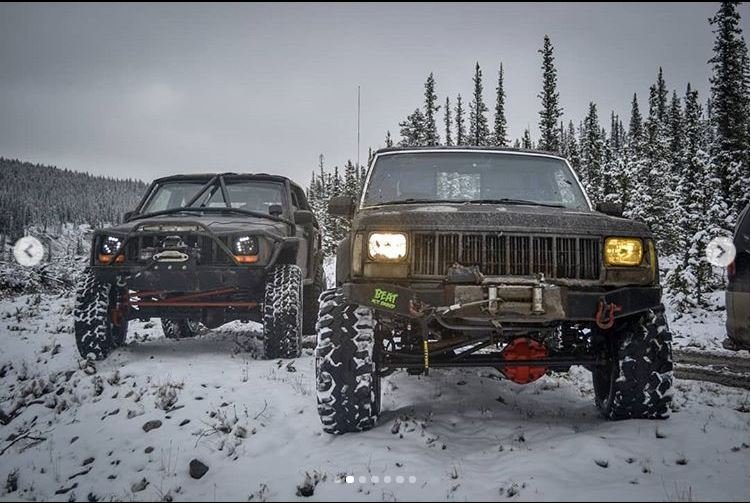
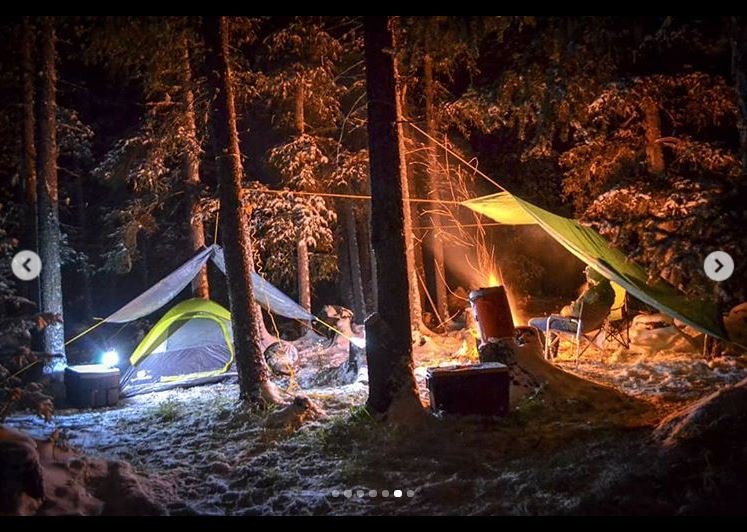
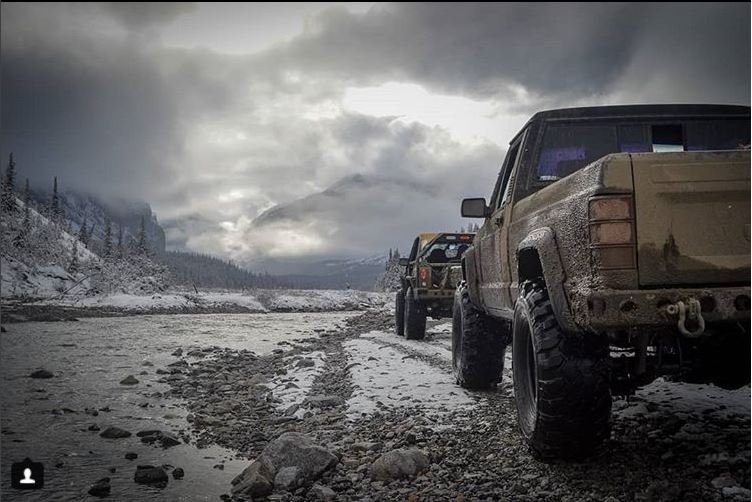
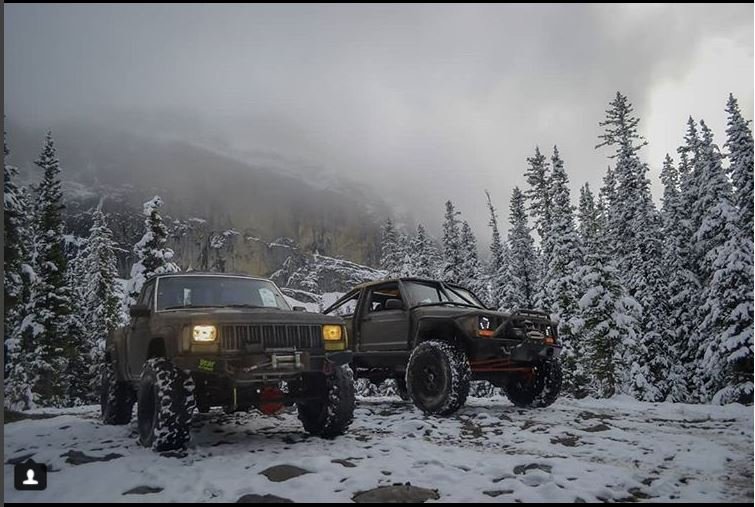
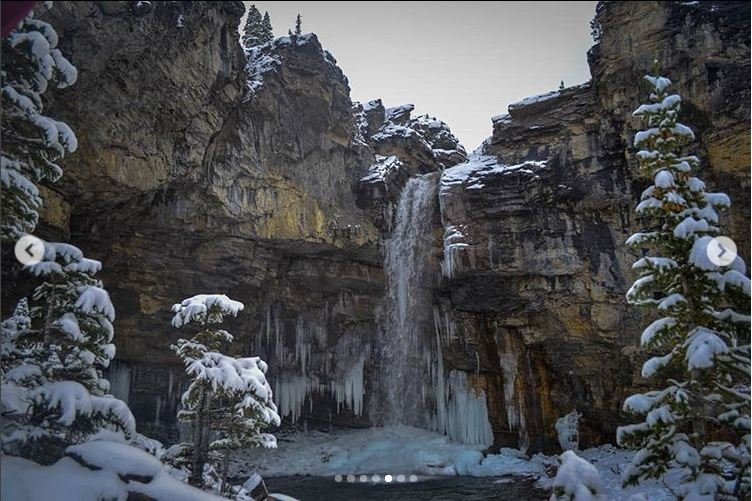
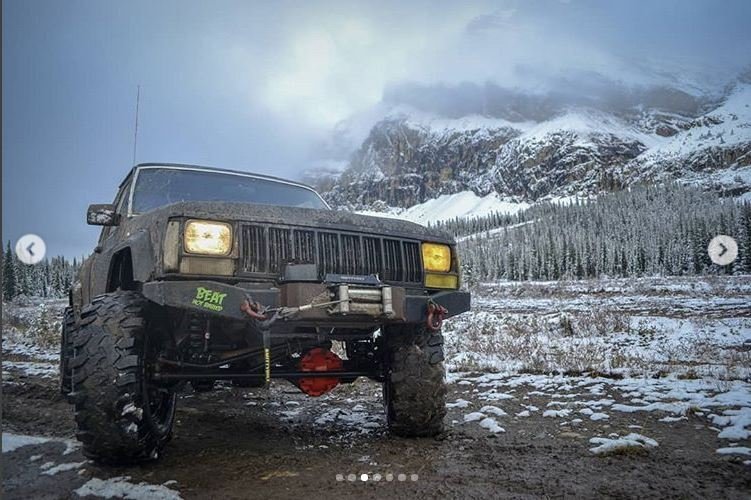
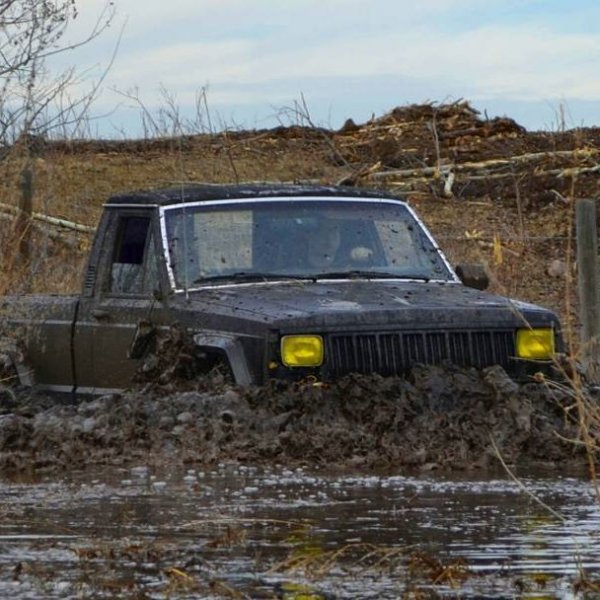
My most recent wheeling trip and the biggest one since the motor swap a year and a half ago. Ran Ruby Falls by Cadomin Alberta, about 200km highway each way then another 120km of bagged out forest service road then 50km of trail into the mountains and the falls. This much snow in September was a surprise and sure made camping a pleasure. Trail was rocky and had about 10 river crossings, i took in a bit of water into the air box but luckily the stock paper filter absorbed almost all of it. Overall terrain there wasn't anything too crazy but the snow sure made some the climbs interesting. on the way back my brothers steering box ripped off his frame but the comanche came out unscathed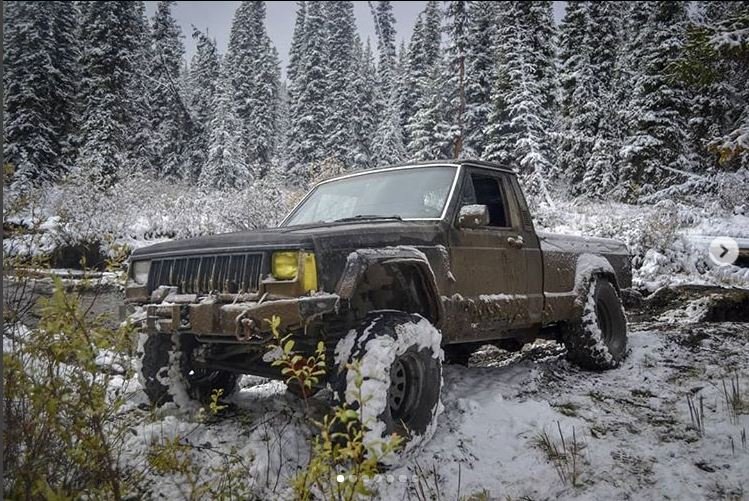
-
Tylers Daily 4X4 Build
Comanchel0ver replied to Comanchel0ver's topic in Member Projects: Your Comanches
Put some new boots on er last january 33x13.5 r15 super swamper TSL


-
Tylers Daily 4X4 Build
Comanchel0ver replied to Comanchel0ver's topic in Member Projects: Your Comanches
Wheeling half put together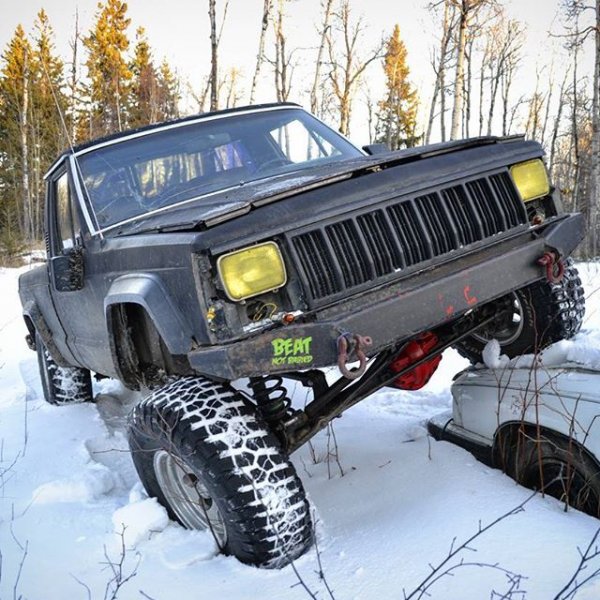
-
Tylers Daily 4X4 Build
Comanchel0ver replied to Comanchel0ver's topic in Member Projects: Your Comanches
Couple from the swap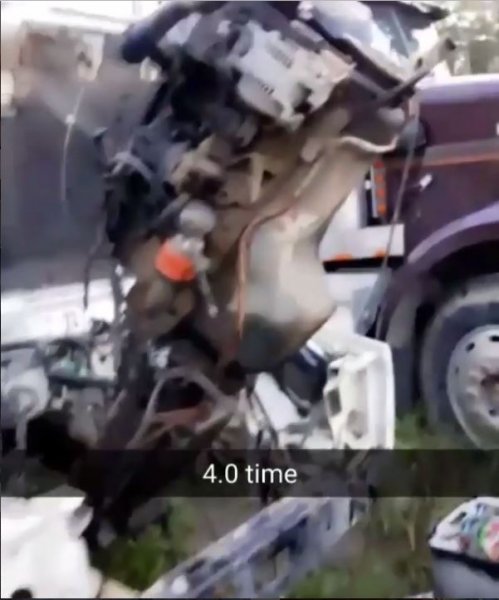
-
Tylers Daily 4X4 Build
Comanchel0ver replied to Comanchel0ver's topic in Member Projects: Your Comanches
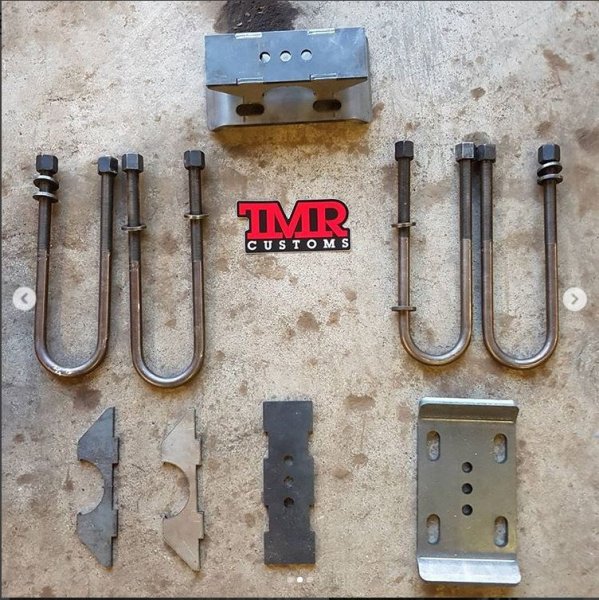
More of the TMR perches and wheel base stretch: Before: After: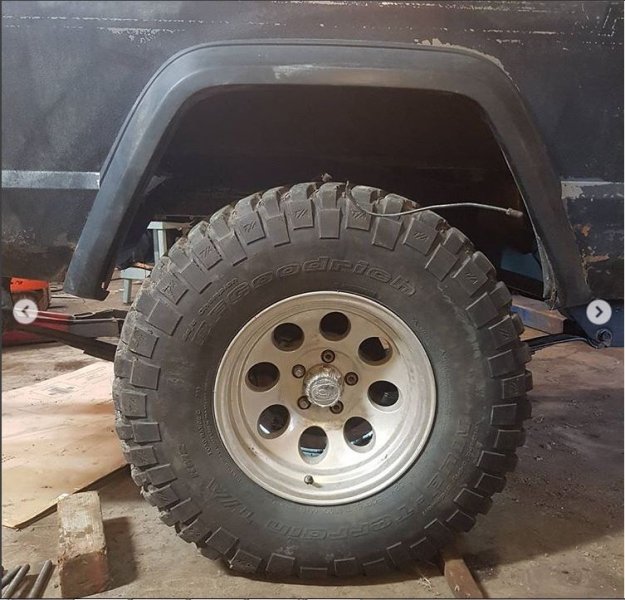

-
Tylers Daily 4X4 Build
Comanchel0ver replied to Comanchel0ver's topic in Member Projects: Your Comanches
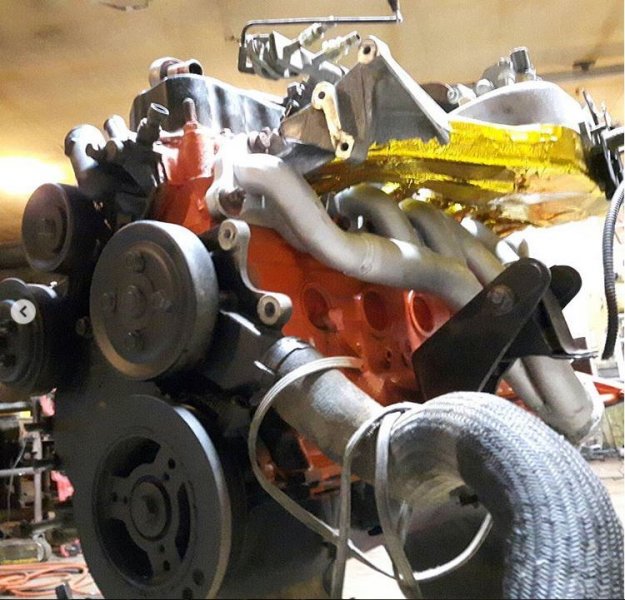
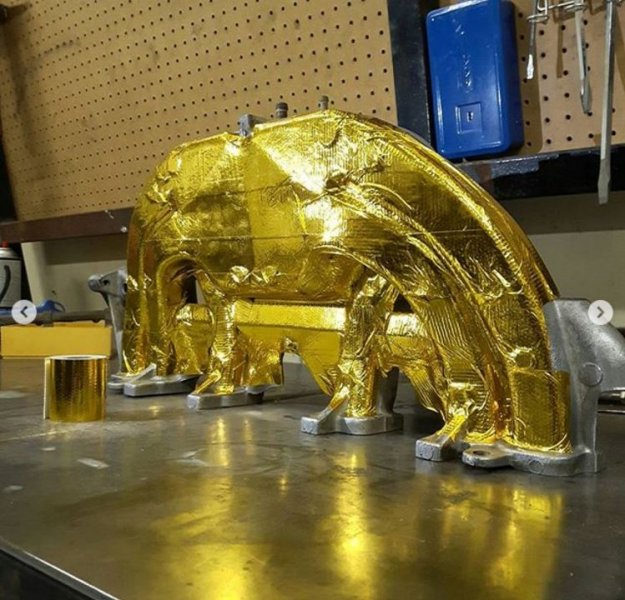
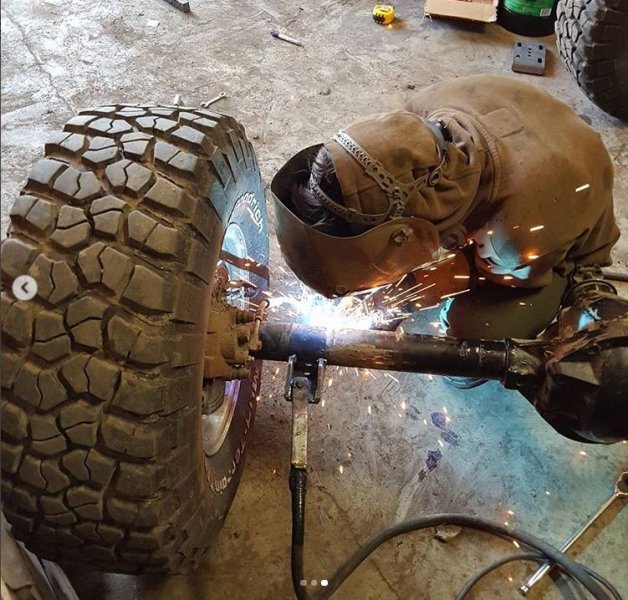
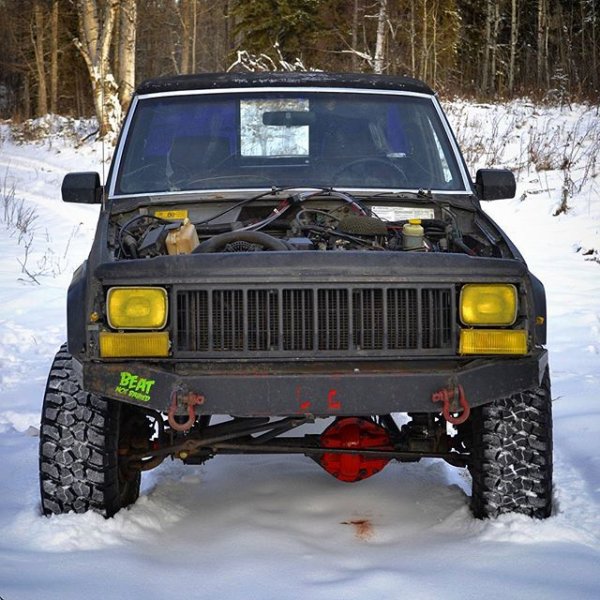
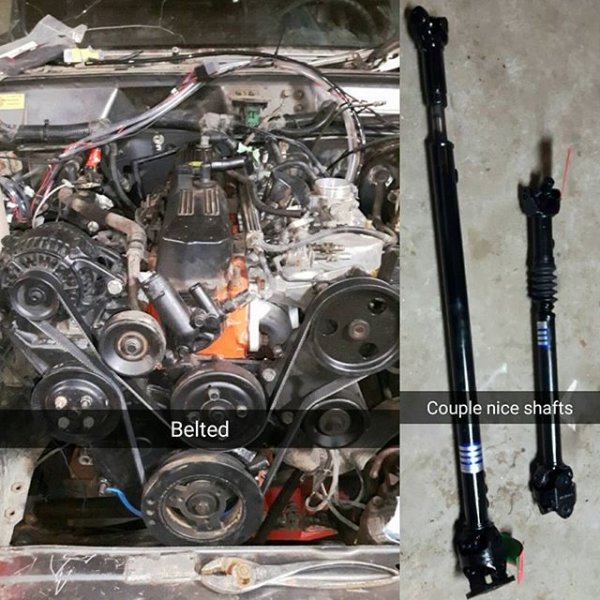
Havent been on here in ages i'll try to get everyone up to speed. Mostly post on my instagram @tgsuteau. Truck is no longer my daily driver now its strictly a weekend wheeler. Since my last post on here ive installed: Suspension: BDS 4 link longarm, BDS 4.5" coils, BDS track bar, TMR customs anti wrap leaf spring mounts set to 1" stretch to recenter the Rear wheel in the wheel well Steering: Off road Only U turn HD steering Drivetrain: Did a complete 93 HO 4.0 swap including all wiring, added a 99+ intake wrapped in gold space foil to try to keep intake temps down. painted hemi orange, welded and painted cracked exhaust manifold, deleted AC and relocated alternator up high to the factory AC location. 89 ax-15, NP 231 t case with rubicon express slip yolk eliminator and CV rear shaft. Front Differential: TJ Rubicon d44 with 4.10s arb airlocker and arb dif cover to match the rear.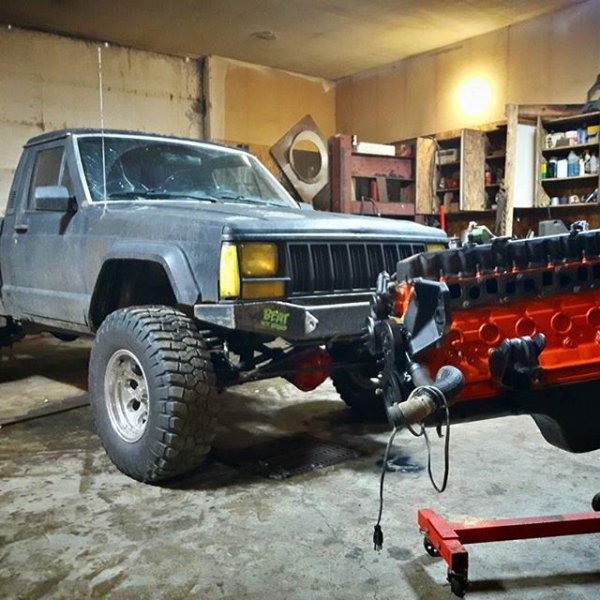
.jpg.dd616d559217aa228f68b3371b9032a5.jpg)
-
Tylers Daily 4X4 Build
Comanchel0ver replied to Comanchel0ver's topic in Member Projects: Your Comanches
Greetings comrade, thank you for the compliment. That was most likely me, I'm pretty sure I'm one of the only ones daily driving a comanche in edmonton. . :MJ 2: . -
Tylers Daily 4X4 Build
Comanchel0ver replied to Comanchel0ver's topic in Member Projects: Your Comanches
Also did a slick install for my air tank pressure gauge . :MJ 2: . -
Tylers Daily 4X4 Build
Comanchel0ver replied to Comanchel0ver's topic in Member Projects: Your Comanches
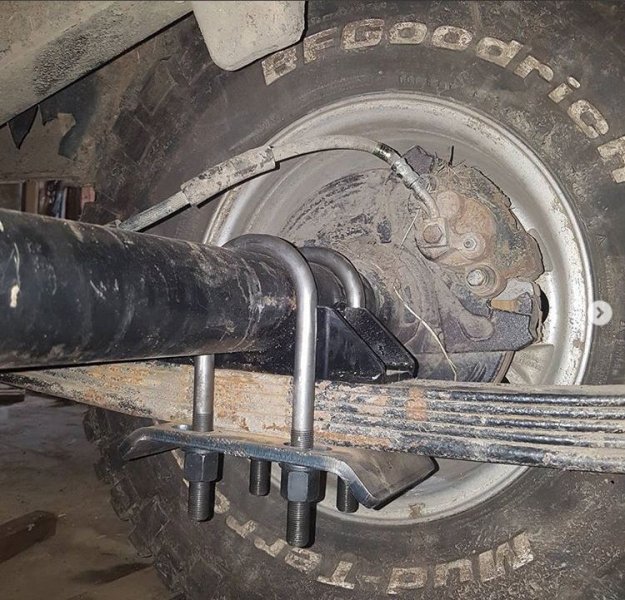
Finally got around to installing my rear dana 44, while i was at it i added a leaf and made up some custom shackles, caused a leak in my rusted out gas tank, plumbed in my rear disk brakes, installed my air tank, found some rust on the frame so i pulled the bed and painted the frame. Pulled the leaves out of my parts truck and took the second longest leaves out and cut them down about an inch so they fit nicely in between the second and third leaves. i added the leaf to try and stiffen up the suspension a little bit it seemed too soft before, so far it definitely rides better but i also replaced the shocks with zone offroad nitro shocks. Old leaf packs on top, new below. The third leaf is the one i cut down from the parts jeep. A better look Here are the custom shackles about 4" longer than stock. i used a factory cherokee shackle and cut off everything and reused the round bit with the bushing. Everything installed New vs old shocks Everything primed after i sandblasted it Painted Found this tank on the local jeep facebook page for free wire wheeled the rust off and painted it too. here is the shock fully extended vs the mount, at full up travel i still had about 4" of shock travel un used So i made my own shock mounts out of some square tubing Accidentally blew out my rear window with the sandblaster so i swapped in this rear slider -
Tylers Daily 4X4 Build
Comanchel0ver replied to Comanchel0ver's topic in Member Projects: Your Comanches
hey all lots of changes incoming. Graduated college a month ago so ive actually had some time to put into the jeep. First off are some hood vents i installed. my brother was having heating problems on his cherokee so he installed some and i figured his looked pretty sweet so i put in a pair. -
Tylers Daily 4X4 Build
Comanchel0ver replied to Comanchel0ver's topic in Member Projects: Your Comanches
Also did some 4x4ing on the weekend on some trails with a lot of dips and dives. This obstacle doesnt look like much on video but was about a 6 foot straight up ice climb. Dragged the rear bumper going up it and down. Also had to pull my buddies 4 runner up it but he made up for it by doing it the other direction in reverse. . :MJ 2: . -
Tylers Daily 4X4 Build
Comanchel0ver replied to Comanchel0ver's topic in Member Projects: Your Comanches
More progress on the Manche today, installed my air compressor, replaced my heater control, fixed some of the rats nest of stereo wires and changed out the lens and lights in my gauges. First i decided to mount the compressor under the hood on the passenger side. Then i pulled those two vintage OBD plugs or whatever they are out of the bracket, ziptied the covers on them so they wouldnt get full of junk then tucked them under the fuse panel and cut the bracket they used to call home. Next i drilled the four holes i needed to mount the air compressor. Here is the compressor bolted and wired in. its an ARB unit and the wiring was very well thought out and a breeze to install. It incorporates a fuse and a breaker as well as a air pressure sensor that cuts in at 70psi and out at 100psi. Right now i only have the tire inflation attachment hooked up once i get my dana 44 with air locker installed i will also plumb in my air tank. After routing all the wires where i wanted them i trimmed the fuse panel cover and reinstalled it. I installed the switches in the usual location on the dash next to my fan switch. For the last month the vent selector slider became very stiff and id have to balance it between the heat and defrost settings for it to even work. Then about a week ago the heat died completely. After confirming the blower motor was not the culprit i swapped the controller out from my parts comanche. While i had the dash apart i cleaned up the rats nest of stereo wires. Changed the lens out of the gauge cluster for one not so scratched, had to drill a hole for the trip knob which was a little stressful with a perfect lens. Pic doesnt do it justice but at certain angles i now can't even tell there is a lens over my gauges. Also got my part time 4x4 light working for the first time since i changed out my gauge cluster. Also readjusted my swaybar disconnects to the different lift and added the mounts onto the skid plate for when they are disconnected. -
Tylers Daily 4X4 Build
Comanchel0ver replied to Comanchel0ver's topic in Member Projects: Your Comanches
Hey all made some more progress on ol Garth. Did away with the old sagging stock front springs and 2" spacers and installed Pro-Comp 3" springs, Zone Offroad 3" lift nitro shocks as well as hockey puck bumpstops and straightened front brake hardlines. I bought the springs from the local offroad facebook group for a wicked steal of $40. The springs came with an axle side trackbar drop bracket, but after looking at my brothers 3" lifted cherokee which lacks it and doing some research i decided not to install it as it lowers the trackbar significantly, increasing the angle and making in more vulnerable to rocks and such. With the 2" pucks and as far as i know stock rear the truck sat 1" lower in the front and stuffed the tire into the fender when flexing moderately. Now with the 3" front springs and Canadian bumpstops the truck sits 1/2" higher in the front and does not rub even at full flex. I only drove the truck home from my dads shop so far the ride seems far better and no death wobble or anything. I also have a ZJ HD tie rod i need to install but will wait until i have time to get an alignment. Now enjoy the pics. 90% of the snow was melted yesterday, got this dump overnight. My brothers cherokee in the background. Fresh snow means fresh hooning . :MJ 2: . Parts to be installed and my helper Sammy He's not a very good helper....... Everything installed, the hockey pucks just have a bolt through them with a countersunk head threaded into a drilled and tapped hole on the spring perch. hard lines were straightened and relocated giving me enough brake line at full droop and lock. SWEET GLORIOUS FLEX!!!!!!! 28" With 3 tires firmly on the ground. Thinking about adjustable short arms to help everything flex a little more. I'd really like more lift and long arms but the amount i drive this thing sideways i like the low center of gravity and I'm not sure if the 4 squirrels can turn any larger tires while still being a daily driver. Rear end gets about a foot off the ground. Grew tired of the straight pipe drone so i threw on this fart can i cut off a sunfire in my buddies junkyard. Sounds a lot quieter at low RPM but actually way better than i was expecting when you open it up and i personally love the way it looks on there. -
Tylers Daily 4X4 Build
Comanchel0ver replied to Comanchel0ver's topic in Member Projects: Your Comanches
I will definitely take you up on that next time I'm in the area -
Tylers Daily 4X4 Build
Comanchel0ver replied to Comanchel0ver's topic in Member Projects: Your Comanches
Thanks for the help i replaced the pictures they should be working now. -
Tylers Daily 4X4 Build
Comanchel0ver replied to Comanchel0ver's topic in Member Projects: Your Comanches
Thanks I think i figured it out they should be working again. -
Tylers Daily 4X4 Build
Comanchel0ver replied to Comanchel0ver's topic in Member Projects: Your Comanches
Finally got around to fabricating myself a rear bumper for the ol manche. Went with a tubular design using some old 1 3/4" x 1/8" drill pipe my dad picked up for $0.30 a foot. 2x4x1/8" box channel for the mounts, took the weld on route for mounting. The shackle hangers are made out of some other scrap i can't remember how thick. Initially didnt have the plate with the holes but after my brother did his bumper and rock sliders i had to. -
Tylers Daily 4X4 Build
Comanchel0ver replied to Comanchel0ver's topic in Member Projects: Your Comanches
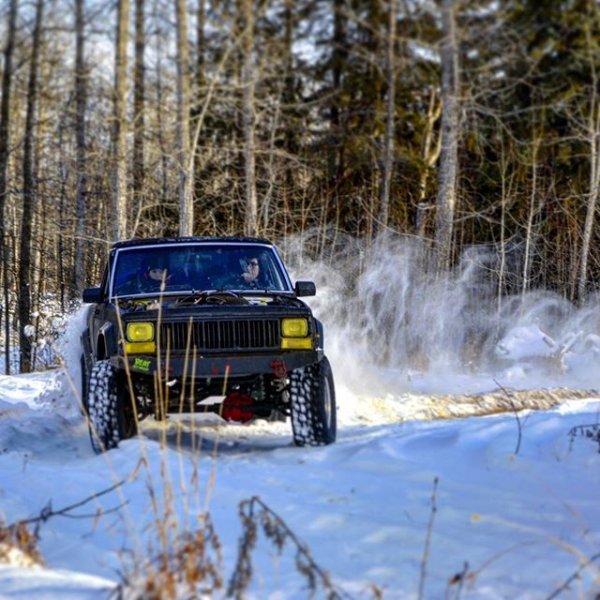
Video of a little hill climb we found. -
Tylers Daily 4X4 Build
Comanchel0ver replied to Comanchel0ver's topic in Member Projects: Your Comanches
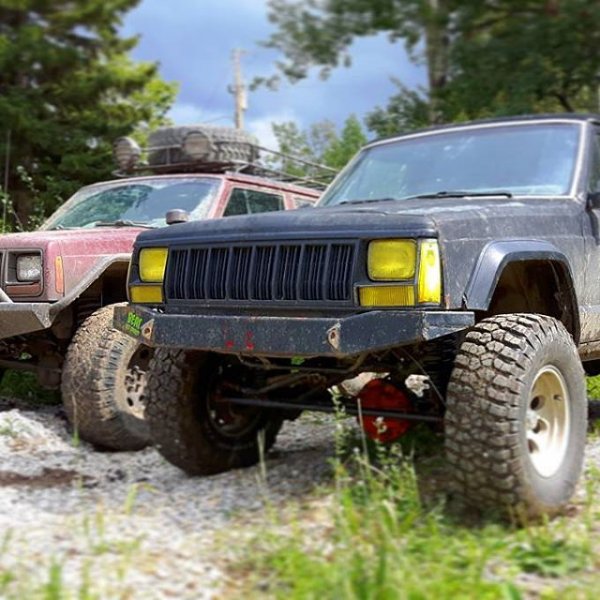
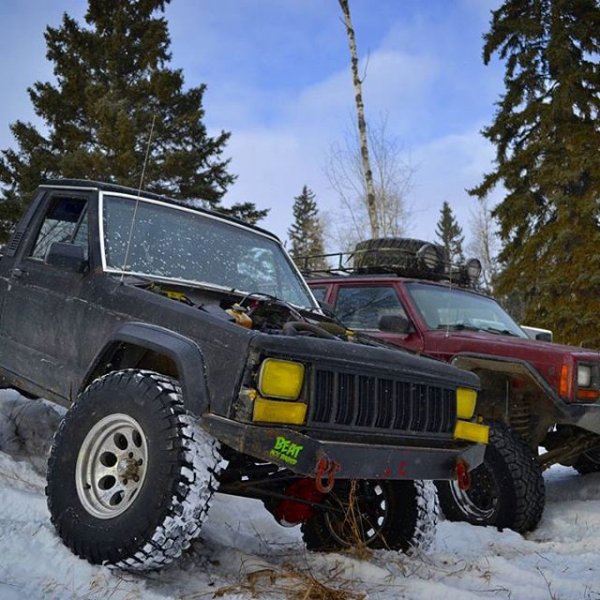
Also did some snow wheeling with my brother and his 3" lifted xj. The old manche flexes pretty good for stock.