Gubachoo
-
Posts
132 -
Joined
-
Last visited
-
Days Won
1
Content Type
Profiles
Forums
Gallery
Everything posted by Gubachoo
-

Post lift tire location problem
Gubachoo replied to Gubachoo's topic in MJ Tech: Modification and Repairs
OK, any suggestions?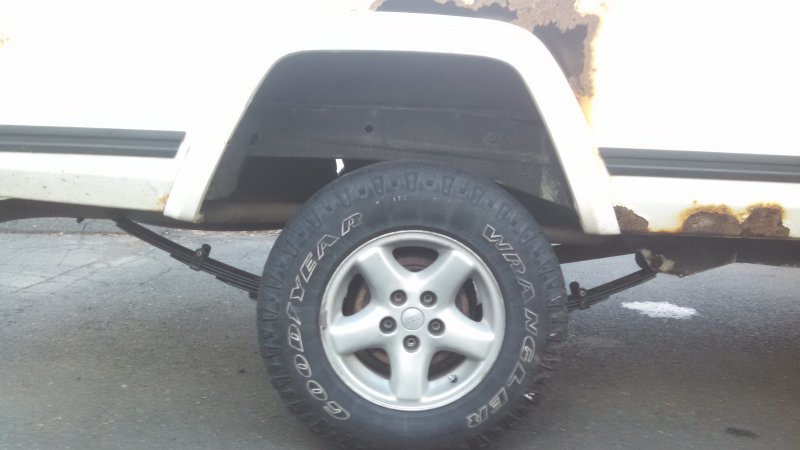
-
Post lift tire location problem
Gubachoo replied to Gubachoo's topic in MJ Tech: Modification and Repairs
Hmm... well the sun is down now, so I can't be sure, but I think so. So its normal? -
Post lift tire location problem
Gubachoo replied to Gubachoo's topic in MJ Tech: Modification and Repairs
Yeah, laid them on top of my old springs and everything matched up except the rate of arch -
Post lift tire location problem
Gubachoo replied to Gubachoo's topic in MJ Tech: Modification and Repairs
Is this yours? Looks similar... -
Post lift tire location problem
Gubachoo replied to Gubachoo's topic in MJ Tech: Modification and Repairs
hmm I didn't consider that. I'll check -
Post lift tire location problem
Gubachoo replied to Gubachoo's topic in MJ Tech: Modification and Repairs
yes, I never removed the shackles -
Post lift tire location problem
Gubachoo replied to Gubachoo's topic in MJ Tech: Modification and Repairs
This is the right side, so it is on the left, right behind the tailpipe -
Post lift tire location problem
Gubachoo replied to Gubachoo's topic in MJ Tech: Modification and Repairs
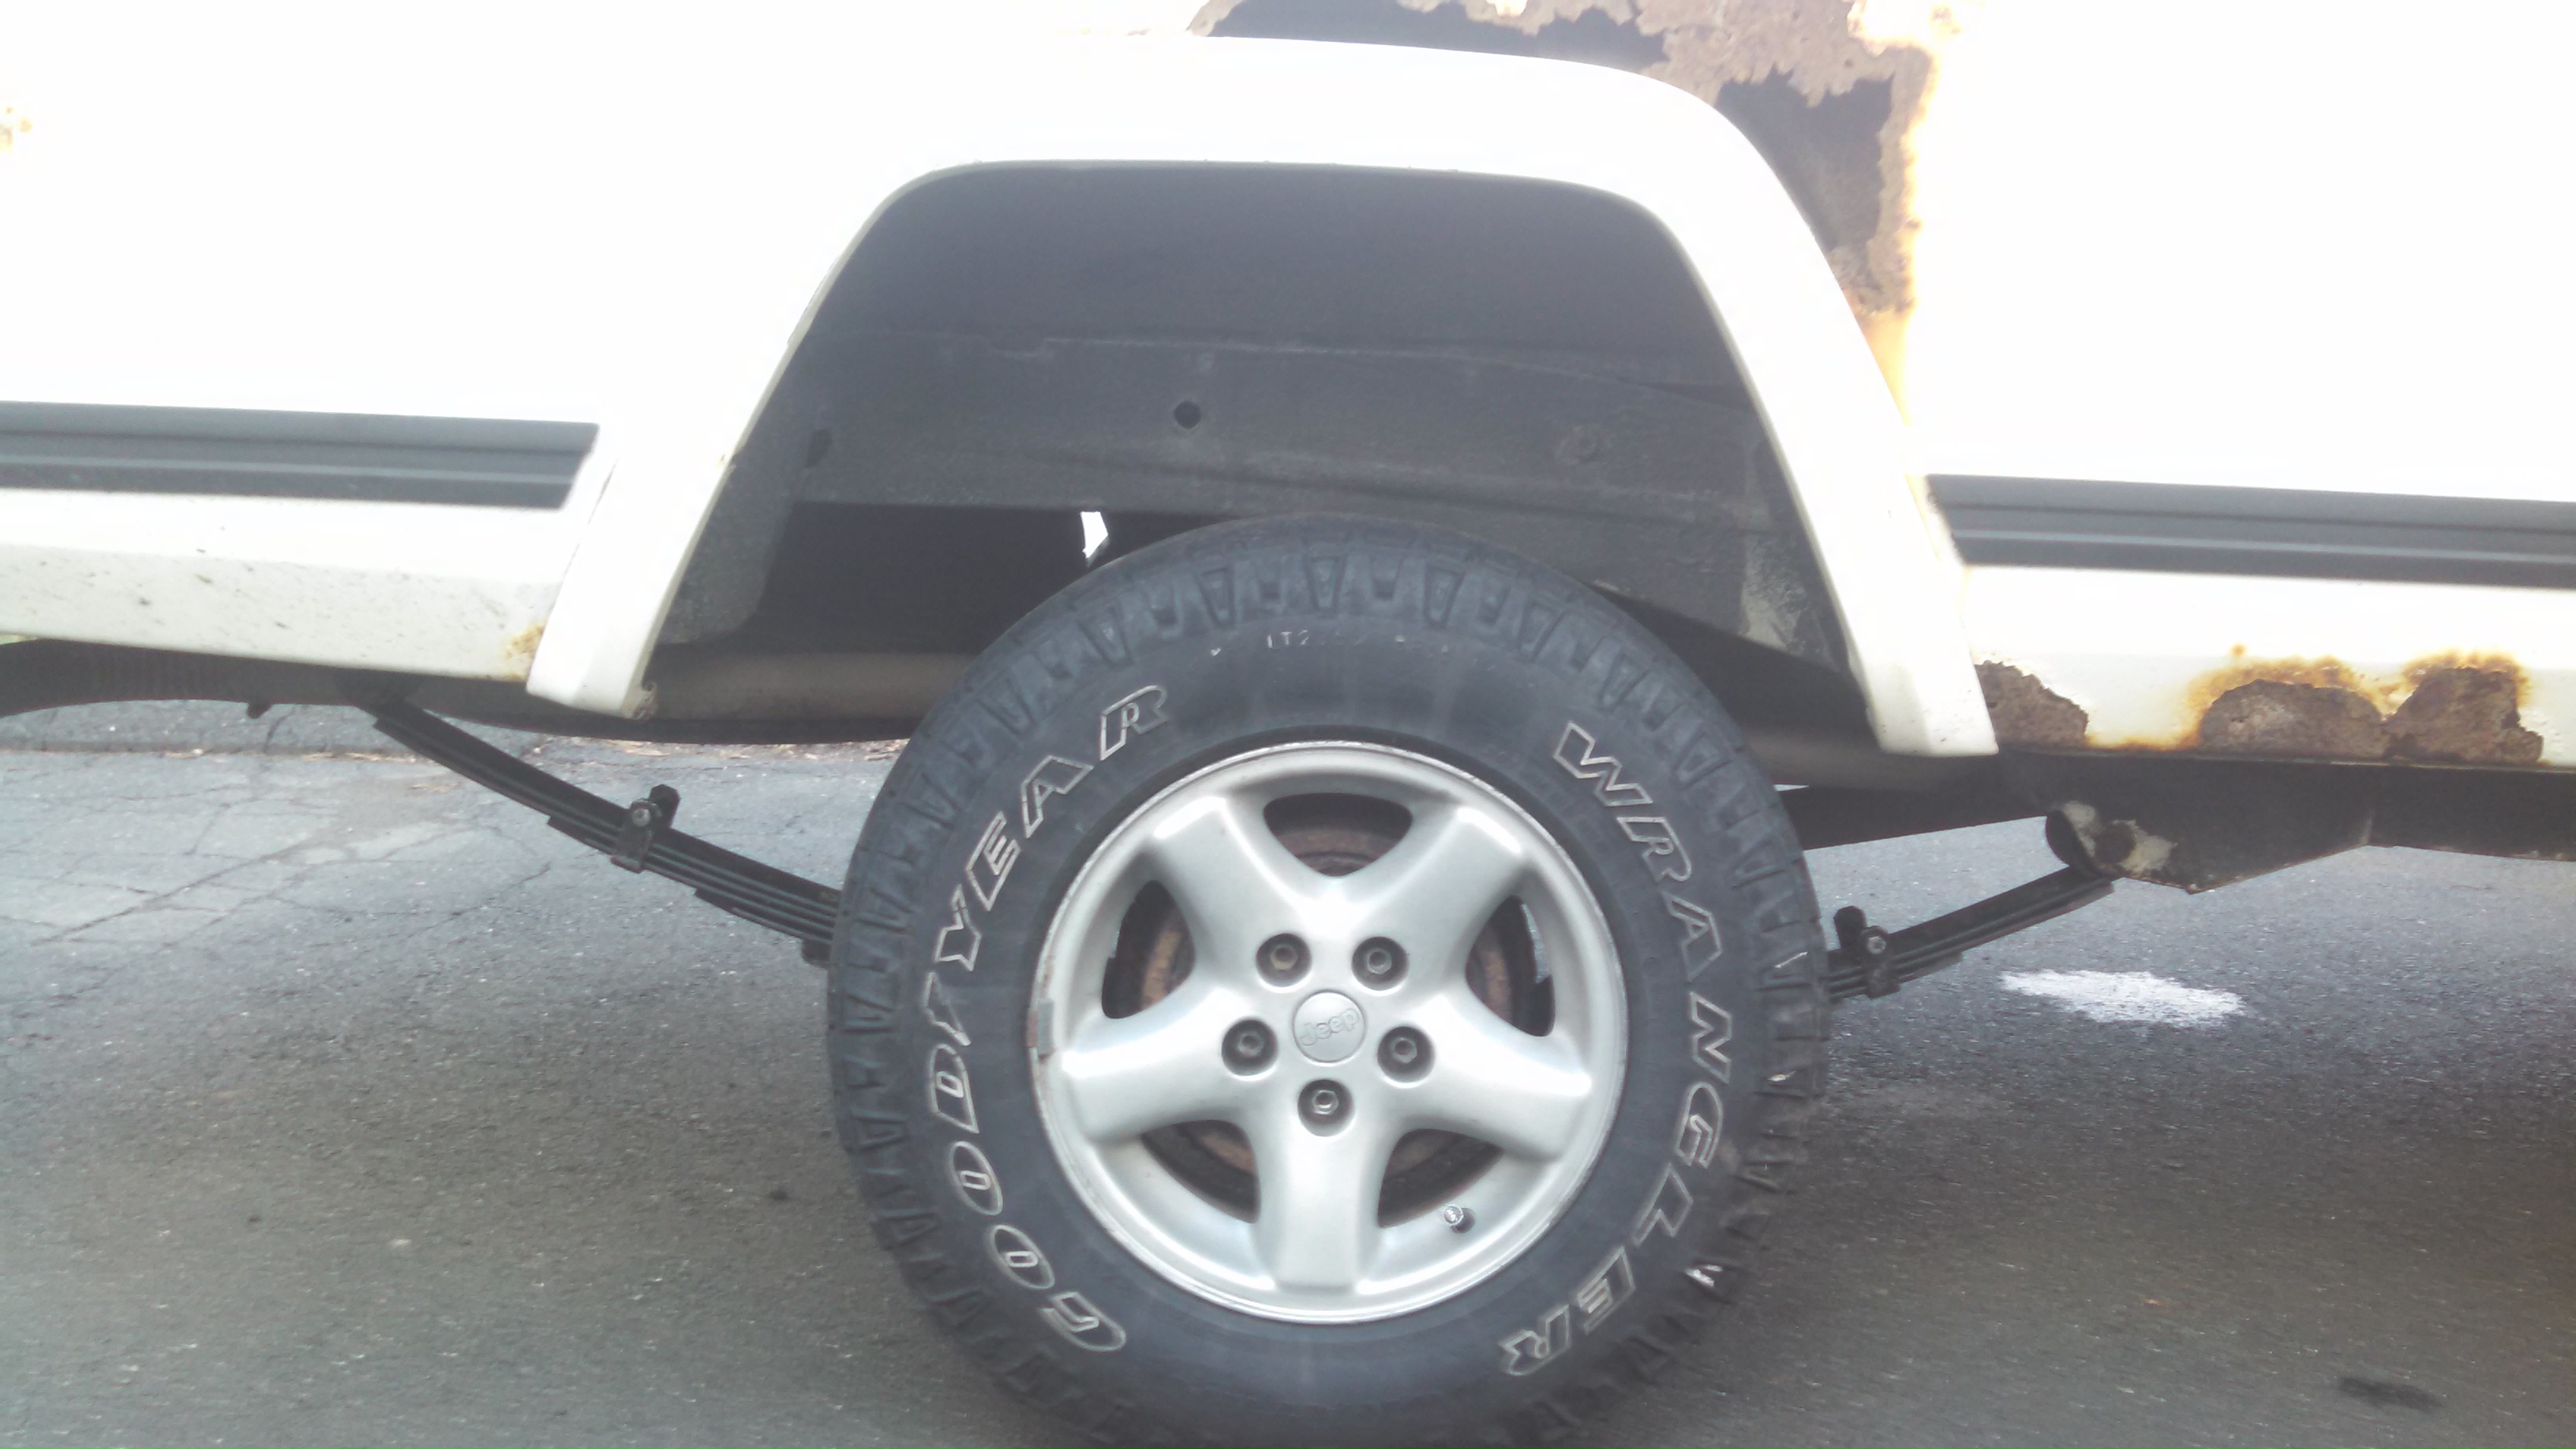
Yeah, double checked, and measured it and checked and if I turned them around the tired would be touching the fender flare towards the rear. I don't get it... The larger eye is to the front, and it seems to have the same distance eye to pin... -
So I've spent the past day putting in my lift kit (4.5 springs from Hellcreek and Rubicon Express front kit) and have been taking pics to document it. I measured the leaf springs front eye to pin (25.5 approx) and rear eye to pin (30.5 approx) they both seem to be about the same but when I put the tire on and dropped it, it looks like the axle is too far forward. I just rechecked the lengths on the ground and it seems to still be correct. I know it will settle a little and move back, but there is a gap of 4.5" between the tire (235/75/15) and the nearest point of the wheel well. I have 31's I'll be putting on on monday or tuesday which will make the gap tighter... Is this a normal thing? Couldn't find any other threads about this. Would call Hellcreek and ask, but it's sunday. Its an 88 LWB 4.0 AX-15 D35.
-
Noise when turning left....
Gubachoo replied to HOrnbrod's topic in MJ Tech: Modification and Repairs
When you use the stethoscope, make sure to stress the bearing a little if you can by pushing and pulling and putting weight on the tire if you can (just leaning on it can help). Since you only get the noise while turning it may not have gotten bad enough yet to be super evident without stress on it. Be careful too, that is one of the most commonly misdiagnosed things in a shop since it can seem like its coming from (for example) the right front but is actually the left rear. Been burned by quick diagnosis a couple of times in the past and end up switching the new part to the other side because I didn't spend an extra 2 mins making double sure I knew which bearing was making the noise. It doesn't have to be spun quickly either, a slow turn will usually give up some slight grumbling noise. Good luck. -
Another vote in favor of something linked to the TPS. I had similar problems so I cleaned the grounds for mine, checked it with a meter, installed the new one, and clocked it properly, and if you don't include the trip to the parts store, it took, in all, maybe 30 mins. That cruiser guy knows what he's saying. ☺
-
Stumble Sputter Stall Bog Surge and Rev
Gubachoo replied to Gubachoo's topic in MJ Tech: Modification and Repairs
Sorry to take so long to repost, I'm traveling and forget. Anyway I replaced the tps, clocked it as recommended by your (cruiser) tip, and that problem is now gone. To answer your question, yes, I cleaned and checked the grounds when I upgraded the cables and removed the c101. I am happy it works, but just wonder why a stock 5 speed has the two plug with the six wire? No big deal, just curious. -
Stumble Sputter Stall Bog Surge and Rev
Gubachoo replied to Gubachoo's topic in MJ Tech: Modification and Repairs
Well, this took much longer to get to than I anticipated. Anyways, I just found that the TPS output voltage starts at .85v at idle, then dives to close to zero off idle, until about 15% throttle where it behaves normally, so that explains the hard stumble off idle. I'm about to head to the parts store to grab one, but wanted to put a question out there. I checked cruisers tips about the TPS and it says it is a 3 wire for 5 speed (like mine) and a 6 wire for autos. Thing is, mine is a 6 wire AND the second plus has a corresponding plug which heads into the main harness and back towards C101. The truck is definitely a stock 5 speed and the harness shows 0 evidence of butchery. I am hoping the parts store has the 6 wire for the same or close to the three wire as I am wary to leave it unplugged if it was there stock. It very well may do nothing, but for a 30 minute trip to the store, I would hate to put the 3 wire in, have something not jive, and make the trip again. Maybe I'll just get both and return the other the next time I head to town, but it is a little bit of a headscratcher... Maybe its just the general harness and the secondary part of the TPS wiring terminates in a connector somewhere? Anyway, I'm off the the store. Anyone run into this or have any insight? -
Stumble Sputter Stall Bog Surge and Rev
Gubachoo replied to Gubachoo's topic in MJ Tech: Modification and Repairs
Alright, I will go double check that line now. I will be near my multimeter tomorrow and will check those values. Thank you for looking those up. Would be lovely if it was something as simple as one of these. -
Stumble Sputter Stall Bog Surge and Rev
Gubachoo replied to Gubachoo's topic in MJ Tech: Modification and Repairs
OK, great. Does anyone have the Ohm specs for them hot and cold? -
Stumble Sputter Stall Bog Surge and Rev
Gubachoo replied to Gubachoo's topic in MJ Tech: Modification and Repairs
Don't know, didn't consider those as a possible source to the problem. Any reason you would suspect those? I'd be willing to check, just don't want to go testing things which may not be related to the problem. Thanks for the input. -
Stumble Sputter Stall Bog Surge and Rev
Gubachoo posted a topic in MJ Tech: Modification and Repairs
Hey guys, having an issue and spent a while combing through previous posts looking for help, but no one seems to have the same issue, so I figured I would put it out here and get some opinions. I have an 88 with a 4.0, AX15. She starts just fine almost all the time, and idles well initially, but the as soon as you start off the clutch she stumbles hard and its a task to keep her from stalling. She's very finicky with how she responds to the throttle at different times. She surges just barely noticeably while at speed, but gas mileage hasn't suffered even a little bit. Smells a bit rich at idle. Now the strangest part is she will often drop very low when the clutch is pushed in while slowing to a stop at a light, if she does stall, I usually just pop start her and here is the odd thing that I have played with a lot. Once she starts back up after the pop, she jumps up to 2500RPM or so, and doesn't want to come back down. What I can do to get rid of this is (while still in gear) cycle the ignition quickly, and the high idle disappears, which eliminates anything mechanical it seems. I experimented the other day, and if I pop start like I described before, and it rev's high, I can head down the road at a consistent speed (where those revs want me which is about 45MPH in 4th gear) and it will not drop down on its own. I have braked to lower the RPM's below 1000, trying playing with the throttle a bunch of ways, nothing changes it. But if I leave her in gear, and quickly cycle the ignition, BAM, all gone. Now, that's not to say she is running well, I can still feel the surge and the throttle response is lacking, but the idle is at least between 500 and 1000. Now, as for what I've done so far. The MAP sensor is good (traded with a known good from a friends cherokee and no change) and the map sensor tube is good as well. Same with the IAC. Have cleaned the throttle body and plates. The EGR seems to respond the throttle input normally, but I also know that will change with load on the engine, so I can't be sure, but as this is not electrically controlled I can't imagine why the ignition cycle would affect it. That being said, I also know that this could be two separate problems interacting with one another so I'm not willing to discount EGR quite yet. I have ordered an O2 sensor as I have owned the truck 5 years and know it needs to be done as a maintenance item at this point (lord knows when it was done last) but am not quite sure where to go from here. I think I will start checking sensor input voltage at the MAP and others to eliminate some of those potentials. No weather or humidty or temp seems to change this. Sometimes it idles great at lights (except for the slight surging/stumbling that often passengers don't notice because it is so slight) and sometimes I have to keep tapping the gas to keep it from stalling. Very hit or miss.But, to be clear, even when it is idling better, it is most definitely not idling correctly, just better than when it is struggling. It starts just fine and usually idles well for a short time, which makes me think the O2 has something to do with it, since I believe she goes closed loop after 30-60 seconds. but this still doesn't explain the revving. I have already eliminated the C101, upgraded all my cables and grounds (cleaned all contact points, beefed up cables) have checked for vaccuum leaks, have a new(ish) ignition system, and have given most electrical connections a good once over. I am not sure where to go next, and as I have little money I don't have the ability to throw parts at it (and as an ex mechanic, hate the idea of "well, I'll just try this, can't hurt") I can't imagine how this contributes, but in the interest of full disclosure in case I am missing something, she has a porous freeze plug under the manifolds so I need to add coolant every few days, and she will run hot sometimes if I don't add it when I should, in which case I shut it down, let it cool, and top it off before I carry on. I hope to fix this in the fall, but it looks like either the manifolds come off, or I pull the engine and just do all freeze plugs and most gaskets to be done with it. Any suggestions or further areas of inspection are appreciated and I'll fill in on whatever I have done that I forgot to mention. Thanks in advance for any help. -
From what I understand, the alternator cable is the most important one to upgrade since it sees the highest amps when the alternator is charging the system (after starting, using a winch, left the headlamps on for a late night football game, etc...). Might want to look into getting that one in particular upgraded! Gotcha. I simply didn't have any cable to do it with at the time and the 1ga seemed a bit overkill. After I find this coolant leak today, I'll run to the store and get that straightened out. Thanks
-
I made myself some cables recently to upgrade since mine were cracking and old. Got most parts from Delcity and got 1 ga welding cable from the local parts store. Spent about 120$ all told. Thats including getting all new connectors for my fuse block, flux, solder, and oxguard. I got a power post to spread the B+ a little more easily and to the power dist center (can't see it very well in the pic but its under that three way junction.) Also grounded the neg to the fender on the way to the block with this neat inline post Delcity has. Did all the cleaning and securing crimps and such while I was at it. I used to do crimping with a big swage tool or vise for a long time but its a pain and DC has these neat solder plugs that (after screwing one up trying to get the right heat level) work incredible and all you need is a propane torch. You can see in the picture how it all works. I'm super happy with it and it probably took about two hours tops to assemble, clean, and install everything. Just another thought for people who want to redo their systems. As a note, I didn't run anything to the alternator and didn't redo the cable from the engine to the firewall yet. Hope this helps some people!
-
As far as I can tell you, they are identical as mine came out of a 16 and went into a 23. I replaced the pump with the unit the tank came with (mostly direct fit, a little persuading but nothing big) so go for it. I can no longer say for sure what went in what, but someone else owned mine for the first 250,000 miles of its life, so there is a good chance it was swapped before. But to clarify, I had a 16g unit (I'm one of those guys with a notebook in my glovebox who writes down mileage and gallons and does the math for MPG per tank for every fill-up, so it's well documented) that used all three straps and looked identical when placed beside the new one. Wish I had taken some more pictures but I didn't expect this.
-
If there was ever time for a b*ner emoji, it's now
-
I recently redid all the terminals in my fuse block using these terminals. I ordered a whole bunch plus a handful of the bussed ones too. I left it in the truck and just spend about two hours in an awkward position. Bent and ground a paperclip to remove the terminals. if you have a good quality set of terminal pliers (preferably the ratcheting type, not the standard part store stripper/crimper) then no solder is needed. I ended up doing everyone over since most needed it and I didn't want to have to do it again. At the same time I picked up a bunch of other stuff from Delcity to upgrade my battery cables. Bought some 1ga at the parts store and the rest from them. They have these neat little solder pellets (https://www.delcity.net/store/Terminal-Solder-Slugs/p_1036) that you just drop in the terminals, heat up to the correct point, and push the cables in. When done well I was super happy with the seal (after ruining the first one learning the correct amount of heat and time.) I also grabbed two of these guys (https://www.delcity.net/store/Anti!Rotational-In!Line-Battery-Terminals/p_1016) and put them in-line from the battery. The negative I cleaned at spot, drilled a hole, and put a 3/8 bolt with a washer right to the fender well to improve my grounding and allow it to continue on to the block (which I then cleaned and did all the stuff cruiser recommended.) I bought an isolated single post for the positive (https://www.delcity.net/store/Junction-Blocks/p_801581) so I could get rid of the double wire terminal off the battery. I mounted it to the fender well also and made a short cable from it to the distribution solenoid thingy (still not 100% what that thing is and I'm a mechanic, so you'd think I would know by now...) out of the same cable and ends to ensure no loss of power to the rest of the truck. Overall the del city stuff cost me about 80 shipped (including way more terminals than I needed plus a few extra end terminals and solder plugs to be safe) and the big battery cable cost me about 40 for seven or so feet of each pos and neg. I still have a foot or two of each for any future stuff it may be needed for. It took probably two hours to make the cables (if you use the solder plugs you need some sort of torch, I used oxy/ac but map gas or propane would work as well according to the site) including putting some nice shrink-wrap on them and the R&R. I still want to upgrade the grounds in other spots but I am super happy with how this all went. It started from lightly flickering interior lights that stemmed from weak and broken fuse contacts (about half of them ended up breaking when I removed them from the block and just wiggled them, bad news) and the sight of breaks and cracks in my positive battery cable. I recorded it turning over on my phone with the coil disconnected before and after and it turns about 15-20% faster now and no more flickering anything. Thanks for whoever figured out these terminals were the right ones as I was unsure about what to do with this whole mess before I found this post.
-
One of my old XJ's had it, which I thought was odd because it was a bare bare bones XJ, with that as the only fancy option. Always made me think someone before me took it from a junkyard vehicle to put in
-
oh man, totally lost track of this thread, but I will resurrect it because I know it's a hot topic. So,mine worked out strangely butto my advantage. So after some debating and inability to really figure out what I could and could not do (only vehicle so it couldn't be down for more than a day or two) I decided to just order the 16g from Rockauto. got straps and pump and all that too. Unsurprisingly, had to cut the old straps and heat the J bolts to get the nuts off then clean the threads, but thats not the interesting thing... Part number I ordered was KIT1282 and I didn't look at much besides the fact that it was dimensionally accurate and said for long wheelbase while the other said short. had i looked more at the details it says long wheelbase 23.5G and short wheelbase 16.5G. I laid it on the ground next to the old one, identical. same holes everywhere and indents for mounting straps and all, so I put it in. now, i know this will sound like I must be some kind of idiot or something, and i assure you, i am most surely an idiot, but i double and triple checked all this. that aside though, my old tank (drove it for 3 years like this) was a 16.5. my new one (identical when laid on the ground next to it) is the 23.5. i am told and assured by everyone that all the LB had the bigger one, but i most definitely had the 16.5. how this happened, i don't know, but what i then know about it, is that somehow there are externally dimensionally identical fuel tanks with different capacities. when researching this i saw a few people say that the small ones had baffles inside to lower the capacity for some emissions reason or production reason or something and most people seemed skeptical of this. So i have been a mechanic for almost a decade, so i know that they were identical externally without a doubt. rockauto lists it as an approximately 7 inch length difference. anywho, just thought i would finish up this story and add to the debate of whether its external size or internal baffles that make the difference in fuel capacity.
-
I've had three XJ's and and an MJ all develop this at different times and all for either slightly or very different reasons. My current MJ the problem was threefold. First the castle nut on top of the track bar had loosened (pin broke and fell out leaving only bits inside) which also killed the steering stabilizer so when I tightened the nut and replaced the pin, it still had a little which went away. I still get it once in a long while and it is my control arm bushings. I bought a set of 4 with bushings in them a year or two ago and am hoping to get to replacing them now that the nice weather is here. If you crawl under the truck and have a strong someone push it back and forth while its in gear with no ebrake (chock the wheels with a little distance for the tires to move back and forth so you don't, um, die) you can see the play in the bushings. It didn't show up on my truck on the lift because of the suspension sag down. On my last XJ a simple steering stabilizer replacement fixed it (saw it was leaking and pulled it off and tried to compress it and it gave me almost zero resistance.) The XJ before that the castle nut had loosened up like someone else suggested and rounded out the hole it was in so even after tightening, it would wobble once in a while. That one was a PITA to find and frustrating as can be. ended up cutting the small section out and welding in a new piece then just drilling a new hole. Not as terrible of a job as I would have thought initially. The first XJ was a twofold problem of track bar end being shot and alignment being toed out. So I guess what I'm trying to say, is it could be a lot of things, but in the shop, we have been putting a new set of control arms on old XJ's at the rate of 3 or 4 a year for a bit now, so in my opinion, that's a great place to start. But spend a few minutes under it with a friend to shake wheel and push and such, and you'll save yourself from the dreaded "throw parts at it and see what sticks" scenario. Also, to the suggestion above of tire balance, if it comes and goes and hits suddenly when hitting a bump or something, I must respectfully disagree as tire balance will be felt pretty much at all times and increase and tire speed increases. Good luck!