

Crassis-Comanche
-
Posts
80 -
Joined
-
Last visited
Content Type
Profiles
Forums
Gallery
Everything posted by Crassis-Comanche
-
Was running fine...
Crassis-Comanche replied to Crassis-Comanche's topic in MJ Tech: Modification and Repairs
It's an 88 auto 4.0L 4x4. I did try the column shift to see if that might be it but it's in Park. And that is correct there is no sound when I turn the key all the way over. Battery is good. thanks Chris -
Well friends I had a running MJ but somehow have turned it into a lawn ornament! I just put in my new rad, added new fuses and started my renix tips to do list and the Comanche will not turn over. I have power to my lights, turn signals, brake lights etc. I can hear the fuel injectors up front even my door buzzer is in fine form but once I turn the key all the way over - Nothing (except that when the I turn the key over my temp gauge needle jumps and my parking brake lamp illuminates and then goes out when I release the key). I have gone back over the engine bay again and checked my connections are together, my C-101 is all back together and on the fire wall and my grounds are all there - EXCEPT the braided ground to chassis wire which I removed while keeping the 4 Gauge wire from the firewall to heat shield in place. Could this be my problem? Am I required to have both grounds hooked up? Thanks all for any help or suggestions.
-
Ok so after waiting a few weeks for my new radiator after a bit of a snafu I got it installed and the first round of antifreeze into the system... But now the MJ won't start at all! I have power to my lights, turn signals, brake lights etc. I can hear the fuel injectors up front even my door buzzer is in fine form but once I turn the key all the way over - Nothing (except that when the I turn the key over my temp gauge needle jumps and my parking brake lamp illuminates and then goes out when I release the key). Posted help question in MJ TECH.
-
Suggestions? Anyone? thanks! Chris
-
Ok as I am changing the radiator and starting Cruiser's Renix tips I have come across a few things I hope others could help me decipher please. I hope I have read the instructions right and in reference to the ground to chassis upgrade I have added the following wire to the same spot as the existing braided wire and attached it to the heat shield of the exhaust manifold. Is this right? It says battery cable but I am hoping it's all the same thing? :dunno: Here it's attached to the firewall. Here it's attached to the heat shield. When I did the dipstick stud/ground refresh I found that the cover of my negative battery ground had deteriorated near the end. I took off what I could back to good cover and taped up the rest back to the eyelet with electrician's tape. Is this ok? Or is this something I should be concerned with? Maybe this ground should be replaced entirely? That's what my C101 looked like inside. It' all cleaned out now and back together. Will delete it in the future. Headlight connectors were corroded. Cleaned now. Does anyone still maintain this pre-heater hose thing? Mine has collapsed and the material is brittle. Next up will be the "what the hell do these things plug into?!" segment... Thanks all! Chris
-
Comanche Pioneer Decals
Crassis-Comanche replied to Mattman6's topic in Vendors- members making products for MJs
I'd be interested too. Are you looking at different colours or just one type? -
The vinyl is repairable but the cloth pattern will need some kind of custom fix I think. There is a place in Edmonton looking at it now.
-
Thanks guys! I think I'll go the Ididit external shift indicator like what Hornbrod has on his truck. It looks classy and a little more old school to me - which I like. I don't think I want to try and cut out the metal face of the new tach. If it was plastic maybe. I want to keep the column shift because I like having all that extra room on the floor for all my crap! :D
-
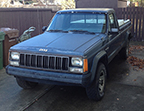
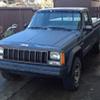
Well after seven years and two Comanches I am finally ready to start my own build thread. In my own personal opinion this website/forum/collective is really unique because of its members and what they do to help each other (and of course help preserve these special trucks). I am a little overwhelmed by the amount of people on here that are pretty skilled and knowledgeable about their Comanches compared to how little I know but it's also been a place where I have learned just from reading posts on how to complete simple maintenance tasks and DYI. Again this site in invaluable to people like me. I stumbled onto CC way back in 2007 after I bought my first MJ - a 1992 Base 4x4 LWB. After joining CC and becoming inspired to make my little truck an even more awesome little truck life stepped in and forced me to sell it off and I have been regretting that every day since. I bought this '92 sight unseen from a dealership in Calgary, Alberta while I was living in Whitehorse, Yukon. I flew down, picked it up and drove it on it's maiden voyage of 2,244km (about 1,400 miles) back to Whitehorse. No problems. I loved that truck. Probably more than any man should love a truck! :D But life happens and we move on. Then in October of last year after spending almost the whole previous year looking and finally getting my life settled down again I found this little beauty. 1988 Pioneer 4x4 LWB from a one-owner family and it had spent that last six years in the woods at a cabin as a hunting truck. It's completely stock except for plywood in the bed, a fibreglass tonneau cover/cap and what I think might be an old remote starter. Since last fall it's been covered up in the driveway but this spring I began work on it by removing the old plywood, removing the cap (which I will turn into a project of its own), changed the spark plugs, wires, distributor cap, new battery, oil change (Wix filter and Royal Purple), temperature sensor and oil pressure sensor (with full gauge cluster). Right away I hope to change out the old radiator for my new one and flush the coolant etc. Also I plan to add some new hoses and begin the 27-step Cruiser's Renix Tips program too. Then it will be a lot of searches on this forum and questions for CC members about the various parts in the engine and how they work and what they do so please bear with with me! then it will be on to other parts of the truck as the plan is to do a 3" lift, 31x10.5, new paint etc. This truck will be a semi-regular driving vehicle/light duty. I have a bunch of photos to add here and please chime in if you see something you like (or don't). Thanks! Pre tune-up I think this might be an original battery?! It's got a date stamp of 1986 and was still turning the engine over as of last fall. Old cluster. "New" cluster. this came out of an '88 XJ Limited and as you can see it was well driven! Almost 500,000 Km! So that's it for now. I'll update asap and I am excited to share this build thread with you all. Chris
-
Hi all, I am hoping someone might have the aforementioned switches? It's the dual Fog Lamps and Cargo Light switches on the same housing. Thank you! Chris
-
Hi all, just putting this out there to see if anyone has the black interior bench seat cover that has the white threaded pattern in it? I have the top/back rest portion in good shape but my bottom/seat section is not repairable. It's the similar pattern that you see in the Chief bucket seats. Thanks everyone and I am near Edmonton, Alberta. Chris
-
Lol! Don't you know that Alberta MJ parts don't work in Saskatchewan! ;)
-
Hi All I was just out there this morning and the driver's side (door on back to mid box) is pretty rough. There's a lot of rust and it looks like it's been hit or hit something on that side. It's got a D35 in the back which looks to be in good shape and rusty height sensing valve. The interior is in good shape but mice have been at it a little bit. Black carpet is probably not worth saving. The buckets are the black vinyl caning pattern (not cloth) but there are some tears on both seats. I am not sure how you would repair that since it feels like plastic and might not have the ability to be sealed/sewn? I don't know. The rear sliding glass is good but windshield and hood are damaged. Engine bay has already been pulled apart and the rear fender trim pieces are pulled and just sitting there. There is only one rear mudflap and rear bumper is straight (relatively lol!) but rusted through. The truck's odometer reads 274,000ish KMs. Wheels are gone. I did grab the 3/4 gauge cluster, some black plastic interior pieces and the tail lights but someone stripped the torx heads! :fs1: Anyway this truck's body looks like it was probably getting ready to give up the ghost but for what I paid in parts the PO probably could have made a little cash (more than PnP pays)! Sorry no photos my stinking phone was dead - again! Chris
-
WTB: instrument cluster (with gauges) for column shift
Crassis-Comanche replied to Crassis-Comanche's topic in Wanted
Awesome tips guys and thanks again for the input. I managed to dig up an owner's manual and according to it both the US and Canadian models with the indicator window in the cluster have the dummy gauges. So yes it looks like I will need to create the indicator window or go the route of having one set up on top of the steering column or rearranging the cluster appearance with decals (thanks johnj92131). Sorry if this has all been done to death but I really appreciate the help and I will continue digging through the CC archives. Thanks! Chris -
WTB: instrument cluster (with gauges) for column shift
Crassis-Comanche replied to Crassis-Comanche's topic in Wanted
Thanks everyone so for with the responses! Has anyone successfully managed to switch out individual gauges instead of an entire cluster swap? I have never taken one apart and maybe just talking out my @ss! lol! I will check out the auto swap (from column to floor) and see if I can look at making an indicator window otherwise. I did see that Hornbrod had a post that showed an indicator window that attached to the steering column. That's always an option! Going from column to floor is not a top priority as I actually love the column shift AND the bench seat! lol! I am a photographer and like being able to scoot across the bench to the passenger side to shoot out the window! Buckets look so much better but don't function well for I need! Anyway back to the archives! Thanks again everyone! Chris -
Hi all, I am currently looking for the aforementioned gauge cluster for my '88 MJ to replace the dummy cluster I have in there now. My truck is a column shift so I am not sure if a gauge with the PRND123 window exists? If anyone has one for sale please let me know and thanks very much for your time and help! Chris
-
Hi all, I am looking for a mini console or any colour for my MJ. I am located in St. Albert, Alberta If you have one for sale please let me know! Thanks everyone for your time and help. Chris
-
Members Map... New and improved and functional!
Crassis-Comanche replied to relyt120's topic in The Pub
Just added mine. Only four Canadian pins? Lol! We're not much for representing I guess! At least we are two-strong in Alberta! Chris *Edit to this post - My apologies to Rockfrog! I didn't see him tucked away on Vancouver Island! Two-strong in B.C.! -
Any idea what this is in my '88 Pioneer?
Crassis-Comanche replied to Crassis-Comanche's topic in The Pub
Thanks for the info Alexia! So it's likely an old style remote starter (with a remote FOB)? I'll have to start poking around the engine to see if there is anything more. Of course it's minus 18 degrees Celsius here - which makes me want that TO BE a remote starter! Chris -
Hi all, does anyone have any idea what this switch might be? I still cannot find where it goes to through the firewall (I just picked up a "new" 1988 Pioneer LWB but haven't done anything with it yet). This is mounted at the bottom of the dash, just below the steering column. Thanks in advance! Chris
-
Removing Comanche Cab
Crassis-Comanche replied to Crassis-Comanche's topic in MJ Tech: Modification and Repairs
Hi guys. That's great. Thanks for the info and I look forward to anyone else who can offer advice on this task. But it sounds like I will be using the sawzall! Thanks again for your help. Chris -
Hi everybody. I have been a regular visitor to this awesome site over the past 10 months but have not posted - until now! I have a question about removing the unibody cab section of the Comanche and if it's a matter of unbolting the unit from the sub frame or if you are required to actually cut along the bottom of the cab to release it. I have seen a few photos on Comanceclub that show the cab off the truck but as I am not as technically skilled as many here I can't make out how it's done. By the way this cab will be coming off an unfortunate 89' Pioneer 2x4 that had a small BBQ under the hood. As a result I am planning on making the bed into a utility trailer to tow behind my 92' Base Comanche 4x4. The 92' will be modestly upgraded to a 3" lift with 31" BFG Mud Terrains, extra lighting, bucket seats and paint - all of which I will post as photos when I begin this week. Thanks everyone for your time and there sure are a lot of inspirational Comanches on this site! Chris