
Huntr
-
Posts
81 -
Joined
-
Last visited
Content Type
Profiles
Forums
Gallery
Everything posted by Huntr
-

Project "It's a Jeep Thing" - Huntr's 87 MJ Build
Huntr replied to Huntr's topic in Member Projects: Your Comanches
Agreed! And yeah the previous owner had all sorts of stickers on this thing! -
Project "It's a Jeep Thing" - Huntr's 87 MJ Build
Huntr replied to Huntr's topic in Member Projects: Your Comanches
Been driving the Comanche around whenever I can these days to break in the engine and test the reliability around town. It’s been around 110 everyday which makes driving it without AC miserable. The next project will be to convert the AC system over to R-134 so driving to work will be more enjoyable. I’ve been pretty impressed with its running temps in the heat. Holds around 210-215 all over town. The manual shifter on the AX-15 gets almost too hot to touch inside the cab though. A bit concerning so I’ll probably double check the fluid levels.
-
Project "It's a Jeep Thing" - Huntr's 87 MJ Build
Huntr replied to Huntr's topic in Member Projects: Your Comanches
Will do! Funny enough I was just looking through a VIN decode you did for me awhile back and it looks like the truck was originally sold by STEVE CHRISTY CHRY-JEEP, TUCSON AZ. A quick google shows that the dealership might still be around under a new owner. I'll have to do some research and try to get a pic where it all started! -
Project "It's a Jeep Thing" - Huntr's 87 MJ Build
Huntr replied to Huntr's topic in Member Projects: Your Comanches
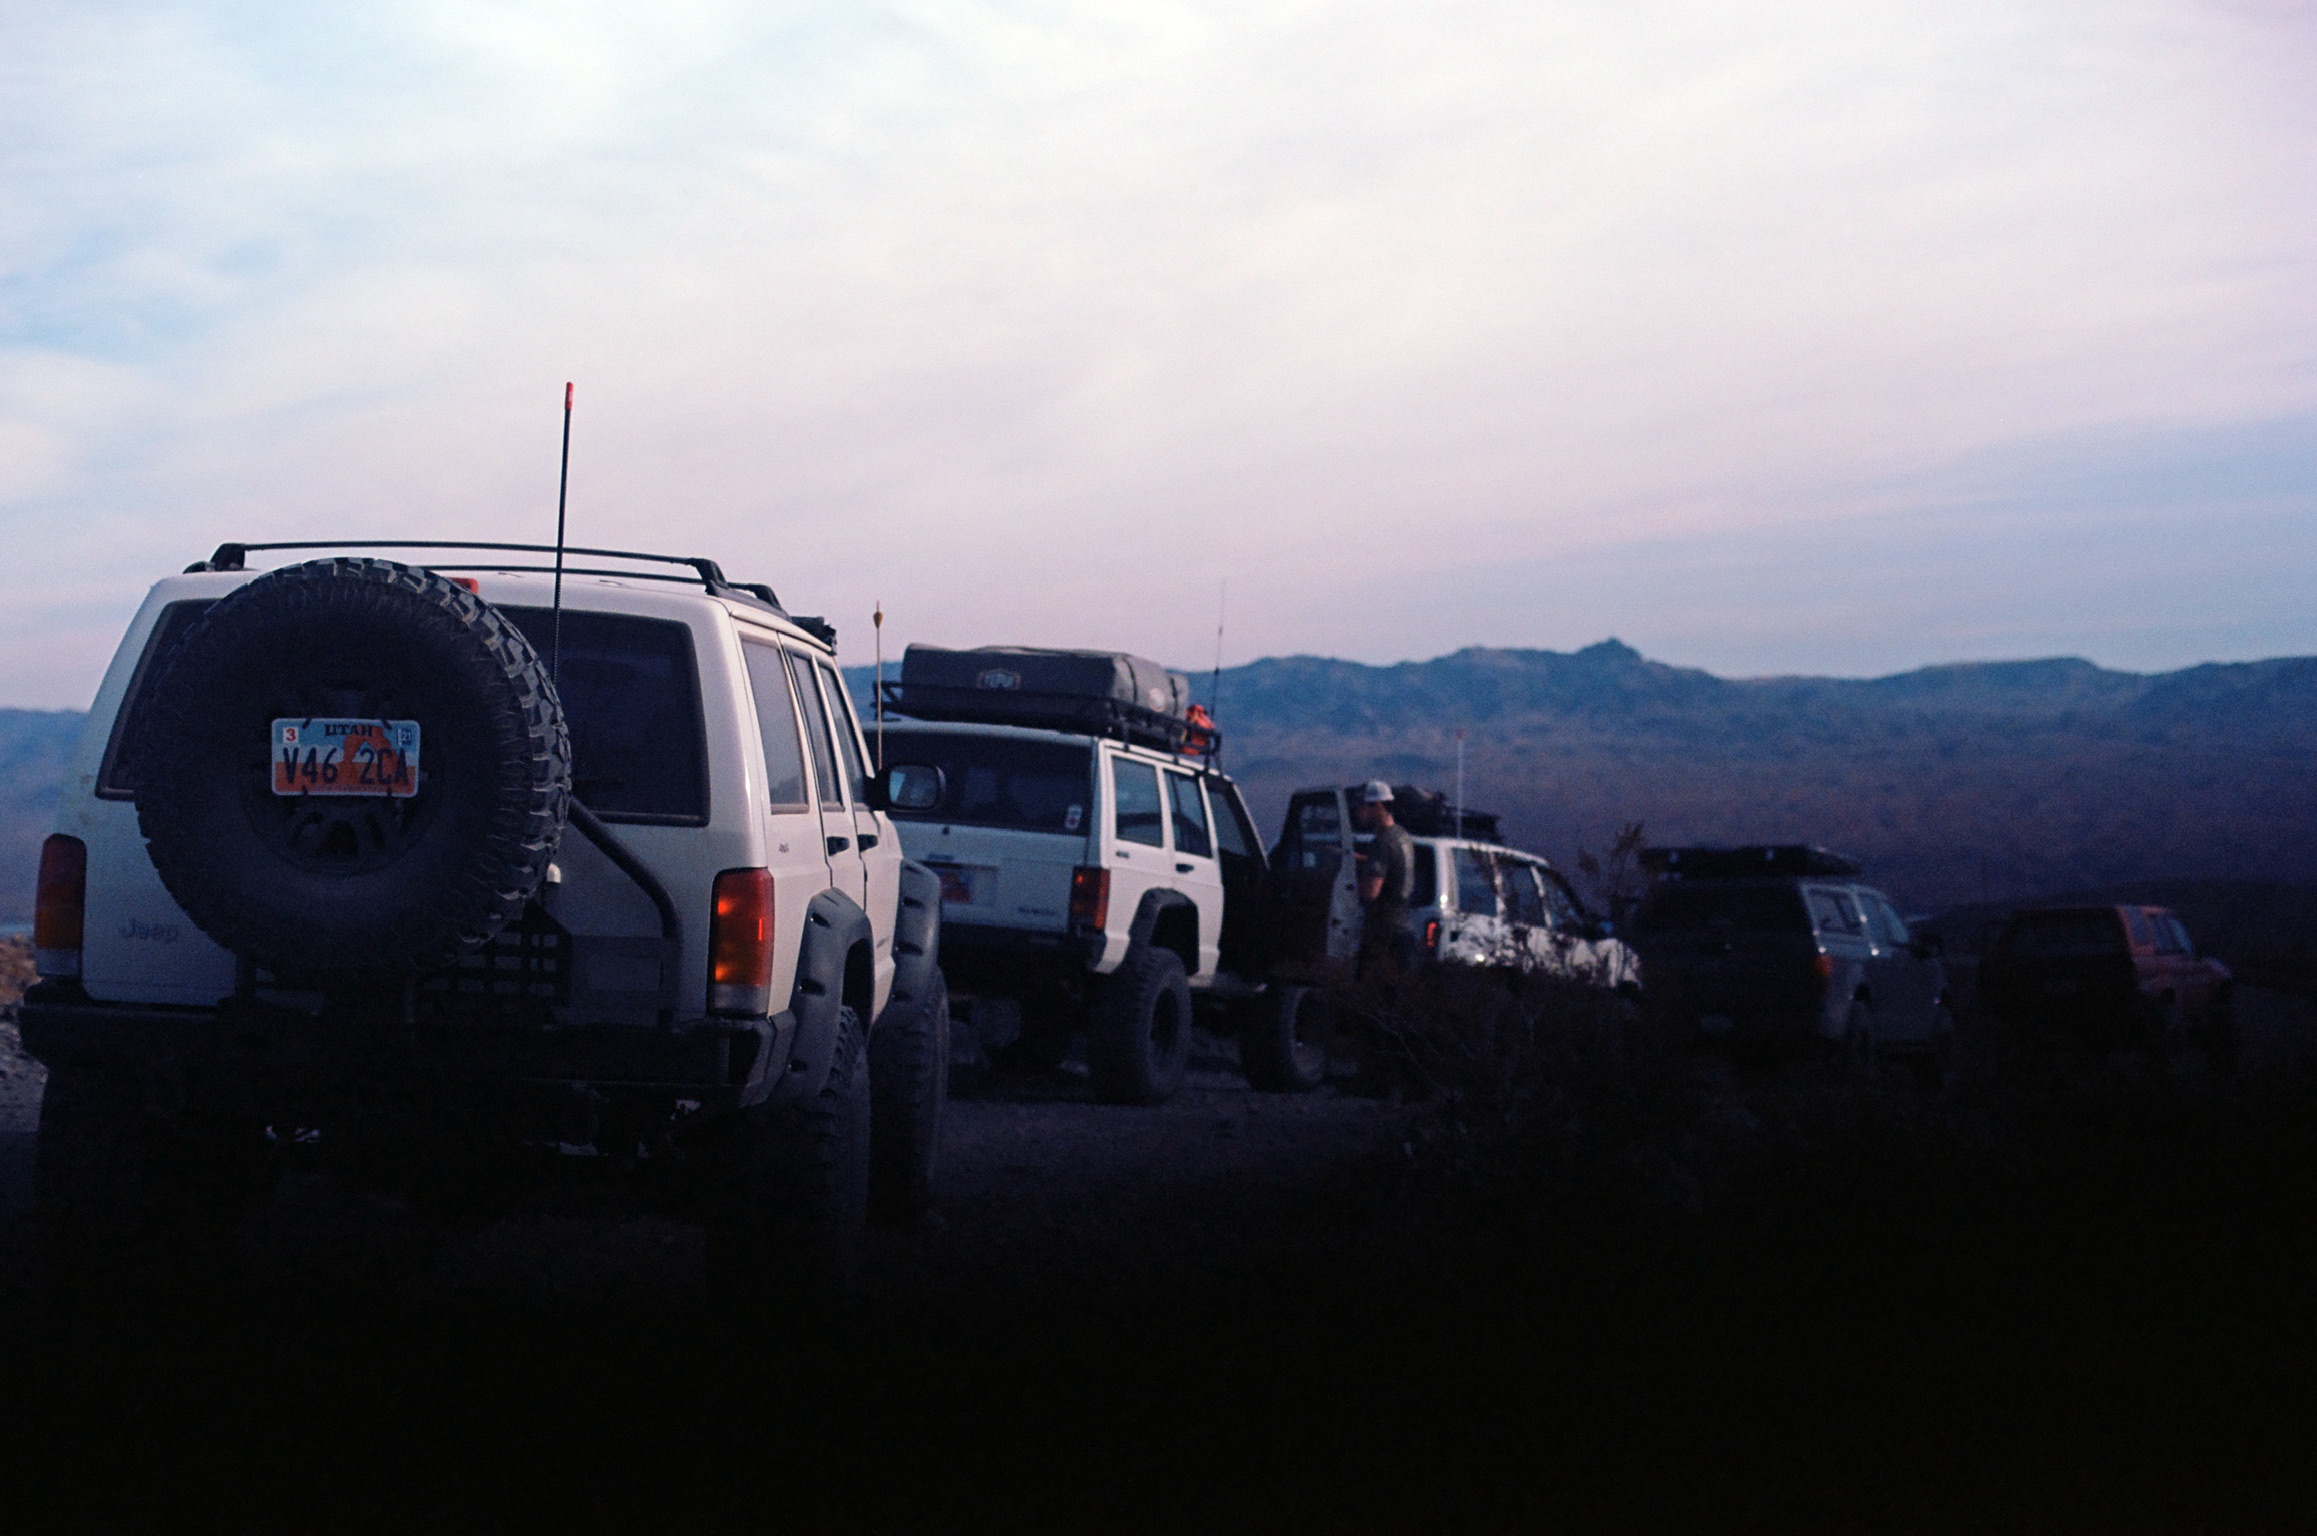
I'll be down in Tucson. Excited to be heading back toward the west though. Arizona was one of my top choices to head to next. -
Project "It's a Jeep Thing" - Huntr's 87 MJ Build
Huntr replied to Huntr's topic in Member Projects: Your Comanches
And now driving! Took it to get a state inspection today. I was unaware of the lack of catalytic converter as well as the TX requirement to have one.... Luckily I caught the dude on a good day and he "happened to see one under there..." I'll be adding a universal high flow one when I get around to doing the exhaust before I really start driving it on the road. Was able to tidy up the engine bay a bit. Next I'll start thinking about suspension, steering, axles, and brakes. Also looking into converting the AC over to R134 since Texas is hot as ****. Moving to AZ soon for work so that won't be much better!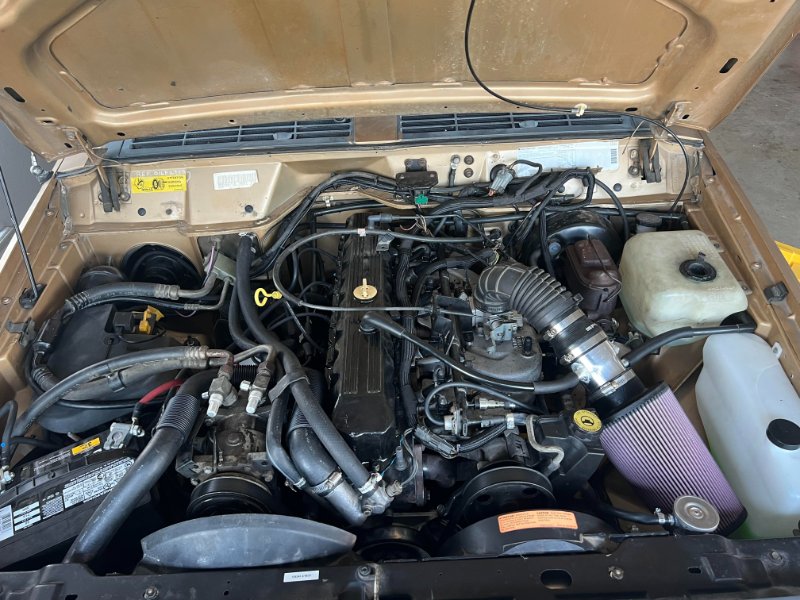
-
Did you ever get around to a compression test? I'd check compression numbers between all cylinders. When you pulled the head did you have the block checked for cracks or just the head?
-
Project "It's a Jeep Thing" - Huntr's 87 MJ Build
Huntr replied to Huntr's topic in Member Projects: Your Comanches
Another issue that took more hours than I'd like to admit is finding a belt that would work with my setup. I'm running a renix block and accessory package with the horse shoe intake and new power steering pump/tensioner to match. This caused me to have to find a custom belt length. None of the ones recommended by different forums seemed to even be close so I don't know why my length is so different. Here is what worked: 6K994 Length: 99 7/8 Width 13/16 -
Project "It's a Jeep Thing" - Huntr's 87 MJ Build
Huntr replied to Huntr's topic in Member Projects: Your Comanches
A couple years later and she runs! A couple months back at the beginning of March I had the engine running for the first time. It took a few hours of chasing down faulty sensors to get it to fire. It turned out to be a faulty CPS (of course). Once we got that sensor changed out it fired right up! Jeep Running.mp4 For some reason I couldn't get it to rev above 2000 rpm. It would idle great and run fairly well right up to 2k then act like it was governed. It also smelled super rich leading me to think it was some fuel control issue. I tested every sensor I could, swapped the MAP, tried running it in open loop to eliminate the O2 sensor being an issue, nothing worked. At idle the timing seemed fine as well as all the way up to 2000 rpm. Fuel Pressure was a bit low for the 24lb injectors but since I'm running rich I don't think its an issue right now: 32psi w/ vacuum regulator; 40 psi w/out vacuum regulator. It holds a stable pressure through all RPM ranges. Vacuum also seems slightly low but no leaks that I can find I don't think its too bad: 14-15 psi at idle. I finally decided to reindex the distributor once again using cruiser's tip #13 . I had done it when I put the engine together but was starting to suspect that the ECU was advancing the timing too far ahead of the rotor causing spark to not reach the cylinders above 2000 rpm. I cut a window in and old distributor and aligned the rotor as close to the trailing edge as I could. Fired it up and it ran great!!! I guess I hadn't followed cruiser's tip close enough and hadn't set it close enough to the trailing edge. Next step is to get everything buttoned up to try driving it up and down the neighborhood. -
Project "It's a Jeep Thing" - Huntr's 87 MJ Build
Huntr replied to Huntr's topic in Member Projects: Your Comanches
Engine and transmission are now connected and resting in the Jeep! It’s going to be a huge push to try and get it running before my deadline. I leave in 4 weeks for Texas and if it’s not done and running it’ll sit for the next 2-3 years! I ran in to trouble with the pilot bearing on the crank being the wrong outer diameter due to using a new style crank and old AX15 design. Ended up having to turn the bearing shell down on the lathe. The next hurtle is adapting the crossmember to fit the AX15. Hopefully I can just tap the 4 existing holes in the body and bolt it up. -
Project "It's a Jeep Thing" - Huntr's 87 MJ Build
Huntr replied to Huntr's topic in Member Projects: Your Comanches
I agree with the loss of functionality but I was really aiming to keep the tent as close to the roof line as possible. The tent will basically take up the entire rack so there won't be room to carry much else anyways! -
Project "It's a Jeep Thing" - Huntr's 87 MJ Build
Huntr replied to Huntr's topic in Member Projects: Your Comanches
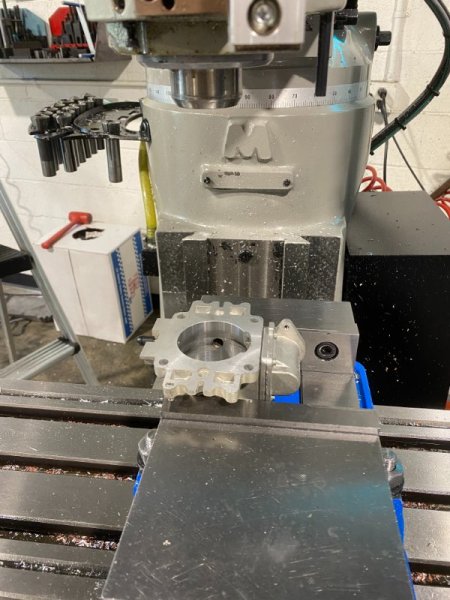
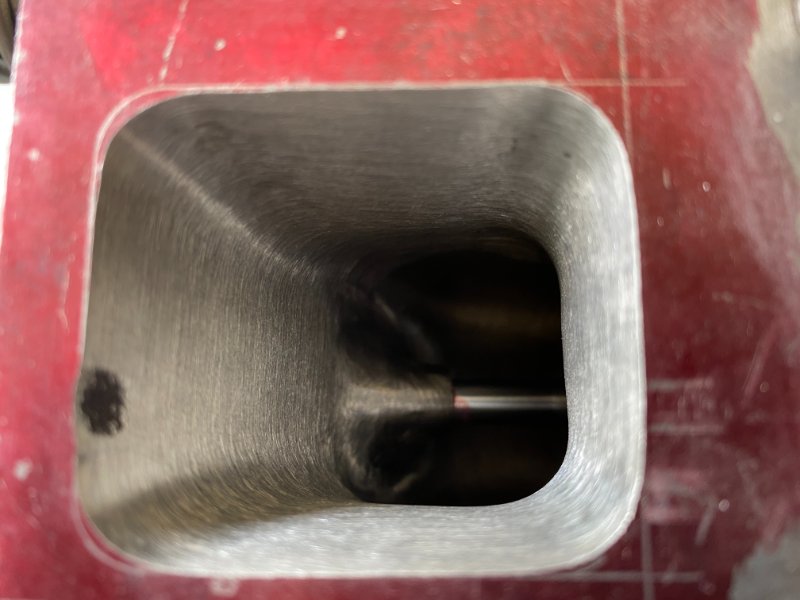
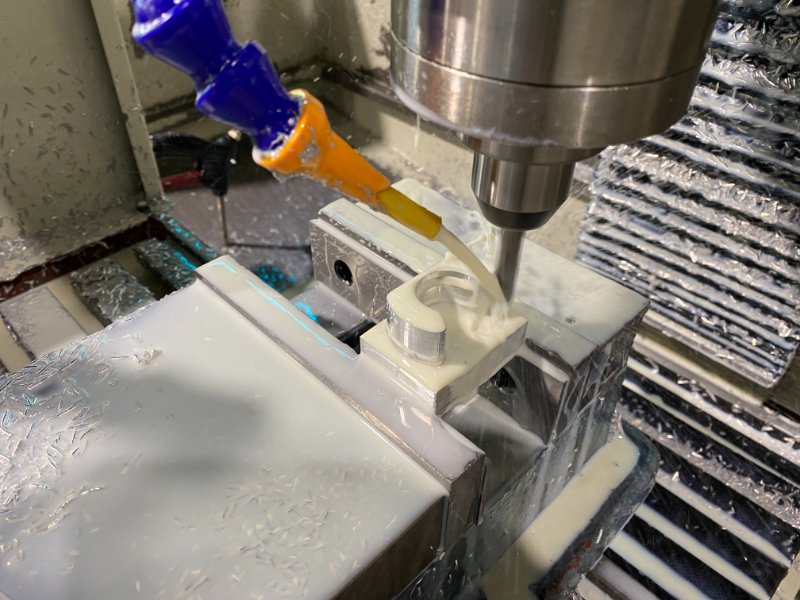
Today I bored out the 60 mm throttle body to 60 mm straight through. There is a ton of misinformation out there on the benefits of doing this and many of them don't make sense. The biggest myth to me is that Jeep did this to "ease the acceleration and decrease bottom end power." From an engineering perspective this doesn't make much sense. Typically a taper is used to increase the intake velocity of the air to assist in charging the cylinders. More people just think more air = more power which is only a small part of the equation. I'm no expert in fluid flows so who knows. I figured that since I have a ported cylinder head with larger valves and and planning on doing a 2.5in exhaust, slightly increasing intake volume couldn't hurt. I guess we will see.
.JPG.80d27fa94912da9652f33da794bb9d7a.JPG)
-
Project "It's a Jeep Thing" - Huntr's 87 MJ Build
Huntr replied to Huntr's topic in Member Projects: Your Comanches
Those would be great but I don’t have the budget for over $450 on rockers right now -
Project "It's a Jeep Thing" - Huntr's 87 MJ Build
Huntr replied to Huntr's topic in Member Projects: Your Comanches
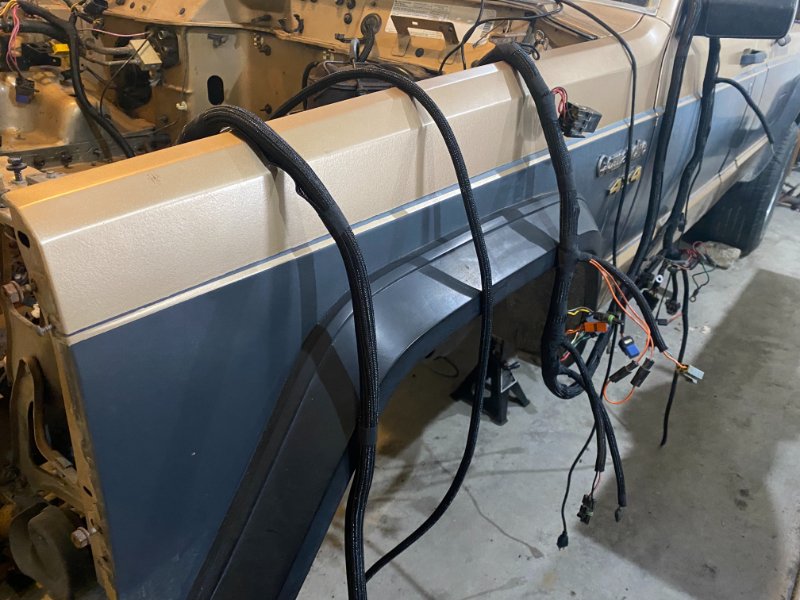
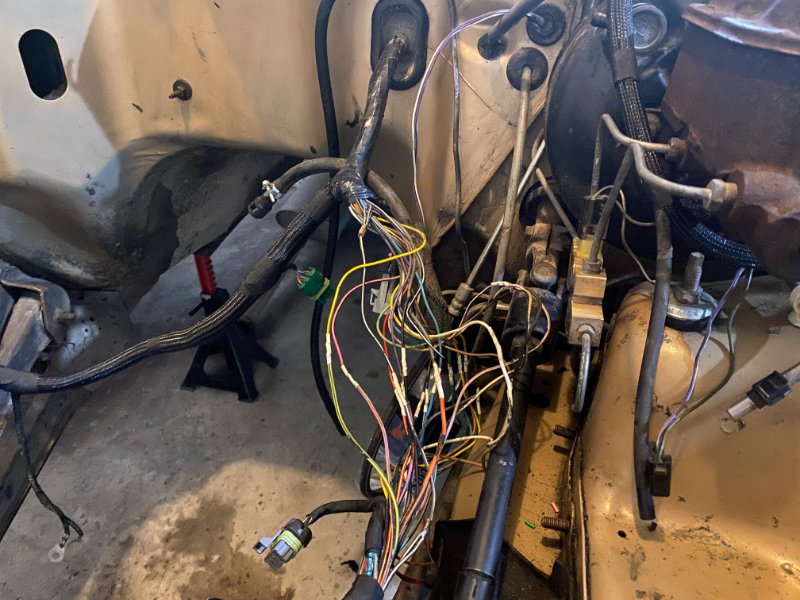
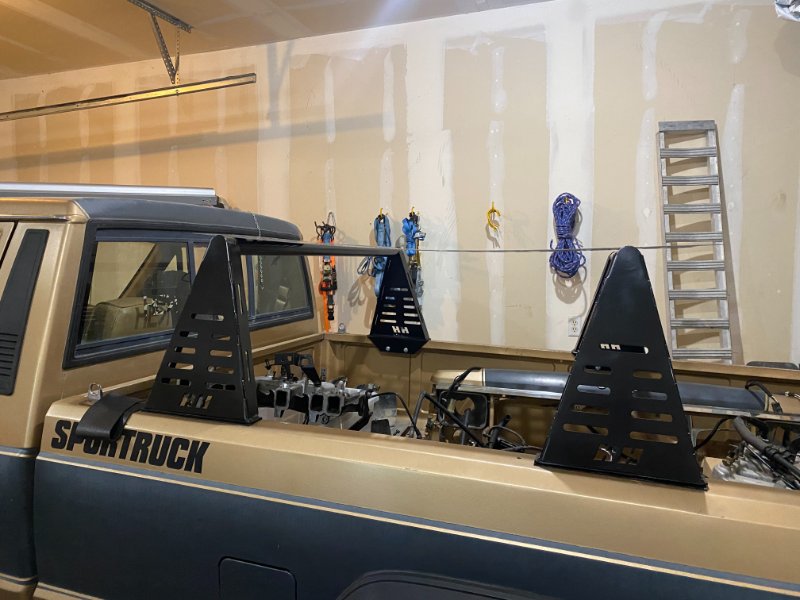
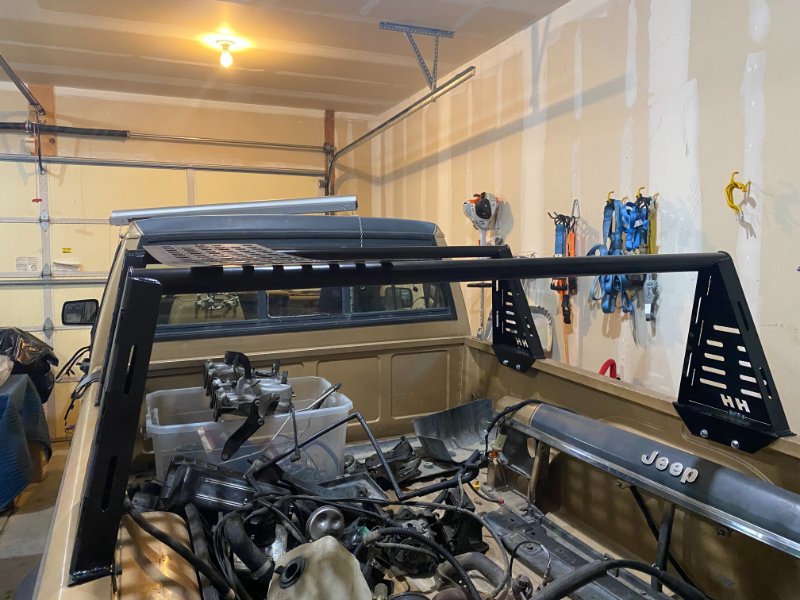
I also was able to get the AX15 put back together and mated up with the NP231. I got lazy and didn't clean them up enough to paint them. I figure when I get around to painting the actual Jeep I'll drop them and paint them. I wrapped pretty much all of the wiring harness using the plastic wireloom like a lot of people have been doing. It looks great for now but I am a bit worried about the tape not sticking all that well over time. I also eliminated the C101 connector, lets hope I got it all correct so I'm not pulling my hair out when it comes time to fire the stroker. I threw together a super simple bed rack in my free time at work. I'm not crazy about the design but it was basically free material and the easiest design I could come up with due to my time constraints. I have a much more complicated design modeled up that includes a headache rack and small roof rack but I don't think I'll get the time to make it. As long as I have a spot to mount my tent right now is all that matters (Don't mind me using it as a scrap rack right now). Just waiting for a package from Summit containing my plastigauge, ring compressor/expander, and degree wheel and I'll be able to start assembling the block. I still need to measure for pushrods and decide what rockers to use. Right now I'm leaning towards just cleaning up my stock set. I'm also tempted to just buy a new set of stock stamped rockers for like $65... hmmmm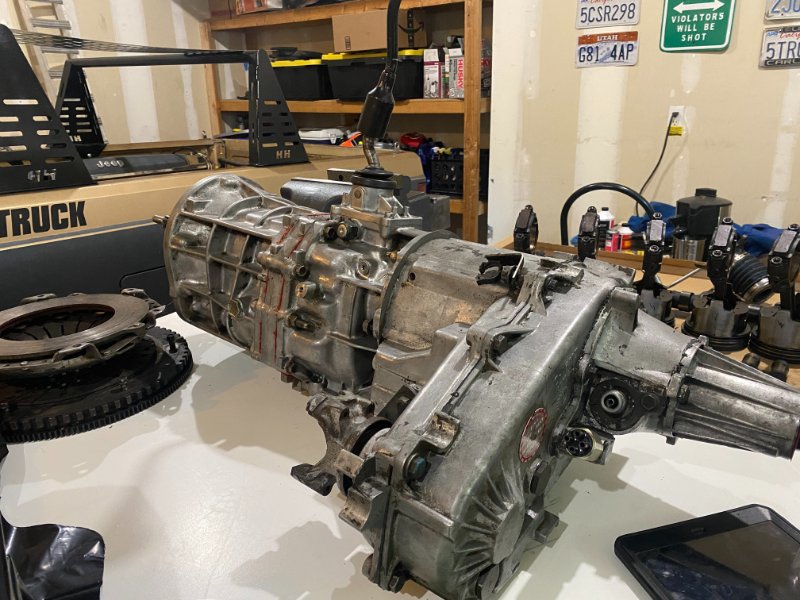
-
Project "It's a Jeep Thing" - Huntr's 87 MJ Build
Huntr replied to Huntr's topic in Member Projects: Your Comanches
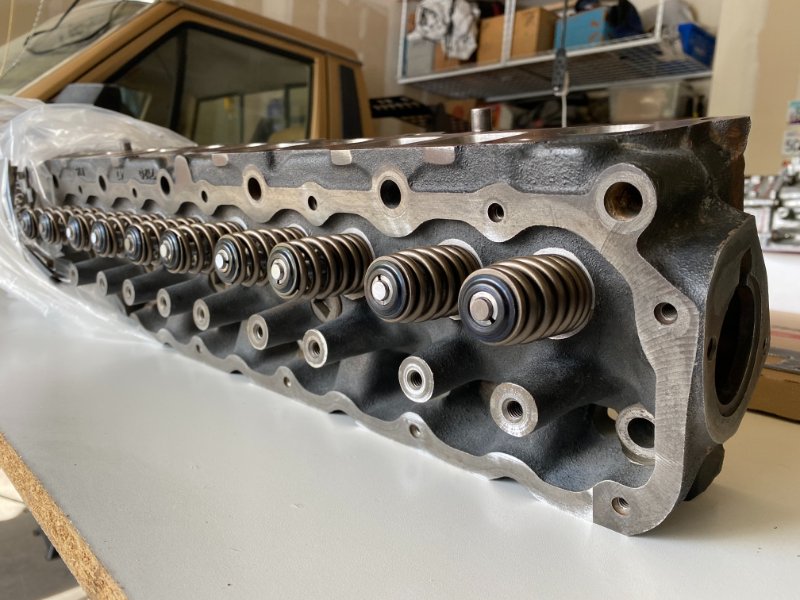
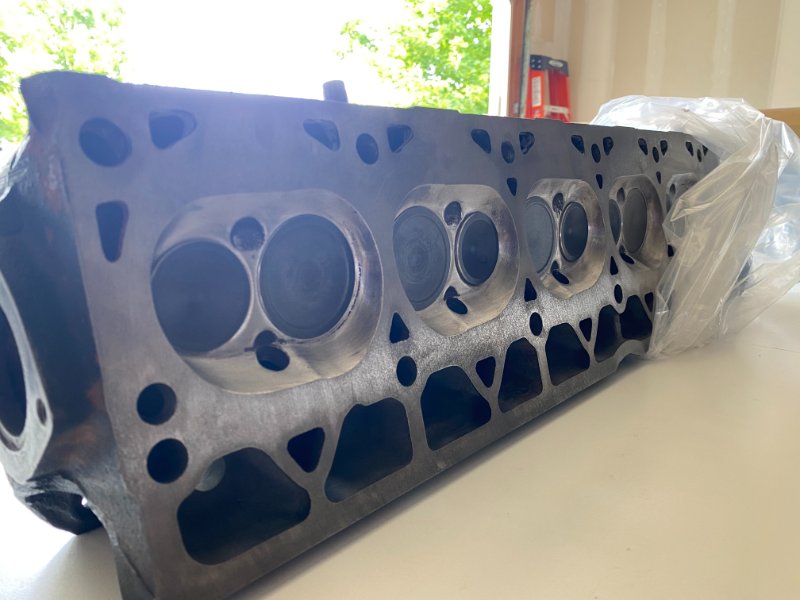
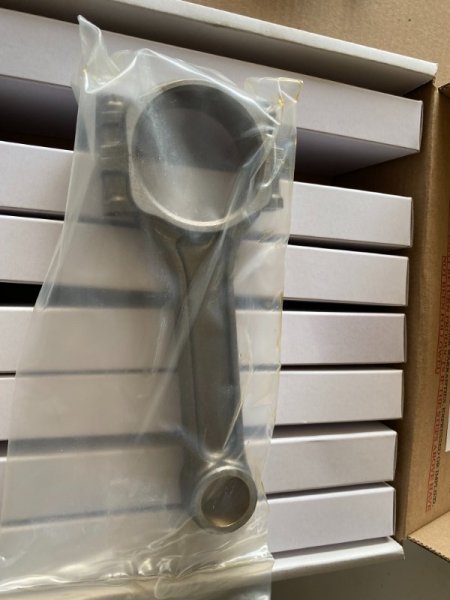
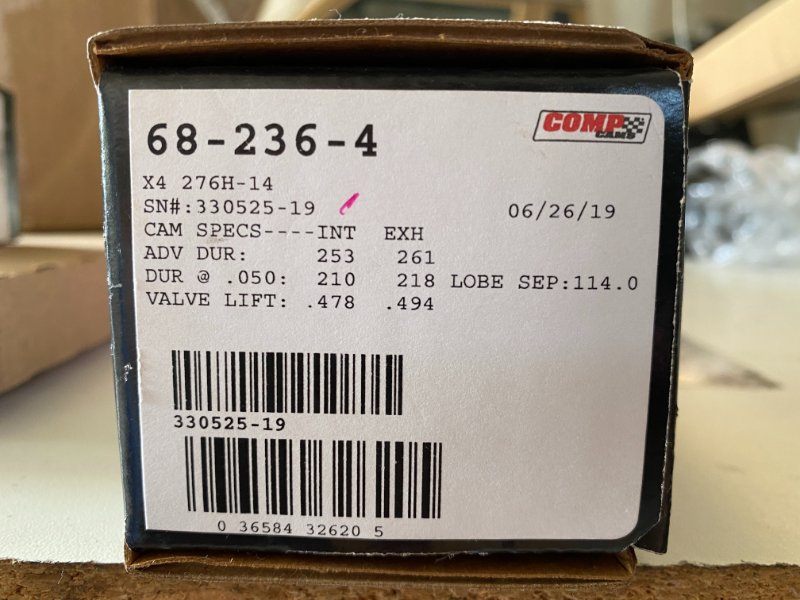
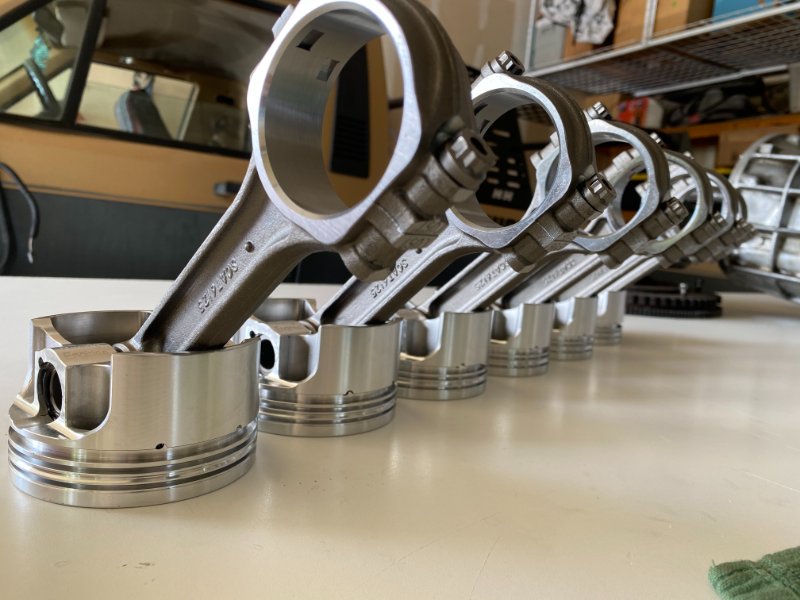
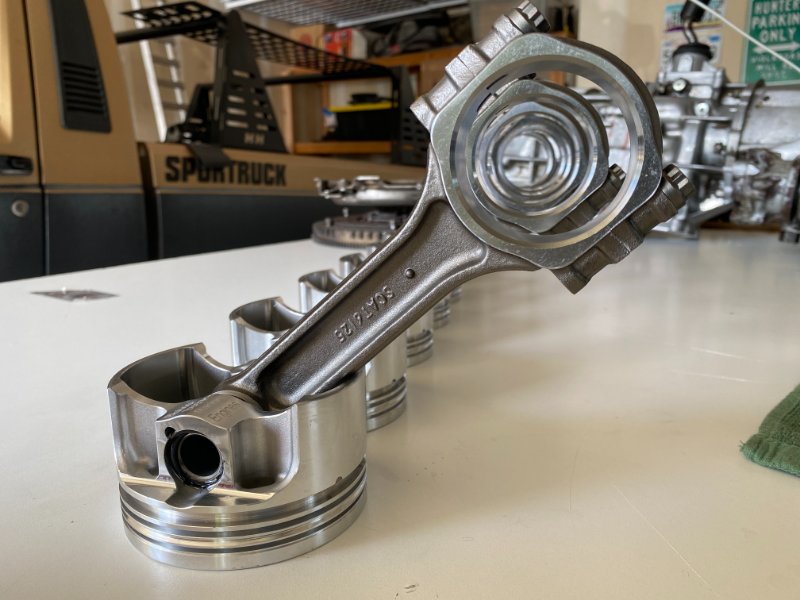
Been traveling and working the last few weeks so I haven't gotten around to making updates. Last week I drove down to California to visit some family and took the opportunity to swing by Russ Pottenger's place to pick up most of my stroker parts. Russ has been incredibly helpful so far and doesn't hesitate to answer all of my stupid questions. Below are the specs for my stroker build: Jeep 4.2L 3.895" stroke crank Scat 4.0L 6.125" rods RaceTec +0.030" bore pistons, compression height 1.385", dish volume -18cc CompCams 68-236-4 camshaft (Russ's custom grind) Russ's Ported and valved 7120 head (Stiffer springs and larger valves) 0.051" Felpro Head gasket 24lb/hr Bosch EV1 injectors Horseshoe Intake 62mm throttle body Should give me something close to these specs below: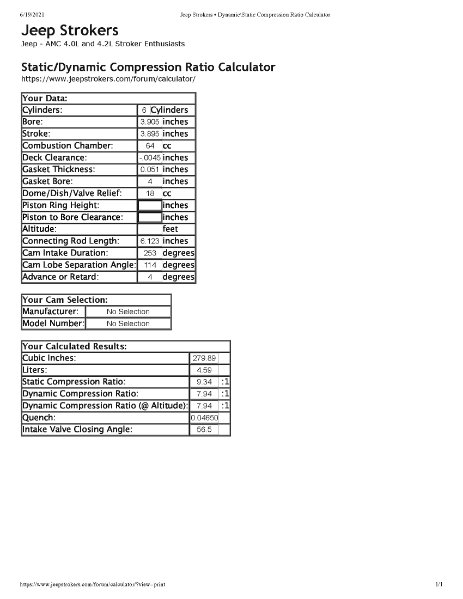

-
AX15 Select Fit Snap Ring (3rd Gear) Part #
Huntr replied to Huntr's topic in MJ Tech: DIY Projects and Write-Ups
Update: The second option Part# 83506214 from crown is NOT the correct one. It is significantly larger.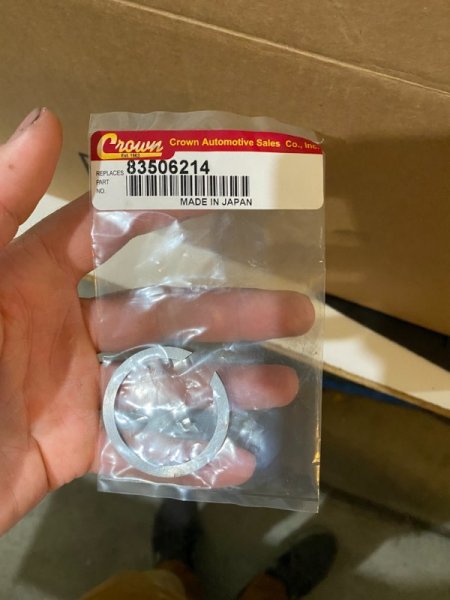
-
AX15 Select Fit Snap Ring (3rd Gear) Part #
Huntr replied to Huntr's topic in MJ Tech: DIY Projects and Write-Ups
Yeah my kit also included two of the wrong synchro rings. From what I gathered its very common to have a different mix of synchro styles... Awesome thanks! -
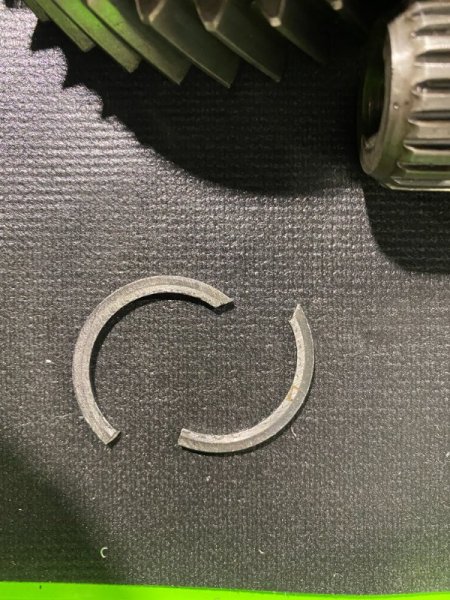
After breaking the select fit snap ring that goes at the end of the 3rd gear and 3/4 Syncro hub I had a lot of trouble finding a replacement. After searching for days and ordering a few different parts, I found that OMIX still offers the snap ring, although it was hard to identify on their site. You can order them through Morris 4x4 but the picture on the website looks nothing like the snap ring which may throw some people off (I assure you it does not look like the picture on the website). I figured I'd post it here incase anyone needs to locate one in the future. There are lots of old forum posts with no direct solution. 1.80mm Snap Ring OMIX Part #: 18892.36 EDIT: This is not the correct snap ring for the end of the shaft. I also ordered the Crown Automotive Snap Ring. I have not received it to confirm if it is the right part. I will update when I know. 2.15mm Snap Ring Part# 83506214
-
Intermittant turn signal problem
Huntr replied to Ruxus's topic in MJ Tech: Modification and Repairs
I don't exactly follow what the symptoms are but before you go trying to rip apart the column I would check the bulb sockets for the front blinkers. If the actually switch lever seems to be mechanically fine I would bet its a bad ground in the bulb socket. It can produce some crazy symptoms like hazards working, one direction of blinker working and the other direction just showing solid on when you turn the switch that way. I just fought a problem like this in my 88 cherokee. Blinker dash indicator would sometimes even come on when I turned on the headlights. -
Scaleless's '87 SporTruck Project
Huntr replied to scaleless's topic in Member Projects: Your Comanches
You're right! It's just smaller and rotated 90 degrees. Weird! -
Project "It's a Jeep Thing" - Huntr's 87 MJ Build
Huntr replied to Huntr's topic in Member Projects: Your Comanches
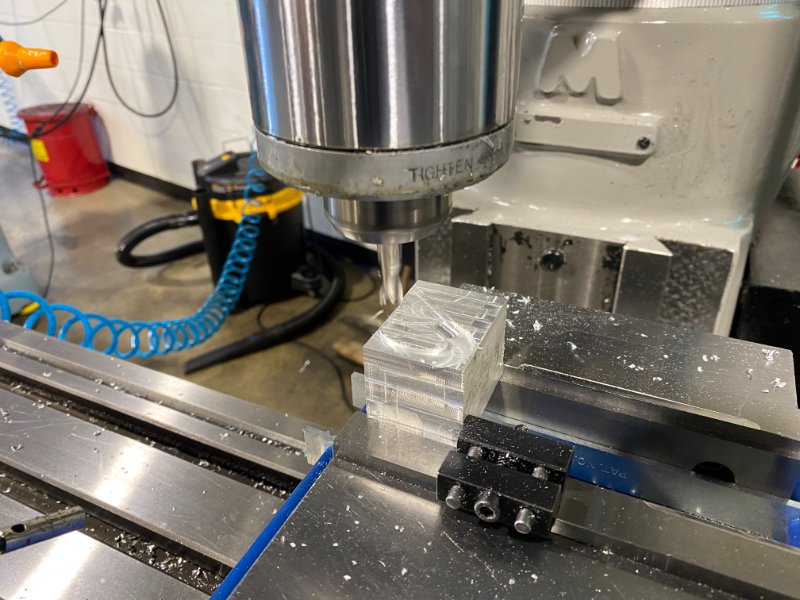
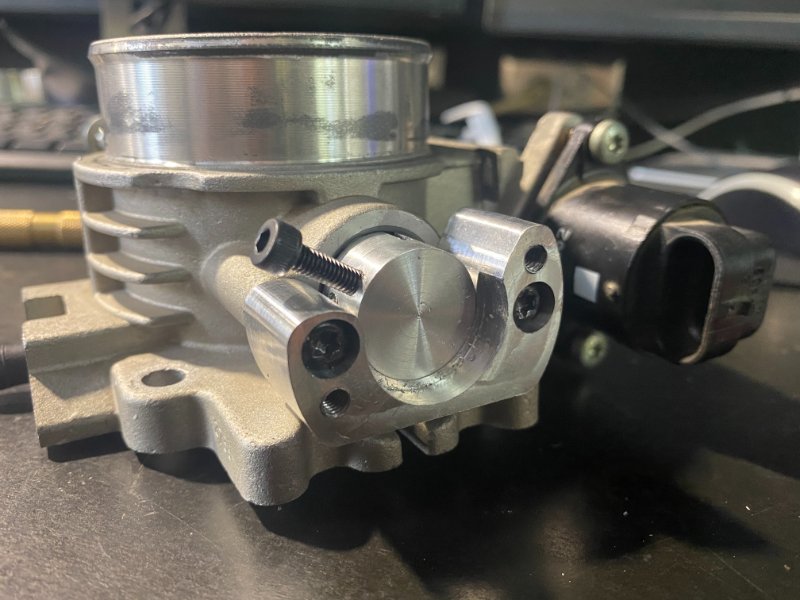
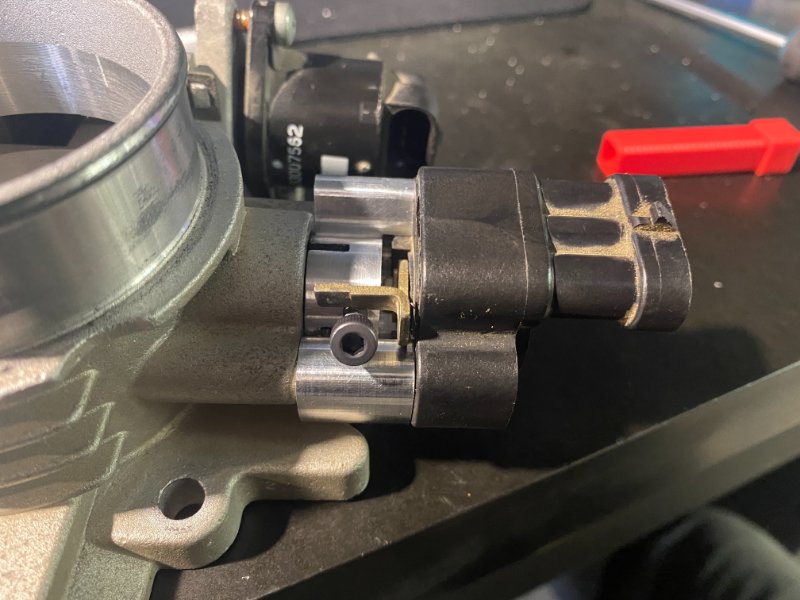
In better news I managed to find a horseshoe style intake and a factory style clock at the junk yard. I was way more stoked on finding the clock in good condition than I should have been! For the intake I will be using the newer style throttle body. I am still on the fence about boring it out, at the very least I think I will remove the tapper at the bottom and make it 63 mm throughout. I also machined a TPS adapter to adapt my renix style TPS to the new throttle body. It looks damn good if I do say so myself! Won't know if it actually works until I build the engine though...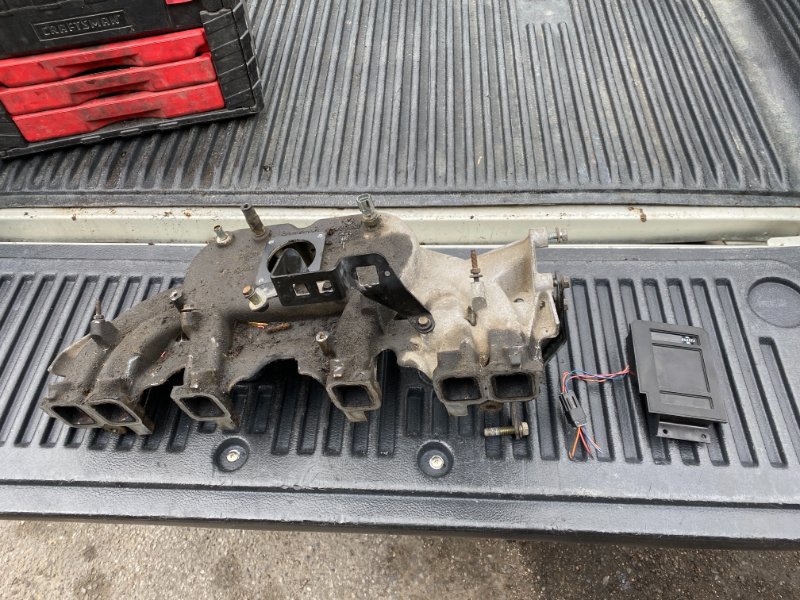
-
Project "It's a Jeep Thing" - Huntr's 87 MJ Build
Huntr replied to Huntr's topic in Member Projects: Your Comanches
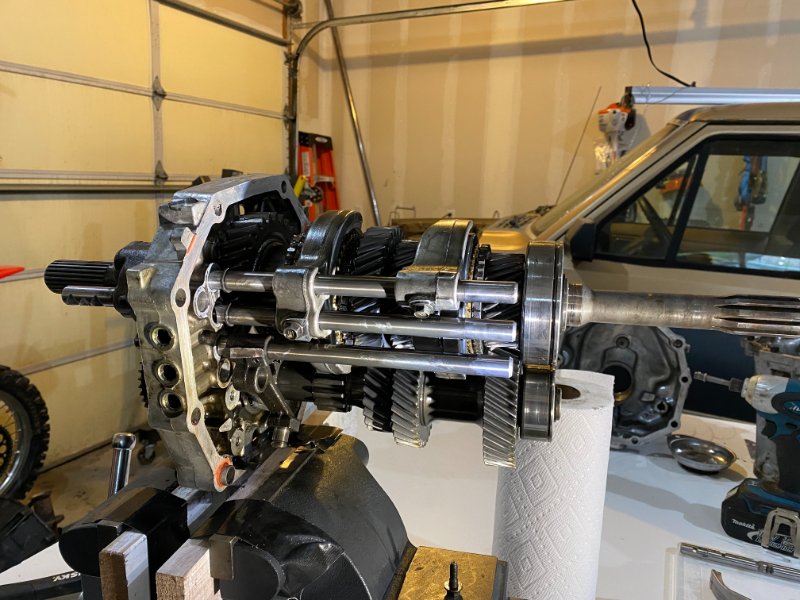
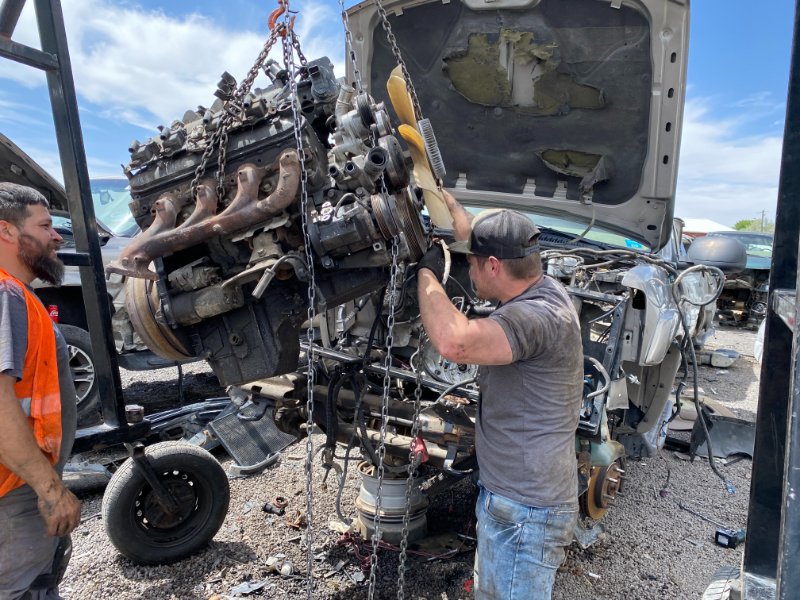
Quick update on the progress. The last 2 weeks have been crazy hectic. The further I get into this thing the more it looks like it won't be done before I have to leave for training. I cleaned and opened up the AX15 that I got with the engine from the guy in Nevada. In typical fashion, I discovered that the trans case is cracked at one of the bracket mounts. It doesn't penetrate into the case itself so it still holds fluid. I debated TIG welding it but I don't feel like dealing with die cast oil soaked aluminum. Right now the plan is to leave it as is and not install a bolt in that hole. If it progresses any further and begins to leak I will replace the tail housing. While disassembling the gear train I managed to crack a few teeth on second gear. Guess that means I'll be ordering a new gear. One of the C-Clips that holds on the third gear syncrohub also decided to just shear down the middle. This c-clip is a select fit and has recently become very difficult to find. I ordered 2 different clips from Morris 4x4 hoping that one of them will be the correct size. If not, I will look into hopefully finding a clip off a R151 toyota trans or similar or calling around to different trans shops. EDIT: Here is the correct snap ring: https://comancheclub.com/topic/66397-ax15-select-fit-snap-ring-3rd-gear-part/?tab=comments#comment-694291 And just because one engine swap isn't enough I spent my Saturday pulling an LM7 out of a Tahoe to swap into my buddies tacoma!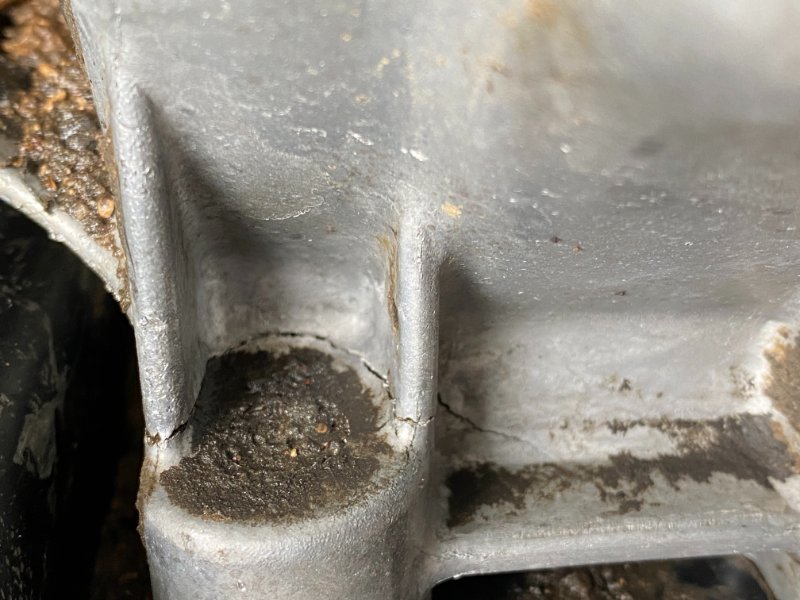

-
Scaleless's '87 SporTruck Project
Huntr replied to scaleless's topic in Member Projects: Your Comanches
I thought so! I wonder where mine went thanks for checking. I'll have to make up a plug while the engine is out. Oddly enough my 1988 Cherokee with an auto doesn't have that hole at all. Must have gotten rid of it after 87? -
Scaleless's '87 SporTruck Project
Huntr replied to scaleless's topic in Member Projects: Your Comanches
Damn that looks great! Love how similar our trucks look currently. Wish I was that far along in my engine build though! Quick question for ya while your engine bay is pretty free. Behind the engine block on the passenger side, do you have an oval cutout that goes in behind where the heater core and stuff is? Is there a rubber plug in that hole? Mine is just a gaping hole into the cab of the truck.... -
Project "It's a Jeep Thing" - Huntr's 87 MJ Build
Huntr replied to Huntr's topic in Member Projects: Your Comanches
Yeah, didn't exactly instill confidence when he told me that. I will be calling them in the morning to let them know I'll press in my own freeze plugs. Lets hope this bore/hone goes as planned. You guys are getting me all worked up! -
I'll try that out. Thanks!