
(1)(1)(1)(1)(1).jpg.66b9216aabfaee796fca6c15567485e7.jpg)
Rooster92
-
Posts
63 -
Joined
-
Last visited
Content Type
Profiles
Forums
Gallery
Everything posted by Rooster92
-
I couldn't agree more! Thank you for reading!
-
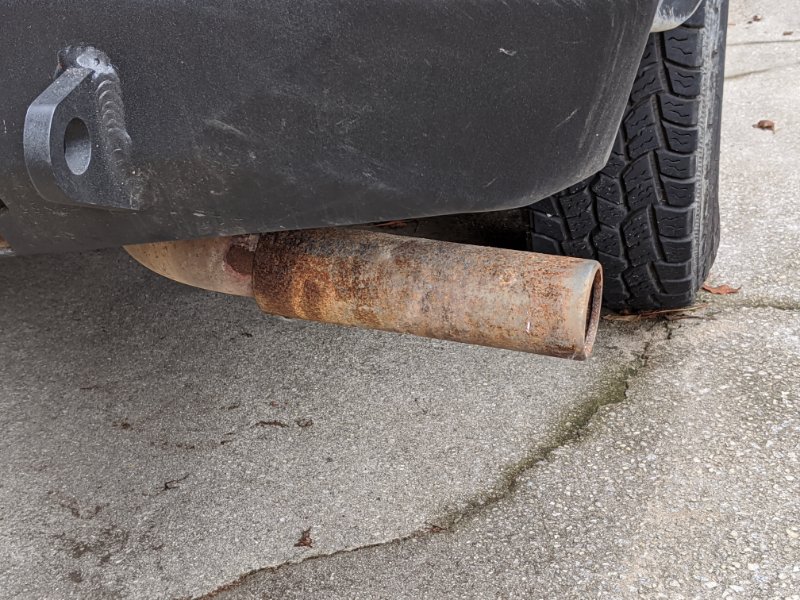
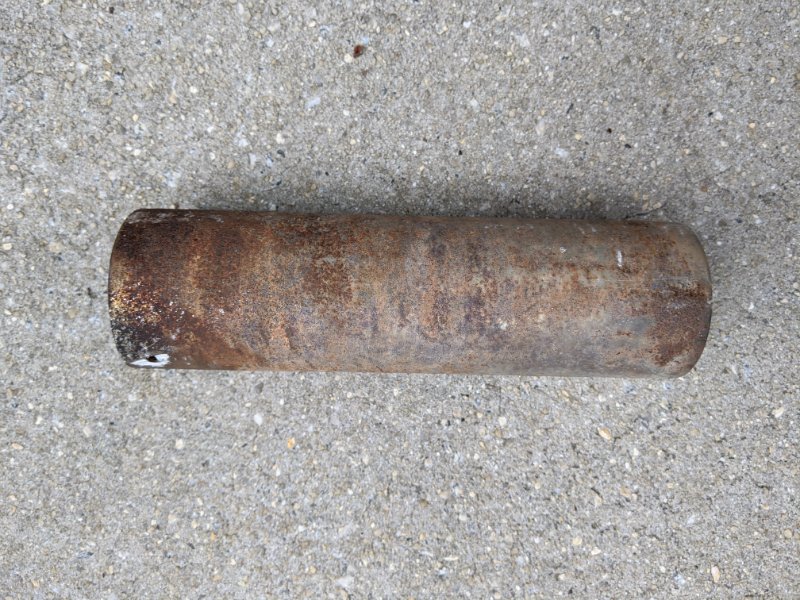
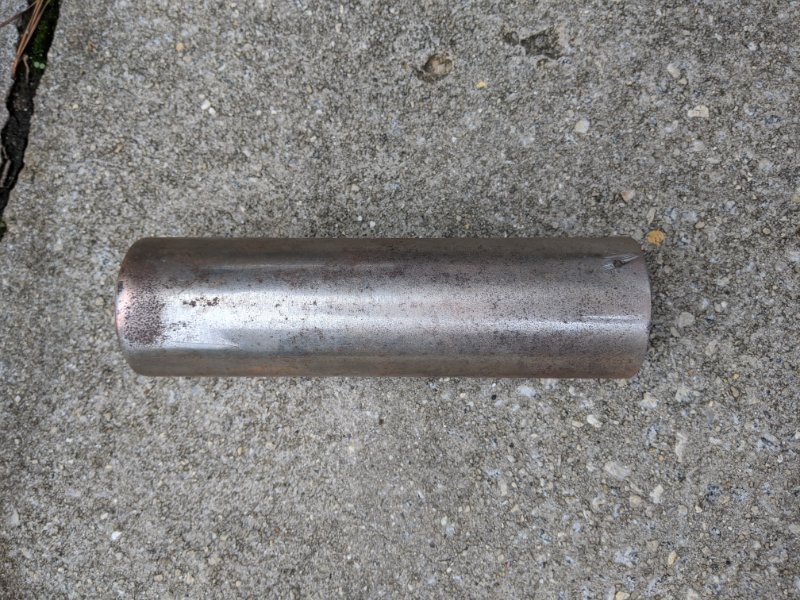
Something that was really bothering me on the Comanche was the tailpipe. It looked horrible. The rust on it was disgusting. It took a little bit of work to get off, since the screws were basically crumbling as I tried to turn them. I cut them out and got it free. From there it was a simple restoration. I sanded it down and painted it with a rattle can. I bought some new hardware and fastened it back on. I think it looks a lot better now. Happy new year to everyone. This year has definitely been one to remember. Despite all the chaos, a lot of good things have happened to me personally. I am very optimistic about 2021. More updates on the jeep to come.

-
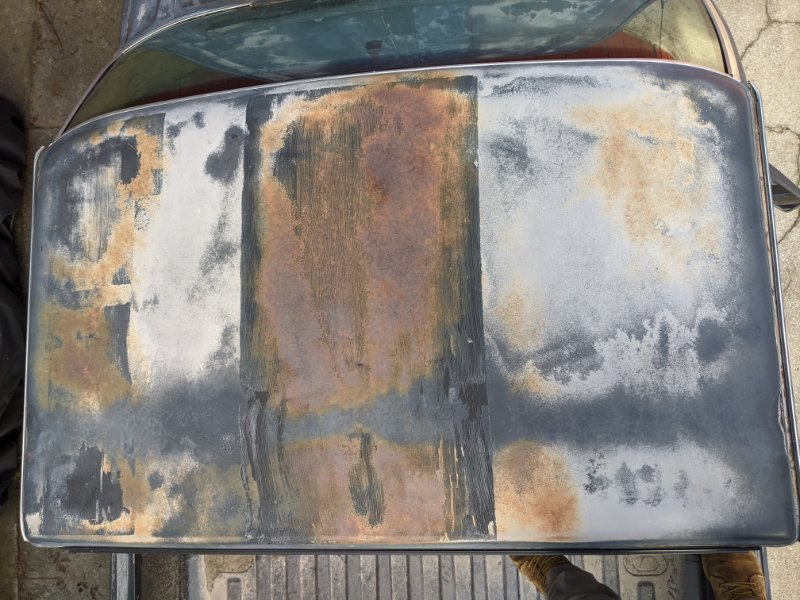
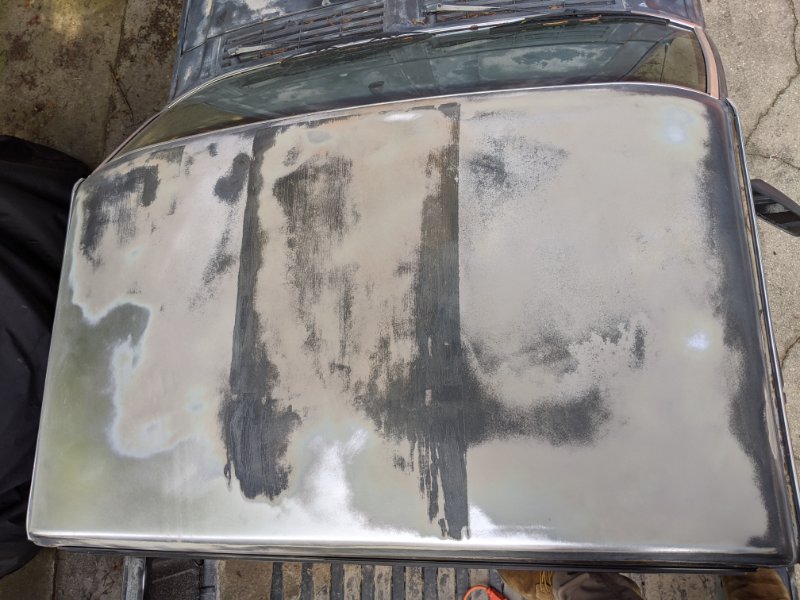
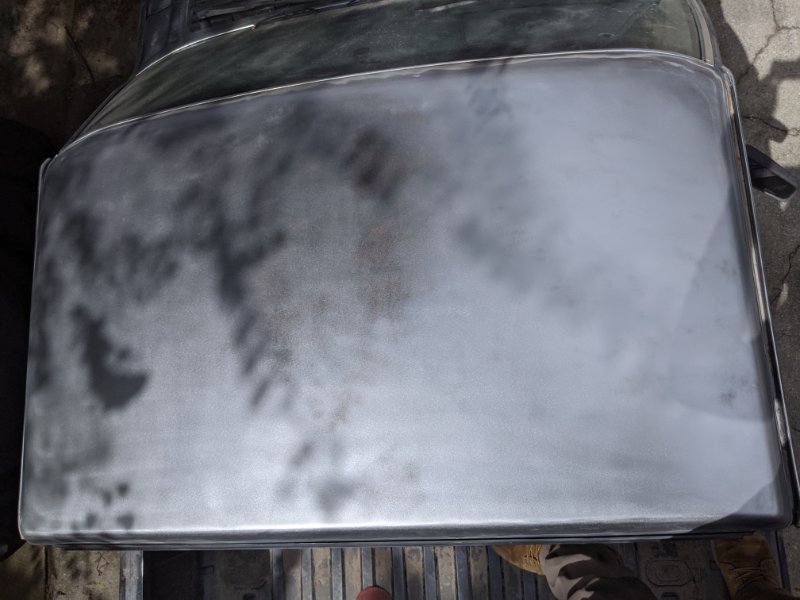
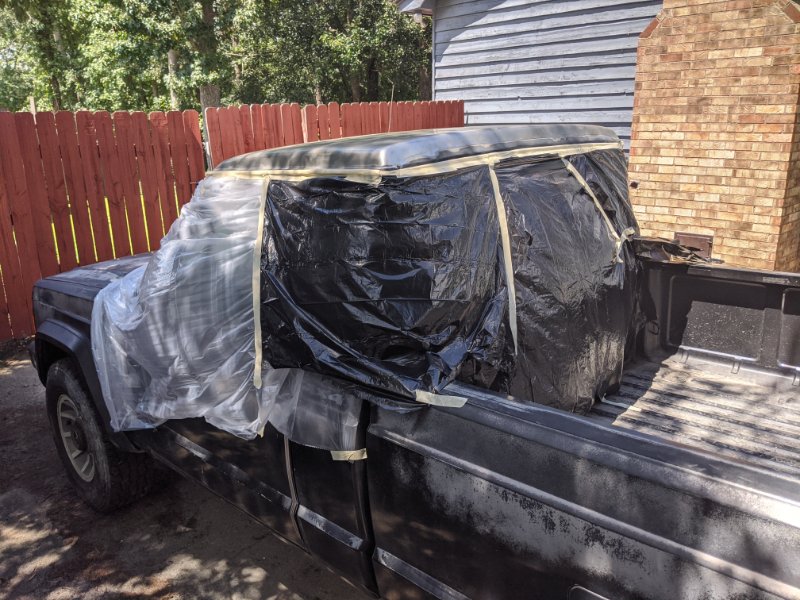
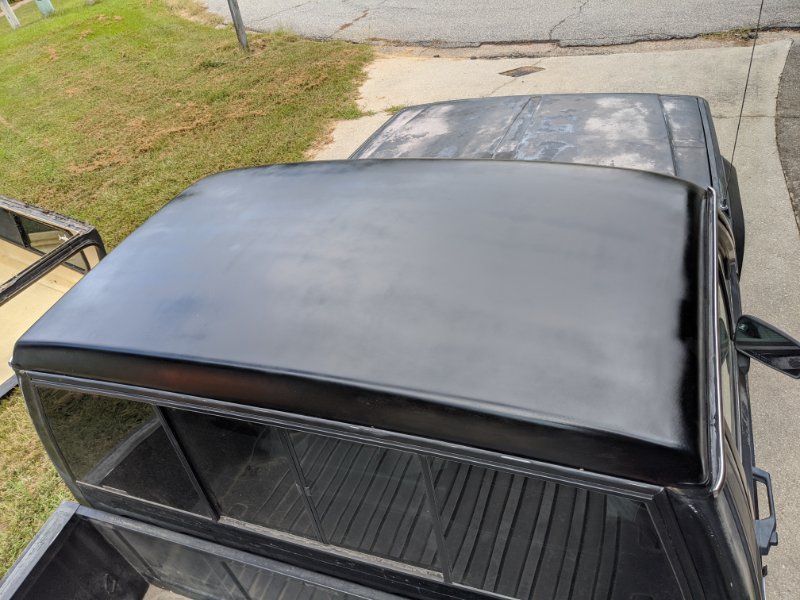
As the previous post discussed, I have been trying to paint the Comanche. Because of the issues I was having with the spray gun, I put the project on hold. There were some serious issues with the finish of the vehicle though that really needed to be addressed. Specifically, I am talking about the roof of the cab. I wanted to clean up the rust before it became a real issue. Ultimately, I decided to go with spray paint. It may not be the most professional solution, but I needed something to protect it from the elements. I used an orbital sander and 80 grit discs to remove the rust and finish. After I was done prepping the surface, I taped off the edges with trash bags and sheets of plastic. Finally, I used a couple cans of rustoleum and covered it as best I could. In the end, I would say the results were not terrible, but not good either. I needed to do something. Eventually I do want to paint the entire thing.
-
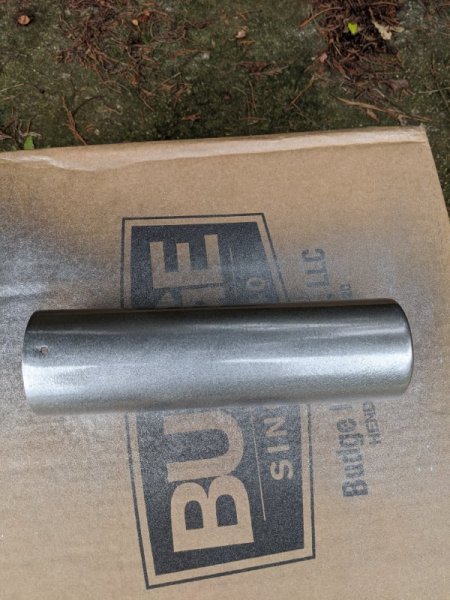
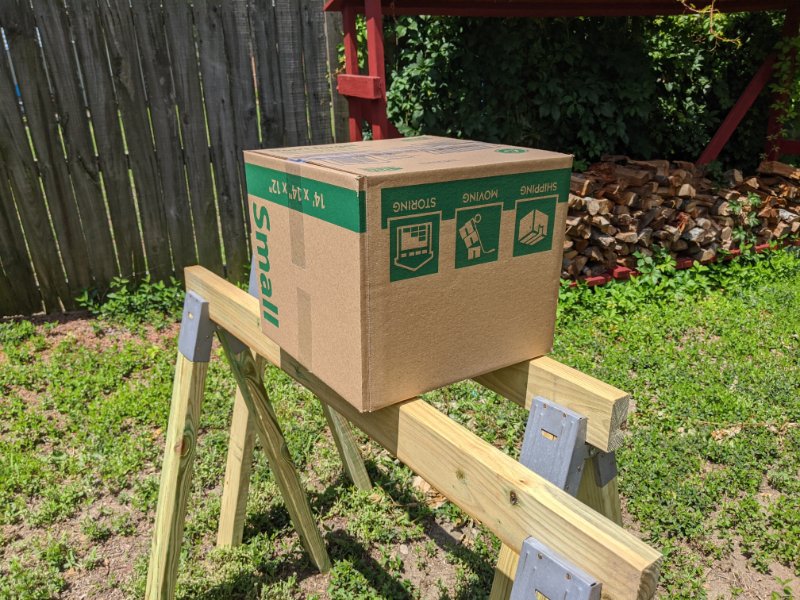
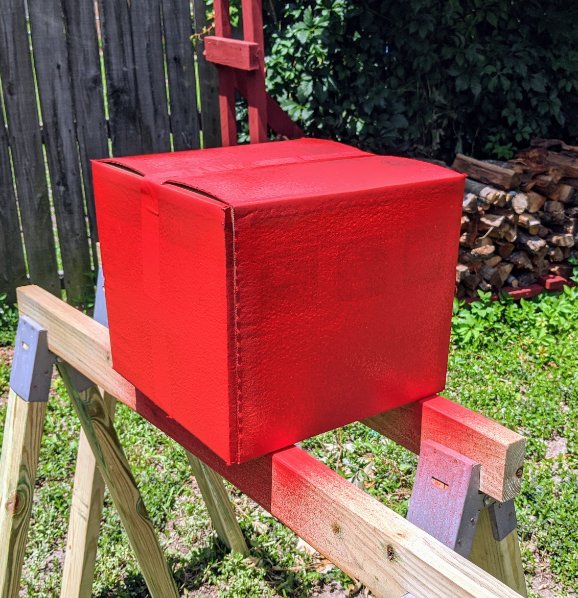
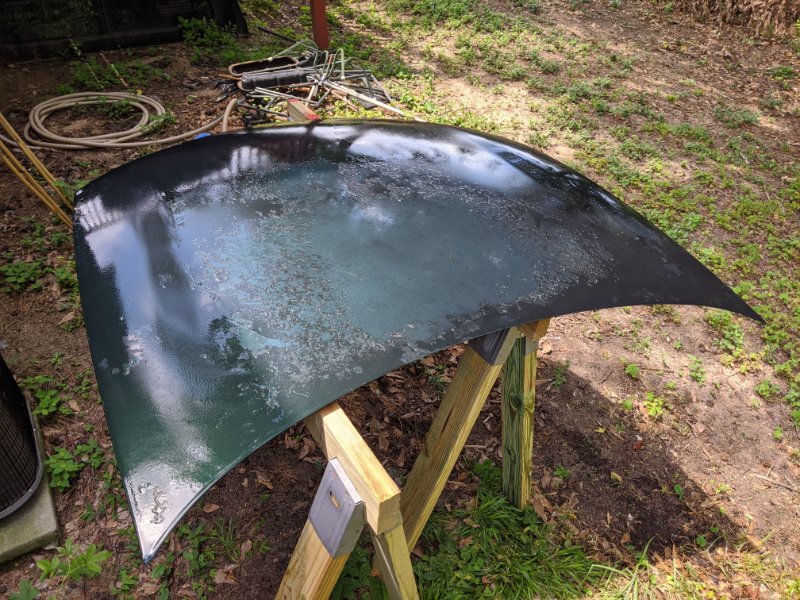
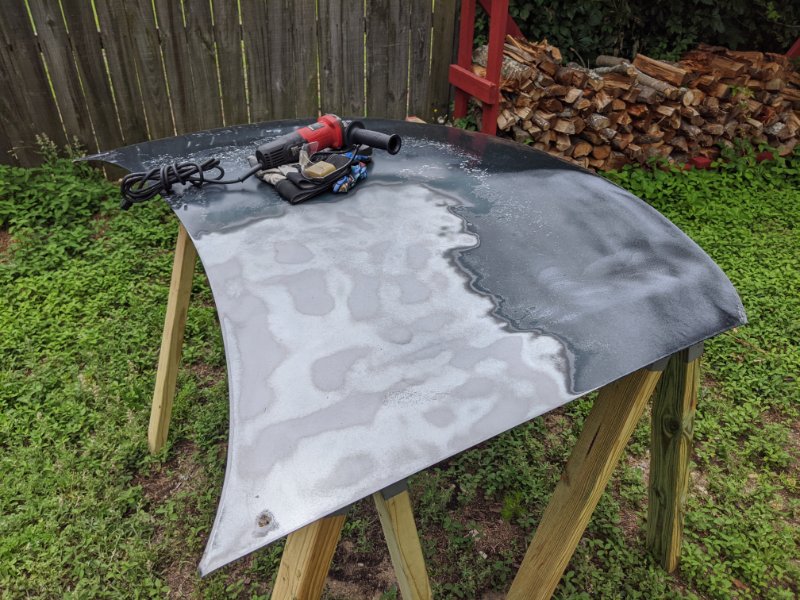
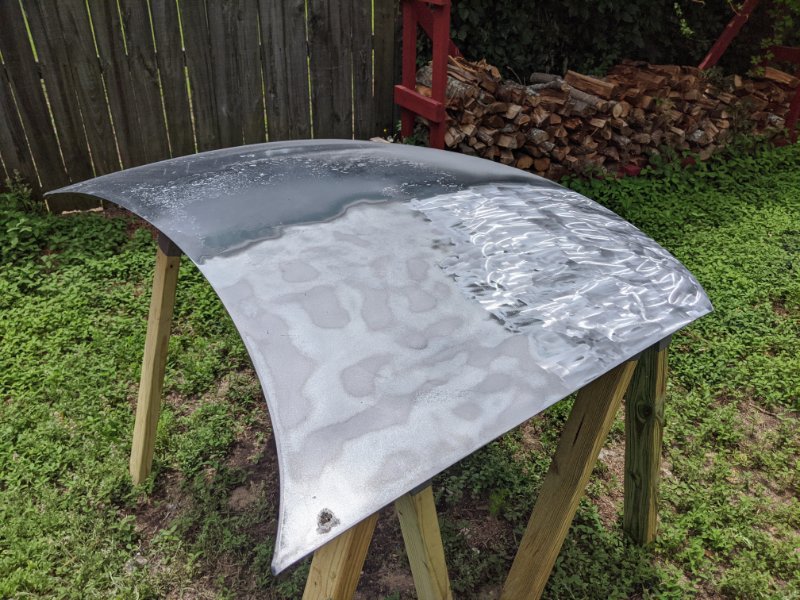
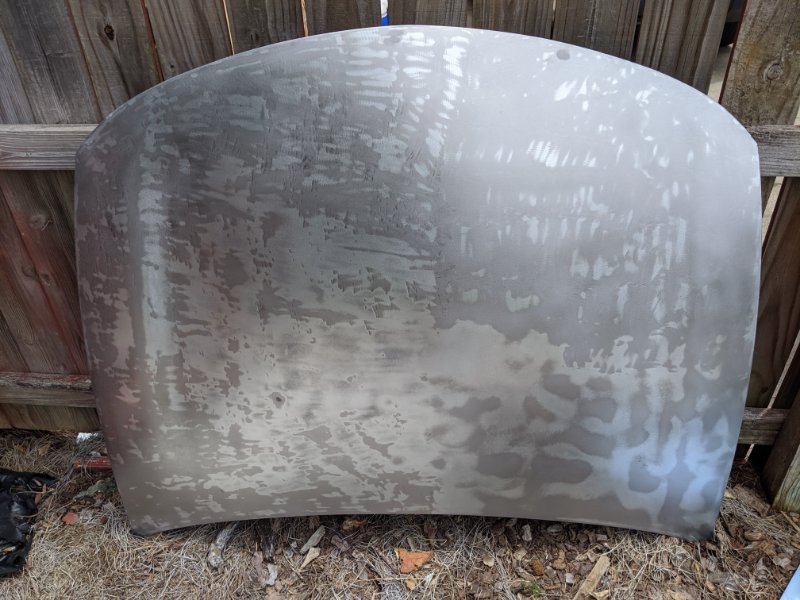
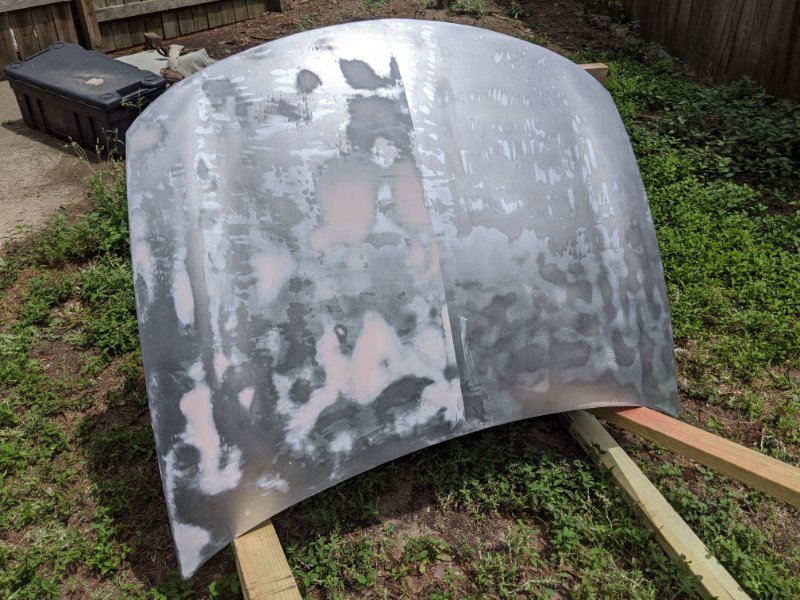
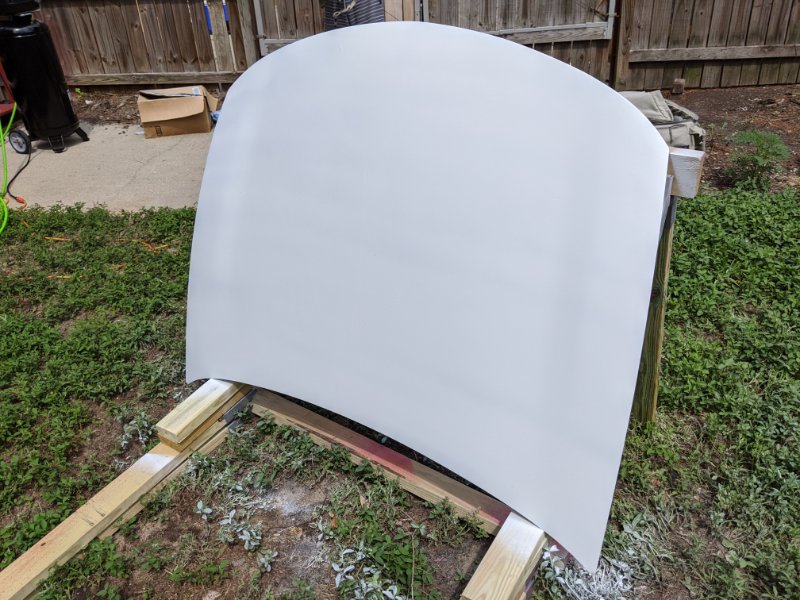
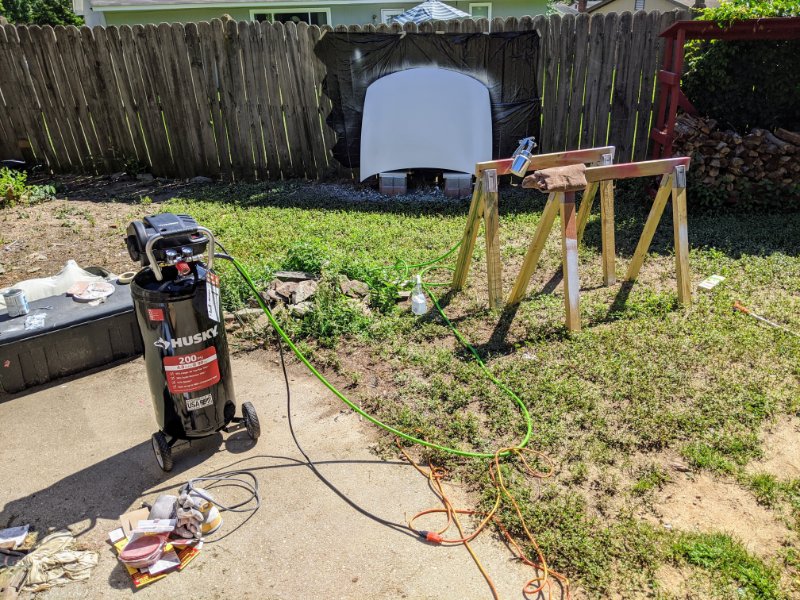
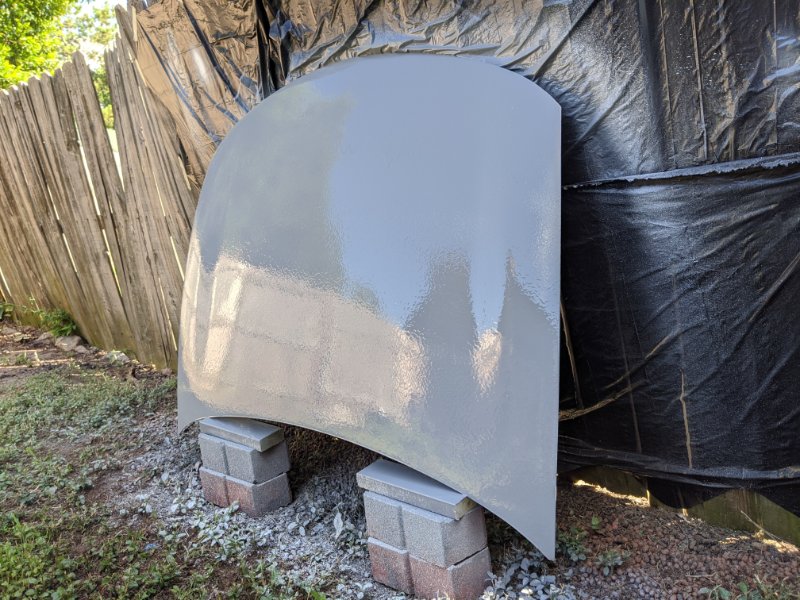
A long time has passed since my last entry into this blog. Truth be told, I have not been working too much on the Comanche. Life has been pretty crazy. Beyond all the pandemic stuff, I moved to an entirely new state, went on a two-month trip for work, and did a bit of personal travel for the holidays. Unfortunately, the Jeep had to move down on the priority list for a little while. Nonetheless, there has been some minor progress in some areas. These photos are from a few months ago. Before I moved, I became pretty committed to the idea of painting the vehicle myself. I watched a ton of YouTube videos and read a bunch of articles. Eventually, I got an air compressor and paint gun. The first thing I did was test it on a cardboard box with some craft paint. Once I felt satisfied that everything was working correctly, I went to the junkyard and bought a hood off of an old Saturn. It was very time consuming, but eventually I was able to sand off the original finish. On some parts, I removed all the paint with an orbital sander. Later I realized it was faster to use an angle grinder with flap-disc attachment. It scratched the surface up quite a bit, so I went over it again with the sander. From there I began filling in all the scratches and gouges with bondo and sanded that down again. That was also extremely time consuming. I only did one half because I wanted to see if this step was really necessary. There is definitely an art to this, and I have gained a lot of respect for people who do body work. Once that was done, I sprayed on a couple coats of primer. Finally, I moved onto the actual base coat. Here is where I started running into issues. The spray gun didn’t vaporize the paint well and it kind of just spurted out. I thought that it may have been that I needed to thin the paint. Even after I followed the specific directions, it was still coming out in large gobs, with an uneven pattern. Then I tried cleaning the spray gun out as well as I could in case there was some sort of blockage. I used the wire brushes, paperclips, and ran mineral spirits through it to break up any paint deposits. No dice. It still wouldn’t spray evenly. I will try replacing the nozzle on it. I'm not sure what else to do. Well, I never did make it to the clear coat. Life started getting pretty hectic and I had to go on hiatus. After the base coat, there is still a good deal of sanding with very fine grit paper to smooth the surface prior to the clear finish. I realize that none of this post has anything to do with my actual truck. This was a huge learning experience for me though. It is a steep learning curve. I am glad that I didn’t dive into painting the Comanche from the get-go.

-
The next project for my jeep is to paint it. I have been slowly researching and gathering the correct supplies/equipment. Are there any important repairs or modifications that should be done BEFORE the vehicle is painted? I want to make sure before I start. Thanks.
-
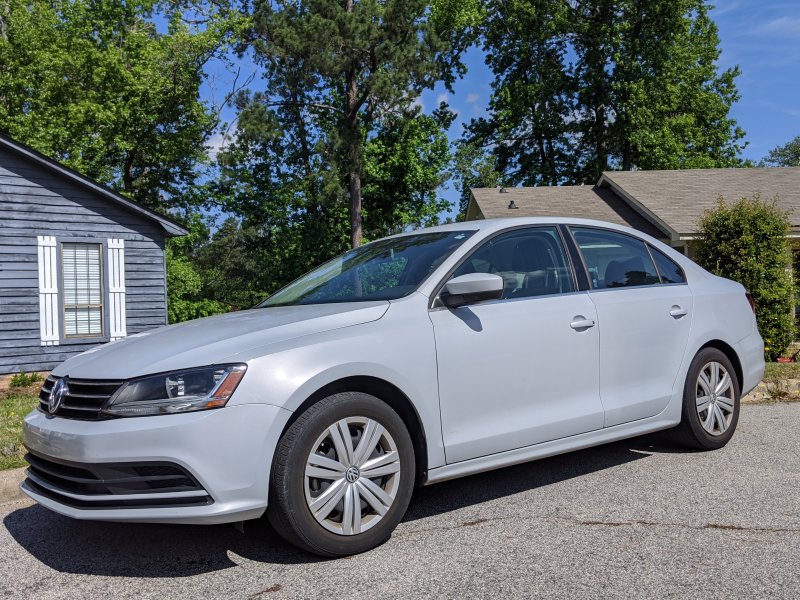
2017 Volkswagen Jetta TSI
-
The military tan looks good. I'd like to clean up and paint the engine bay in mine as well. What else do you have planned?
-
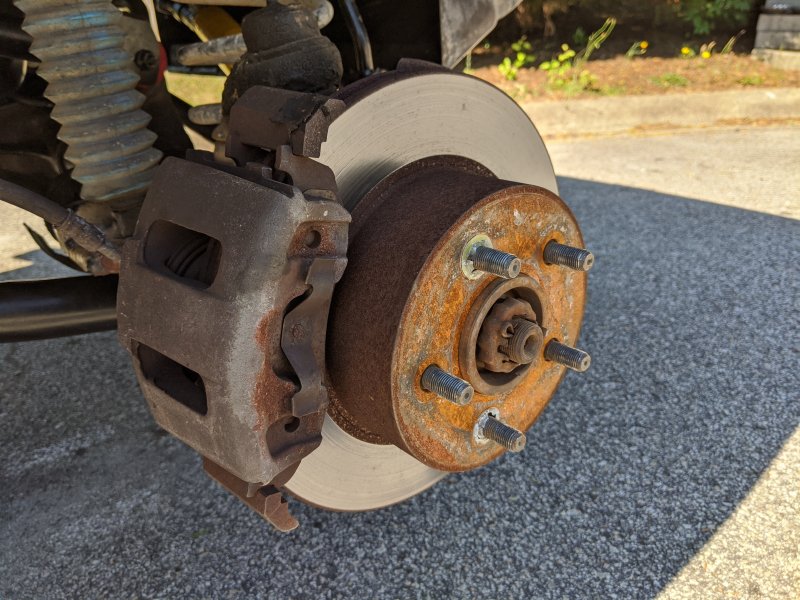
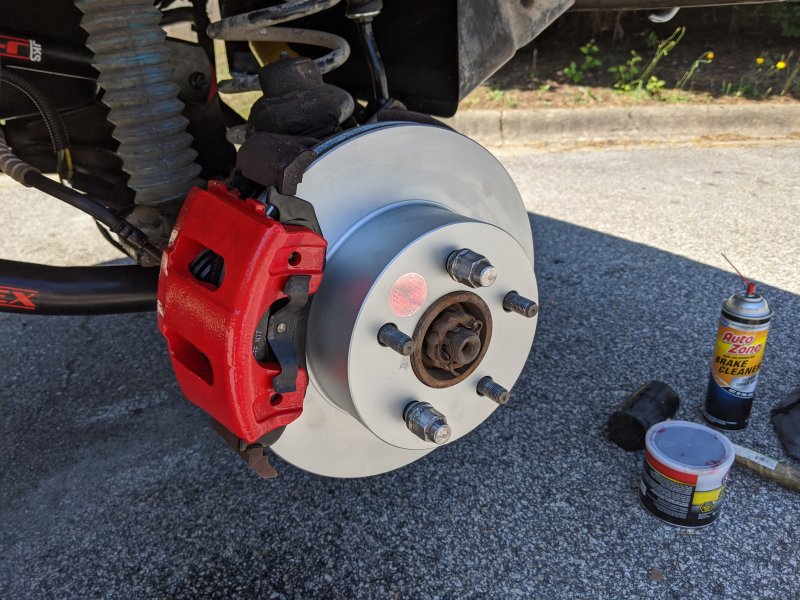
Yesterday, I worked on the truck a bit. A friend came by and helped me replace the rotors, pads, and calipers. Afterwards, we changed the rotors and pads on her Subaru. The weather was great and it was a good time all around. I want to work on the drum brakes next. I am starting to consider though, is it worth it to do a drum-to-disc conversion? They say it will improve the breaking power, especially in wet conditions. Something to think about this week.
-
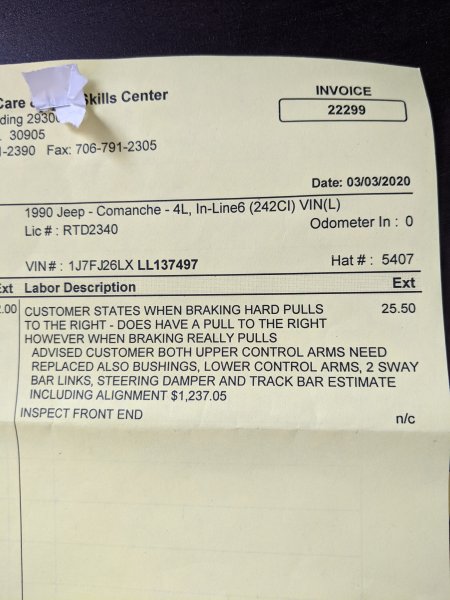
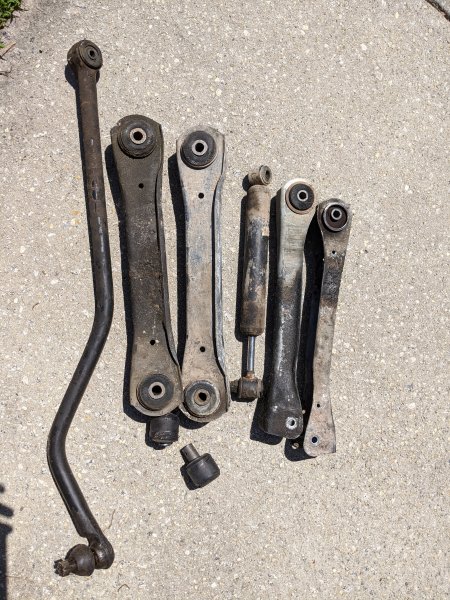
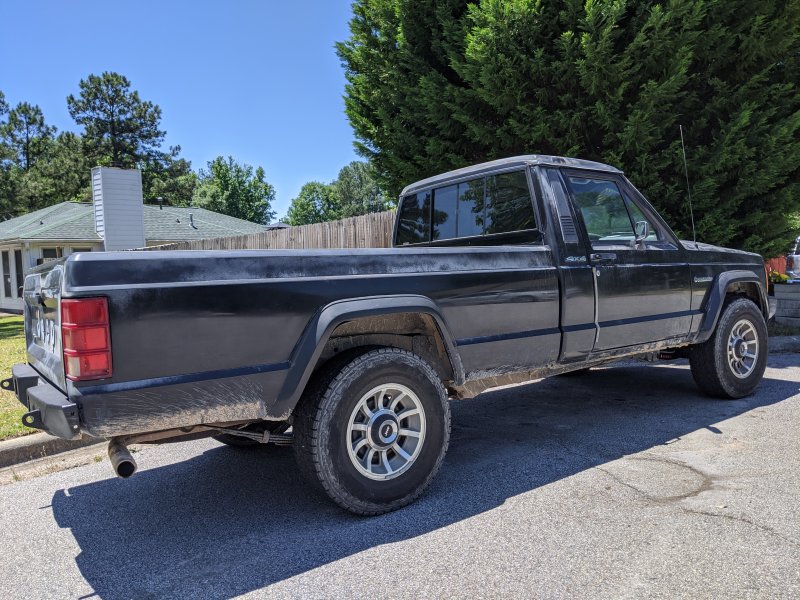
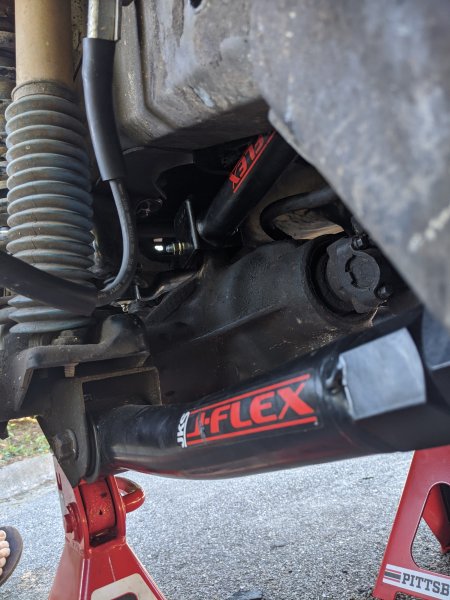
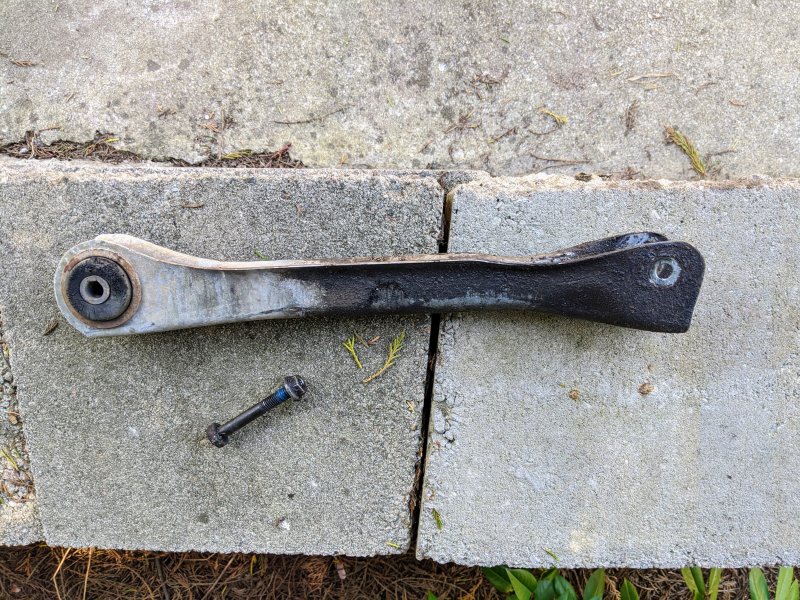
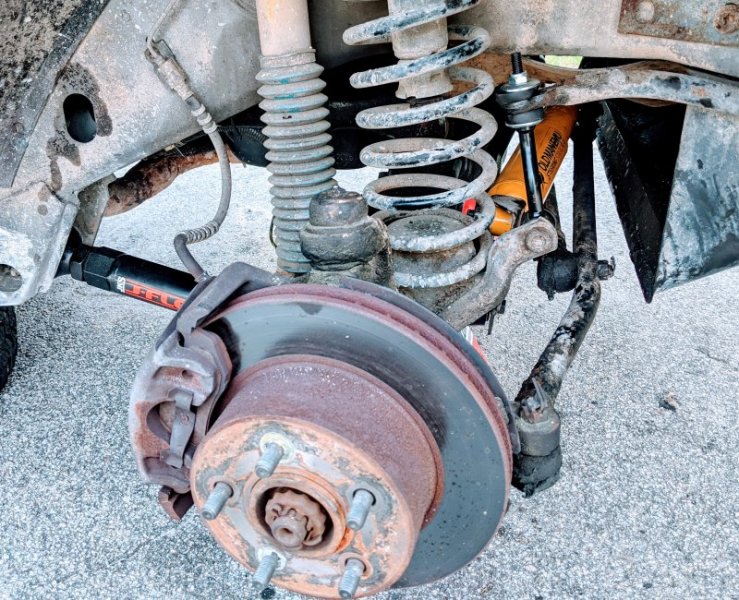
Yesterday I finished my first significant project on my Comanche since getting it. I have gotten it back on the road after about a month of being on jack-stands. Today I am writing an after-action review of the project, lessons learned, and ways forward. I am going to be completely transparent. What was supposed to happen? It all started when I went to get an alignment. The mechanic said that they could not do the job until I replaced the following parts: - Upper control arms - Lower control arms - Sway bar links - Steering damper - Track bar Including the alignment, their original estimate was $1237.05. Here is the original receipt. My plan was to order and replace the parts myself, in front of my house, for less than the mechanic's quote. What actually happened? I successfully replaced every part mentioned over a period of about four weeks, in front of my house. I did not, however, do it for less than the mechanics quote. For one, I bought mostly upgraded parts. The control arms were much more expensive than the OEM parts. Also, I started this with a basic set of wrenches, a few pairs of pliers, and a 3/8 inch drive socket set. I am including all the money I spent on tools. Without the alignment, I am sitting at about a $1500 investment. The replacement parts: - JKS J-flex adjustable front lower control arm https://www.morris4x4center.com/jks-manufacturing-j-flex-adjustable-lower-contol-arms-for-0-6-lift-pair-jks-1650.html?gclid=Cj0KCQjw17n1BRDEARIsAFDHFey5whOW5TuEknRfUkMEhy7nsm5UvY9D-0EA_07KMPX0utD7nn1_xZEaAgYsEALw_wcB - JKS J-flex adjustable front upper control arm https://www.quadratec.com/p/jks-manufacturing/j-flex-adjustable-front-upper-control-arms-84-06-jeep-wangler-tj-cherokee-xj - Old Man Emu steering stabilizer https://www.morris4x4center.com/old-man-emu-nitrocharger-steering-stabilizer-replacement-omesd40.html?gclid=Cj0KCQjw17n1BRDEARIsAFDHFeyV435WmcR6M4rNRlNUojfaDiqt5mMq7NzaWunf-ers3bW0b1T0FSQaAquTEALw_wcB - Proforged track bar https://www.rockauto.com/en/moreinfo.php?pk=8729028&cc=1181720&jsn=395 - Proforged stabilizer bar link https://www.rockauto.com/en/moreinfo.php?pk=8730356&cc=1181720&jsn=417 - Energy suspension bushings https://www.rockauto.com/en/moreinfo.php?pk=6393351&cc=1181720&jsn=435 A non-exhaustive list of some tools I bought specifically for this: - 1/2 inch drive socket set - Breaker bar - Torque wrench - Jack - Jack stands - Angle grinder - Vice grips - Grease gun Lessons Learned When I started, I had this naive idea of me working on my truck outside as a relaxing pass-time. Well, I quickly learned that every single thing I had to do was a problem. The parts on the vehicle have been on there for over 30 years and did not want to get out. This brings me to my first lesson: realistic expectations. Everything took a lot longer (and cost more) than planned and had to be broken down into smaller and smaller steps. Part of the reason is that I had to learn everything and buy tools as I went. Nevertheless, I was persistent and learned a ton of tricks and skills. Another lesson is to keep doing research. I watched youtube videos, read this forum, read chilton/haynes manuals, got advice from auto parts store employees, and talked to all my automotive friends. This was for every part, tool, and job that went into the truck. A final lesson is to keep buying higher-quality parts (as affordable). If I am going to go through all this trouble to change it, I might as well upgrade. Way Forward I definitely want to continue improving the suspension. The end goal is to have a 3-4" lift. Other areas to work on are the brakes and inspect/replace all fluids and lubricants. Of course, I also want to do body work and other additions. Suspension - Rear leaf spring bushings - Sway bar bushings - Bump stops - Ball joints - Coil springs - Shocks Brakes - Rotors - Calipers - Drums Fluids and Lubricants - Transmission fluid - Coolant - Transfer case - Brake master cylinder - Clutch master cylinder - Front and rear axle - Power steering - Chassis grease Body/Other - Paint (considering a charcoal gray) - Light bar - Side-view mirrors - Clean/refinish wheels - Center console - Phone mount - Sound system - Ham radio/antenna I have not made any decisions yet, but there are a number of other additions that I am comparing and considering. - Rock sliders - Winch - Flares - Bumper - Tool box - Roll bar - Camper shell (I have one already that needs restoring) - Canoe rack I will continue to update this page as I make progress!
-
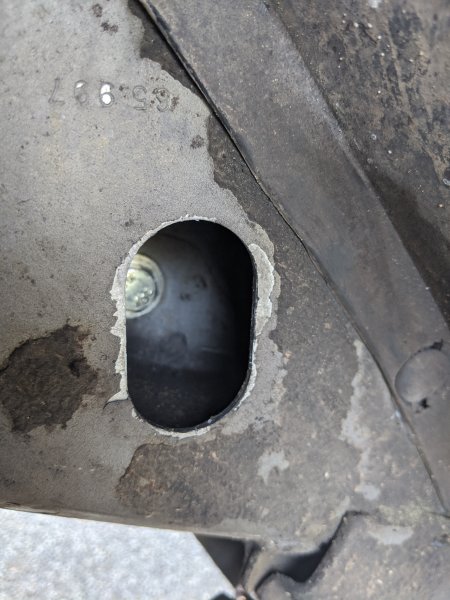
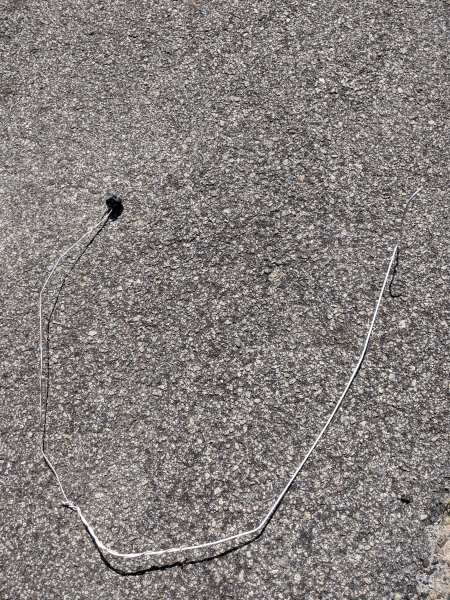
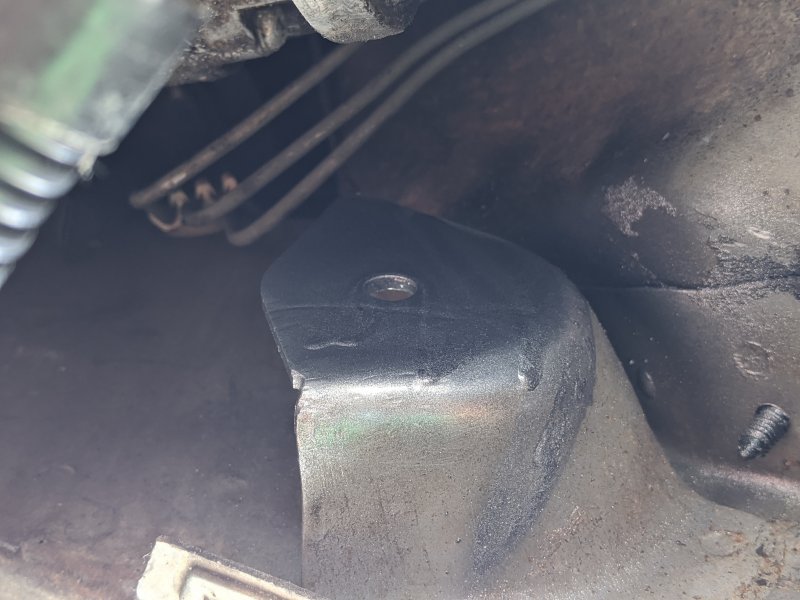
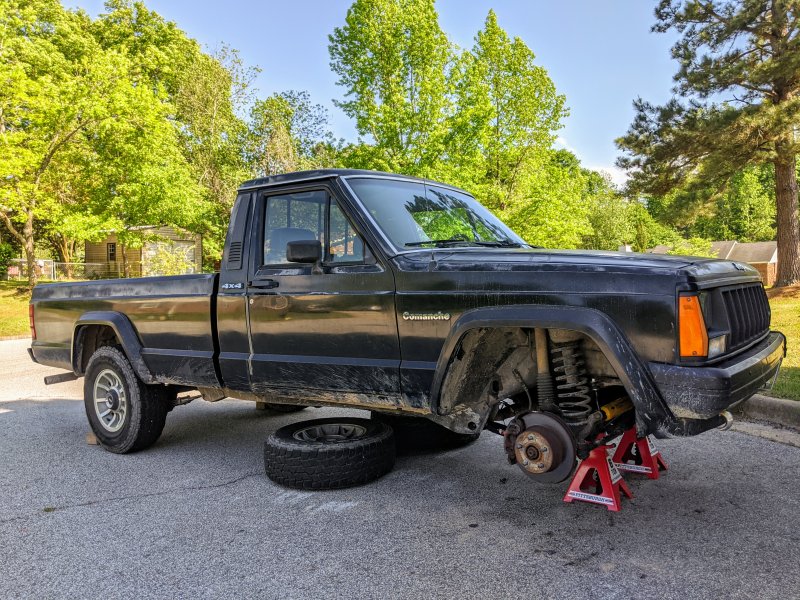
At this point, all of my new parts were in the truck. I wasn't quite ready to get the wheels on and take her back on the road yet. There were a few things I had left to do. During the process of putting the new control arms in, I had lost a few (three to be exact) sockets in the frame of the vehicle. See, to get to the bolts, you have to go through this access hole. The sockets had popped off and rolled down the frame. Yes, I was extremely pissed. I have a magnet on the end of a flexible rod, but it wasn't long enough to reach the sockets. They had rolled down quite a bit I guess. To get them out, I opened up two metal coat hangers and twisted them together. Then I took off the magnet from the rod I mentioned and duct taped it to the end of the hangers. Here is my creation. Its hard not to admire the craftsmanship. After fishing around for 15 minutes or so I was able to get them out! That was such a relief. I also had to grease the new track bar I put in. I bought a grease gun and filled it up. That was the last thing to do. I put the wheels back on and drove it around the neighborhood a bit. I can't believe how much tighter the steering is! It feels like a world of difference! On Monday I am going to take it in to get the alignment done.
.jpg.8ab1530140c03263b5b05550a2567713.jpg)
-
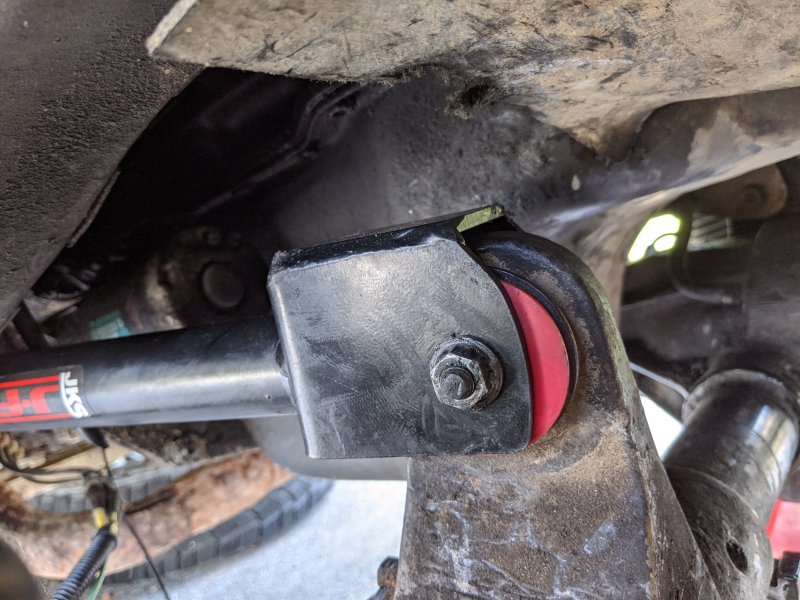
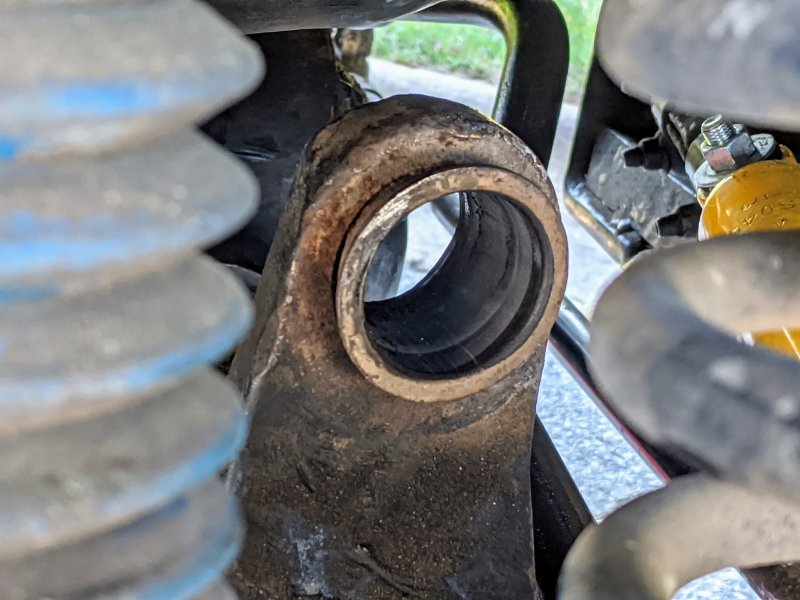
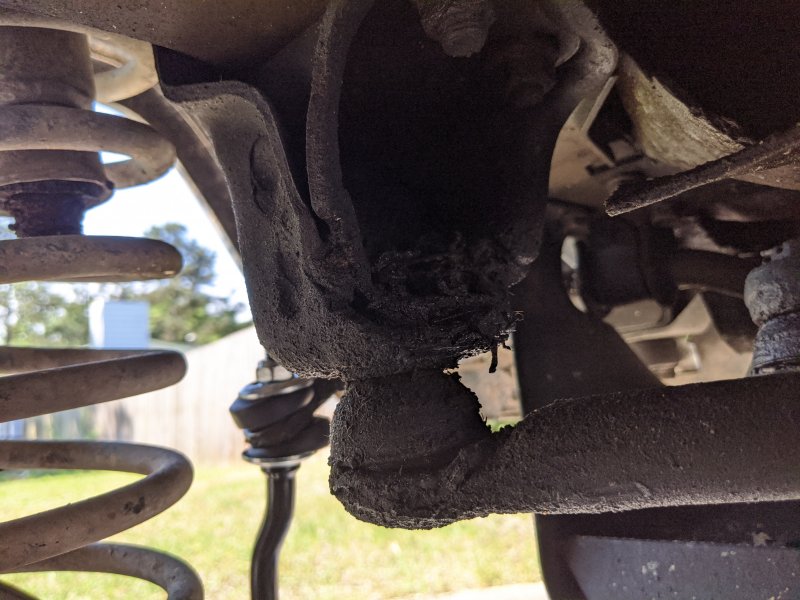
I had issues with driver's side from the very beginning. Of course, the bolts at both the axle and the frame were seized and stripped. I didn't want to, but ended up using the angle grinder again to cut them out. It was especially fun on this side because the drive shaft was in the way. I had to disconnect it. I was then able to get the grinder to the bolt and cut it out. Naturally, I scratched the housing on that side as well. I used the same procedure as before to clean it up and paint it. The new arms came with replacement hardware for the frame end, but not for the axle end. Because this time I cut out the bolt at both sides, I had to buy new hardware. I probably should have just ordered it, but I didn't want to wait. I had to get the bolt and nut at separate stores because only one auto parts store carried the right size flange nut. Well, once I started putting the new bushing onto that side, I ran into trouble again. It would not fit in all the way. I ended up using the same method you would do with a mouthpiece. I boiled a pot of water, took it off the stove and dunked the bushing in there for about three minutes. I also got a wire brush attachment and cleaned out the inner surface of the metal shell as best I could. Needless to say, it worked like a charm! I was able to fit the bushing in and install the new upper control arm on the driver's side. Felt so good!

-
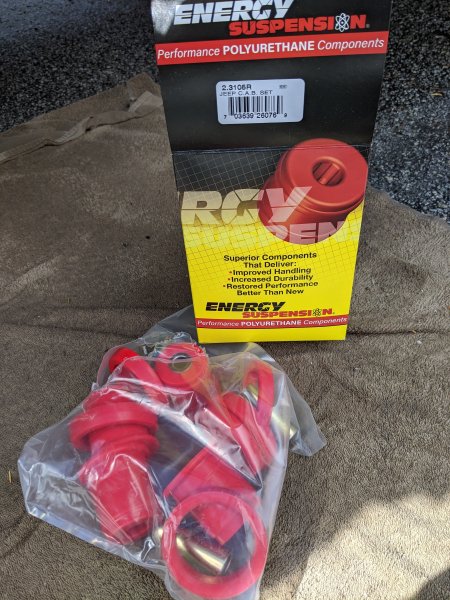
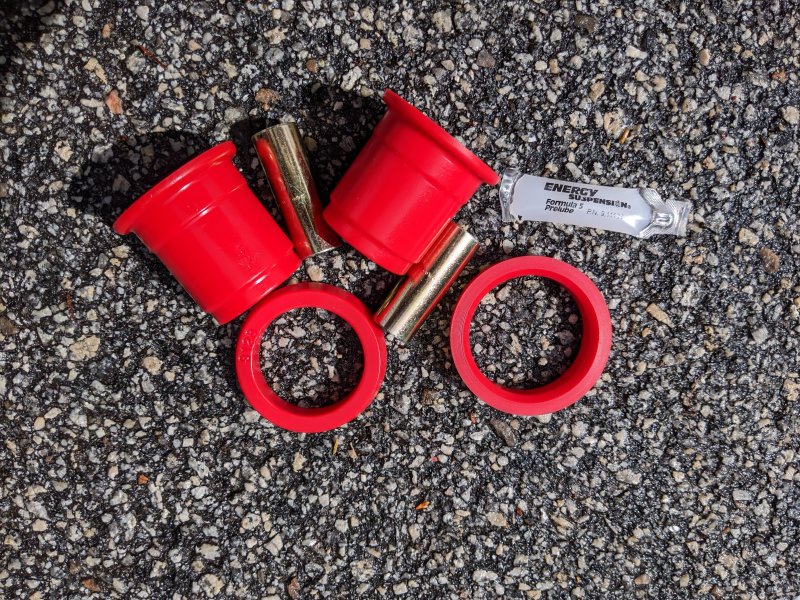
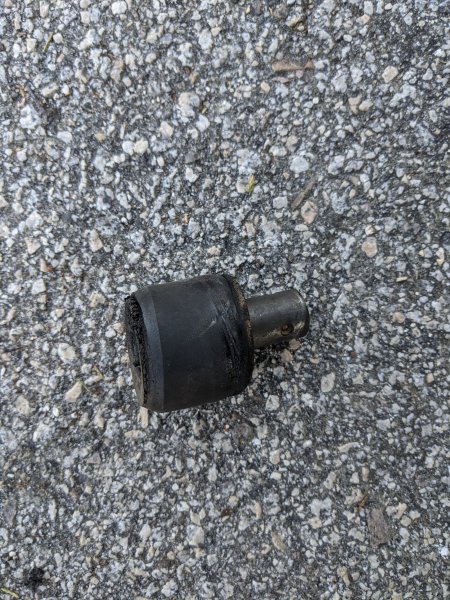
After about a week, the new polyurethane bushings came. They were super easy to install. I just used my finger to put a light coating of grease on the surface of the bushing, and the metal sleeve that fits inside. It just slid right into the housing. Once that was in, I was able to install the upper control arm and torque it down. I didn't use those rings and I still don't know what they're for. Everything was finished on the passengers side. Time to get started on the drivers side.
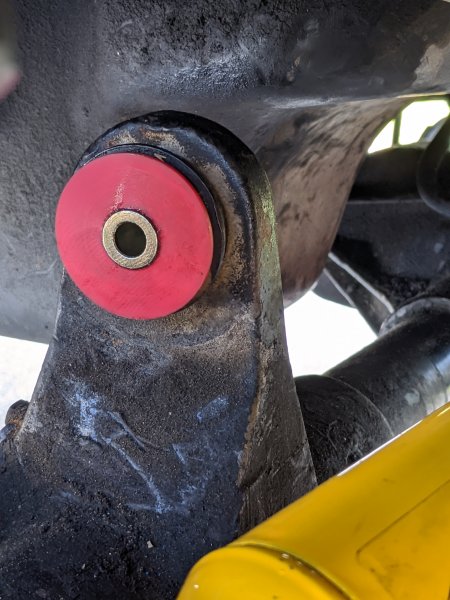
-
Alright, so I have not posted any updates in a few weeks. Progress really slowed down because I had to go back to work. Nevertheless, I have been chipping away at it little by little. I am going to recap everything I have been doing. Since my last post, I had been waiting for new polyurethane bushings to come in the mail. In the meantime I cleaned up the housing that I scratched up cutting out a seized bolt. I took @WesD's advice and sanded it, cleaned it, and sprayed it with rustoleum. I couldn't really get far enough away with the spray can so there was a bit of runoff. No one will see it though, and I'm happy with how it came out.

-
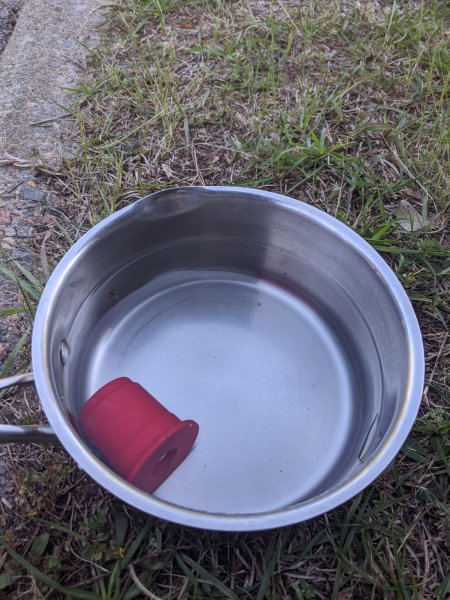
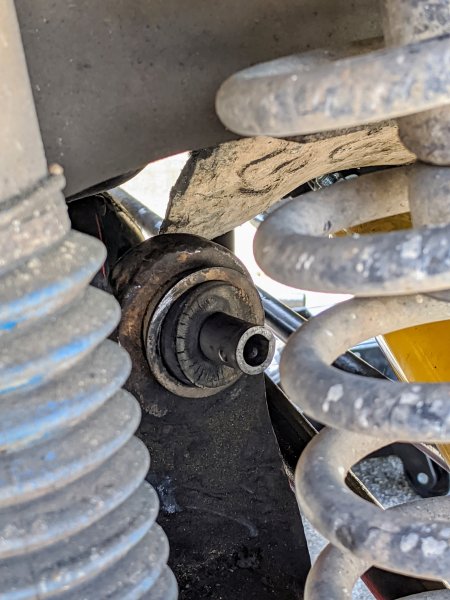
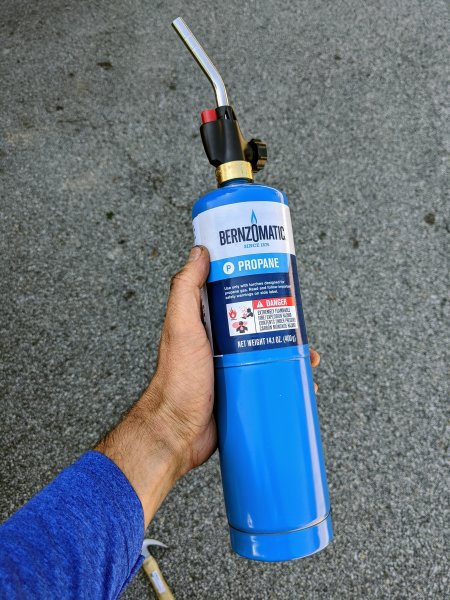
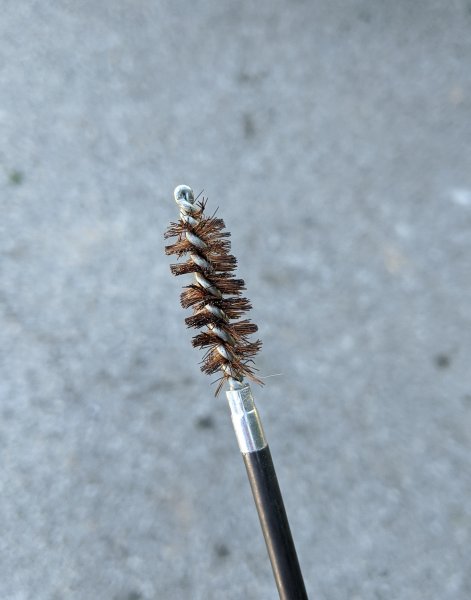
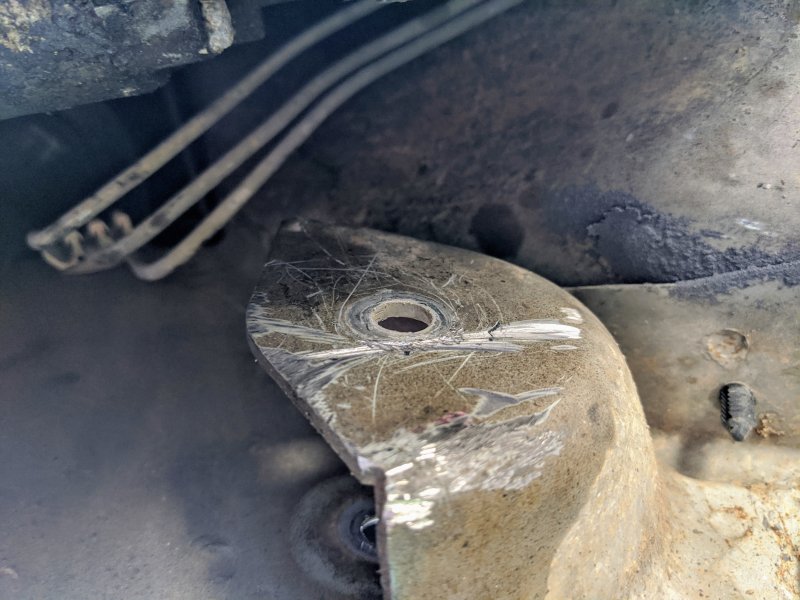
Alright so today I worked more on that bushing. I started out by renting that ball-joint press from the auto parts store again. I was using that for a long time with basically no success. The thing was just really cumbersome, especially wilth all those bars and rods under there. I was like cramming my hand in these crazy positions only to be able to get one click at a time with the wrench. After like two hours and a lot of cursing this is where I was at. I had been really reluctant to do the burn out method. I was nervous about using the torch with the housing still attached to the vehicle, especially that close to the oil pan. I didn't know If I would have to get under the truck to get a good angle on it either. Well, I decided I needed to do something. So I got the torch. I can make Crème brûlée now! So then I sat outside the wheel well and blasted the housing with this for about five minutes until it started smoking a bit. I then used a hammer and pushed it out from the back. It was awesome! Then I took an old rifle cleaning kit and scrubbed the inside of the housing with a copper brush. I was so happy to get that bushing out. It seems small but I was really stuck on it. I really don't want to mess with those metal sleeves in there. I just don't have the right tools and there's not much access with the truck on jack stands. I am going to order some polyurethane bushings.
-
(1)(1)(1)(1)(1).thumb.jpg.e857e6d37271c0325b582be2c9c58521.jpg)
Upper Control Arm Bushings
Rooster92 replied to Rooster92's topic in MJ Tech: Modification and Repairs
Thank you! @JMO413 -
Upper Control Arm Bushings
Rooster92 replied to Rooster92's topic in MJ Tech: Modification and Repairs
Can you give me the link? -
Thank you for the heads up. I posted a new topic in MJ Tech.
-
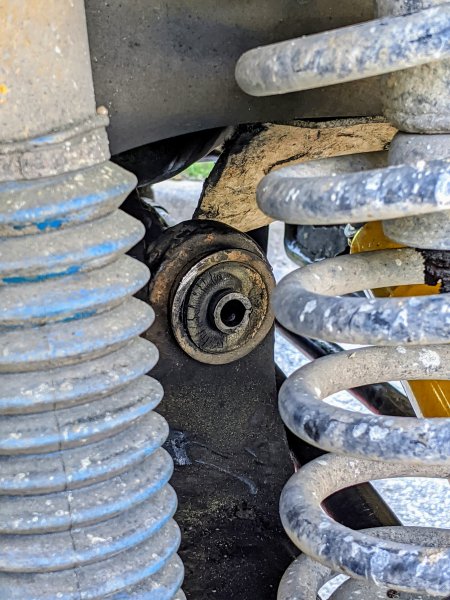
I am currently replacing the upper control arms. The bushings for the frame-end are built into the arms. The bushings on the axle-end however are separate. I have removed the arms, but the bushings remain in the axle. What methods do you have to remove it? I am assuming the metal sleeve is seized pretty bad.
-
Today I got to work on the upper control arms. It turned out being way more difficult that I expected. The bolt connecting it to the axle was stripped and seized. We ended up taking an angle grinder to it and eventually breaking it free after a while. Now I have to learn how to clean this up and keep it from rusting. The axle end was simple and it came loose immediately. The next problem is getting the bushing out. I rented a ball joint removal kit from the auto parts store but unfortunately the metal cups that came with it were too big for the bushing. I am thinking that getting a socket will do the trick. Others have told me you can use a blow torch and melt the rubber out. I suppose I will get a blowtorch. I know those can be useful as well if I run into more seized or stripped bolts. I'm laughing at myself because I thought this was going to be simple. My tool collection is getting really big, really fast!

-
Right now I am working on the front suspension. I'm a novice with all this stuff, so I'm starting with simple things. My MJ is in great condition to begin with so I am really lucky. I will definitely ask you questions as it gets more complex!
-
I really like your build. It is giving me a lot of inspiration for mine.Thank you for sharing it!
-
Man, I love the look of that camper shell! Very Nice!
-
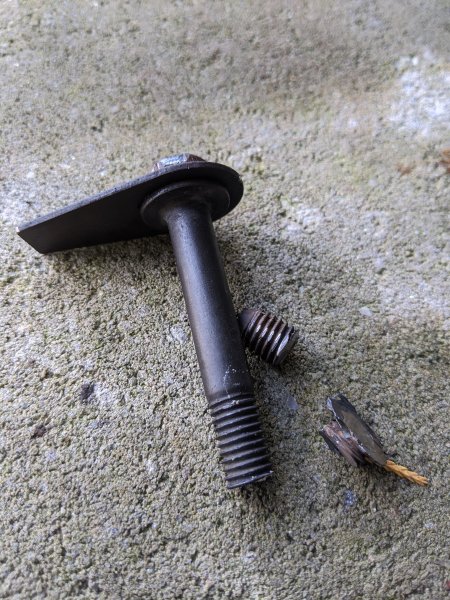
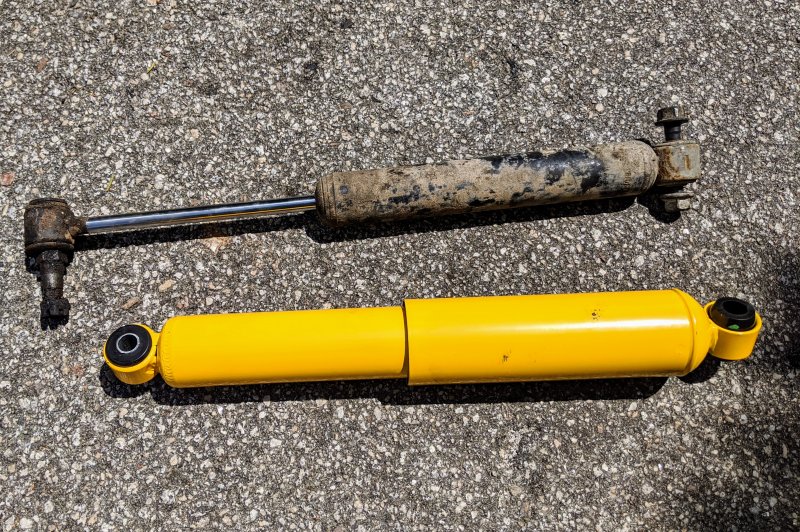
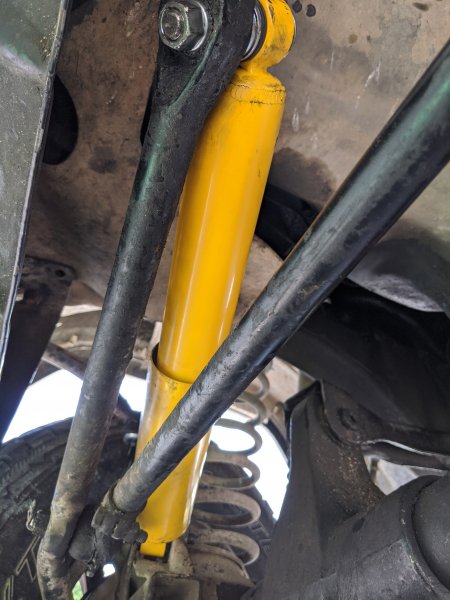
Some good progress was made today. Thank you to @MontanaComanche23 and @Pete M for your advice on getting the track bar installed. In the end, it needed to have the passenger side jacked up and turning the steering wheel until it fit right in. It was that simple. I got a heavy duty ratchet strap anyway for use at a later time. I was also able to change the steering damper. Here it is next to the new one. And now here it is in the vehicle. So the front end is really starting to come together. All that I have left is the upper control arms. I plan on getting that knocked out tomorrow.
.jpg.3b97f88b8d9240f6375a068979c54048.jpg)
-
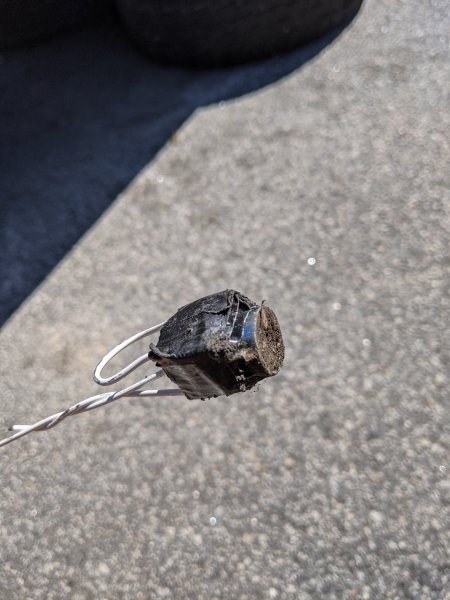
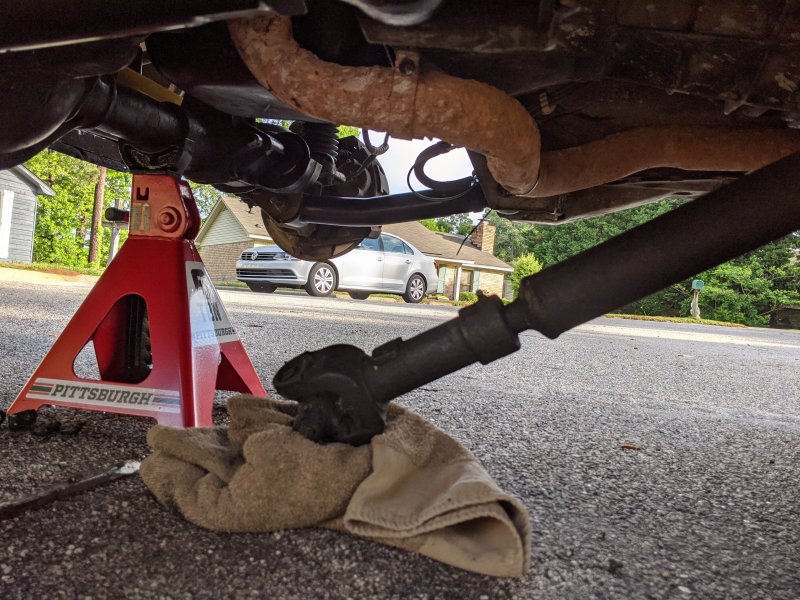
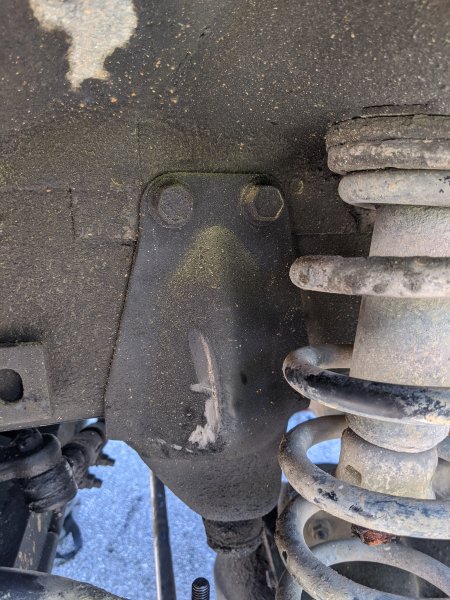
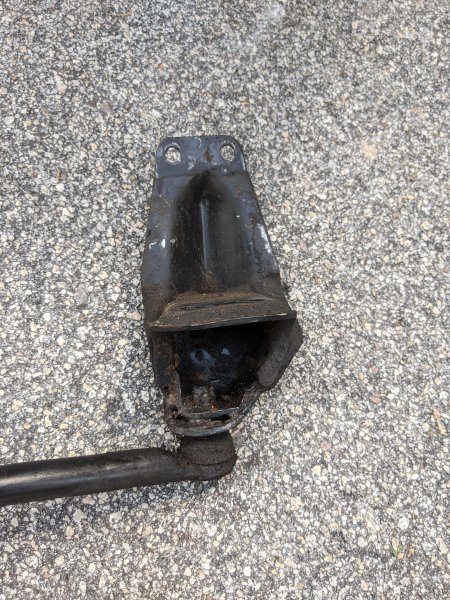
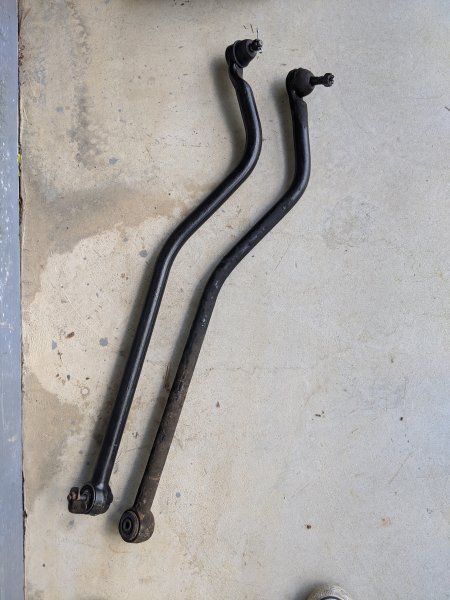
Alright so today the truck defeated me. I planned on replacing the track bar. Like @WesD said, the part itself is just fine. All that really needed to be replaced was the the bushing, which had exploded. It was a mess of grease in the housing bracket. I admit, I couldn't get the cotter pin out. It ended up just breaking as I was trying to yank it free. Between all the gunk and the poor access/visibility, I decided to go a different route. I thought I would remove the entire bracket. It wasn't very difficult, but I had to remove the air filter housing in order to get to nuts on the other side. Here it is once i got the entire thing free. By this time. my neighbor had come around and was helping me out. We got the cotter pin out and cleaned it all up as best as possible. So here is when the real issue started. No matter what we tried, we could not get the new, or old track bar to fit back into the truck. We tried everything. We tried with weight on the axle, weight off the axle, passenger side jacked up, drivers side jacked up, turning the steering wheels.... everything we could think of. We tried loosing up all the bolts to give it play. I am taking a tactical pause and readdressing the issue tomorrow. So now, I have two track bars and an out-of-service Comanche. Any advice anyone has is much appreciated.
-
Yeah I think you're right. Really, I should have just got a complete set of bushings for the entire suspension. I am learning almost everything as I go on this.
