


Griff04
-
Posts
144 -
Joined
-
Last visited
Content Type
Profiles
Forums
Gallery
Everything posted by Griff04
-
Maiden Voyage - My List Just Got Longer
Griff04 replied to Griff04's topic in MJ Tech: Modification and Repairs
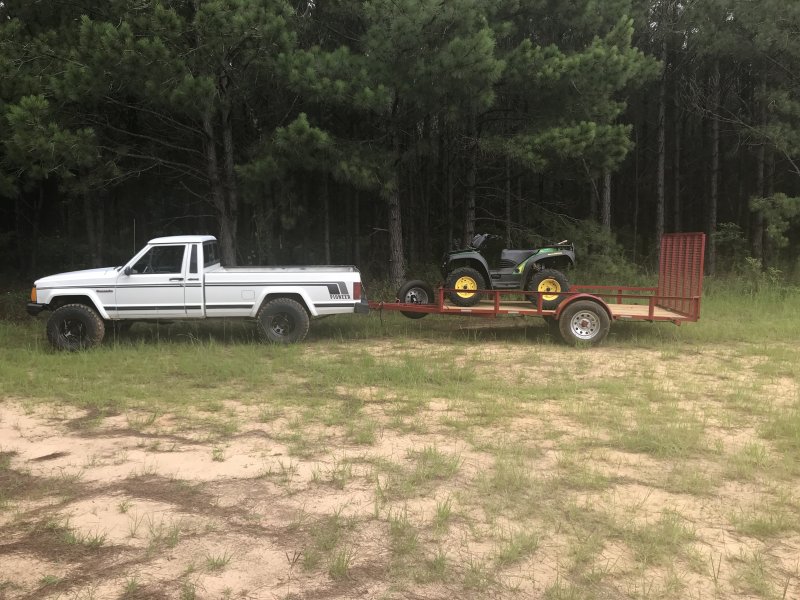
Well drove it up to the lease today pulling my trailer. Got back home and oil once again present on the underside, not as bad as it was but still enough to coat up the exhaust and have it burning off. Definitely not the VC gasket nor the oil filter adapter o-rings I just replaced. All indications at this point looks like the RMS...so it is what is, will be replacing it. Any manufacturer recommendation for the rms itself and oil pan appreciated?? Should have know I wasn’t going to get out that easily. -
So it wouldnt come into play in regards to the looseness in the steering?? BTW, that’s a great diagram, thx.
-
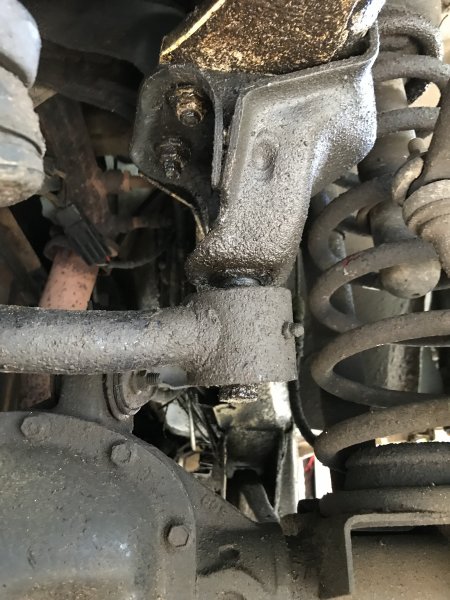
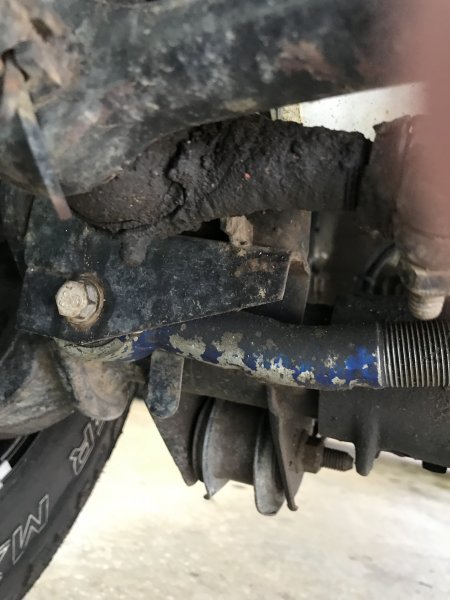
Although this was touched on in another post I had going with a couple of other issues I wanted to start a fresh thread. Steering is is a little sketchy, wants to wander a little and 1” steering wheel play both ways. It’s really not that bad, still very drivable but I’m just “anal” when it comes to small things like this. Had some good advice on the steering box adjustment but also suggested looking at all the front end steering components. So that’s where I’m going to start at. So here I go with a real stupid question. I’m underneath looking around and run across a bar that mounts below the steering stabilizer on the passenger side and to the frame on the drivers side and not sure exactly what it is and it’s purpose. I looked in the FSM and do not see it, keep in mind I have a reproduction FSM so it may be missing so info. Can someone help me ID it please. I'm attaching a couple of pics and its mounting location on either side. Thanks in advance.
-
Maiden Voyage - My List Just Got Longer
Griff04 replied to Griff04's topic in MJ Tech: Modification and Repairs
I drove the “stew” out of it to work last after oil adapter oring overhaul. The underside looked cleaned this morning. With that said I’m going to say that instead of the RMS causing all the oil the leaking oil adapter was the main culprit. I’m driving it up to the hunting lease tomorrow which will give me a better idea but as of now I’m going to consider that project behind me. Time to move on to the play in the steering. I’m going to start a new post that would be more search friendly which may help out later on if someone needs some help. Thanks for the replies here. -
Maiden Voyage - My List Just Got Longer
Griff04 replied to Griff04's topic in MJ Tech: Modification and Repairs
Definitely did, was surprised that the kits didn’t come with the correct sized o-rings. Thx Griff -
Maiden Voyage - My List Just Got Longer
Griff04 replied to Griff04's topic in MJ Tech: Modification and Repairs
Got the filter adapter out today, picked up 2 different o-ring kits, 1 Fel-pro and 1 Dorman and neither one had the correct oring for the stud. Found an old post that actually had the oring sizes and found them all at a local hydraulic shop. Got everything back together and the underside of the truck degreased and cleaned up. Fired it up and didn’t see any leaks, will drive it hard tonite to work and check it in the morning. here's the link I found the oring sizes on, really saved my butt. https://comancheclub.com/topic/44420-mj-renix-to-ho-oil-filter-adapter-o-ring-data/ -
Maiden Voyage - My List Just Got Longer
Griff04 replied to Griff04's topic in MJ Tech: Modification and Repairs
Found a video on YouTube detailing the o-ring replacement on the filter assembly. Looked simple enough...will give it a try tomorrow. -
Maiden Voyage - My List Just Got Longer
Griff04 replied to Griff04's topic in MJ Tech: Modification and Repairs
Finished up the gasket...turned out good. Installed the Fel-pro with no sealant as recommended, let the truck idle for 20 minutes and saw no leaks. Will drive this weekend and retorque bolts. So I’m looking around for more leaks, got a ton of oil leaking around the oil filter area. Hard to tell where it is coming from, will clean up in the morning and further investigate. Never seen an oil filter assembly like this. Gonna have to do some digging. Looked in the FSM I have and couldn’t find an assembly drawing, not sure it wouldn’t have something like this....will have to look around. -
Maiden Voyage - My List Just Got Longer
Griff04 replied to Griff04's topic in MJ Tech: Modification and Repairs
Got VC off today and cleaned up. Went ahead and did the Cruiser54 mod on it. It appeared appeared to have a Fel-Pro gasket installed, did see a couple of nicks in it on the backside and the 3 stud bolts that hold the fuel rail bracket in place were only finger tight. Will get the head cleaned up in the morning and hopefully get the VC reinstalled with a new Permadryplus Fel-Pro. Had to order the hose that runs off the rear CVC fitting...it was pretty much toast, old and just crumbled in my hand. After that will look for more possible oil leak potentials. Depending on what I find I’m going to degrease the underside and clean . May have to drive it in order to help pinpoint anymore leaks if there are any. I’m hoping replacing the VC gasket and proper torquing will fix the leak issue but don’t have a lot of confidence in it..... -
Maiden Voyage - My List Just Got Longer
Griff04 replied to Griff04's topic in MJ Tech: Modification and Repairs
That’s perfect, straightforward and to the point. I’ll definitely check all the front end components before making any adjustments....gotta get this dang oil leak put to bed first though. One thing, you mentioned the “screw bottoming out” I’m assuming the adjustment screw is turned in clockwise rotation, correct?? ****Sorry, overlooked your instructions on turning the screw in, so it is clockwise rotation**** -
Maiden Voyage - My List Just Got Longer
Griff04 replied to Griff04's topic in MJ Tech: Modification and Repairs
What is the “clear purpose” of the valve cover mod?? -
Maiden Voyage - My List Just Got Longer
Griff04 replied to Griff04's topic in MJ Tech: Modification and Repairs
Picked up my fel-pro along with the 2 ccv valves tonite from Oriellys on the way to work. Plans are to work on in the morning when I get off. Will also be doing Cruisers #25 tip along with #15 in regards to RMS diagnosis. Appreciate everyones input. -
Maiden Voyage - My List Just Got Longer
Griff04 replied to Griff04's topic in MJ Tech: Modification and Repairs
I can live with the play for now but really got to get the oil issue resolved first. Once that’s completed I’ll move on to the steering. I glanced through the FSM but didn’t see anything in regards to steering box adjust, are there any good articles that you can point me towards or would Google be my best bet?? -
Maiden Voyage - My List Just Got Longer
Griff04 replied to Griff04's topic in MJ Tech: Modification and Repairs
Are you referring to the pcv valve? -
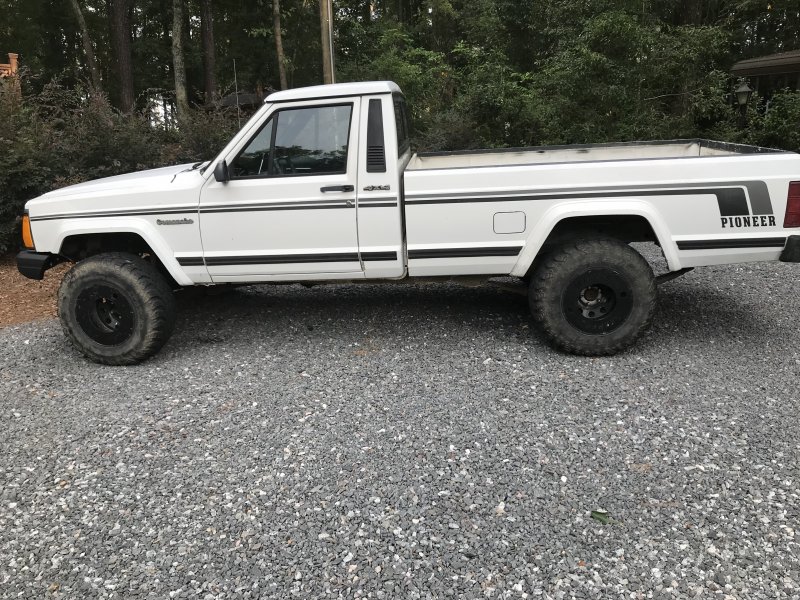
Well after getting news tires and the AC working I drove her round trip today, about 70 miles, up to the hunting lease. Actually pulled a trailer with the ATV on it. Overall done well, was happy with the way it pulled the trailer, it did have to “work” a little bit on a few of the hills. Here’s some things I learned today. 1. Steering has a little play, 1-2” both ways on the steering wheel and likes to wander a little bit side to side. Not sure if the play on the steering wheel is normal or not. 2. The wipers or lack of need help. Can’t see a lot of difference between hi and low. I knew I had issues with them but not to this extent. 3. Leaking oil badly, before the trip was over with it looked like I was spraying for mosquitoes because there was so much on the underside exhaust. Appears to be coming from the RMS but the PO had replaced the valve cover gaskets and did a poor job. I can see oil leaking on the very back up against the firewall but not 100% sure if this is responsible for all the oil I’m seeing on the underside of the truck. So, I’m gonna start with the VC gasket and go from there but pretty sure it’s gonna get to the RMS. May need some some input on the steering issue so I’ll probably be doing some posting Thanks, Griff04
-
Got the new accumulator/drier and installed today. Prior to replacing it I had shot some dye in the system and found a leaking o-ring on high side hose fitting and replaced it also. Pulled vacuum and isolated system which held at 25 for 30 minute, I’m good with that. Ran vacuum another hour and then recharged system, man it’s nice when the AC works in southwest Ga.
-
So need some help from the AC gurus. Got another service valve. Before replacing I checked the pressure on the high side, vehicle not running and it read “0”, could not check the low side because of the service valve stuck in the closed position, I would “assume” it would also be at “0”. When I removed the valve for replacement no noticeable freon came out so I’m assuming the system was bone dry. From what I’ve read anytime a system sits for an extended period while empty it is best to replace the accumulator/drier?? I ordered one today. Before replacing it I wanted to check the system for leaks, pulled vacuum for 20 minutes, got to 30 inches, closed system off and in 20 minutes it leaked down to 25. So I shot can ine can of 134 in it with leak detector dye, will check tonite with light and try to pinpoint and repair leak(s). Once I’m sure leaks are corrected I’ll install the new drier, re-vac, and recharge which I should be good to go. Here’s my questions: Is it necessary to replace drier as I’ve read all over the place? At the amount it’s leaking, 30 to 25, in 20 minutes, wonder how it long this 1 can charge will last....The system was readying at 30psi on low side with compressor running. thanks Griff
-
I know there’s one out there somewhere, color doesn’t matter, can have recovered. Please PM if you have one available or know where I might get one. Thanks, Griff04
-
Brand New A/C will not charge
Griff04 replied to AeroNautical's topic in MJ Tech: Modification and Repairs
If you have this type of service valve as seen below then go to this post to see correct positioning when servicing the system: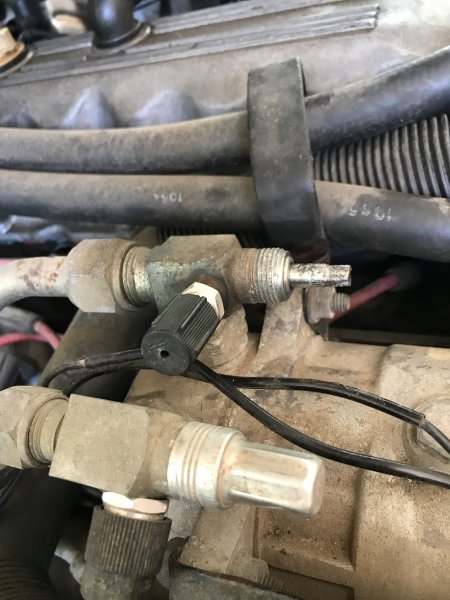
-
Great job, looks really good!!
-
I know I need the low side one but if you can spare both I’ll take them. How much do you need to get out of them? Will need shipping quote to 31707? Thanks, Griff
-
I’ve tried turning both ways with no luck. You are probably already aware of this but this is a 3 position valve...all the way out or in the backseated position it blocks off the service port, mid-way in and it is in the service position for adding freon, the full-in position blocks the system from the compressor, that is the position I believe it is in. Thanks for the reply.
-
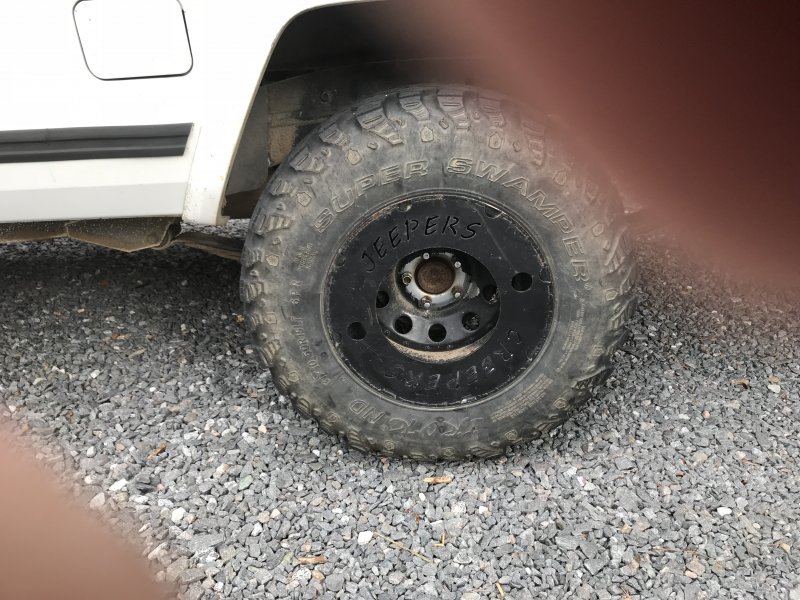
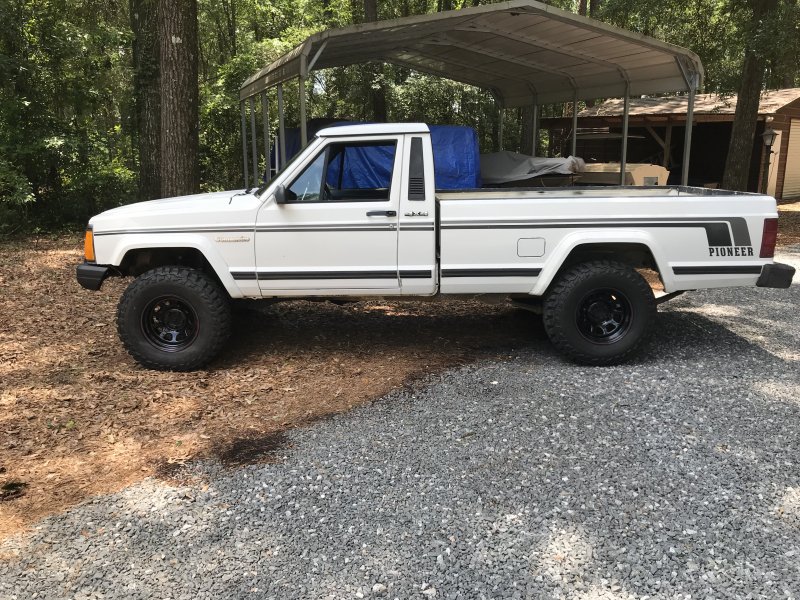
I got a sweet deal on some new tires and rims that I couldn’t pass up. Found them on the Jax CL for $400, PO had wrecked his XJ and was parting it out, tires have less than 1000 miles on them. The ones I’m taking off I don’t have much details, they Jeeper Creepers 15x10. I’ve Googled them for details and can’t find any. They are free for the taking. I’m in Albany Ga 31707. Really don’t want to ship. Come and get them.

-
Trying to get my AC going but the low side service valve is froze up. I can tell at one point it had some vice grips put on the valve stem so I said what the heck I’ll try it again but still will not budge. I ran across this particular one on EBay that appears to be a plug n play replacement: https://m.ebay.com/itm/BACK-SEAT-ROTOLOCK-YORK-R210L-A-C-COMPRESSOR-SUCTION-FITTING-FORD/280963786818?_trkparms=aid%3D111001%26algo%3DREC.SEED%26ao%3D1%26asc%3D20160908105057%26meid%3D8f05ca875cb444979047aa9433803f1d%26pid%3D100675%26rk%3D1%26rkt%3D15%26sd%3D280963786818%26itm%3D280963786818&_trksid=p2481888.c100675.m4236&_trkparms=pageci%3Abf667721-6cd4-11e8-9084-74dbd18011bd|parentrq%3Aeac4e98d1630aa48d8bfe9d9fff08cc7|iid%3A1 Can someone give me some proper guidance on the steps after replacing. I’m thinking the following: 1. capture all the coolant if there is any which may be a problem if I can’t get the low side open, hopefully this can be done on the high side, I’ve checked and it turns freely 2. Replace service valve and pull vacuum, ensure no leaks and refill system which appears to have been swapped to 134a just looking at the fittings. Thing I have questions on since there is no nameplate data on the compressor itself. 1. How many ounces of 134a to use 2. How to check the compressor oil, per the FSM to shows a special tool which of course I don’t have. Any other suggestions on shortcuts or performing the service valve replacement would be appreciated. Thanks in advance, Griff

-
Sweet list, not sure how or if you pull it all at one time but nice job.