Green Mesa XJ
-
Posts
672 -
Joined
-
Last visited
-
Days Won
1
Content Type
Profiles
Forums
Gallery
Everything posted by Green Mesa XJ
-
Do you still have a charcoal canister? Should be by the radiator. mine routes there eventually after going in to a mess of pipes Sent from my iPhone using Tapatalk Pro
-
According to the instructions online the rear is a pcv, front top is supposed to be fuel bowl vent. Sent from my iPhone using Tapatalk Pro
-
On the throttle cable on the bracket the inner is for the throttle the outer is for a spring that attaches to the factory valve cover. I don’t have that second big vacuum port at the back, not sure where you should run it to, probably run it to the vacuum port directly behind it or run it with the other big line in the front. Sent from my iPhone using Tapatalk Pro
-
Will these gauges swap??
Green Mesa XJ replied to rylee144's topic in MJ Tech: Modification and Repairs
I’ve noticed both styles of clusters. I’ve always thought the early blue were discontinued by the HO years but I seen some HO with simple clusters that look like the early non gauge idiot light clusters. I’m using a full gauge cluster like that 88, mine I think is off a 89 or 90. as long as it a mechanical speedometer it should work. Only difference in the eighties is the speedometer cable changes about 1987, the early 84-86 use a slightly different way of securing to the back of the speedometer. I believe I was able to still plug my 85 speedometer cable into the 89 cluster. Eventually I did order the correct cable. Sent from my iPhone using Tapatalk Pro -
On that gasket I believe when you pull the old one it will be self evident, I think the printed number side was up. Brake booster line is the same as mine, goes to the back of the intake manifold. The front vacuum port on the carb was for the distributor. Guess just block it with a rubber stopper until you need it. I’ll have to look at the rest later. I think there might be a second design with a second vacuum line at the back. Do the instructions mention how to route the lines? Sent from my iPhone using Tapatalk Pro
-
Nice. I got a Innova 3140 many years ago to read my Toyota’s computer. It came with a bunch of adapters for various OBD1 terminals, including Jeep. I was telling a friend about the kit a few years ago and discovered how much the price jumped. From the looks of it Innova may be the same as a lot of other companies readers. Sent from my iPhone using Tapatalk Pro
-
On the 91 There is a plug in the engine bay to connect a reader to, problem is it’s proprietary Chrysler requiring a special adapter. Getting a reader with the correct adapters now will probably be a pain to locate and expensive once you do. I would try to get the dash light working so you can read the codes that way. O2 sensor could be a culprit. I’ve had bad injectors cause a brief hiccup feeling but never with the jeeps. Sent from my iPhone using Tapatalk Pro
-
Either that or a Holley kit. Sent from my iPhone using Tapatalk Pro
-
All of the computer controlled carburetor setups were junk, had a chrystler 318 with a “spark control” computer that never worked correctly, going back to the late 70s distributor fixed that mess. Even Honda had a convoluted carburetor system, all because the federal government imposed arbitrary emissions requirements. With a simple carburetor and new catalytic converter these old engines run much cleaner than with all the old emissions crap the engines were never designed for. And more fuel efficient too, used to get 26 mpg on the highway driving from Co to Fla a couple times a year. When these kind of carbureted setups have problems it’s: computer, o2sensor or wiring. Going back to basics usually fixes it. Sent from my iPhone using Tapatalk Pro
-
I believe the computer is why the engine has been “hard to tune”. And why the last owner thought the Federal emissions carb would be a upgrade that made it tunable. AMCKid did that Autoline D2100 distributor check out? Sent from my iPhone using Tapatalk Pro
-
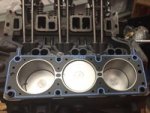
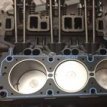
Absolutely right, however when I did the carb upgrade it was still a high altitude jeep in Colorado so had emissions and that damn AIR pump. When I pull the engine for my 30 year rebuild (yes running behind schedule on that) I'm planning to get rid of the last of the AIR piping and clean the vacuum lines up to the minimum required. I've seen a 2.8 cleaned up this way and it was a huge difference. From a tangled mess to clean.
-
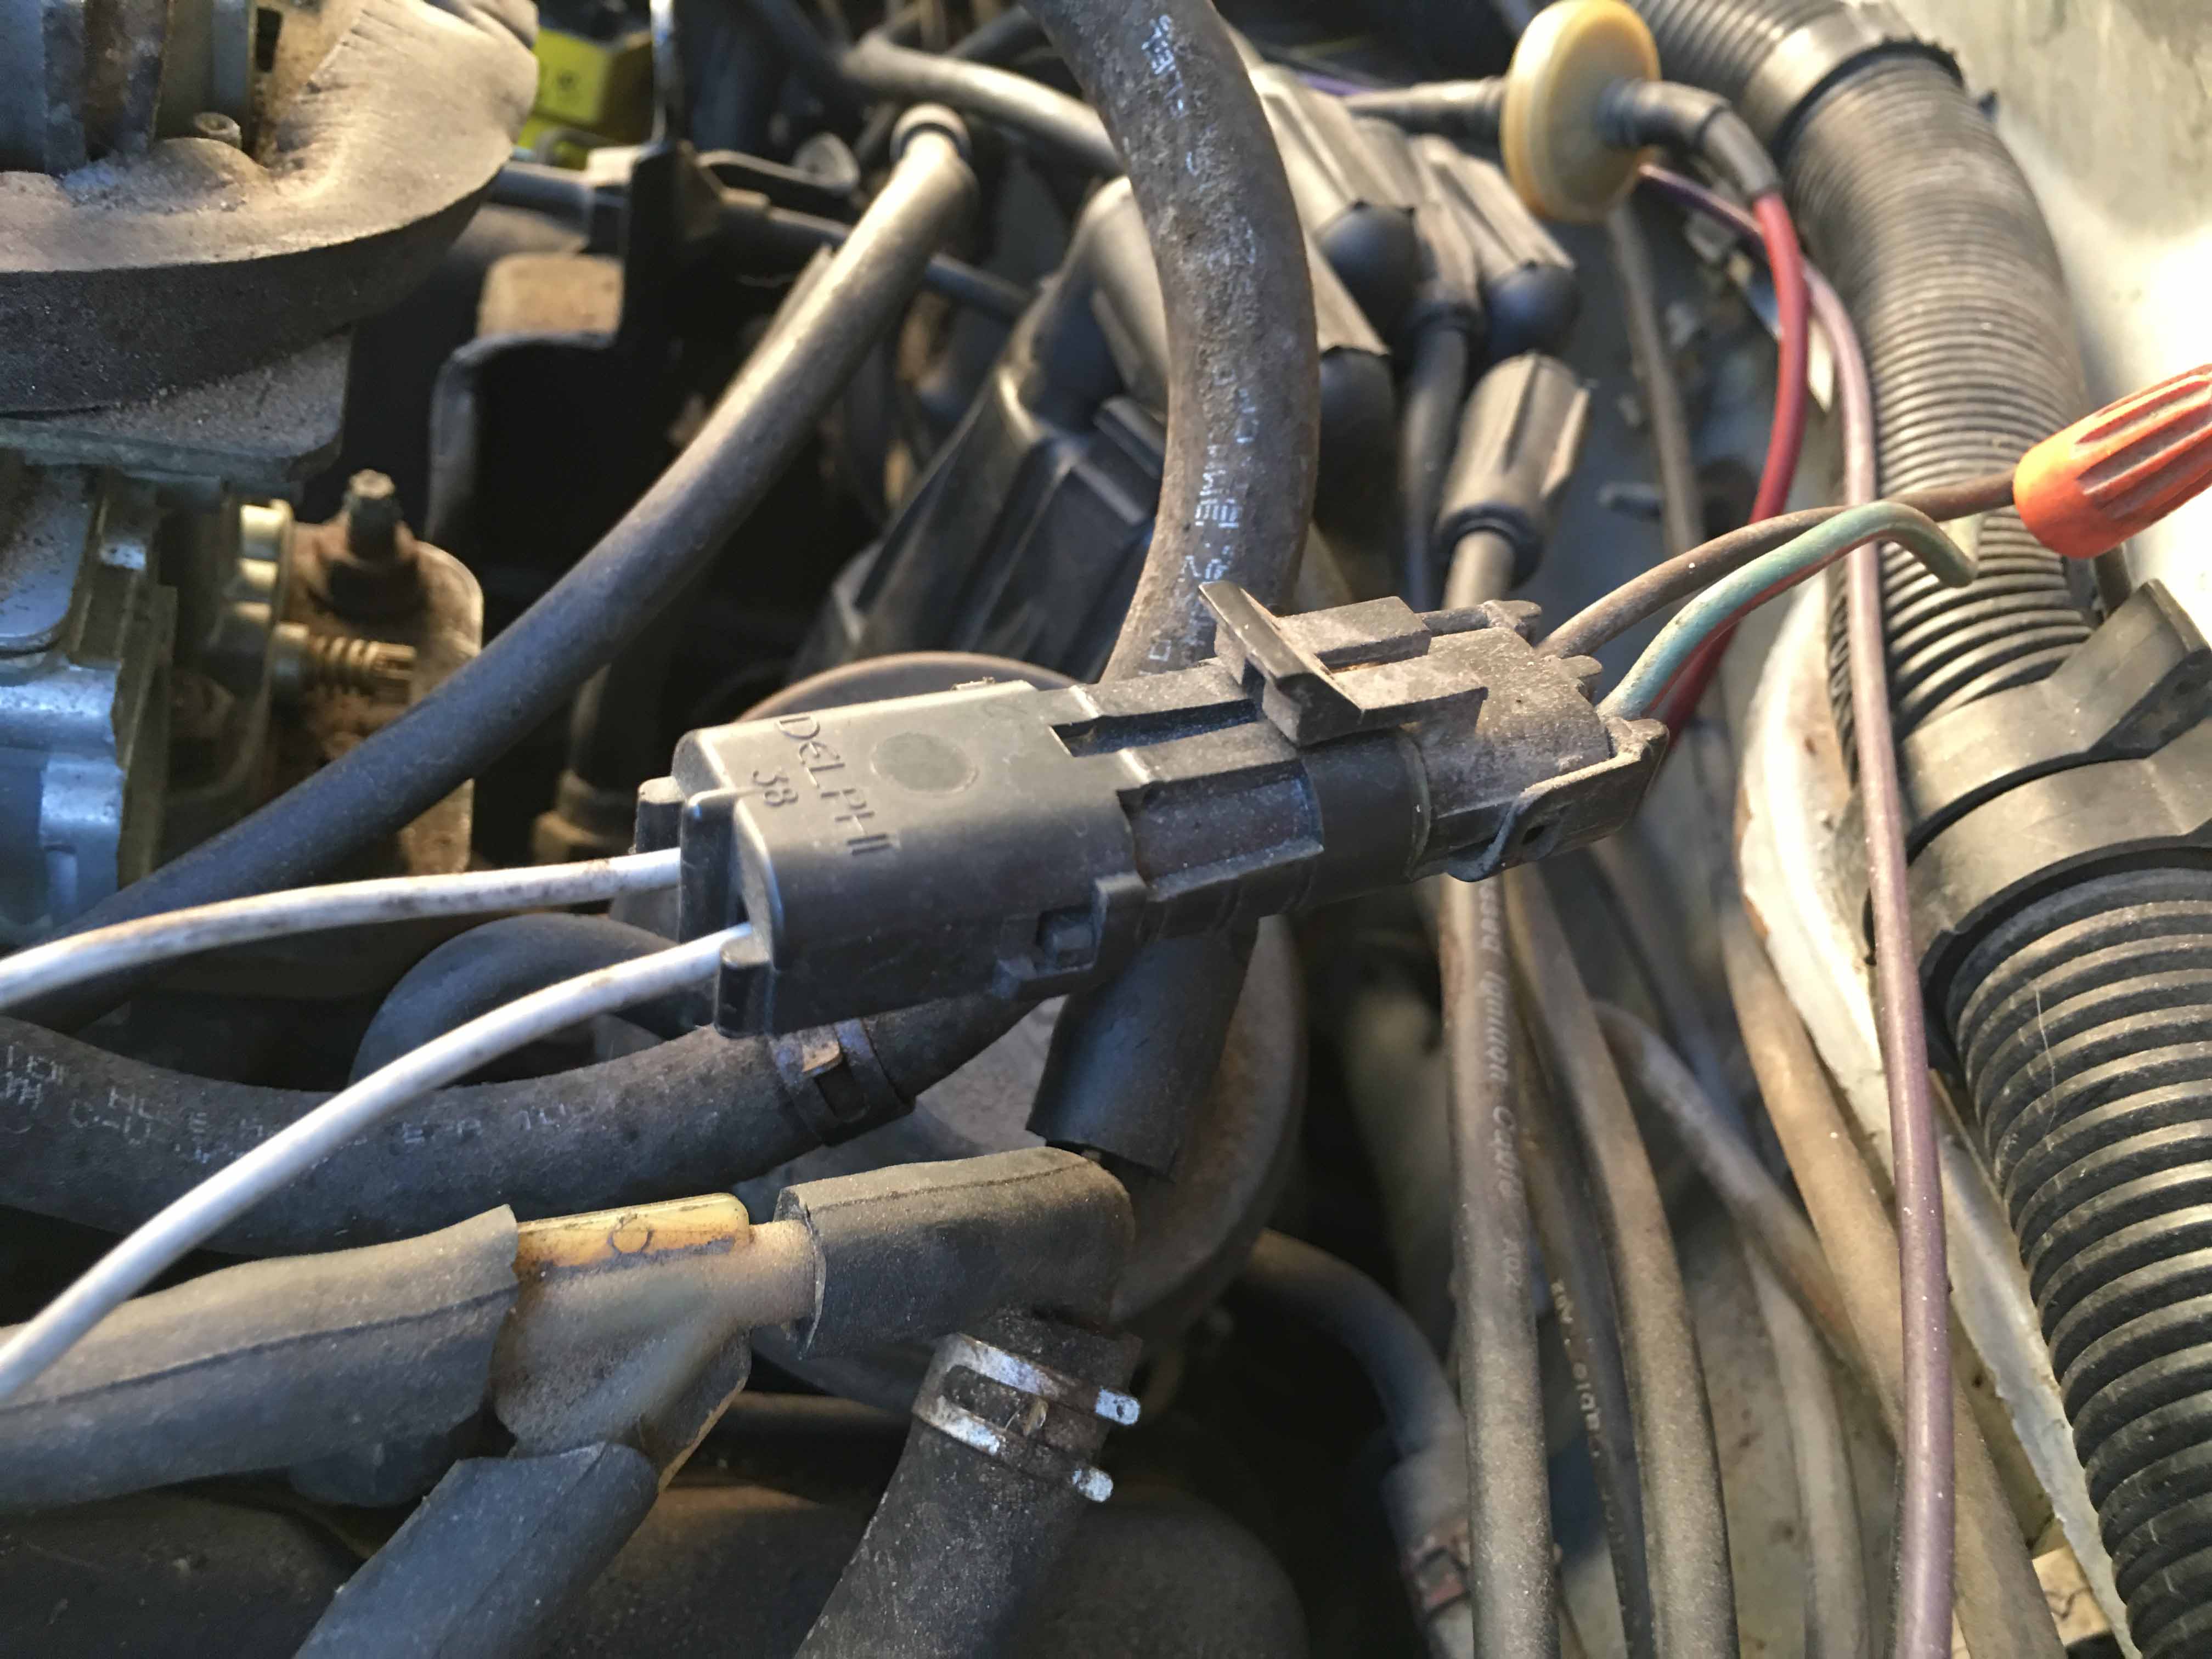
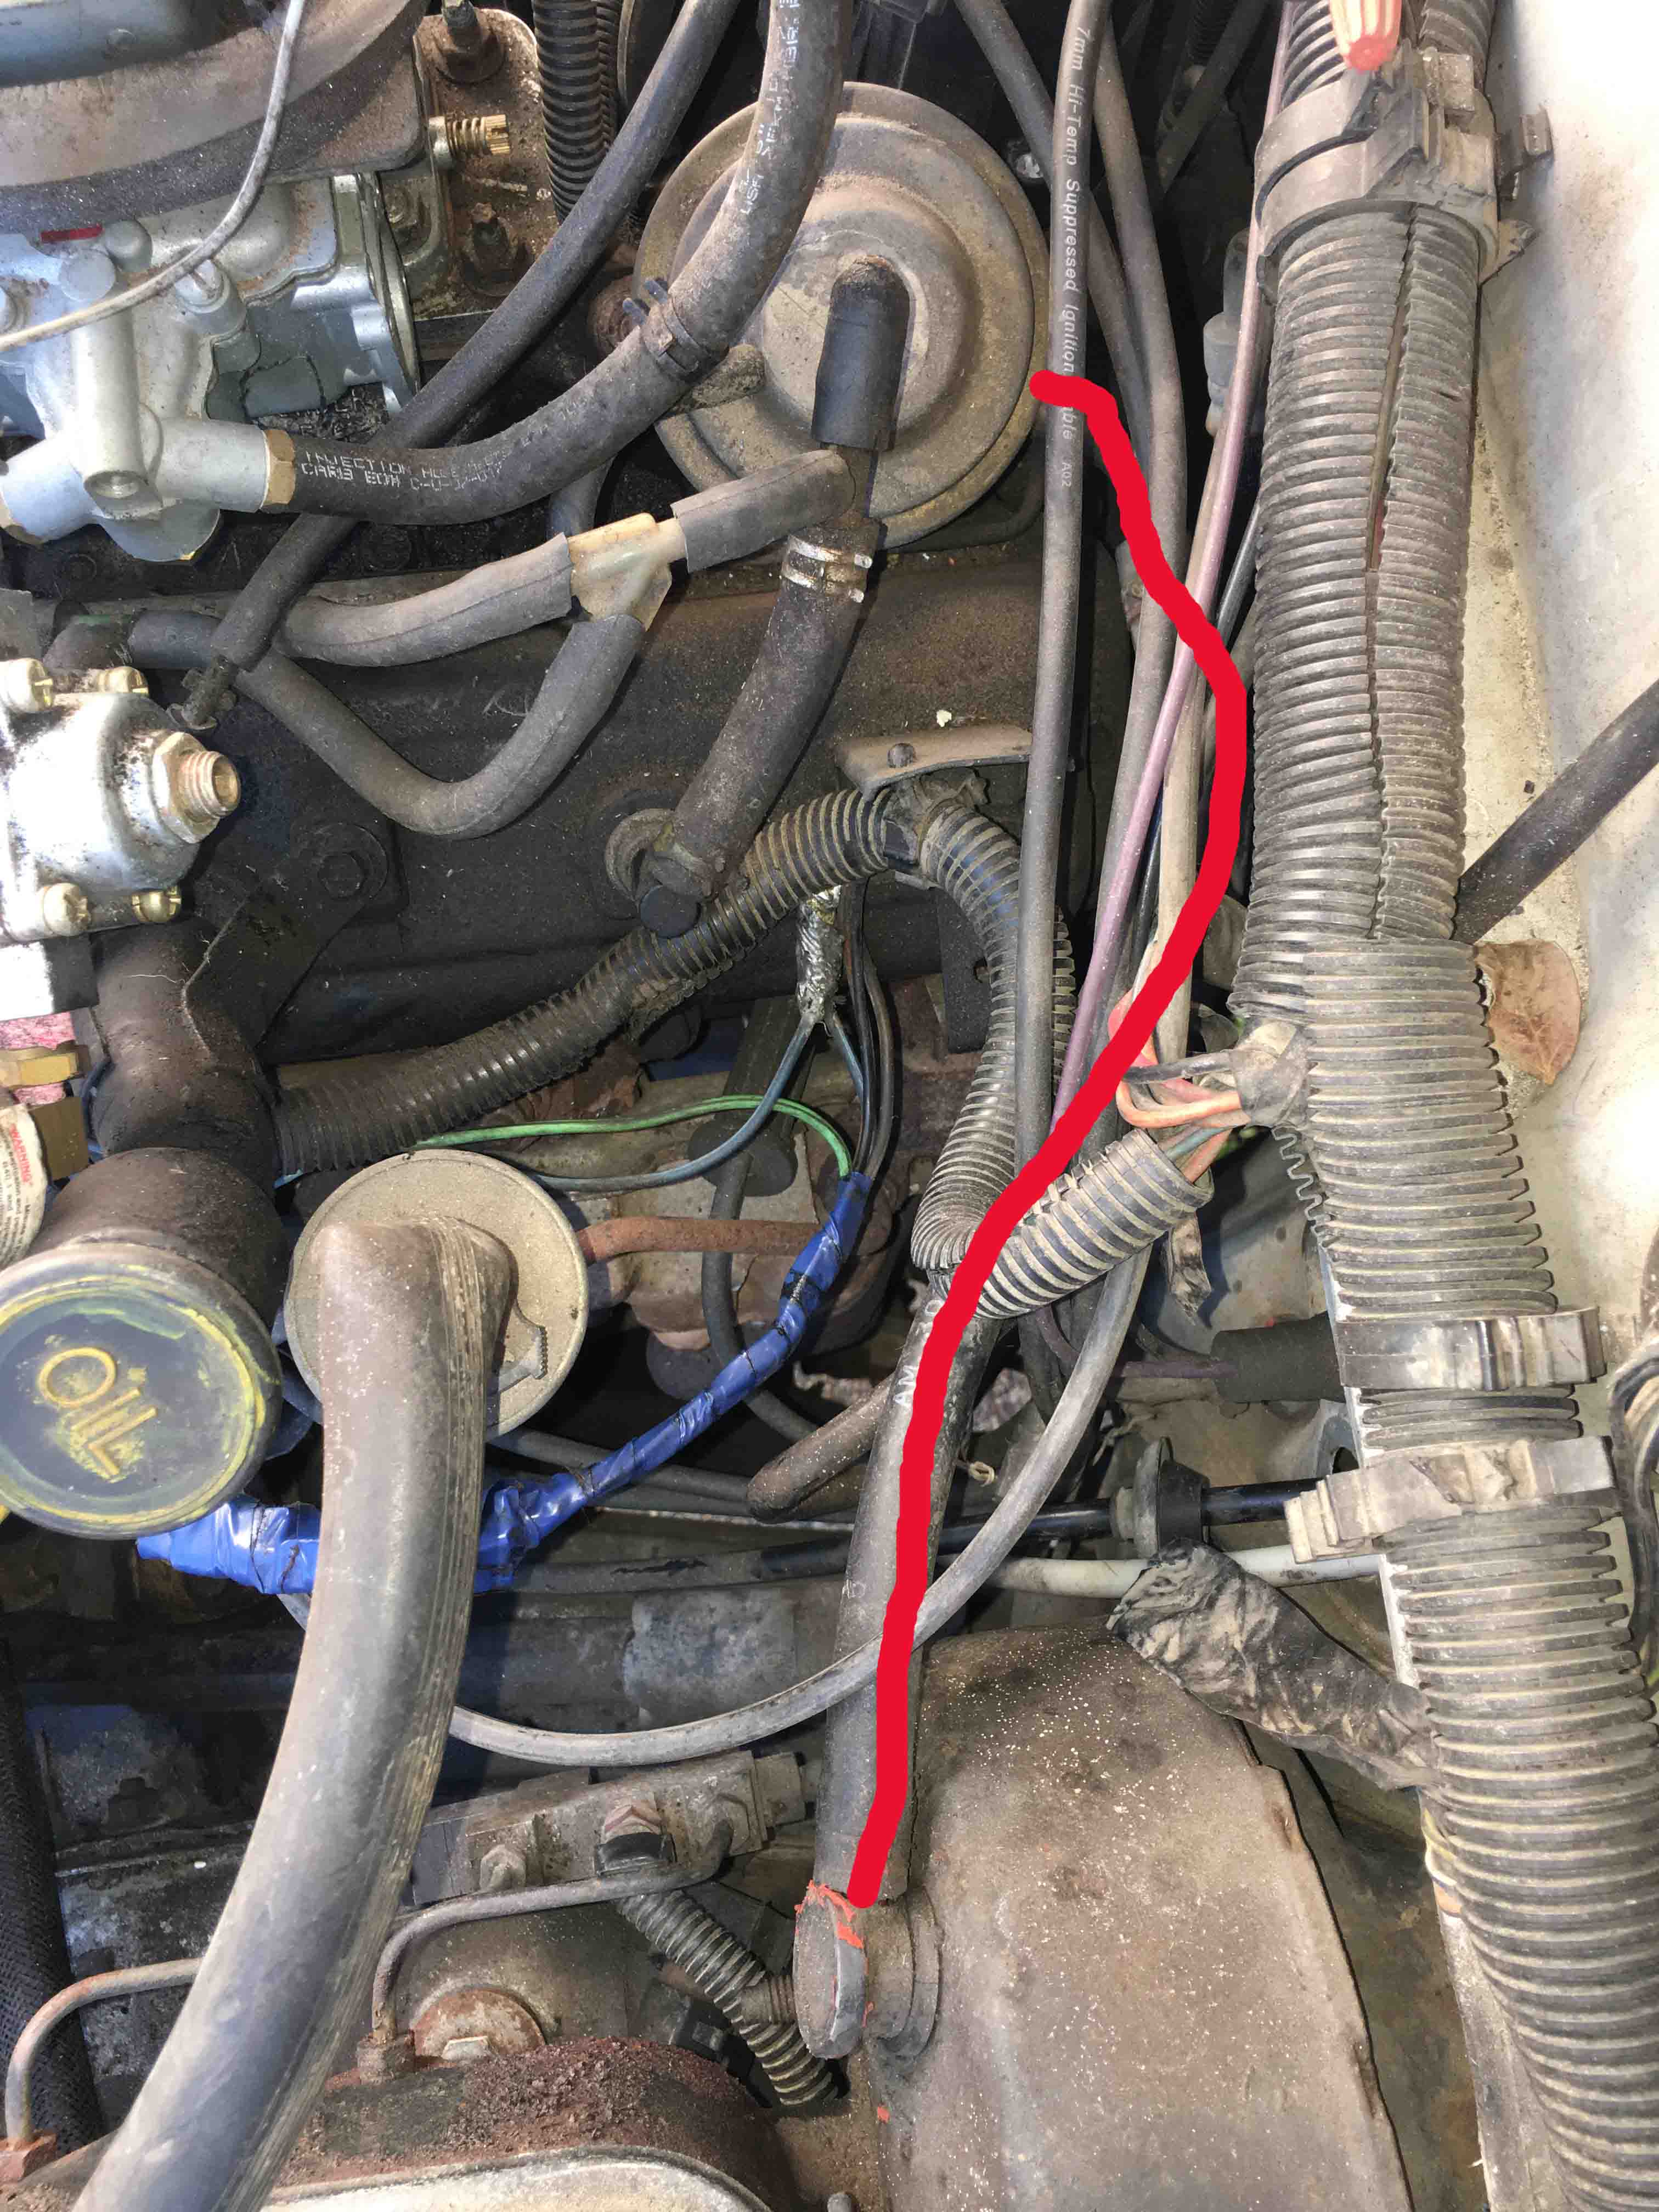
Last but not least for powering the electric choke, on the 1986 harness I found a new way, where the engine harness ran along the firewall I found a plug that only power on with the key, so I located a plug to match it then ran the power side to the terminal on the electric choke. The line that is hot with the ignition on is the one with that stupid twist on wire connector (BTW previous owner of the donor jeep the harness came from put that connector on) On my original harness I used on of the other wires that came on with ignition, just kept testing until I found one, may have even been the original power line to the OEM GM carb's choke. You've probably got all kinds of connectors and power sources to choose form with the California emissions harness. Didn't cover the fuel line because you should have more or less already run that with getting the pressure regulator set up.

-
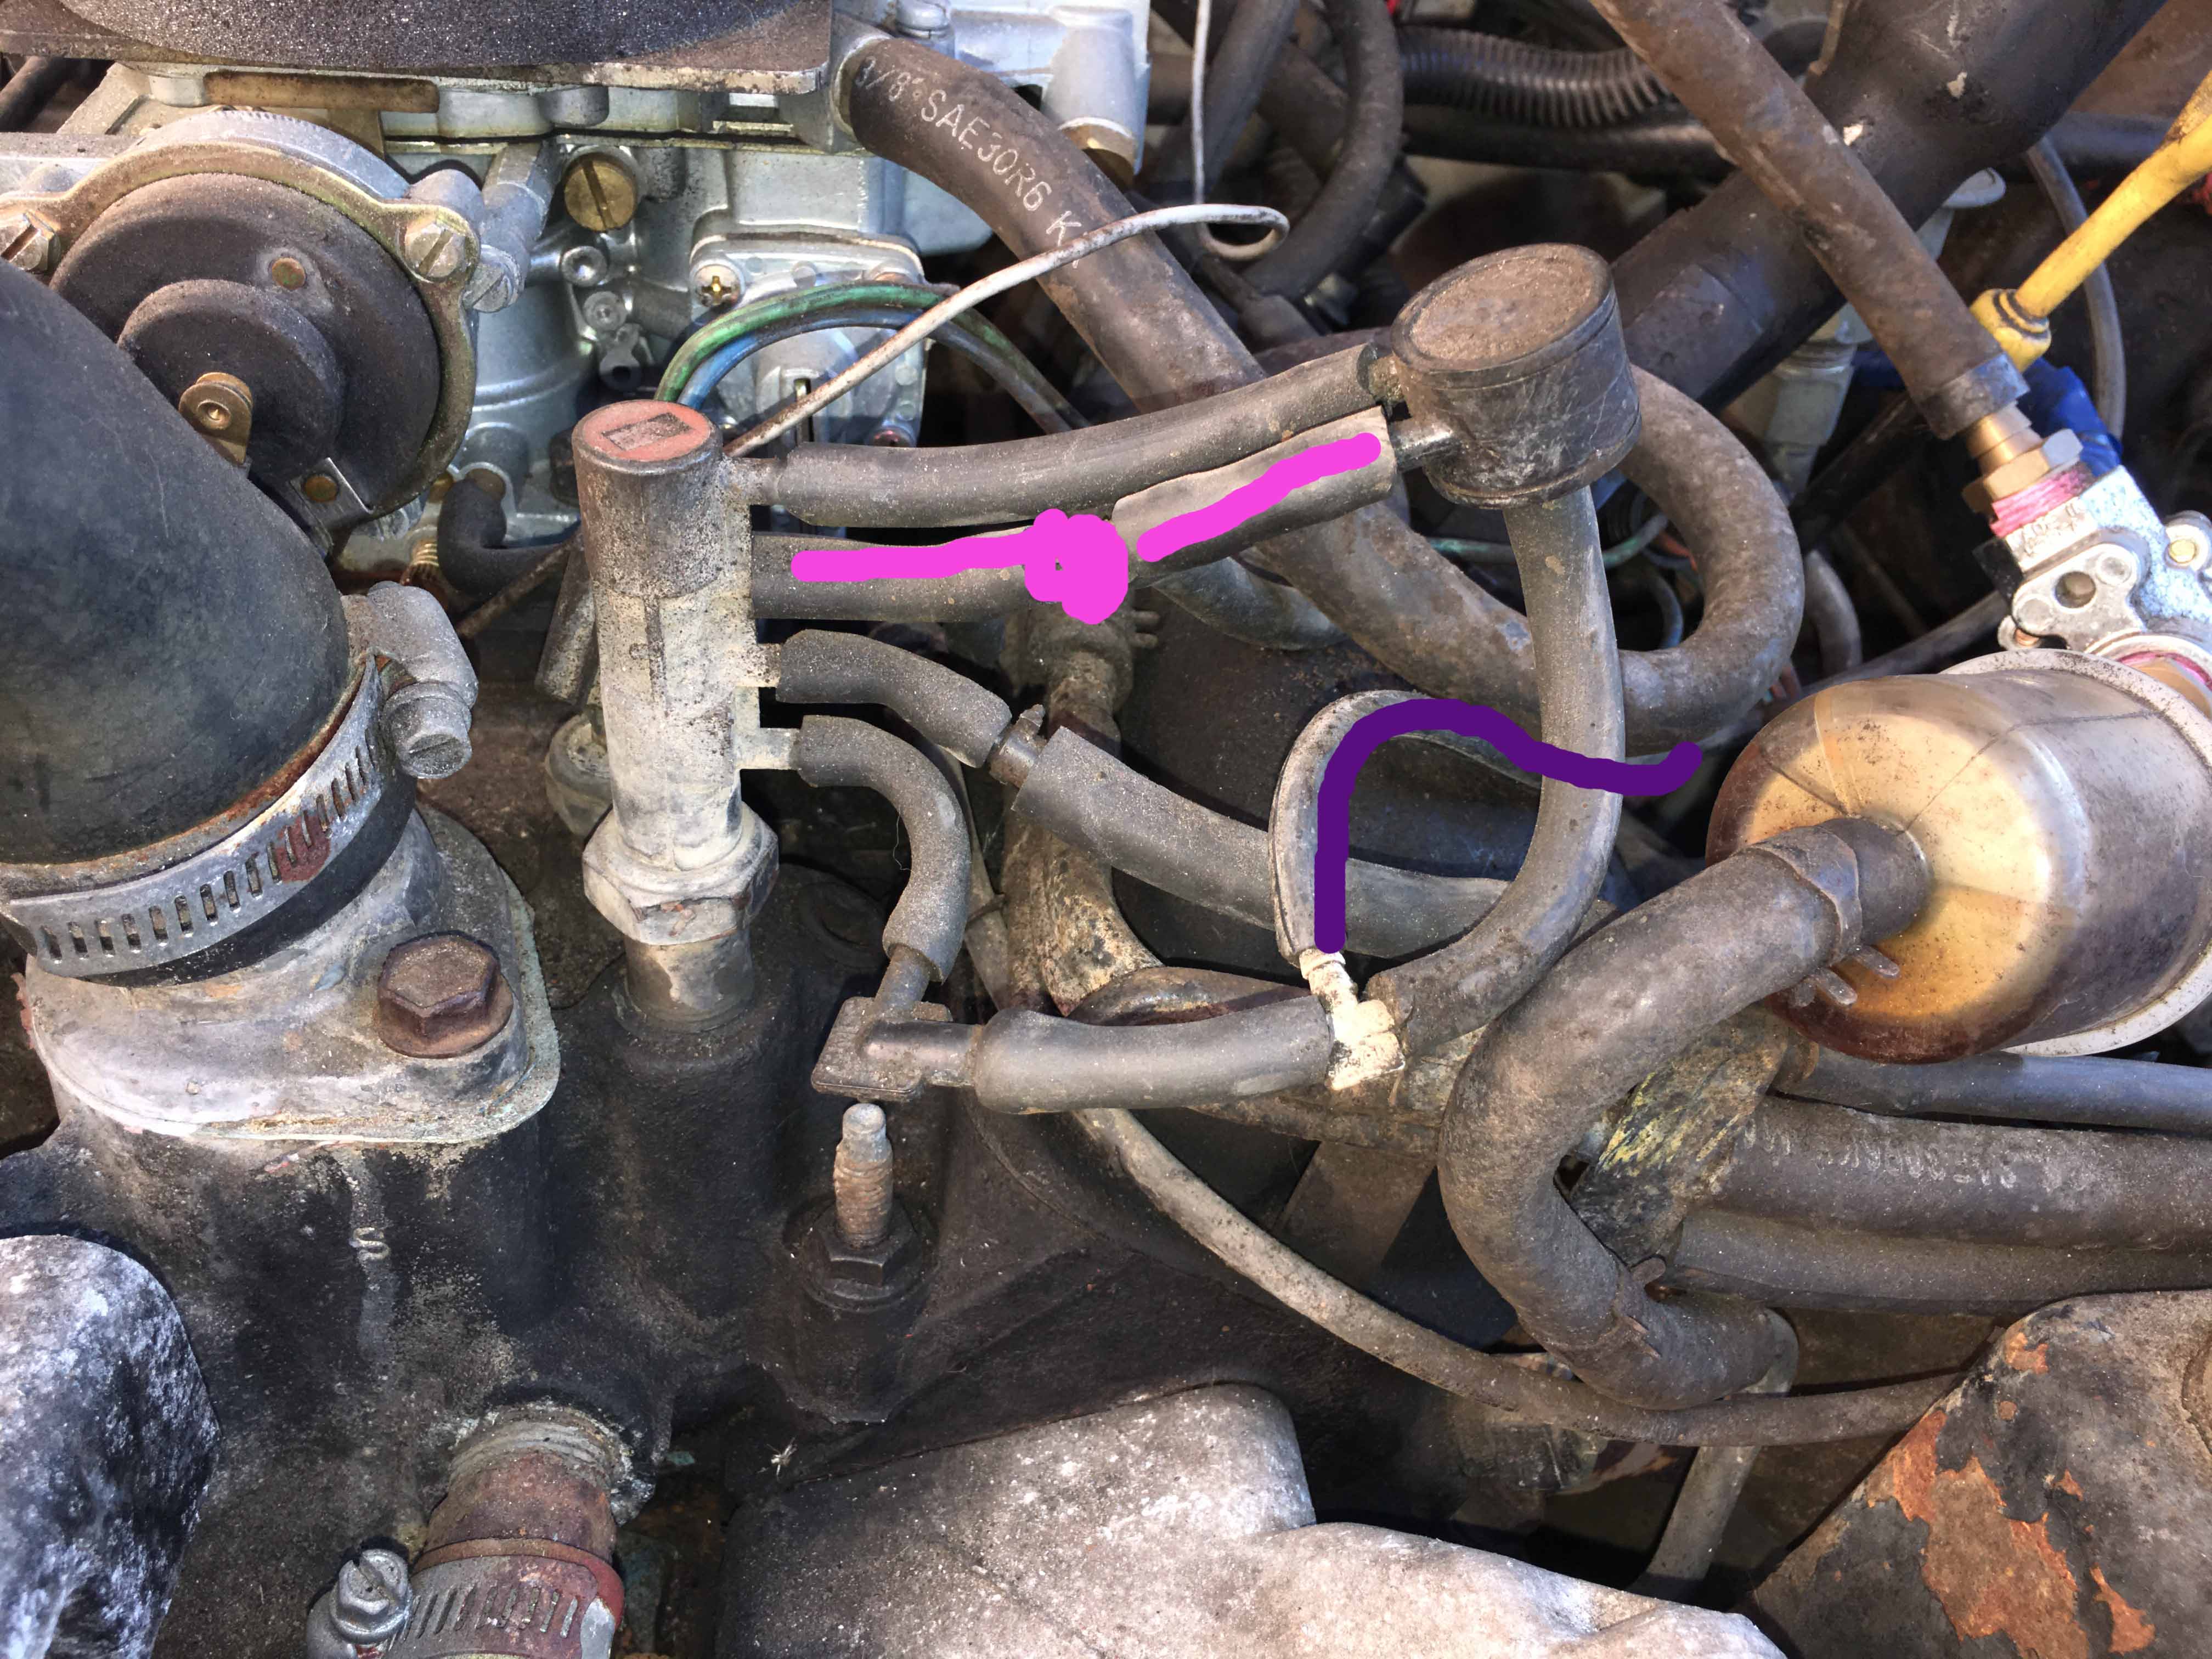
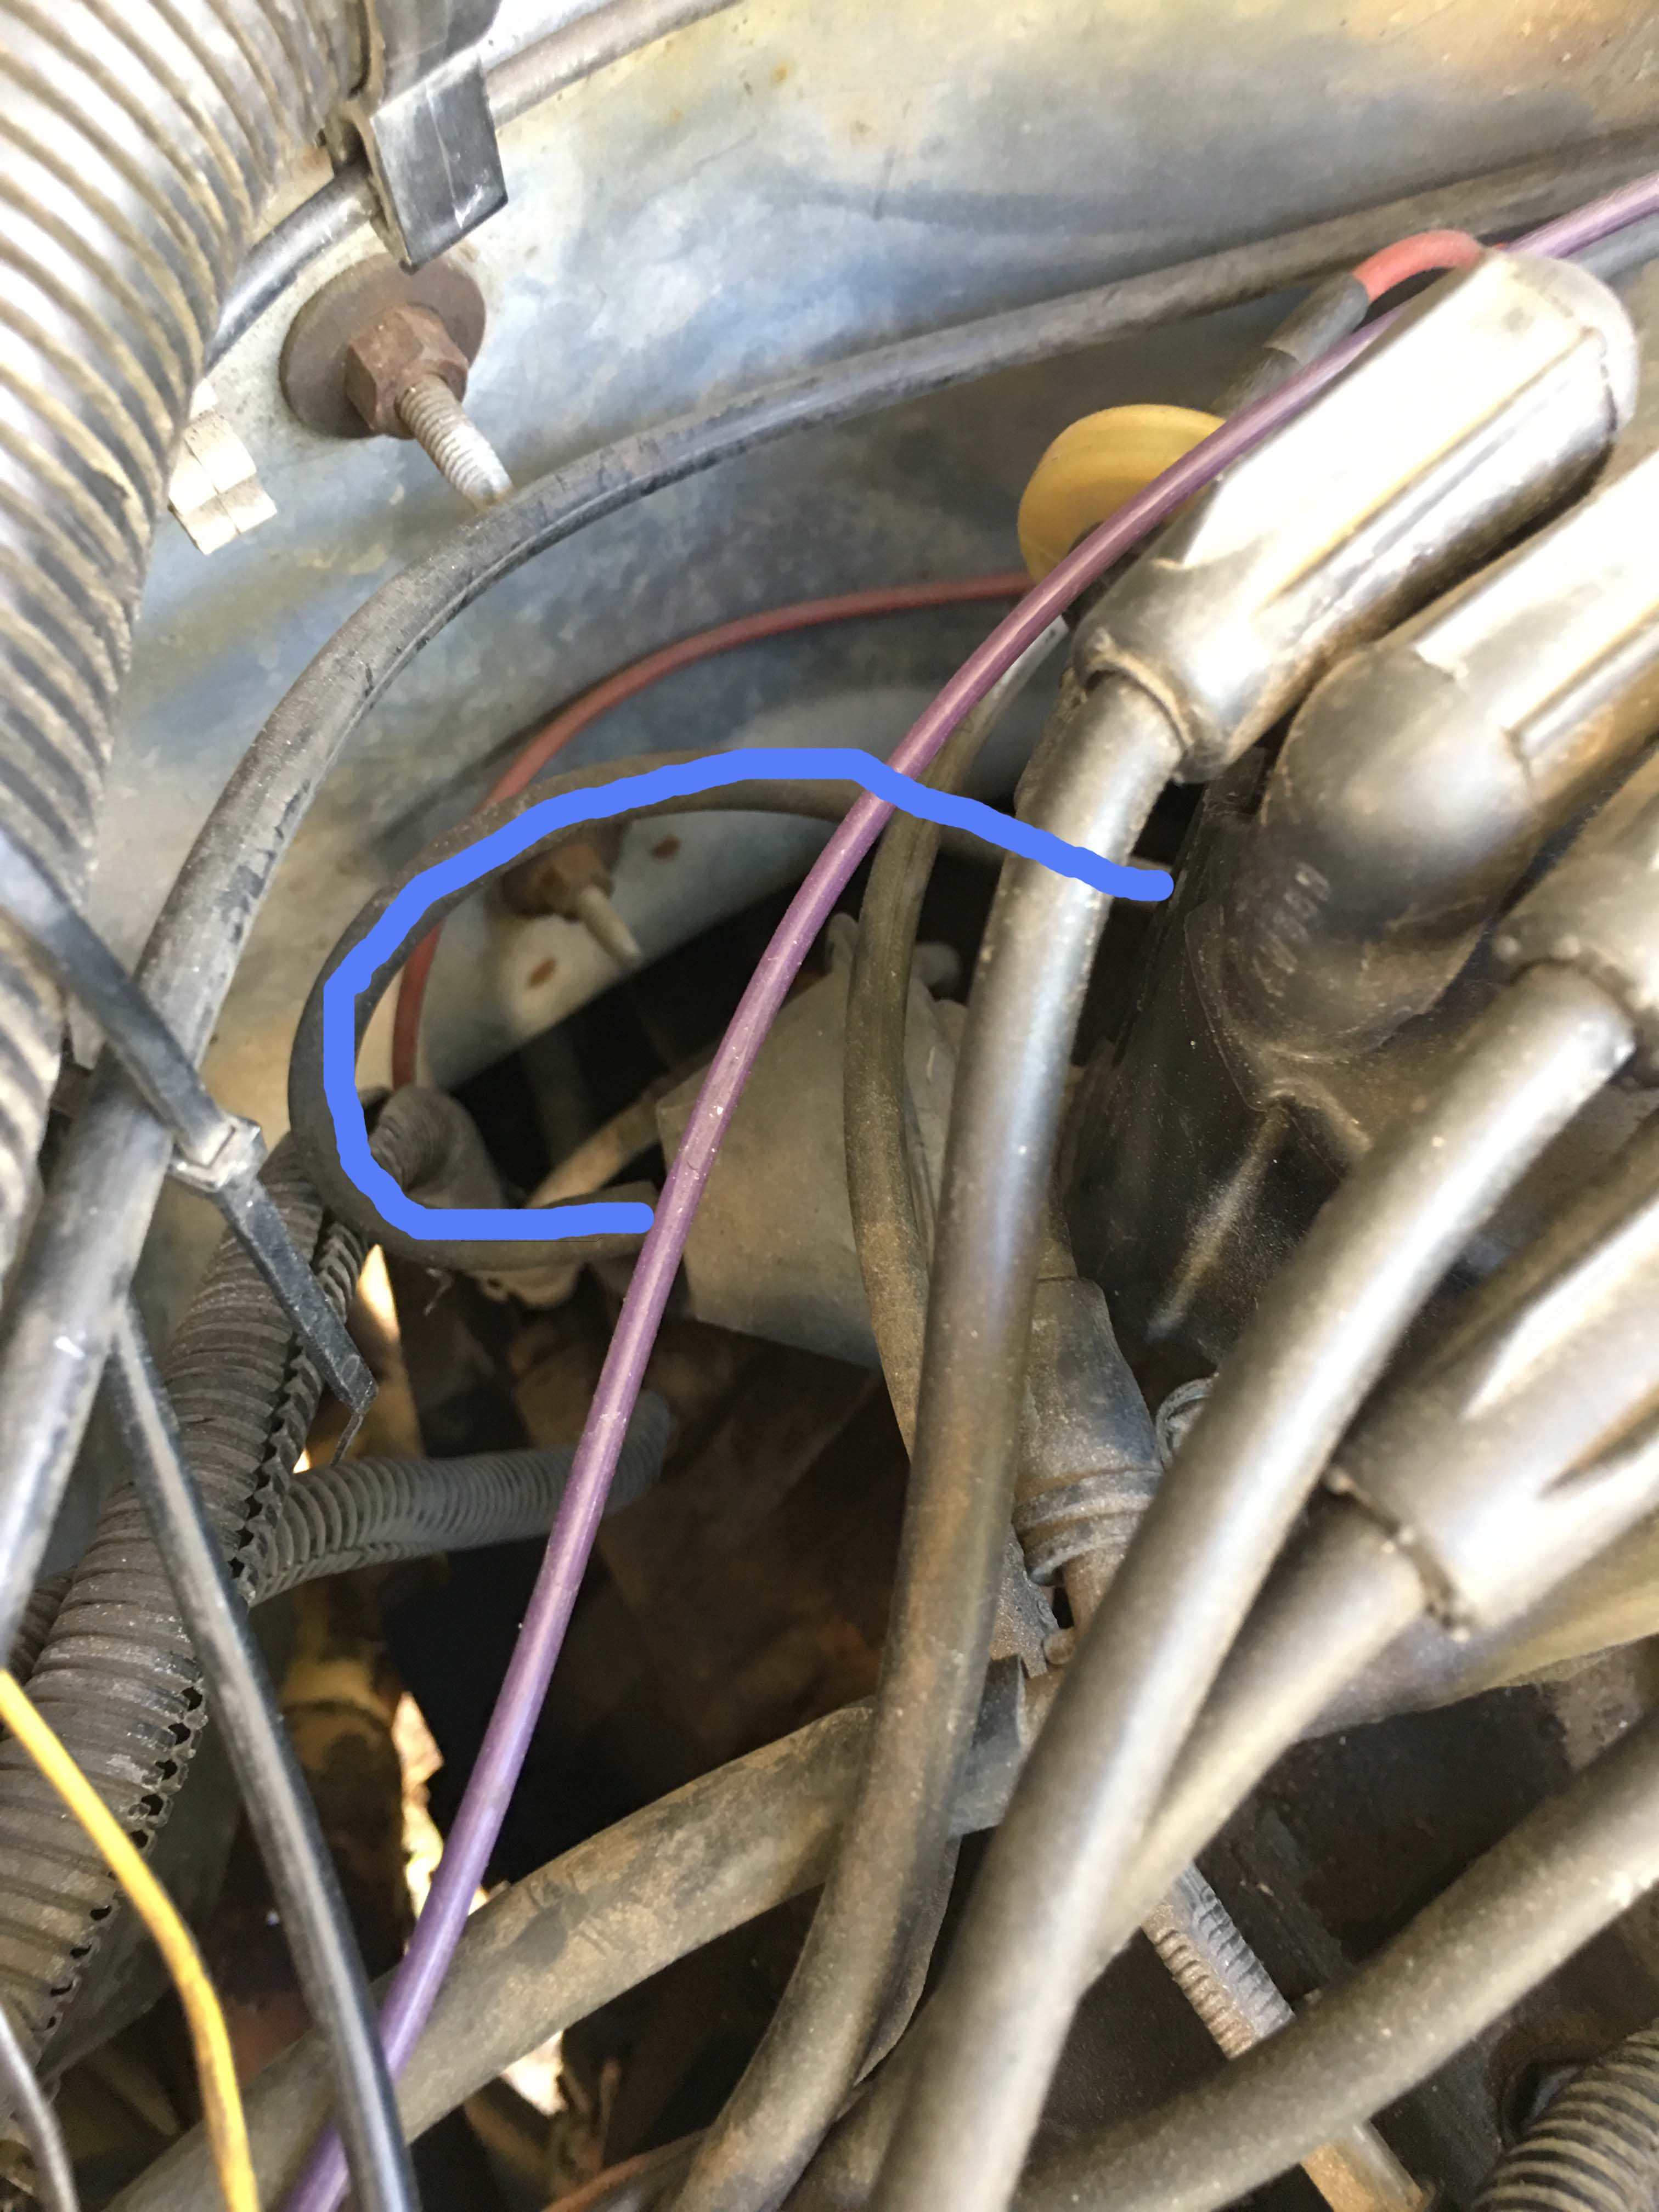
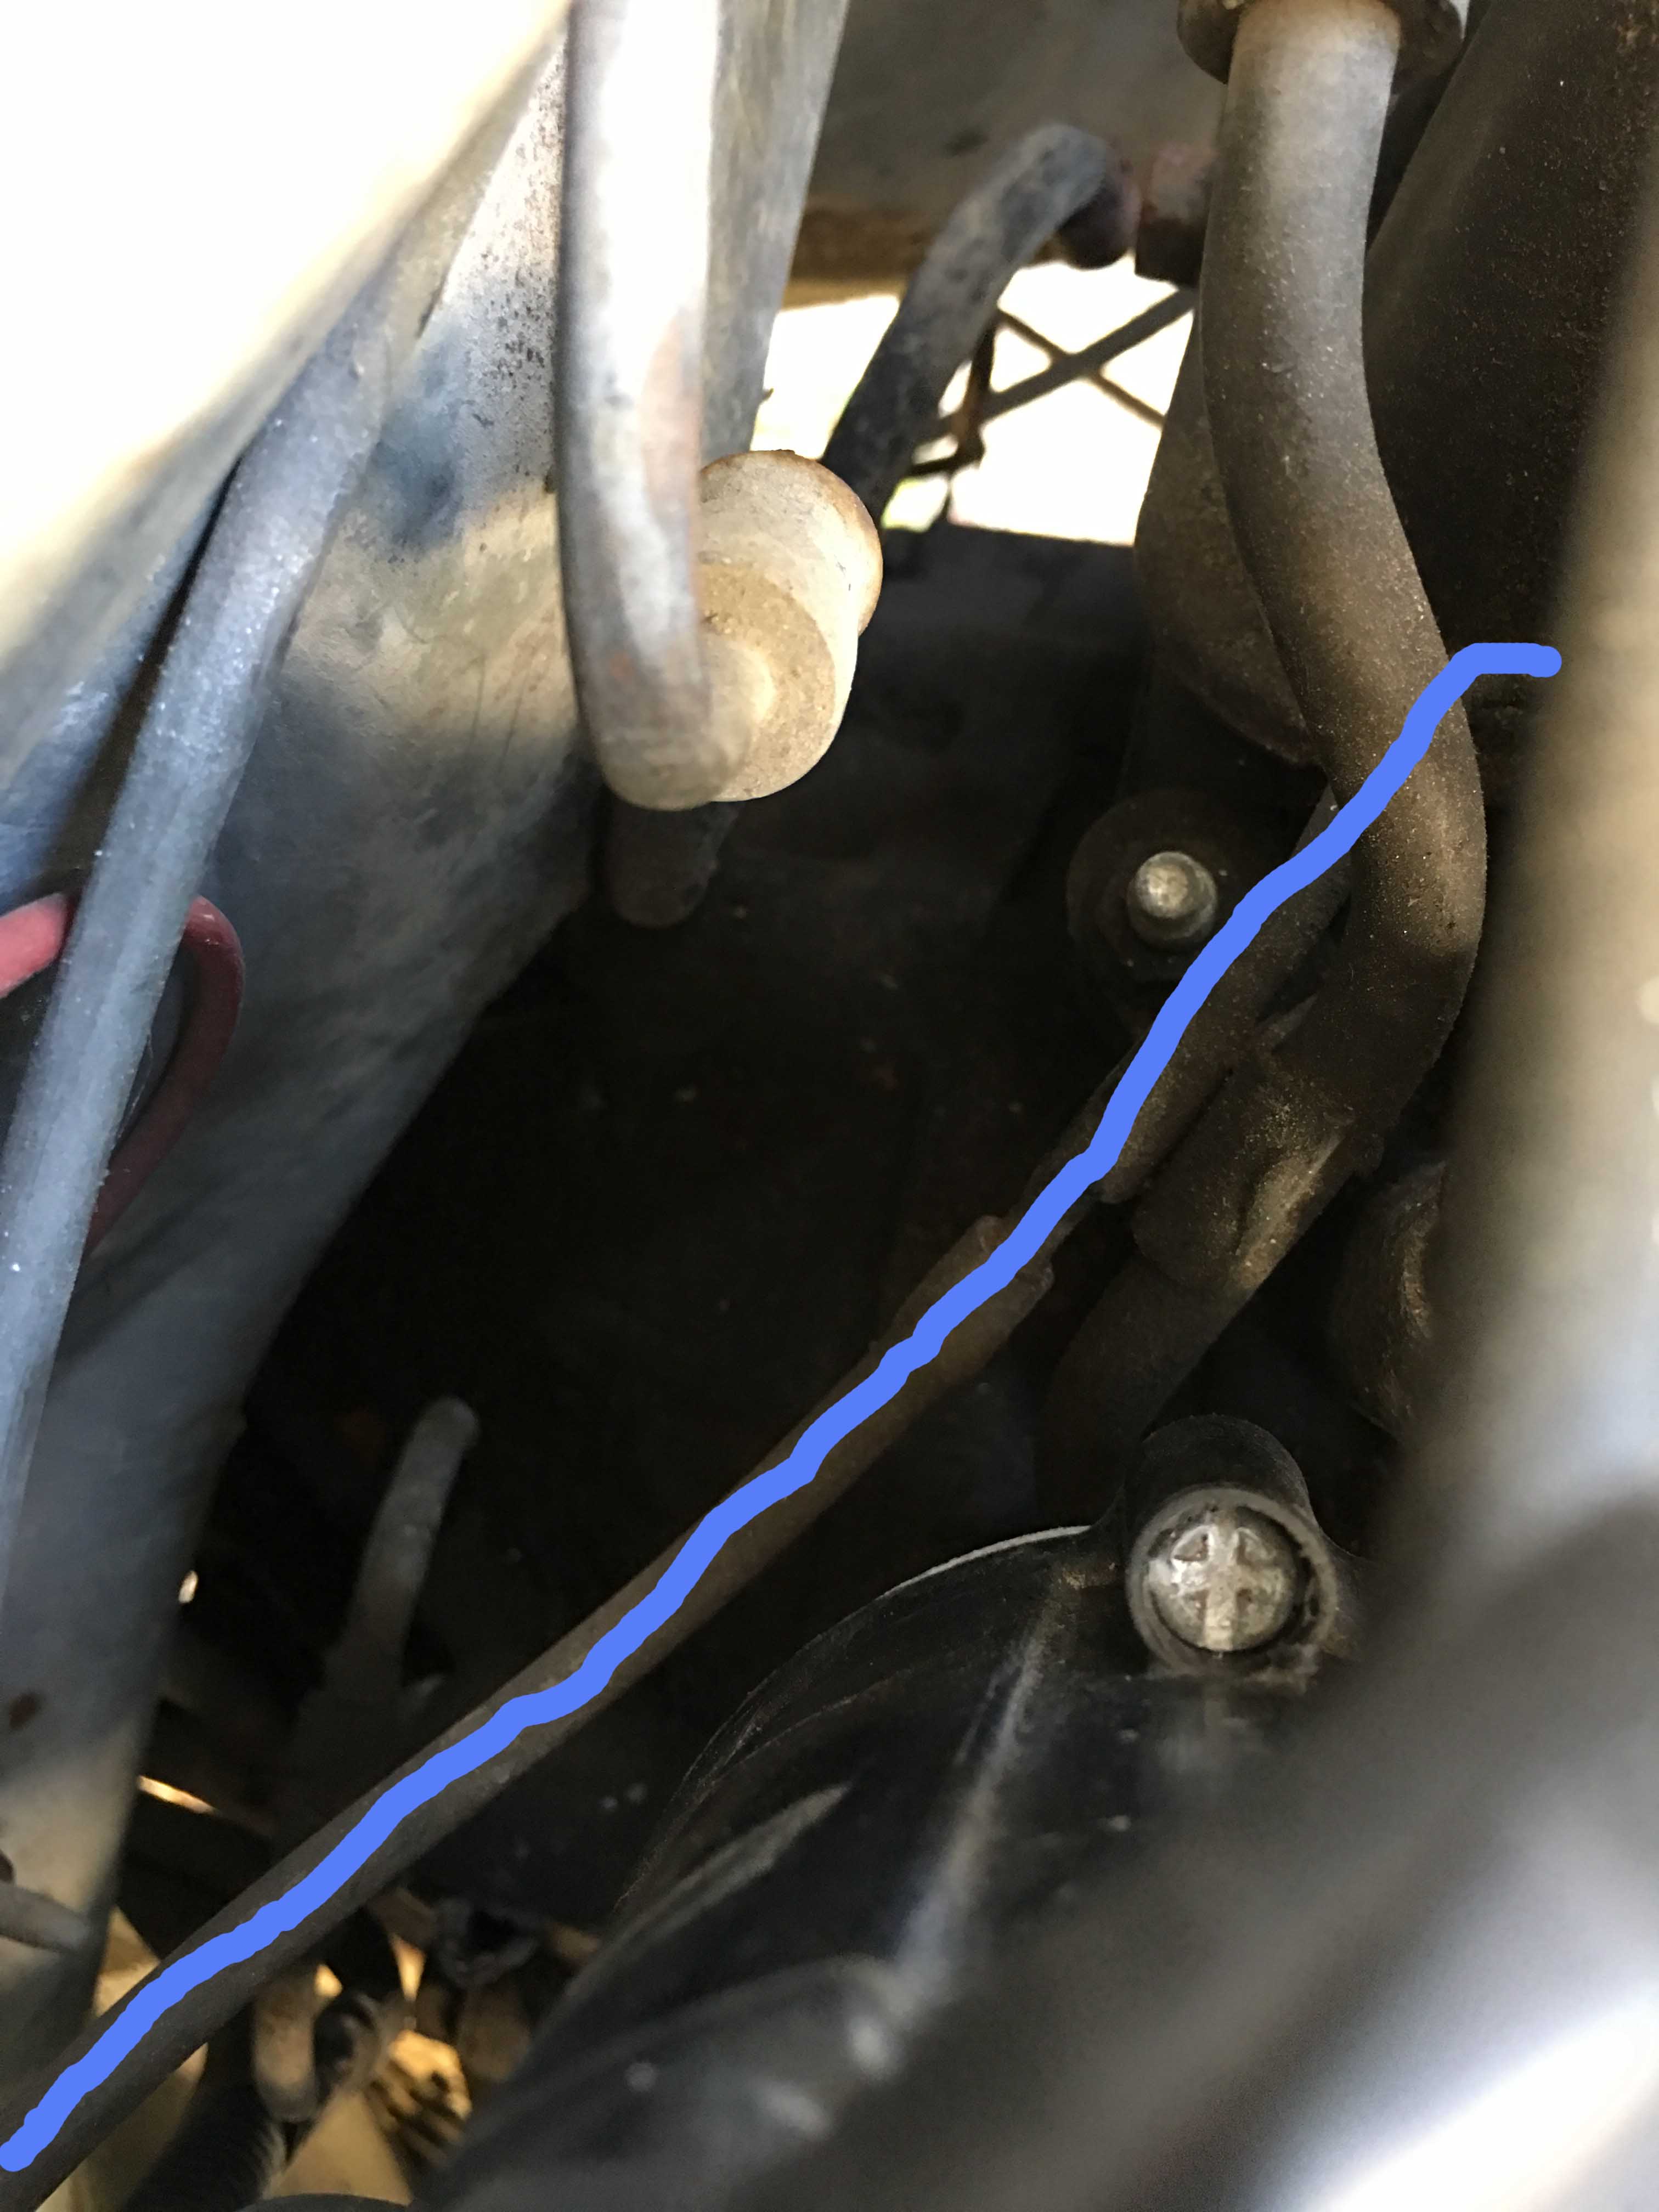
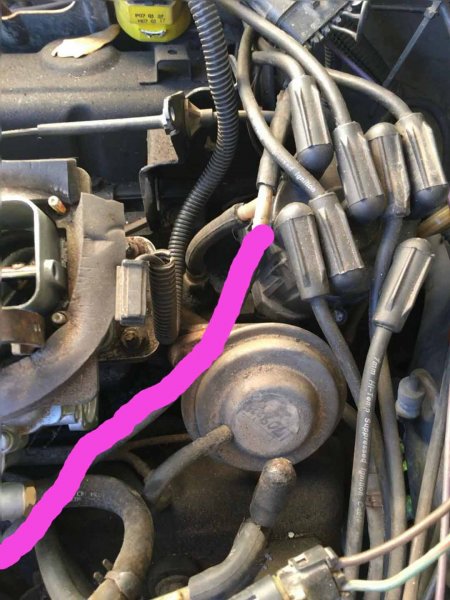
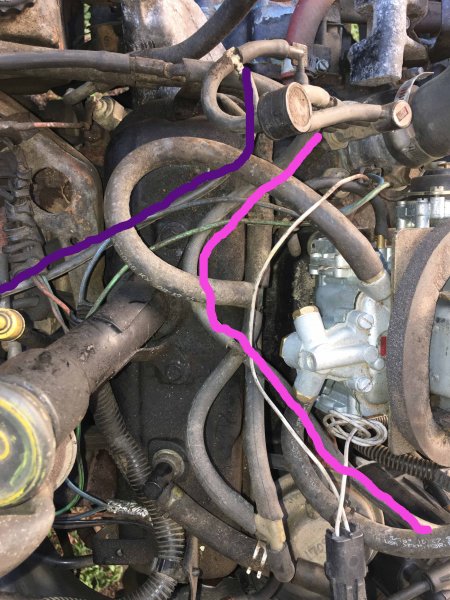
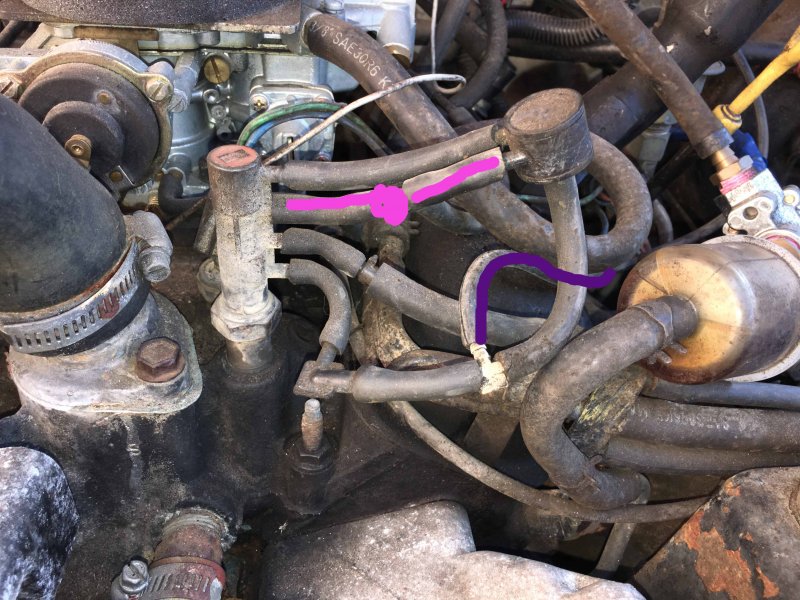
Last vacuum line to trace (marked in pink) originates at the tee at the back of the intake goes around to the vacuum switch in the front of the intake, second port from the top, which splits up again. The line mark with purple splits off the last port of the vacuum switch going all the way back to the vacuum canister on the fender. I am certain the vacuum routing can be cleaned up a lot more, not being the first owner I'm not 100% certain these vacuum lines at the switch are the way it should be, however it runs right, Vacuum CAD axel works well, and the dash vacuum control has always worked well too.
-
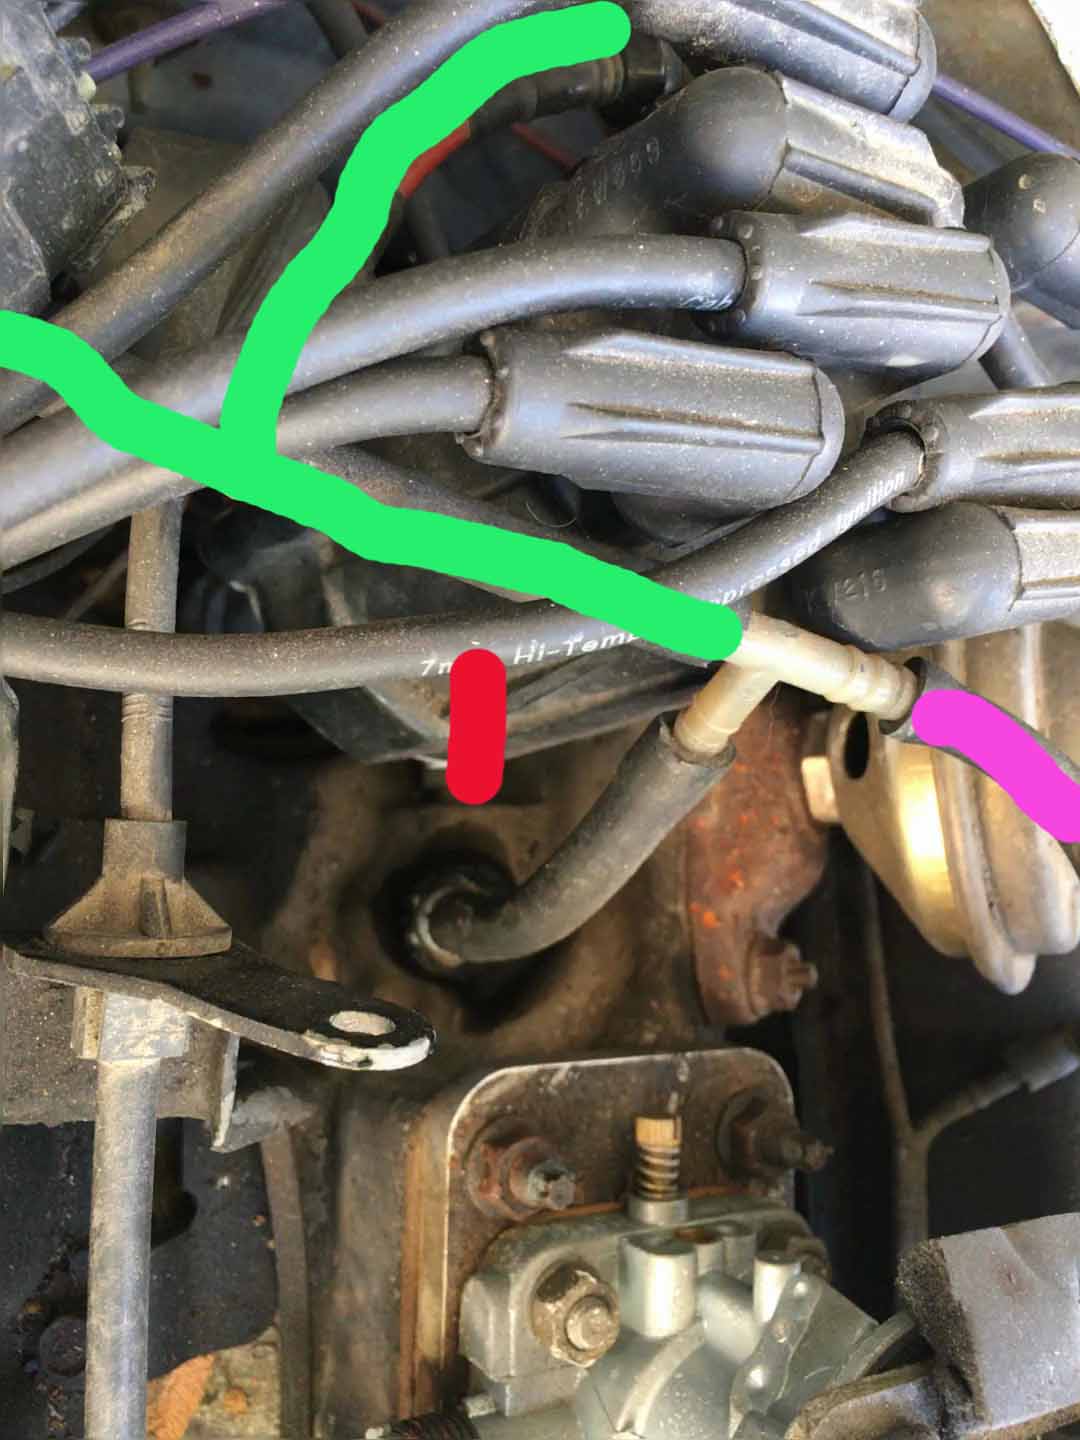
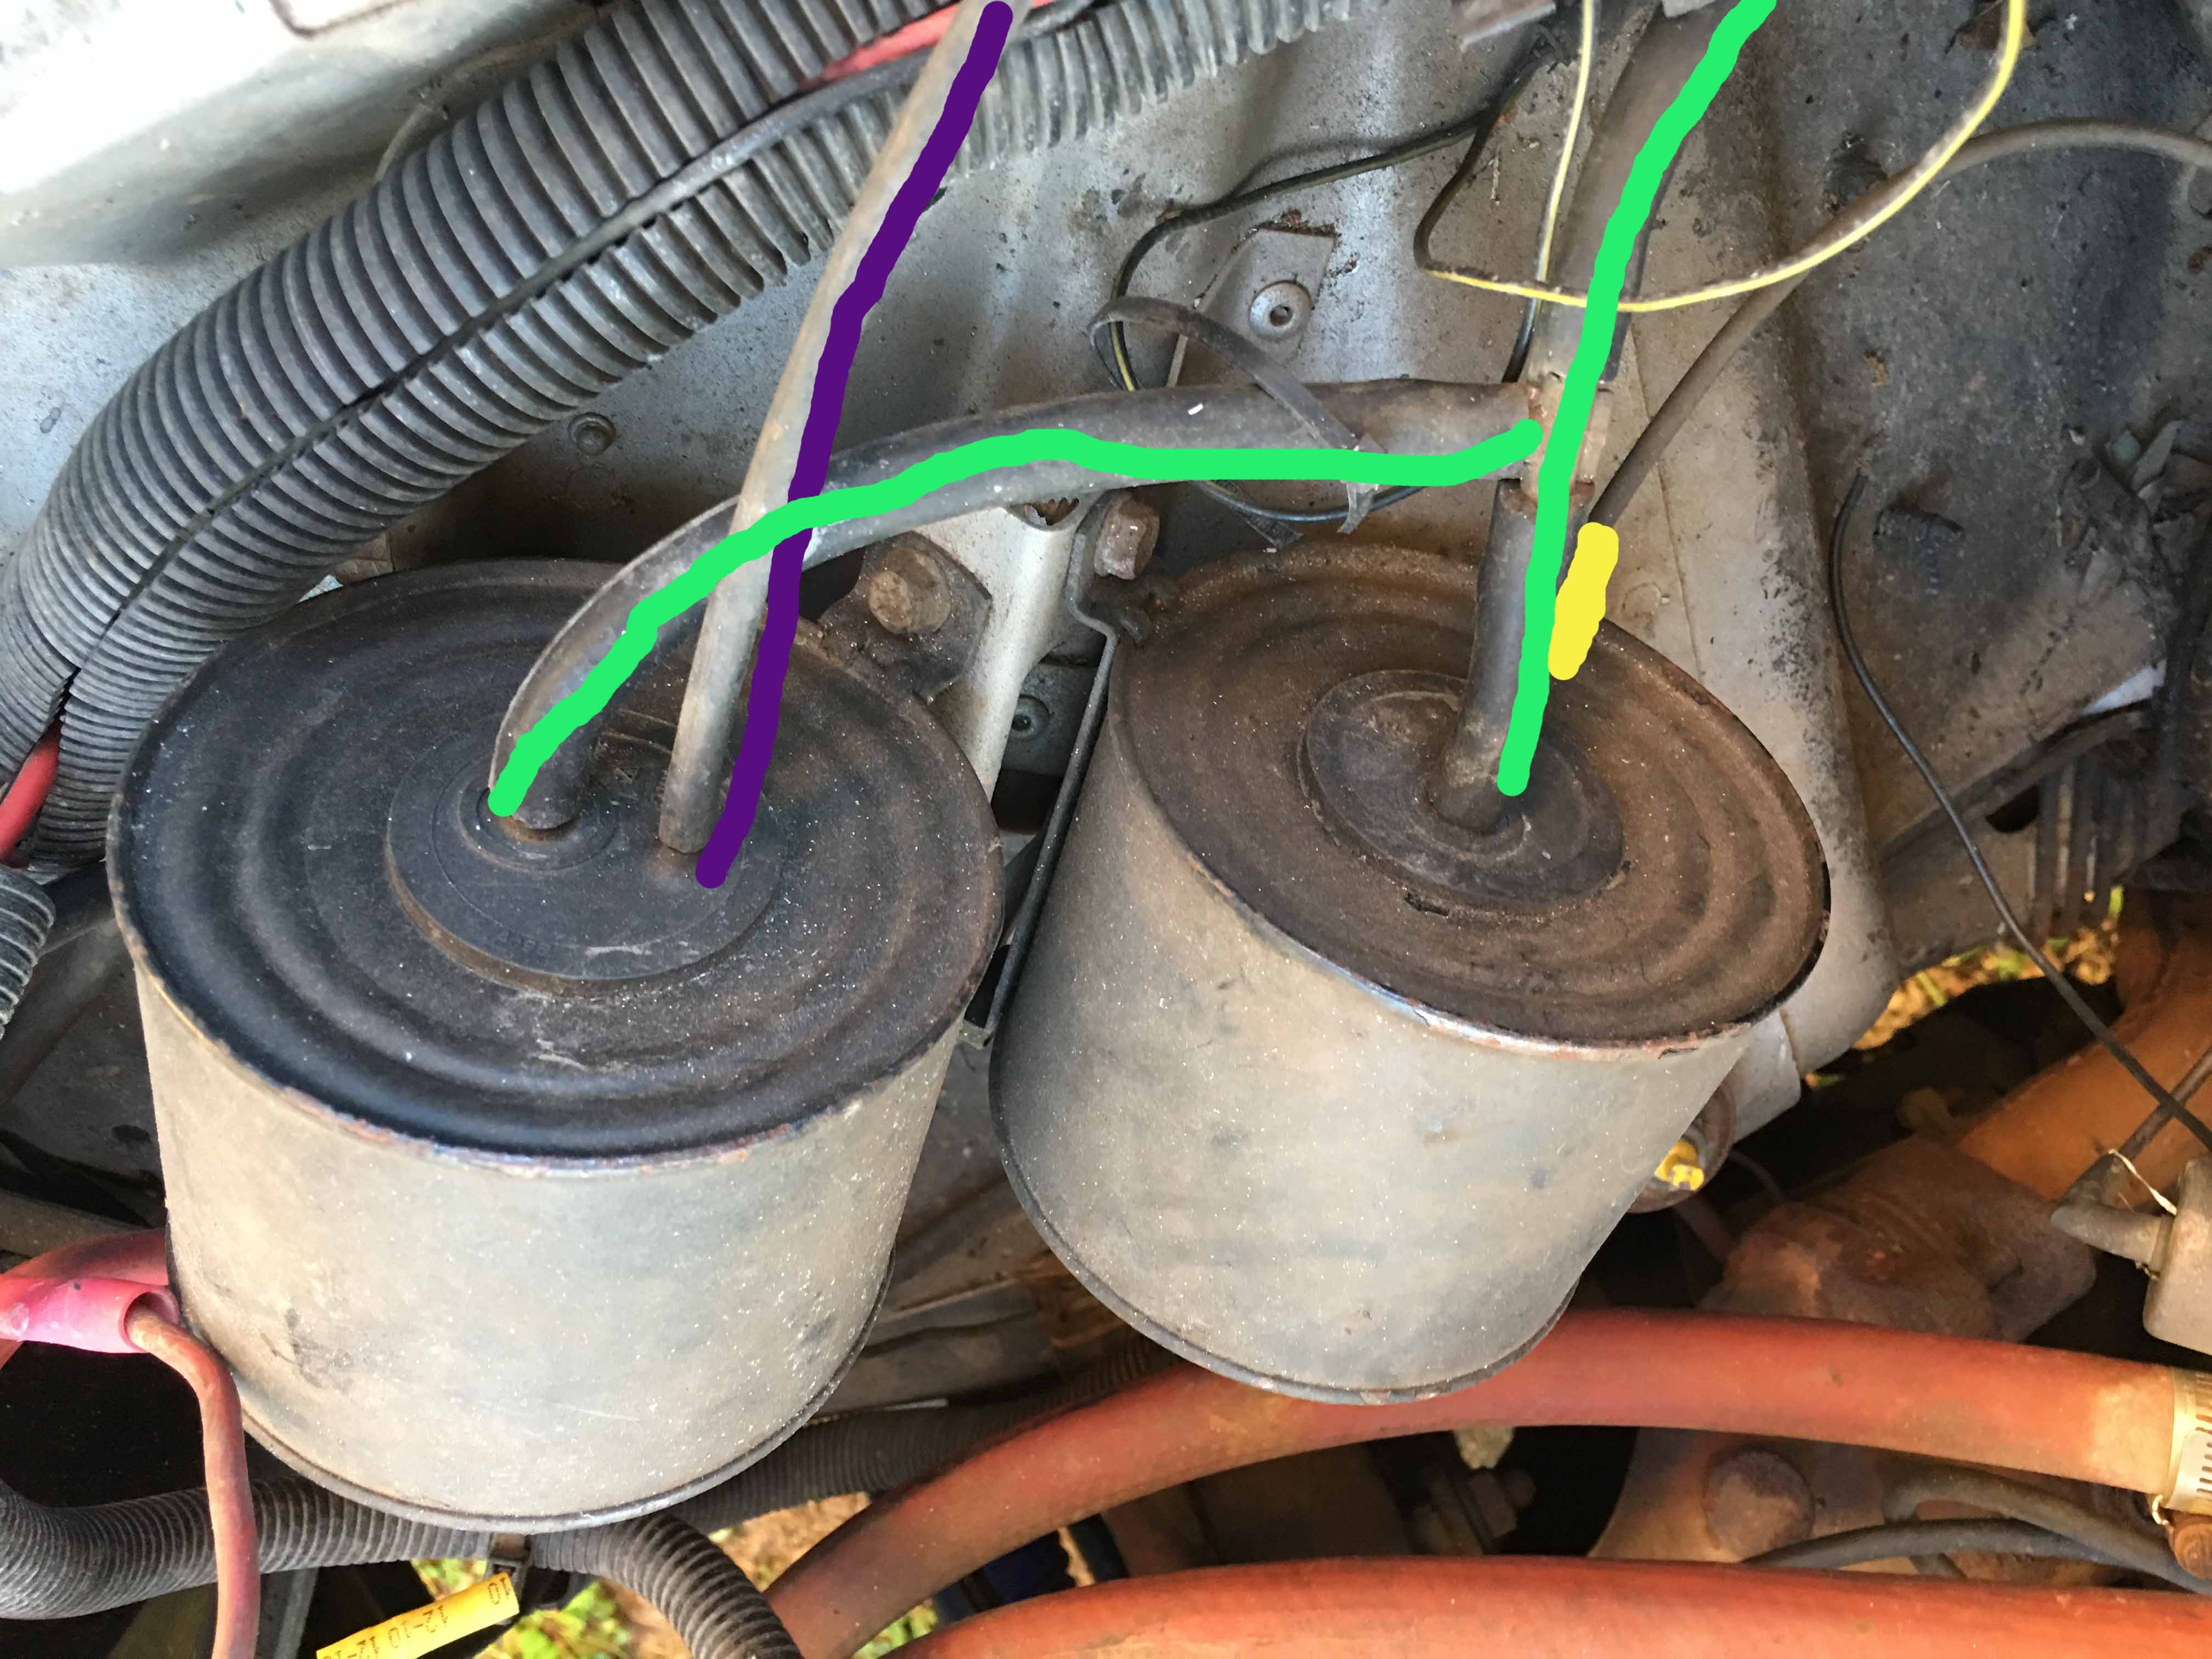
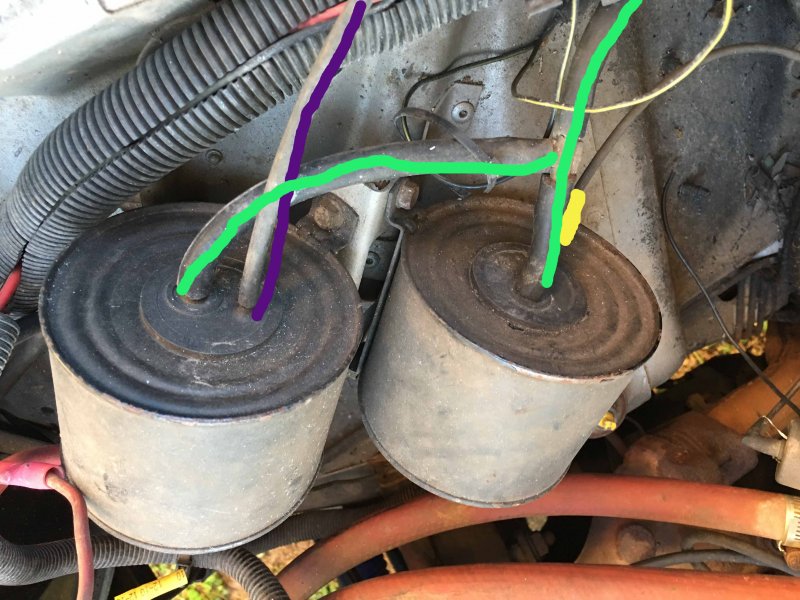
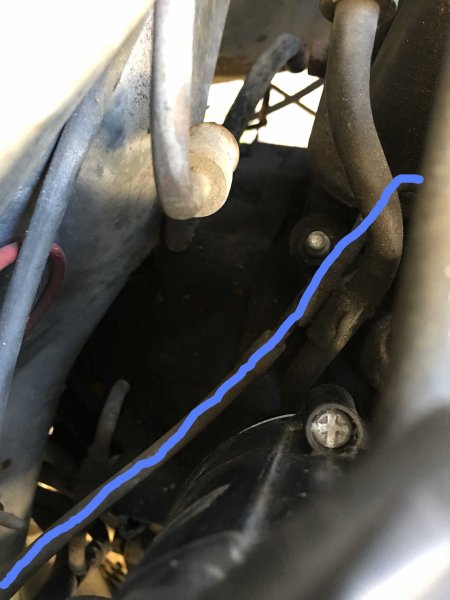
Never mind! Refreshed the page and I could upload again. :) Brake booster line (in red) is on its own originating from the back of the intake manifold below the where the Vacuum line spilt in to a tee at the top. Off the tee split the line (in green) split again for the vacuum going to the CAD actuator, main line then continues to vacuum canisters on the passengers side engine bay fender. On the canister the line marked with yellow goes to the dash heater controls, line marked in purple goes to a vacuum switch at the front of the intake ---which I'll post next.


-
I've hit the max for uploading pictures to the forum, I'll have to send the photos to my phone then post through tapatalk.
-
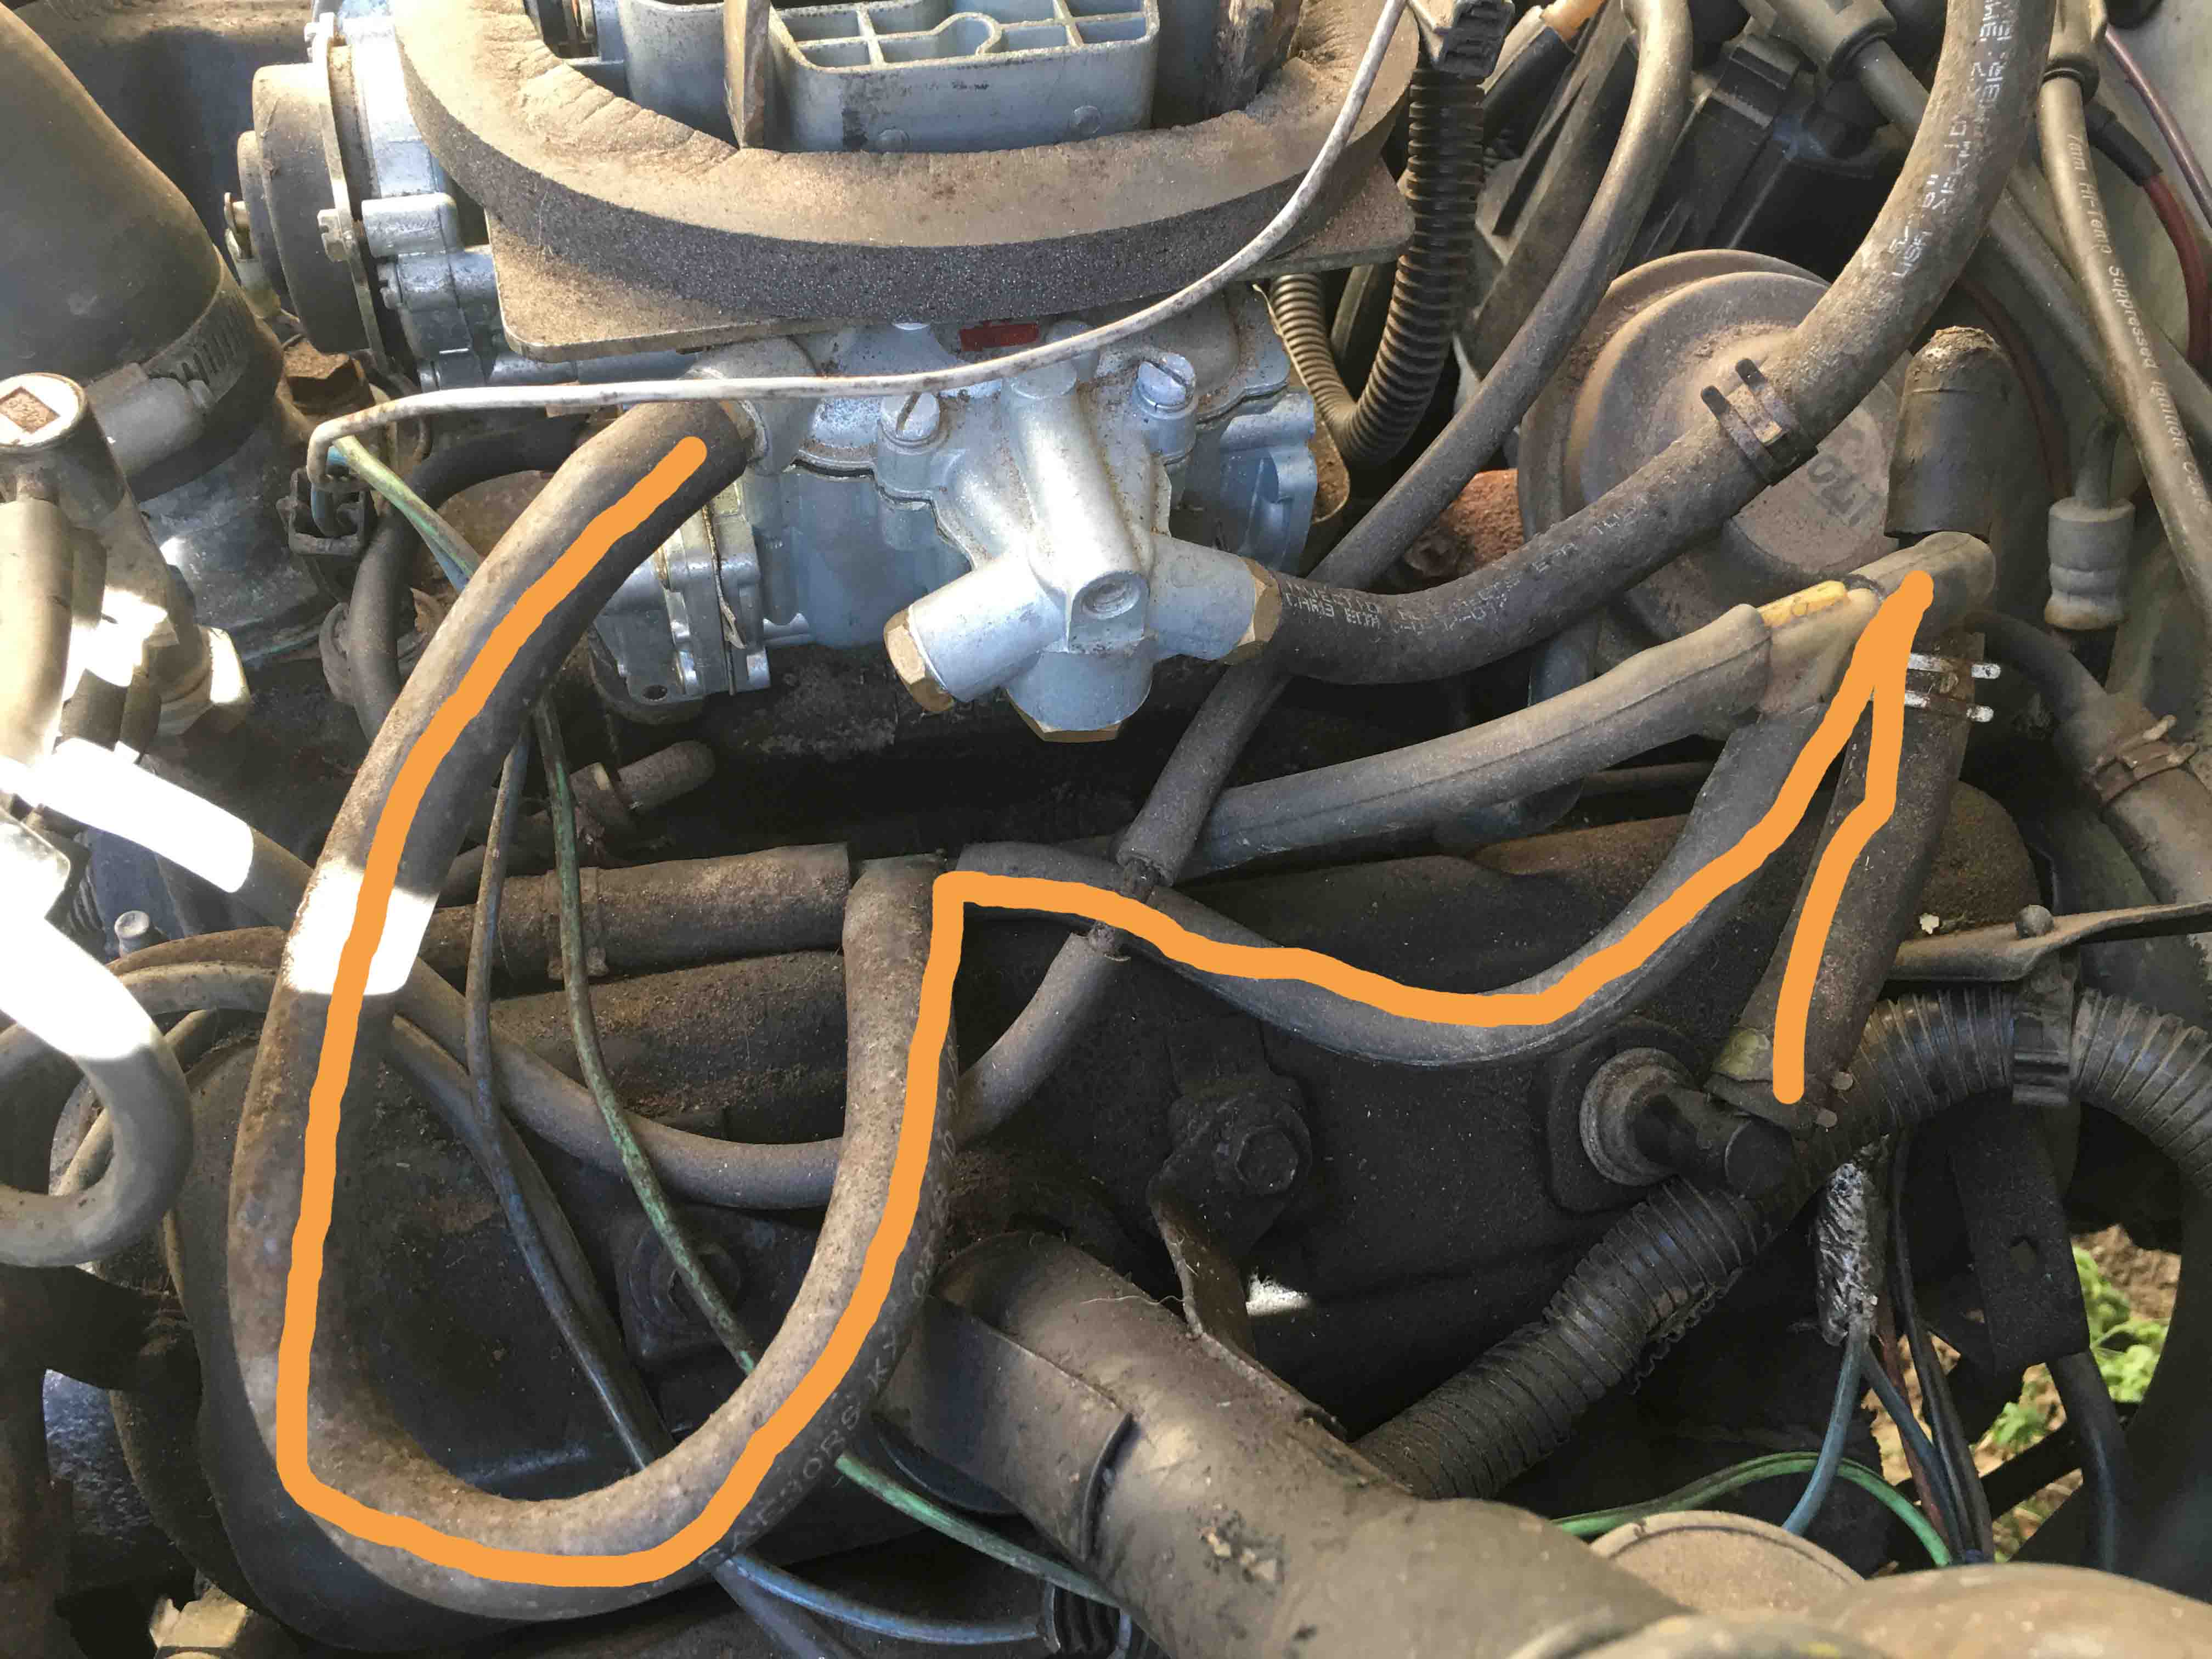
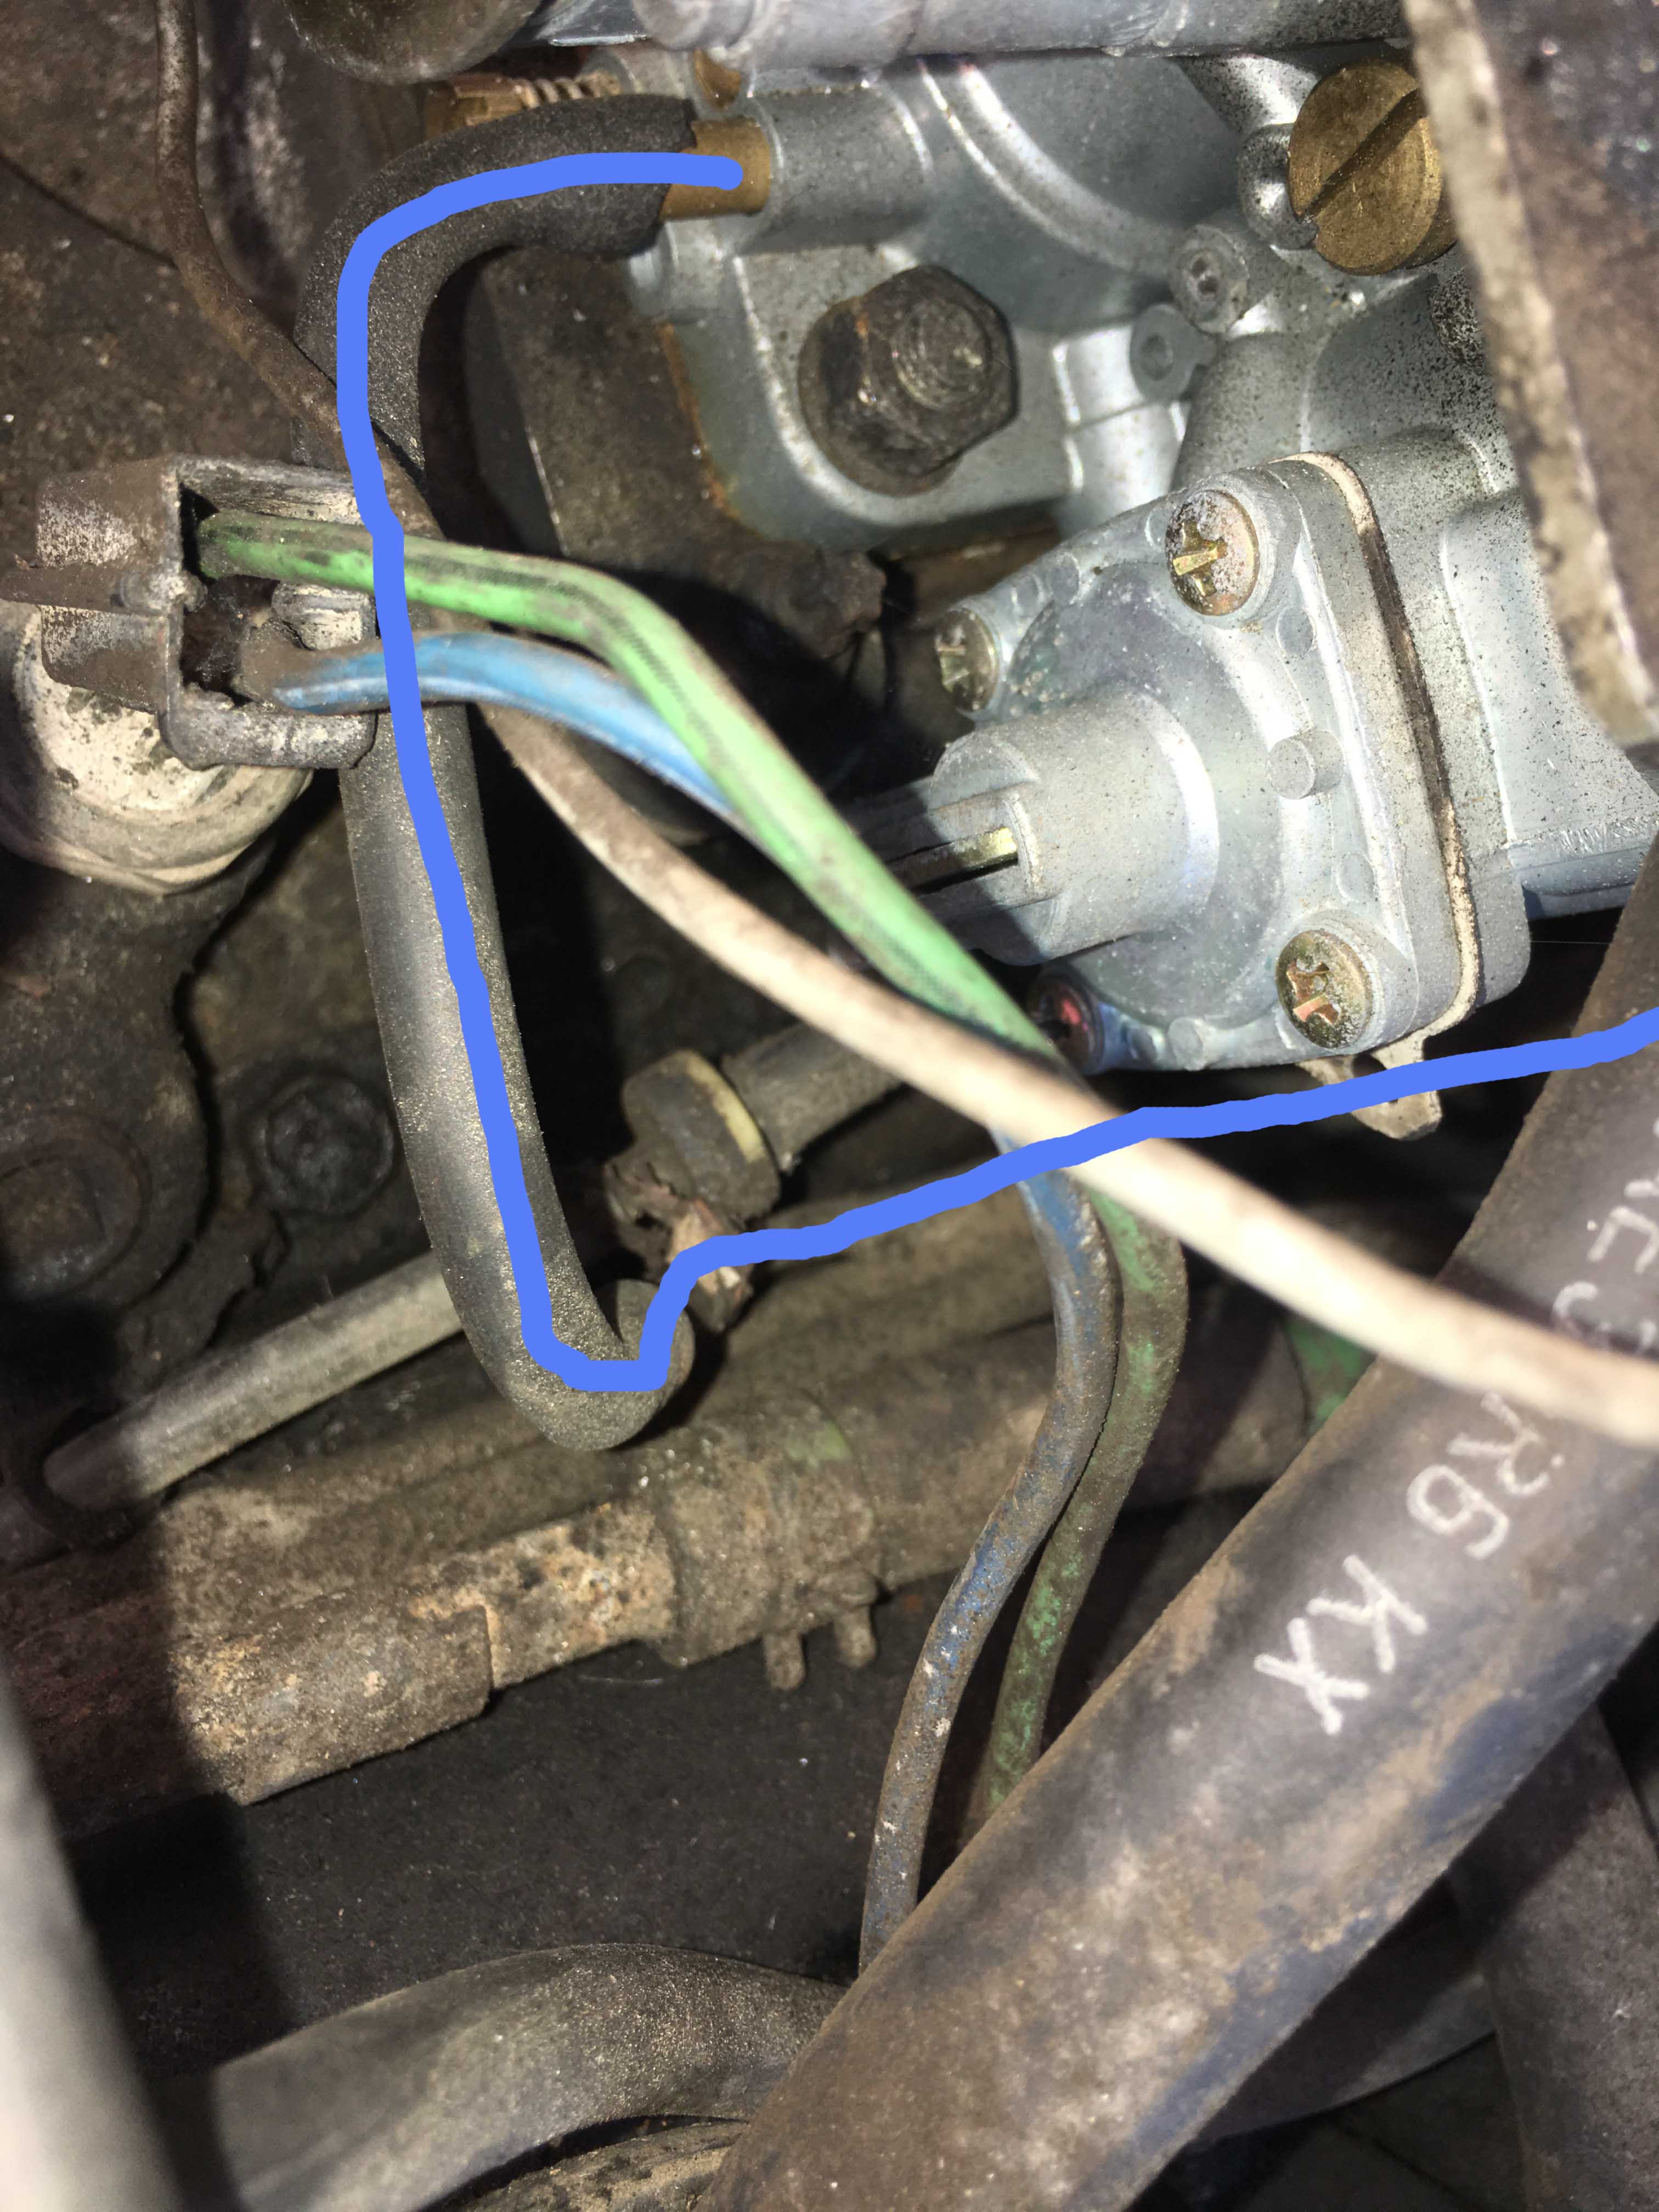
I believe the distributor line is correct because it is similar to how it runs on the factory vacuum diagram except it looks like it cut out a few superfluous connections that are no longer need with the weber carb. Next is the diver side valve cover PCV to Carb, a lot of those metal lines run to a canister at the front near the radiator. I could stand to clean it up a little better, the plug is blocking a line the OEM carb used, probably should eliminate the need for that. Crap looks like I'll hit the limit on file size soon

-
Distributor is up first. Tracing back from the distributor vacuum advance it goes along the back of the engine to a metal Vacuum line which take it from the front to the engine when it goes to the only vacuum port on the front of the Weber 38 DGES carb. (Images were saved as lower resolution so they could be uploaded.)


-
It may be fuel line after all, I thought the kit included a vacuum line splitter but it was decades ago when I first installed it. First pictures are coming up, its kind of hard to see what's what so I am breaking it up into sections then using a paint program to make the lines more visible. Often I have to go back and retake a photo because the mess of vacuum lines its unclear when the line goes.
-
I think those are for vacuum lines, I just got home I’ll try to get pictures of my setup tomorrow Sent from my iPhone using Tapatalk Pro
-
The ax15 from the 90 up 4.0 ought to work behind a V8 Sent from my iPhone using Tapatalk Pro
-
Lord no! That ax-5 transmission could never take the power of the v8. It barely handles the 4cyl /V6 at 121hp. Finding a way to adapt the bellhousing would probably be hard too. I don’t know what will work but it should be a do able conversion just do . I’d check with Novak to see what their guide has. Sent from my iPhone using Tapatalk Pro
-
Well it is correct on their website. I think they are a Canadian company ??? http://www.showmetheparts.com/autoline/
-
I posted the factory vacuum line sticker in your thread (its convoluted but you can see how they run it OEM) , I'm going to get pictures this Sunday of how I ran the lines after the Weber carb conversion.
-
Melted Wiring Harness
Green Mesa XJ replied to pfloyd32086's topic in MJ Tech: Modification and Repairs
Thanks. If I could see where the code was changing it I could fix it manually, I'm just not used to the real interface for this forum instead of the phone app. -
Vacuum advance dist on 2.8
Green Mesa XJ replied to ammohead's topic in MJ Tech: Modification and Repairs
I believe the timing for the automatic needs to be around 12 degrees, the California emission with the computer controlling advancing was about 10 degrees. You may just need to bump the timing up a little. Strangely my 2.8 manual transmission is supposed to be 17 degrees, maybe because it’s high altitude emissions. If you’ve got the right distributor I’m not sure why it’s not advancing, I’ll post a vacuum diagram for the factory set up but you can hook up the vacuum line to the distributor several places. This weekend I’m going to post the way I’ve set up the vacuum lines with a Weber carburetor for another member. Sent from my iPhone using Tapatalk Pro