


RKTJeep
-
Posts
29 -
Joined
-
Last visited
Recent Profile Visitors
765 profile views


RKTJeep's Achievements
Can Spell Comanche (2/11)
-
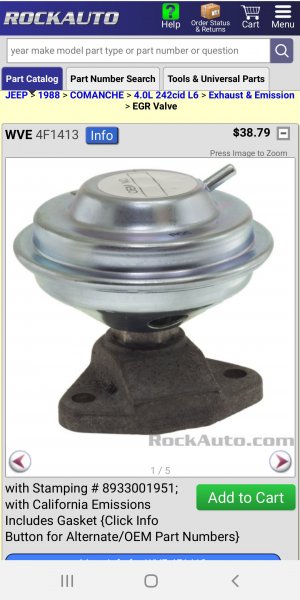
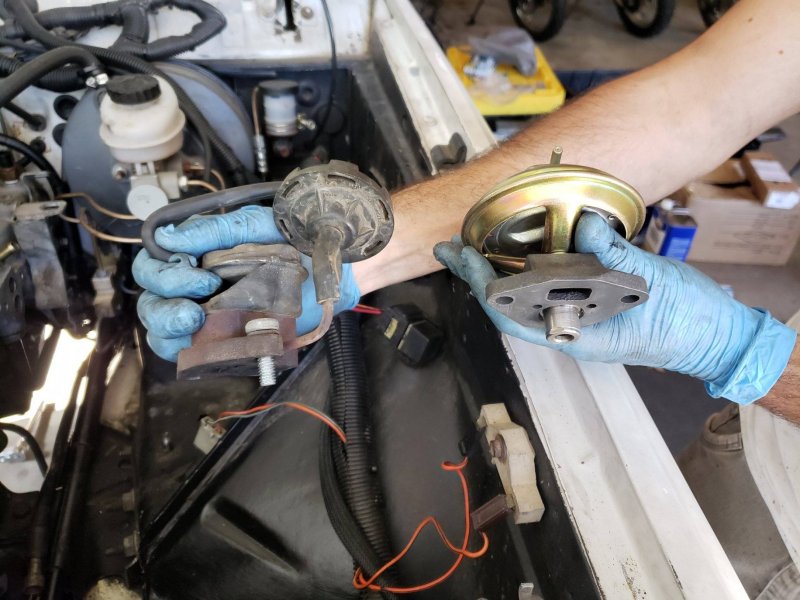
********* UPDATE SOLVED ********* So the RockAuto replacement EGR caused it to fail California Emmissions for NO2. After some diagnosis, I found that the vacuum pressure was not enough to actuate the EGR properly. Luckily was able to to source the a used OEM EGR on the forum here, I couldn't find an EGR era 4.0 in the LA area salvage yards. It passed emissions at the very next test. So if you have a used OEM EGR don't throw it away. You might want to post it up here for those in restricted areas. I haven't been able to find a new OEM equivalent, so we'll be dependent on salvage and community used parts as far as i can see.
-
Can you point me in a direction for the correct one?
-
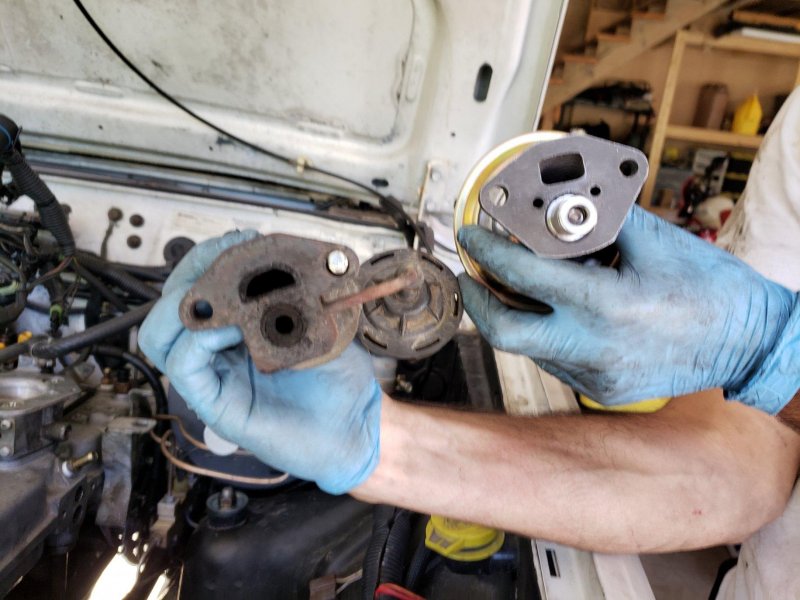
I ordered a replacement EGR valve from Rockauto, but it is significantly different from the factory one (much larger diaphram). It came without the vacuum transducer and does not have a port to connect the original vacuum transducer. From the limited information I can find, it looks like the transducer interlocks the EGR operation to only open when there is exhaust pressure. Has anyone ran this setup or similar EGR without the vacuum transducer?
-
Renix Factory Vacuum Configuration
RKTJeep replied to RKTJeep's topic in MJ Tech: Modification and Repairs
Perfect, thank you! Do you have the diagram for the reservoir, hvac, cruise, 4wd? Just want to make sure i get it all back to factory. Much appreciated -
Renix Factory Vacuum Configuration
RKTJeep replied to RKTJeep's topic in MJ Tech: Modification and Repairs
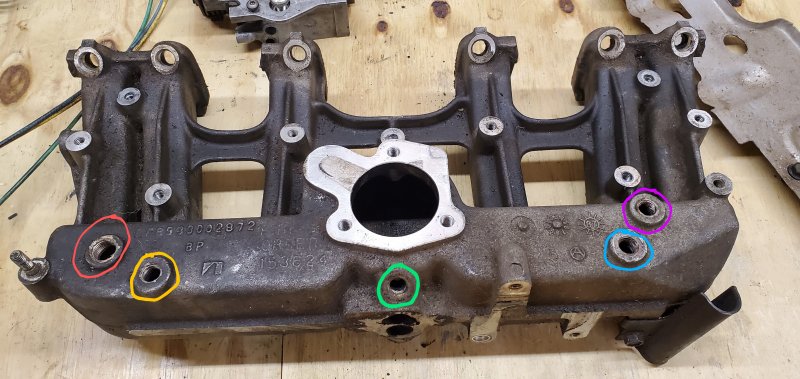
Thanks Cruiser, I've looked at this diagram when I did some searching. But it's still unclear what is connected to the Green, Blue, and Purple vacuum ports? -
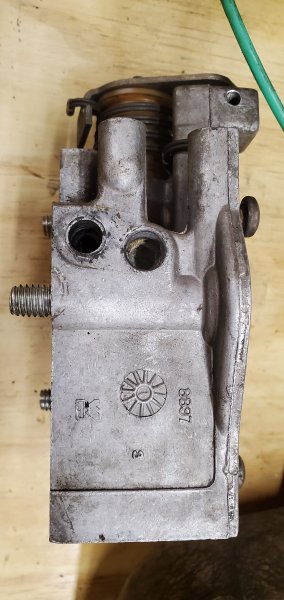
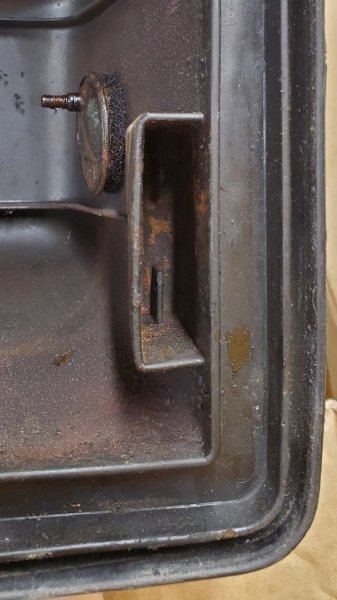
I had a HO 4.0 rebuilt for my 88 Pioneer that was in a factory configuration. Added Borla head/exhaust and ran the HO Intake manifold and TB. Recently got a job in California and have to convert everything back for CARB compliance. Luckily I have all the original parts except the airbox. There are a couple tings that I need clarification on when I swap the intake, TB, and vacuum lines. Can someone post up some picture of a factory vacuum line setup, particularly what is where on the intake manifold. (See color coded pic) I think I'm missing some fittings on the TB for the MAP vacuum line. (See pic) Also do I need order a filter or diffuser for this vacuum port in the airbox (see pic)
-
Just wanted to follow up. I ordered the Luk branded MC and it is notably different from all others. The housing is cast steel and painted black, instead of aluminum. Dimensionally it is the same. So far I've had no issues with leakage and actuation is smooth.
-
Over the last couple years I've had issues with clutch MCs developing leaks from the piston. This causes fluid to leak past the interior boot and down onto the fuse panel. I've pulled the boot back to verify that it is coming from the location. I've tried Dorman, O'Reilly store brand, Advance store brand, and all look to be manufactured the same. All development this leak imediately or soon after installation. I do a gravity fill with the bleeder open. Then once it's mostly blead and filled I do the traditional 2 person bleed method. I'm posting this because my current one is starting to leak and I'm looking for more options and to see if others have had the same experience. It looks like LUK offers a MC for about $20 more than the "house brands" i may give it a try if no one has recommendations or solutions based on experience.
-
AX-15 Clutch Travel *Solved*
RKTJeep replied to RKTJeep's topic in MJ Tech: Modification and Repairs
Knowing what the correct part IS, is most the battle with a conversion. I posted a link to the Novak slave cylinder page, above (3/4"). Good luck with your research! -
AX-15 Clutch Travel *Solved*
RKTJeep replied to RKTJeep's topic in MJ Tech: Modification and Repairs
Problem Solved: This evening Installed the original Master Cylinder that was used for the internal slave cylinder on the BA10-5 (stock). Since the stock one has a 5/8" longer rod (than the YJ MC) it gave me more than enough travel to disengage the clutch. No adjustable rod was necessary. I've included a photo of them side by side, the stock MC is on the bottom.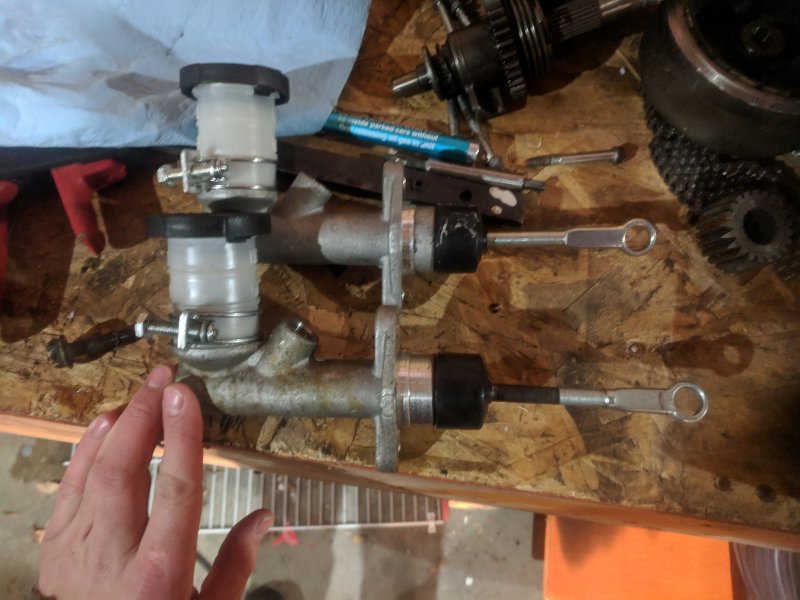
-
AX-15 Clutch Travel *Solved*
RKTJeep replied to RKTJeep's topic in MJ Tech: Modification and Repairs
Talking further with the support at Novak it sounds like the master cylinder that they include is for a YJ (~87-89) this makes me suspect that the pedal assembly is probably different which may mean that the master cylinder shaft may have a different length to account for different pedal travel distances. I just measured the old master cylinder rod to the center of the hole and it's about 3.75 in, the one from Novak is 3.125 in. Aside from that, there's almost no visible difference. From full extension to bottoming out the pedal on the floor, with the Novak MC, I get about .75 in. of travel at the MC Rod. Tomorrow I'll install the old MC, I'm thinking the additional .625 may be enough for full actuation. -
AX-15 Clutch Travel *Solved*
RKTJeep replied to RKTJeep's topic in MJ Tech: Modification and Repairs
The Master cylinder appears to be a stock replacement for the original setup. I'm using Novak's external slave and a new external slave bell housing. The slave cylinder is in the link below, but it bolts directly to the housing without a bracket. https://www.novak-adapt.com/catalog/clutch/kit-hcr3/kit-hcra/ I went with Novak for convenience of not piecing everything together, searching for used parts. I also got a brand new transmission, transfer case rebuild kit and proper shafts to make it all work. Everything has has gone together fairly smoothly up to this point. -
I'm currently working on finishing up my AX-15 swap in my 88 Comanche. I went with a complete kit from Novak transmission, which has been good so far. However, I've encountered an issue with the clutch not fully disengaging. I've blead the clutch multiple times and made sure the Novak (3/4 bore) slave cylinder/piston is not bottoming out. Novak included a replacement master cylinder which appears to be the the same as the stock '88 (11/16 bore). I've measured the travel of the slave piston with the pedal fully depressed and I'm getting 0.718" of travel, this means that the throw-out bearing is only pushing in the pressure plate fingers 0.359". Which doesn't seem like enough to fully take the pressure off the clutch. I did install new carpet with the during this process but that may only be removing about 0.5" of pedal travel at most. I'm used to clutches disengaging within the first half of pedal travel so I would expect that last but to make or brake me. At this point it seems like either the pushrod of the mast cylinder is too short. Leading to a low clutch pedal, idk? I've tried to find information on the Luk clutch to see how much travel is needed to compress the pressure plate for full disengagement, but haven't had any luck. If anyone has some info or insight on this I would appreciate it. I have been in contact with Novak and they recommended bleeding and pushing the piston as far back as possible. Which I was skeptical of since I had already check for it bottoming out. I performed this today and it made no difference. I'll be calling them again tomorrow.
-
I'm in the process of rebuilding the HVCA on my 88, R&R the Heater core and evaporator. I'm on a bit of a time crunch to get the truck reassembled. Since I won't need AC where I live for another 5 months, can I leave the compressor lines disconnected and still run the Jeep without damage. I'll cap off all the fittings to prevent contamination... I would think as long as I disconnect the clutch control, the compressor pully should always just free spin. This way I can drive the truck and clean/replace the AC system components at a later date.
-
Late Update: I went to take some measurements for the bolt spacing on the sway-bar bushing mounts. I plan on making my own spacers/offsets. After comparing the setup in links you provided it looks like there are already drop brackets installed. See images below. This has me even more puzzled, if this is the case, since i thought i had finally found a solution to the probablem. Does anyone recognize these brackets? It would be nice to identify the lift that is on the truck. I'm to the point where I may borrow a go-pro and mount it underneath the truck to see if i can pin-point something...