Search the Community
Showing results for tags 'street comanche'.
-
So I have 2 manchee, one of them is 3’ lifted, and the second one I want to make it in to a “street Comanche” not sure is that is how is called. What I want to do is put 245/40 r19 wheels but, not sure it they will fit and / or what is the biggest rims whit tires I can throw on. I want something like this
-
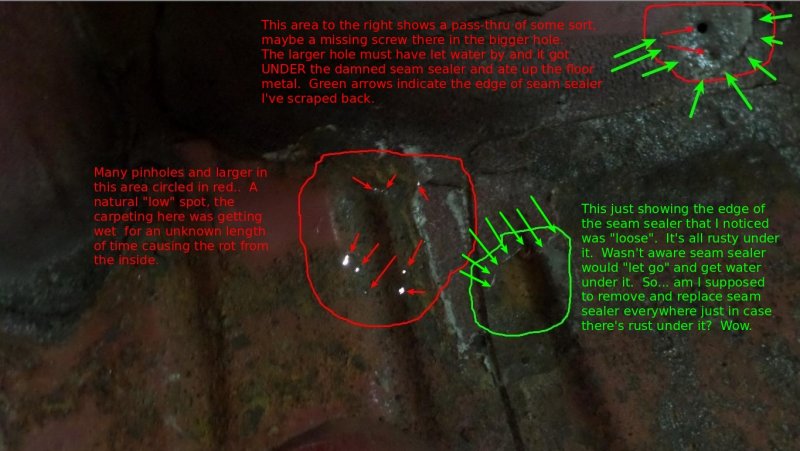
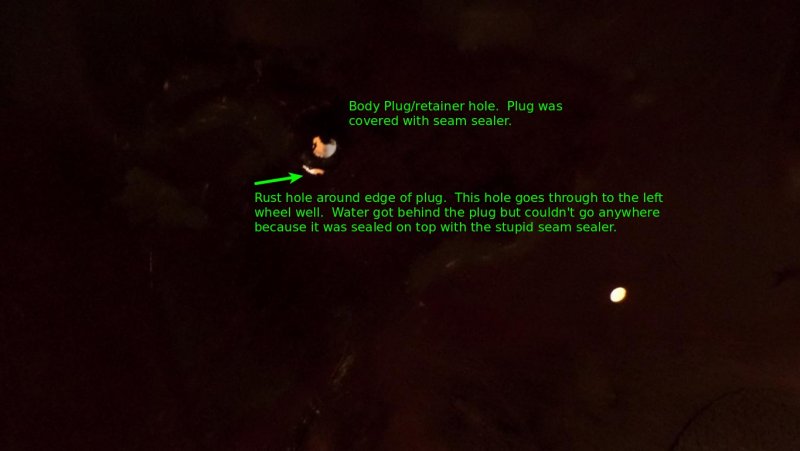
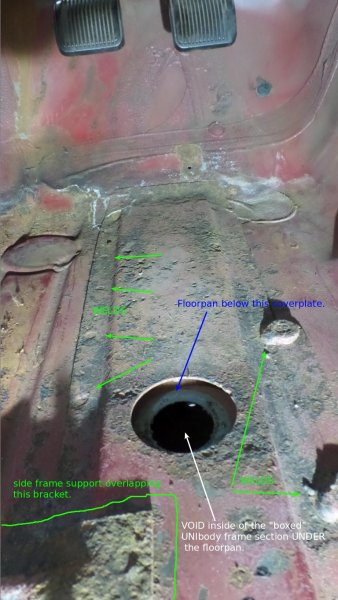
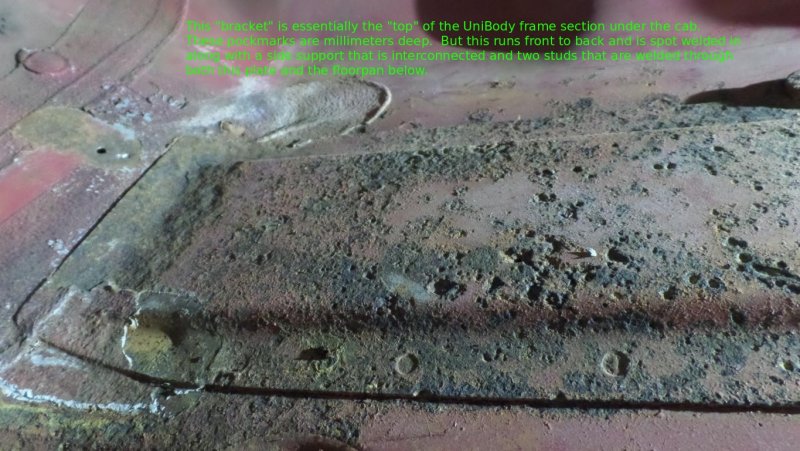
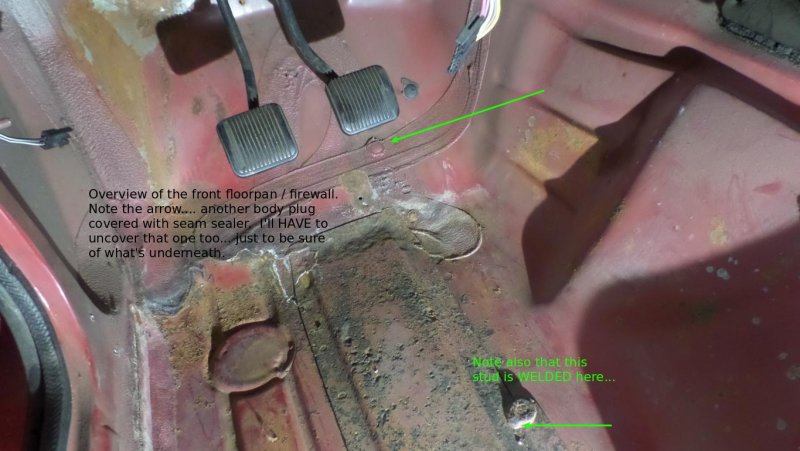
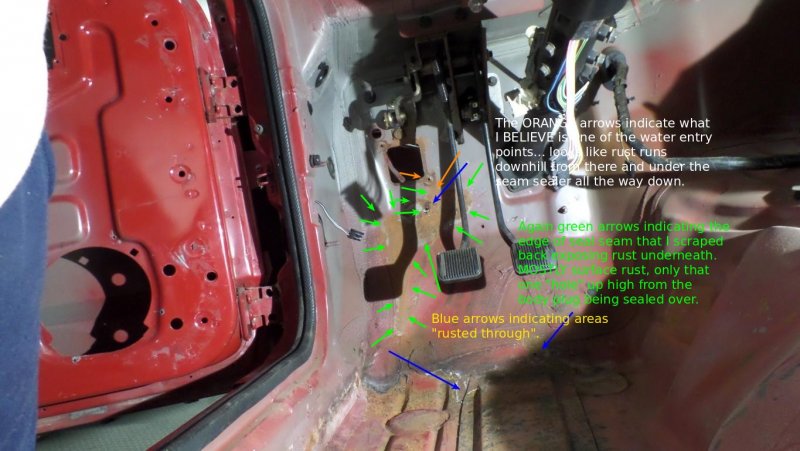
Hi all. As I've explained to some members who've posted to the Street Comanche Registry, I've not been active over the last 5 or 6 years as my wife battled cancer. She lost that battle last May and it's been (still is) tough. But I'm finally returning to other things important in my life and it's been a long while since anything substantial was done with #24. I didn't read closely enough or thoroughly enough Pete's ongoing mantra about pulling up the carpet. I didn't have a spot of rust on the exterior, under, on any fenders, or doors, didn't think I really had to worry. I missed the part about other water entry points...sigh. Some time ago I discovered the carpeting wet and found the sunroof had been leaking ever so slightly but for ever so long apparently. But in the process of getting my feet wet with restarting the project I note water entry / rust in some unexpected places. At least the master cylinder hasn't eaten up the fusebox assy. So that's a bonus. I've not yet posted new images or made updates on my build sheet but owe the site a lot of attention as well and plan to get that done very soon. Meanwhile I come seeking wisdom and experience. Now that the interior is fully stripped, I pulled the fuse box assy apart and note that there is evidence that water seeped past and into the interior. What I did not expect was to find that the same water had infiltrated UNDER the seam sealer. I can only presume that the surface wasn't prepared correctly or the sealer SHOULD have been well connected as it is in most places. But now I'm leary of ALL the seam sealer. Am I crazy to think it ALL has to be somehow removed to check to see if it's eaten up underneath? GAWD there's a lot of seam sealer... Is it overkill? Should just look maybe for loose edges and cracks (which I've found). I've pulled the sealer out of a corner where it was cracked by 1/4" x 1" so I pried it out. Sure enough rusty metal underneath. Just surface rust at that specific point but ...concern seems justified. So you experienced bodymen.... take a look at the images and tell me... what do I do / have done? I'll live another 20 years if I'm lucky and if I'm still driving that long even LUCKIER... but I want it fixed RIGHT not halfassed. The truck may well be passed to a grandkid going forward... not quite sure what to do with this in my will frankly, if it ever becomes worthwhile to will to someone... and not to be morose but... think about it folks... who gets YOUR projects...lol It WILL become an issue... pun fully intended. But similarly (and apologies for not having the correct terminology, but there is this sort of U Shaped channel with flanges that is spot welded to the floorpan in the cab. It essentially acts as support and I'm supposing as part of the Uni-Frame section under the cab. It's kind of like the cab floorpan is sandwiched between a deeper U shape under the pan and a shallower U shape on top of the pan, creating a defacto "frame" unit, integrating the cab floorpans. So this top channel is ate UP with pockmarks millimeters deep in the front 1/3 of it's length. Do I need to replace that channel? or just fill and paint? I've bought a full left floorpan to resolve what holes that I KNOW are there, delivery pending... But how does that work. Do I need to grind out every single one of those spot welds, UNweld the studs that mount thorough it, UNweld the side frame rail that runs to the driver's door opening and take ALL that off to cut out and weld in the floor pans? What about that uchannel frame section below? Those who know.... how does that work exactly to replace the floorpan? Can't see how you'd do it without "disassembling" the frame in that area....sounds like a bad idea. Yet they sell this full cab length floorpan... He'p me, he'p me... LOL
- 15 replies
-
- street comanche
- body work
-
(and 1 more)
Tagged with:
-
Sent mail to Painless Wiring and they stated simply that they have nothing for this vehicle and cannot help. Seemed curt and left me with the impression that they'd be uninterested in pursuing any custom work. I'd gotten the impression that they were a better comany than that but there it is. My firewall fuse boxes are intact. But insulation on wiring under the bonnet is dry and cracking on a lot of wires and I don't trust it. I'd as soon have an entire new harness firewall forward AND the interior harness as well firewall in. I'm NOT opposed to building them myself but sourcing the connectors would likely be a tremendous task as there are many variations. The other thing would be finding the plug housings themselves. I'd much rather pay someone else for the harnesses professionally prepared but if I can source the components, I CAN do it myself. Any vendors for these?
-
and so it begins... streetcomanches.zohosites.com I've not been what you'd call an active poster, but just not much time with all that is going on in our world. I'll try to keep the site updated often with pics and such.
-
I just wanted to drop a note to the list that I've moved the Street Comanche site. New one is here: http://streetcomanch...m/Overview.html Been trying desperately to get things organized so that I can pull #24 out of the barn (literally) and tow it to the garage to start resurrection. I'll be posting more as I begin the rebuild... Sorry to see Mark having to move #59 along to a new owner. Hope a real MJ lover gets this one. It's really close to real nice....just a little TLC and she's a beaut!
