
James92
-
Posts
58 -
Joined
-
Last visited
Content Type
Profiles
Forums
Gallery
Everything posted by James92
-
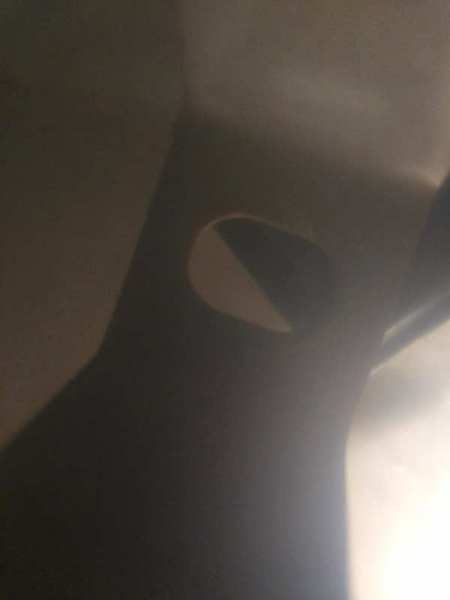
Hey all, I'm deep in battle with my triangle window currently. I embarked on replacing all my window seals this evening and didn't realize the hole I was digging myself into. I was able to get all the rubber installed without removing the rolling window. (It's one of the ones with the torx bolt and plastic retainer that just spins...) But now I'm on the last step trying to reinstall the triangle window. It looks perfect and the upper screw holes line up fine. But the lower bolt hole isn't even close. I'm at a complete loss. Any advise, please? When I try to grab it in and line it up, it still isn't even close. It needs to move at least 3/4" or so down... Thank you
-
Found on offer up. Looks like a very clean HO! https://offerup.co/dHJqacwqmUb
-
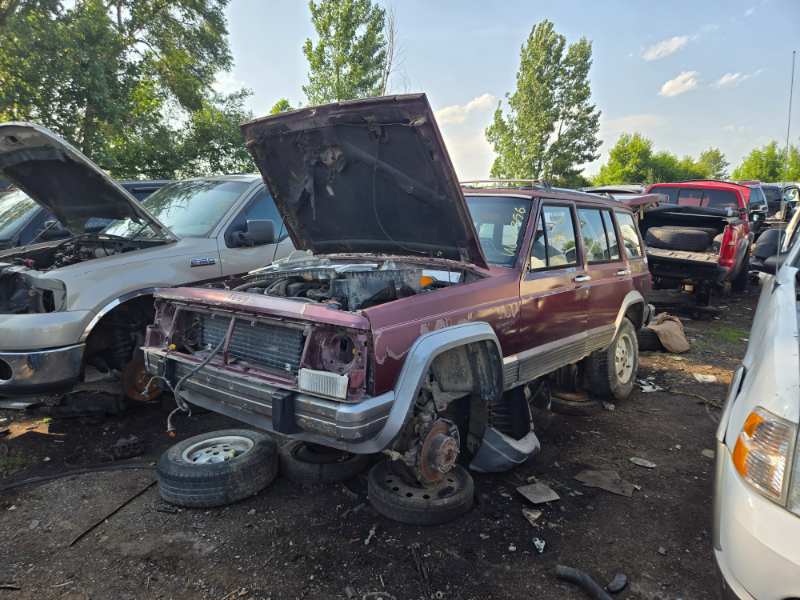
Thanks, I'll definitely be cleaning up the floors before I put in the sound deadening and carpet. Not sure if I'm going to paint with POR15 or just grind down the rust and repaint red, but we'll see. I'm in Minnesota now visiting a friend and we swung by the junkyard. There was a really sweet loaded maroon on maroon 92 XJ there. I pulled a few parts that I should be able to fit in my luggage or ship back. I got a spare gauge cluster (to hopefully fix my odometer issue), the dual note horns, cruise control(!), the brackets to mount the center console, and an underhood light. I wish I was local, I would've pulled the power seats and interior. Maroon is sweet! The original chrome grill and headlight surrounds were in great shape too, and the chrome door handles. But I think I prefer the black plastic look personally. Hopefully someone else can grab them and make good use of them.
-
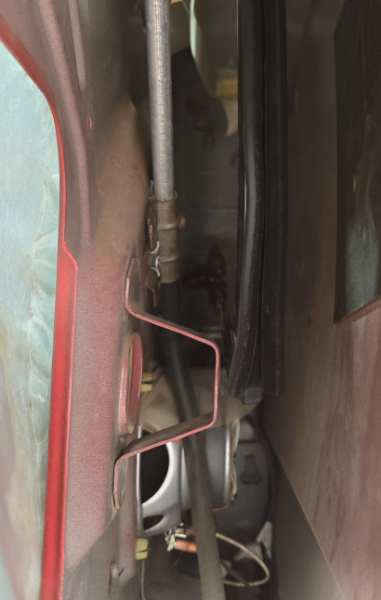
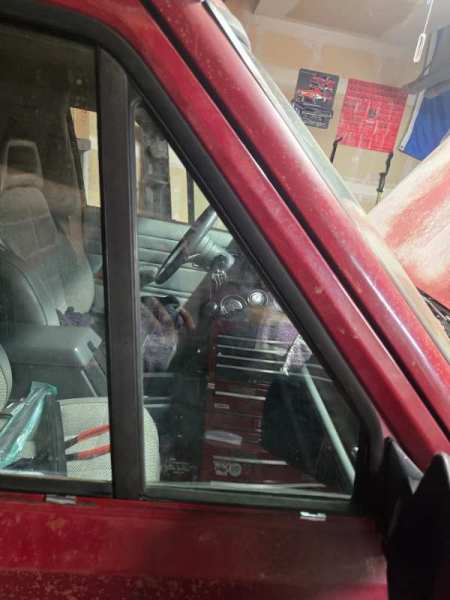
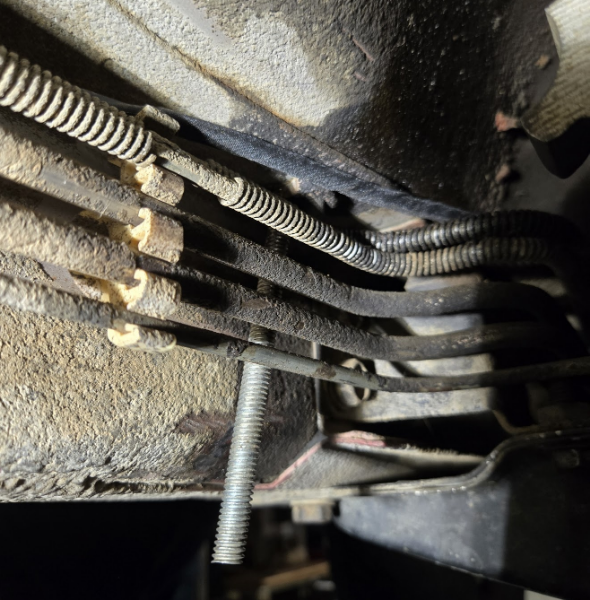
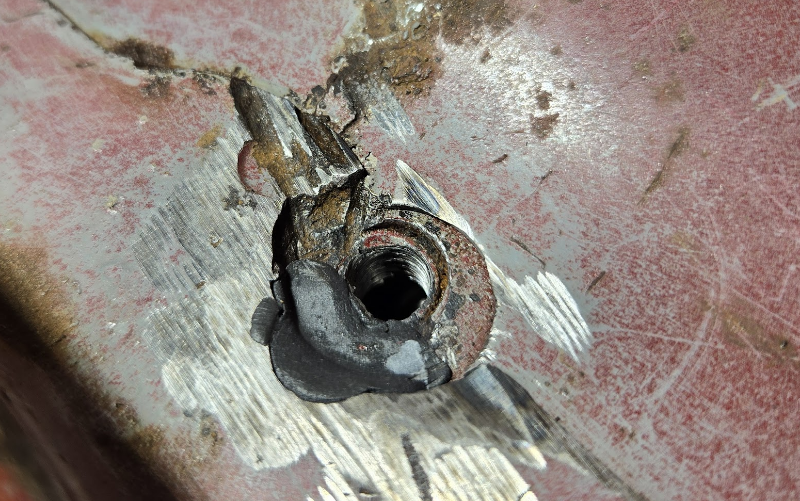
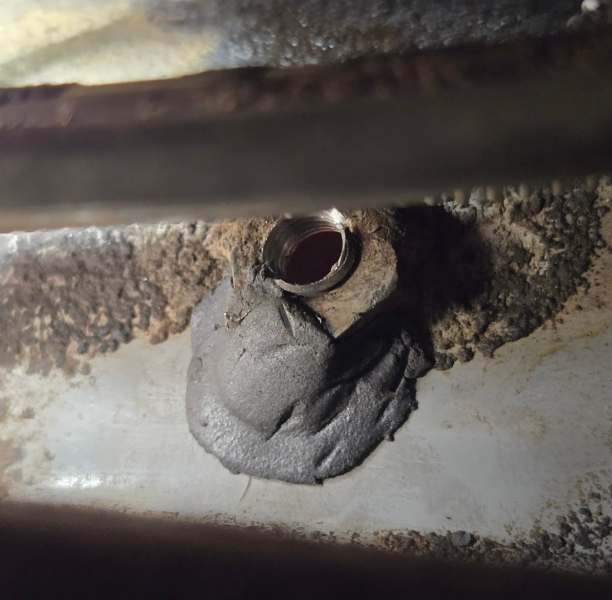
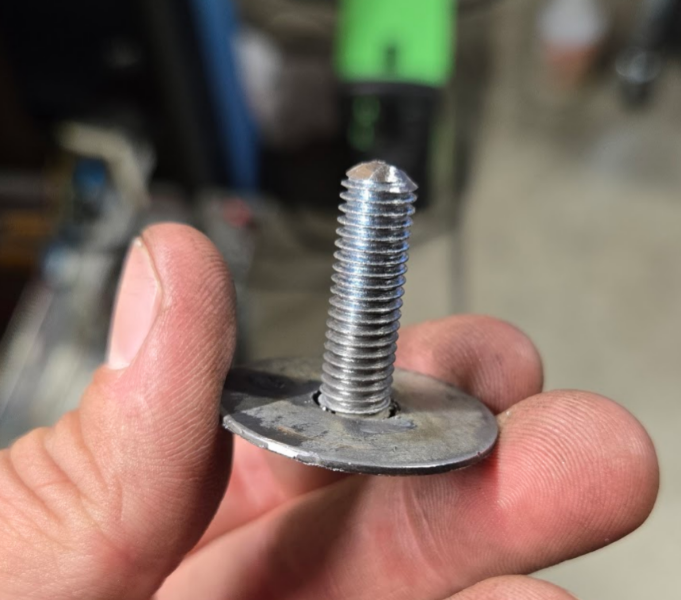
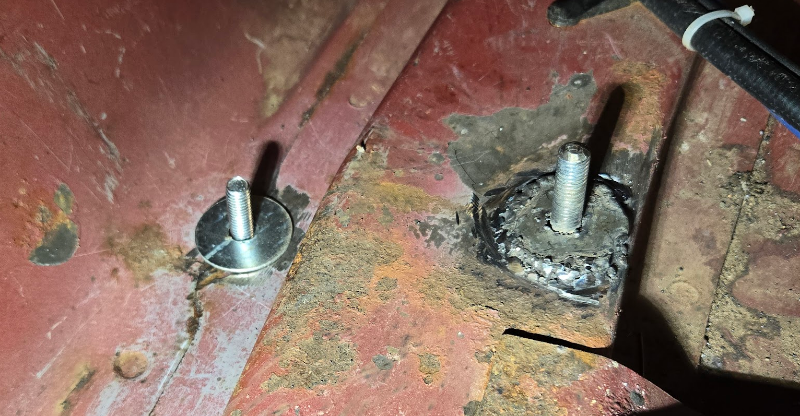
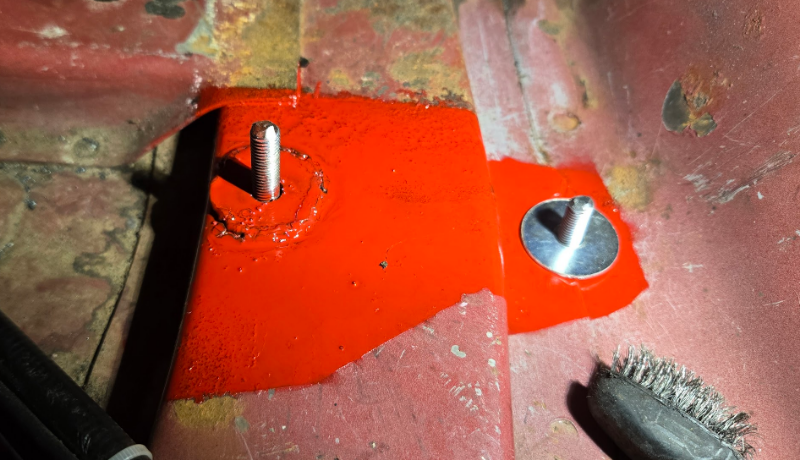
Thanks! This weekend I had to fix my seat bracket. The previous owner did a really hack job installing the XJ buckets, which I didn't notice until I sat down the other day and the seat was very loose. They had cut off the stock mounting bolts and drilled a hole next to the OEM one to put a threaded rod through it. Since there wasn't any room, they just put a threaded rod through the hole with some washers and a nut. The washers had tilted and the nut ended up clamping against the brake line!! I don't have a good picture of it, but this is the threaded rod, and you can see a little bit of wear on the brake line where the washers had worn against the brake line... I ended up drilling out the factory threaded rod and tapping the stock welded nut. I filled the hole that the PO drilled with JBWeld StickWeld. I know this isn't ideal, but the brake lines are RIGHT there, so I couldn't weld it closed. For the other side, I got some threaded rod, cut it to length, then welded a washer to it. Then, I welded the washer to the floor pans in the stock location. I know my welds aren't great, but I'm working with what I got! It'll hold for now. I grinded down the welds and painted it so it wouldn't rust. Again, I know the red looks terrible, but it was what I had on the shelf. It'll eventually be under sound deadening and carpet, so I don't really care. Bolted down the seat with Krustyballer's seat bracket and now it's not loose anymore! Much better.

-
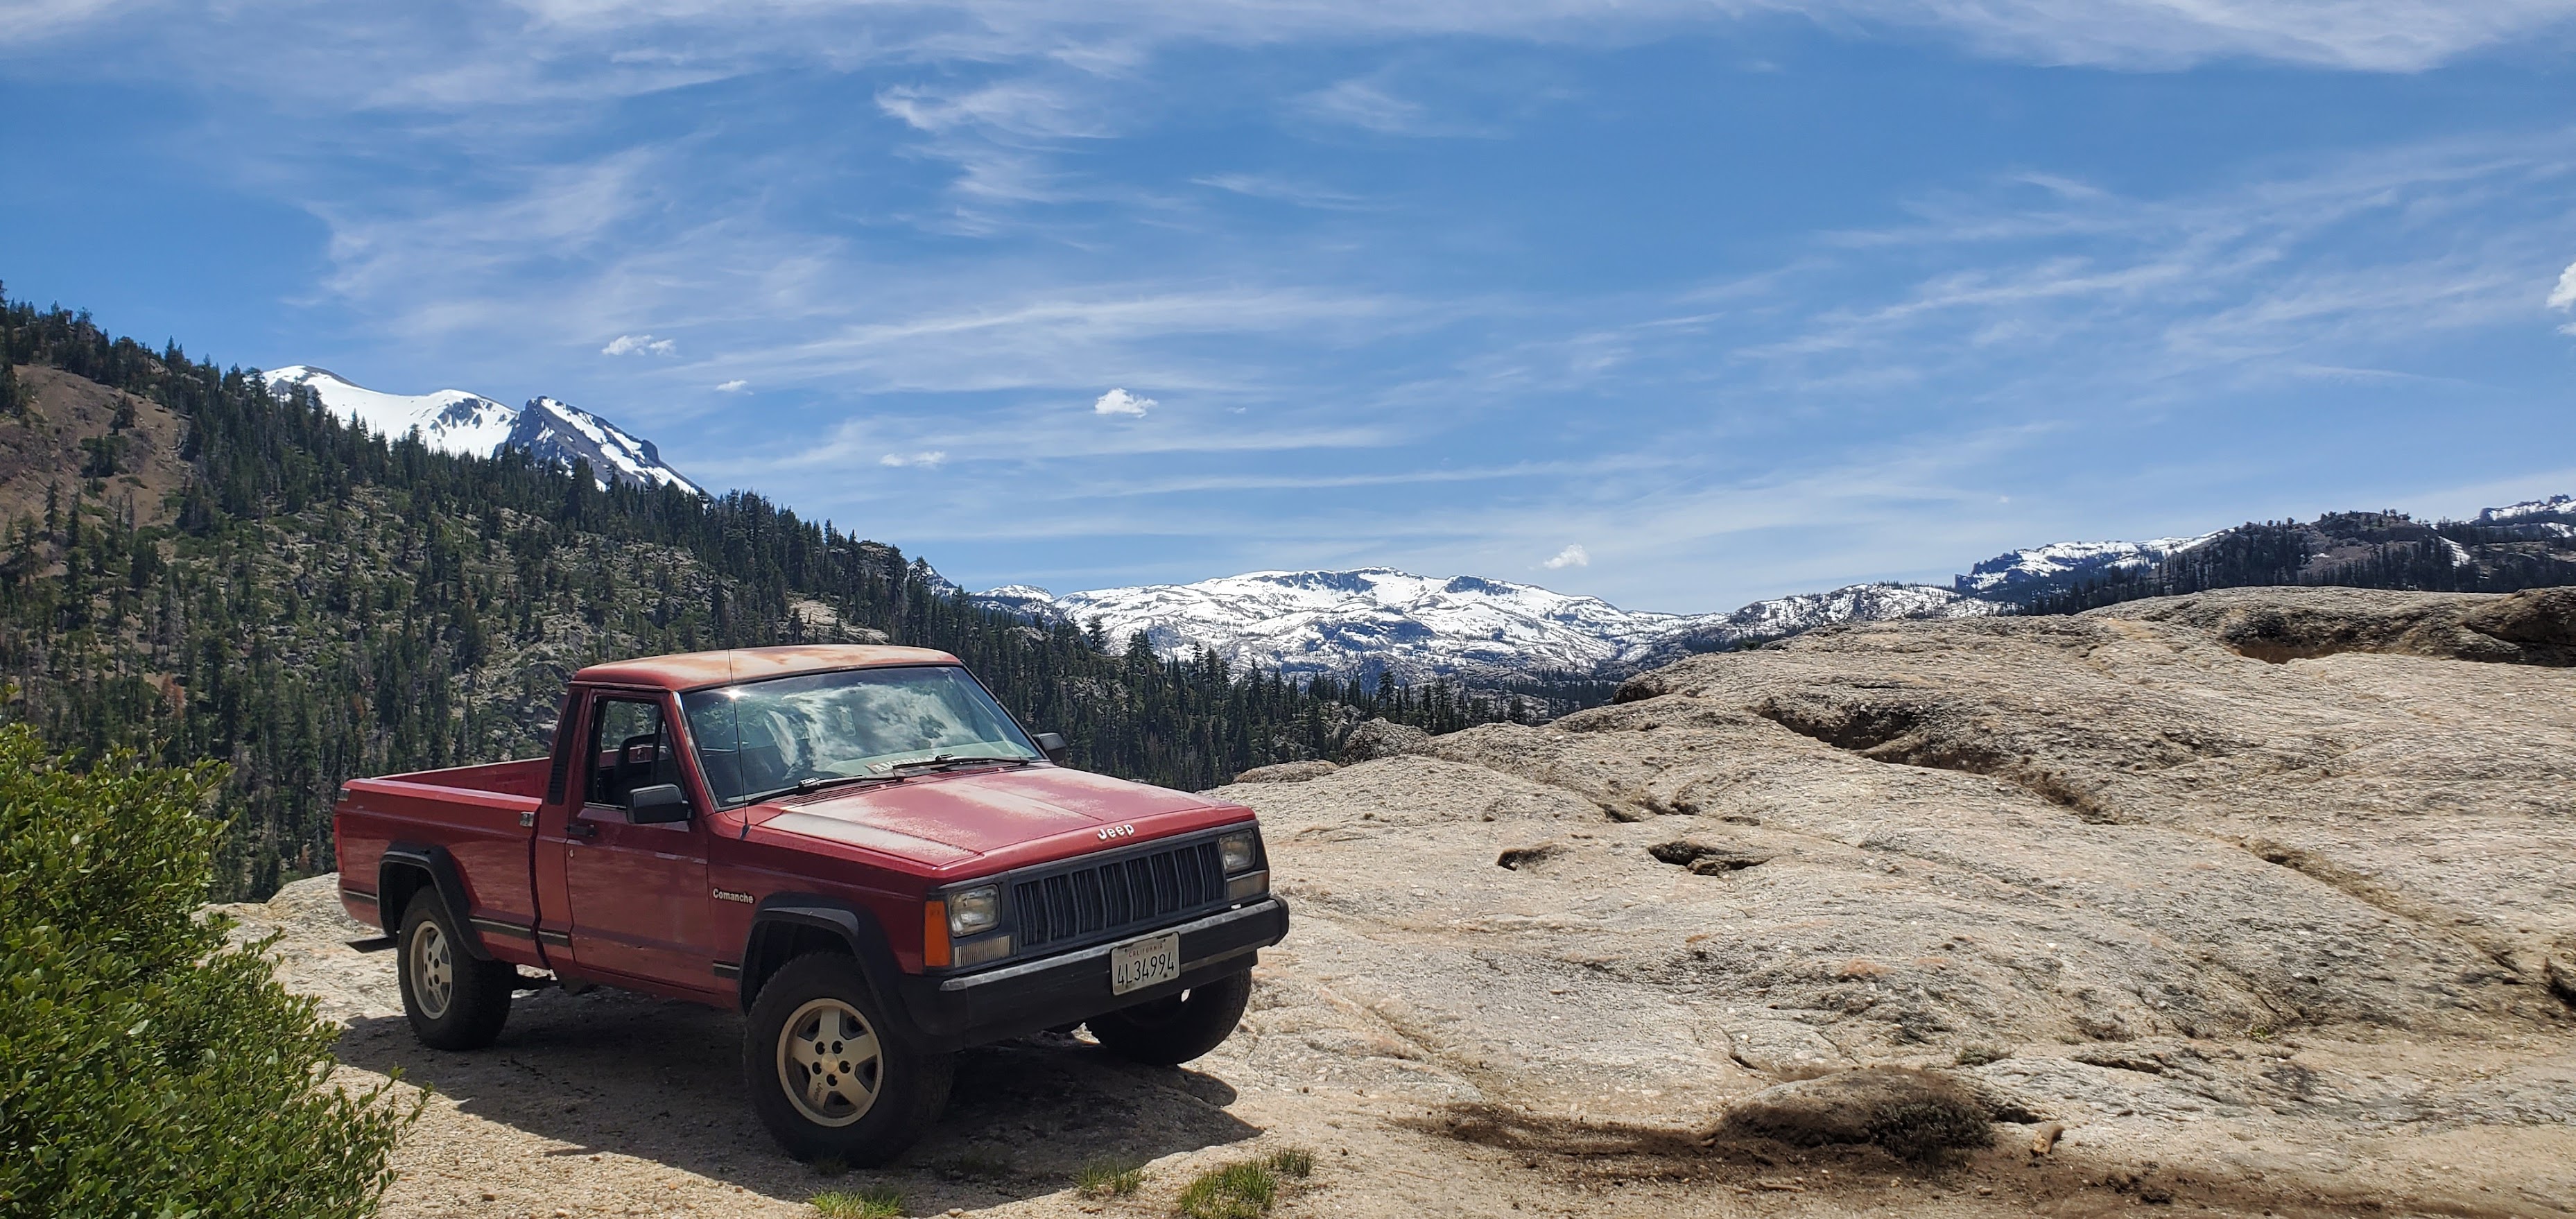
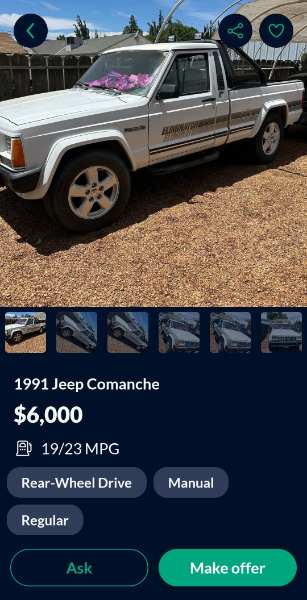
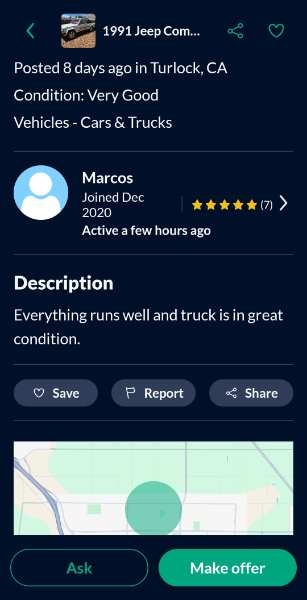
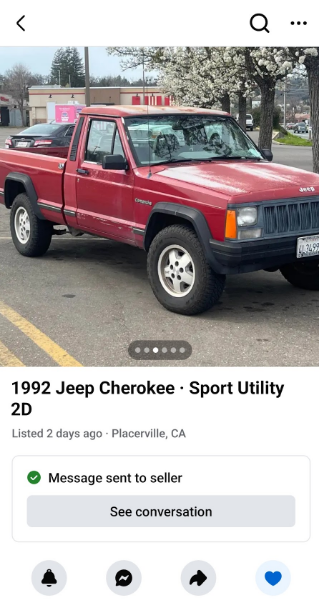
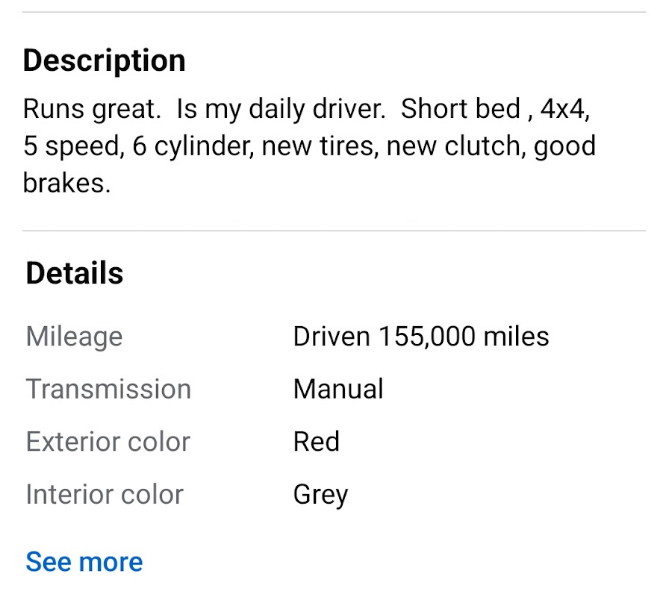
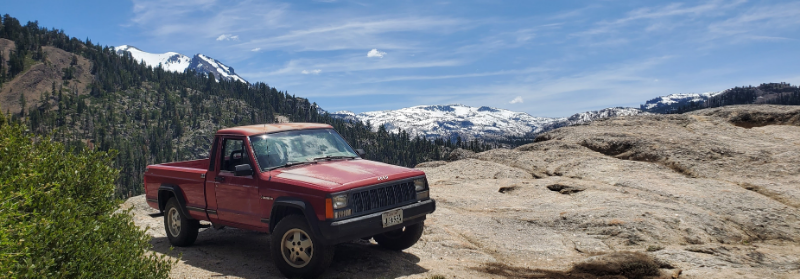
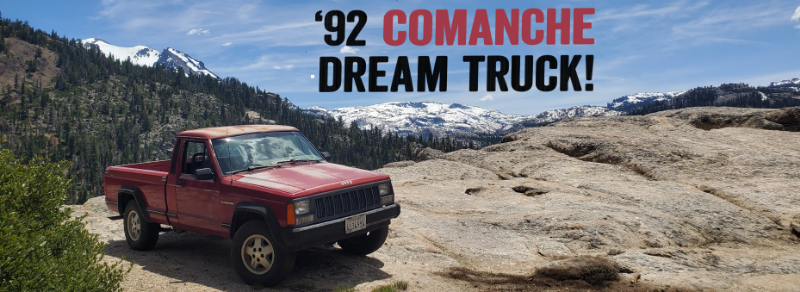
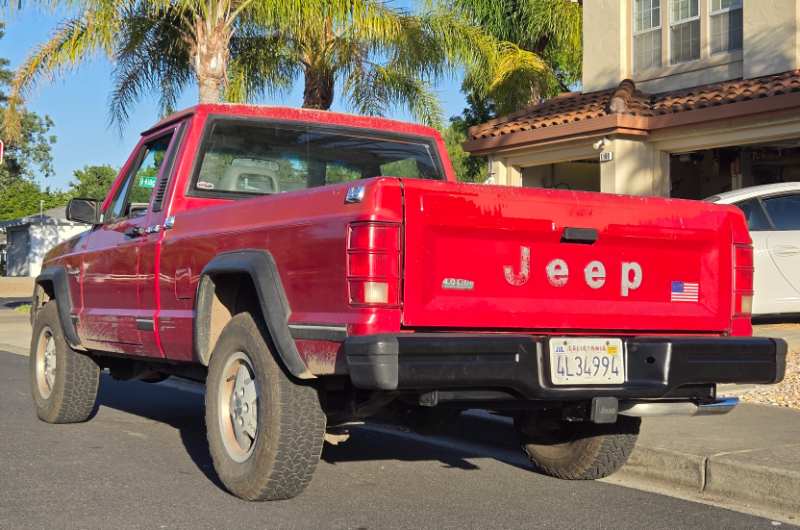
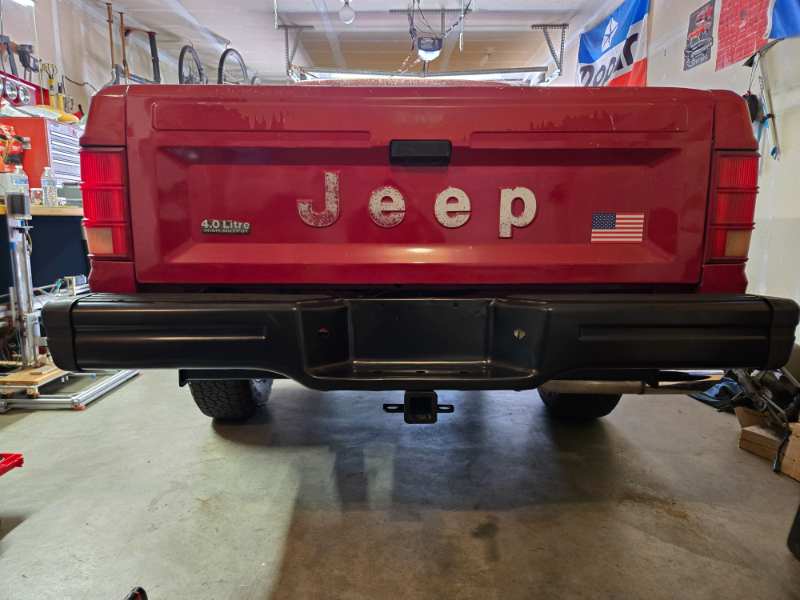
==================================== 🛠️ 1992 Jeep Comanche Build Thread ==================================== 🚙 Model: 1992 Jeep Comanche (Base) | Built: 01/23/92 🛞 Drivetrain: 4.0L | AX-15 | 4x4 | Short Bed | Dana 44 rear 📖 Background: Hey all! I've been meaning to start this for a little while to document the progress on my Comanche. Growing up in New York, my family always had Jeeps — a 1995 ZJ 5.2, 1998 ZJ 5.9, 2002 WJ Overland 4.7HO, 2007 WK 4.7, and now a 2018 WK2 Hemi. While the Grand Cherokees are great family trucks, I was always obsessed with the boxy styling of the XJ. And as a big fan of small pickup trucks, the Comanche was the obvious dream rig. Unfortunately, in NY, MJs have been off the road since long before I had a driver's license. You just don’t see them - rust and time took almost all of them (as most of you are very familiar with). I looked on and off for a few years but eventually gave up. Then I moved to California. The cars here are incredible. No rust, clean frames, and original paint everywhere. How is that possible? People out here don’t know how lucky they are. With new hope (and a better climate), the MJ search began again. I’ve had too many project cars I was only half-invested in because they weren’t exactly what I wanted. This time, I promised myself I’d hold out for the right one, something I could build and keep long-term. The target: a 1991-92 Comanche short bed, 4x4, 4.0L, 5-speed. Turns out that spec is rarer than hen’s teeth. Once again, I figured it wasn’t going to happen. Then one random Sunday evening, I opened Facebook Marketplace, and there it was. The exact truck I’d been dreaming of. I couldn’t believe it. I messaged the seller immediately, and by Monday afternoon I was there with cash in hand. One quick test drive later, I was totally sold. It's a base model MJ that I picked up in very solid shape. It's almost completely original and very clean. It even still has the factory rubber plate under the engine bay! There isn't any major body damage, the worst thing is a couple minor door dings. The Carfax shows it never left a 20 minute drive from the town it was sold in! The original owner checked off some great options, especially the factory Dana 44, 3.07 LSD, and A/C. My plan is to keep it reliable, useable, clean, and enjoy it. It's been a blast to drive so far. I took it up the Sonora pass (pictured above) at 9600' elevation and it didn't skip a beat. The 3.07s are great for highway driving, and the truck cruises easily at 70. ========================== 📅 Completed Work ========================== ✅ Krustyballer Tow Hitch powder coated and installed ✅ Rear bumper straightened + powder coated ✅ Spare tire carrier installed ✅ Single DIN Android Auto head unit with backup camera ✅ Replaced bent up front bumper with junkyard unit ✅ Rear main seal replaced (fun...) ✅ New sway bar end links and bushings ✅ Fixed play in tilt column ✅ New cat-back exhaust with SS Magnaflow muffler ✅ Fix seat mounting brackets ✅ Coolant Flush ✅ Transmission Fluid Change ✅ Replaced cracked fender flare ✅ Replaced cracked exhaust manifold ✅ New valve cover gaskets ✅ Power steering pulley replaced ✅ New lower radiator hose ✅ New O2 Sensor ✅ New Heater Hoses ✅ Fresh Transmission Fluid ===================== 🔧 In the Pipeline ===================== 🧰 Transfer case fluid change 🧰 Front & Rear axle fluid change 🧰 Fix broken odometer 🧰 Redo headliner 🧰 Fix water leaks in cab 🧰 Install carpeting 🧰 Replace transfer case output shaft seal =========================== 🙌 Thanks for Reading! =========================== I'll try to keep this thread updated as I knock stuff off the list and I'll be posting more pictures below. Any advice or suggestions is greatly appreciated!
-
Intermittent Odometer - 1992
James92 replied to James92's topic in MJ Tech: Modification and Repairs
Ah, thanks for the suggestion. I'll have to do some digging. Wow, that's an interesting idea. I'll have to dig into it. Thanks! -
I bought some to use on my fender flares a month or two ago and haven't gotten around to it yet. I saw some reviews that applying it can be iffy and leave streaks. Have you used it and had any issues?
-
Ah, fun time. I just did mine last weekend! Nice job
-
Auto and Truck Bumpers https://www.atbumpers.com/ (510) 881-1886 Turnaround is ~4 weeks, including the powder coating. I called him and he gave me a cell number to text a pic of my bumper to, then gave me an estimate.
-
My odometer works for the first few miles when you start the truck, then stops counting. It varies, but sometimes it'll work for 3 miles and other times for 20 miles. The speedometer and tach work fine. The trip odometer tries to turn, but ultimately doesn't get anywhere. Any ideas? I havent taken the cluster out yet, just trying to get some ideas of what to look for. Thanks!
-
Thanks!! Yeah I'm a big fan of the stock bumper. None of the aftermarket ones do it for me. The $350 to straighten the bumper I was okay with. I was planning on either painting it, or I have a friend who would've powder coated it for a little cheaper. So the extra $275 I was not a fan of... but whatever it's done now. And man it looks so much better now, especially with Brandon's hitch underneath! Huge upgrades to the rear of the truck. I also snagged a spare tire carrier and installed a spare under there, and a new catback with shiny chrome tip :) Being in the bay area definitely adds a little to the price. But, it also means I was able to find a shop within ~45 minute drive that actually specializes in bumper straightening and re-chroming (mainly on 40s and 50s cars), and didn't need to deal with shipping it. So that's a plus. Too bad about yours! It looks very clean otherwise. This guy would definitely be able to straighten it. I'd be happy to share shop details if you're interested. It certainly would be nice if someone made OEM style bumpers...
-
Haha definitely going to need to avoid scratching it! This is almost too nice for me to be trusted with... Ah, thanks for that. That makes me feel a little better about the whole thing! It does looks pretty darn good in the daylight.
-
Hmm I'll keep an eye out at ace next time I'm there. Thanks for the tip
-
Thanks guys! $350 to straighten it, $275 to powdercoat. Definitely a lot more than I wanted to spend. But it looks great.. I'm going to keep telling myself that to justify it.
-
Well, I decided to have the bumper straightened by a local shop. I asked for a quote on powdercoating, but they just went ahead and did it without telling me.. oh well. A little more expensive than I wanted, but it came out very nice!
-
Thanks guys. Heater hose is a good idea. I have been using my foot to stop the aggressive swing as well. I guess I'll just keep doing it! Haha
-
@watchamakalit Sweet! That looks great. I'll pm you. Thanks!!
-
Oh great!! Thanks a bunch!
-
Oh, also, I'd be very interested in a stock jack kit. Mainly the tire iron. I'm putting a spare tire under my bed now and realized I have no way to actuate the rod to lower the spare! Thanks!
-
@watchamakalit Yep! The carpet panel in the back of the cab. And the side molding I'm referring to is actually pictured on the first post in this thread. Thanks!
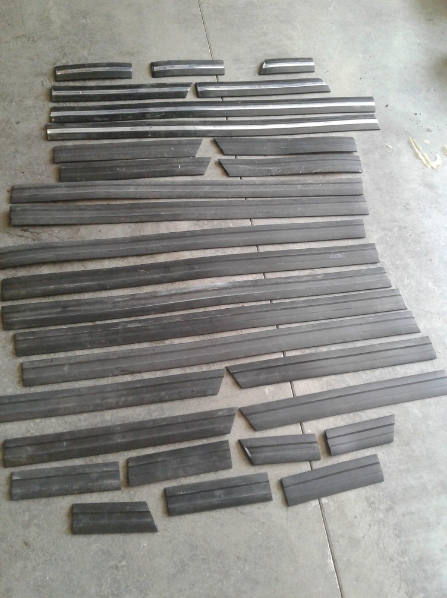
-
@watchamakalit I'd be interested in a gray carpet panel and side molding pieces. Particularly ones with the silver stripe. I'm missing driver and passenger door, and driver box side. Thanks!
-
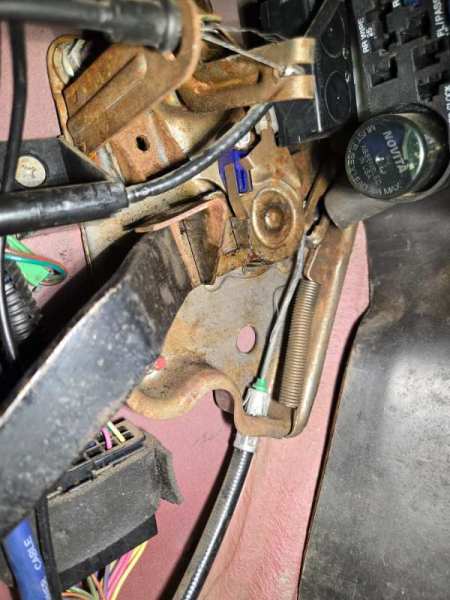
My e-brake goes up with an aggressive whack when I release it. Is there supposed to be a rubber stop here? It looks like there is a hole for one to mount. Anyone know where I can get one that'll fit? Thanks!
-
Its a Pick n Pull. Once a car is in the yard, they refuse to sell it. Against CA law or something.... I've tried a couple times
-
It was definitely a shame to see it in there. Whoever scrapped it clearly didn't even try to sell it, because someone definitely would've snapped it up. It was a typical CA truck, totally rust free. I grabbed a bunch of parts on it at least, so it won't go completely to waste. Sad sight though
-
It was a 2wd