
MYE Jeep
-
Posts
74 -
Joined
-
Last visited
Content Type
Profiles
Forums
Gallery
Everything posted by MYE Jeep
-

Brand New Taillight Lens Installation
MYE Jeep replied to MYE Jeep's topic in MJ Tech: DIY Projects and Write-Ups
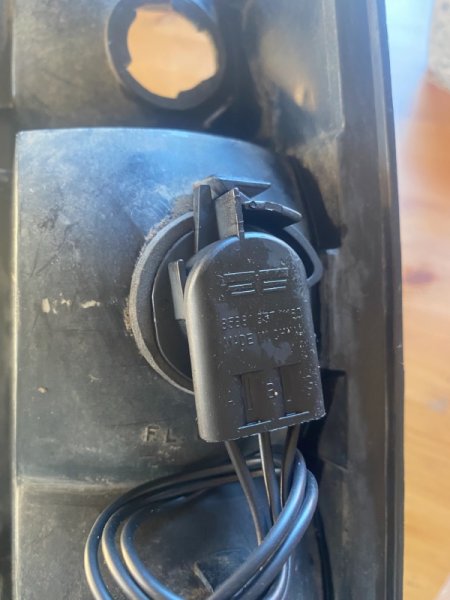
Thanks for clarifying for me! Key Parts Inc Ebay page, and the socket is a Dorman 85881 part number. It will convert the bulb size to a more modern 3157 bulb. -
Brand New Taillight Lens Installation
MYE Jeep posted a topic in MJ Tech: DIY Projects and Write-Ups
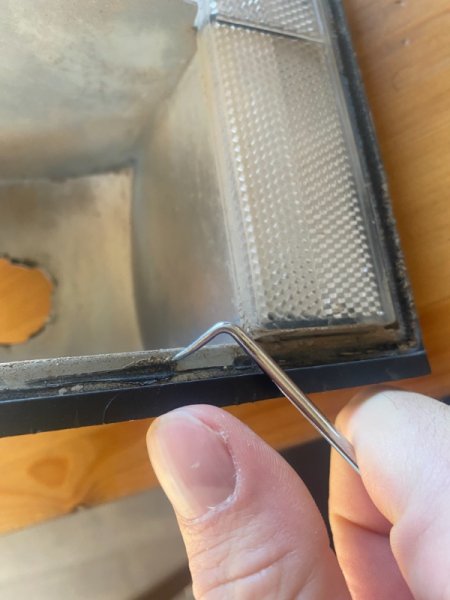
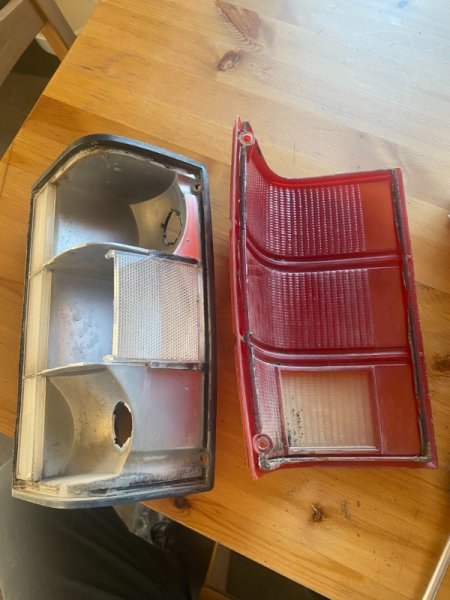
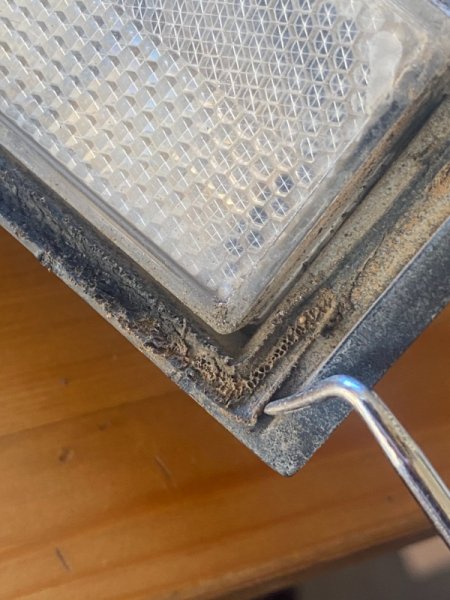
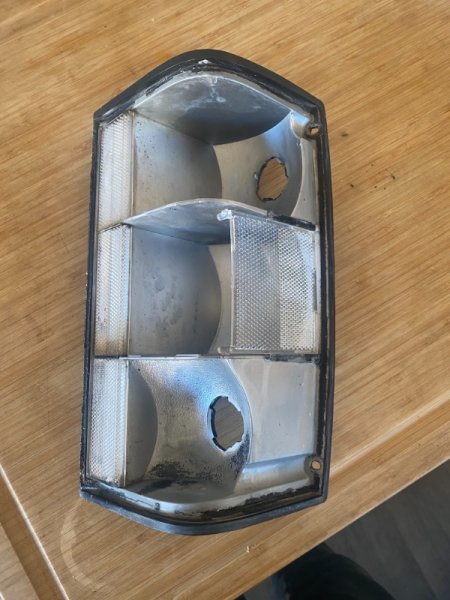
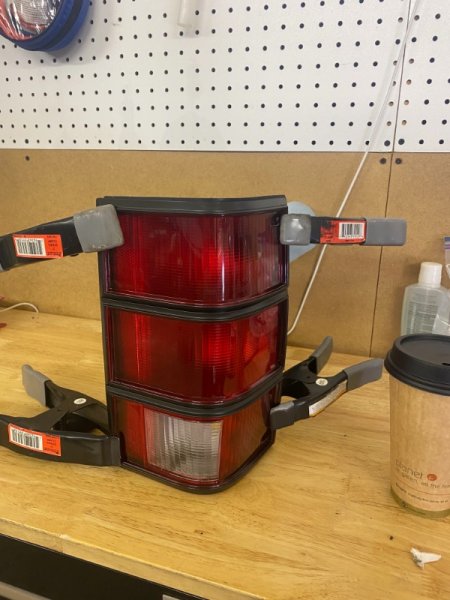
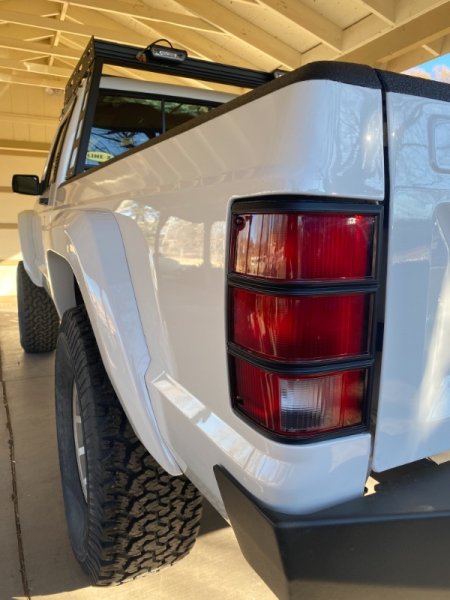
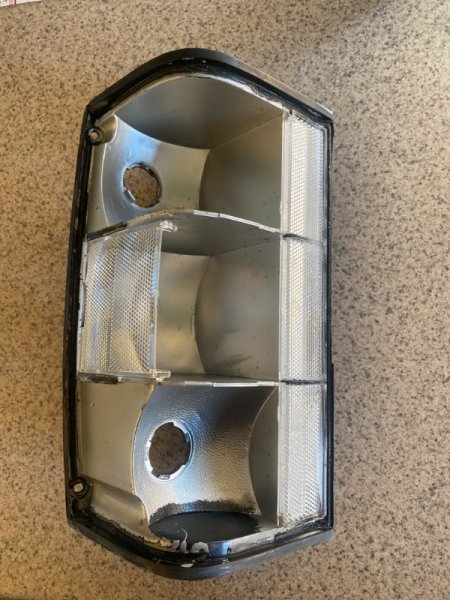
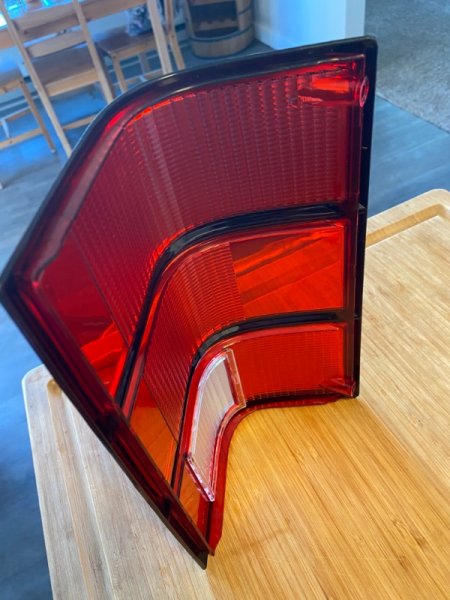
I’ve received a good amount of messages in response to installing these new Key Part tail light lenses, so I figured I’d do a little write up for those wanting more information. Finished result: Important! As with most headlights and tail light modifications, normally most people first think “Bake then in the oven”. And while that case is true with most vehicles newer than the 2000s, it’s very much not the case with these. These tail lights are heat bonded, meaning there are no adhesives or glues to melt to separate the lens from the housing. Ask me how I know? I bought an extra used tail light with a shattered lens to test on before tackling this job on my own taillights. Don’t bake them. Trust me. First step is to separate the old lens from the housing, I tried a couple different methods, baking, dremeling, etc. and the most effective method I came across is a simple chisel, putty knife or very wide flathead screwdriver, maybe a mixture of all of them. In my case, the lens was brittle enough to get a putty knife between the lens and the housing, and instead of prying, just give the putty knife or screwdriver a little “twist” ever so slightly, you might hear a slight cracking noise, and that’s a good sign. Don’t twist the handle of whatever you’re using hard enough to leave marks in the housing. Just make a little twist, and move to the next spot. Keep following along the edges and twist just enough to hear a tiny crack noise. You may have to go around the edge 2-3 times before you start to feel it separate. Once you can get it wide enough to put your fingers inbetween the lens and housing, slowly pry with your hands. Okay cool, you got the housing off! Time to clean it. Run it under some warm water and rinse the crud out, be very careful not to touch the silver paint inside the housing. It comes off extremely easily. Pat dry with a light cloth, or if you don’t have problems with hard water, use a air gun or can of compressed air to dry it. You may also choose this time to spray new reflective silver paint into the housing. I did not paint the inside of my housing, and I don't think it's noticeable even in the slightest once it's installed. Next, use a small pick or razor blade to clean up the seams where the lens was molded to the housing, feel free to break off any small bits of plastic that are sticking up from the heat molding process as you want your new lens to fit nice and flush. Clean it out again with compressed air. Use a sealant of your choice to bond the new lens on. I personally used Threebond for a variety of reasons, it takes a while to harden giving you more time to work, it’s very smooth making it easy to work with (imagine creamy peanut butter), and once it’s dried, it still has a good amount of flexibility to it. Use whatever you want, but I’ve always had good luck with Threebond. If it can seal the crank case on my KTM it can seal my lights. It’s similar to a butyl tape once dried. Anyways, moving on. Use a small pick to evenly spread your adhesive around all edges, making sure to seal all the way around the screw holes, don’t use a ton of adhesive as it will squeeze out on the inside of the housing(not a big deal for me because I used the black trim lenses). Once you’ve got a good spread of adhesive, slap that new lens on and use a couple clamps to hold it together, let it sit for 24 hours, then you’re ready for the next step! This part is probably optional, but it’s a good safety measure. Use some of your adhesive and fill in the gaps around the edges of your tail light. Keep in mind you’ll be able to see these edges just a little bit once the light is installed, so use your finger to make a nice smooth seam, kind of like using caulking on a window, bathtub, baseboard moulding etc. And you’re done! Enjoy your pretty new tail lights and fingers crossed you did a good enough job so that they don’t leak! Also, pick up some new bulb housings at your local parts store and get rid of those old metal housings that never sealed right to begin with, put some nice new plastic ones with big fat foam seals to protect contaminates from getting in your newly refurbished tail lights. Go get em tiger!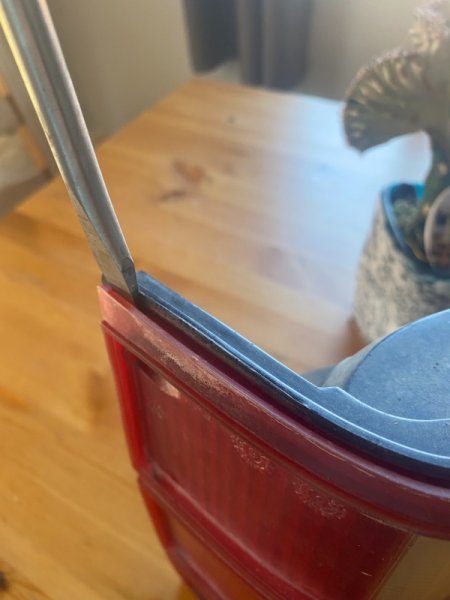

-
Let’s discuss taillights
MYE Jeep replied to ghetdjc320's topic in MJ Tech: Modification and Repairs
Agreed. No instructions came with my order. Honestly the sellers (Key Parts) are kind of dicks when you ask about anything. Definitely have to get a little creative on this one, but we’ll worth it for the looks of a shiny new tail light lens! -
Let’s discuss taillights
MYE Jeep replied to ghetdjc320's topic in MJ Tech: Modification and Repairs
I use threebond on just about everything, it makes a strong bonded seal that holds up to weather well, but is flexible enough for a small amount of movement. You could get away with a lot of different types of sealants but this is just personally what I’ve used in the past on headlights and tail lights and I’ve had good success with it. Butyl tape is another good option but a little harder to work with as it doesn’t compress as well for applications like this where there isn’t a “channel” for the butyl tape to sit in. I’ll post more pictures soon, sorry I’ve been caught up with a house remodel and haven’t had a chance to get pictures of the tearing apart and sealing process, also waiting for new light sockets to arrive to install everything. -
Let’s discuss taillights
MYE Jeep replied to ghetdjc320's topic in MJ Tech: Modification and Repairs
I did not, luckily I noticed how chalky it was when cleaning dirt off of an inconspicuous area, so then I very carefully rinsed it with water and “pat dry” the area as to not wipe off any more of the silver color. I thought about repainting, but didn’t think it would be necessary once the unit is sealed back up. However the test housing I baked originally had hardly any silver reflector paint inside, probably due to me pressure washing it prior to baking. I would say add paint on a case-by-case basis depending on how your housing looks when pulling it apart. -
Let’s discuss taillights
MYE Jeep replied to ghetdjc320's topic in MJ Tech: Modification and Repairs
I just finished up one of the tail lights, sealed it together with Threebond afterwards and it actually came out really nice.. I’ll work on cracking the second housing open tomorrow and I’ll take pics of where I cut, should be much easier the 2nd time. I’m glad I had a spare tail light with a broken lens to test it out on first! -
Let’s discuss taillights
MYE Jeep replied to ghetdjc320's topic in MJ Tech: Modification and Repairs
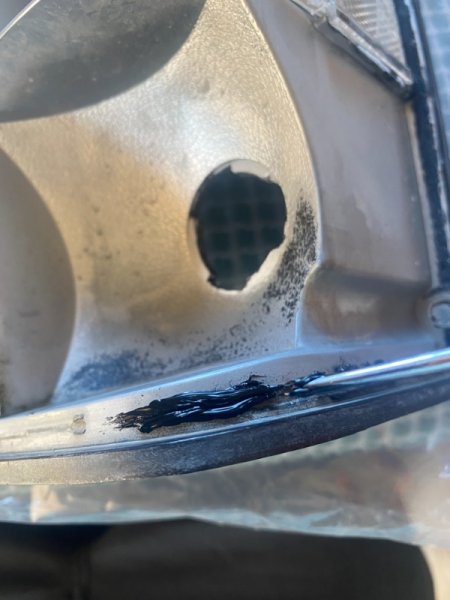
Small update… I’ve baked dozens of headlights with great success. Don’t bake these tail lights.. the housing will melt long before the glue is soft enough to pry them apart. Here’s the baked one: The next method I used was taking a dremel to the red part of the housing and essentially cutting the middle of the housing off, then using a series of picks and chisels “shatter” the edges off. Came out pretty well except I cracked the back housing a little bit prying too hard on one last section, I can repair the crack but still makes me sad. Here’s the housing I used the cut and chisel method: I don’t recommend baking, just take your time and cut the red section out and chisel the little edges off afterwards, the glue will never soften, at least on my AZ baked tail lights, the glue has essentially become its own hard plastic. also be extremely careful once you crack the housing open, if there’s dirt or debris on the silver part of the inside, and you try to wash it off, the silver paint will come off even with just your finger softly sliding across it, it’s almost like silver chalk. will update more later!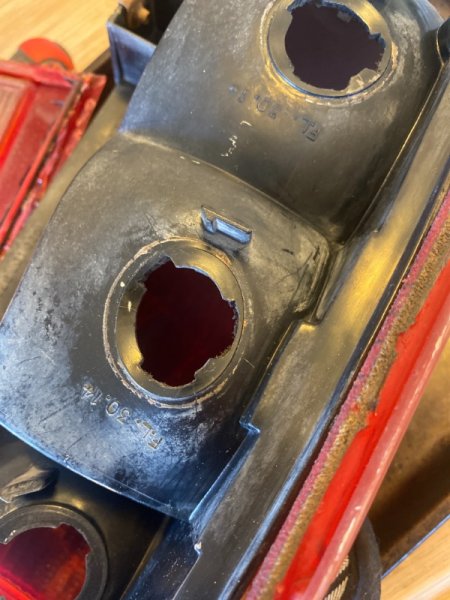
-
Let’s discuss taillights
MYE Jeep replied to ghetdjc320's topic in MJ Tech: Modification and Repairs
New tail light lenses are in!! and boy do they look incredible! Currently baking my tail light housings to test how they fit with the new lenses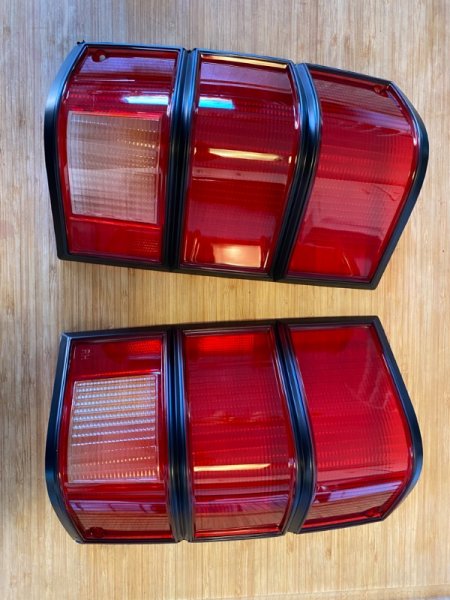
-
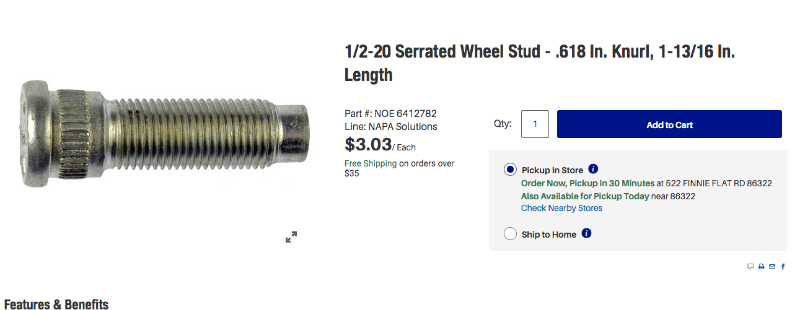
So after grabbing a handful of different sizes from NAPA and 2 hours worth of driving later I found a stud that works pretty well. It's not absolutely perfect, but they pressed in well and they are much longer than the factory ones, and still clear inside of the wheel spacers. Here's the part I ended up grabbing 1/2-20 Serrated Wheel Stud - .618 In. Knurl, 1-13/16 In. Length P/n: NOE 6412782 Fits the factory Dana 44 rear end, the only thing I wish it had was a slightly longer base length as it doesn't come all the way through the axle hole, but close enough for me to be very happy with it.

-
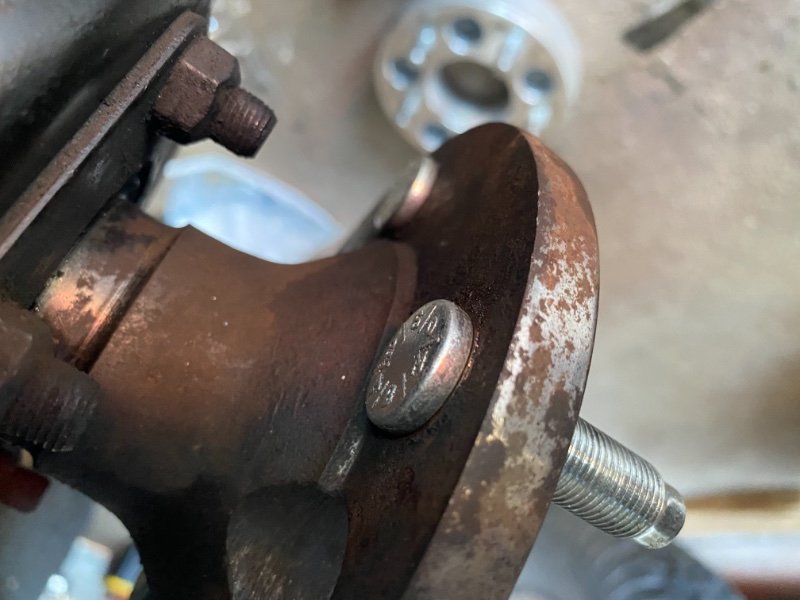
It looks like the part number for the stud on the left should be either 83503053 83503066 according to Crown Automotive, but I can't find any specs on knurl diameter.
-
Hey everyone, I'm at a bit of a loss right now trying to figure out the specs of the wheel studs for a factory Comanche Dana 44 rear end, I've tried a few different studs now, and they all seem to be slightly bigger diameter, and have longer splines than the ones that came out of it. If anyone knows where I can find the studs that fit, I would really appreciate it. Additionally Id like to find something a tiny bit longer than the factory studs so that I can safely mount the wheel spacers on my truck. The studs on the spacers are long enough, but the factory studs aren't quite long enough to get the nut on as much as I would like. Any info would be greatly appreciated! Photo for reference, left is factory wheel stud, right is replacement that doesn’t fit(p/n 16714.08)

-
AZ: 1988 Comanche Pioneer 4x4 Build
MYE Jeep replied to MYE Jeep's topic in Member Projects: Your Comanches
Thanks! Lots of hard work finally starting to pay off! -
AZ: 1988 Comanche Pioneer 4x4 Build
MYE Jeep replied to MYE Jeep's topic in Member Projects: Your Comanches
Both shocks mounted, and a little makeshift arm for the rear brake load sensing valve. Coming along nicely! new seatbelts, tail lights, front suspension and drum brakes in the mail, then I think it’s due for some proper photos to show it off a bit!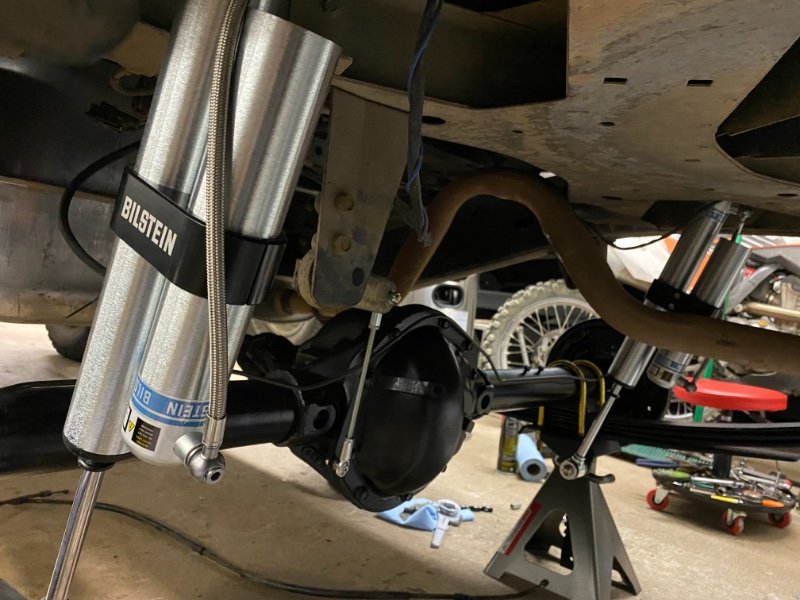
-
EBAY Comanche Seatbelts - Anyone used these?
MYE Jeep replied to MYE Jeep's topic in MJ Tech: Modification and Repairs
https://www.safetyrestore.com is the website, however I was able to save a good amount by ordering it through their eBay store and then calling in to have the extra services done like rewebbing the female receiver end and tightening the retract spring. They should be arriving tomorrow or Friday so I’ll post pictures once I get them. Here’s my invoice for reference: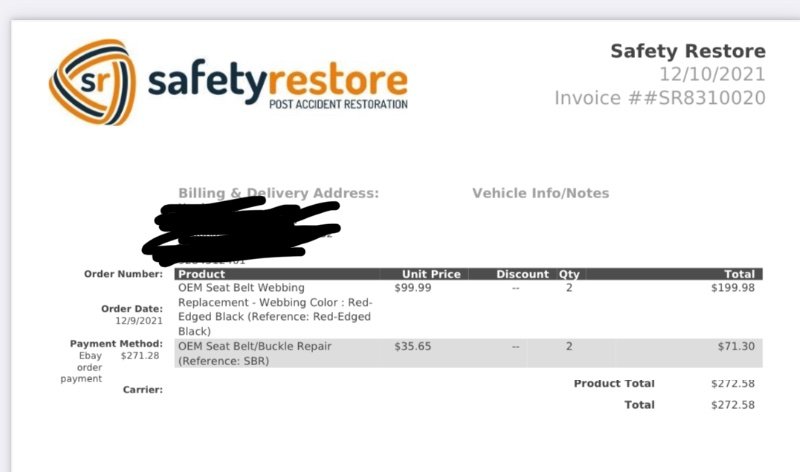
-
AZ: 1988 Comanche Pioneer 4x4 Build
MYE Jeep replied to MYE Jeep's topic in Member Projects: Your Comanches
Some progress has been made! Thanks to @Oizarod115 I was able to get a Dana 44 put in the back, used Rustys shock mounts to put everything back in the factory locations, and General Spring leafs. Upon taking the old Cherokee D35 out of the back, I realized the leafs that were on there must’ve been from a Cherokee as well because they were not even close to the same size as the general spring ones, significantly longer shape… To top it all off I grabbed some Bilsteins to slap on the back, now I’m just waiting on the rest of the brake parts to come in to put it all back together! I’ll post more pictures soon!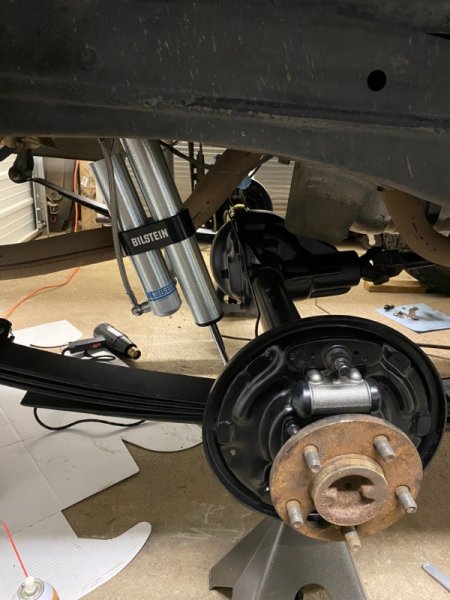
-
Let’s discuss taillights
MYE Jeep replied to ghetdjc320's topic in MJ Tech: Modification and Repairs
Ordered a set, let’s see how it goes! -
Let’s discuss taillights
MYE Jeep replied to ghetdjc320's topic in MJ Tech: Modification and Repairs
I see that they have deleted all of their posts in regards to making them now.. I'm assuming that means its not going to happen anymore. -
Adjustable MJ Load Sensing Valve
MYE Jeep replied to HOrnbrod's topic in MJ Tech: DIY Projects and Write-Ups
Sorry to revive an old thread, but after shopping local stores and being unable to find the spherical rod ends I thought to myself... There's a lot of applications where threaded adjustment rods are needed, and decided to search online for something already made. Here's what I cam across, they sell these in various length depending on your application, but for $13 you can get a pre-made bumper splitter that I think would work great (Although probably made of cheaper materials). However I thought someone might find this useful! https://www.amazon.com/Tiousmoky-Adjustable-Splitter-Accessory-Compatible/dp/B09C1R5TQJ/ref=sr_1_1?crid=1ANKRP4M1KMPK&keywords=6"%2Badjustable%2Brod%2Bsplitter&qid=1640456878&sprefix=6%2Badjustable%2Brod%2Bsplitte%2Caps%2C180&sr=8-1&th=1 -
Let’s discuss taillights
MYE Jeep replied to ghetdjc320's topic in MJ Tech: Modification and Repairs
Any updates on any of these reproductions? Also Merry Christmas everyone! -
EBAY Comanche Seatbelts - Anyone used these?
MYE Jeep replied to MYE Jeep's topic in MJ Tech: Modification and Repairs
Ah I see what you mean.. I ended up finding a company online that would rebuild and reweb my existing ones for $270. Pretty pricey but with the new colored webbing it will match my black leather seats much better than the faded blue/grey belts I have right now. The stuff we spend money on.. -
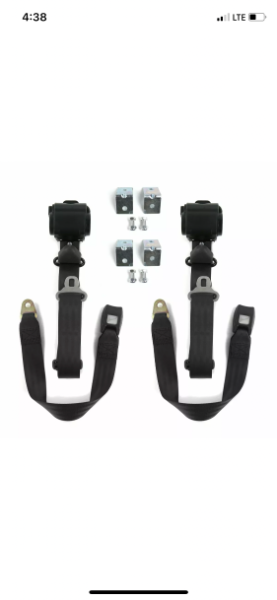
Hey all, I stumbled across this eBay listing for “new” Comanche seatbelts. I was curious if anyone has used these? If so how was the fitment? Thanks! https://www.ebay.com/itm/Jeep-Comanche-1985-1992-Standard-3pt-BK-Seat-Kit-w-Brackets-2-Belts-/123811047457?mkcid=16&mkevt=1&_trksid=p2349624.m46890.l6249&mkrid=711-127632-2357-0
-
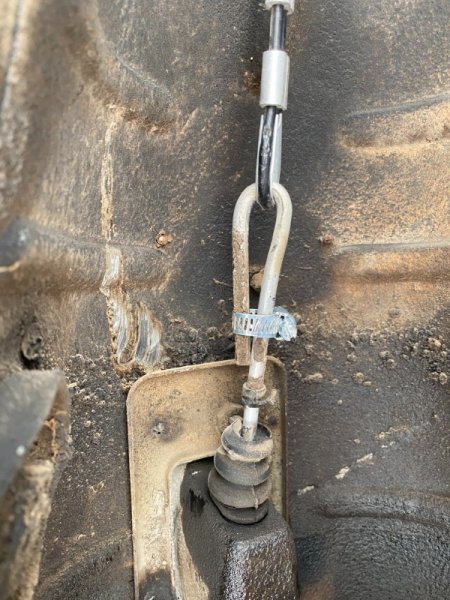
Thanks for all your input guys! I really appreciate it! Another solution I thought may work would be to replace the rod that bends at a 180 degree with a threaded rod, or use a tap and die to put threads on the existing rod, then find a way to put some sort of hardware that could attach to the cable line. For the moment it is working OK, and I have plenty of adjustability on the other end to tighten it if need be. Luckily I have plenty of other things I need to do to the truck first so I'll have lots of time to come up with a more permanent solution.
-
Awesome! Thanks a ton for clarifying. I feel like I ought to buy you a beer one of these days for all your help on all these different posts haha
-
Thats not a bad idea at all. Still curious whether this is even a Jeep handbrake to begin with, but I guess as long as its working now I don't need to mess with it. Just wondering how it "should" be put together for ease of replacing parts down the road, especially once I get that D44 installed because I know it comes with the lines attached on it.
-
Here’s the temporary fix I came up with. Bent the rod back and put a little hose clamp on it. We’ll see how long it lasts!