hakukamana
-
Posts
198 -
Joined
-
Last visited
Content Type
Profiles
Forums
Gallery
Everything posted by hakukamana
-
Water pump pulley bearing???
hakukamana replied to hakukamana's topic in MJ Tech: Modification and Repairs
Perfect, thanks for the update gives me everything I need to know about exploding the aluminum casting. No seriously the part number is a life saver. The process is also greatly appreciated. I really don't want to do this more than once in the life of my Eliminator. -
Ok, its not really the water pump bearing, but the AC bracket, mechanical fan shaft bearing assembly. The shaft is pressed into the aluminum bracket has a bearing and a shaft the hub for the mechanical fan rides on the hub and has 4 studs. I have a squeal from the bearing and need to replace the bearing. Checked online and got a reference to the part as the water pump bearing. It has nothing to do with the water pump. The only one I saw was an Omix Ada part number 17104.83 but it does not (supposedly fit and 89' Comanche). The reviews are also pretty bad, longer shaft, sloppy bearings, some have died in less than 100 miles. I tried to remove one from an old bracket I had only to break the housing in the press. Any insight for a part or replacement? Also how about a service procedure, if any no reference in the FSM.
-
how many miles on your truck's factory engine?
hakukamana replied to Pete M's topic in MJ Tech: Modification and Repairs
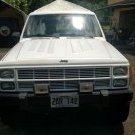
1989 Eliminator 282000 -
The 89' Eliminator is pushing the 280K mark and I know that at some point in time I am going to have to either rebuild or replace the engine. I have a couple of issues. I live in the middle of the Pacific Ocean, only 2 machine shops on the island, one will do a rebuild of the engine, the other will only do the machining no assembly. The local part houses have various suppliers that I have researched but not one has a really good review on quality, service backup, or warranty support. I have Googled a number of engine remanufacturers but its hard to tell the quality levels based upon a webpage. I don't need a stroker, (Hesco) and really don't need the extra HP or the use of 92 Octane, just a solid well built stock 4.0L that will give me another 280K or more. The plan is to drive it till it dies but I would like to have my backup on hand so the downtime is minimized. Have search here on the Forum but not a lot of info regarding remanufactured engines and suppliers, any experiences or suggestions would be appreciated.
-
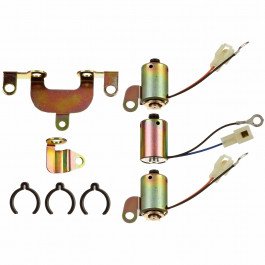
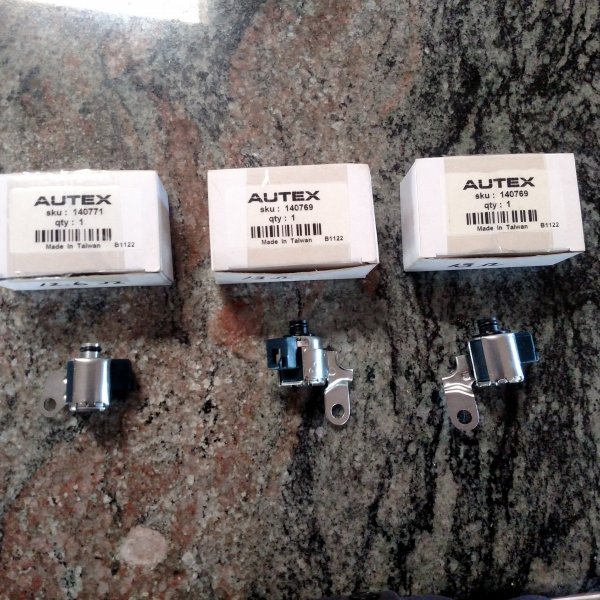
3 times the price of the other solenoids.
-
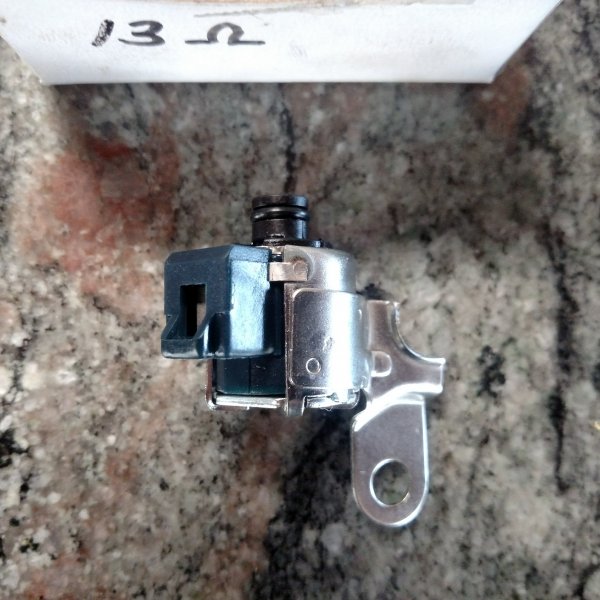
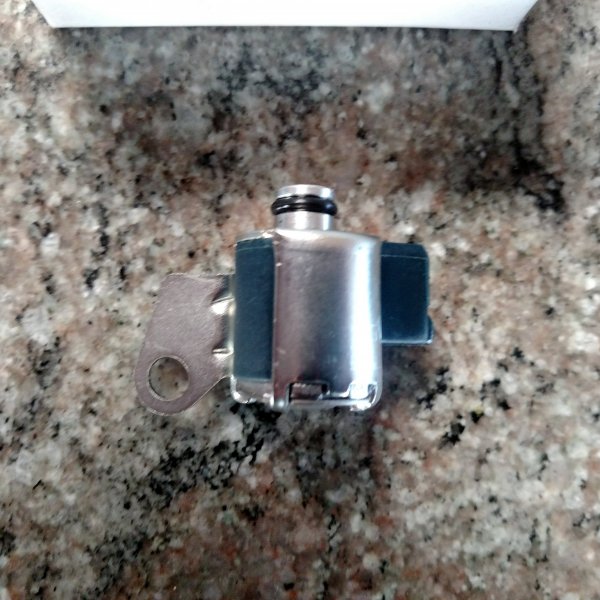
This appears to be what is in the transmission
-
Here's what I ordered, its suppose to be (2) shift solenoids and (1) lock up solenoid. These are not going to fit in the existing solenoid positions, or be able to be mounted correctly.
-
I have an AW4 in an 89' Eliminator, I ordered the 3 pack solenoid kit for the AW4 for the correct years. I get into the trans and the solenoids are not even close to the correct ones. They won't mount correctly they face the wrong direction, the connectors are wrong. Verified the order with the vendor, nope those are for your 89 AW4, but that's not whats in the transmission. Anybody got a clue?
-
Slow cranking, good battery & alternator
hakukamana replied to hakukamana's topic in MJ Tech: Modification and Repairs
Try PB Blaster, a little tapping on the bolts, and either a 14mm or 15 mm for the bolt heads. Never had the starter bolts seize. If all else fails use a MAP gas torch on the heads after a good soaking of the PB Blaster, between the heat and the rust eater they should come out. Be patient the last thing you want is a snapped bolt head. Good luck -
87'Starter relay fuseable link wiring
hakukamana replied to hakukamana's topic in MJ Tech: Modification and Repairs
Lights turn on with key off. Blinkers only work with key in the run position. I think that that 12ga red wire from the link might have been as Ohm indicated for the fog light relay. there are no wires in the loom for the fog lights nor are there any wires to support a fog lamp relay. -
87'Starter relay fuseable link wiring
hakukamana replied to hakukamana's topic in MJ Tech: Modification and Repairs
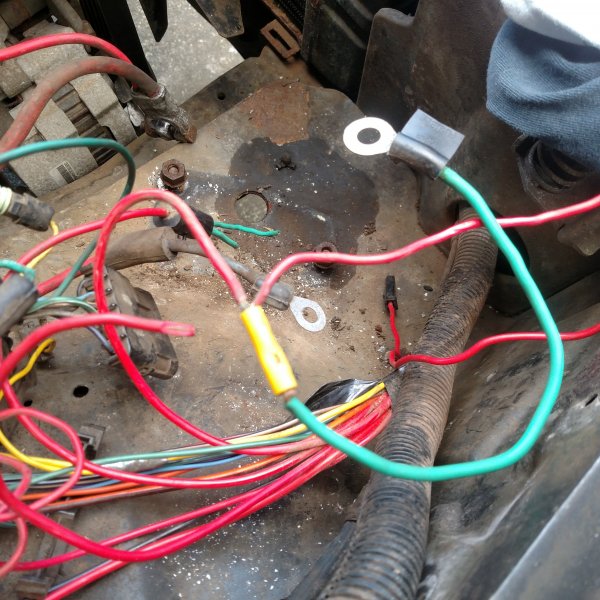
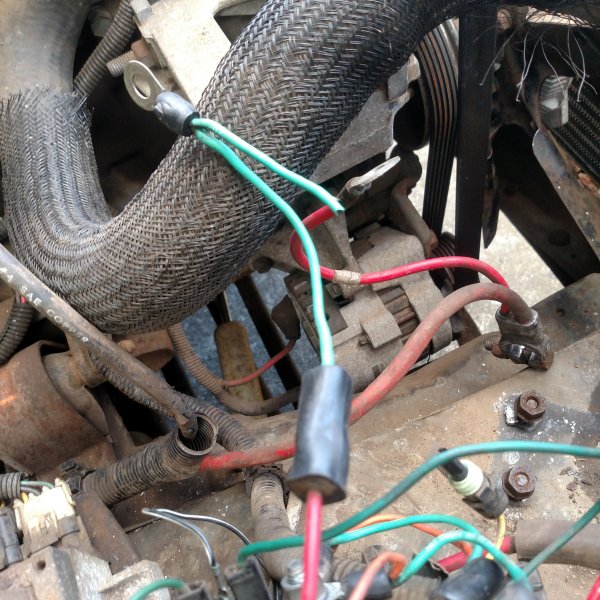
Ohm, thanks for the 87' manual, I have the 88' but didn't know if there were differences between the two. So this one should get your head scratching, fuse link J has a splice to the front lighting harness and says to the headlights. The wire was cut at the link, I traced it to the front lighting harness connector.The 12ga red wire goes through the front harness in the engine compartment from the J fuse link and ends in the connector for the front light harness, and it connects to nothing, there is no receiving wire that the 12ga red wire routes to in the front lighting harnessconnector. I have no clue...…..
-
87'Starter relay fuseable link wiring
hakukamana replied to hakukamana's topic in MJ Tech: Modification and Repairs
OK, Ohm this one a 87' has no ballast resistor, nor can I find wires in the harness usually Org/Blk with tab connectors to plug into the resistor. I looked at an 88' that I have and it shows the double green link as in picture (3) having one red wire on one link, and three red wires on the other. Do I have to many fuse links in the harness? (2) org/green links, one Green link to a 2 Red, maybe 3 red and One double green one side cut and one side connected to a red. -
87'Starter relay fuseable link wiring
hakukamana posted a topic in MJ Tech: Modification and Repairs
This is one of my latest projects, 87' 4.0L Shortbed Pioneer 5 speed manual no AC. I started to look at the wiring harnesses and noticed that I had some cut and splice work going on. All of my other MJ's have a 4 tab starter relay, this one has a 3 tab relay. The relay also has the normal ringed fuse links but two of them have been cut and one has a splice connector. The links are not identified on the insulation, so I am using the elimination technique. The alternator, the battery, and the two org/grn double wire fuse links are in tact. The double green link, is cut with no indication of a cut wire in the harness that it would attach to, based upon the length. The double green link looks like a factory link. The single green link with the little rubber tab at the ring terminal, seems to be the 3 wire red feed to the ETR fuse, the fog lights(which I don't have) and the engine compartment light (which I don't have). That link to me does not look link a factory link. The question is whats the best way to determine what goes to what????? I have both schematics for the starter relay.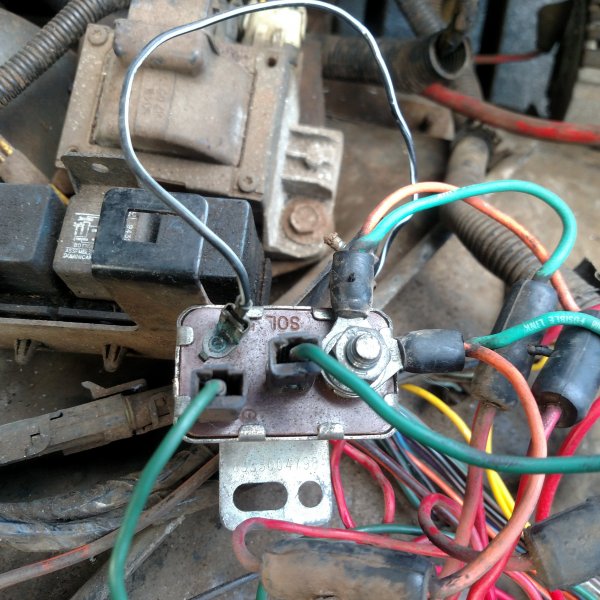
-
Slow cranking, good battery & alternator
hakukamana replied to hakukamana's topic in MJ Tech: Modification and Repairs
Worn brushes was the culprit. I took it to my local alternator/starter rebuilder in town, we tore the case down and there was little to nothing left of the brushes. New Mitsubishi starter, works like it did before the issue. I wonder how long the brushes last? Thanks for the help guys, never had this issue happen before so was not clued in to the brush issue with the starter. -
Slow cranking, good battery & alternator
hakukamana replied to hakukamana's topic in MJ Tech: Modification and Repairs
Ohm, it looks like approximate cranking amps is 160 based upon the 88 electrical manual. They are using a S-VAT-40 meter its the old style carbon pile load tester and a CCA tester. I have a load tester but not like the S-VAT-40 tester, I also have a Fluke 88 meter so I have some good electronic instruments, I have a clamp on amp tester but I don't know what that would show. Amp draw during cranking from the battery or the starter relay ????? Shouldn't the voltage draw and the amperage draw be the same during cranking from the B+ battery post and the starter relay feed ? -
Slow cranking, good battery & alternator
hakukamana replied to hakukamana's topic in MJ Tech: Modification and Repairs
Ohm, Battery 13.2v static. Terminals and posts clean. Battery B+ to starter solenoid 0vdc, Battery Neg- to engine block ground 0vdc, Battery Neg- to starter case 0vdc. I kinda figured these were good I'm kind of anal regarding my connections and their condition. Everything is clean and tight. -
This just started about a week ago on the Eliminator. Usually when I go to start the truck the starter whirls for about 2 seconds and then pow the engine fires right up. So initially I checked the battery (size34 AGM) $200 + at Autozone. Battery tested good, put the load tester on it, tested good, just for the heck of it, put it on the charger over night, 13+ volts. Checked while running alternator is kicking out 14.3. But it is slow to crank, but catches and then starts. This is not normal for the truck. Grounds are all done, I am wondering if its the starter relay or the starter solenoid itself. Usually a slow cranking of the starter would indicate a low charged battery or the battery not taking a charge. This one has me puzzled.
-
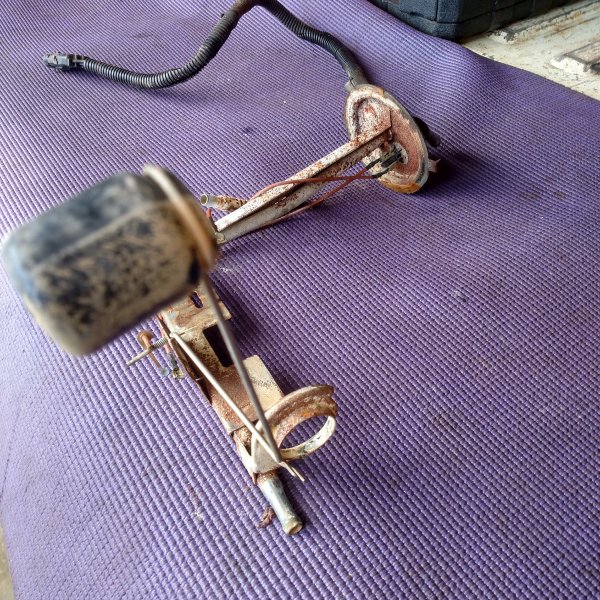
Fuel pump hanger assembly
hakukamana replied to hakukamana's topic in MJ Tech: Modification and Repairs
This is what I am dealing with
-
Anyone have a source for the fuel pump assembly? Part number? 88' 4.0L Sport truck. I was changing the fuel pump out today and found that the entire unit was encrusted in some type of white crusty scale, and that everything was rusting. My guess is its the original pump or close to it. I can find Bosch pumps, but no entire assemblies. Let me know what you guys think. The sending unit tab is broken on the sending unit as well so I need to get the entire assembly.
-
88 Automatic Column shift adjustment
hakukamana replied to hakukamana's topic in MJ Tech: Modification and Repairs
I got it. There are (2) clips. The upper clip is a guide for the two tiny cables that control the shifter positions. The lower cable clips to the shift column that rotates as you shift from P through the various gears. The lower clip is actually what controls the position of the shifter indicator. The best way to get to that clip is to drop the lower valance it gives you access to the clip from underneath. Pretty simple but a pain in the a**, move the shifter adjust the clip and so on. Once done you have to compensate for the slack in the shifter arm as well. Thanks for the help, got me going in the right direction. -
88 Automatic Column shift adjustment
hakukamana replied to hakukamana's topic in MJ Tech: Modification and Repairs
I am not getting the picture in my mind. The clip slides off of what? I understand the dash bezel removal, I think. The clear lens then the idiot light cover (dash bezel), then I should see a clip and a string? -
Trying to figure out how to get the PRND32-1 adjustment on the column shift. Looked in the FSM not much help. I know there is a cable to the transmission, but I also think there is a cable to the gauge cluster. Anyone have experience with this? The P position is fine but everything else is off like between the letters off.
-
Eagle I don't think the transmission is a 44RE, if memory serves me, is that what was used in a Grand Cherokee with a 5.2L? I would think in 88' it would have been a AW4.
-
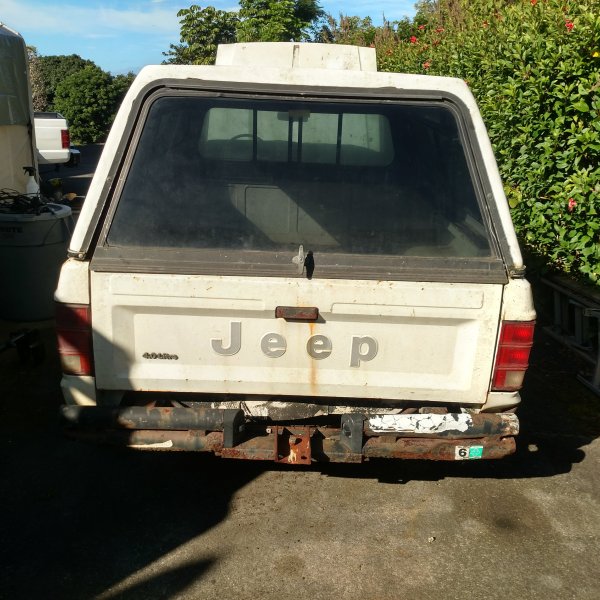
Eagle Scout you are correct. After your post I compared the license plate lights, the inner plastic caps and the brackets it was a factory tube bumper. Its trash and rusted pretty badly. Its been backed up into the tubes and they are bent and dented. I looked at the tube thickness looks like .0625 thickness its paper thin. No wonder if you backed into anything it dented. The piece of channel I think was used as a tow ball extension. The spare tire winch is in tack and functional, the load valve for the brakes is there and the rod and the bracket on the diff all in place. This is the first truck I've ever seen with all of these pieces still on the truck. Looks like the original muffler, and exhaust pipes.
-
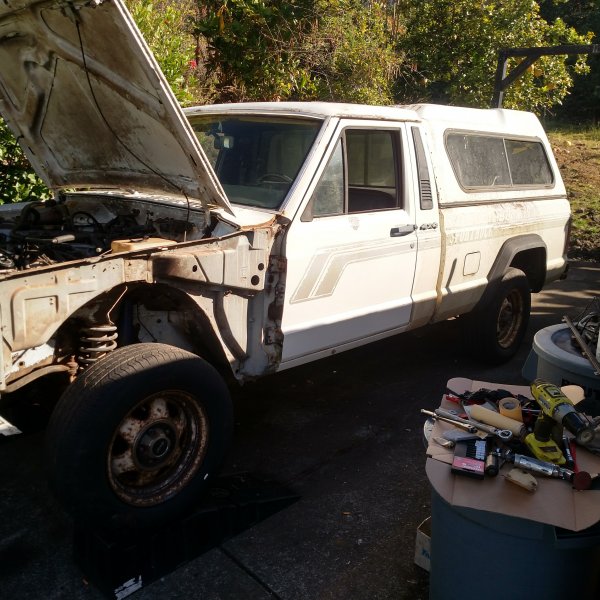
Its a little rough, this is the one that had the RH mirror delete. Got a pinched DS fender. Had to take off and pound out..