

BBCchris
-
Posts
176 -
Joined
-
Last visited
Content Type
Profiles
Forums
Gallery
Everything posted by BBCchris
-
Sorry doing it all from memory from a late night. Your right on the 11 pin. Well thanks for the lead and when I get home tonight I'll hit it again. Hopefully I'll get it banged out tonight, seems like the stupid little things are dragging it out. :roll: But i guess that's what makes it fun. -Chris
-
Are your talking about pin P on the 12 pin connector on the steering column. On the MJ it was a LtBlue/black wire that ran from the 12 pin to the brake switch. On the 91 harness it is empty. I did remove it from the old harness but wasn't sure if I should put it into the 91 column harness and if I did where should it terminate...at the brake switch? The brake switch has 5 or 6 wires in it unlike the stock MJ one with only 2 wire. The doner XJ had all the options like Anti-lock and cruise which would explain the extra wires in the brake switch (to cancel the cruise when the brake is depressed). All the Anti-lock crap was not used when I swapped it over. On the 91 XJ (page 34, L50 white/tan) wire is the brake feed. I do get power on L50 when I press the brake, so if I have to run a new wire to the rear lamps, well thats what I'll do. -Chris Is pin P feeding brake signal through the steering column to the turn signal wires out back?
-
Well here is the quick rundown of whats going on. The truck started out as a 89 4cyl 5spd 2wd and now is sitting in the garage with a 91 4.0 AW4 in the place of the old stuff. I used the 91's engine and dash harness but from the front of the doors to the back of the truck is the stock harness. The truck had 1 harness running down the drivers side that hooks to the dash harness. On that cab harness there are 2 connectors (Black oval 6 pin, Grey square 10 pin). I spliced in the black oval plug into the 91 harness to get the following items to work, Fuel pump, fuel gauge, reverse lamps, left turn, right turn and park lamps. On the grey plug is mostly interior garnish stuff, rear speakers, console lights, switched ground ect. My problem is I can't seem to get the brake lights to work. There is no brake feed wire running in the stock harness. I have a wire left (white/tan) on the 91 harness which is the brake light feed. It's in same plug that the other lights got pulled out of to hook to the MJ harness. So where does it go to power the stop lamps? Thanks, Chris Everything thing else works, new sockets, bulbs.
-
One word for 80's quartz technology................ PIMP! see I'm working on it again! :)
-
Sam your a frickin riot.
-
Ya, its like the grill insert is 98% smaller than the original. I'm guessing they made a mold off of an original part, and then when the injected plastic cooled, it shrank. Leaving us with an exact duplicate, just scaled down. Like you I was planning on cutting it in half so that I could get the two pieces to fit behind the grill and boltup. Also, I got the stuff from you, I'm really surprised, those mirrors look REALLY good, much better than I thought they would. I am pleasantly surprised by the quality of them. I too was surprised by the mirrors. O/T Alex said they wouldn't give me any credit on the broken headers and when I told them how crappy the fenders fit they seemed to get all offended... now they won't email me back. So, I don't see myself doing anymore business with them in the future. I guess the thing that blows is that I have some extra fenders and mismatched lamps and won't be able to get the mate.
-
Well I got the 2500 header back on the truck and the fricking grill insert fits just like the other quality parts from Alex. I ended up splitting the insert into two parts so it would fit. I'll snap some progress pics of it tonight.... I've been busy working on my other "project" so it's been hard to stay focused on getting the truck going again, but it's getting closer.
-
Well I got the fuel pump swapped out with the 4.0 stuff. I had to change over the sending unit and float assembly so the gauge would read the correctly. I used the stock '89 2.5 TBI pump chassis, removed the 2.5 fuel pump, put the 4.0 pump in it's place. If I would of used the '89 sending unit the gauge would of read backwards, so I removed the sending unit off a '91 XJ pump chassis and made it fit on the MJ one. Fun huh? Other than that I've been putting it back together slowly... but it's getting closer.
-
I got the motor in last night and will wire it up tonight. I'll try to get it outside this weekend and take some proper pictures of it.
-
Well I got the truck back and it's nice to see it one color again. I think it needs some more wet sanding and I might do it after the paint stops stinking. Sorry for the crap picture, between the finger print on the camera, being late and tired.... thats the what I got :)
-
There are a few MJ's at the Pick-n-Pull in Spokane, Wa. as of last weekend. It's right off of I-90 (Broadway exit) when your bombing into Spokane and it's visible from the freeway.
-
Please elaborate. Why is it "junk"? Have you experienced hardware failure, or just electrons? Mine was fussy with the disconnect and then it wouldn't re-engage after using it. Subsequently after a few trail rides the guts blew out of it. DC was nice enough to replace it under warranty, but that one also failed after a few month's. So I just use the standard set up now. And on a side note I don't wheel hard and never play in water or mud so it didn't fail due to abuse. The axles are top notch and a better product than the TJ D44's. And if I can remember correctly you can use the JK D30 brakes, knucks and unit bearings. I did remove the OE switches in mine and replaced them with some Contura II ARB style ones that were relocated above the center stack.... mainly for comfort and so they could be used in 4 hi and independently of each other. This all took place back in late 07 to mid 08 so it's possible that there was a redesign since then to address some of the failures. -C
-
I thought the rusty knuckles looked familiar. And the S/B disconnect is junk, cool idea bad execution on DC's part!
-
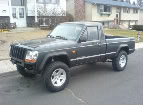
Man am I going to be rich when I finish mine.... don't worry I might still come by here just to see how the "little" people live. x2 what a tool - Missing combat rims - Some dumb azz cut in a tailgate - I don't see a glovebox (but picture is small)
-
I was wrong and I'm ok with that.... I just really wanted that cookie ;) ..... JK So how goes the engine battle or have you been busy with other stuff?
-
Rubi TJ Front D44
-
Bastard :shake: You get all the cool stuff
-
Yes it will.
-
Transfer case linkage Question
BBCchris replied to robfg67's topic in MJ Tech: Modification and Repairs
Can you snap a pic of the linkage from the underside? -
Transfer case linkage Question
BBCchris replied to robfg67's topic in MJ Tech: Modification and Repairs
Did you use the same shifter assembly and linkage that the 231 used? I'm not sure if the gate part is in the same spot 231-242 or even if the linkages are the same..... but I'll look. -C -
He must of had "nicer" fenders than the sh!te we got. :(
-
He did do a nice job on it. I like how he used the 2500 lamps on the newer style hatch.
-
Just remove the one bolt (engine bay side) where the column meets up with the steering shaft. Its on the firewall side of the little u-joint. After the bolt is removed go back in the cab and pull the column straight back and it will separate from the steering shaft.
-
All I told them is that I do not want the header put on the truck. I don't care if they put the doors, hood, fenders and bed back on it. I would rather it get scratched down there than after I get it back...... (you know it will). I disassembled it about as far as it was when it was painted at the factory, except the bed was still bolted on for the trip down there. Figured the header would have a better chance of not getting messed up when I put the motor back in. Anyhow I'm pretty jacked to see it when its done.
-
I thought it was stripped down enough..... but I guess they wanted all the parts in the bed. :???: