


Billy Darson
-
Posts
17 -
Joined
-
Last visited
Billy Darson's Achievements
Jeeper (1/11)
-
checked on progress this morning and much to my surprise and dismay, got more surface rust. I was under the impression that the metal etch was supposed to leave a zinc phosphate coating on the metal protecting it from rusting... so what the fudge Did I do wrong? I degreased exposed metal. rinsed. applied metal etch, rinsed, towel dried, and air dried. so why are there rusty bits? I don't get it. well any way, Would you continue on at this point or try to do something about the rust? am I just being overly sensitive about minor surface rust? *apparently rinsing off the metal etch is supposed to leave a zinc coating and flash rust. this info was not on the product documentation that came with the product, but instead on the Tube of Yous. So now that I know for sure this is what was supposed to happen I shall proceed with the project. Ahhh gotta love the inexperience of a FNG. LOL
-
So, after a bit of poking around with a flathead at the rear of the cabin at some of the old seam sealer I noticed there was a bit of rust, and some nearly undetectable paint bubbles. I decided that I needed to cut out more. after cutting, I used a coarse wire wheel to clean off paint and sealer. Flapwheeled any raised weld point after flattening the surface edges with a hammer and makeshift dolly. went over the wire wheeled areas with flap wheel for a cleaner surface. at the end of the day I vacuumed up debris and gave a wipe down with a clean towel. then hit all exposed bare metal with a coat of WD40 to prevent any rust from forming. Next day I sprayed everything that was coated with the WD40 with a dish soap solution twice, with a good rinse after each wash. Then went after it with the POR15 cleaner/degreaser twice, also rinsing well after each wash. I blew off standing water and went after the exposed metal with the POR15 Metal Etch. instructions were not clear if the surface had to be dry after cleaning before application of the metal etch. Applied the Metal Etch with a spray bottle, and kept surface wet with the etch for more than 20 min before rinsing. Also instructions do not specify that you should assist in the drying process after rinsing off the metal etch. well I blew off most of the rinse with compressed air before calling it a night. The next morning I see rust staining in patches on the metal that was supposed to have been etched. Nothing major, but enough for me to re-treat the metal with the Metal etch. Probably went through 500ml of the solution throughout the whole process. I might have had less waste if I had brushed it on.... *shrugs shoulders*. So now that I have re-etched the metal, rinsed off Metal etch, and towel dried the surfaces, I get to wait until its bone dry before I get to paint. YeeeHaw. so that's where I'm at on this project.

-
Yes, Virtually all rusty and compromised metal have been removed. I had considered practicing buttwelds with some of the material I removed. Ill have to see if I have proper gauge wire for the task. I have an old craftsman portable wire feed MIG welder that I inherited. From what I could gather from my Uncle's ramblings(career industrial welder) and the interweb, using solid core with CO2 or Argon leaves less slag to mess around with VS Flux core. So ill have to check around for any CO2 cylinders mucking about. once I confirm/acquire proper wire for the task, and get some gas, I'll monkey around with the welder and some scrap for a bit and make a determination on which route I'll take afterwards. Do you think 3" overlap is too much? Is the reason for a thin or narrow overlap to be more efficient with the materials at hand, i.e. requiring less sealer on a 1" band VS. a 4" band? or less areas to have worries of rust forming in hidden inaccessible areas? all the above? Thanks for your insights 89MJ
-
I do intend to do a finger drag of seam sealer. I was curious if the pan-sealer-frame plugweld sandwich approach was considered "best practice". Appreciate your input ThatJeepGuy. I assume that you went light on the coats of POR15? all my work is being done without the benefit of a shop, just driveway wrenching in the PNW, so I'm guessing my application intervals will be a bit different. I definitely don't want to be redoing this anytime soon :) nervous LOL
-
My welding skill is not up to par for confident buttwelds on such thin material. Probably should have mentioned that in the post to give better context to the question. What I'm asking is would you drop the fresh pans in at this stage, assuming all surface prep and protective frame rail coatings have been completed? or would you continue trimming out vehicle metal despite it being rust free? My intent is to keep the new pans fully intact, with the exception of the holes where I plan to plug weld. Much appreciated 89MJ
-
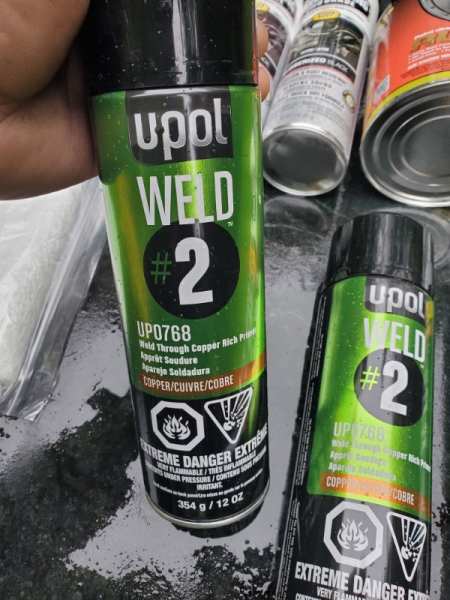
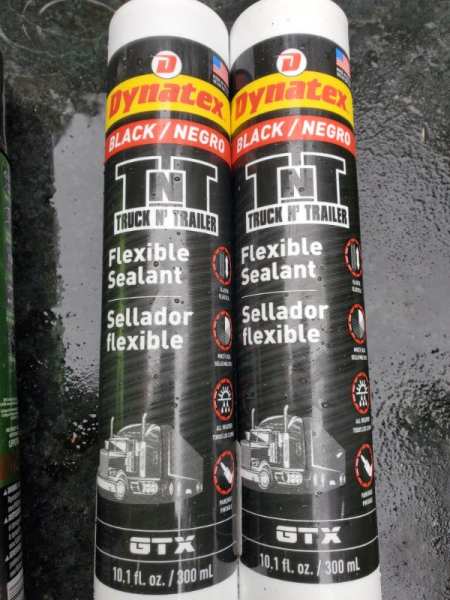
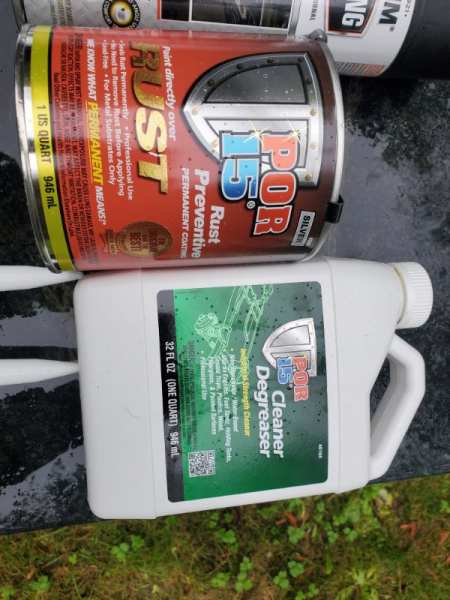
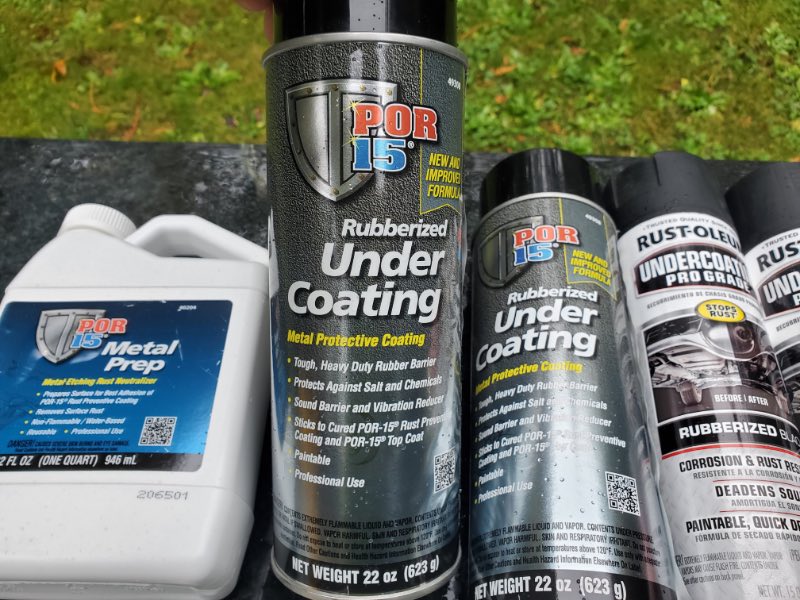
After hitting contact surfaces with weld through primer, and prepping the floor pan for plug welds, would you then lay a bead of seam sealer down on primed contact surfaces of vehicle, put floor pan in place, sandwiching the sealer between metals to be welded? and would you put seam sealer between the frame rail and the floor pan? Here's what I have on hand to use. If anyone has a recommended replacement for any of these products please don't hold back. and if you could add what advantage might be gained from the replacement, I would be very grateful.

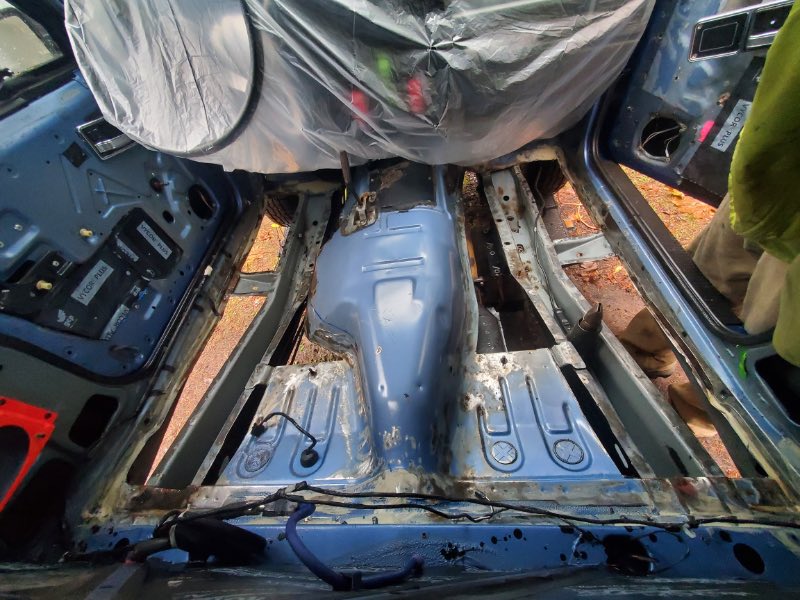
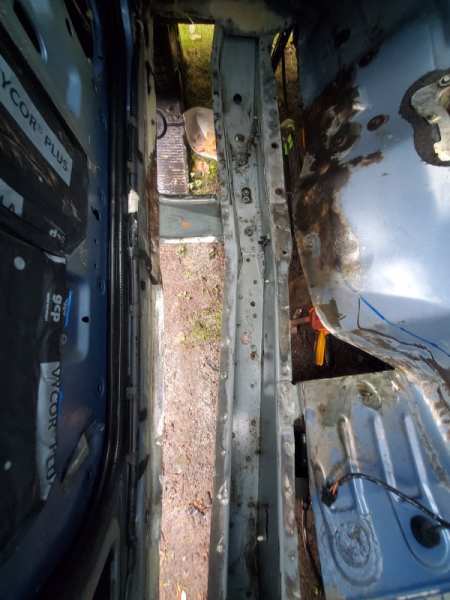
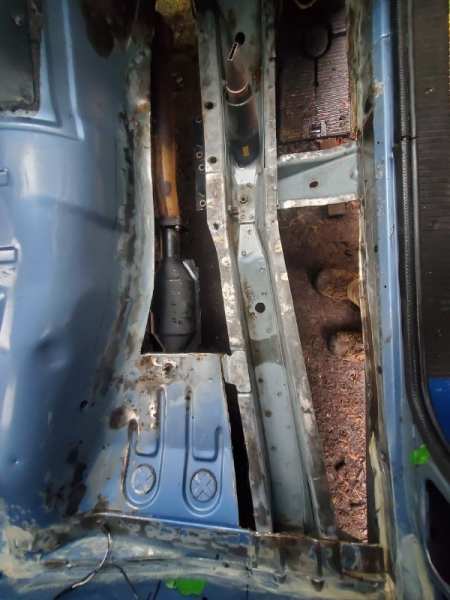
-
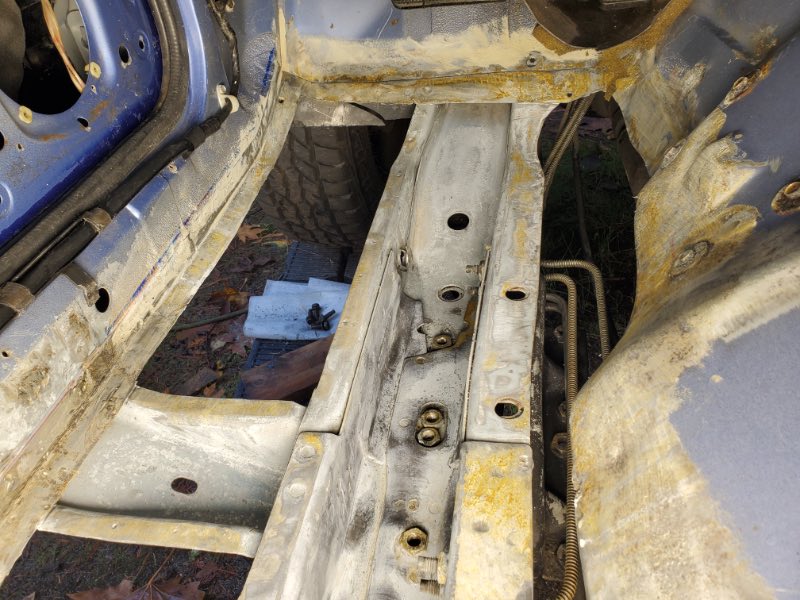
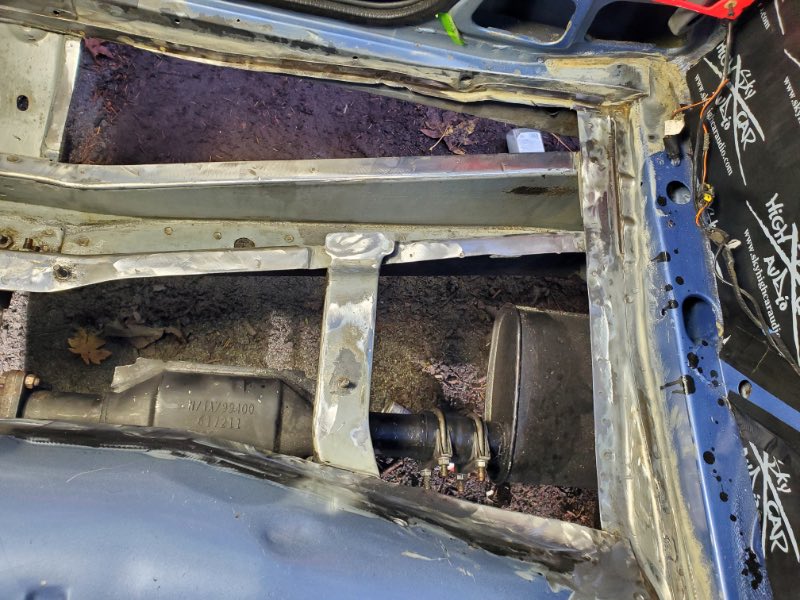
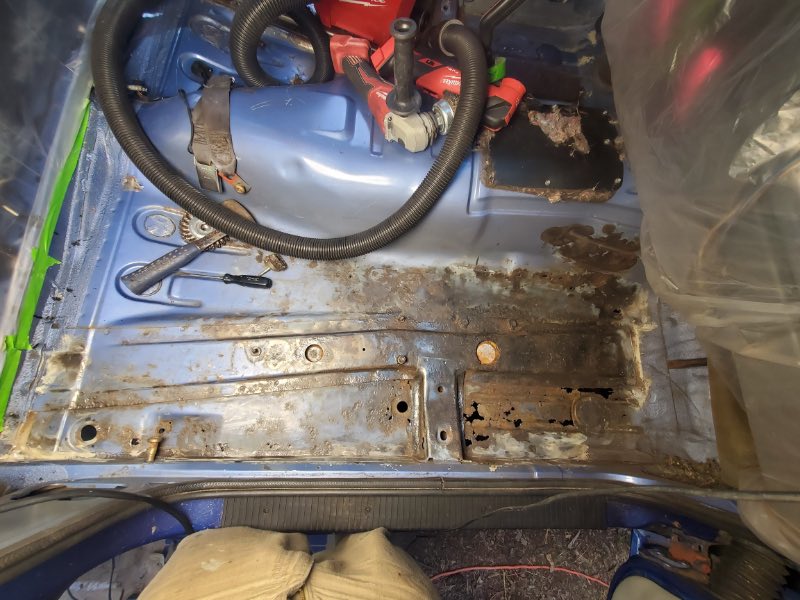
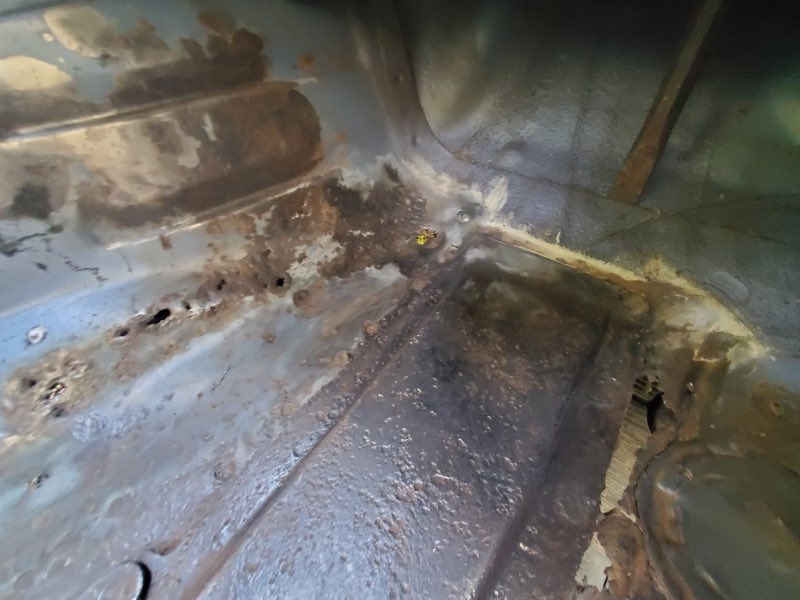
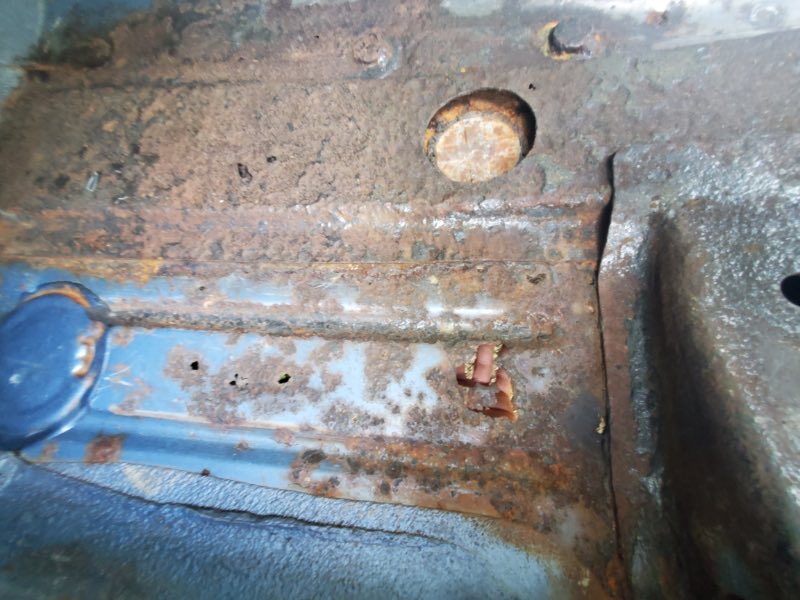
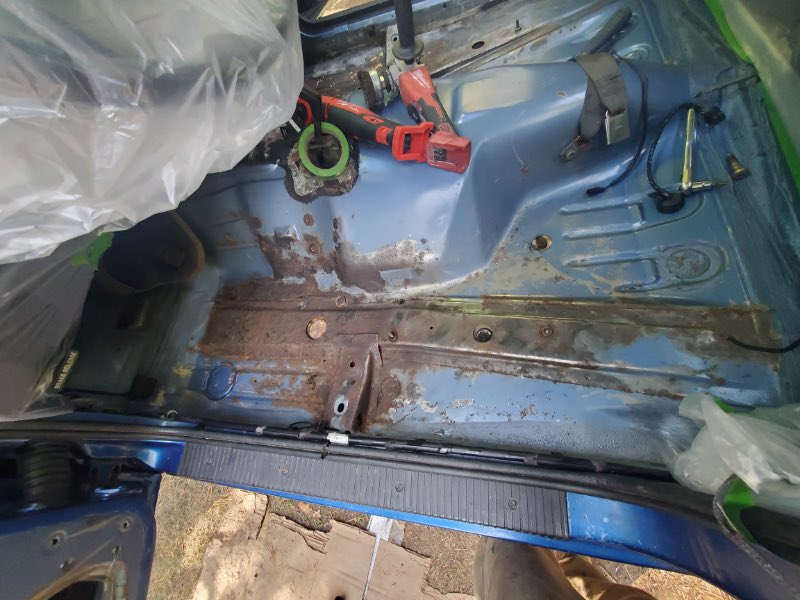
So I went ahead and removed the topside corner supports and the topside rail supports. casualties of the process as I had imagined. I had to slice out the corner supports with an angle grinder with cutoff blade, even after drilling out the welds and trying to hammer and chisel bar them loose. had to do similar thing to the topside rail supports so that I could fit my tools to get the sucker loose. Ground down the booger welds and wired off a boat load of the goobers of seam sealer. I probably have more to remove but for now its much improved. gave the interior a spray down with a fairly concentrated soap water mix to help get the rust dust and seam sealer dust off the surfaces, and let the frame rails get a good soapy soak. I took a soft bristle brush to the frame rails and scrubbed em as clean as I could and gave a rinse. Did this process twice. Here's where I'm at now. I fit the new pans, traced them. Removed the worst of the metal, exposed frame internals. did a bit of clean up cutting, but as you can see from the photos, i was pretty conservative about how much I was cutting out. Figured more metal= more strong. but maybe more issues in future? So how far would you go on removing the old material knowing that full length pans are going in?
-
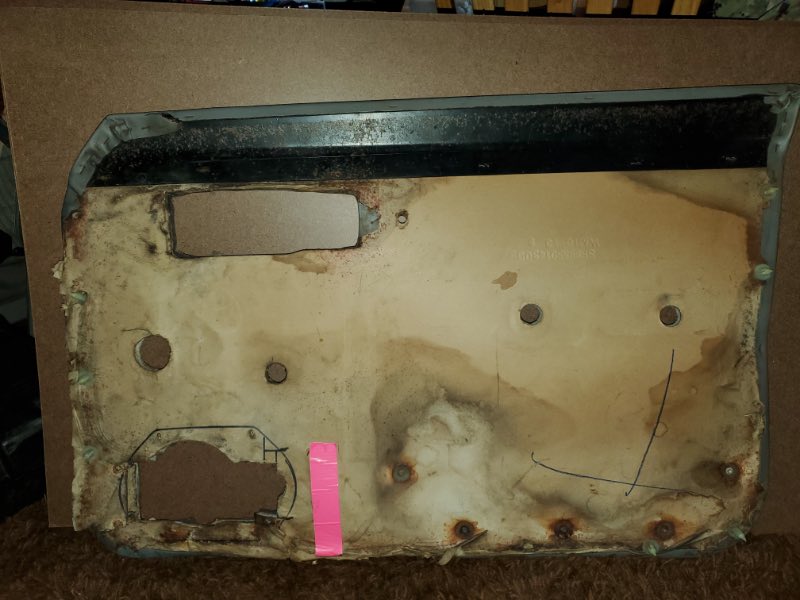
The hounds tooth pattern looks good @Aidenmoreno3. For anyone interested in going the same route of interior refresh, one 4x8 sheet of hardboard ripped lengthwise at 24", will give you both door cards, and the back carpeted bulkhead beauty cover, with material to spare for odds and ends. If one goes hard board route, I would highly suggest painting or otherwise sealing the entirety of the final cutout of the hardboard. I'm planning on hitting mine with herculiner after I get all the cutouts fine tuned. as you can see in the pictures I have yet to cut any of the pieces to shape. I live in the PNW...Wet! so for me its a no brainer to ensure the replacements aren't as susceptible to the elements as the originals. Cheers!

-
On the backside of the door card, the original "board" material is stapled to a rounded piece of plastic (abs?) that seats into the top trim channel lip under the front corner of the window.

-
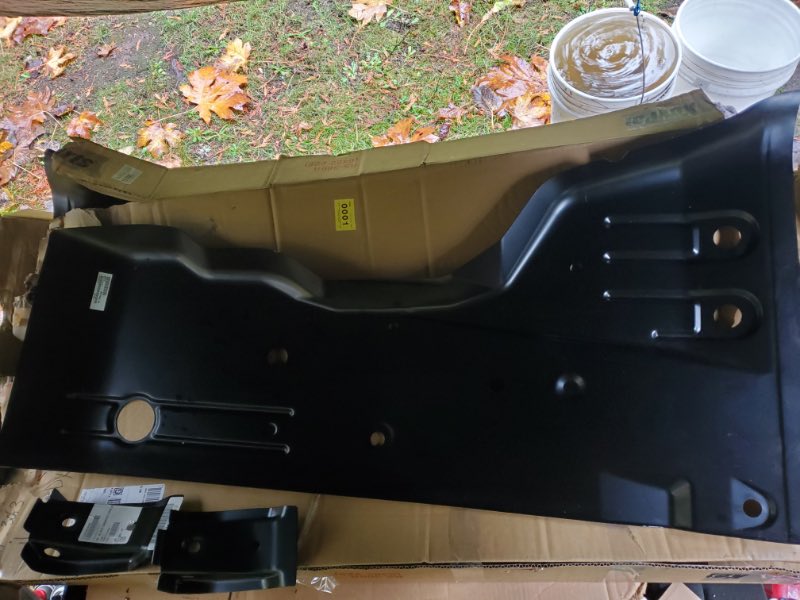
I went and bought all new supports and drivers and passengers floorpans from Keyparts Via JEGS. glad I had a tiny wad-o-cash put aside for such an occasion. Found some sexy high temp paint and some rattle can undercoating while I was getting fresh wire wheels and flap wheels from the local Tractor Supply Co. I couldn't resist the high temp paint, oooweee! LOL. I will commence the project when the parts arrive. Need to source me some weld through primer though. @BoilermakerI'm not hip to the 2k. I've heard it mentioned on a few Tube channels, but overall ignorant about its benefits. I've got some more learnin' to do. @ThatJeepGuy I figure while I'm going this deep, might as well dig a bit deeper, get at as much as I possibly can. @ratrapp Glad you got the XJ pans to work for you. I'm pretty sure Id be doing the same if Key parts hadn't made the MJ pans. probably an extra helping of cussing, just to reassure the neighbors I'm having a good time elbow greasing the pans to fit. thanks all for the support and suggestions
-
Thanks Boilermaker. you've voice what I have felt I needed to do. the more I can get at the better off Ill be later down the line.
-
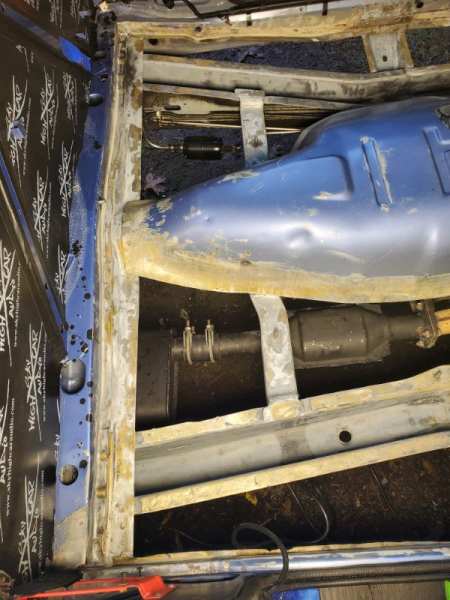
Got after it a bit more, finding and exposing where the rust line meets clean bare metal. Appreciate the feedback Y'all! I had a feeling full on replacement would be the way to go. Guess I needed the outside confirmation to give myself permission to go whole hog. Jegs wants nearly 200 for 1 side and 125 for the other? EEks. I'm no metal worker, LOL. so with that said modding a Cherokee floor pan set seems like a lit of a bother, and I'm definitely not confident enough with my metal skill to attempt the dryer patch-@ Eaglescout. I appreciate your resourcefulness! Need to hone my metal skills to be as resourceful. Save that money. those with the skills, do what those without the skills, pay out the boot hole for. Hats off to you sir. I tried searching summit, no dice on the MJ panels. Jegs appears to be the only ones with them in stock. KeyParts doesn't sell directly?? am I mistaken on that?? I've been burnt on Ebay before, so id much prefer to go with a credible source than deal with that mess again. looking for a middle ground Between getting scammed and bent over a barrel. Any suggestions there? All of the supports look like they're seen better days 89 MJ. some eaten through metal on the drivers side center support. and all of them seemed to dent fairly easy when I was chiseling off the flake rust. But I suppose I won't know if the supports can be saved until I get them off. chances are though they'll need to get replaced. no telling how much Ill mangle them getting em off. Ill probably use my rotohammer in hammer function with a chisel tip and a prybar to get it all out. I don't have an air hammer, but figure its similarly effective... time will tell eh? From the other people that have put in the new floor pans, what did you do about the seat studs? I have a feeling I should make a template of where things are before I go hacking and a prying. I feel like I've learned the broad strokes of the process from the community members that did us all a service by documenting their work in doing their floor pan(and other) repairs. for that, I salute you. One of those gems that stuck was the weld through primer. shout out@ 89MJ. Anyone use Jegs seam sealer? I'm sort of stumbling through the dark here on this project. First time doing any project like this, usually stick to stuff that can be fixed with wrenches, grease, and duct tape. so yeah :) Thanks again!
-
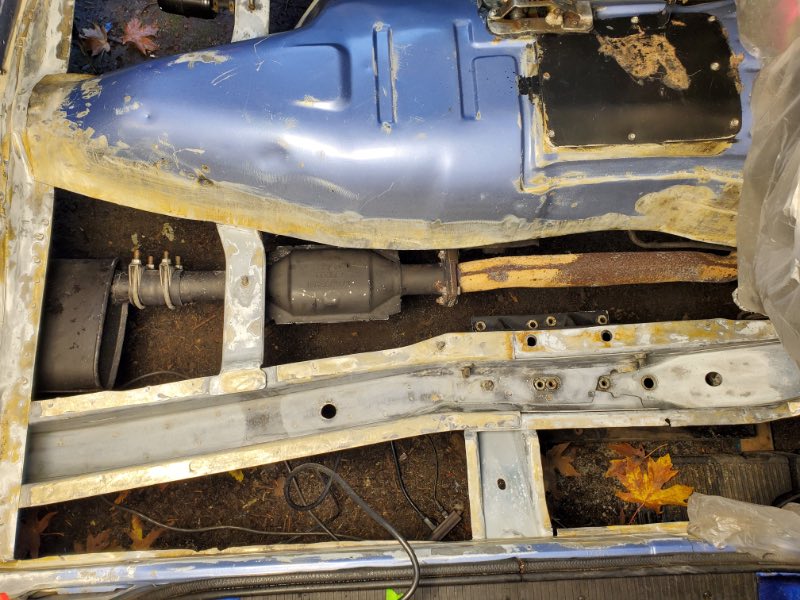
Fond Hello to you all. I'm a new member but long time lurker of the CC Forum, Recently I've jumped into eliminating water intrusion and cleaning up the rusty and Swiss cheesed floor pans to asses what would be the best approach to handle it. I have a POR 15 floorpan/trunk repair kit(essentially, had to buy separate items to compile the kit that whey were sold out of). Which typically comes with some fiberglass mat to lay, and wet out, with the POR15 over the questionable rusty metal. So where I'm at is, should I remove the side supports and the center channel frame rail cover? from the bottom the frame rails look fantastic, like the undercoat really did its job at protecting the metal. Which I will have to reapply, any suggestions on undercoats? the interior, well we know... LOL. While lurking and searching posts on the topic of floor pan replacement, I saw many people suggested the floor pan replacements offered by KeyParts if you had the $, or if you're handy with welder, make em. Well, I'm ok with welding, not terrible, but far from good, safe to say i'm a novice. So regardless which method I choose it looks like I'll be welding. at the very least welding the side supports back on and center channel/rail cover... So if were your MJ and you had this kind of rust damage, What route would you take for a proper long-lasting peace of mind repair? Much thanks for your input.
-
92 Comanche - Dream Truck!
Billy Darson replied to James92's topic in Member Projects: Your Comanches
Inspirational! Awesome find, and great work so far! -
Door Window Seals
Billy Darson replied to 88 Pioneer 4.0's topic in MJ Tech: Modification and Repairs
RockAuto also sell the same kit from precision. just finished with my passenger side. I feel like the outer window scraper piece is lacking a bit. it sits low like there should be another piece attached to it for a nice seal above the sill of the window opening, keeping water out of the doors. as it is now I'm not convinced my door cavity will be dry inside on a wet day. If anyone has the solution let a BillyDarson know. the Kit I got was the Precision DK611084, which doesn't come with the vent window seal . haven't found a kit that does. Stellar Job 88 Pioneer 4.0!