
H3ADBANG4L1F3
-
Posts
143 -
Joined
-
Last visited
Content Type
Profiles
Forums
Gallery
Everything posted by H3ADBANG4L1F3
-

Custom Gaskets for HVAC
H3ADBANG4L1F3 replied to H3ADBANG4L1F3's topic in MJ Tech: Modification and Repairs
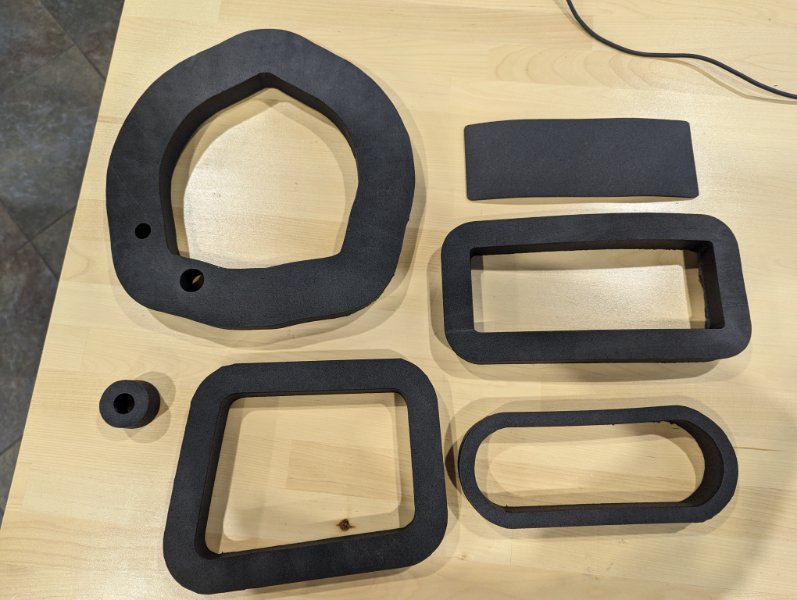
Tested them, will need to make some adjustments for a better fit. They seat really well, I just made a few too wide. Hopefully I can cut them out tomorrow and try again! -
Custom Gaskets for HVAC
H3ADBANG4L1F3 replied to H3ADBANG4L1F3's topic in MJ Tech: Modification and Repairs
-
Custom Gaskets for HVAC
H3ADBANG4L1F3 replied to H3ADBANG4L1F3's topic in MJ Tech: Modification and Repairs
The blower motor gasket may need a bit of a touch up. It was an interesting one being 1" thick in some places and 2" in others. -
Custom Gaskets for HVAC
H3ADBANG4L1F3 replied to H3ADBANG4L1F3's topic in MJ Tech: Modification and Repairs
I used a crayon to trace the openings onto a sheet of paper, scanned that to the computer, then traced the scan in CorelDraw. From there, I made an outline in the thickness I needed for each gasket (also on CorelDraw) and sent it over to our laser cutter to cut. -
Made these at work today, going to test fit them once I get home. Will let y'all know how they do!
-
These videos are a masterclass in what NOT to do to your vehicle. Great toilet vids lol
-
You may want to try your local library - we have one at ours!
-
Have you tried cutting it out in a Cricut machine? https://youtu.be/hejUzvfGuY8?si=O0CegUP-200g0doz
-
Rust at Top Edge of Firewall/Cowl
H3ADBANG4L1F3 replied to H3ADBANG4L1F3's topic in MJ Tech: Modification and Repairs
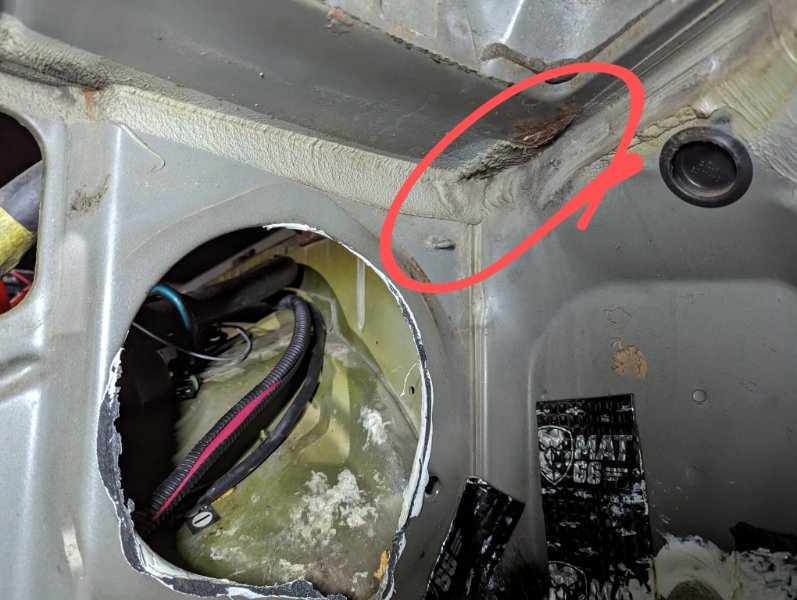
I'm definitely going to get it done completely. Don't want to half-@$$ it and have it come back and bite me in the future. It was already hard enough wrestling with those heater box studs! The good news is that the rest of my firewall looks really clean. -
Rust at Top Edge of Firewall/Cowl
H3ADBANG4L1F3 replied to H3ADBANG4L1F3's topic in MJ Tech: Modification and Repairs
Could you cut into the cowl and access it from there? I noticed one of the POs cut into mine to seal up the fresh air intake. -
Rust at Top Edge of Firewall/Cowl
H3ADBANG4L1F3 replied to H3ADBANG4L1F3's topic in MJ Tech: Modification and Repairs
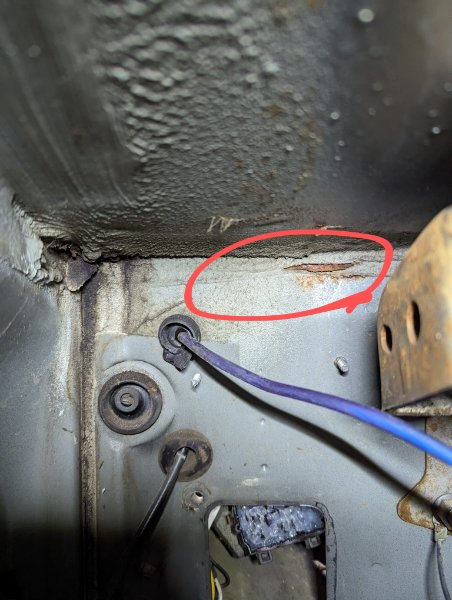
Digging through my Google Drive I found this post saved by ghetdjc320. I think this is the same issue that he fixed. https://comancheclub.com/topic/67224-project-“tomahawk”/?do=findComment&comment=724821 Would I just pull the old seam sealer, sand, prime, and reseal? Can I even reach the other side of that seam? -
Got some rust poking through the seam sealer at the top edge of my firewall. How would y'all tackle this?
-
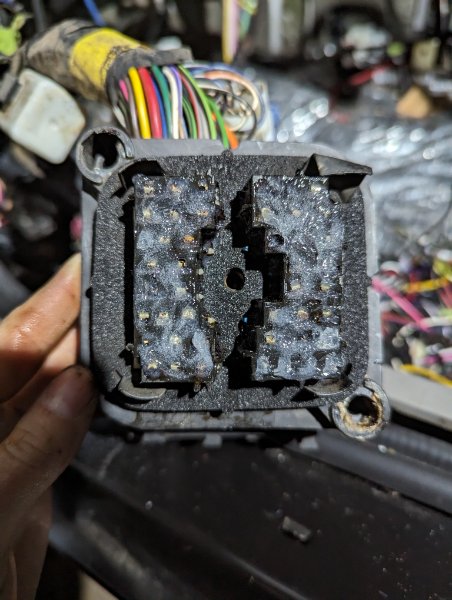
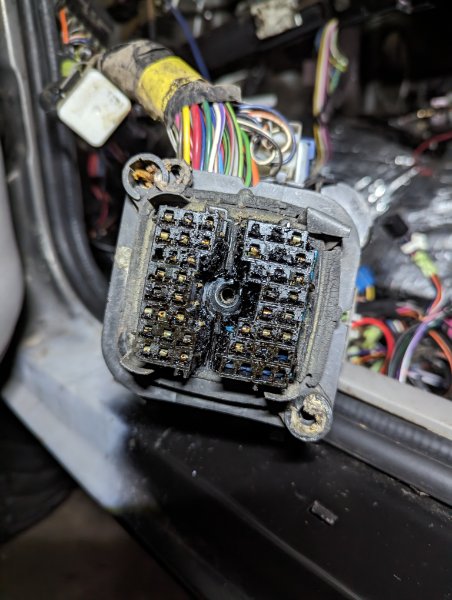
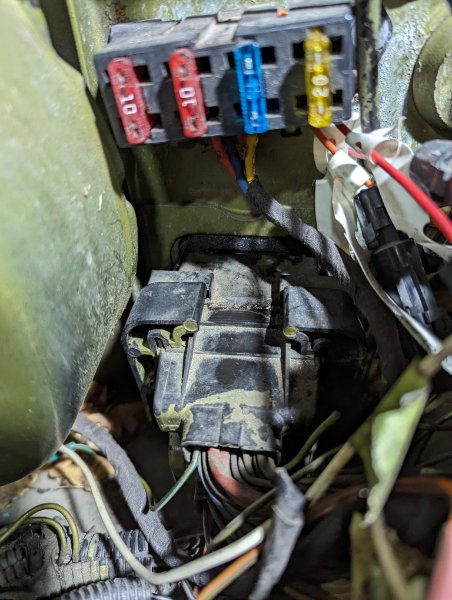
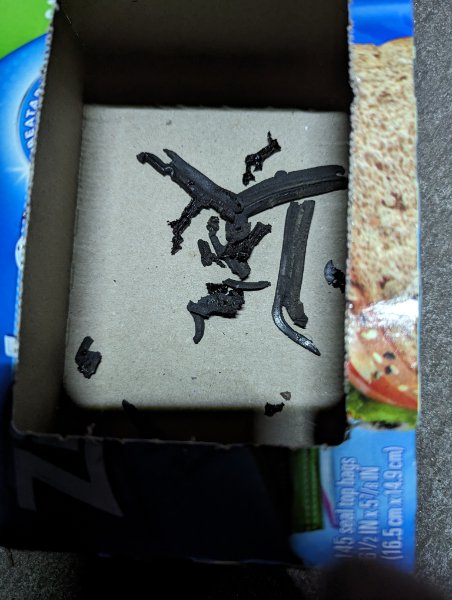
Went ahead and knocked out the fuse box tonight, the gasket fits perfectly! I didn't get all of the old black grease, but I did scrape out the bulk of it. Here you can see the old crusty gasket. It just crumbled as I tried to take it off. Here's the new gasket. A perfect fit! Nevermind the bent plastic at the top, it was like that before. Straightened it out as best I could. Here you can see the gasket peeking out before I screwed everything tight. Fingers crossed this will take care of at least one leak source!
-
1988 Comanche "Frankenjruck"
H3ADBANG4L1F3 replied to H3ADBANG4L1F3's topic in Member Projects: Your Comanches
Pulled the dash using the instructions here: https://www.cherokeeforum.com/f51/dash-removal-35444/. Lots of good info to be found if you look hard enough! Been building up a Google Drive chock full of goodies for the truck. Also plan on removing a bit of the sound-deadening, specifically on the floor of the cab. Going to be addressing all of the leaky points, but want to be able to easily clean up water in the event it does make it inside. The sound deadening holds water and makes it difficult to dry (ask me how many hours I've spent vacuuming and holding a heat gun lol) -
1988 Comanche "Frankenjruck"
H3ADBANG4L1F3 replied to H3ADBANG4L1F3's topic in Member Projects: Your Comanches
Also picked up two sets of turbines. Going to try my hand at restoring a set, the other set will be powder coated. -
1988 Comanche "Frankenjruck"
H3ADBANG4L1F3 replied to H3ADBANG4L1F3's topic in Member Projects: Your Comanches
Interior is almost completely out. Dash pulled today, just need to pull the HVAC box to take care of some problem areas for leaks. The wiring is a bit of a mess lol. Going to have to clean it up a bit! Those seat bolts are dangerous! Dad's shorts didn't make it out unharmed. Pulling HVAC box tomorrow. Windshield and rear window are next, followed by some upgrades to the vent windows a la Pizzaman. (https://comancheclub.com/topic/68921-1990-comanche-eliminator/?do=findComment&comment=763885) I also found an older pic of my truck. One of the POs did a really nice job restoring many parts of it! -
https://www.facebook.com/share/tqUay7kpqP6k4TKb/?mibextid=kL3p88
-
Very cool build. Looking forward to seeing the engine swap!
-
$1400 '87 Diesel in MS
H3ADBANG4L1F3 replied to H3ADBANG4L1F3's topic in Craigslist/eBay... i.e. Not Your Stuff
That was fast! Though I was a bit late to the party as it was posted 5 days ago. -
https://www.facebook.com/share/gVxBX8cHiS5bqgko/?mibextid=kL3p88
-
$1200 91 in TX (project)
H3ADBANG4L1F3 replied to H3ADBANG4L1F3's topic in Craigslist/eBay... i.e. Not Your Stuff
Interesting. 4200 is fairly ambitious! -
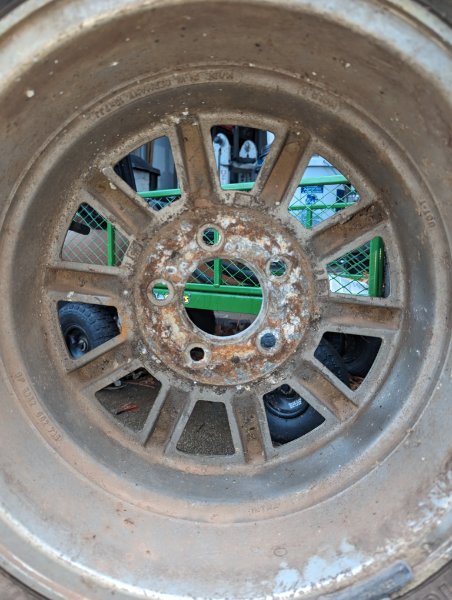
Turbine Wheel Manufacture Differences
H3ADBANG4L1F3 replied to H3ADBANG4L1F3's topic in MJ Tech: Modification and Repairs
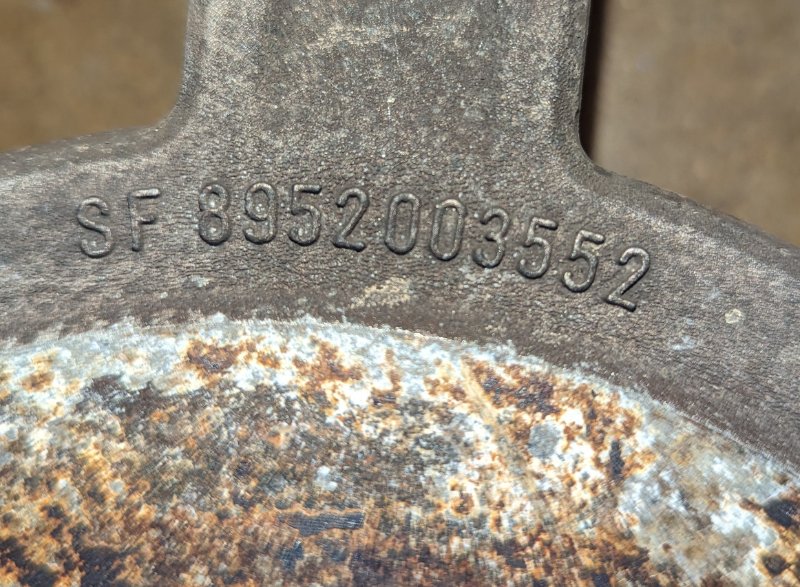
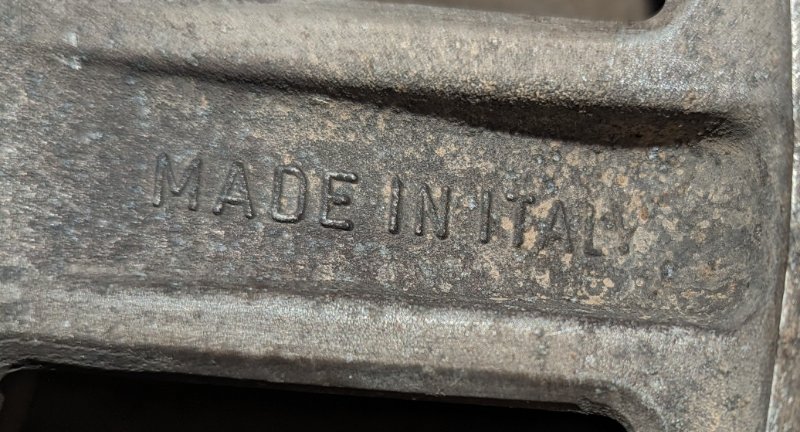
Bought 4 more today lol. 3 from the US, one from West Germany. The West German one is similar to the Italian, but has deeper grooves on the rear side of the spokes.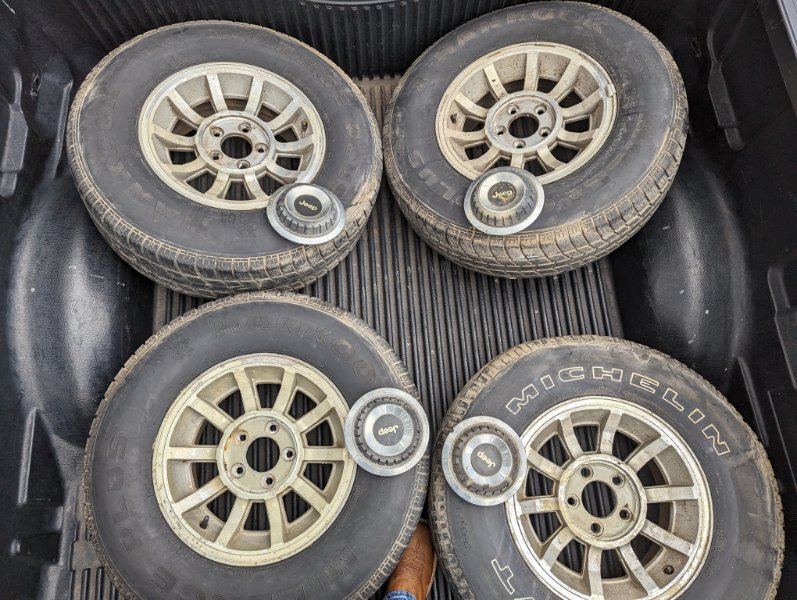
-
Turbine Wheel Manufacture Differences
H3ADBANG4L1F3 replied to H3ADBANG4L1F3's topic in MJ Tech: Modification and Repairs
Here's a much cleaner one I found from the web -
Turbine Wheel Manufacture Differences
H3ADBANG4L1F3 replied to H3ADBANG4L1F3's topic in MJ Tech: Modification and Repairs
That's what one of mine looks like! -
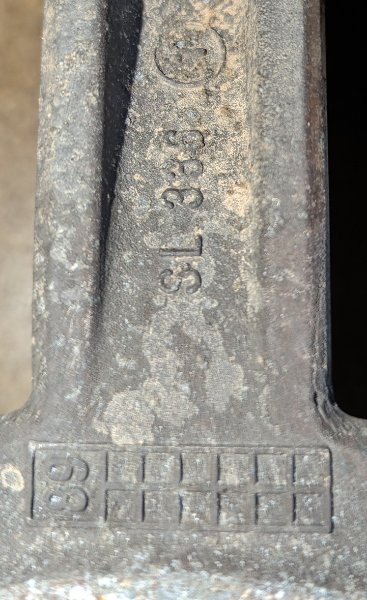
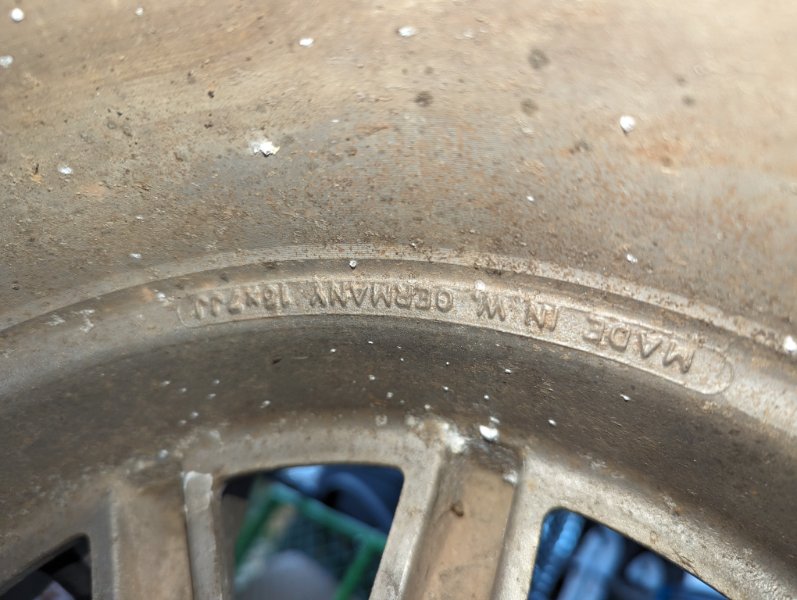
Turbine Wheel Manufacture Differences
H3ADBANG4L1F3 replied to H3ADBANG4L1F3's topic in MJ Tech: Modification and Repairs
Here are the identifying marks I could find.