
H3ADBANG4L1F3
-
Posts
143 -
Joined
-
Last visited
Content Type
Profiles
Forums
Gallery
Everything posted by H3ADBANG4L1F3
-
https://www.facebook.com/share/Jk2TWxPs2cA2tTrt/?mibextid=kL3p88
-
https://www.facebook.com/share/HSDnc5KsFvvu9TtQ/?mibextid=kL3p88
-

Custom Gaskets for HVAC
H3ADBANG4L1F3 replied to H3ADBANG4L1F3's topic in MJ Tech: Modification and Repairs
In the lab working on seals that will fit A-man930's evap orientation.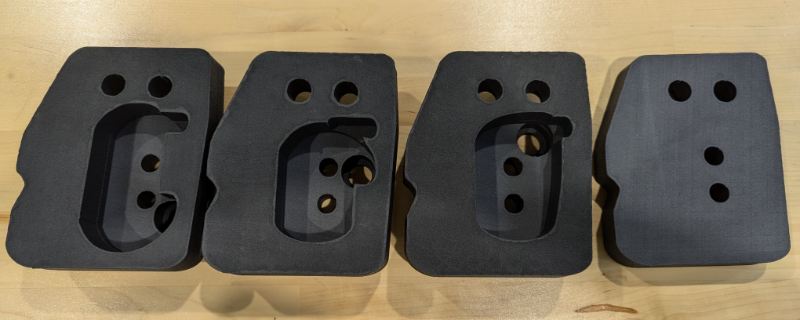
-
Custom Gaskets for HVAC
H3ADBANG4L1F3 replied to H3ADBANG4L1F3's topic in MJ Tech: Modification and Repairs
I'm assuming the most recent one I made (reply above) matches your original, yes? -
Custom Gaskets for HVAC
H3ADBANG4L1F3 replied to H3ADBANG4L1F3's topic in MJ Tech: Modification and Repairs
Back from a wedding trip and at it again! Shipping trouble with one of the gaskets I ordered but I have this one made up.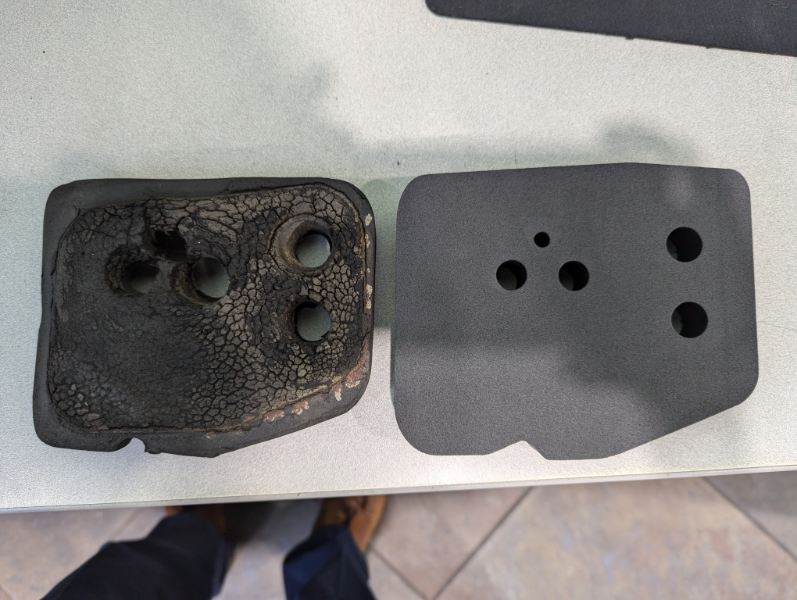
-
Custom Gaskets for HVAC
H3ADBANG4L1F3 replied to H3ADBANG4L1F3's topic in MJ Tech: Modification and Repairs
I don't see why not! If it works once I test the rubber out I'll need to get some that already have that logo -
Custom Gaskets for HVAC
H3ADBANG4L1F3 replied to H3ADBANG4L1F3's topic in MJ Tech: Modification and Repairs
Playing around while waiting on those other seals. Just printed on foam for now, rubber will be next.

-
I have that one as well. It's very nice! I picked it up on eBay for about $10 cheaper.
-
Custom Gaskets for HVAC
H3ADBANG4L1F3 replied to H3ADBANG4L1F3's topic in MJ Tech: Modification and Repairs
Put in an eBay order for both of these - going to try and recreate them as well! I looked at several different heater boxes and these two + the one that I've already made seem like all of the variants.
-
Custom Gaskets for HVAC
H3ADBANG4L1F3 replied to H3ADBANG4L1F3's topic in MJ Tech: Modification and Repairs
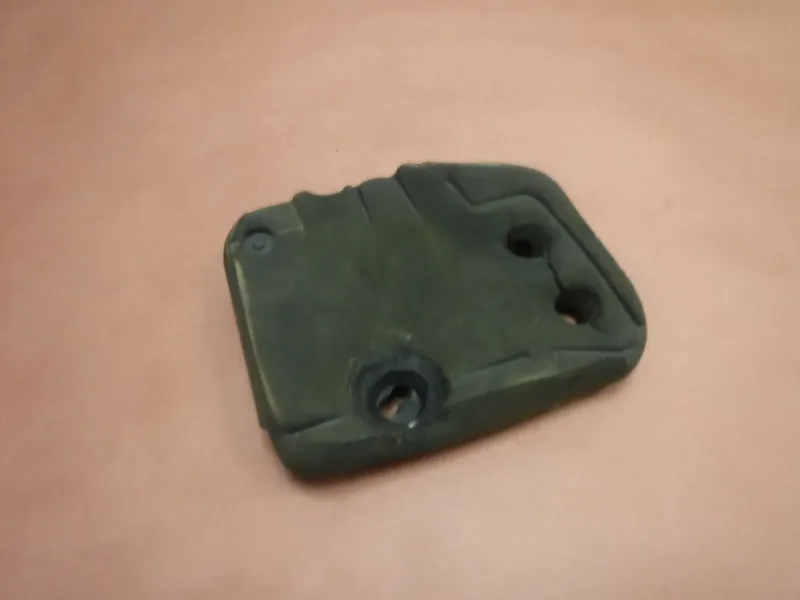
I could certainly do both, as people like yourself won't be needing the evap seal unless I can make one that works for you -
Custom Gaskets for HVAC
H3ADBANG4L1F3 replied to H3ADBANG4L1F3's topic in MJ Tech: Modification and Repairs
Alrighty so after many test fits and redesigns here are the final products. What do y'all reckon would be a fair price? I've found you can still buy the 97+ Cherokee ones, those are $60-80.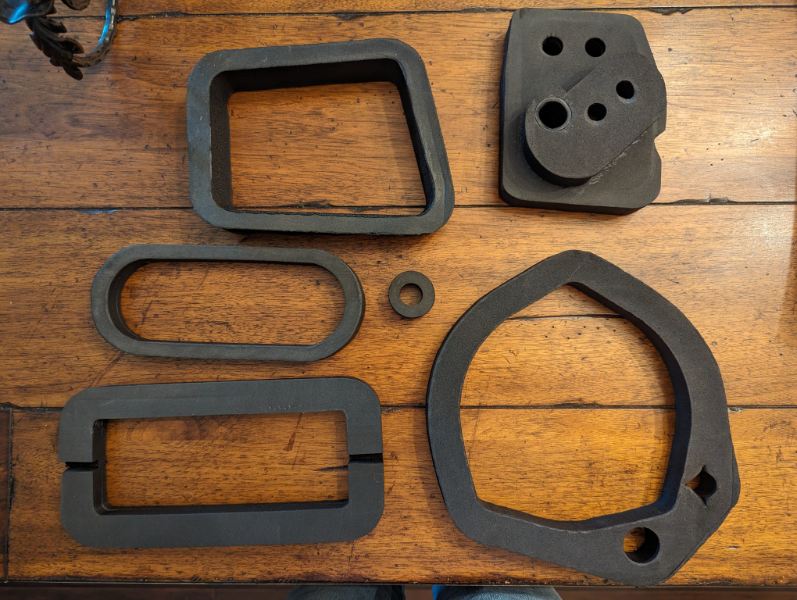
-
Custom Gaskets for HVAC
H3ADBANG4L1F3 replied to H3ADBANG4L1F3's topic in MJ Tech: Modification and Repairs
-
Custom Gaskets for HVAC
H3ADBANG4L1F3 replied to H3ADBANG4L1F3's topic in MJ Tech: Modification and Repairs
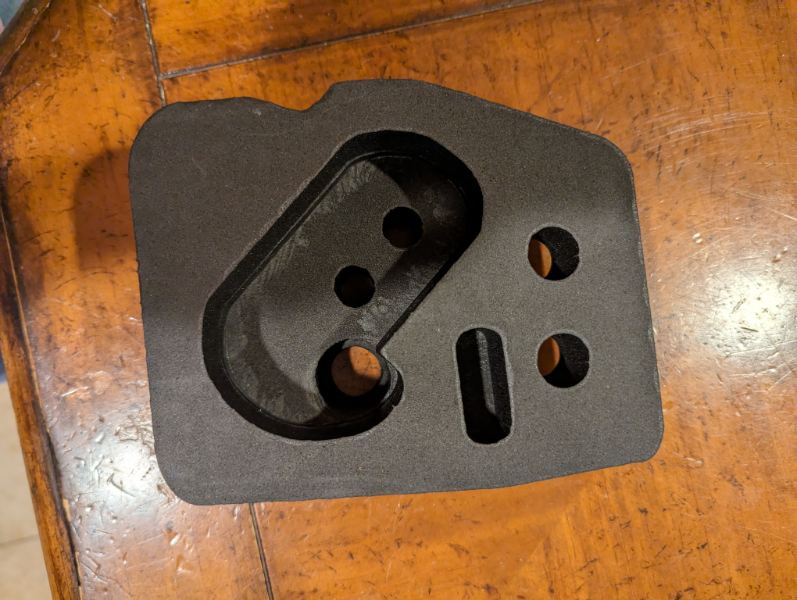
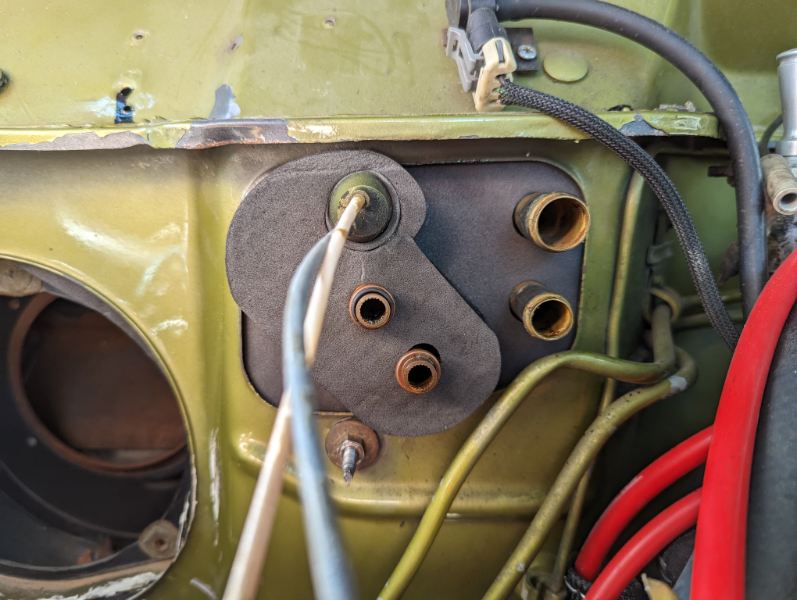
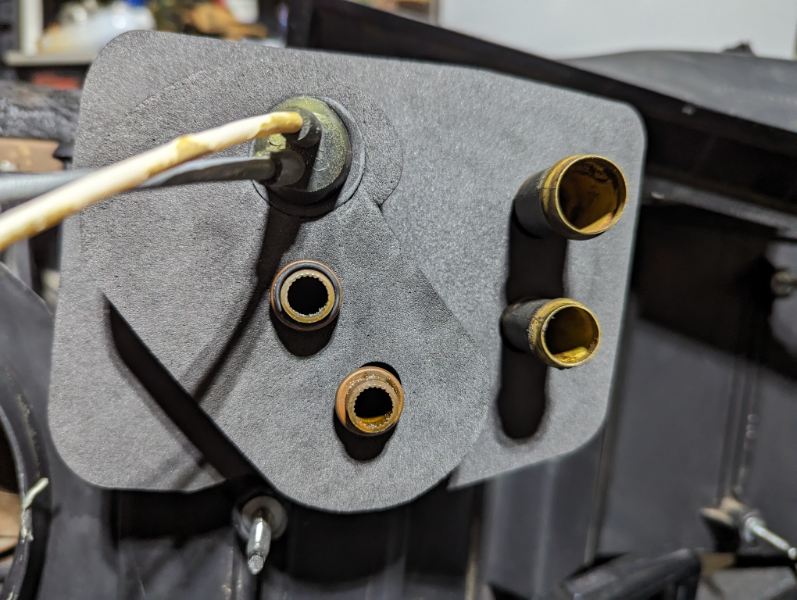
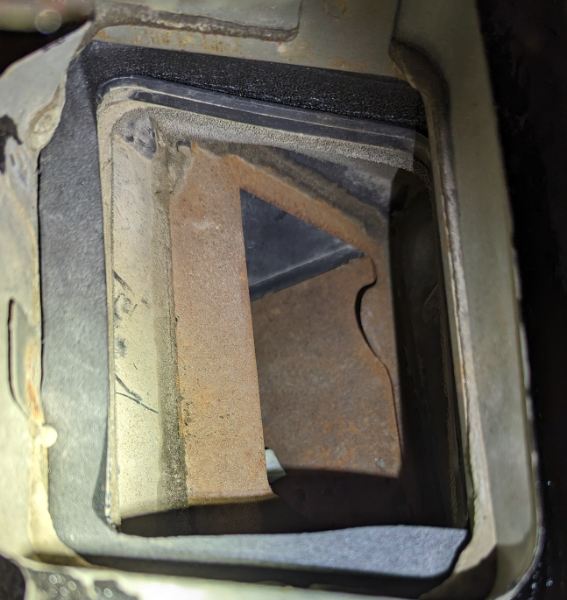
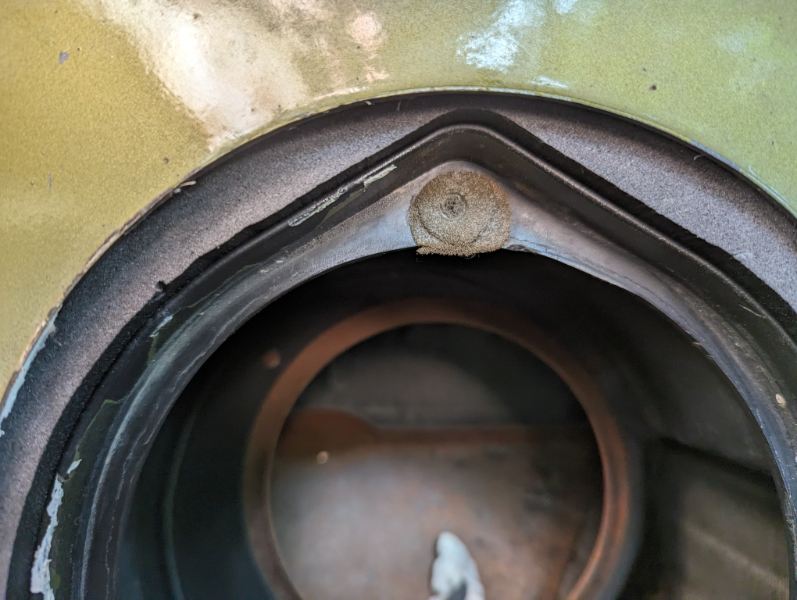
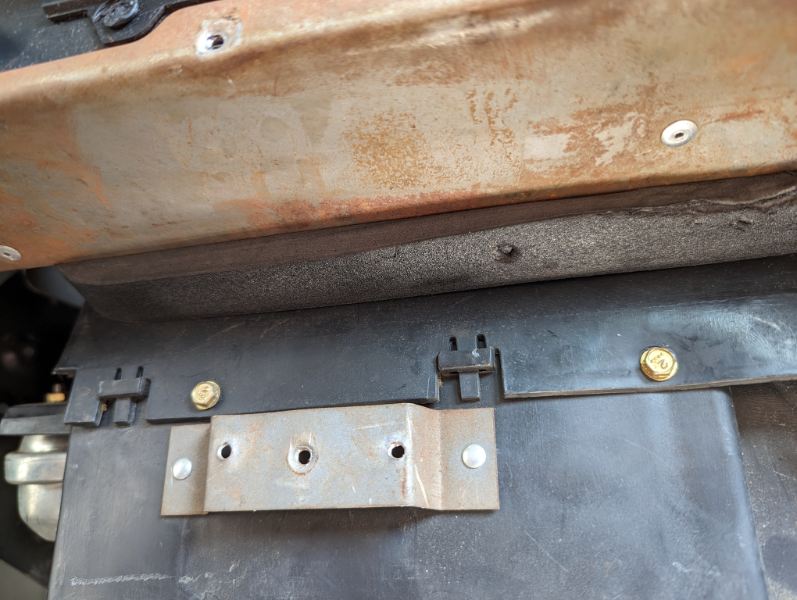
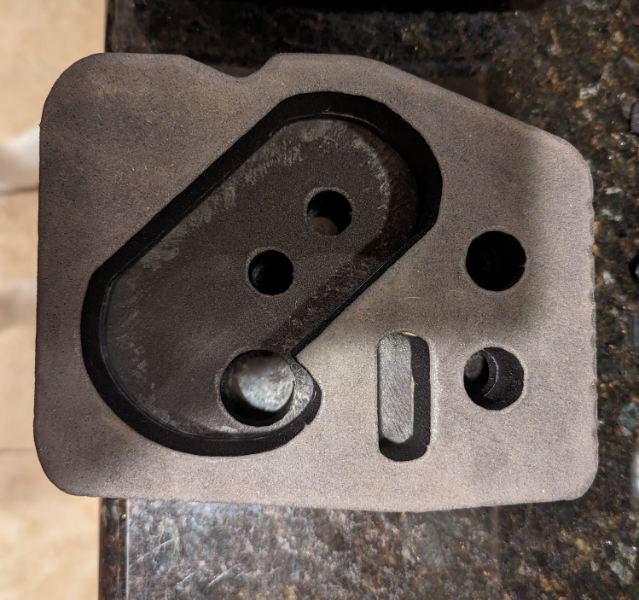
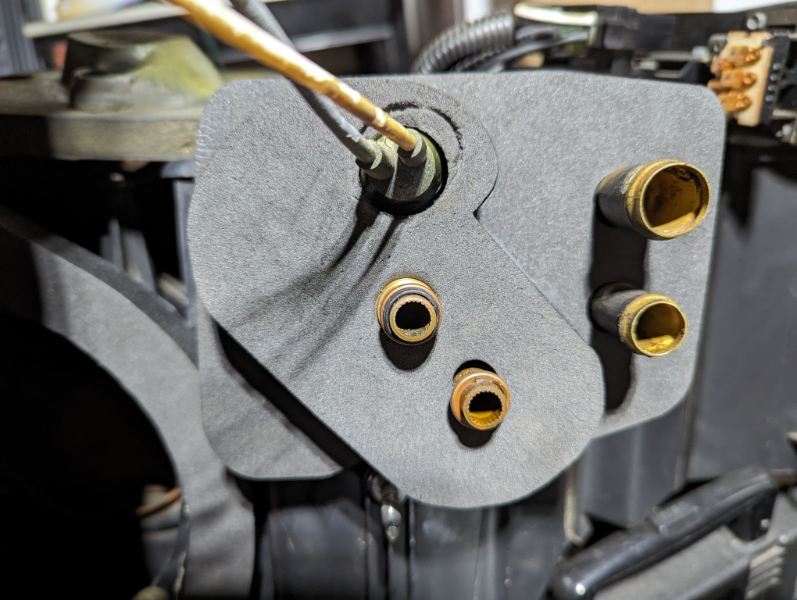
Made a few more changes and it looks like everything is working as intended! New evap seal, added an insert for the vacuum grommet Fits like a glove! Good on this end as well After tightening up the nuts on the studs the blower motor seal fit nicely Also have a gasket on this piece, never mind the rust hole lol Inside view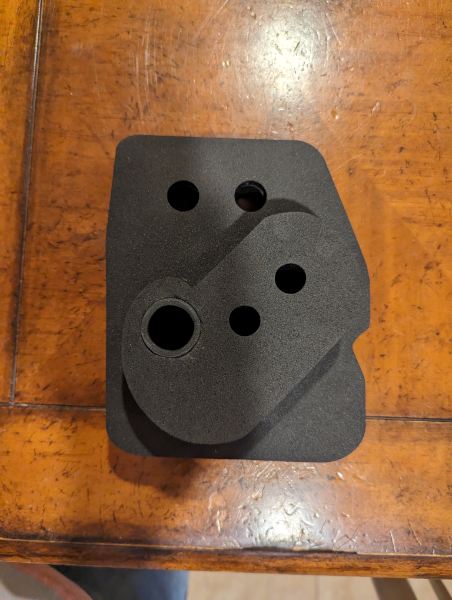
-
Custom Gaskets for HVAC
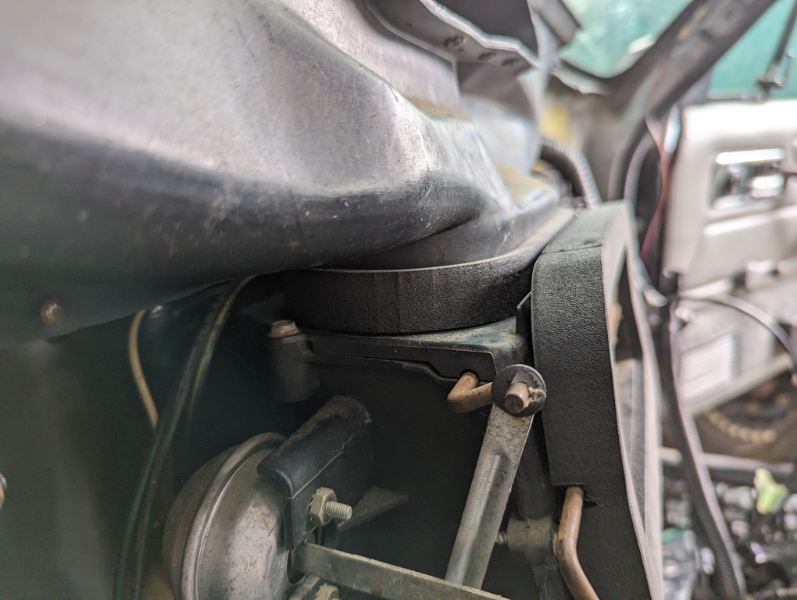
H3ADBANG4L1F3 replied to H3ADBANG4L1F3's topic in MJ Tech: Modification and Repairs
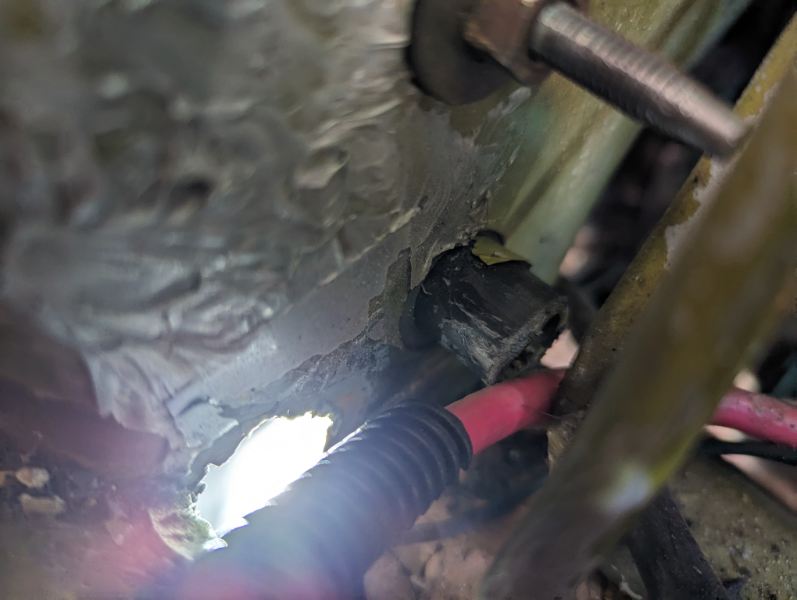
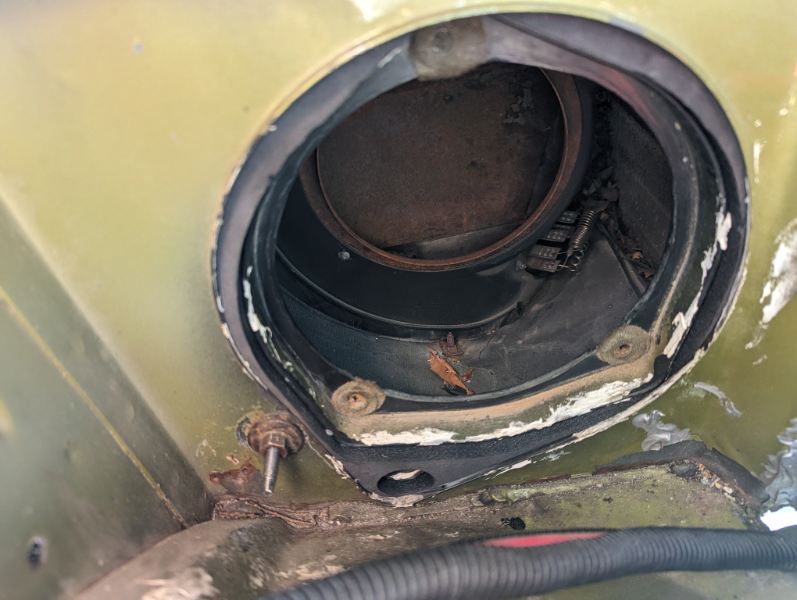
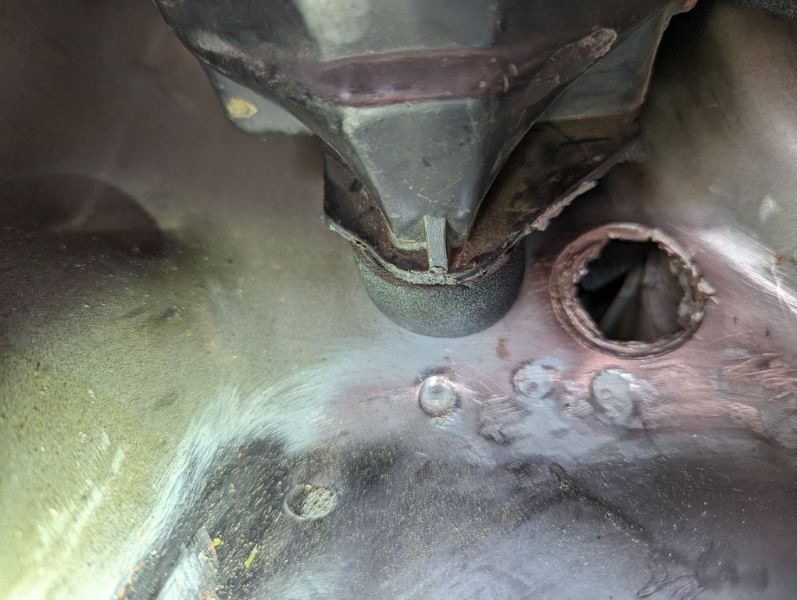
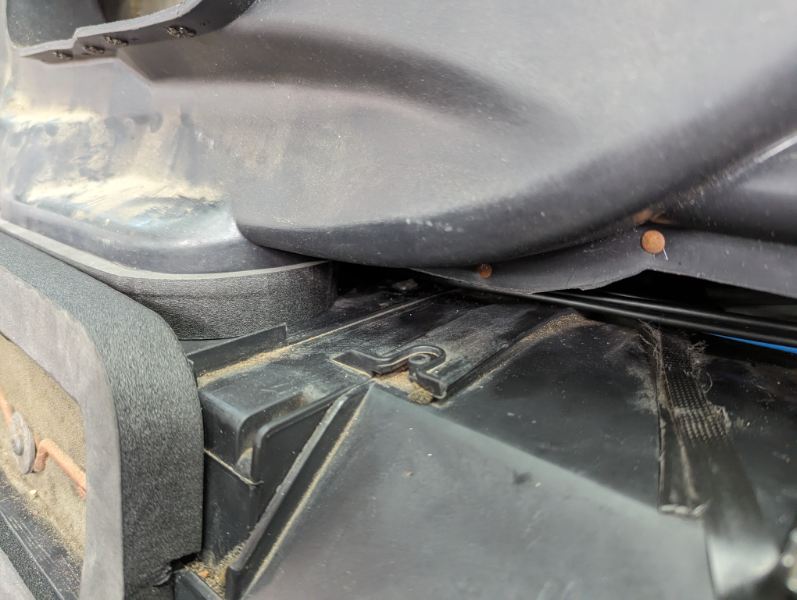
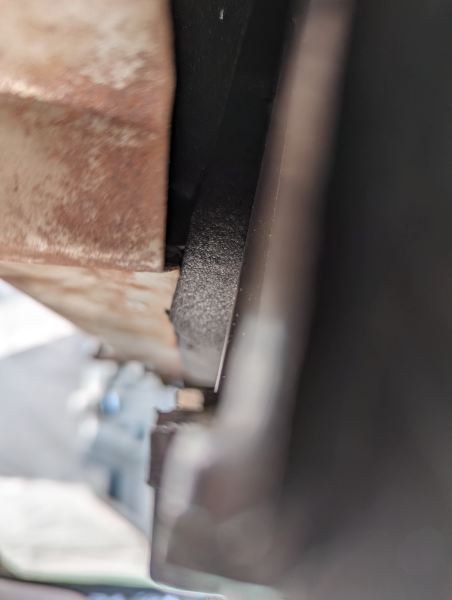
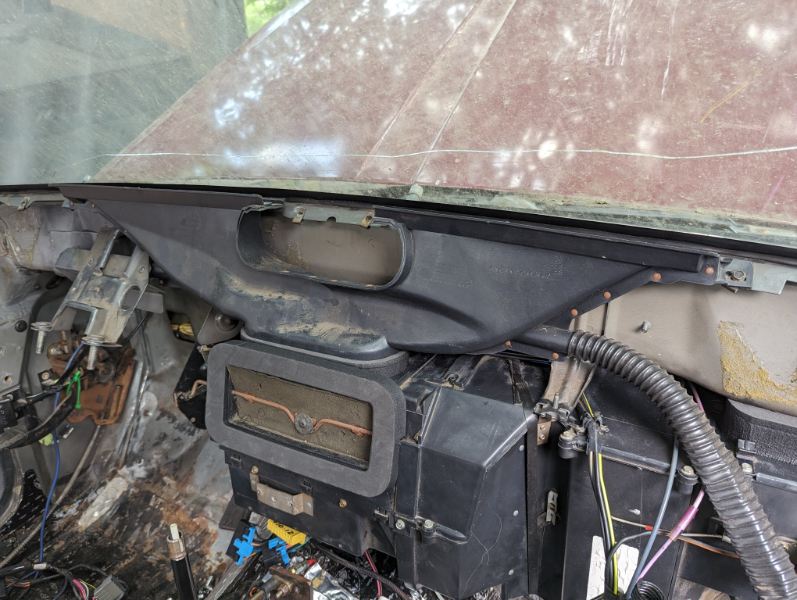
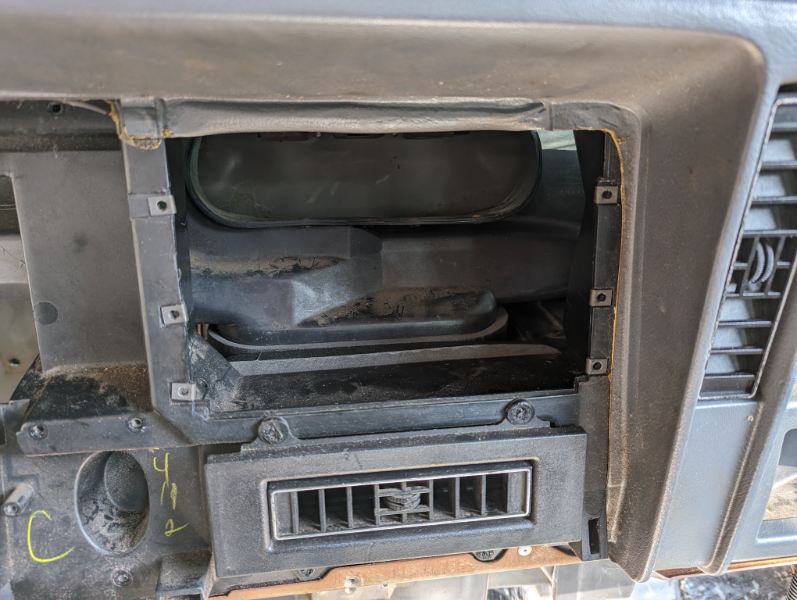
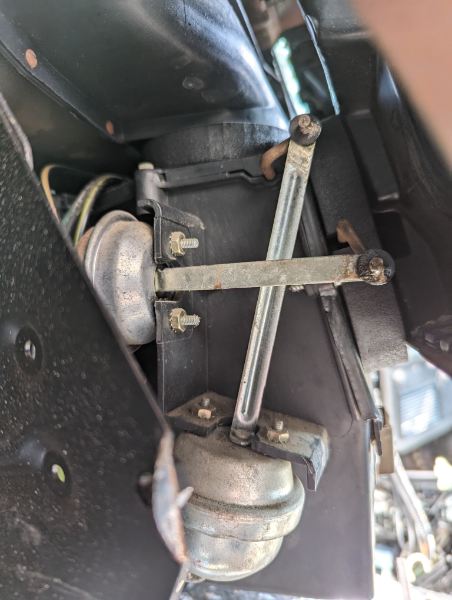
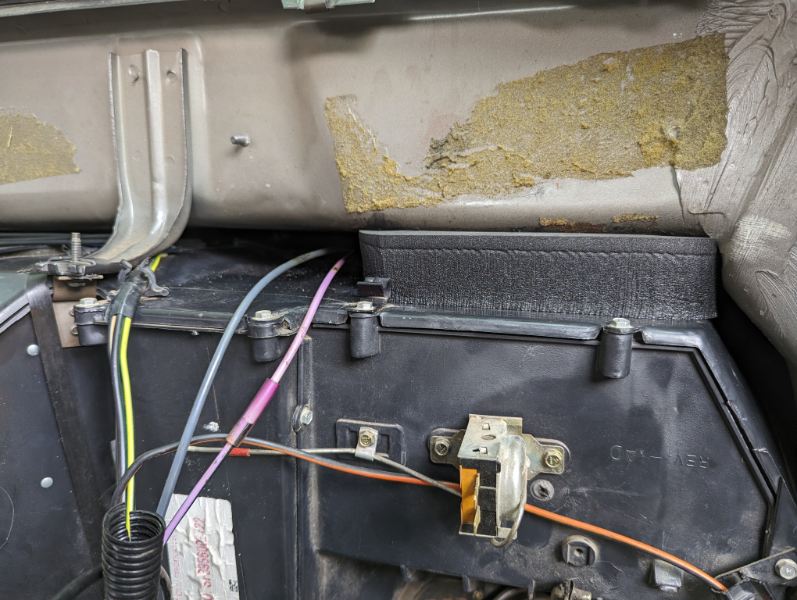
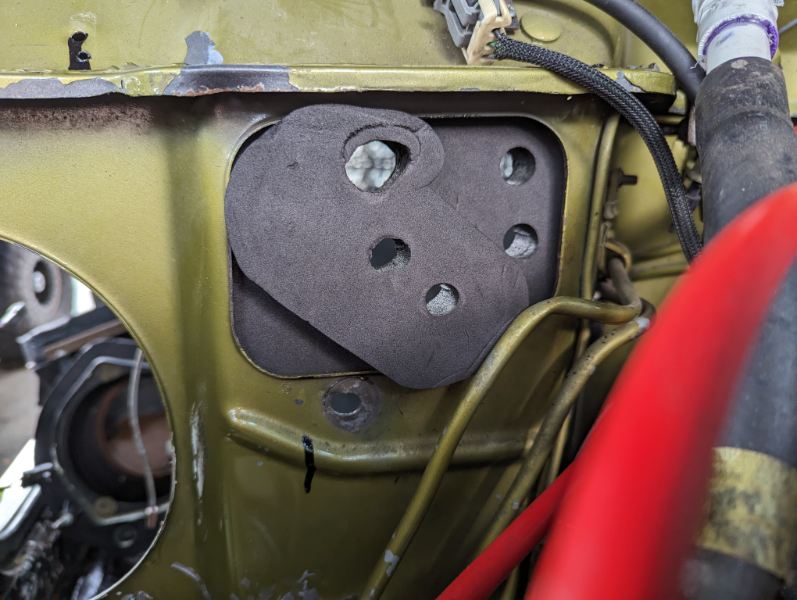
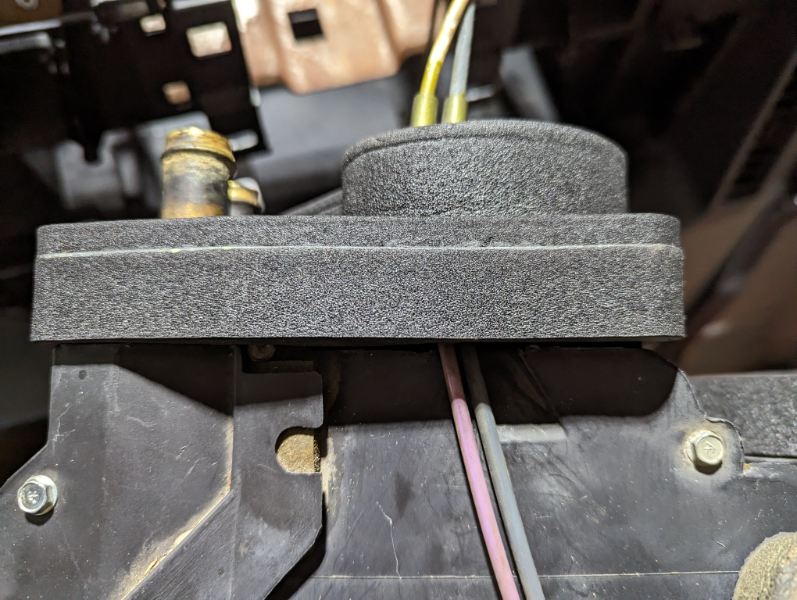
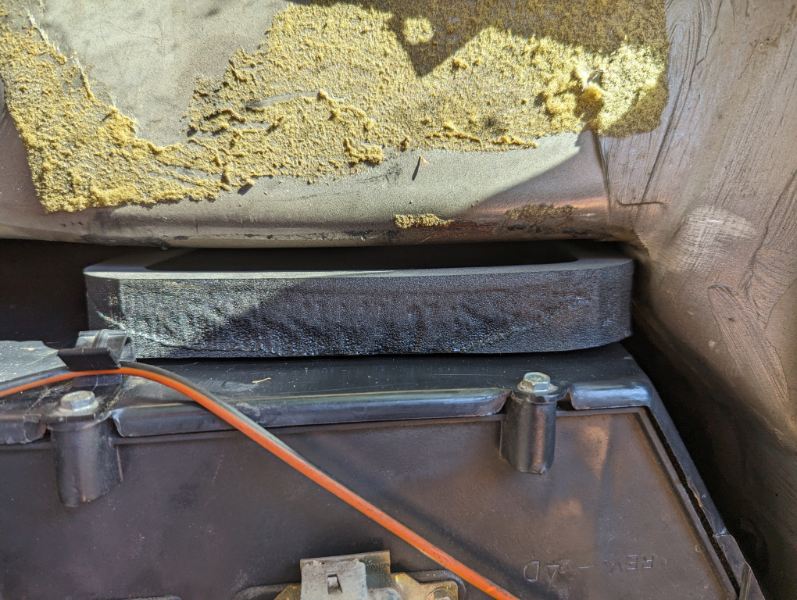
Fitting went well today! Everything other than the evap seal mates up well. I made the end piece of the evap seal a bit too large to poke through the hole, easy fix. The blower motor seal also has a slight gap at the top, may have to add just a bit of thickness to it or perhaps it will close upon tightening the nuts on the firewall studs. Will be cinching that down tomorrow (or the next time when it's not raining) to check and see. Fills up the gap nicely! The view from my fresh air intake. That hole the PO cut is at least useful! Defogger attached. Left side Right side Front view Dash attached Left side Underneath Right side (can't see much) Evap seal. Couldn't get it to fit with the heater box, shoved it in by itself. Will be trimming to fit this week at work. Besides the outermost piece being too large it fits like a glove. Blower motor. You can see a bit of a gap above the firewall stud. I'd imagine this will close when the nut is added and tightened. Will be experimenting with that ASAP. If it doesn't close the gap I'll add some more beef to this seal and try again. Top half of blower motor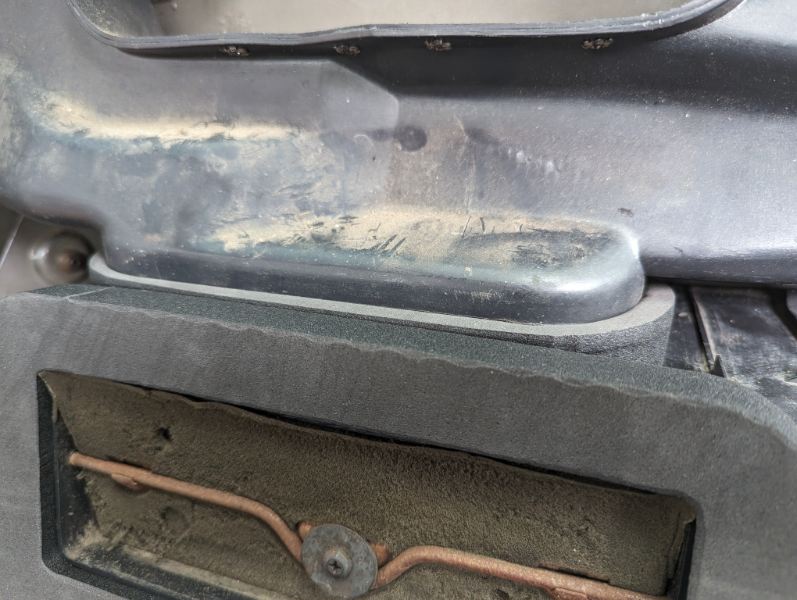

-
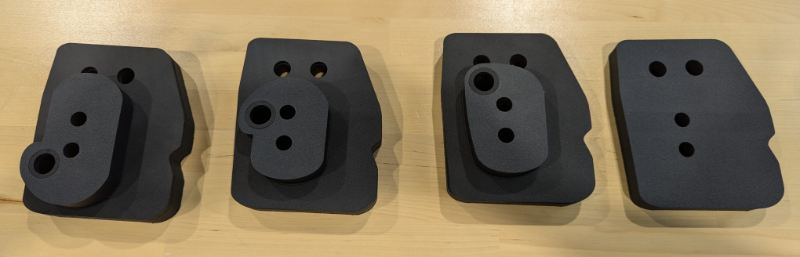
Custom Gaskets for HVAC
H3ADBANG4L1F3 replied to H3ADBANG4L1F3's topic in MJ Tech: Modification and Repairs
Evap seal is looking very good! Might make a few slight adjustments. Pushed the rubber grommet in a bit too far and messed up the front of it, but it should still work to test the fit. Got in my thicker foam as well, will laser cut some more tomorrow and do another test fit this weekend, this time installing the full dash.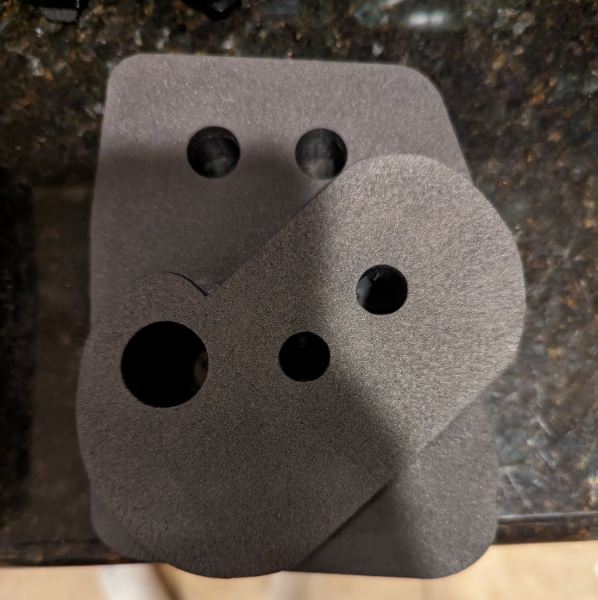

-
Custom Gaskets for HVAC
H3ADBANG4L1F3 replied to H3ADBANG4L1F3's topic in MJ Tech: Modification and Repairs
Did a bit of a test fit today. Everything seems to fit really well, need to make up for a gap on the fresh air intake so I ordered some thicker foam. If that doesn't work I'll have to get a bit more creative. Just received the other foam as well so I'll be completing the evap seal next week at work. Blower motor seal looked great on the engine bay side. Will get a more proper test fit after I make the necessary adjustments.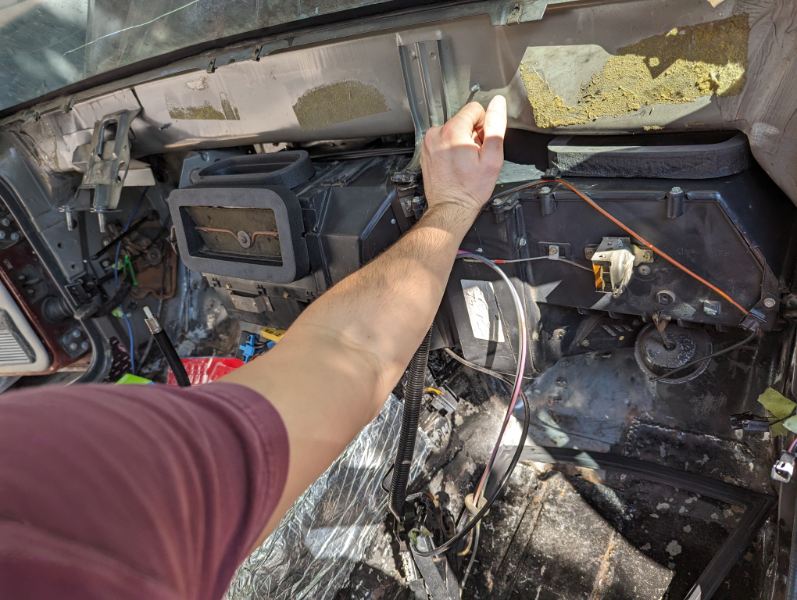
-
Custom Gaskets for HVAC
H3ADBANG4L1F3 replied to H3ADBANG4L1F3's topic in MJ Tech: Modification and Repairs
That IS different! Interesting. -
Custom Gaskets for HVAC
H3ADBANG4L1F3 replied to H3ADBANG4L1F3's topic in MJ Tech: Modification and Repairs
Still waiting on some different foam. In the meantime I made steering column and brake pedal/booster gaskets. Not sure if the one for the pedal/booster goes on the outside of the cab or the inside. I think I saw a photo of a simple square one on the engine bay side someplace. Mine is long gone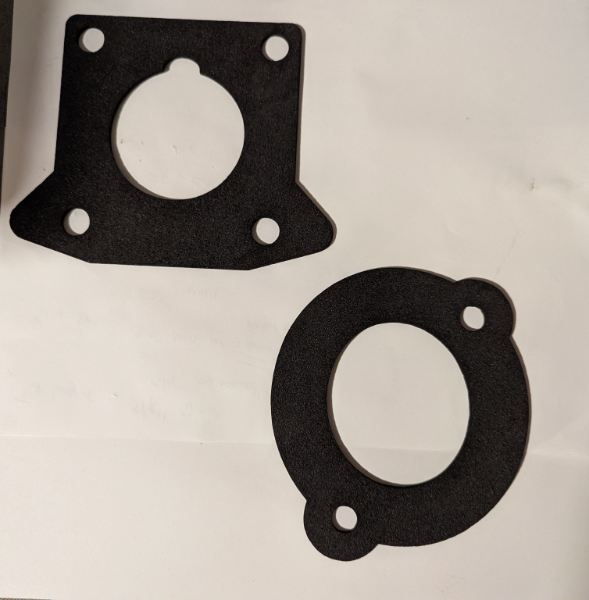
-
Is the title of the website not enough?
-
Custom Gaskets for HVAC
H3ADBANG4L1F3 replied to H3ADBANG4L1F3's topic in MJ Tech: Modification and Repairs
That said, eaglescout526 did mention that there are multiple variants of the evap/expansion valve seal. To make the other variants I'll need a source. I'll make a trip to the junkyard and see if I can find some, but if any of y'all have one that is different get in touch with me and I'll send you a full set of seals if you'll send me the one that I need to make a repro of. -
Custom Gaskets for HVAC
H3ADBANG4L1F3 replied to H3ADBANG4L1F3's topic in MJ Tech: Modification and Repairs
Not that far off! I'll be finishing up the most recent seal and that will complete all of the outer seals. Then I need to do a test fit by putting the heater box back into the truck. If everything fits nice and snug then it's ready. If not, I'll need to do slight modifications and another test fit. -
Custom Gaskets for HVAC
H3ADBANG4L1F3 replied to H3ADBANG4L1F3's topic in MJ Tech: Modification and Repairs
That's the idea! -
Custom Gaskets for HVAC
H3ADBANG4L1F3 replied to H3ADBANG4L1F3's topic in MJ Tech: Modification and Repairs
This one is a doozy! Still in testing phase for this piece, need different thicknesses of foam so I just made a mock up.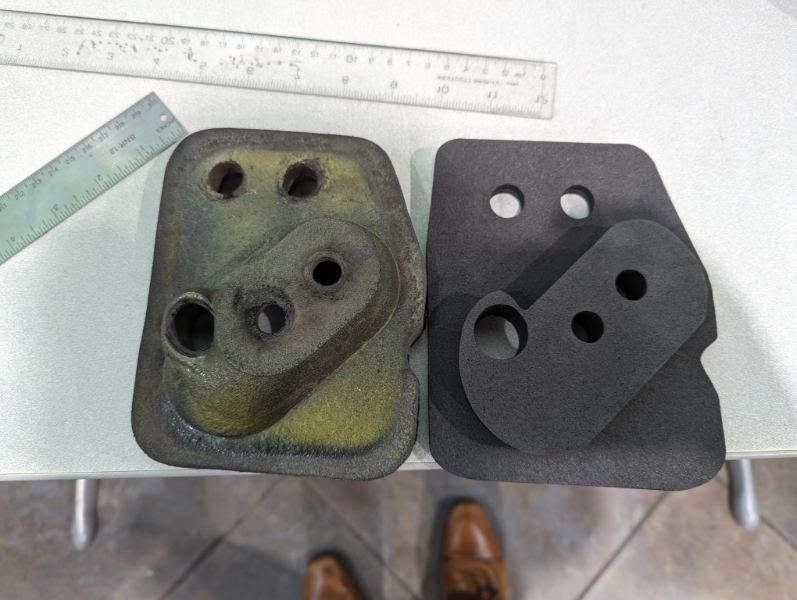
-
Custom Gaskets for HVAC
H3ADBANG4L1F3 replied to H3ADBANG4L1F3's topic in MJ Tech: Modification and Repairs
I better get this finished for all of y'all! Will be posting updates here as I test and I'll make a thread in the vendor section when I do start selling them. -
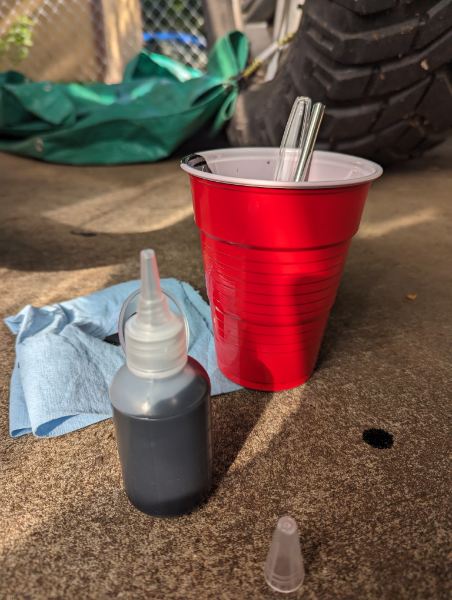
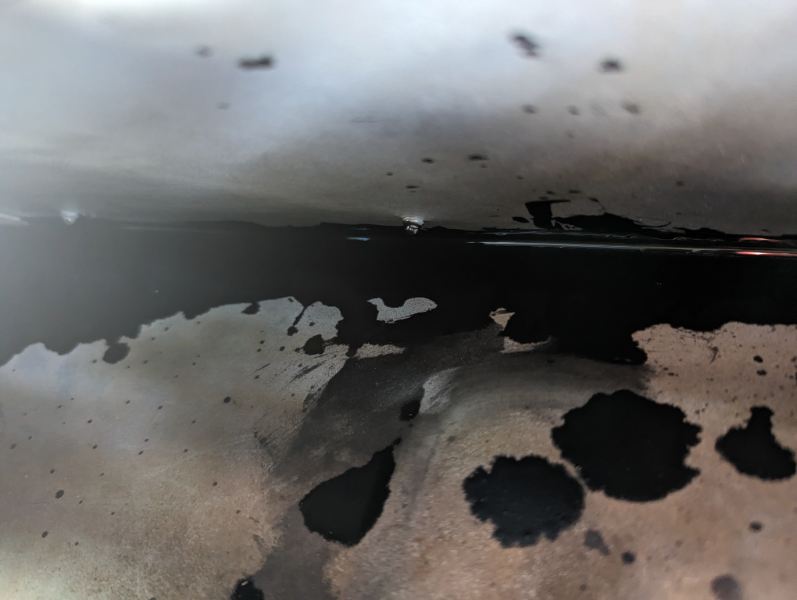
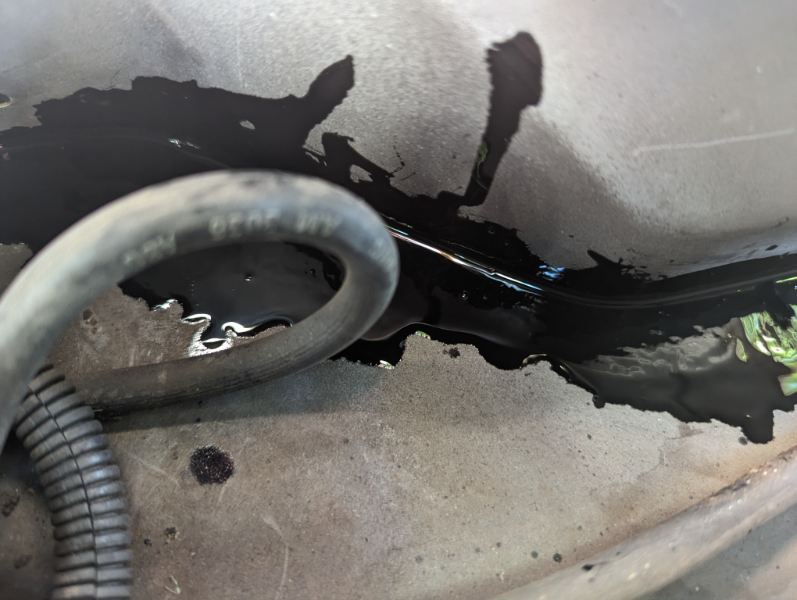
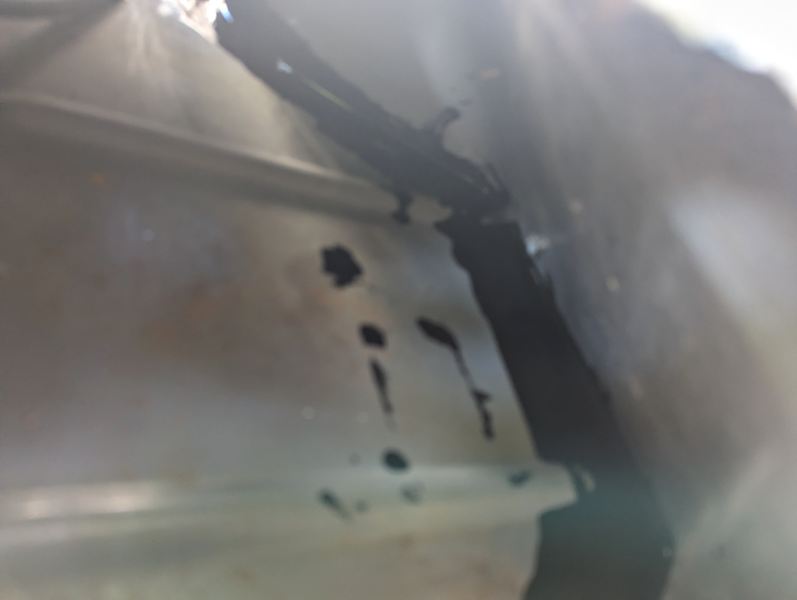
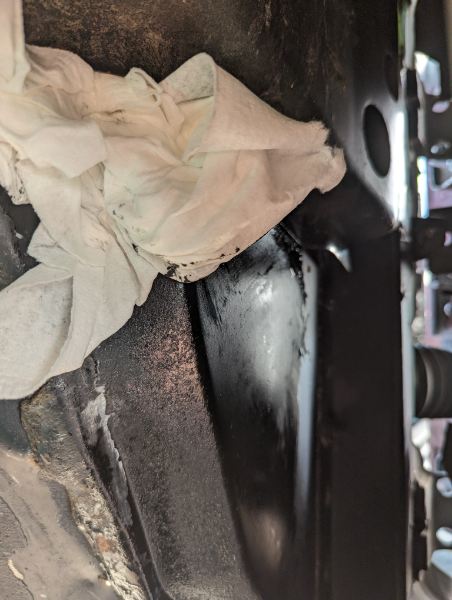
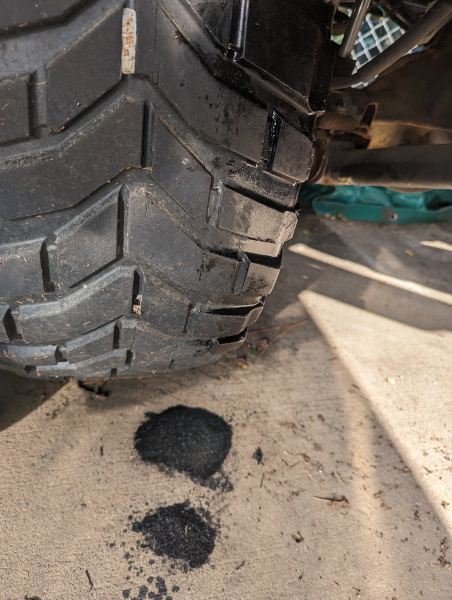
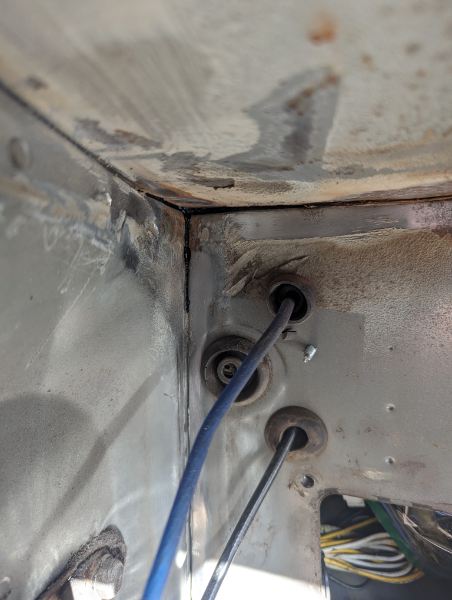
Rust at Top Edge of Firewall/Cowl
H3ADBANG4L1F3 replied to H3ADBANG4L1F3's topic in MJ Tech: Modification and Repairs
Reduced some POR15 and got it in the cowl. A little messy! This little squirt bottle was absolutely perfect for the job. Got these for making bait flavors to fish but they've come in handy a couple different times! Not the prettiest but it's doing the job! Here you can see it starting to come through into the cab. Don't be like me, be prepared for the drippage!