
FigurativeGarbage
-
Posts
44 -
Joined
-
Last visited
Content Type
Profiles
Forums
Gallery
Everything posted by FigurativeGarbage
-
1986 2.5L to 3.4L: Amateur Hour
FigurativeGarbage replied to FigurativeGarbage's topic in Member Projects: Your Comanches
Battery was fine. Starter was fine per a bench test, but I noticed a mounting ear was cracked. There have been enough issues with the starter binding, needing a lot of shims, and the possible power draw that I'm going to try a different gear reducing starter with matching bolts from British Motors Company. -
1986 2.5L to 3.4L: Amateur Hour
FigurativeGarbage replied to FigurativeGarbage's topic in Member Projects: Your Comanches
Thanks, Gojira. I have some things to work with just from an initial scan tonight. I don't see a VATS issue if I am reading the data correctly. But I do see low battery voltage while cranking (7V to 8.5V per a multimeter and the computer). I'll have O'Reilly's check and charge the battery, then I'll check again. It could be the starter is pulling too much power (misaligned?). There is an injector fault indicator, which might be wiring. I see a MAPS error, but I think that causes the PMC to use a default number and it would still fire. The MAPS connector is damaged, so I'm not very surprised. I have a spare MAPS if it's not the connector.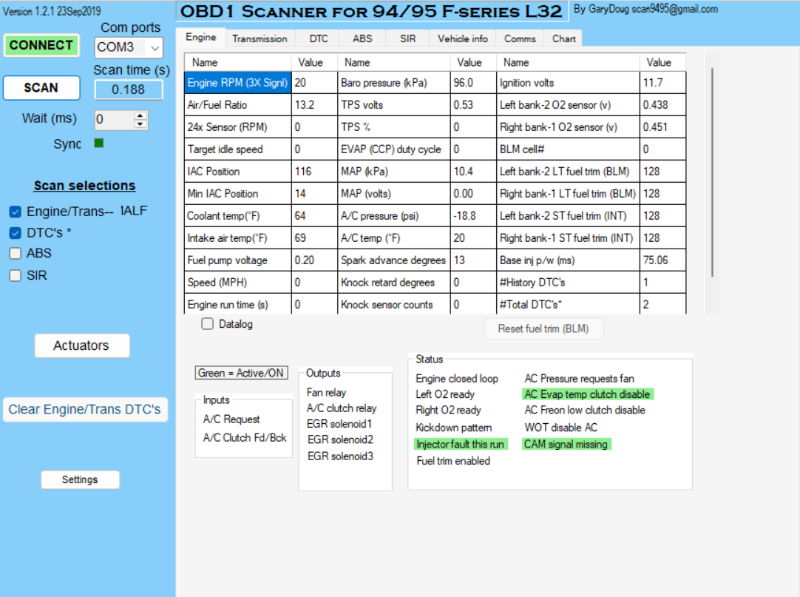
-
1986 2.5L to 3.4L: Amateur Hour
FigurativeGarbage replied to FigurativeGarbage's topic in Member Projects: Your Comanches
Great ideas. Hadn't thought about the safety switch. I still have the VATS attached, just in case I can avoid tuning. I don't have a Camaro ignition cylinder. I've looked at a number of sources and this engine seems very hard to pin down whether it is 30Hz or 50hz. I don't have a reference key to measure resistance. The diagnostic connectors arrive Saturday per FedEx, so I'll just wait and see what the scanner says. Got an adjustable throttle cable from BMC installed yesterday. Crawling towards victory. -
1986 2.5L to 3.4L: Amateur Hour
FigurativeGarbage replied to FigurativeGarbage's topic in Member Projects: Your Comanches
Reviewing my notes, the PCM I ordered years ago was actually for a 94-95 automatic, not a manual. Unclear if that matters, as I gave the seller a manual Camaro VIN for coding. I had the Timers VATS bypass set to 30Hz. I set it to the more common 50Hz. Still nothing. I can try the two other functions on that system, but your comment makes me doubtful it will help. On your suggestion, I've downloaded the Scan9495. I ordered a jumperless ALDL connection and matching wire mount, but it take a week or so for them to ship. Once I see what's happening, I'll see if I need to escalate to deleting the VATS or otherwise tuning. -
1986 2.5L to 3.4L: Amateur Hour
FigurativeGarbage replied to FigurativeGarbage's topic in Member Projects: Your Comanches
Thanks, Coheed. Yes, the noid flashes a bit. Yesterday I found that my PCM ground wires (C1 and C17) were not connected. I got one hiccup. I can still test voltage levels at cranking. I have suspected VATS (by Timers) could be the issue. I recall you ground it to change the Hz, and I am using the default setting. Agree I should get a scanner. -
1986 2.5L to 3.4L: Amateur Hour
FigurativeGarbage replied to FigurativeGarbage's topic in Member Projects: Your Comanches
The fuel pressure tester showed no pressure. Turns out the factory ground wasn't working. I reviewed Cruiser's info on grounding the fuel pump to the frame, but the frame doesn't seem well grounded. As a temporary measure, I ran a long wire a ground in the engine bay. Pump works again; pressure good. I noticed the PCM B+ wire was pulled out of its eyelet. I rewired it and the noid light lit up, but the pulse might have been weak or erratic. I tried to crank the engine again, but it still didn't fire. I checked a sparkplugs and they don't smell like gas. Then I heard a loud "pang" and checked the starter. The drive gear is stuck against the flywheel again. It must have twisted itself out of alignment. A good place to stop for the evening.... -
1986 2.5L to 3.4L: Amateur Hour
FigurativeGarbage replied to FigurativeGarbage's topic in Member Projects: Your Comanches
Oreillys rents both noid and fuel pressure testers for free. -
1986 2.5L to 3.4L: Amateur Hour
FigurativeGarbage replied to FigurativeGarbage's topic in Member Projects: Your Comanches
I had a muffler shop install a custom y pipe and new catalytic converter. I cleaned up some of the wiring with a electrical manual for the Comanche. Finished the cooling system, with the heater core temporarily bypassed. I left the heater hoses long enough that I can reconnect the core later if I want. I also filled and bled the power steering system enough that the pump should be safe to run. I bought a cheap mechanical oil-pressure test kit. After a few short cranks, the gauge came up to about 55-60 PSI. I built a simple 3-inch intake using a Spectre flexible duct. I installed the IAT sensor in one of the rigid couplers. I still need to make the crankcase fresh-air connection from the passenger-side valve cover into the intake, but for purposes of initial startup I am leaving that valve-cover port open. The vacuum system has also been simplified considerably. I am not dealing with EVAP yet. The MAP, fuel-pressure regulator, and PCV system are the only engine-vacuum items I am concerned about for initial startup. I ordered a replacement throttle cable from BMC and installed the firewall guide, but I am missing the original Camaro throttle-cable bracket. Until the bracket from ebay arrives, I can operate the throttle with my hand during the initial break-in. I made my first attempt at breaking in the engine. The engine cranked normally, but no fire. I pulled a plug and confirmed that I have spark. The plug looked dry and did not smell like fuel. I then unplugged one injector and confirmed approximately 12.3 volts at the injector connector with the key in RUN. I tested the PCM controlled ground. It flashed something like 7 volts once while cranking. Tomorrow I'll pick up a rental noid-light set and a fuel-pressure tester (I tested it two months ago, but want to make sure). If fuel pressure is still correct but there is no injector pulse, I have to check wiring/PCM/VATS. -
1986 2.5L to 3.4L: Amateur Hour
FigurativeGarbage replied to FigurativeGarbage's topic in Member Projects: Your Comanches
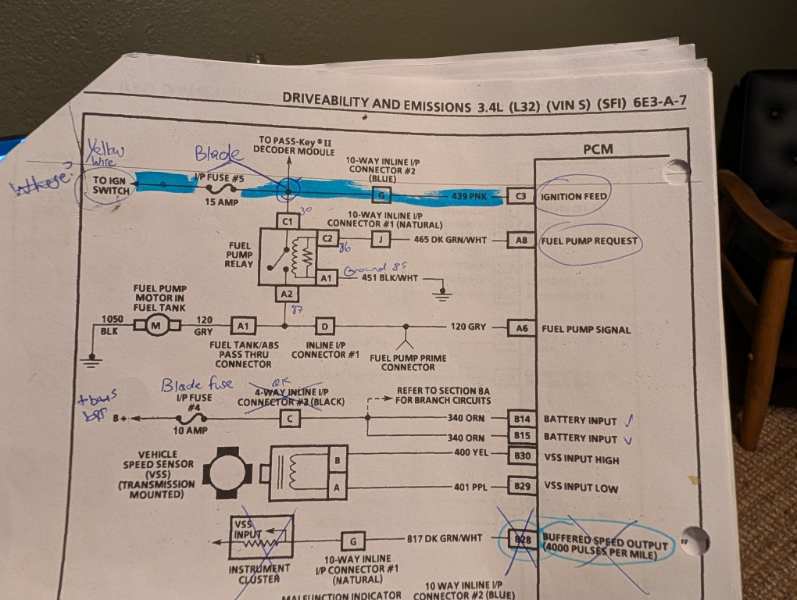
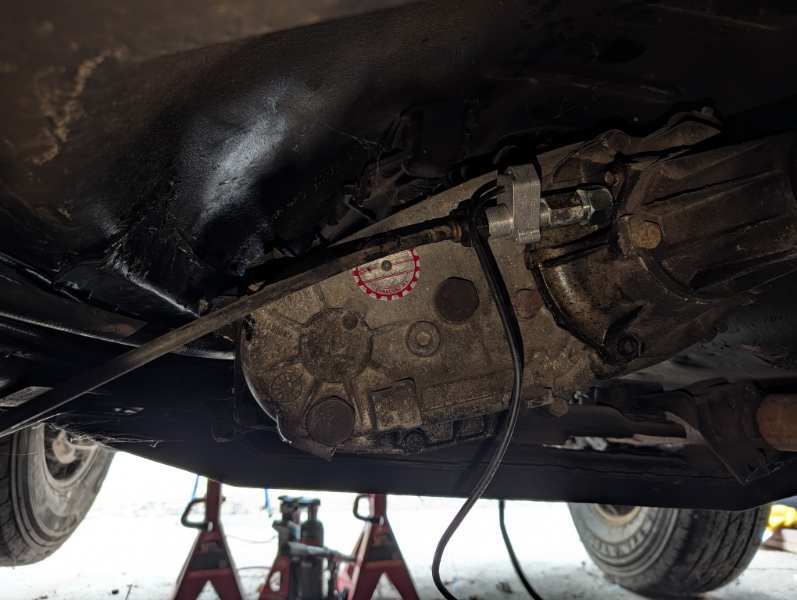
I installed EFI-rated fuel hose and filter, but still had to build the pump relay and resolve my switched ignition and constant power wiring. I added a 125-amp terminal fuse at the battery feeding a positive bus bar and switched the starter relay wires over. I also installed a ground bus tied directly into the battery ground system. The VATS bypass is connected to the same switched ignition source. I’m using the GM VATS Bypass Module for LS1 and LT1 from Timers. After some troubleshooting with the multimeter, I found a missing PCM ground connection. Once that was corrected, the fuel-pump relay clicked and the pump finally hummed. I rented a fuel-pressure gauge from O’Reilly Auto Parts. It connected easily to the Schrader valve on the fuel rail. The pressure came up into the low-40 PSI range and held. I installed a Dakota Digital pass-through speedometer sensor at the transmission as well. This allows the PCM to receive the electronic vehicle-speed signal while keeping the original mechanical speedometer cable and factory dash functional.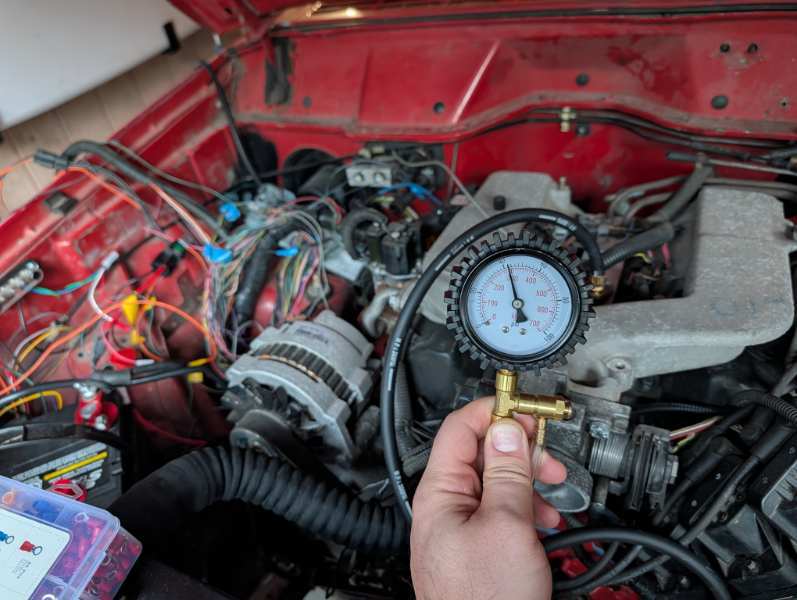
-
I've written some stuff on an early 90's 3.4L Camaro engine. I'm about to pick up the project again after a year on the backburner. I made wiring diagrams and such.
-
1986 2.5L to 3.4L: Amateur Hour
FigurativeGarbage replied to FigurativeGarbage's topic in Member Projects: Your Comanches
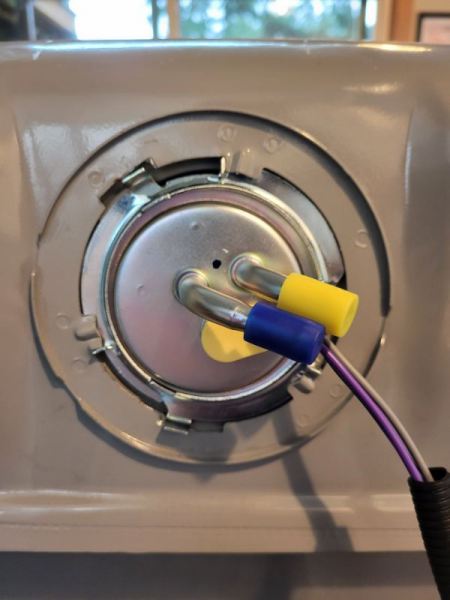
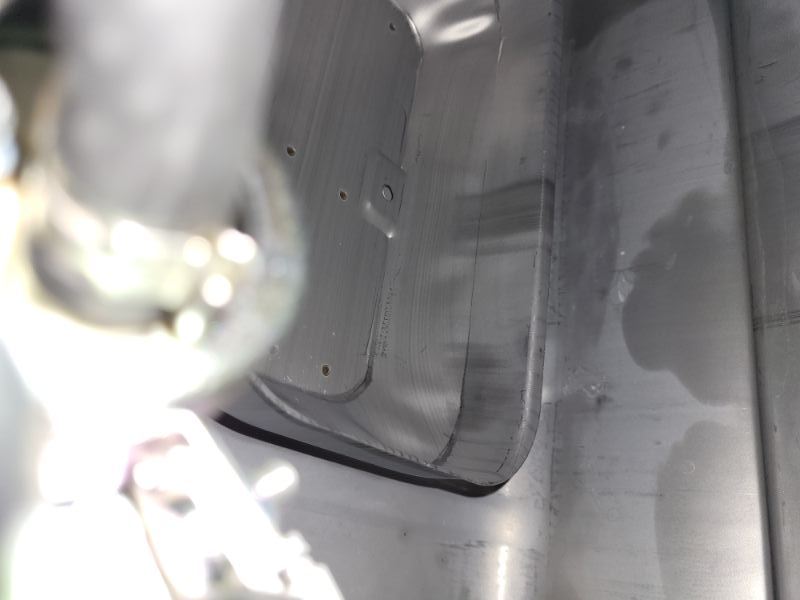
Seems to have fixed pump/baffle issue. I haven't seen anyone else do this, nor has it been suggested. I hope it works. In the image below, cut the sender guides on the tank wider (at 7 and 11 o'clock). At this orientation, the pump won't press into the baffle wall. I also was able to get the sock on with one hand in the tank. Had to walk away from it twice before I had an aneurysm.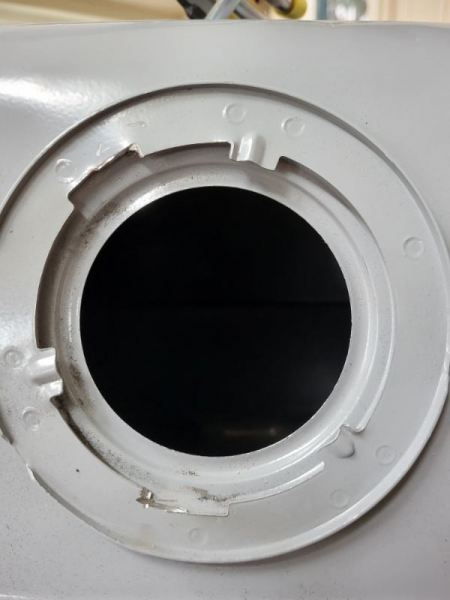
-
1986 2.5L to 3.4L: Amateur Hour
FigurativeGarbage replied to FigurativeGarbage's topic in Member Projects: Your Comanches
Looks like I have a common issue: the baffle in the tank is in the way. However, it seems that if you turn the sender just a few degrees to the right, the pump will point straight down and sit in the baffle. This would require doubling the space for the guide tabs, but it seems easier than cutting the baffle (and compromising its function) getting a new tank, bending the sender, or getting a new sender. My hope is the gasket under tension keeps it aligned. It seems no one else has done this in the other threads. Also, the fuel gage is in the way when installing, so I have to partially disassemble the sender and reassemble it with one hand it the tank. I can do this, but getting the sock on the pump with one hand feels like a carnival game.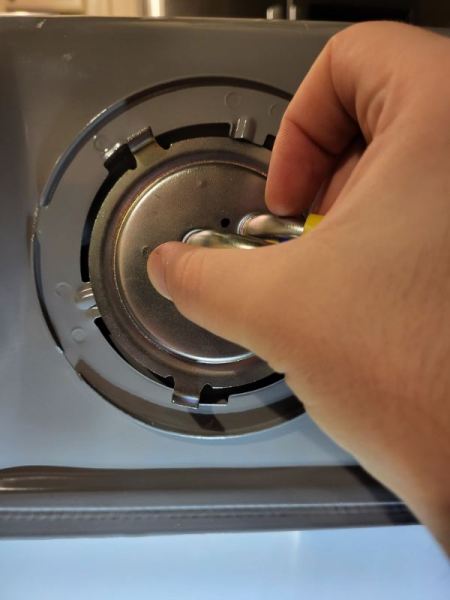
-
1986 2.5L to 3.4L: Amateur Hour
FigurativeGarbage replied to FigurativeGarbage's topic in Member Projects: Your Comanches
Looks like I'll go for the MTS JPSU-6P4.0. Seems like it will provide enough flow and PSI for the 3.4L. https://www.mtscompany.com/sendingunits.htm $39? Its like $65-$160 everywhere else: https://a.co/d/hePOZeq -
1986 2.5L to 3.4L: Amateur Hour
FigurativeGarbage replied to FigurativeGarbage's topic in Member Projects: Your Comanches
Dropped the tank and pulled the sending unit. As I suspected, there's a hole near the rear grommet that is likely the source of water contamination. After I get a new tank, I need a fuel sending unit that will deliver 36-50 PSI to the Camaro engine. I prefer to do it in tank, but I'm not interested in figuring out a complicated custom system. I may do in-line so I can get this fired up this year. I'll need new fuel lines for the pressure in any case. Open to thoughts.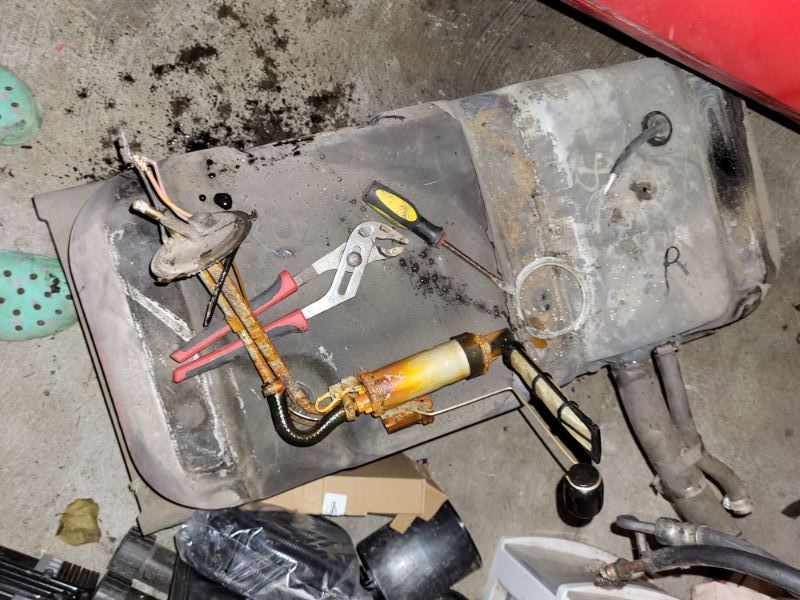
-
1986 2.5L to 3.4L: Amateur Hour
FigurativeGarbage replied to FigurativeGarbage's topic in Member Projects: Your Comanches
Spent some time this weekend sorting the original engine bay wiring a bit more. There are still several mystery connections to resolve (hanging outside of the cabin in the pic below). I removed the auxillery lights and relay for now. I also removed the fuel pump and what I think was the B+ latch relays as they look pretty corroded. I ordered a relay box and bus bar to help clean things up. I'll also relocate the electric fan relay the previous owner installed. Frustratingly, I found water in the passenger side cabin. I see in other posts this isn't terribly uncommon and is likely either the hood hinge seal or the blower/heater seal. I'm not wild about pulling the dash right now. Goal is to try and get the motor started soon.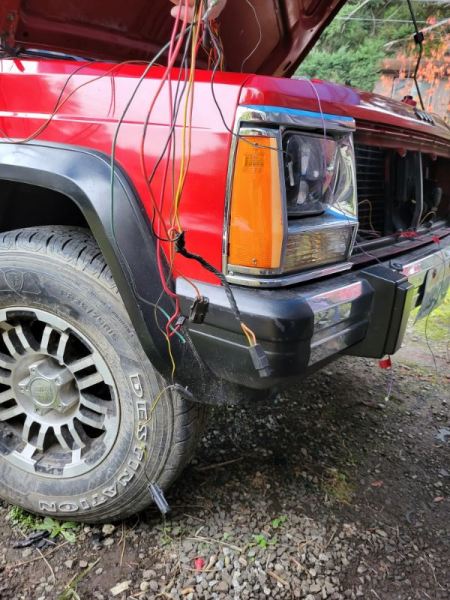
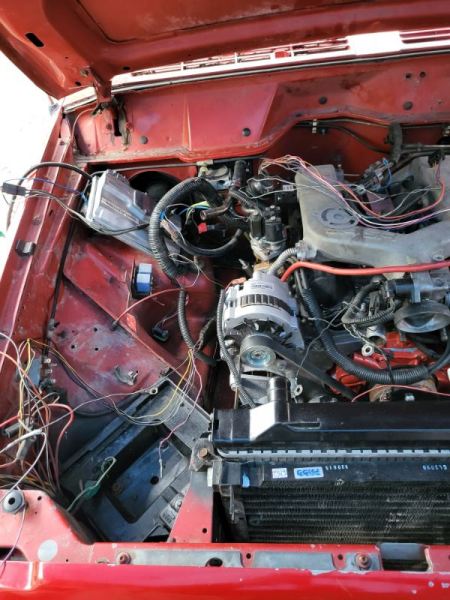
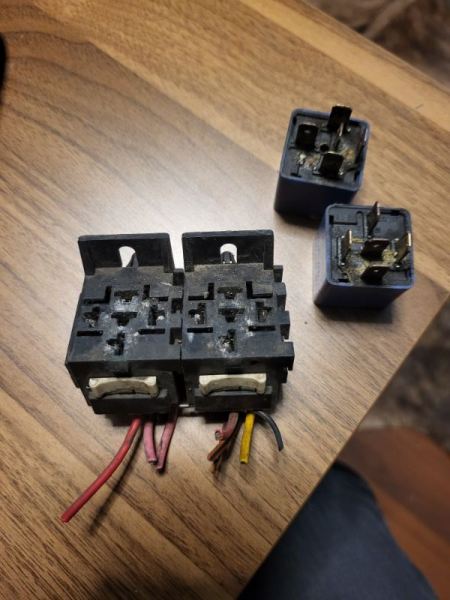
-
1986 2.5L to 3.4L: Amateur Hour
FigurativeGarbage replied to FigurativeGarbage's topic in Member Projects: Your Comanches
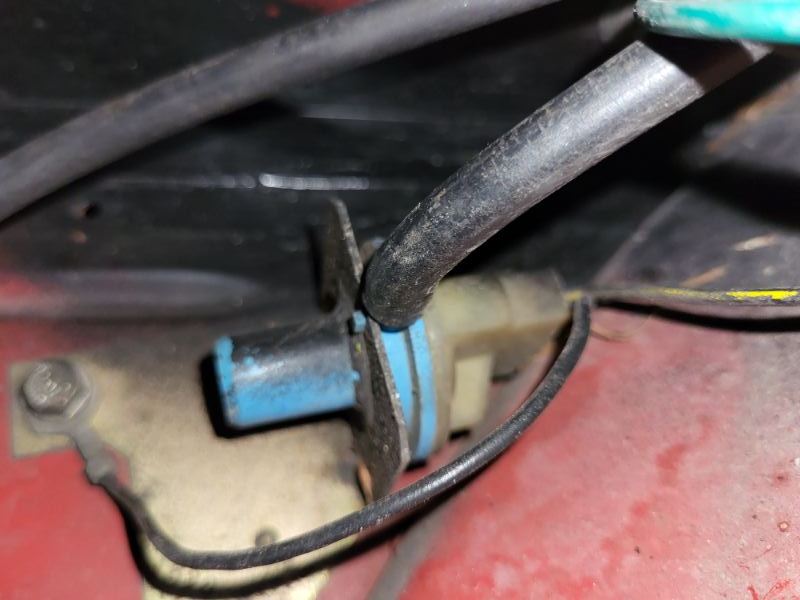
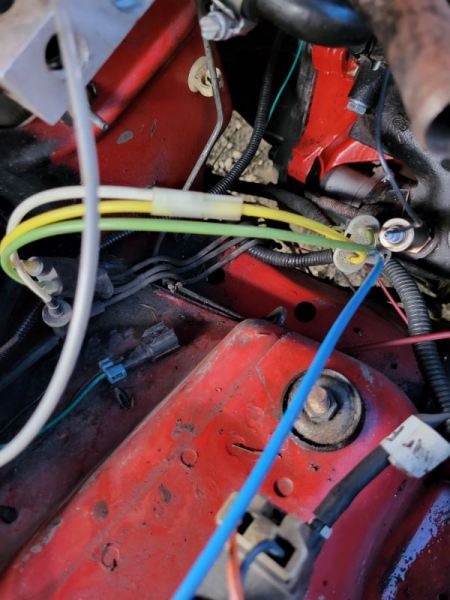
It has those sections, for sure, but they don't have the illustrative diagrams that I found helpful as an amateur (pinouts, harness routes, etc.). If I'm wrong, let me know what page or upload (if you have have a chance). For example, white, yellow, and green run to the axle and I am guessing they are the 4wd actuator. Identifying these will take some time, but I suspect they are no longer necessary unless they run to the gauges. Points if you know what this is.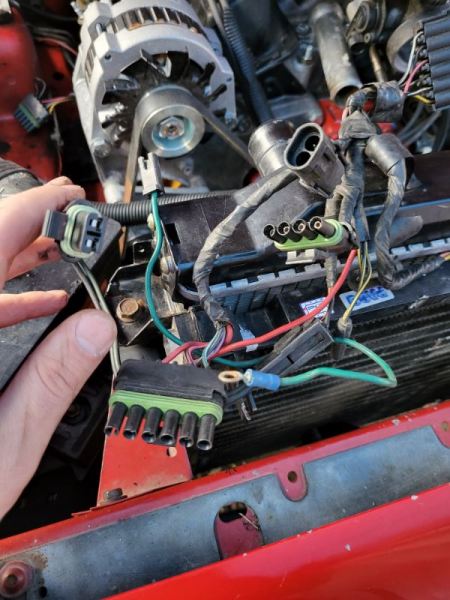
-
1986 2.5L to 3.4L: Amateur Hour
FigurativeGarbage replied to FigurativeGarbage's topic in Member Projects: Your Comanches
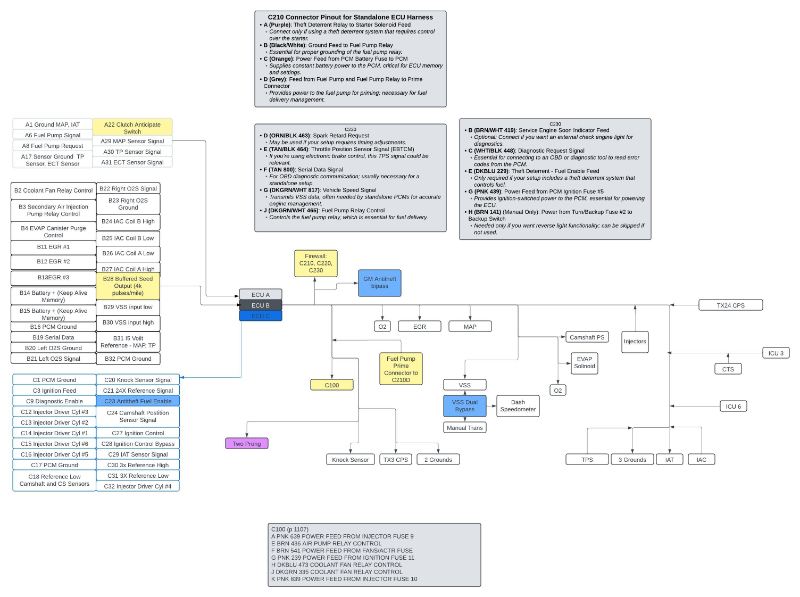
I removed the starter solenoid because the new starter has an attached solenoid. I'm thinking I'll keep the ignition relay. I removed the ICU/distributor (between the original fuses and alternator). The standalone wiring harness is largely thinned save for figuring out the C### connections. I need to clean up the remaining original wiring a bit more (A/C related, I/P to engine connectors, etc.). It is harder to find information on the 2.5L Comanche; the service manuals are not as thorough as the Camaro manuals I've been using for the engine (wiring diagrams for the instruments, headlights, etc.).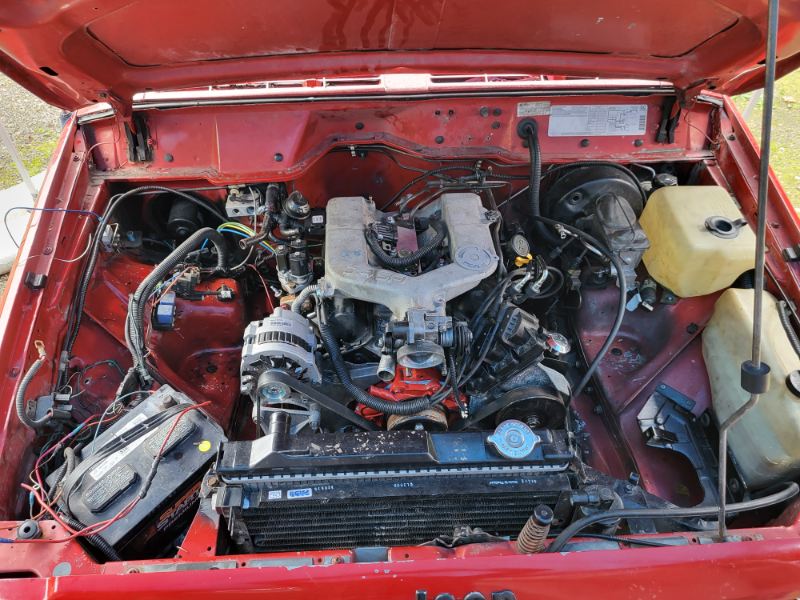
-
Electrical Manual
FigurativeGarbage replied to BLHTAZ's topic in MJ Tech: DIY Projects and Write-Ups
I can't seem to download this (link is a blank page). Can anyone re-upload it? -
1986 2.5L to 3.4L: Amateur Hour
FigurativeGarbage replied to FigurativeGarbage's topic in Member Projects: Your Comanches
Cleaned up my hand-drawn diagram on Lucidity. I believe I found one solution to this set up: a VSS dual bypass (Dakota Digital SEN-01-4280). This allows the mechanical signal to go to the dash and converts an electronic signal to the ECU. I believe the B28 Buffered Speed Output sends to the dash and therefore can be removed. I'll next make a list of the C100-230 wires that need to be resolved (fuel pump relay, etc)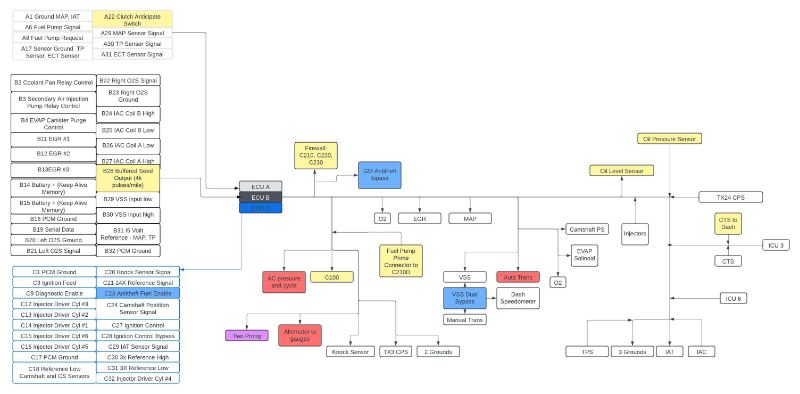
-
1986 2.5L to 3.4L: Amateur Hour
FigurativeGarbage replied to FigurativeGarbage's topic in Member Projects: Your Comanches
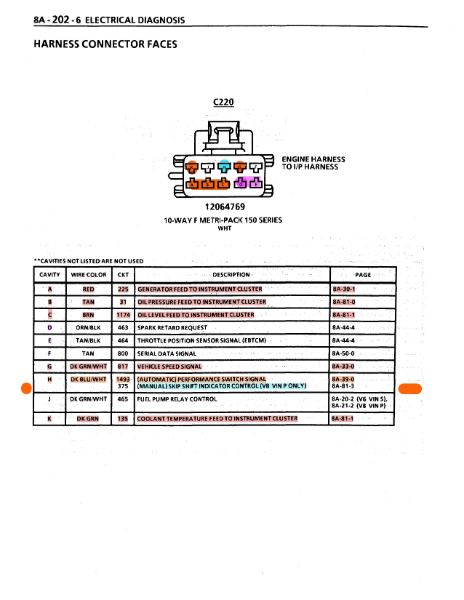
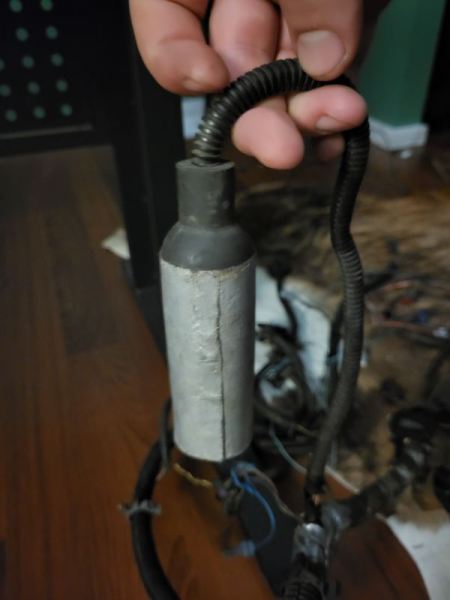
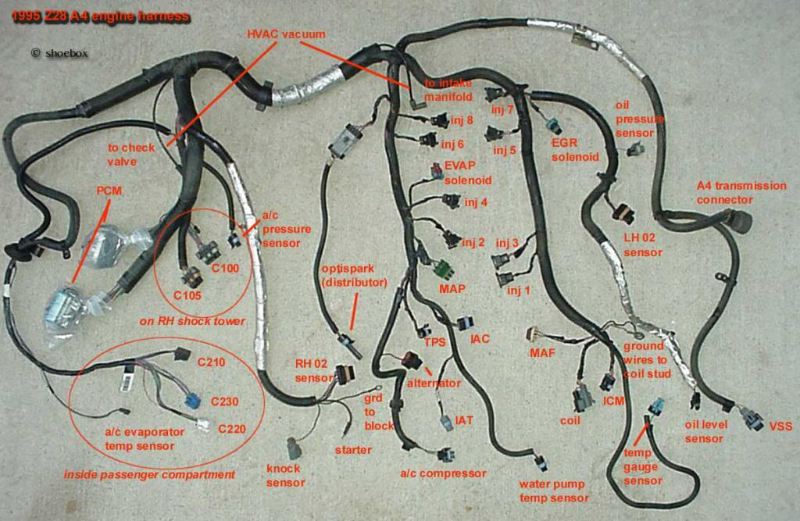
I'm currently working on a standalone ECU harness. I’ve de-pinned around 17 wires from the ECU connectors. Most of these were related to automatic trans and AC functions, which are unnecessary for my standalone setup. (not my photo, but used for initial reference) (one of the Camaro manual diagrams) I've been looking at connectors C100, C210, C220, and C230 that connect to lights and the body harness. Example: the C220 alternator connector powers the dash. I have a GM VATS bypass from Timers. I need to figure out speedometer and fuel relay wiring. (The C220 only has two wires in it right now, and matching connector. I'll need to figure out the clutch anticipator.) I also discovered a mystery component with brown and black/white wires that seems to be tied to the oil level sensor area (it has some kind of recessed button that clicks when pressed). The actual oil level sensor connector nearby has two-black-wires. I'll trace the wires back for both if I have to. (Manual reset button? Diagnostics? Kill switch? Jetpack handheld ignition control?)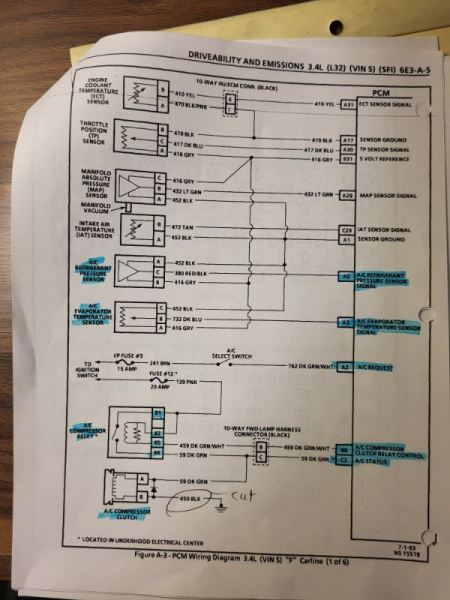
-
1986 2.5L to 3.4L: Amateur Hour
FigurativeGarbage replied to FigurativeGarbage's topic in Member Projects: Your Comanches
I got them from my neighbor. I'm sure you're right. Appreciated, but its okay. The original ones are on now. Mostly an aethetic thing anyways. -
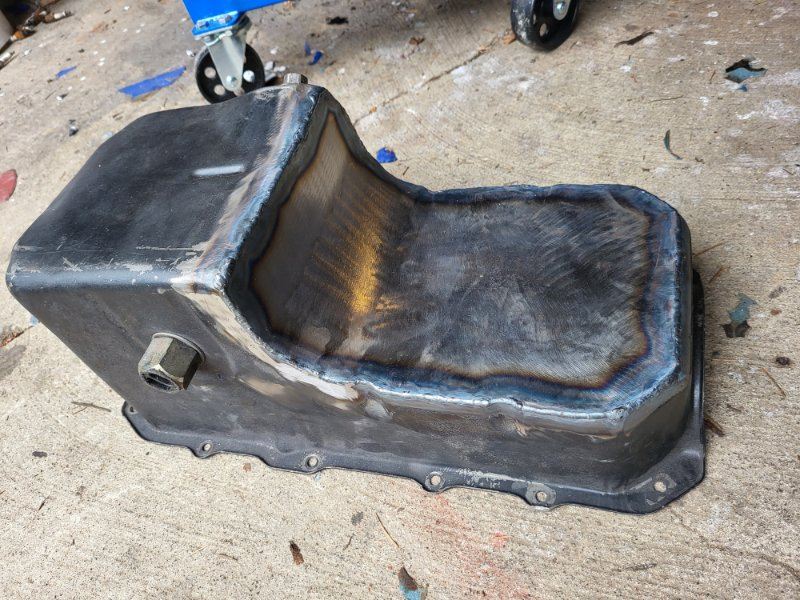
Looking at the clearance, I think modifying the pan was unnecessary. Maybe other the other builds noted the issue had different set ups. See the attached photos; one may appear upside down, but you can see there's a great deal of clearance. In hindsight, I would have installed the engine without a pan and check the clearances after.
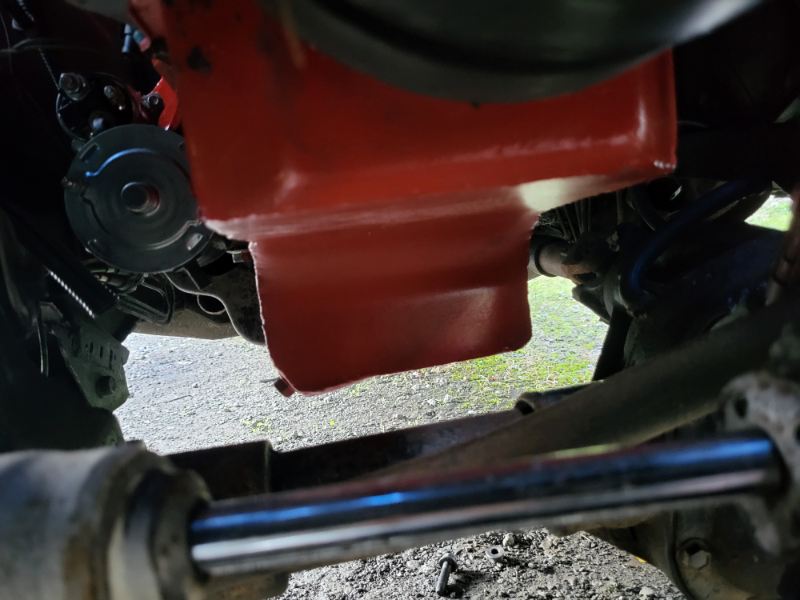
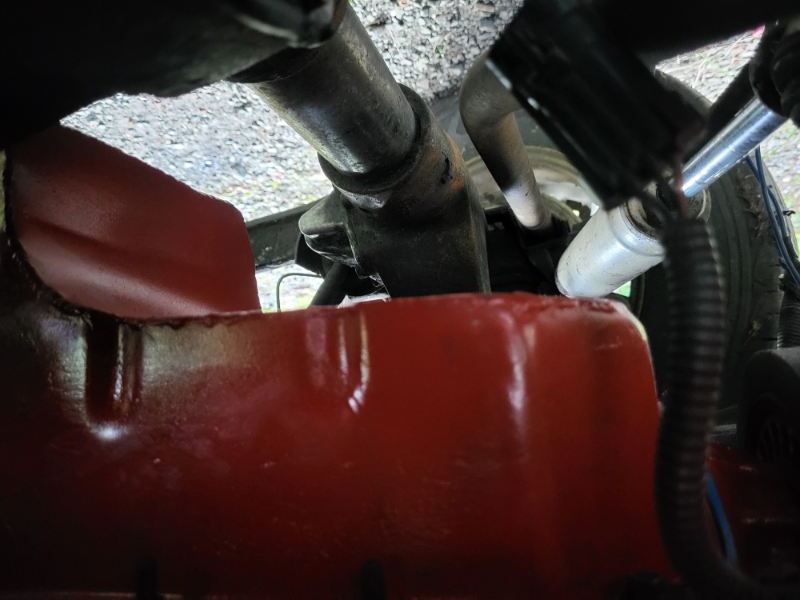
-
1986 2.5L to 3.4L: Amateur Hour
FigurativeGarbage replied to FigurativeGarbage's topic in Member Projects: Your Comanches
It's okay, they were aftermarket aluminum valve covers. I kept the original covers just in case. Glad I did. -
1986 2.5L to 3.4L: Amateur Hour
FigurativeGarbage replied to FigurativeGarbage's topic in Member Projects: Your Comanches
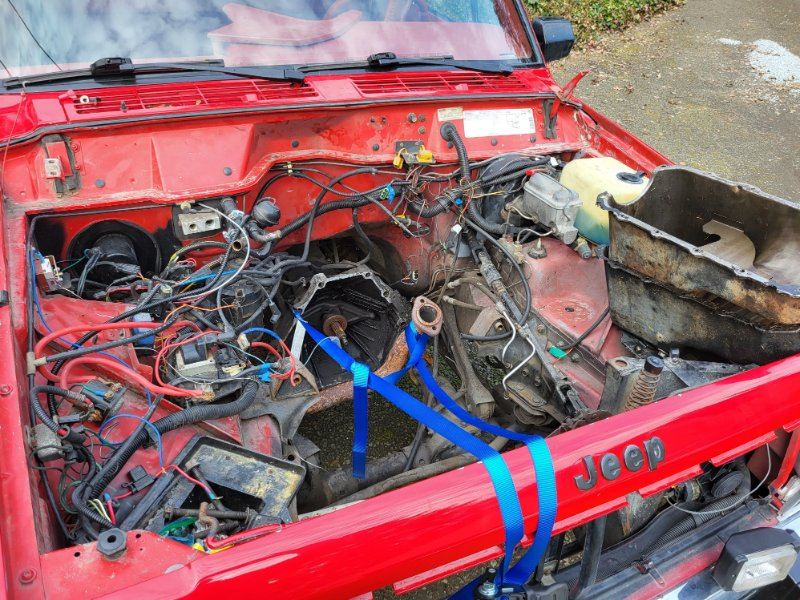
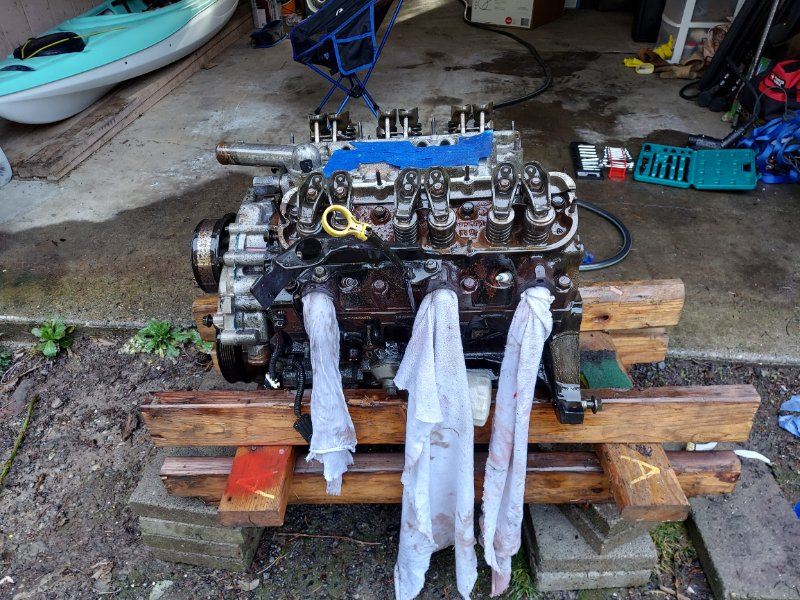
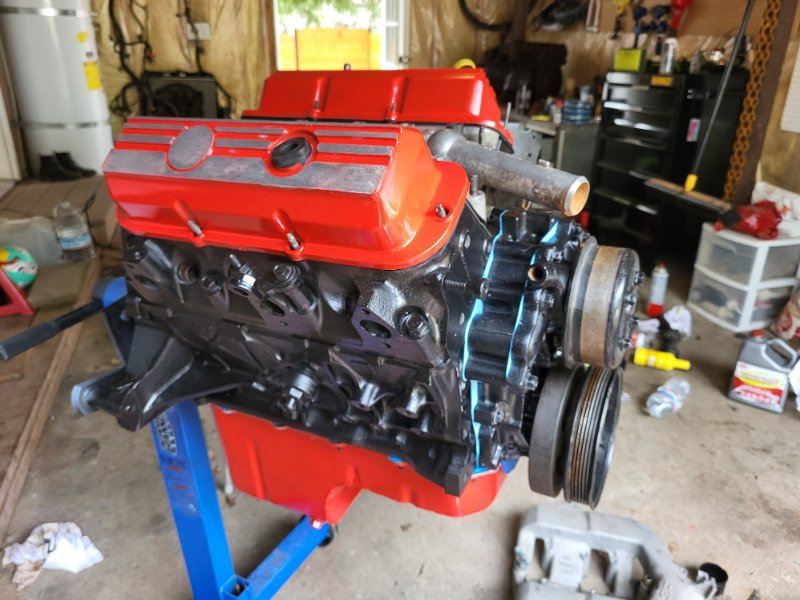
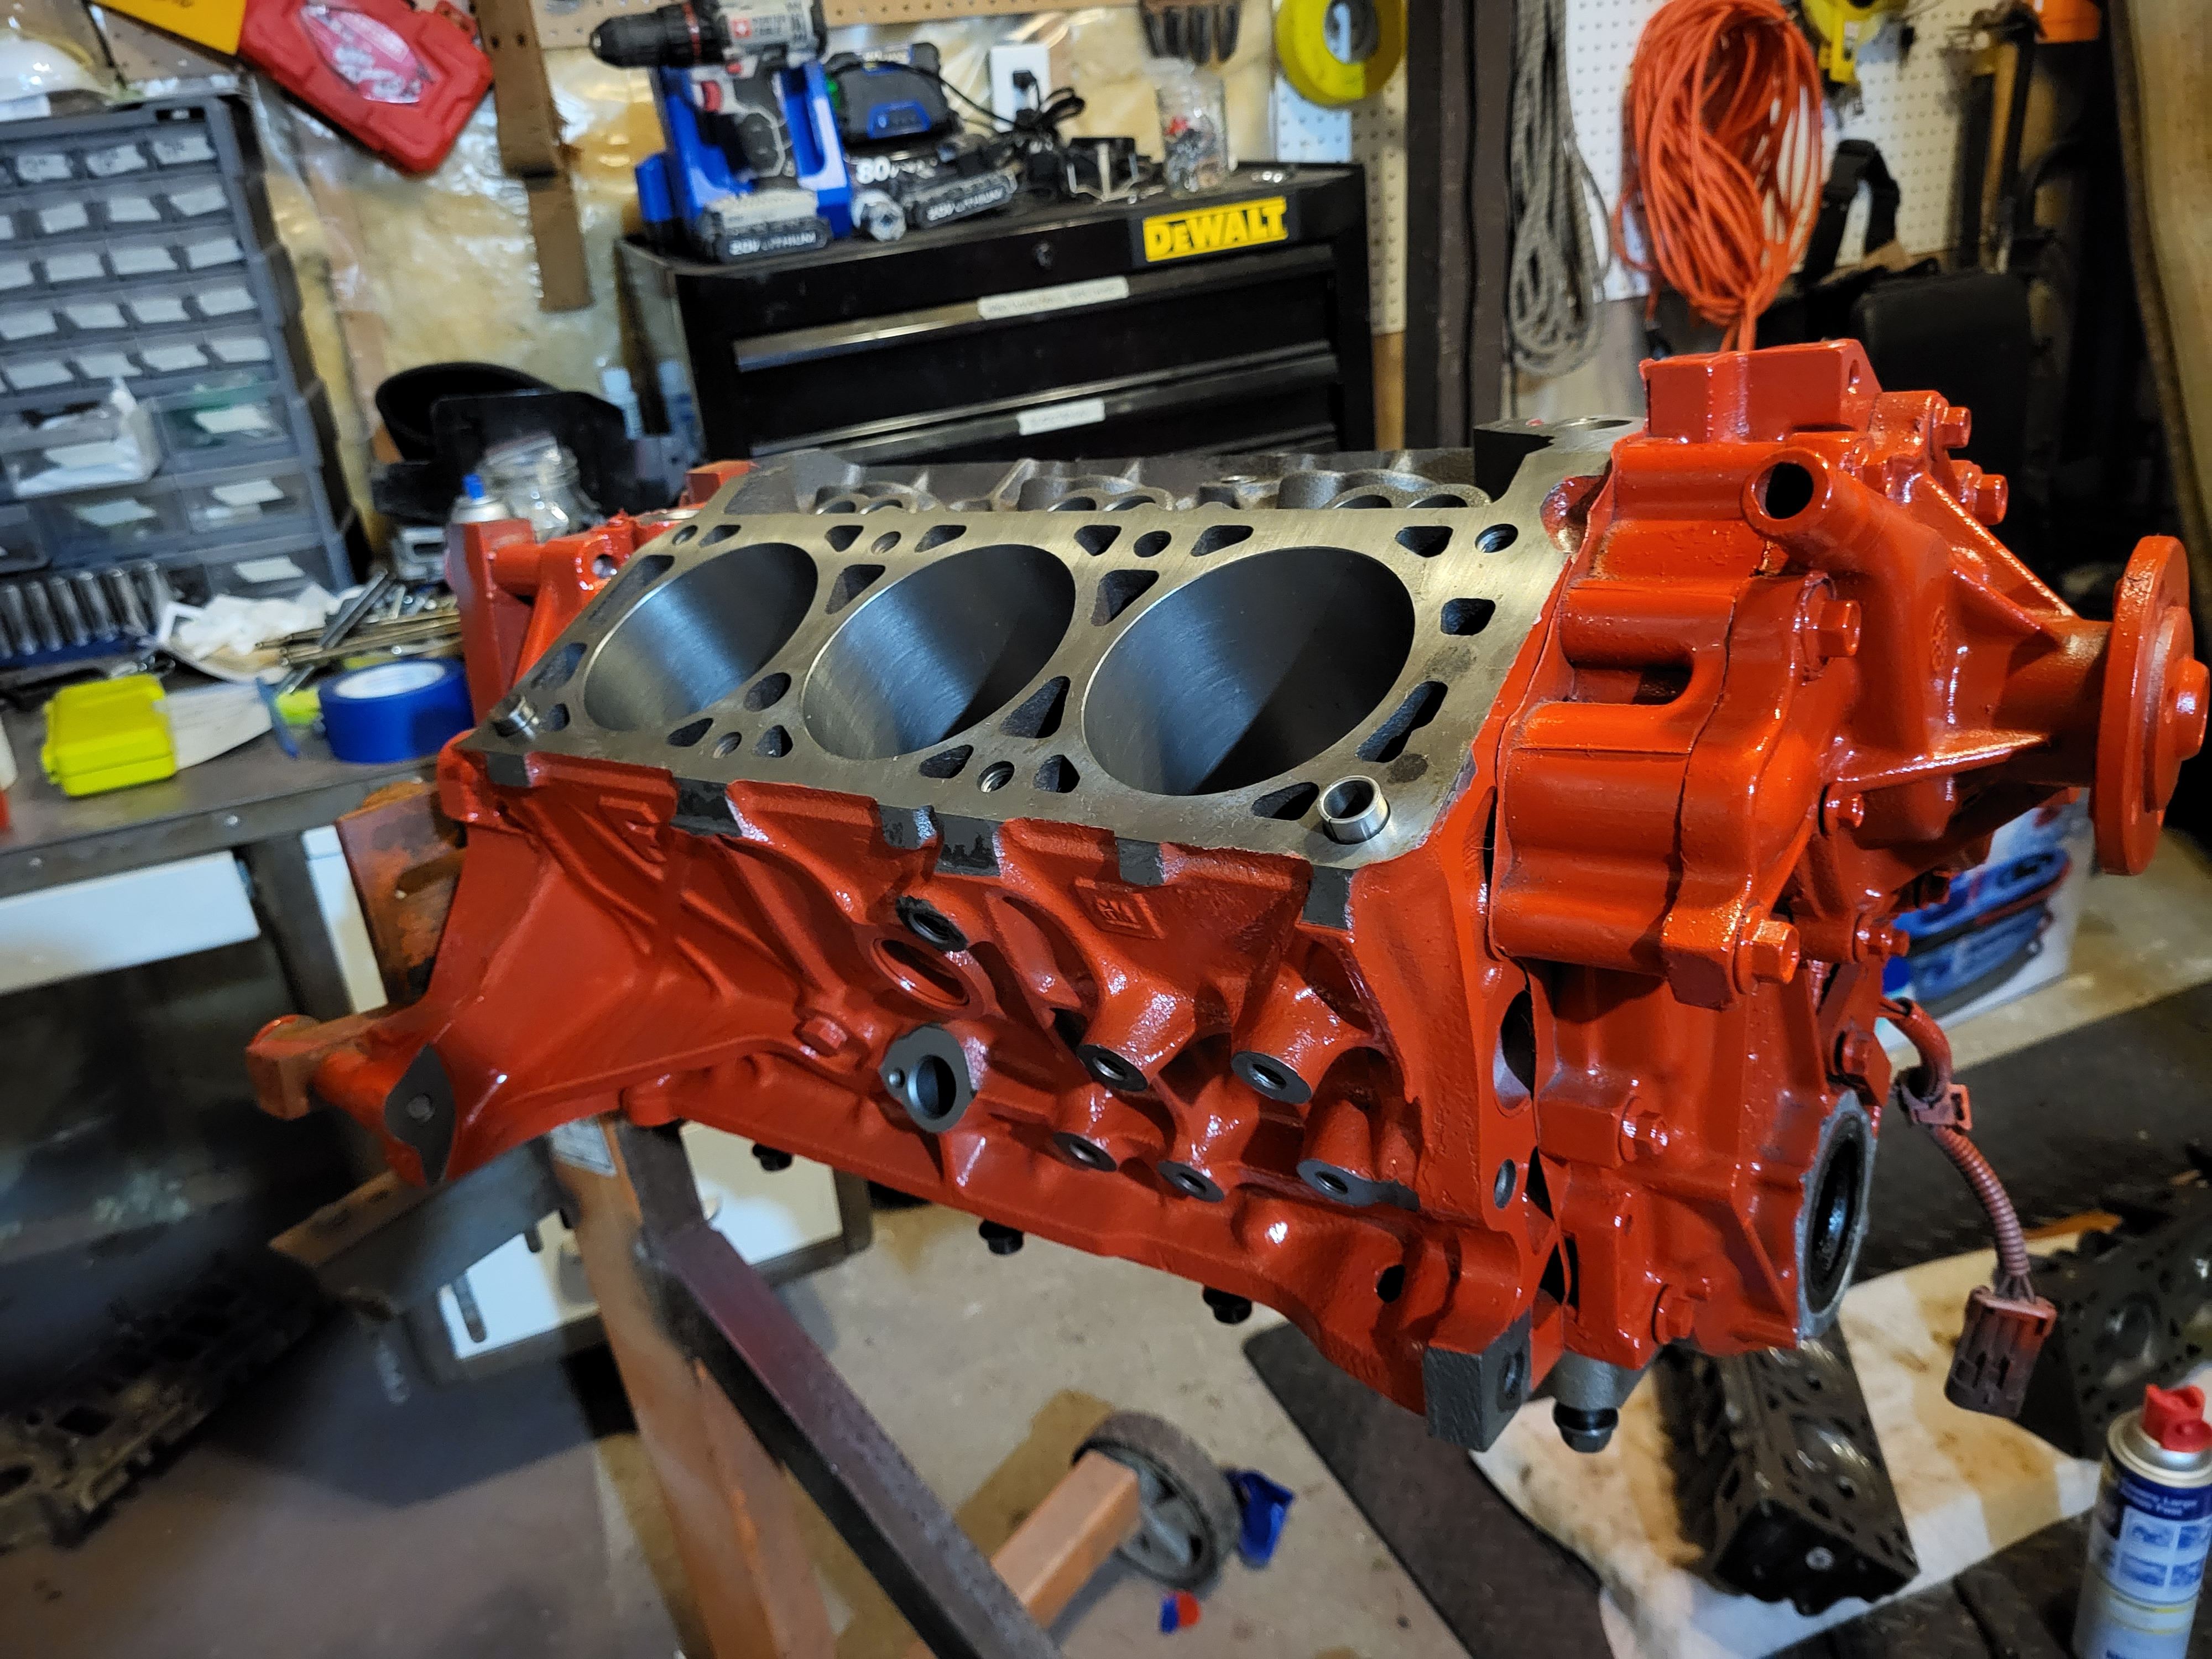
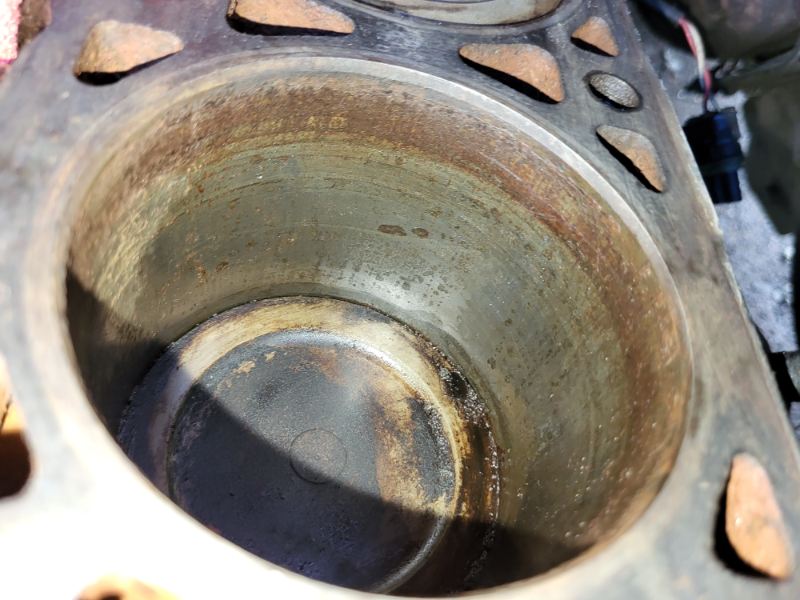
By December 2023, I had the 3.4L installed and was bolting in the exhaust manifolds. I broke a bolt in the cylinder head and I took the head off to have it professionally drilled out. I was horrified to find the cylinders were full of rust beyond what could be ignored of fixed with steel wool. The machine shop also tested the head: warped. I bought remanufactured heads from OReilly's for roughly $400 and paid $2k for the machinist to bore the cylinders, deck the mating surface, supply new pistons and bearings, and polish the crankshaft. I got the engine back around early spring and rebuilt the engine. At this point feel like I've replaced nearly everything on it. Countless trips to Ace to find the right bolts. The total cost has far exceeded what I would have spent on a crate engine, but then I wouldn't have learned how to install Helicoils in a newly machined engine block near the cylinder head mating surface. (Unsure what happened with area after spending all that money machining the mating surface) Now I'm on to wiring, which everyone has told me will be the most difficult part. I've pulled the old ECU (near driver's right knee if anyone is doing this) and attached harness. I've figured out all but one or two connectors on the new harness. My understanding is I need to delete the A/C (I deleted and replaced with a dummy pulley) transmission (this is a manual) level sensors and coolant temp sender (will be wired to the dash) C100 &C210-230 connections to non-engine Camaro harnesses. (I cracked the aluminum valve covers I so carefully painted red; they may not have been 100% compatible or I just over torqued) I will also need to figure out a new relay/fuse system. And figure out the antitheft bypass. And install the fuel pump, line, and power. And finish the coolant system. And power steering. And vacuum tubes. And drop the tank to figure out how this all started. I've found CC users to be genuinely helpful in my other posts and in the guides I've reviewed. I document my struggles and progress should this be of any use to someone or if anyone has suggestions moving forward. Cheers.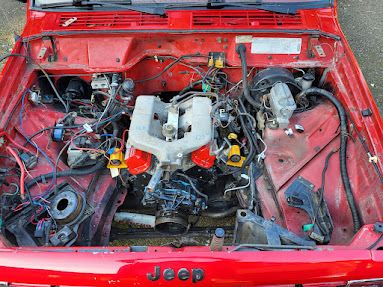
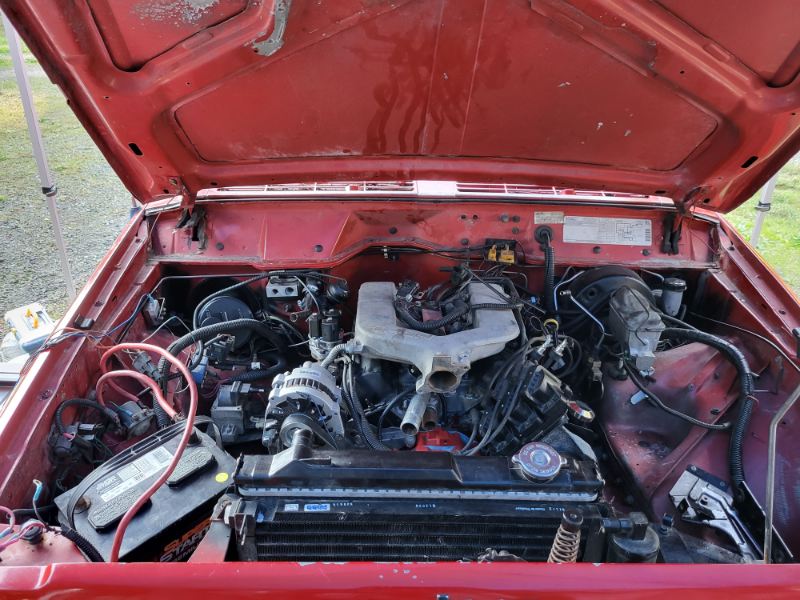
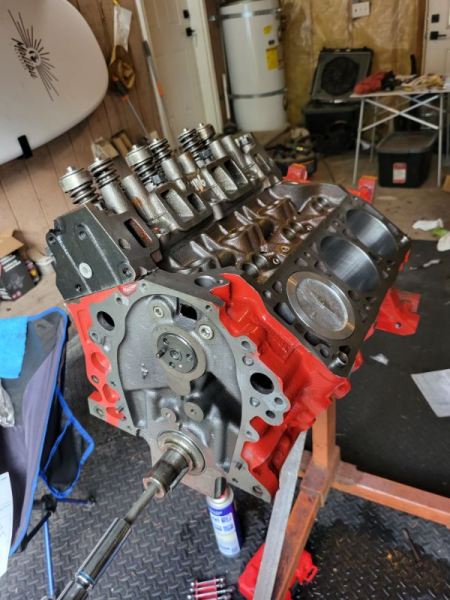
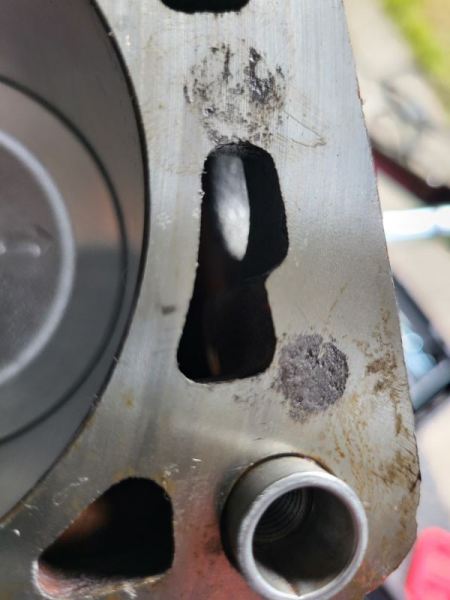
-
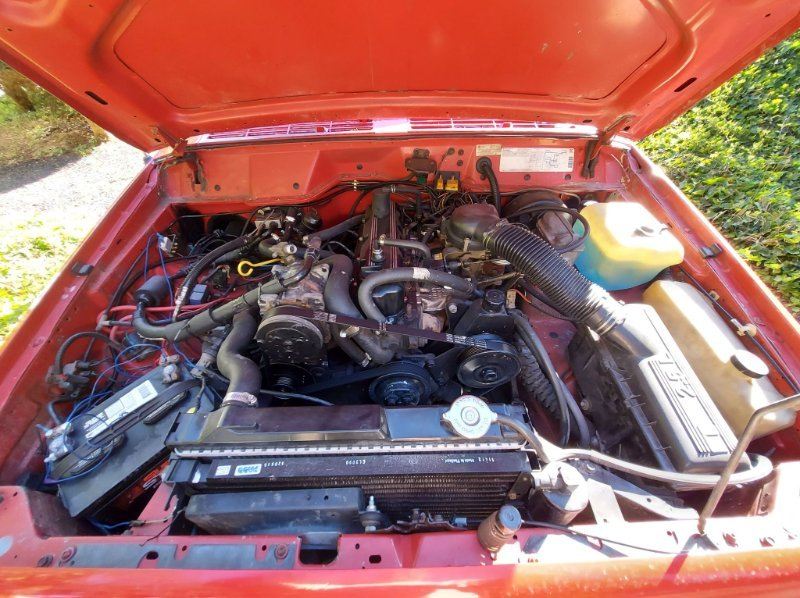
I've posted about this truck in other threads, but my last update was about 18 months ago. Another user had then suggested I start a project thread to document the build. Background We bought an electric commuter car in April 2022, so I figured I didn’t need my newer Subaru for house projects or hauling the paddleboard on weekends. In August 2022, I bought a 1986 Jeep Comanche with a 2.5L engine and a 4-speed manual transmission. The previous owner made a few modifications, like an electric fan with some questionable wiring, replaced parts of the interior with components from a Chevy Silverado, and an odd sliding motorcycle rack bolted to the bed. I had never done any work on a vehicle before, aside from topping off wiper fluid. I paid a mechanic to work on the differential and fix the missing passenger seatbelt bolt. I wasn’t planning on turning this truck into a showpiece or a rock-crawling off-roader, but I did notice 2.5L engine struggled to keep up on the highway, maxing out at about 65 mph during my commute. Not long after I bought the truck, I started noticing the idle getting rough. About two months after buying, the engine quit working altogether. A neighbor found that the fuel coming out of the injector was not flammable. Given that the rainy season had just started, I figured rainwater invaded the fuel tank, either from rust or wild drilling when the previous owner install the motorcycle rack. My neighbor said I should consider replacing the injector with a carburetor, but he also mentioned that he had a 3.4L engine from a 1994 Camaro sitting in his garage. I knew from this website that some owners swap 2.8L engines for the 3.4L from a 1993-1995 Camaro. He said I could have the engine for free. That was two long years ago. I understand that this build would be more difficult because I couldn't just pull compatible parts as is the case with a 2.8L. I cleaned the 3.4L, removed the 2.5L and accessories (without knowing what most of it was exactly), had a welder modify the oil pan to make sure it would clear the differential, replaced the clutch, machined the flywheel, I even had the welder fabricate custom engine mounts (I got tired of searching for them after a salvage yard crushed a car I spent a precious Saturday pulling the rusted accessories off). I bought a new upper intake manifold, exhaust manifolds, an ECU from ebay (hopefully coded properly with the VIN I gave them), had a salvage yard pull an engine harness from an automatic 3.4L Firebird, new accessories, accessory brackets from ebay.