KFingerlos
-
Posts
30 -
Joined
-
Last visited
Content Type
Profiles
Forums
Gallery
Everything posted by KFingerlos
-
91 Colorado Red SWB, as base as you can get
KFingerlos replied to KFingerlos's topic in Member Projects: Your Comanches
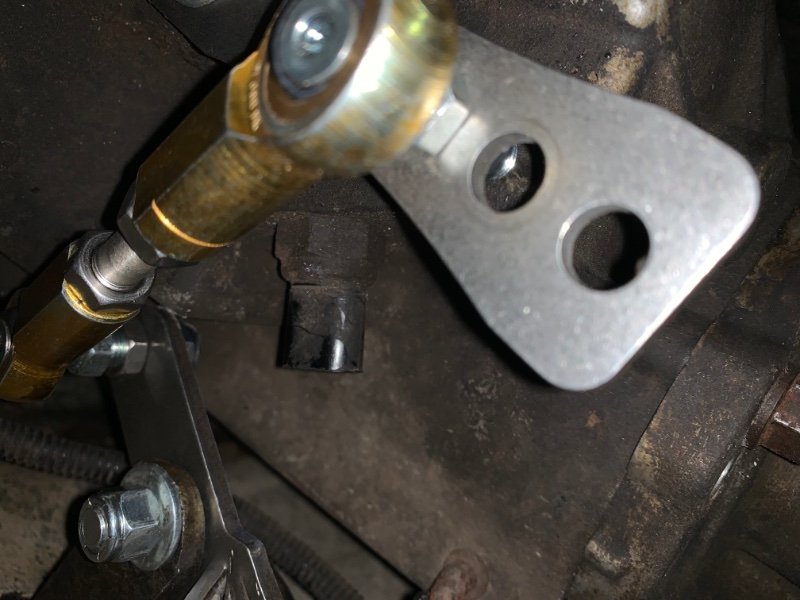
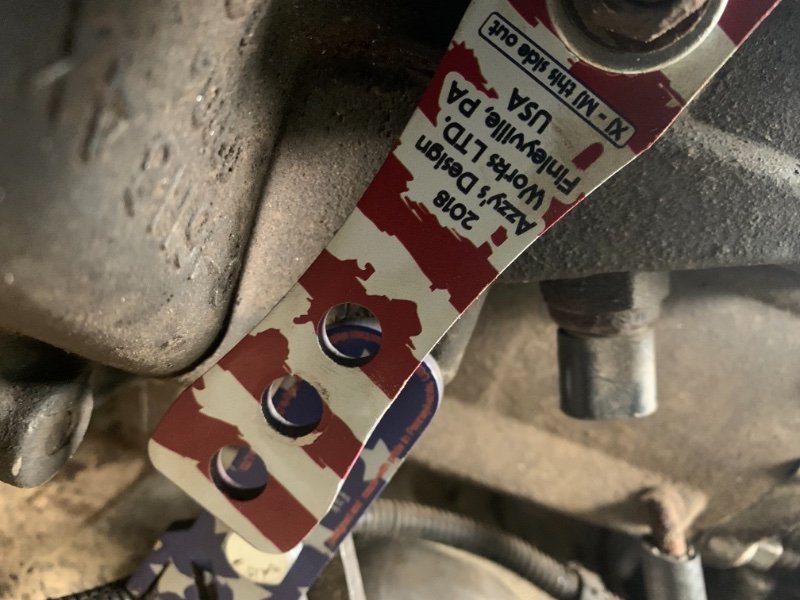
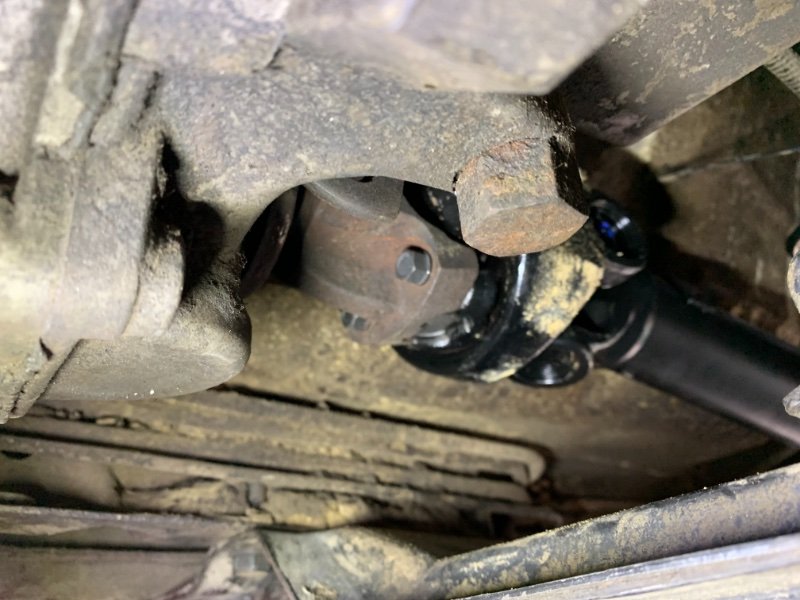
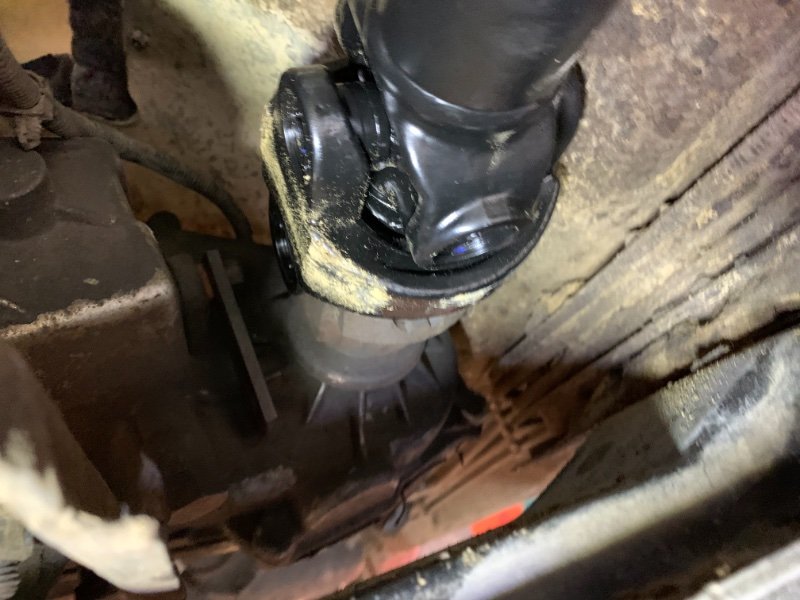
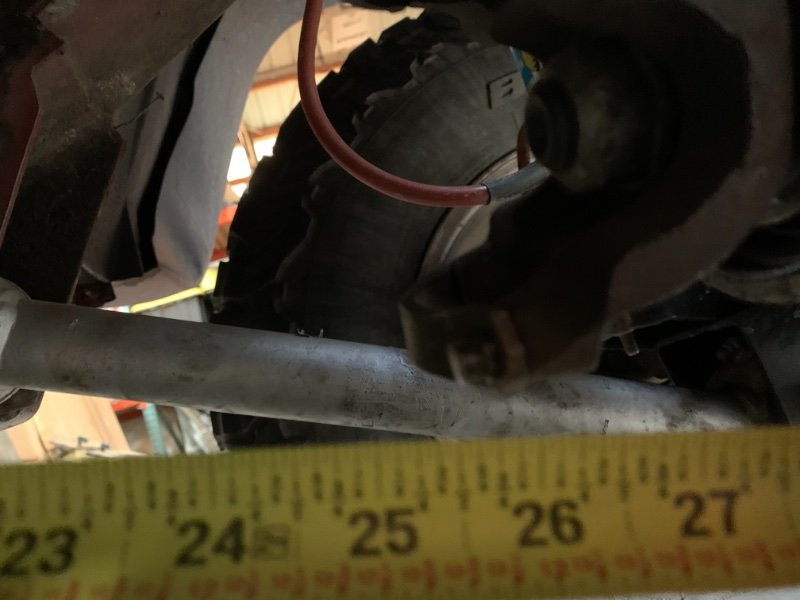
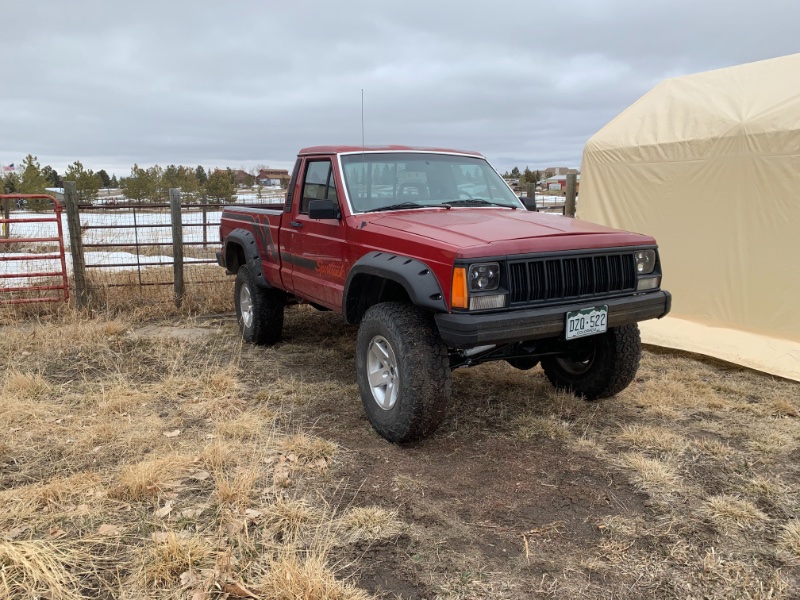
Milestone today, it’s officially a 4x4. Had Frontrange Driveline shorten the rear driveshaft, found out the front driveshaft from a 1979 J10 is a fit and rebuilt that. Azzie shift linkage for the transfer case, though that took a bit of fanagling. More or less put every piece of the linkage on backwards of how it goes for a 4.0L and it does fit/work on the 2.5L with the AX5. Photos of how it finished out and how it looks if you try to assemble per instructions. It’s now winter ready; or ready for its first 4x4 trip.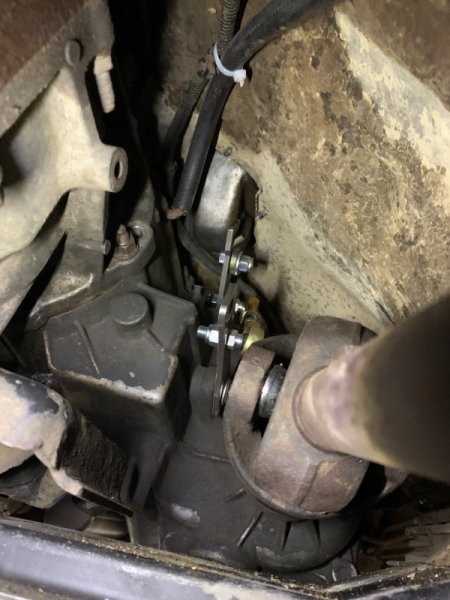

-
91 Colorado Red SWB, as base as you can get
KFingerlos replied to KFingerlos's topic in Member Projects: Your Comanches
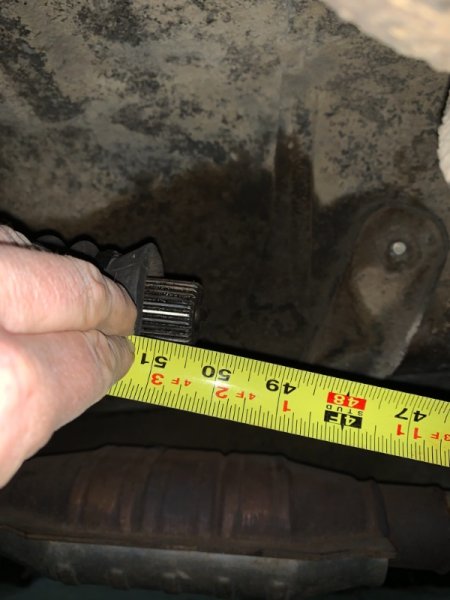
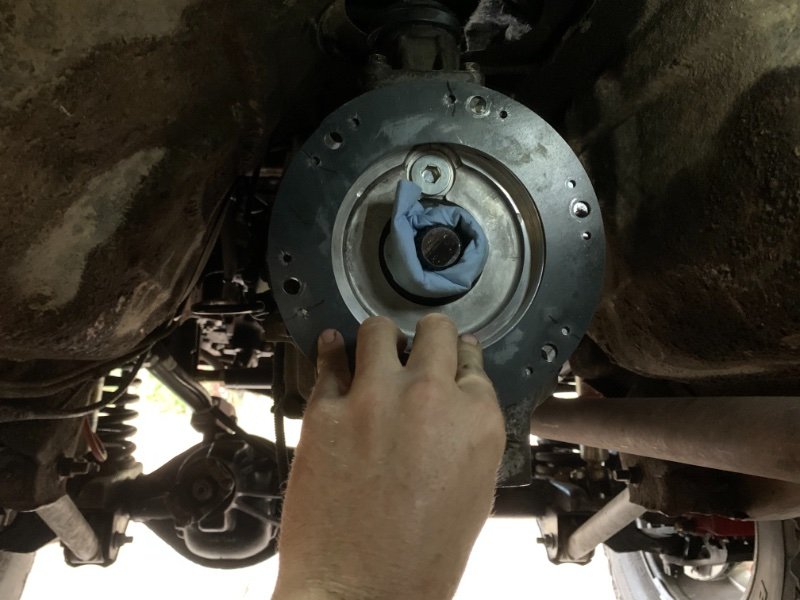
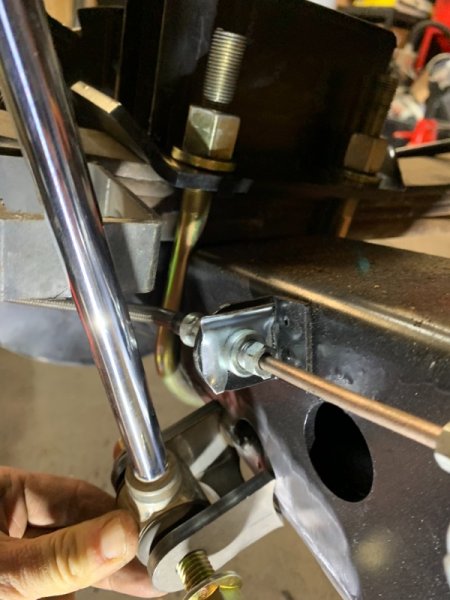
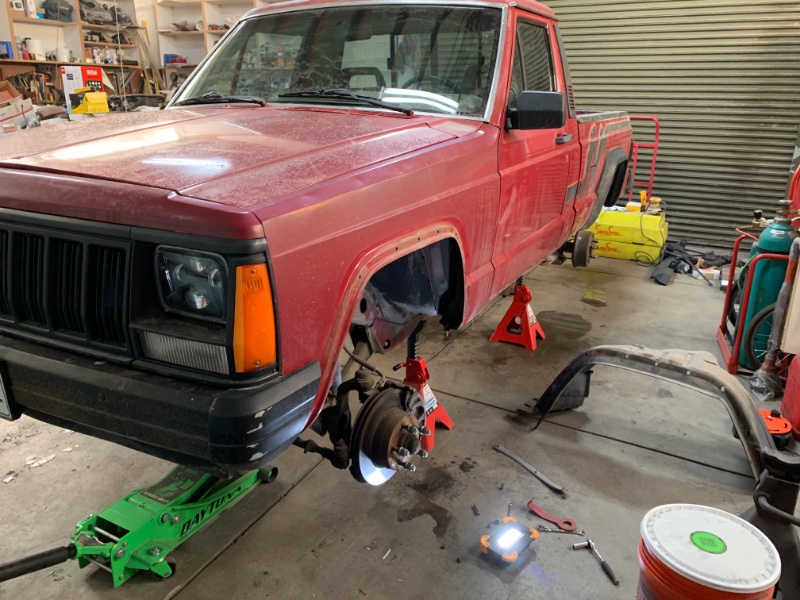
Bit more work past couple weeks towards the 4wd conversion. pulled out the 2wd AX5, stuffed in one from a 4wd TJ. Swapped the clutch master cylinder and slave to match the new trans (external slave). slight issue with the clocking of the transfer case.. it’s too high and contacts the floor. Ended up re-drilling the transmission flange to clock the tcase down a bit. swapped the slip yoke from the trans for one which matched the tcase; and then had the rear driveshaft shortened by Denver Driveline. at this point I think I’m just a front driveshaft away from being 4x4. I have a ZJ shaft that I’ll have shortened for that duty this week.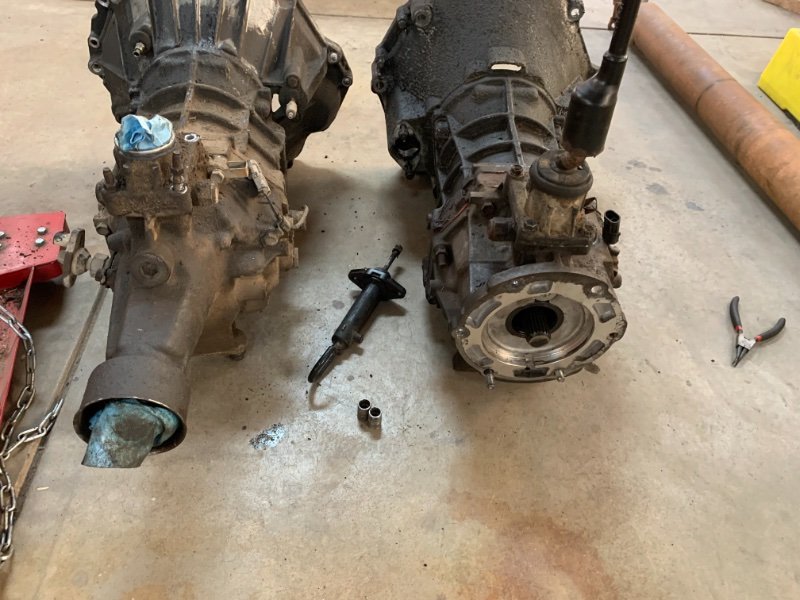

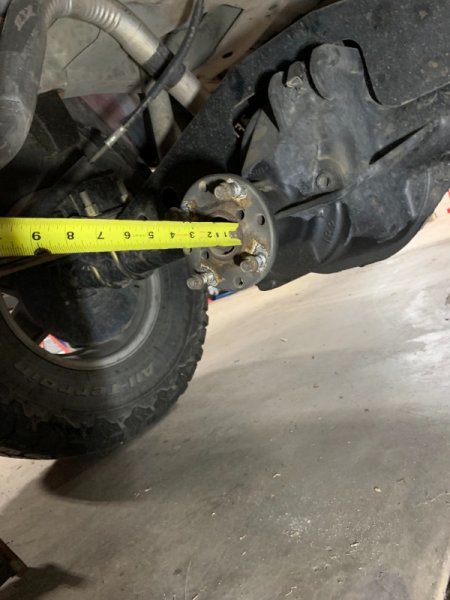
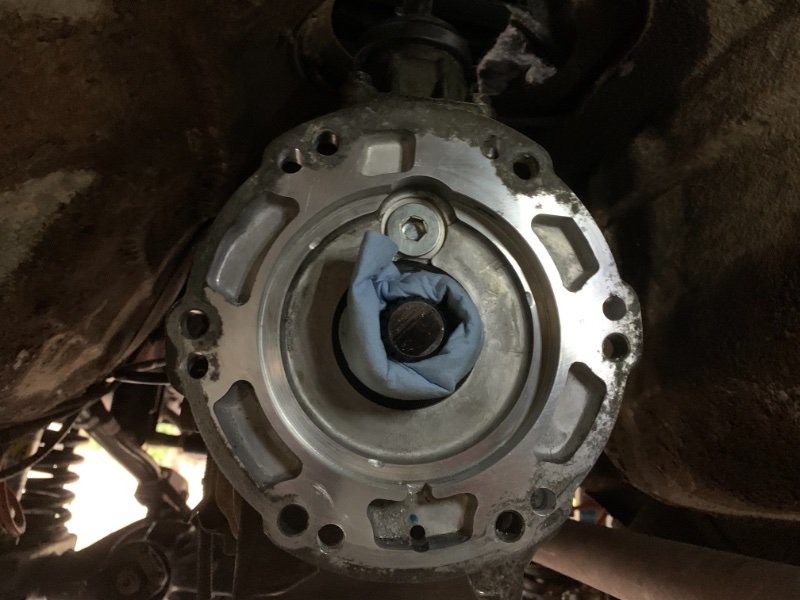

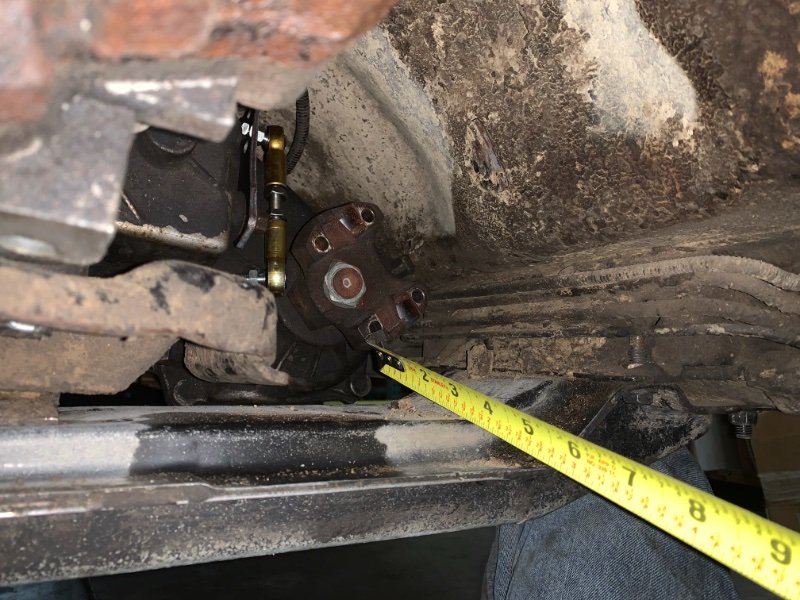
-
91 Colorado Red SWB, as base as you can get
KFingerlos replied to KFingerlos's topic in Member Projects: Your Comanches
So, did a bit more today. Having a problem where it’d soaked the air filter with oil. Replaced the PCV with a new elbow with the orifice; what was there was wide open. fired it up, and ran it for a bit at 2000 rpm to warm it up for a compression test. Shut it down at operating temperature. had a big puddle of oil under the vehicle... seems it puked a half quart out of the dipstick tube. ran the compression test... 80/115/120/120.... low compression in cyl 1. Hrm... hooked up shop air to the compression tester adapter. Rotated to a point where both valves are closed. Can hear/feel air escaping from the oil fill on the valve cover. put the straight elbow back. I guess if I end up with a pool of oil in the air box at least I can monitor how much. -
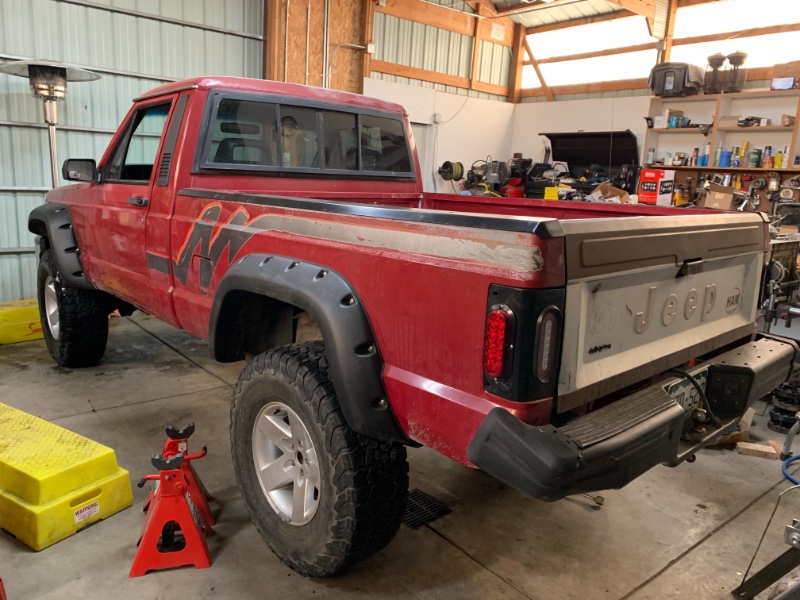
91 Colorado Red SWB, as base as you can get
KFingerlos replied to KFingerlos's topic in Member Projects: Your Comanches
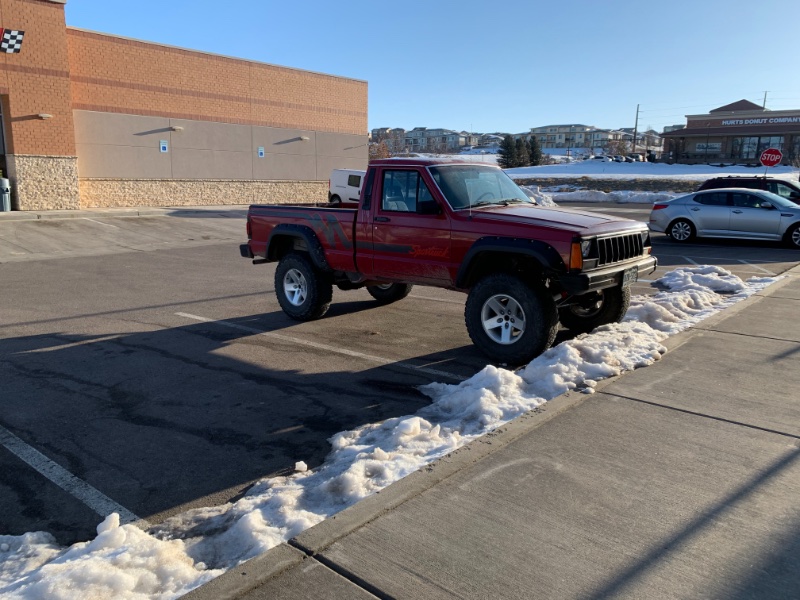
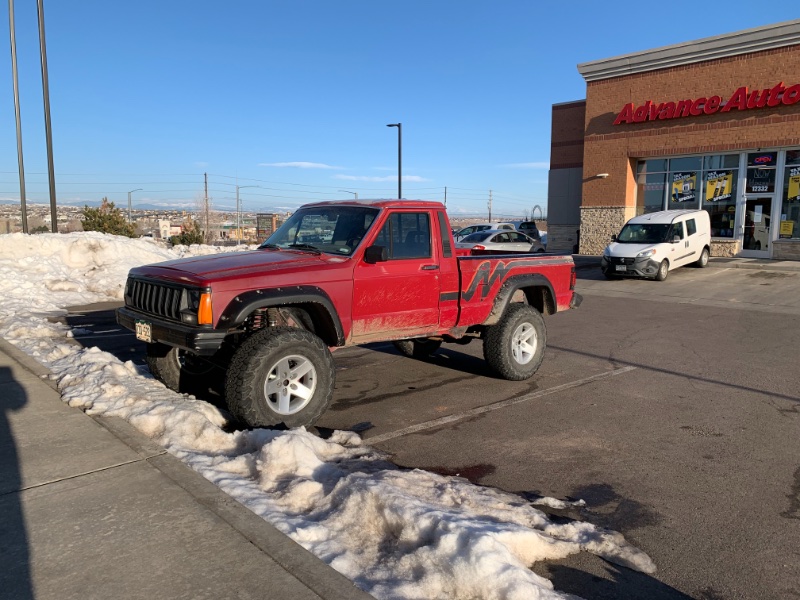
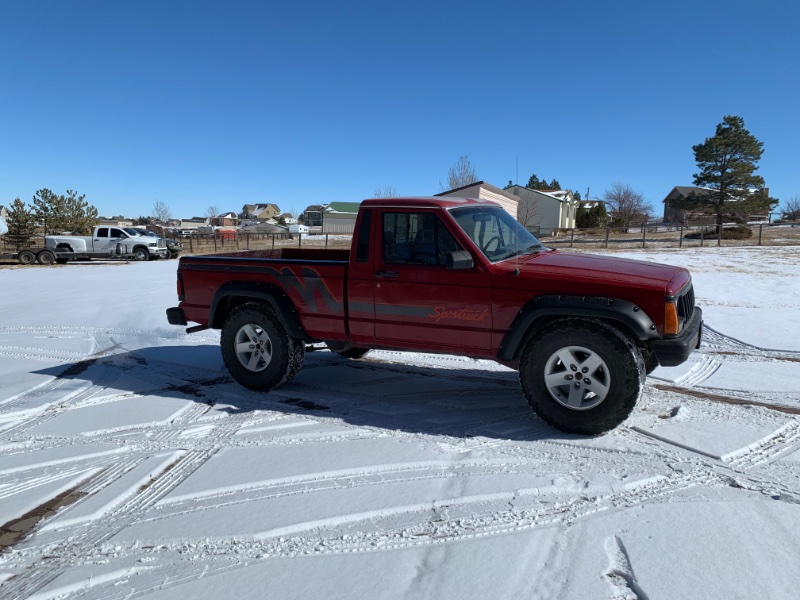
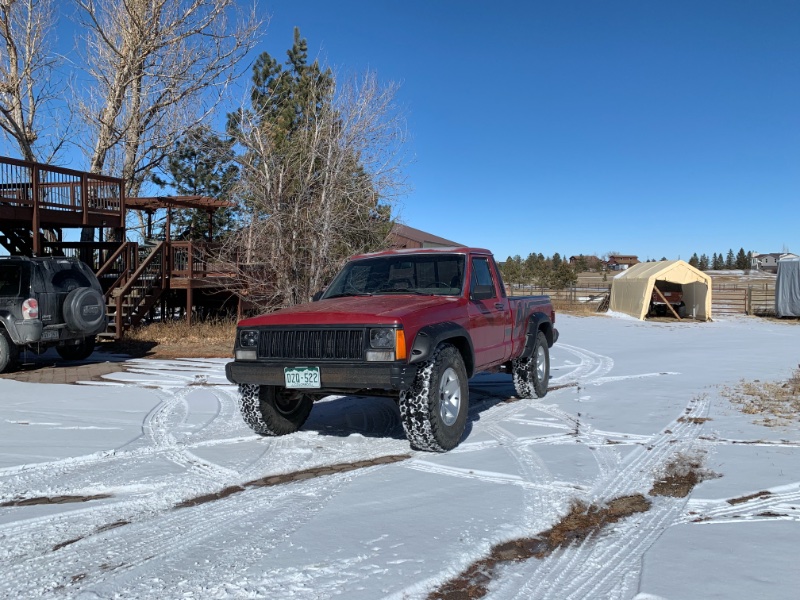
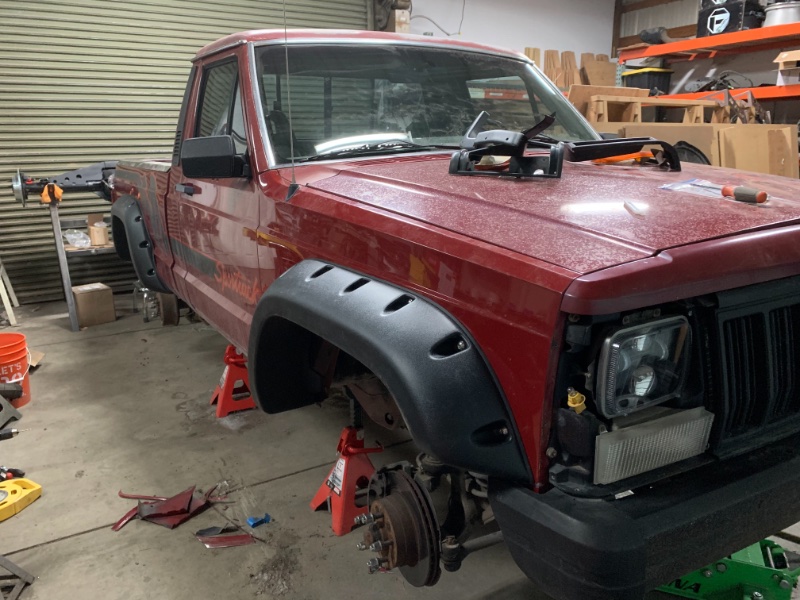
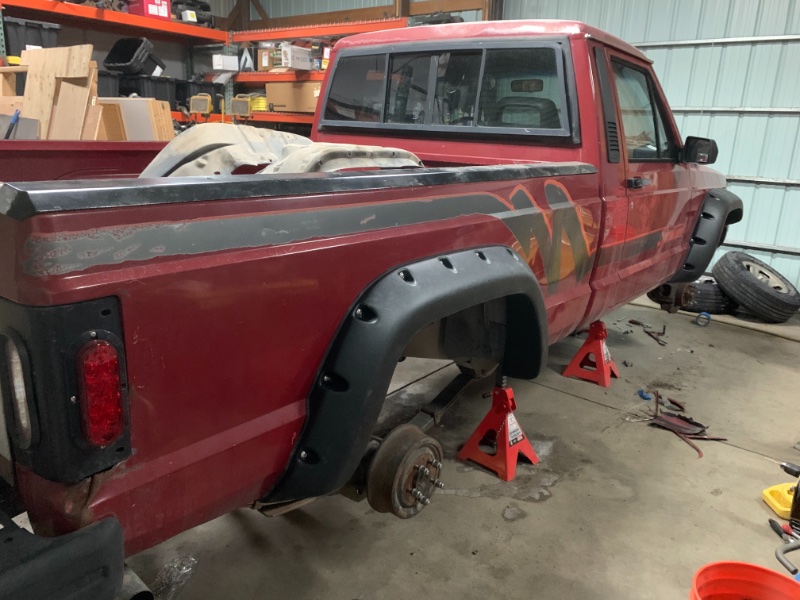
Couple “as it sits” photos ow that it’s out of the shop and driving around. Now with the 4.5” lift up front and SOA rear. Now has power steering and a 95 brake master/booster and ZJ proportioning valve. I do think the 8.8 looks a little narrow under the back end. Probably exacerbated by the wide flares. May need to think about running some wheel adapters.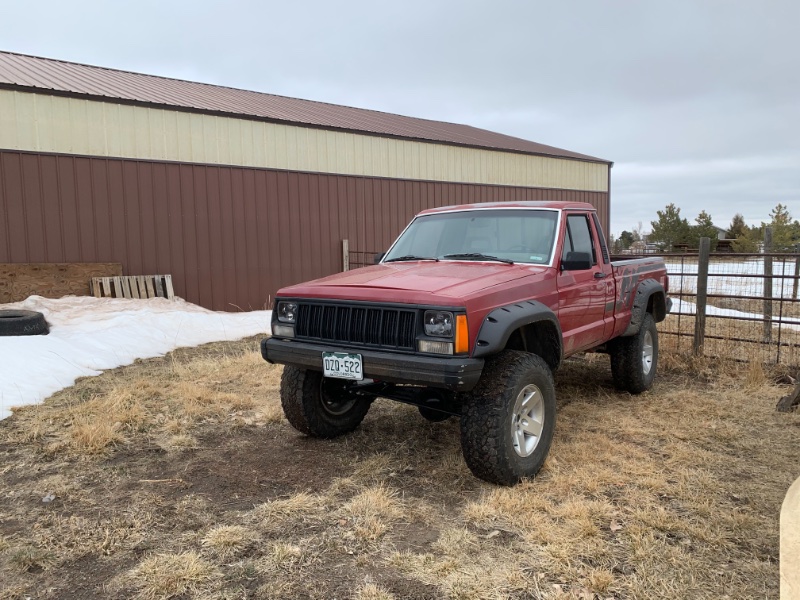
-
91 Colorado Red SWB, as base as you can get
KFingerlos replied to KFingerlos's topic in Member Projects: Your Comanches
Got it into the alignment shop Friday. Was basically thinking told “custom suspension is too complicated for us” so ended up with a toe and go. All told the numbers weren’t as bad as I’d expected. Will have to get it into a custom shop in a couple weeks to finish dialing it in.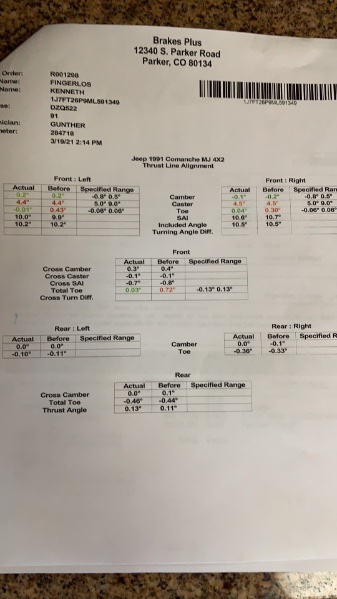
-
Grew up outside Boise in Nampa, at 18 moved to Moscow, ID and stayed till 2008 when I moved to Colorado. Idaho is a mostly rural state with the only major population center right at Boise. If you’re all about the malls and big city, look elsewhere. If campfires and looking at the stars is your thing then you might be happy. It’s definitely a live and let live kinda place.
-
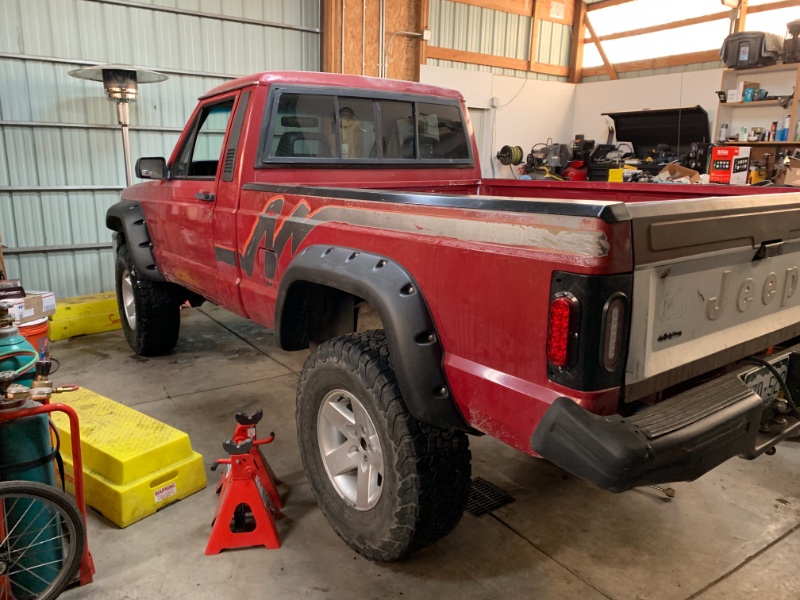
91 Colorado Red SWB, as base as you can get
KFingerlos replied to KFingerlos's topic in Member Projects: Your Comanches
And with all of that, it’s mobile again. Of course just in time for snow.... so the alignment and test drive will have to wait a few days for Denver to thaw out some. i think I did end up with a slight rake to the front end. Yeah, I know the photo looks like a Carolina squat... no it doesn’t look like that in person. 4.5” lift in front, SOA 8.8 in the rear. 285/75-16 on TJ Moabs.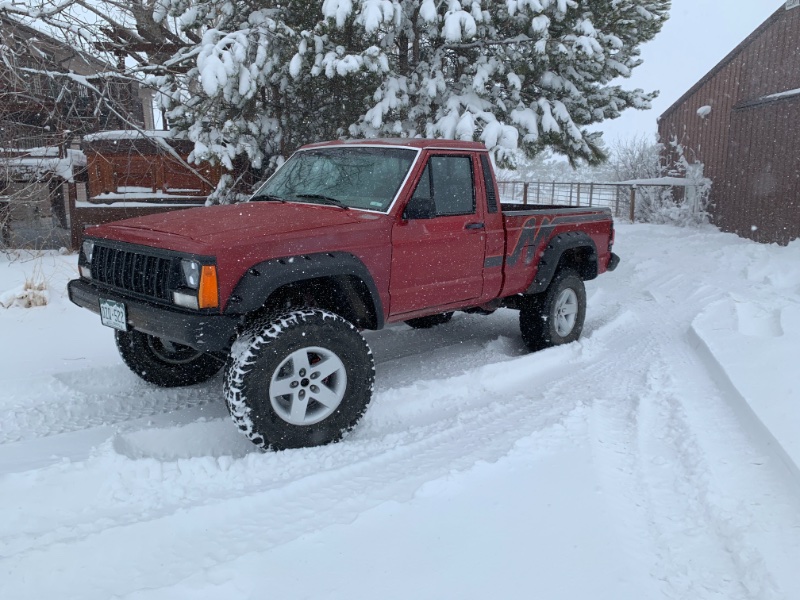
-
91 Colorado Red SWB, as base as you can get
KFingerlos replied to KFingerlos's topic in Member Projects: Your Comanches
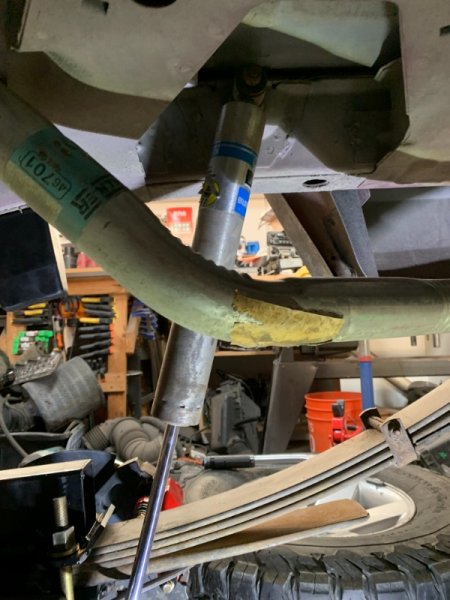
And of course the whole front suspension setup, mix of Rusty’s and Rubicon Express bits. RE just because I had them available in my spares.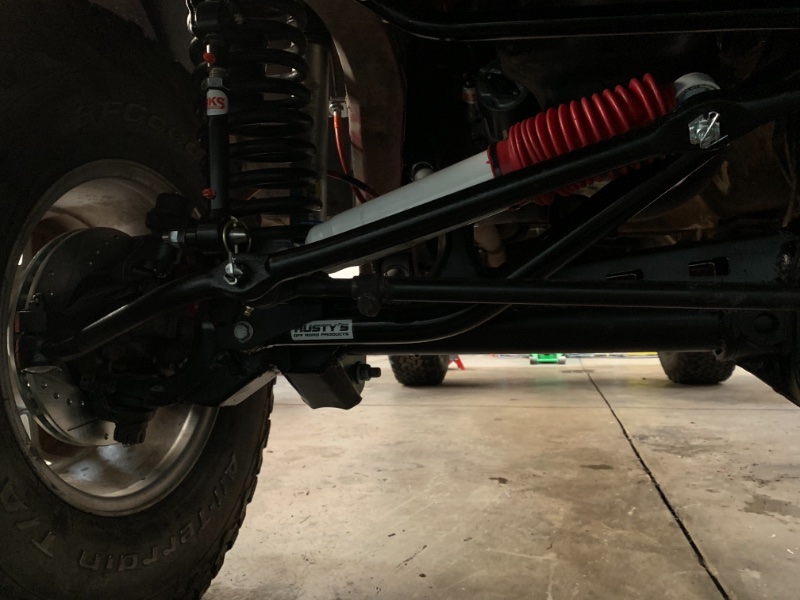
-
91 Colorado Red SWB, as base as you can get
KFingerlos replied to KFingerlos's topic in Member Projects: Your Comanches
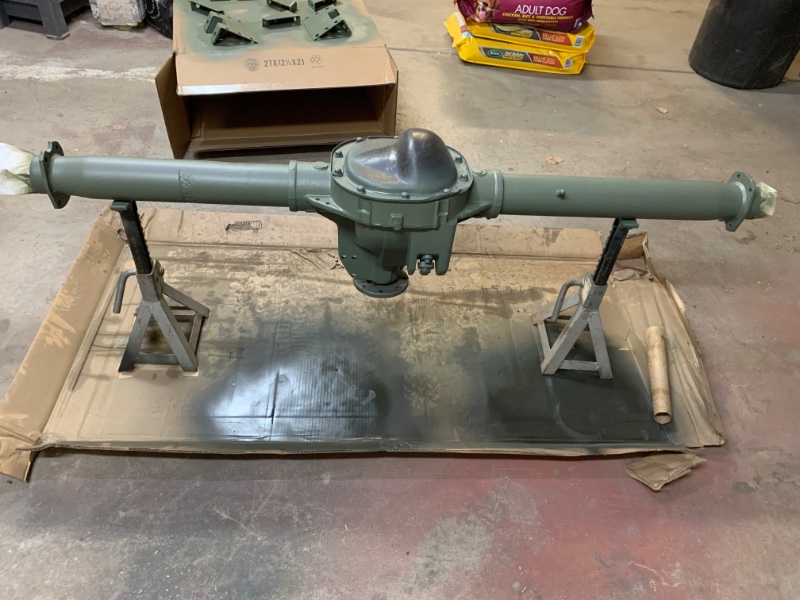
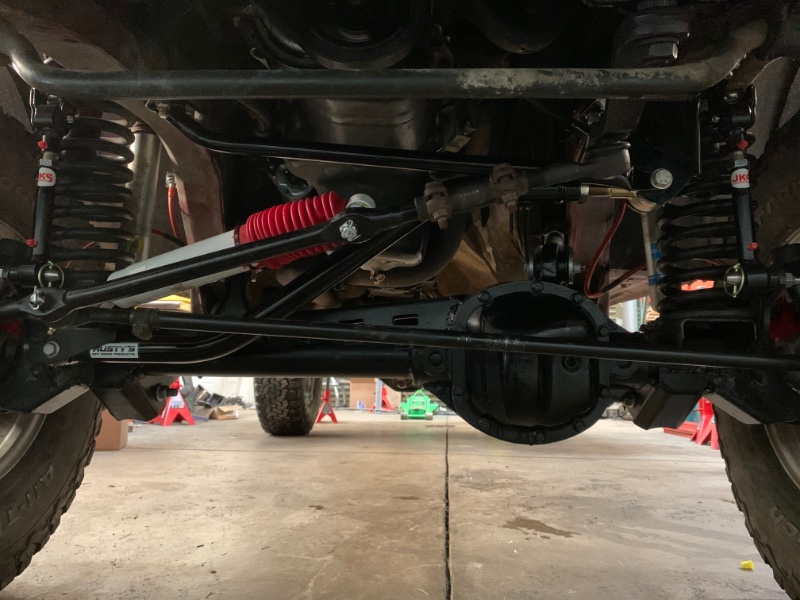
Few more of the final shock setup and final configuration of the 8.8 swap. It’s an IRO XJ truss that was modified to accommodate the narrower MJ perch.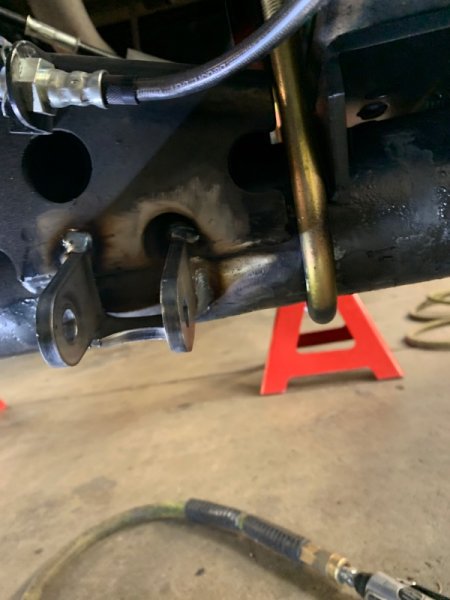


-
91 Colorado Red SWB, as base as you can get
KFingerlos replied to KFingerlos's topic in Member Projects: Your Comanches
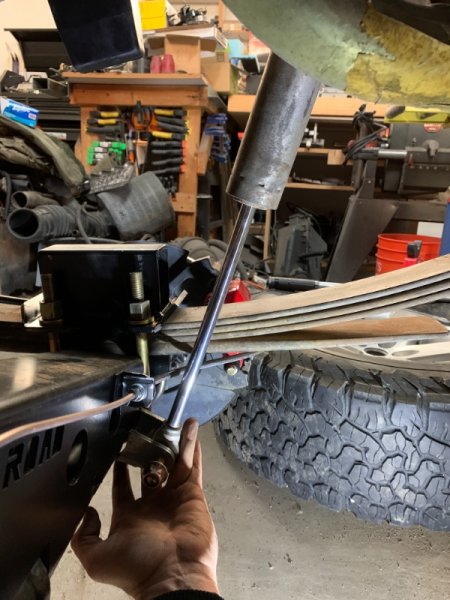
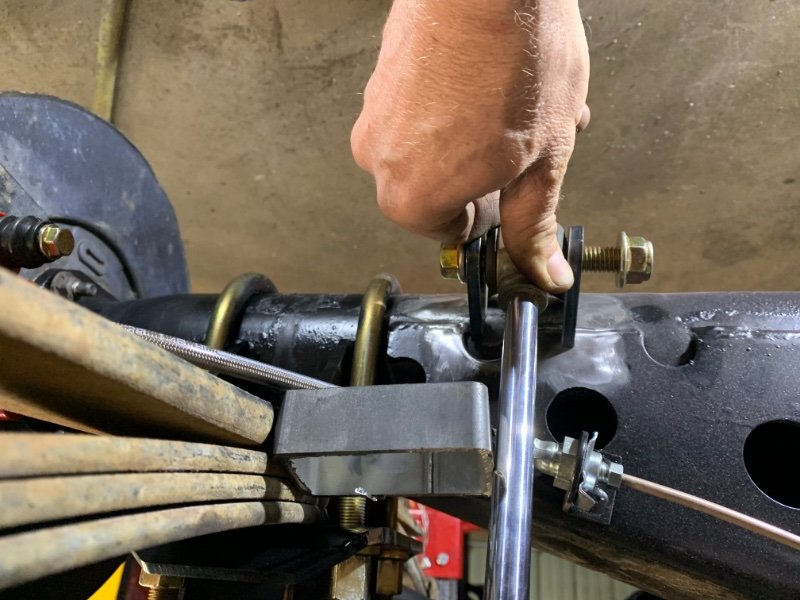
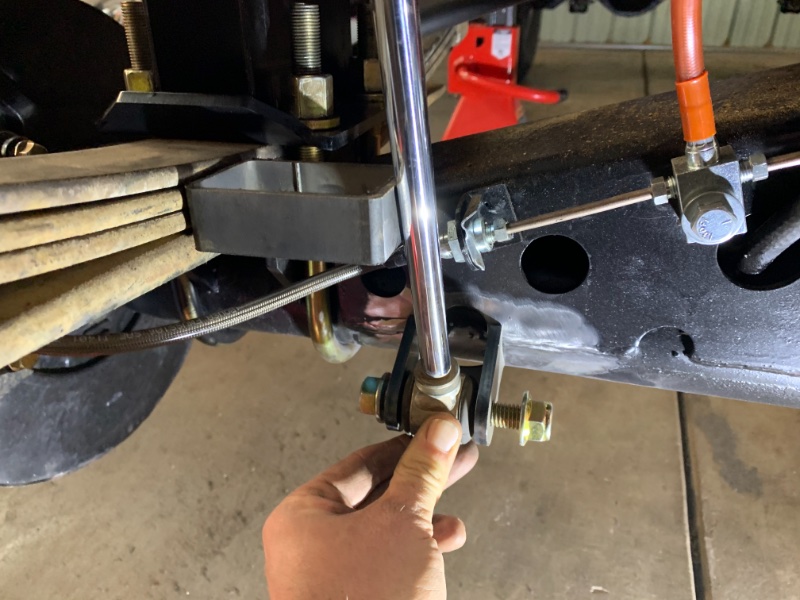
RuffStuff shock mounts going on. Factory location is just inside the springs (on the spring plate), but I didn’t like where that landed with respect to the brake lines, so I grabbed a bit of leftover 2x3 tube and spaced the shock shaft 3” in from the springs. Puts a slight amount of pressure on the upper bushings but not too bad. Shocks are a “modified” Billstien 5100 from a TJ, with a 4” lift. Modified in that the TJ uses a bar pin on the upper so that had to be pressed out and a new bushing installed. Set it up so that the shock bottom out at full droop. shocks have about 10” of travel and the axle should hit the bump stop at about 7.5”


-
91 Colorado Red SWB, as base as you can get
KFingerlos replied to KFingerlos's topic in Member Projects: Your Comanches
Revised spring perches in place. Just welded a 2x3 tube on top of a ruffstuff spring plate.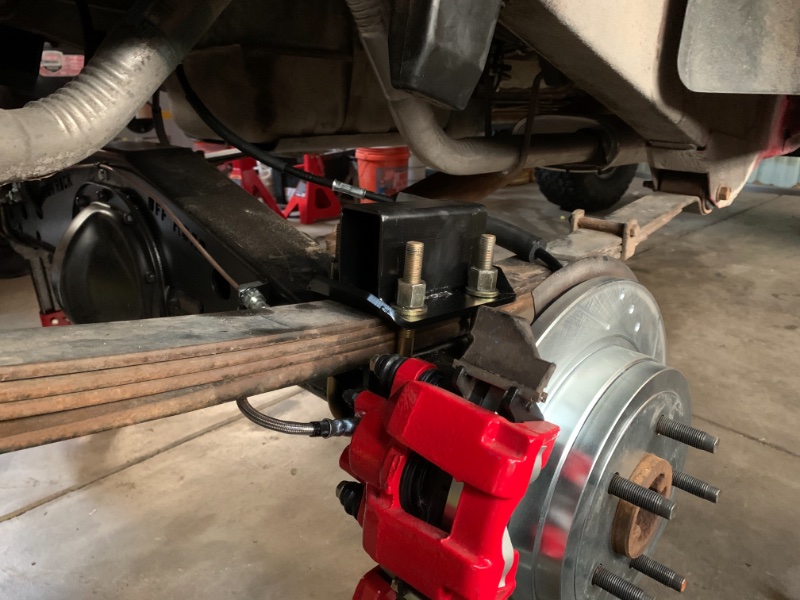
-
91 Colorado Red SWB, as base as you can get
KFingerlos replied to KFingerlos's topic in Member Projects: Your Comanches
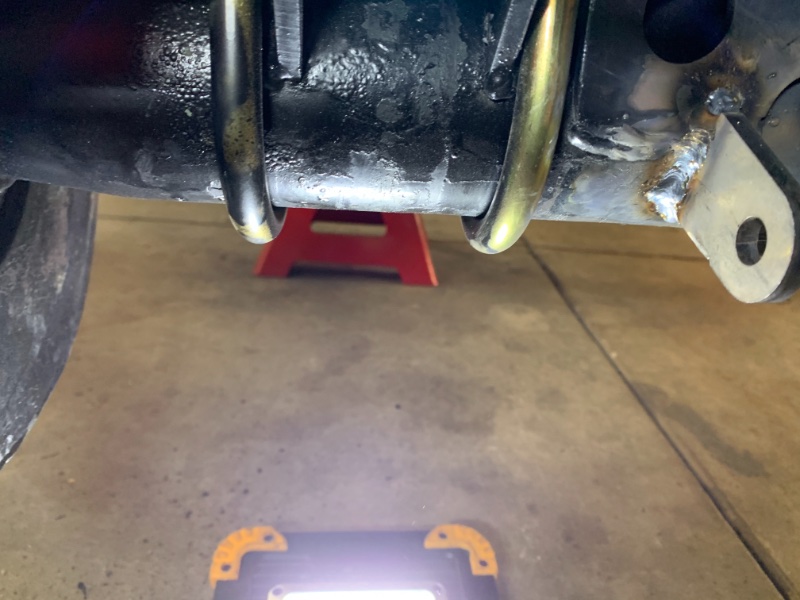
Need to address bump stops in the rear. Seems the longest easily available bolt ins are only about 4” tall. This just isn’t enough to compensate for the SOA rear. So, I welded a piece of 2x3” .120 wall tube to the top of the spring plates. This should put the “top of the axle” back approximately where it was before relocating the axle. And worst case provides a platform for additional bump stop extensions.
-
91 Colorado Red SWB, as base as you can get
KFingerlos replied to KFingerlos's topic in Member Projects: Your Comanches
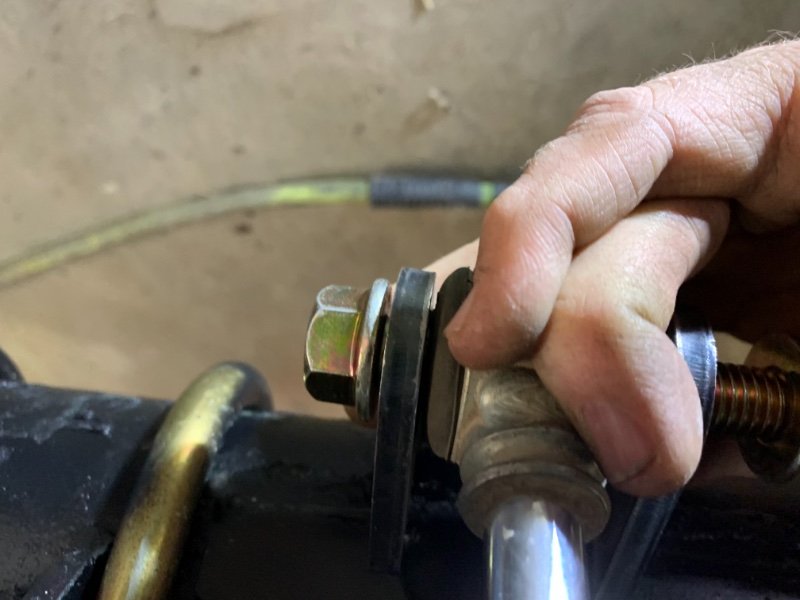
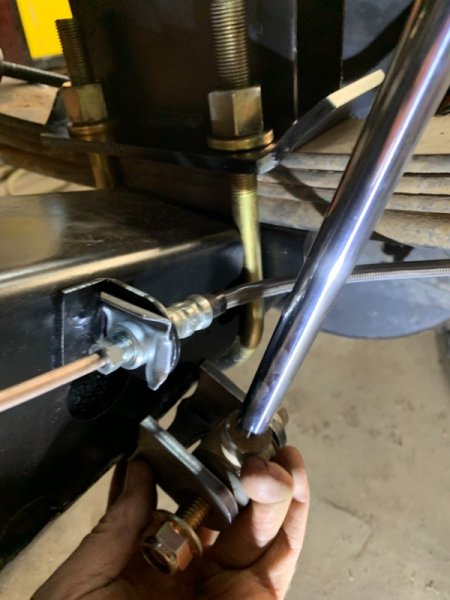
Rusty’s offroad springs, track bar, steering box brace, track bar brace and a set of Rubicon Express control arms (take offs from another project). Set of Billstien shocks and it’s standing on its own 4 feet again.

-
91 Colorado Red SWB, as base as you can get
KFingerlos replied to KFingerlos's topic in Member Projects: Your Comanches
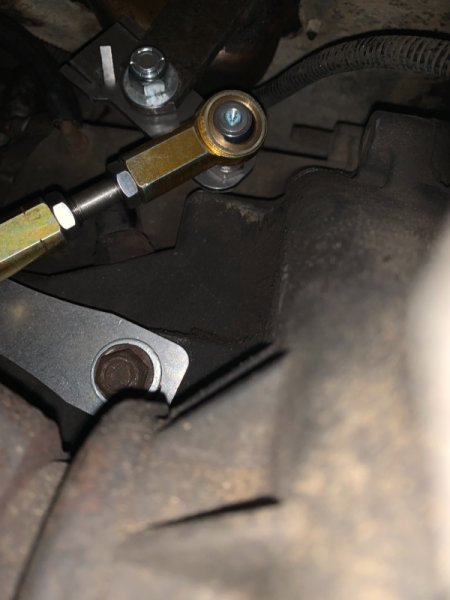
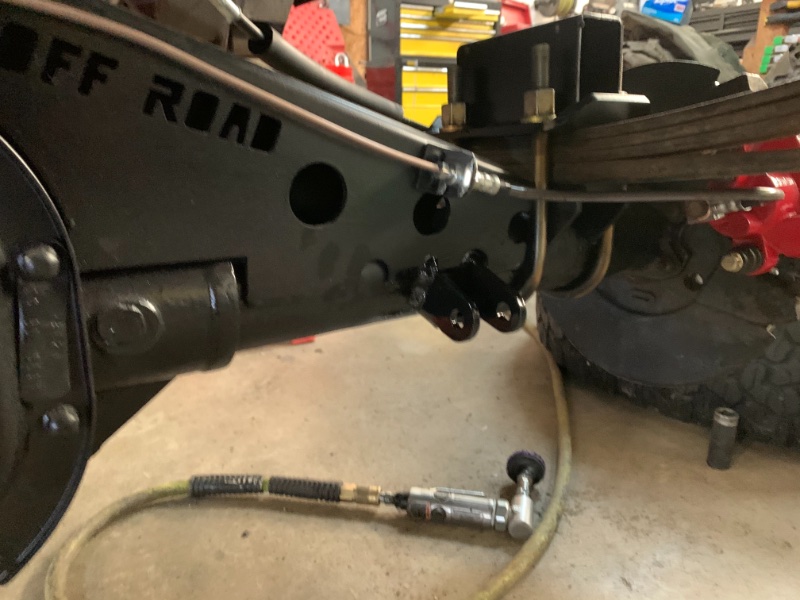
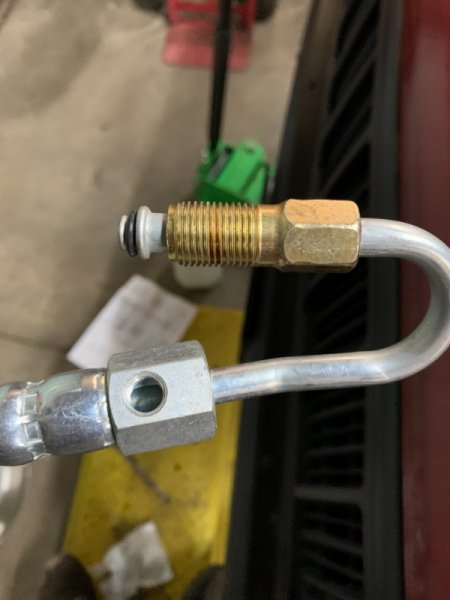
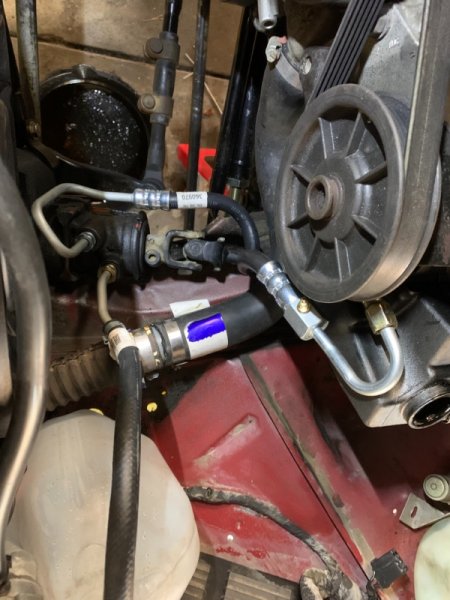
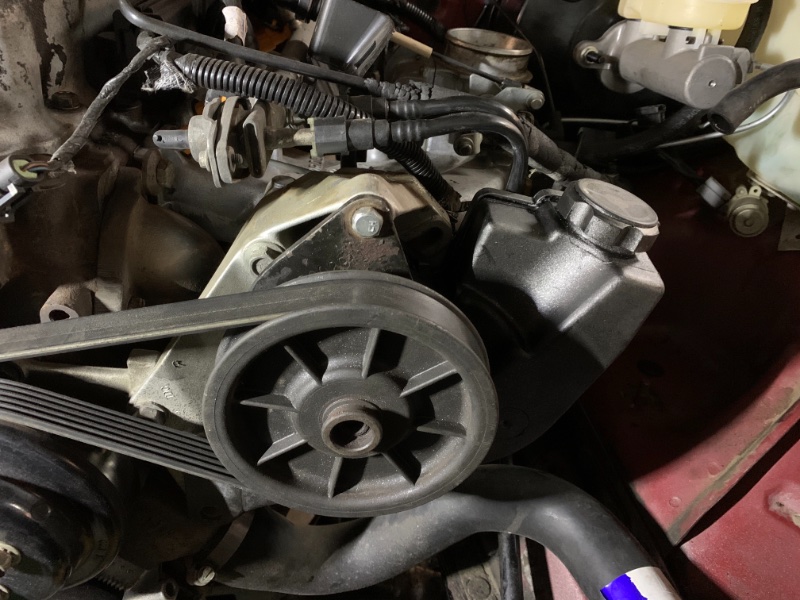
Finished up the power steering conversion today. All factory parts, power steering pump, steering box, pitman arm. Did have an unpleasant surprise... the high pressure line apparently has a bleed screw port which faces directly at the accessory belt. Beyond that it was all bolt in, just replaces the idler on the drivers side. Brakes are bled, steering is bled. All new linkage going down to the rebuilt D30 front axle.
-
91 Colorado Red SWB, as base as you can get
KFingerlos replied to KFingerlos's topic in Member Projects: Your Comanches
Did a bit more today. Had to re-flare the brake lines from the master cylinder to the ZJ Prop valve. Hadn’t realized that the 95+ MC requires “bubble flares” at the MC rather than the SAE standard “Inverted double flare”. Re-done, brakes bled. Which completes the MC and DD booster upgrade.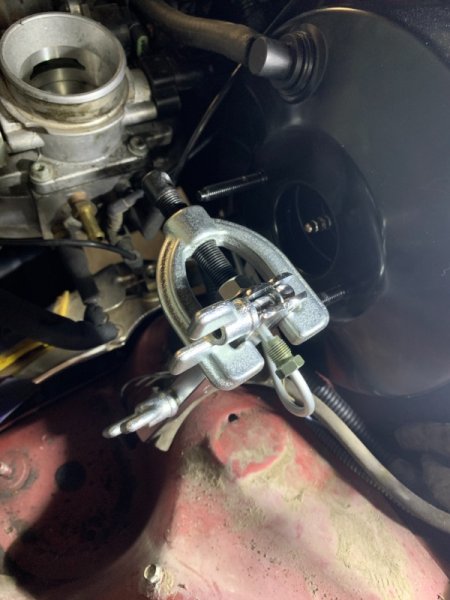

-
91 Colorado Red SWB, as base as you can get
KFingerlos replied to KFingerlos's topic in Member Projects: Your Comanches
Made a little headway last weekend, front axle (XJ HP D30) is in with rhe Rusty’s 4” kit, track bar, steering brace, track bar brace. All new steering linkage and the power steering box. That stuff was all bolt in and just time consuming getting bolts to line up. then we started trying to hook up brakes. The 95 XJ bootster upgrade went ok, but the master cylinder and ZJ proportioning valve took a lot longer than expected. Somehow none of the “this is a bolt in” write ups mention the new MC having the ports on the opposite side; or their needing to be metric/bubble flare fittings vs SAE inverted double flares. Also no mention of the booster interference with the washer res. Not a lot to see in pictures, just a lot of running around looking for parts. hopefully get it back running next weekend. Just need to finish the power steering conversion and bleed the brakes. -
Ha! Whenever is basically my schedule too.. mine’s been down for the past 3 weekends working through axle swap and suspension upgrades. Haven’t done much but look up torque specs for a while it seems.
-
Yeah, I could be interested. You already pull it?
-
91 Colorado Red SWB, as base as you can get
KFingerlos replied to KFingerlos's topic in Member Projects: Your Comanches
And with the planned 285/75-16 (33”). And proof that you can mount 33’s with no lift if you do a little trimming.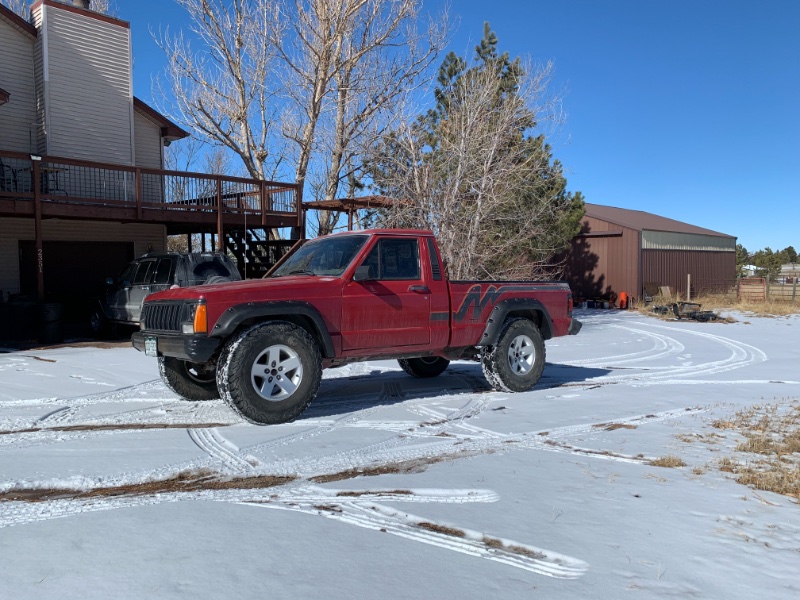
-
91 Colorado Red SWB, as base as you can get
KFingerlos replied to KFingerlos's topic in Member Projects: Your Comanches
ok Derf... just for you, stock tires and cut out flares....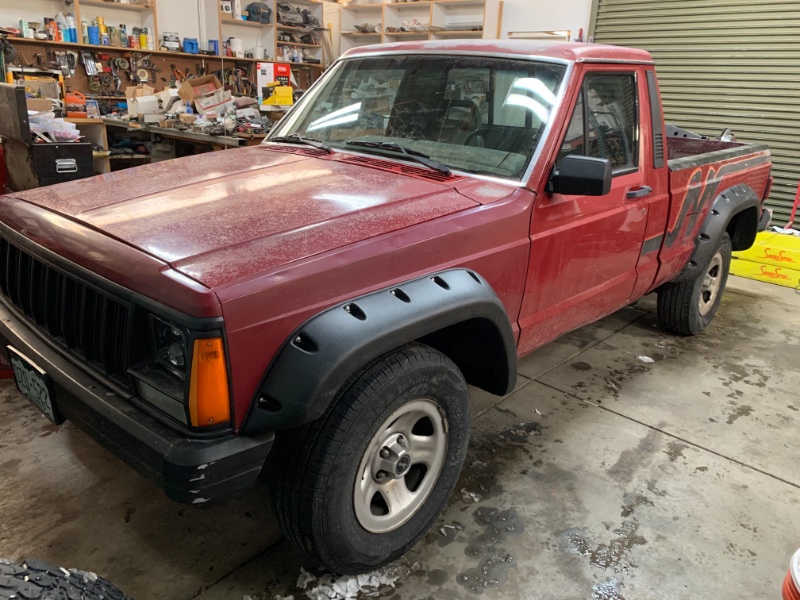
-
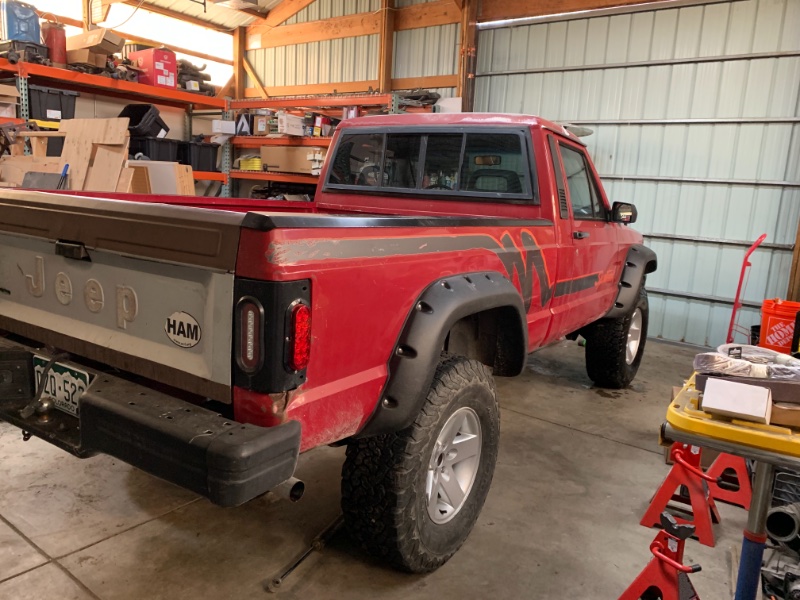
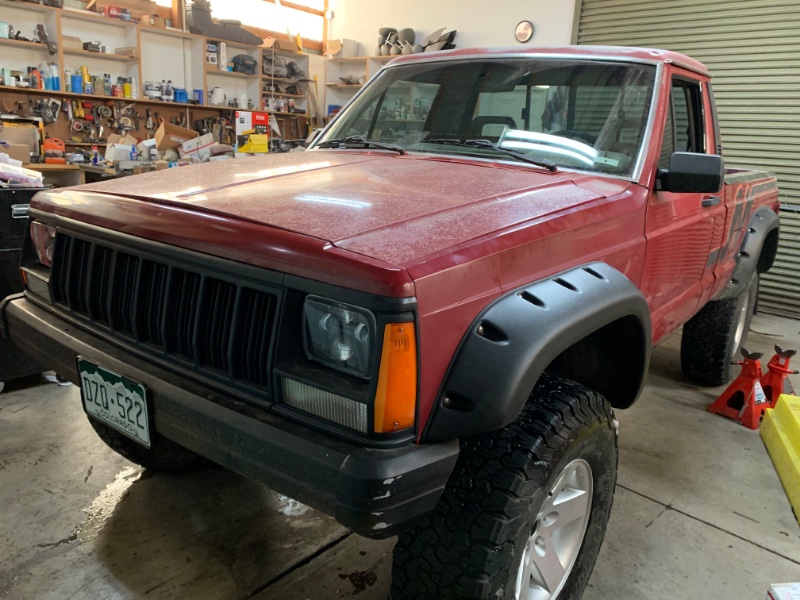
91 Colorado Red SWB, as base as you can get
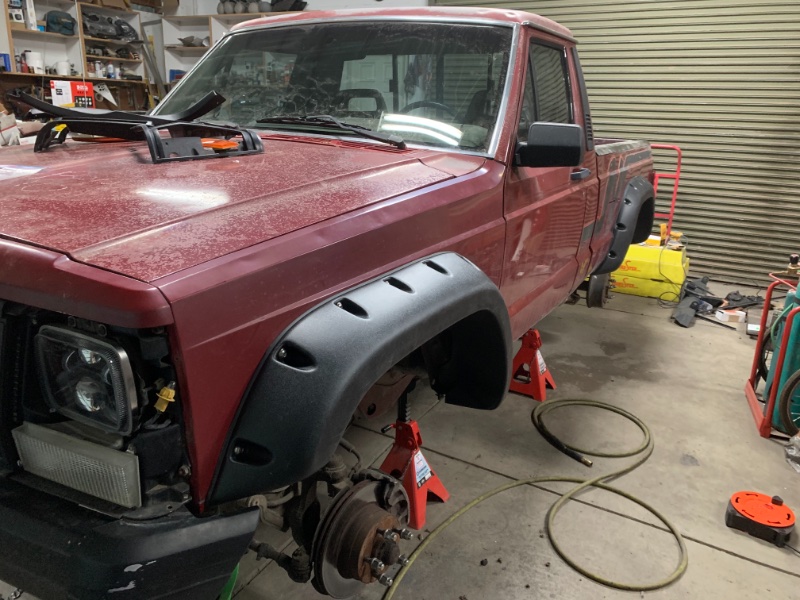
KFingerlos replied to KFingerlos's topic in Member Projects: Your Comanches
Little exterior work today. Set of bushwhacker flares to help cover the new tires after the 4x4 conversion happens. Before I get chewed on about the cut-out flares... the front fenders aren’t original and they’re hail damaged. Bed is hail damaged, smashed at both rear corners, and as big ‘ding’ in front of the rear tire. It’s very much a 50’ truck. I did make sure not to cut anything that would prevent me from putting the stock flares on the bed or a another set of fenders if I change my mind.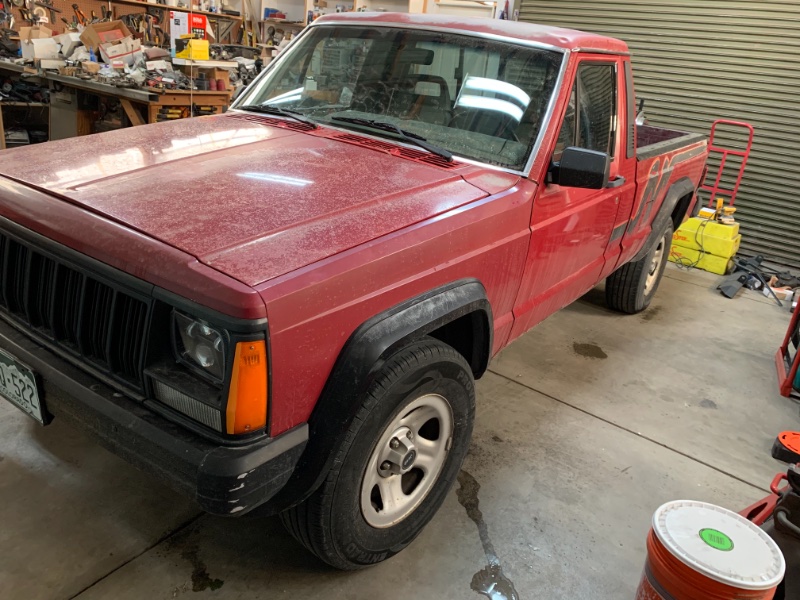


-
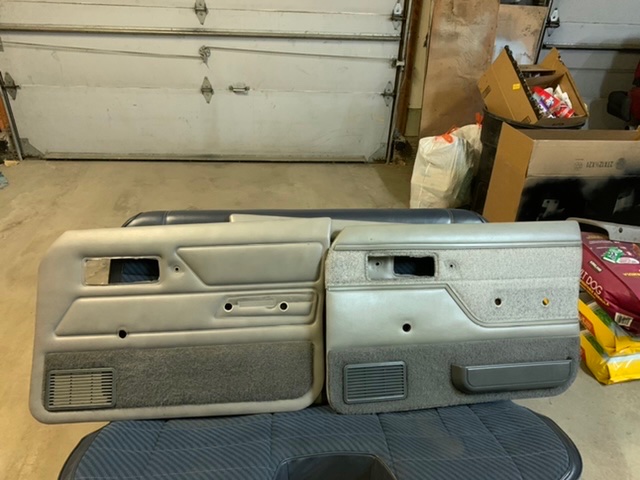
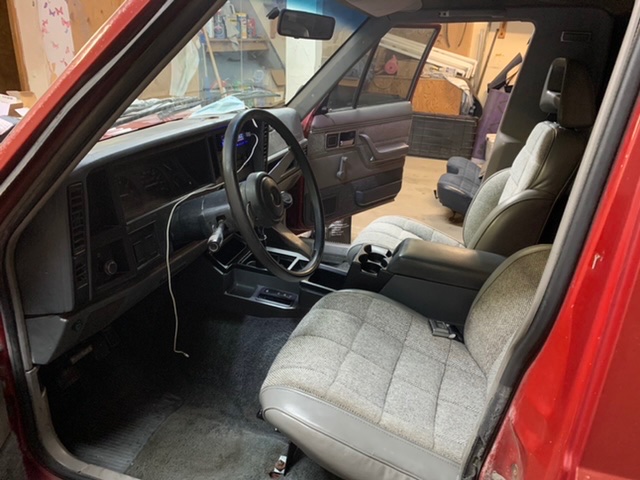
91 Colorado Red SWB, as base as you can get
KFingerlos replied to KFingerlos's topic in Member Projects: Your Comanches
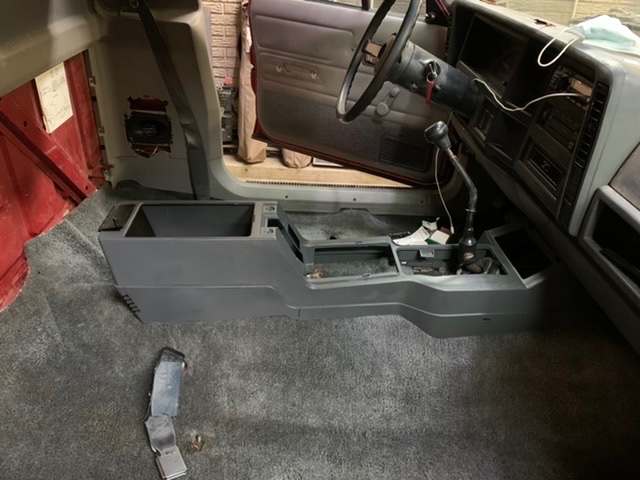
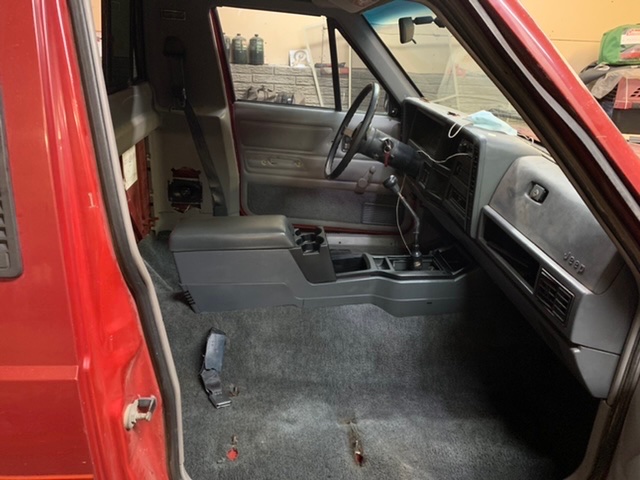
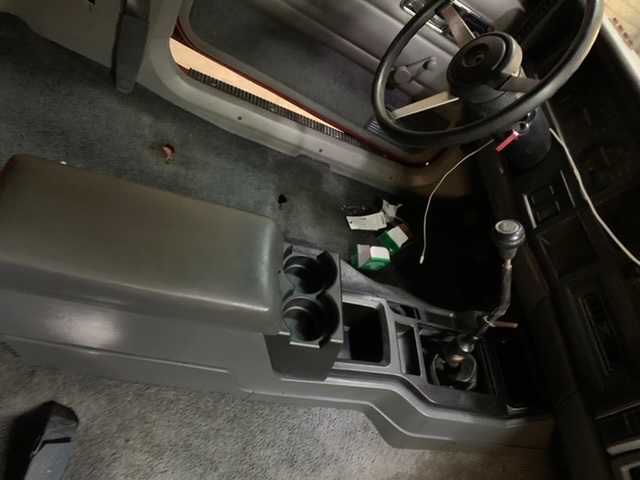
And now its done. XJ buckets, console, and a little more upscale door cards.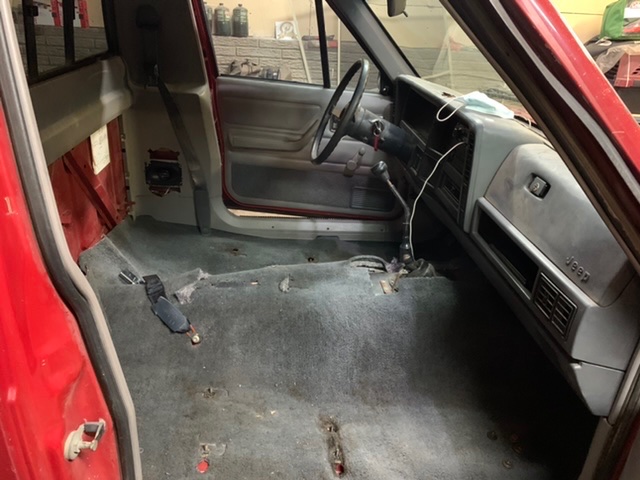


-
91 Colorado Red SWB, as base as you can get
KFingerlos replied to KFingerlos's topic in Member Projects: Your Comanches
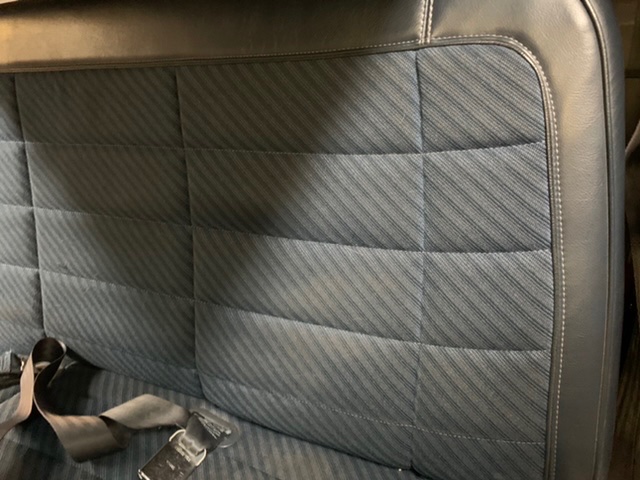
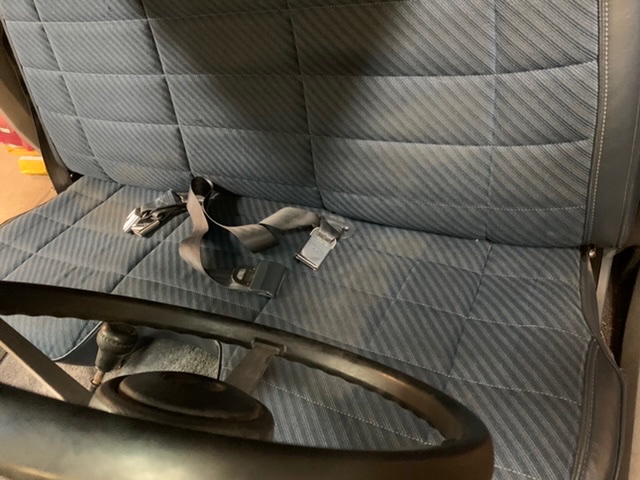
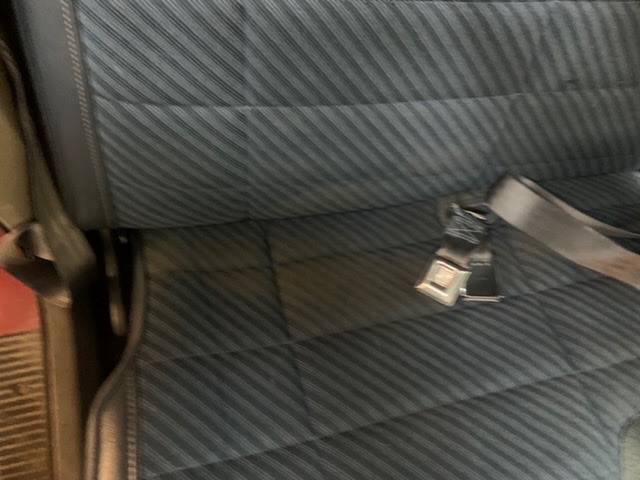
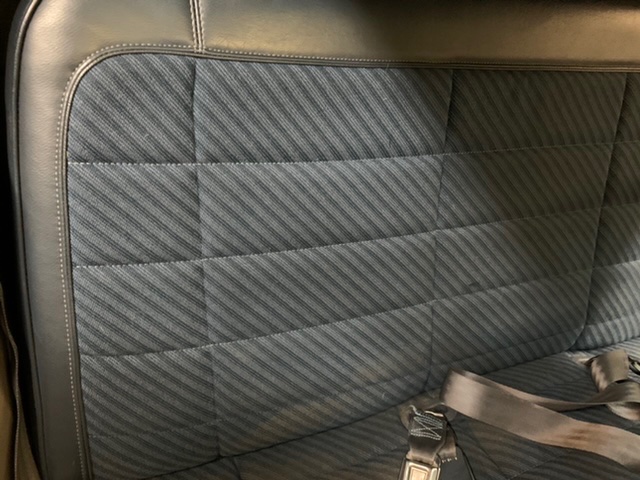
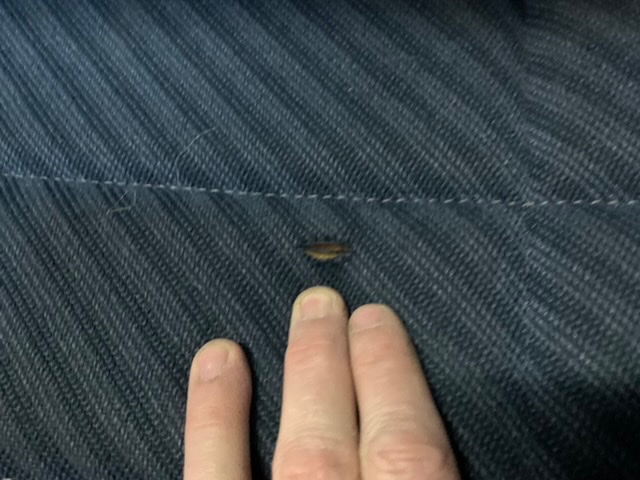
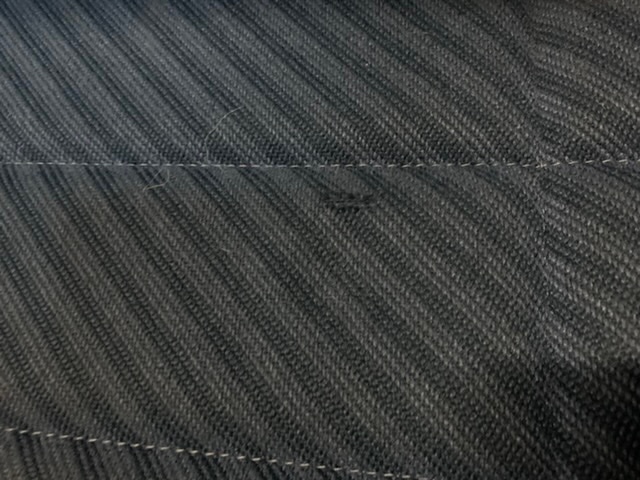
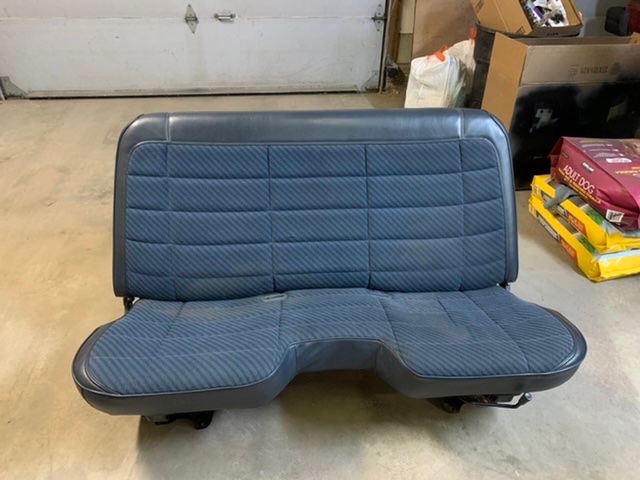
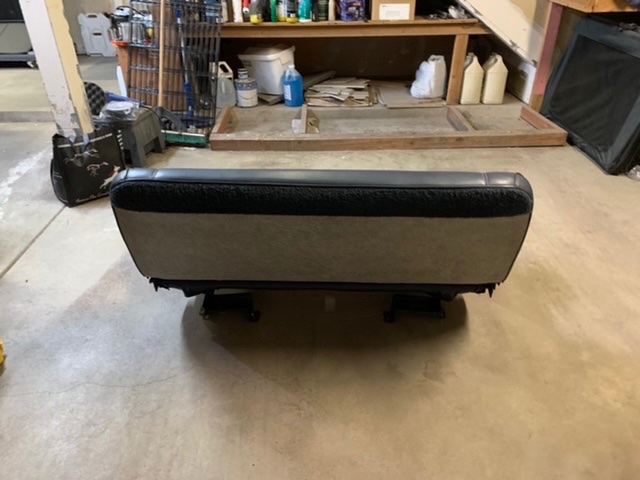
Anyone need a blue bench seat? Does appear to have a cut in the fabric (pictures below), but it certainly looks like it could/would be repairable. Also have the center seat belt that I won’t be using.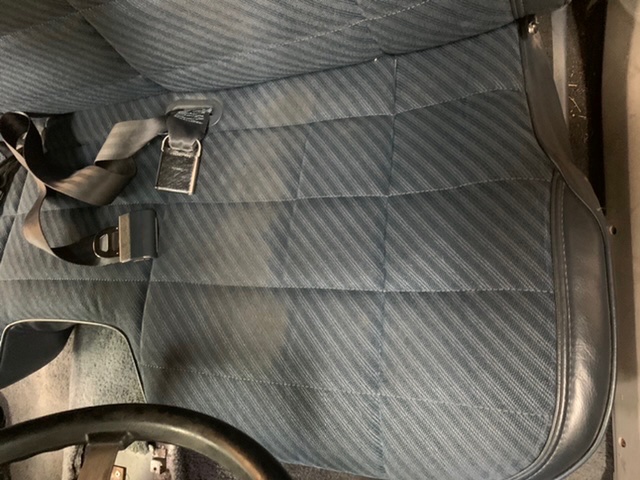


-
91 Colorado Red SWB, as base as you can get
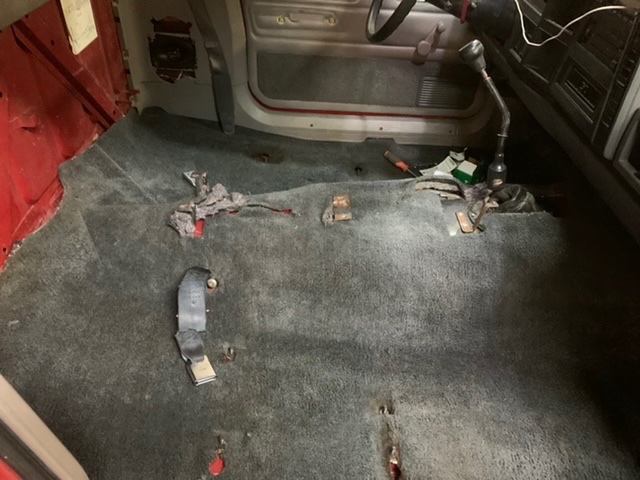
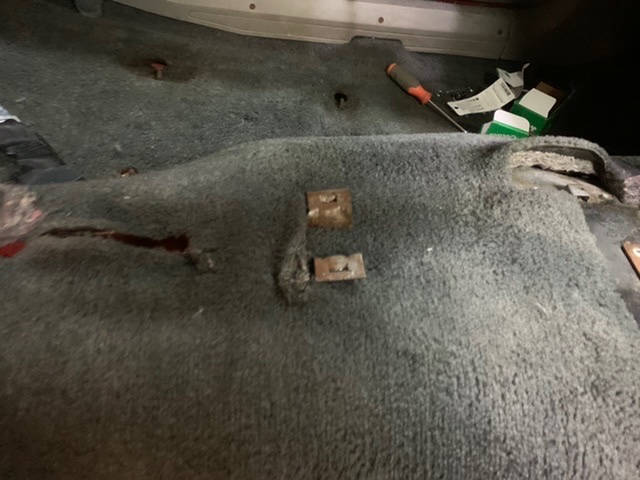
KFingerlos replied to KFingerlos's topic in Member Projects: Your Comanches
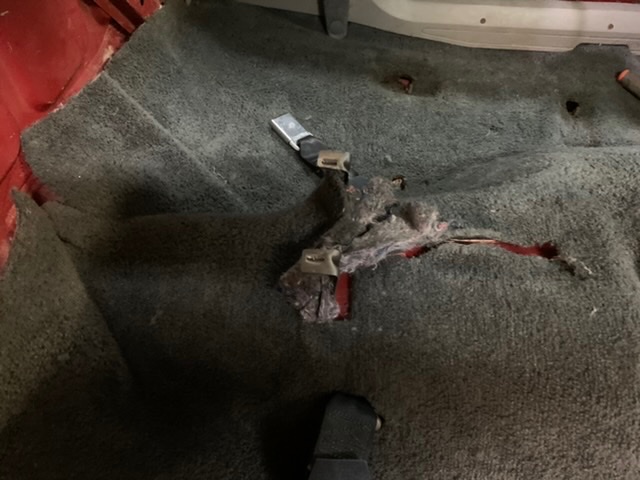
And now that the paint is dry, back to working on bucket seats. Seems somewhere in history the factory rubber floor was replaced with carpet (thank you!), but I’m guessing from an XJ as it doesn’t quite fit properly behind the seat. Bonus however that it already has holes for the center console brackets.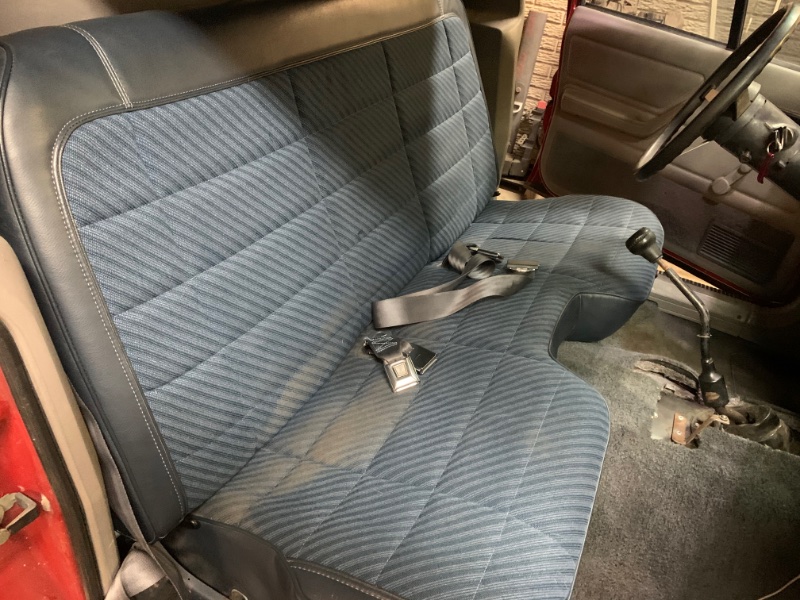


-
91 Colorado Red SWB, as base as you can get
KFingerlos replied to KFingerlos's topic in Member Projects: Your Comanches
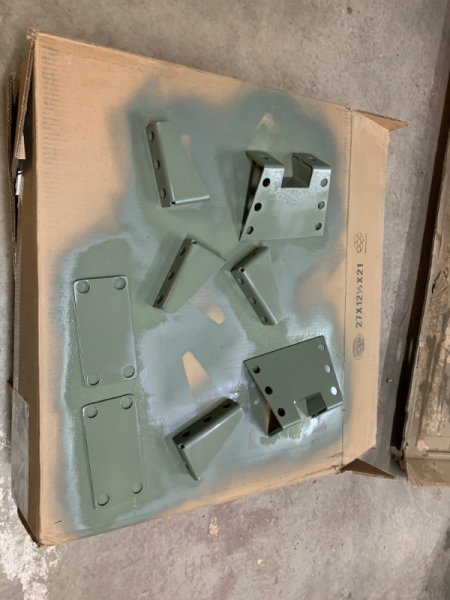
While I’m painting, might as well prep the sport bar brackets too. Should be able to put the axle back together this weekend.