
barimpact
-
Posts
52 -
Joined
-
Last visited
Content Type
Profiles
Forums
Gallery
Everything posted by barimpact
-
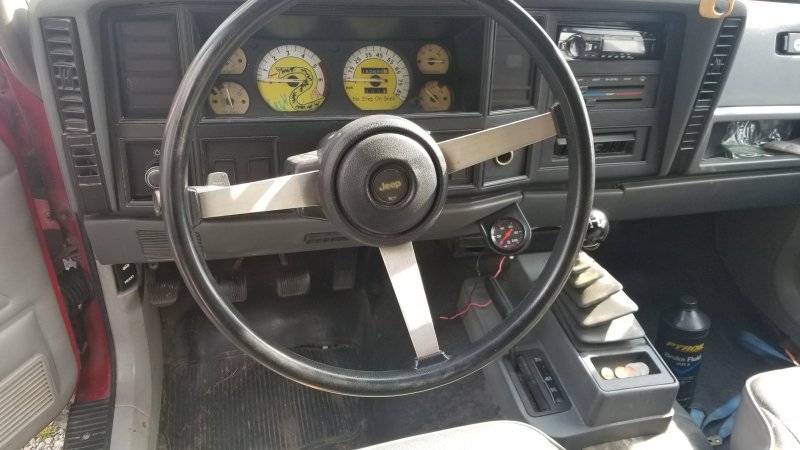
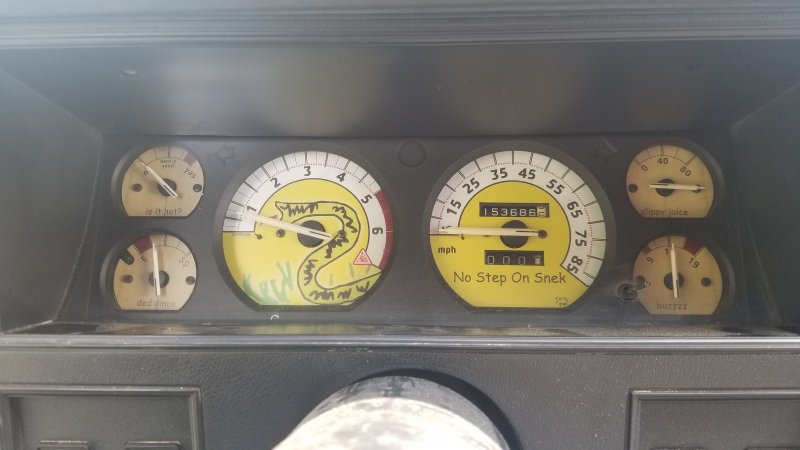
I got some new gauges from Azzy Design Works installed today (and a shift boot clip). The post office lost my order and the president of ADW emailed me personally to make it right. He sent me a new set free of charge, and included some cool badges. Top notch customer service!
-
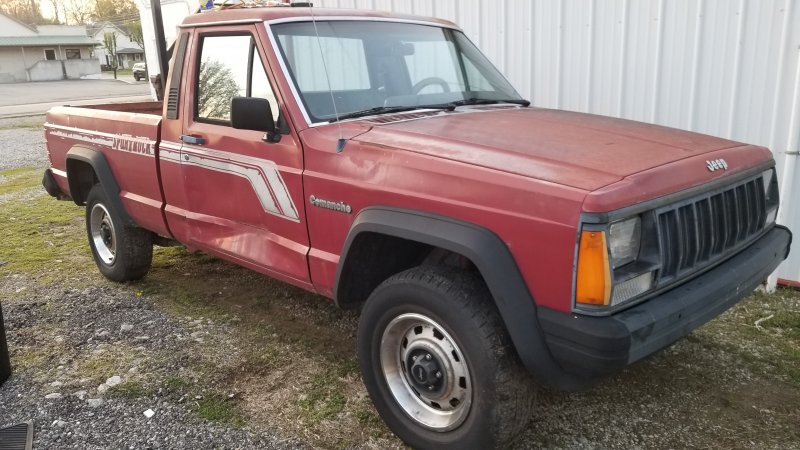
1988 Comanche short bed. 2wd, 4 cylinder, 5 speed. Bench seat, carpet floor, manual windows. My parts donor truck. Salvage title, missing key. Cincinnati, OH. Sold in a Cincinnati police impound auction in 2016.
-
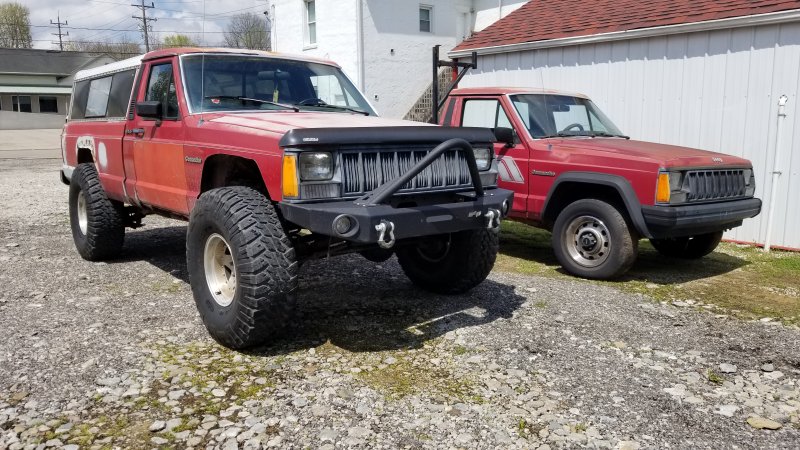
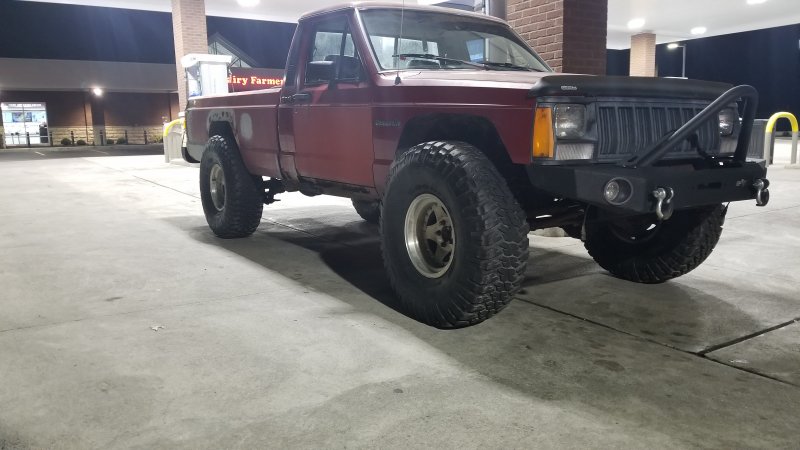
1991 Comanche long bed. 4.0L AX-15 NP231, Dana 30 HP front, Dana 44 rear. 3" Rusty's lift, 37x12.5 tires, steel bumpers front and rear. Cincinnati OH, my current project. Door mount mirrors, manual windows, vinyl floors, bench seat, sliding rear window, no AC.

-
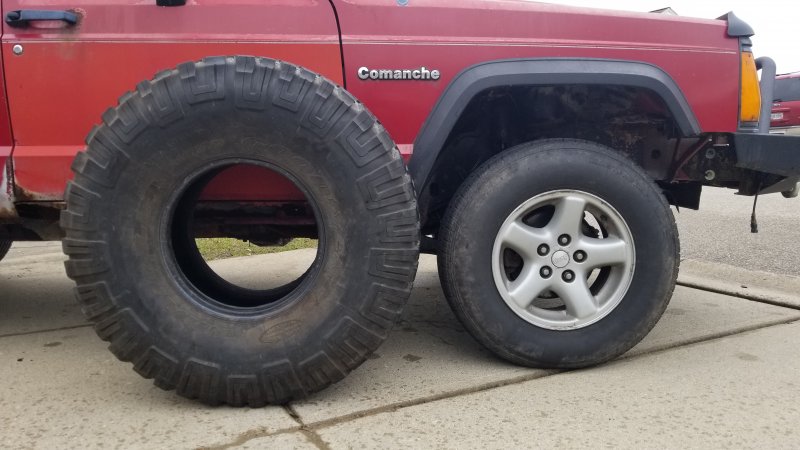
I got myself a parts truck today! (Before feeling bad for it, it has a salvage title, no keys, 2wd 4 cyl). It will be posted in parts for sale soon. But holy cow, it really makes my truck look HUGE!
-
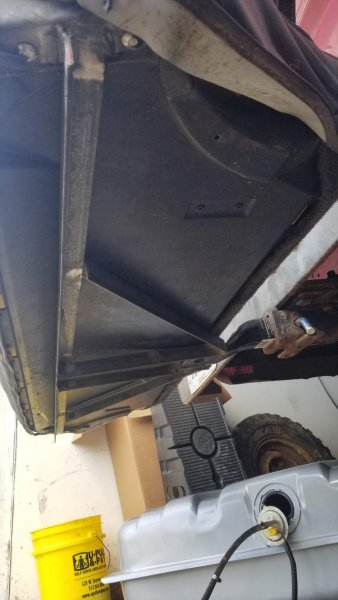
It came off a local MJ so it fits perfect! Has the original purchase tag on it stating it was purchased for a Comanche back in 96. Sent from my SM-N950U using Tapatalk
-
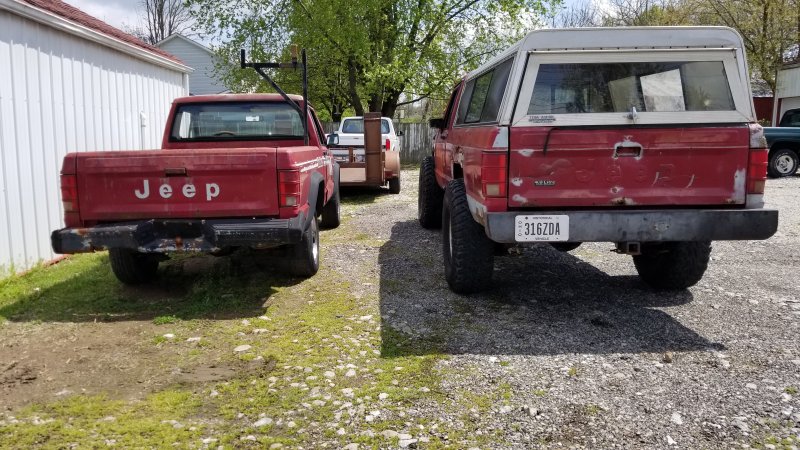
I got myself a bed cap today for FREE off marketplace. I never intended to get one, but I know how hard they are to find around here, and who can argue with free?

-

Twin Turbo SN95 Mustang Build
barimpact replied to barimpact's topic in Member Projects: Other Cool Stuff
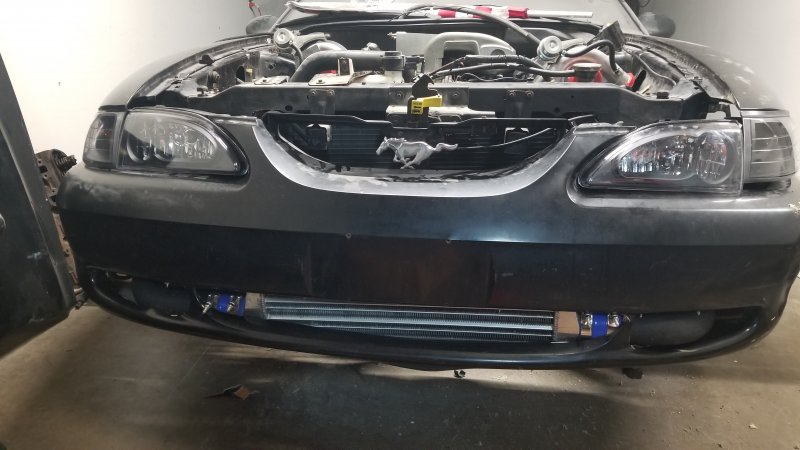
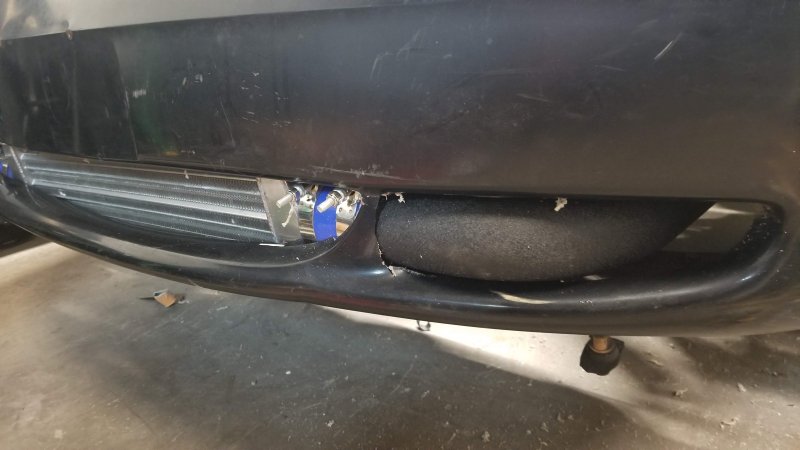
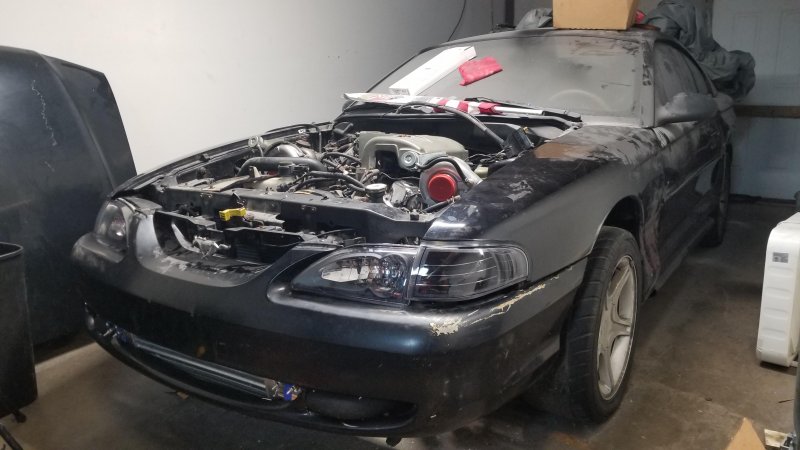
This is where the car sits currently. COVID-19 has given me a LOT of time to work on the car and get some of the custom stuff done at my shop (such as the intercooler mounting and cutting) and I'm estimating that if all goes well I can get a first start on it next month!
-
Twin Turbo SN95 Mustang Build
barimpact replied to barimpact's topic in Member Projects: Other Cool Stuff
For a long time, this is how the car sat in the garage. I started getting more into my Jeeps and modifying other projects I had, and since this car had a garage spot, it was put on the backburner. It sat about like this for 2 years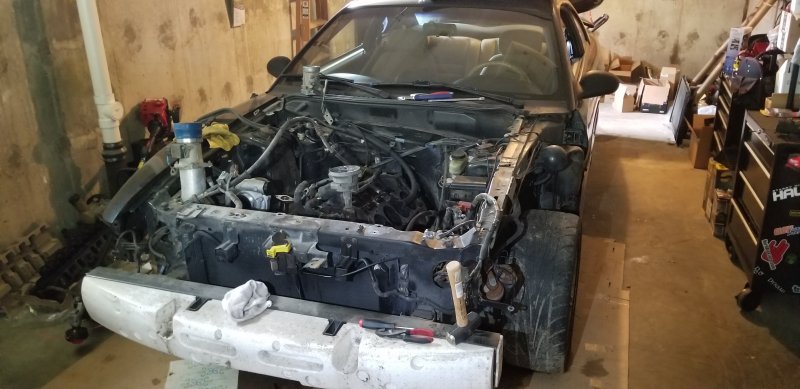
-
Twin Turbo SN95 Mustang Build
barimpact replied to barimpact's topic in Member Projects: Other Cool Stuff
With the car driving great for a couple months, I decided it's time to add some power. I had just sold an old Powerstroke I had sitting around and in the spur of the moment, I poured basically all of that money into the Mustang to truly make it a project car instead of doing small bolt ons one at a time. With this, I tore down the car and started unbolting pretty much everything from the engine. The main things I purchased for the car are: AFR 185 ported polished heads Comp Cams 1.6 roller rockers F303 camshaft ARP head studs 340 LPH Pump 80 lb injectors 28” Intercooler Twin T04E Compressor: 55 trim, Turbine: 73 trim BBK fuel pressure regulator -
Twin Turbo SN95 Mustang Build
barimpact replied to barimpact's topic in Member Projects: Other Cool Stuff
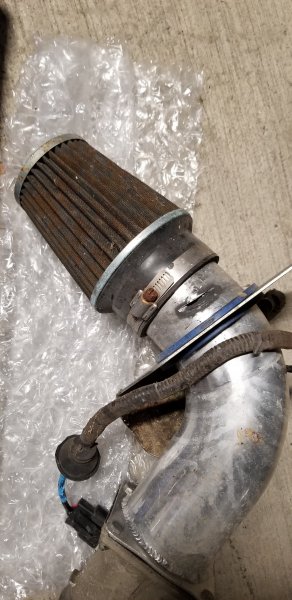
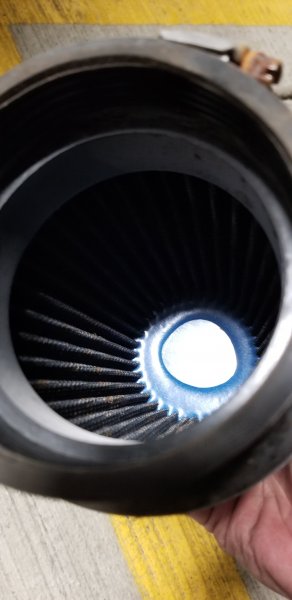
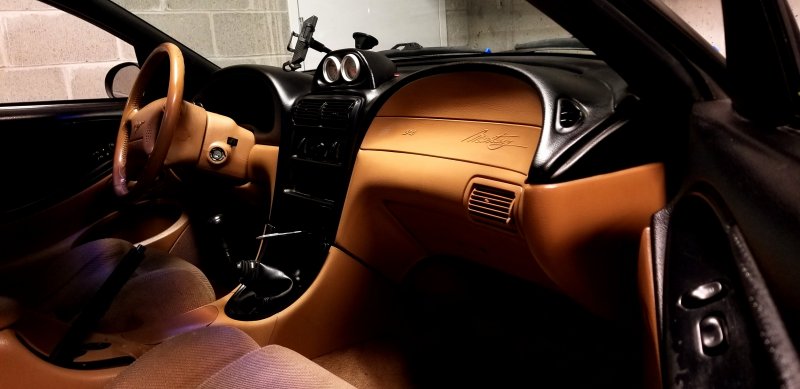
Once I got all this done and replacing the horrible air filter (brown and rusty on the outside, blue on the inside. Quite a lot of nasty), I spent some time cleaning up the interior that was actually in good shape. Once I got all this done, it was actually a super good driving car, and it was a ton of fun to hoon around town. Here's a picture of the car next to my daily.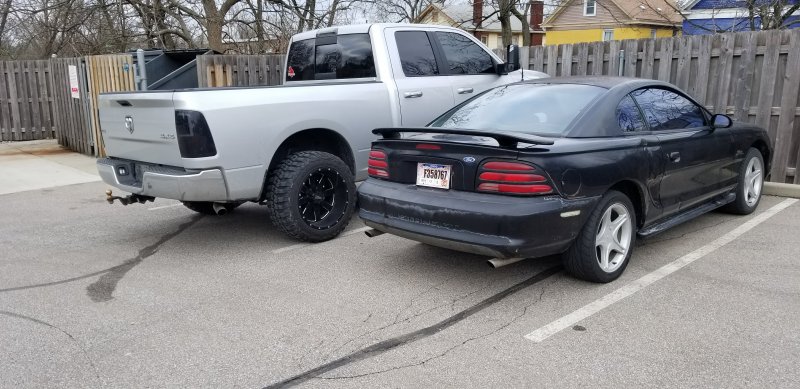
-
Twin Turbo SN95 Mustang Build
barimpact replied to barimpact's topic in Member Projects: Other Cool Stuff
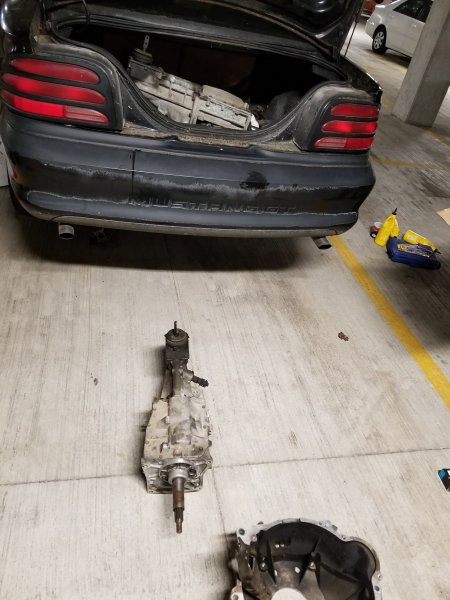
The absolute first thing I did was get new wheels and tires for the car. I've had my share of junky cars, but the tires on this were the most genuinely unsafe tires I've ever seen on a car, even to this day. The cheap ones I got were off a friend of a friend who got an aftermarket set for his '99 GT. At the same time, my throw out bearing crapped out (2 days after I bought the car). I was living on campus at the time, so me and one of my mustang buddies swapped the bearing AND the transmission in 8 hours on jack stands and oil change ramps with only hand tools in the parking garage at the university. This is one of my best car stories that almost no one believes until they see the evidence.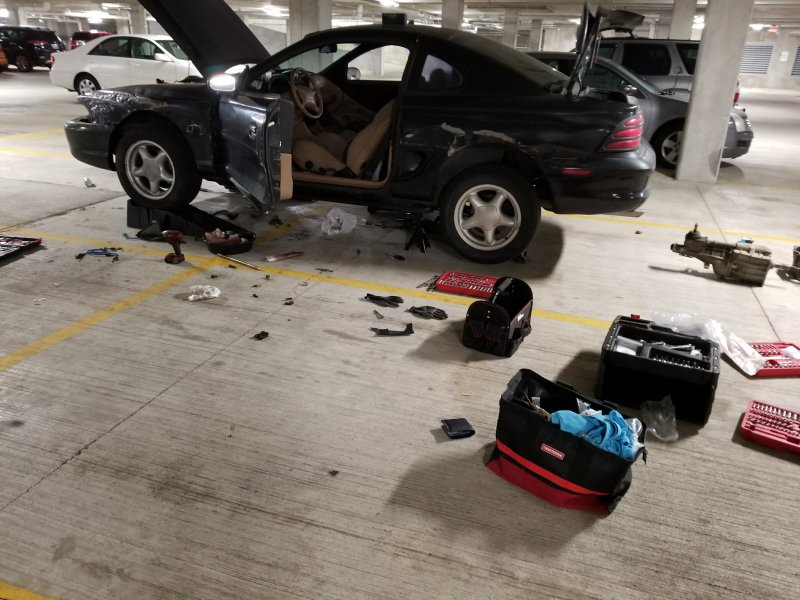
-
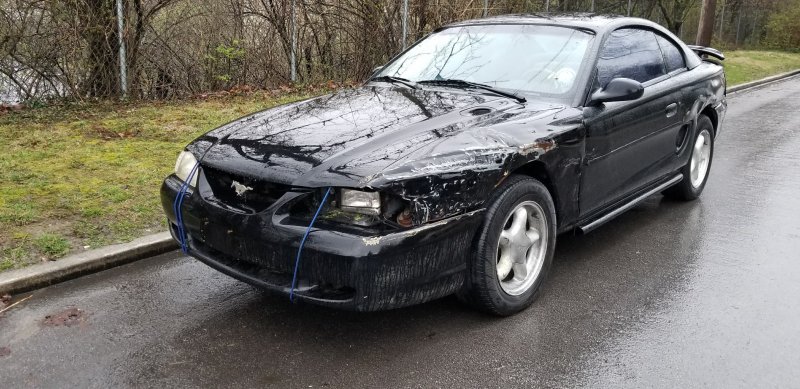
So I've always been a 4x4 guy growing up, my parents always had trucks and when I started driving I always had a truck, and all my projects were trucks and Jeeps. However, when I started making more car friends in college, I had a group that all had Mustangs (5 or 6 guys). One day they all let me drive their cars on a cruise day and I decided right then and there I had to have one. Since this would be my first sporty car, I looked to find a pretty cheap stang. The stars aligned and 2 days later I happened to come across a guy that was selling all his old stuff to pay off the bank that was repossessing a lot of his stuff, and I got my Mustang for $500. The car is a 1995 Mustang Gt with the 5.0L V8 and the 5 speed manual transmission. Being an old small block Ford, it only made 215 horsepower and 285 torque at the crank when it was new. It was super beat up like it had been a drift practice car. The front driver fender was smashed beyond repair (like it was in a rainstorm of hammers), the driver headlight was a basic sealed beam square that was zip tied in, large pole slide marks on both rear quarter panels, and tires that were dry rotted so bad you could move the car 6-8 inches left and right by pushing on it. The battery was out of a boat. The hood was not latching correctly. Second gear synchro in the transmission was bad. But otherwise, it was a good runner.

-
I'm hoping to be between 500 and 600 at the wheels I'll get one started today
-
Since my Comanche is back on the road, I've been working on getting my Mustang back on the road. She's been down for 2 years now getting the twin turbo treatment. For those that want a build list: 5.0L V8 5 speed manual, AFR185 ported polished heads, F303 cam, Ford Racing push rods and head gasket, Comp Cams roller rockers, AFR head studs, twin 55 trim turbos, BBK fuel pressure regulator, 340 LPH fuel pump, 80 lb injectors. Lots of other goodies.
-
If you haven't disconnected your battery to reset your ECU yet, it's free and worth a try. I didn't have any issues when I changed the injectors on my '00 XJ or my '91 MJ. However, on the XJ I had the battery unplugged for a week doing the head gasket, and the MJ had it unplugged for 3 months while I swapped in a new engine and transmission! Make sure there's no leaks at the injectors while it's running, and make sure all the plugs are the correct way and firmly plugged into the injectors. Sounds simple, but I know I'm guilty of overlooking the easy solutions sometimes.
-
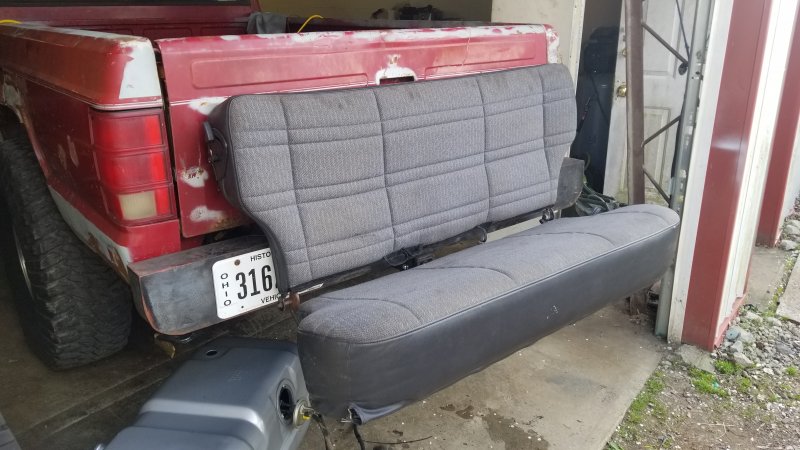
Oh and one more thing: besides the tools and the bench seat (I had the bench laying around from a part out Jeep), the hitch, hitch pin, and steel all together was $50 at Lowe's.
-
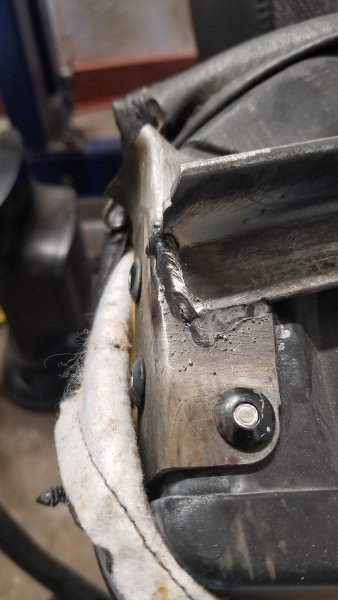
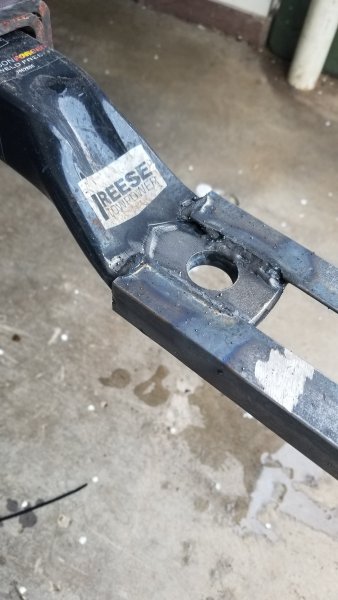
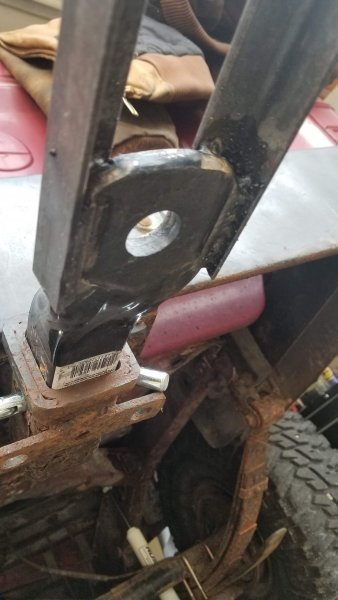
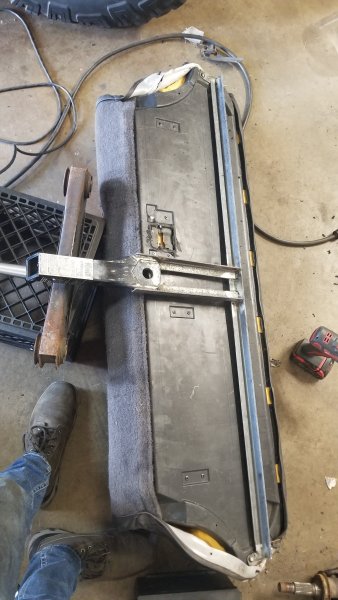
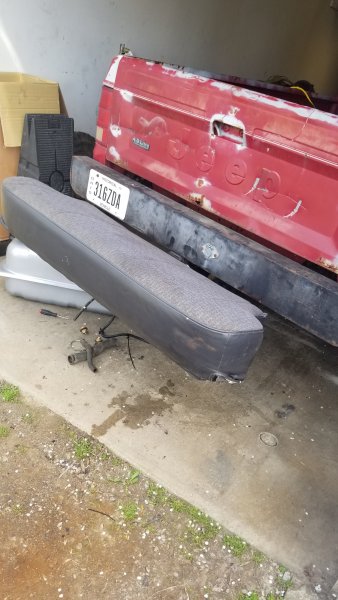
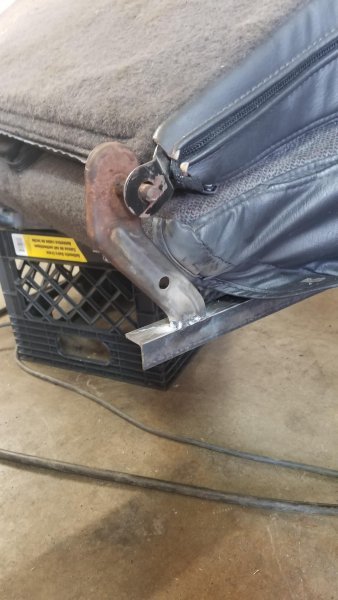
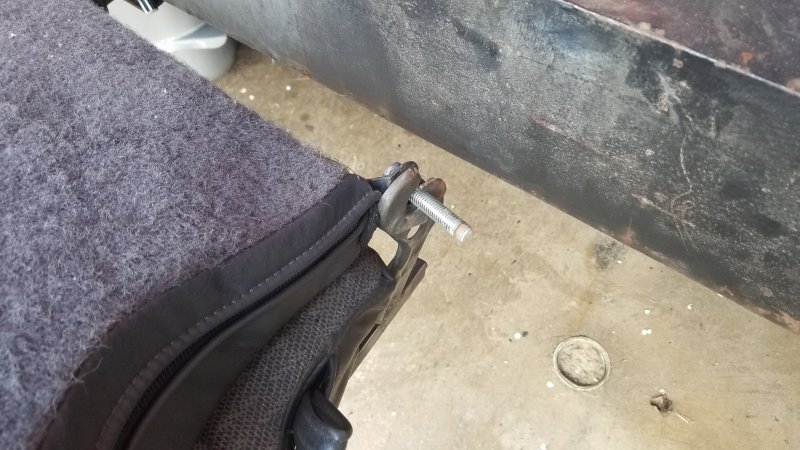
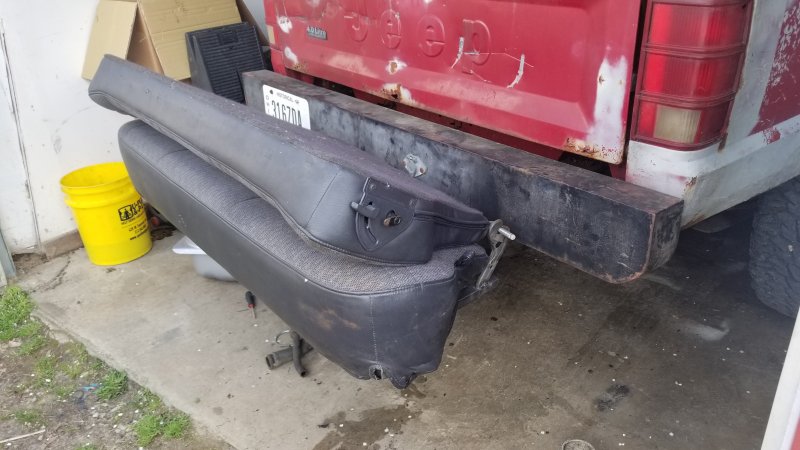
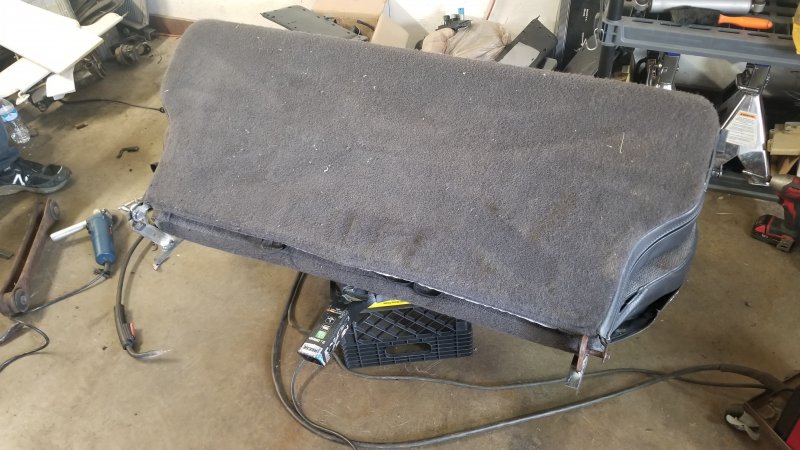
Hey everyone! I got a lot if interest in the Hitch Bench that I built in my quarantine boredom both on and offline so I decided to make a quick write-up. I did this with a back seat out of a 99 XJ, a 2" hitch, some angle iron (about 12 feet), a single bolt and nut, 4.5" angle grinder, and a cheap flux core mig welder (Lincoln Electric for those that are curious). First step, cut the brackets off the front bottom of the bench seat that attaches the bench bottom to the XJ (the latch and the pin part). I used a hammer to flatten these brackets to make things easier to line up. Next, pull the seat fabric back and grind the paint off the steel piece of the seat bottom and weld a beam across the length of the seat. Next, I welded 2 pieces to a hitch to set the distance from the receiver on the truck. In my advice, make it a little further from the tailgate than you might think you need it, mine is 3-6 inches too close to the truck to call it perfect. Once you get this far, put it in the truck and test the distance! Make sure it's where you want it before continuing on. Like I said before, mine is closer to the tailgate than I wish it was. Next up, add some support to the structure so people can actually sit on it. The thickness of the steel will determine the amount of structure you need to add. For me the structure above was sufficient, but I would add a full boxed perimeter around the bottom of the seat on Hitch Bench 2.0. Once this is complete, add some tabs from the structure to the back of the seat and weld on those brackets we cut off in step one to make a convenient removable back for the bench. On the opposite side where the latch is, weld a bolt to the seat back so it will clip into the bracket. If your pieces are a little too far apart (like mine were), weld a nut to the seat back to extend the hole that the post sits in. As long as you don't care about the seat back resting on your tailgate (like in my case where the truck is nowhere near perfect), you're done! If you do care about your tailgate, I would either add a stopper for the seat back or add a thick foam piece to the seat back to hold it against the tailgate. These are perfect for drive in movies, bonfires, garage seats, extra transportation on the farm (low speed only of course), using friends as backup sensors, parade seats, and more! Best of all, it's easily removable and works perfect on the ground too so I keep it in my shop for guests. Let me know what your wacky quarantine projects are below!


-
Didn't think about that, great idea! For version 2.0, I would make it a little further from the truck so that the recline was a little more comfortable.
-
Got the new fuel tank in and she's back on the road! But with all the parks shut down, and some spare time, I decided to build a hitch mount bench seat. I grabbed a spare XJ rear seat and some angle iron and welded it to a 2" hitch. Got about 300-330 pounds on it and it held up. Very impractical but now I've got one

-
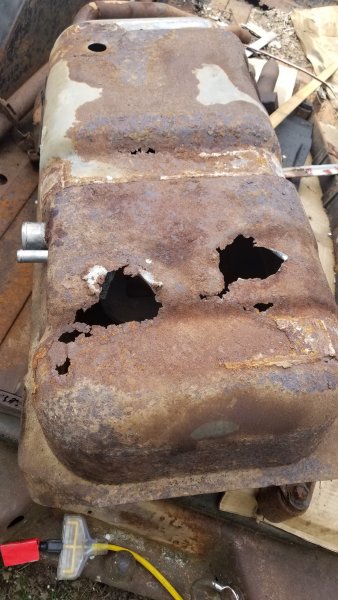
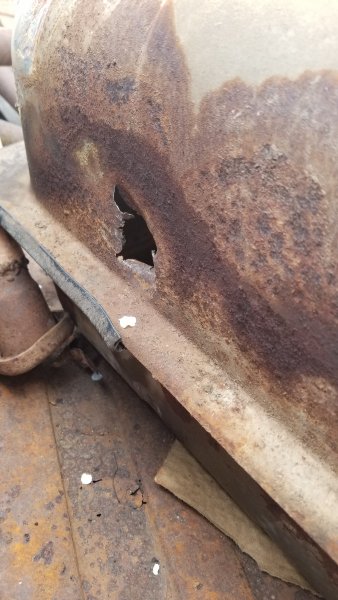
Well here's what's left of the gas tank. No wonder it was spilling everywhere! Much bigger holes than I expected to see. New tank should be in the mail today
-
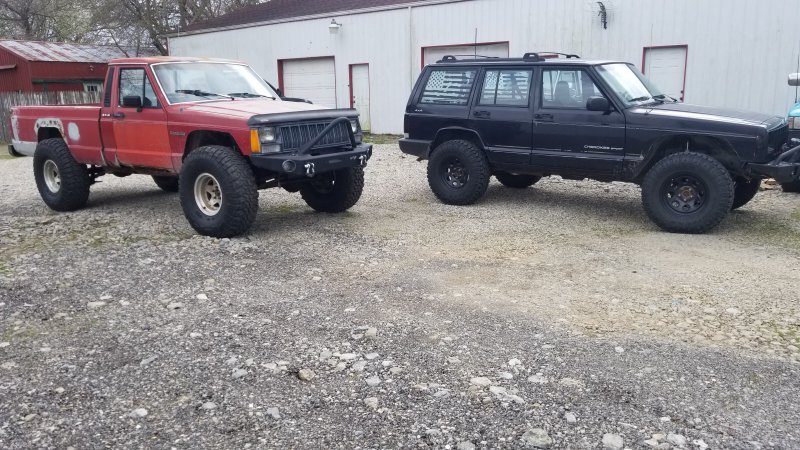
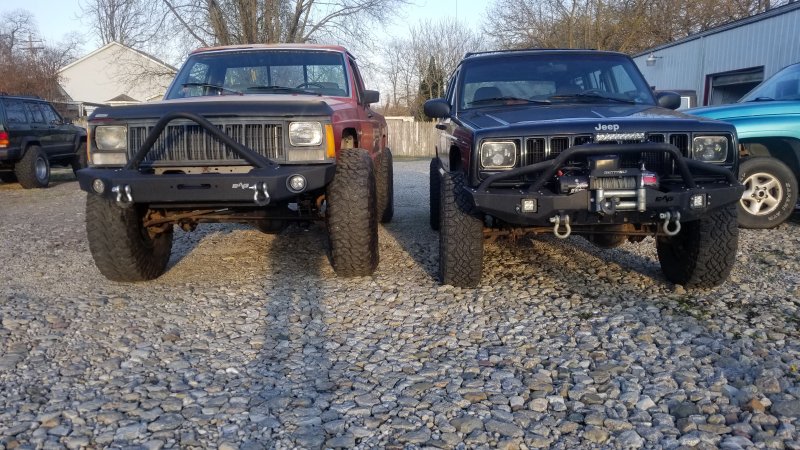
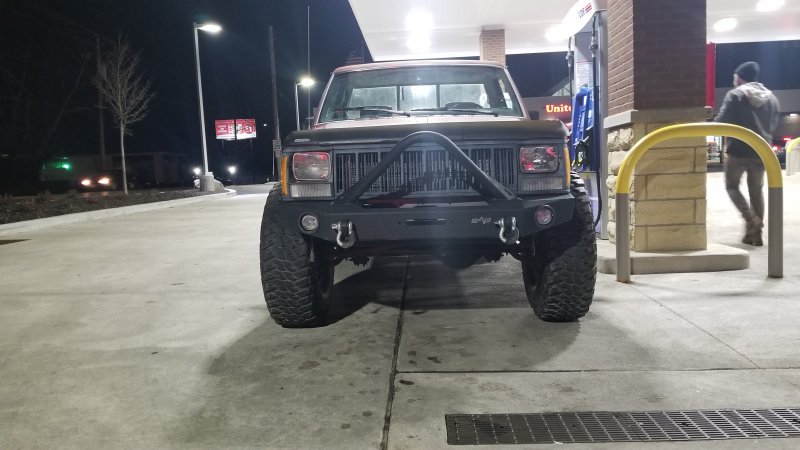
Here's the lift installed, it certainly rides better than it did with the stock shocks blown out! (Only took it around the block before dropping the tank). For comparison, here's the Rusty's 3" lift with Heavy Duty front springs (designed for winch bumper support without sagging) vs the XJ with Rough Country 3" lift. Both trimmed about the same spot in the front. MJ on 37x12.5, XJ on 32x10.5
-
I haven't gotten to take it out yet due to the COVID-19 pandemic, all the parks are being forced to close due to MASSIVE amounts of people trying to spend their outdoor time wheeling. Plus my gas tank is more rust holes than fuel storage so that's my current project!
-
Going with the Rusty's 3 inch for the time being. I wanted to go as low as I could with the option of adding long arms in the future. Once the lift is on I'm gonna need ujoints basically immediately, as well as brakes. Gonna do the 96 brake booster upgrade that I've read about to see how much of a difference the dual diaphragm setup helps with these big tires. The hubs are in surprisingly good shape, they're definitely not original

-
With a little cutting and hammering they are able to get me down the road without a lift! Can't turn very tight though it won't be sitting this tucked for long, but what a cool look!
-
Big news today. This build is about to get real. Picked up some 37s today! Gonna build the truck around these tires to make a sweet little rig. Tires on the truck are 225/75/r15 and the big boys are 37x12.5 r15 Goodyear MT/R